Month: July 2011
Fatties, and Fat Tires Too
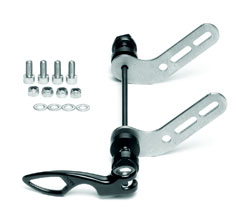
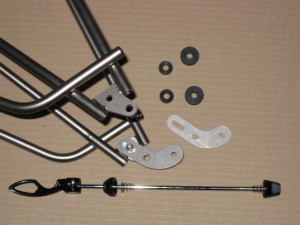
Made for use with Tubus racks, the Tubus Quick Release Adaptermakes it possible to mount a rack securely on a bike without threaded braze on tabs at the dropouts. The package comes with two brackets meant to be attached to the lower two bolt holes on Tubus racks. The supplied skewer is then threaded through the bracket on one side, a shim, (also supplied) the hub axle, and the shim and bracket on the other side and tightened down with the standard cam lever. There are shims provided of two different thicknesses, and the adapter will work on any rear dropout spacing.
Keep in mind that, if your bike doesn’t have eyelets at the dropouts, chances are it wont have eyelets on the seatstays and some sort of clamping arrangement will need to be made there. Tubus makes a stainless steel clamp with a thick and firm cushioning liner, in various sizes, just for this purpose.
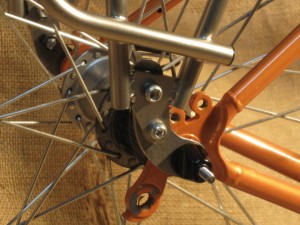
As can be seen in this last photo, the brackets cause the rack to be mounted a little bit farther back than if it were attached to the braze on eyelets. This might also be a good solution for bikes with shorter chainstays when the pannier placement results in heel strike.
Ortlieb Panniers – Back Roller Classic
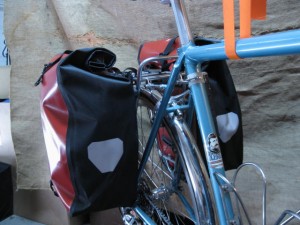
The German maker of Ortlieb Panniers is a well known and highly regarded bicycle pannier maker. The company also makes motorcycle dry bags and panniers, horse panniers, drybags, messenger bags and rucksacks, water containers, protection bags for electronics and documents, coffee filter holders and , my personal favorite accessory, a waterproof, toilet paper holder/dispenser.
The Ortlieb catalog points out that sustainability of their production is due in part to how long the products are expected to last and the fact that they are easily repairable if damage occurs. To that end they offer replacement parts and patch kits and back up durability claims with a 5 year warranty.
The Back Roller and Front Roller panniers are no frills bags made from pvc coated polyester fabric with welded seams rendering them waterproof. The roll top closure system keeps out dust and water. There are no external pockets on these panniers and only one side pocket inside.
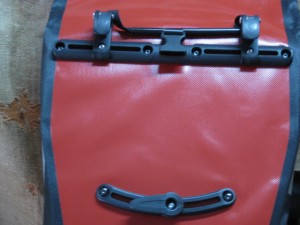
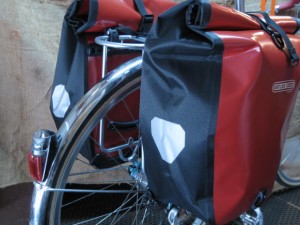
These panniers fit fine on the MT-Campee rack with the bottom edge trailing only slightly below the rack, but not so low as to interfere with the rear derailleur cable. Made to fit on almost any rack such as, besides this one, the Tubus Cosmo, Tubus Logo, both sizes of the Tubus Cargo and the Racktime TourIt.
In the next post I want to try the Racktime TravelIt pannier and then I should be ready to announce the winner of this little comparison and the lucky bag which will be traveling with us on the Olympic Peninsula the first week of August.
Preparing for our upcoming 3 day tour on Washington’s Olympic Peninsula, I did a dry fitting of a few different panniers on Sky King’s bike.
First, a word about the bike and the rack. The bike is a Rivendell Bleriot with 650b wheels and I selected the Nitto MT-Campee rear rack which is made for 26″ wheels but which also fits nicely over the fendered 650b tires. I wanted a rack that mounted with the top platform close to the top of the wheel, for a low center of gravity, and that had side rails for pannier support.
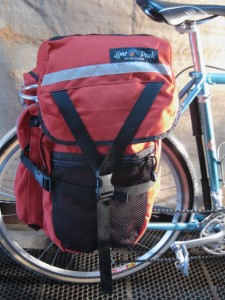
First up is the Lone Peak Mount Superior pannier. Lone Peak is based in Salt Lake City, Utah and their products are made in the USA. The company has been around since 1979. The website is very minimalistic and it’s short on specific information about the bags they make….information like mounting systems and materials.
With a nominal capacity of 3200 cubic inches or 52 liters per pair the P-500 Mount Superior panniers are the most capacious panniers in our store. With zippered pockets on the face, trailing edge and top, there should be plenty of room for items which need to be readily accessible. The zippered mesh pocket on the face of each pannier is perfect for carrying damp clothes while they dry out. There is no claim to waterproofness of the cordura fabric which forms the body of these bags but rain covers are sold separately.
Two composite hooks are bolted onto the back outside of the bag through the plastic stiffener inside the bag. The hooks go over the rack rail and are held in place with a pivoting thumb lock.
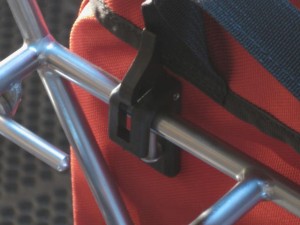
The horizontal compression strap can be adjusted to keep the load from shifting and can even be wrapped around the rack frame to keep the panniers hard against the rack. On the bottom portion of the back is bolted an elastic cord, strung through a metal s-hook which is meant to hook to a bottom rail or clip on the rack, keeping the bottom of the bag secure.
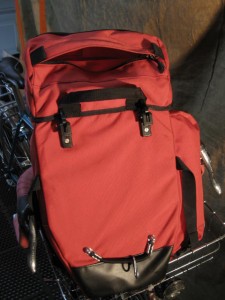
With the upper hooks hanging on the Nitto MT-Campee I discover that there is no place to hook the lower s-bolt and pull the elastic cord taught. From the top, inside, of the composite hooks, where they rest on the rack rail, to to the s-hook, the part that will hook on a bottom rail, with the elastic cord being flaccid, measures 295 mm. and to the very bottom of the bag measures about 320 mm.
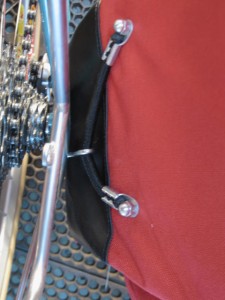
I hooked the bags on some other racks to see how they fit:
-The 26″ Tubus Cargo rack is a perfect fit and I’m sure the 28″ cargo would work as well.
-The Tubus Logo and Cosmo racks work as long as the bags are attached to the upper rail, which sort of defeats the purpose of the lower rail on these racks.
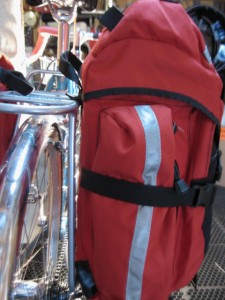
In the next installment: Ortlieb Back Roller Classics.
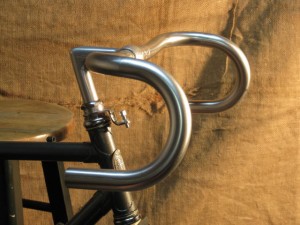
The Bike Touring News store stocks two different versions of the Nitto Dirt Drop handlebar. The main difference between the two, or so I thought, is the diameter of the bar at the stem clamp sleeve. The RM-013 is 26.0mm and the RM-014 is 31.8 mm. I recently did a side by side comparison and was surprised to see just how different these bars are, not only in the clamp diameter but in the overall shape.
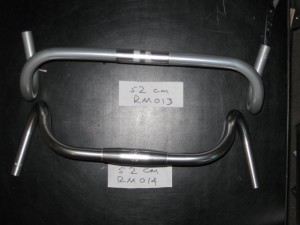
The bars in the above photo are both 52’s. That means it is 52 cm from the center of the end of the tube on one side to the center of the end of the tube on the opposite side. Even though both bars are the same width at their widest, or the bottom of the flair, the top, flat part of the RM-014 begins curving to the drop much closer to the center of the handlebar, resulting in a narrower top section and a wider flare.
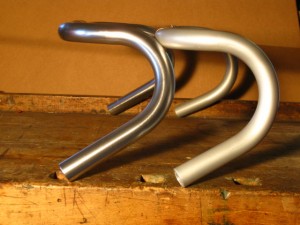
From the side the differences are not as pronounced. The bottom flared portion of the RM-014 on the left may be a slight bit longer and the bend a little bit sharper.
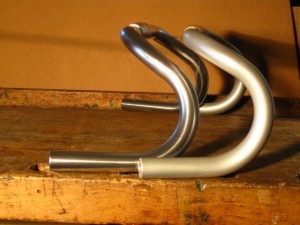
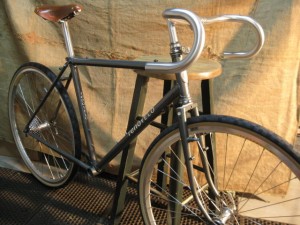
For a bike that will be ridden mainly off-road, the Rm-014 might be a good choice with the ramps at a little more of an angle (like in the last photo) and the brake levers mounted a little lower to make riding in the drops more comfortable.
But this picture I find to be the most interesting:
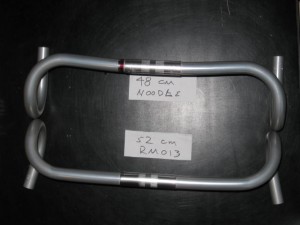
The 52 cm RM-013 is very similar to the 48 cm Nitto Noodle bar, it just flares out a little more and doesn’t have the slight return bend on the tops. A Google search revealed why. Grant Petersen from Rivendell designed both bars. The Dirt Drop was original equipment on the 1987 Bridgestone MB-1 and the Noodle was a replacement, with a few tweaks, for the Dirt Drop when Nitto stopped making them due to lack of a market. Now they are making the Dirt Drop again, in two versions. I personally like the extra flare on the RM-013 and I use them on my touring bike.
Either bar will accept bar end shifters and road style brake levers. The RM-014 is a few grams heavier in any given size and it comes in 50 amd 52 cm widths. The RM-013 comes in 46, 48 and 52 cm widths.
Chapter Two – Almost Finished
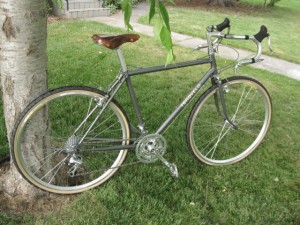
This is the third installment of posts about putting together a touring bike starting with a bare frame. The others can be found under “Rivendell Bicycles”
The new 127 mm spindle length bottom bracket from IRD works perfectly with the IRD crankset, and the rest of the build went smoothly.
Here’s a short rundown of the parts we used:
Wheelset; Shimano LX hubs laced with 32 spokes to Velocity Dyad 650b rims. (Velocity and Mavic are the only two brands to consider for rims when buying or building wheels)
Tires; Panaracer Nifty Swifty 650b
Shifters and Derailleurs; Shimano 8 speed bar end shifters operating Shimano Tiagra derailleurs. I really like the Tiagra level derailleurs. Even though they are not on the high end of the Shimano line, they work well and look good and they are made without a lot of plastic pieces.
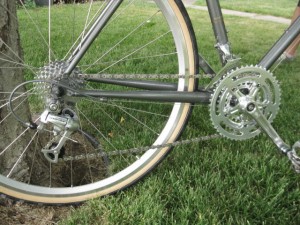
Drivetrain; IRD Defiant triple crankset with 48, 36 and 24 tooth rings. Sram 8 speed cassette 11,12,14,16,18,21,24 and 28 tooth cogs. Sram 8 speed chain. Shimano PD-A530 dual sided pedals.
Cockpit; Nitto Grand Randonneur handlebars, Nitto Technomic Deluxe stem with shim, Tektro/Soma short reach brake levers, Shimano Ultegra seat post with the Gilles Berthoud Aspin/Marie Blanc saddle
Brakes; IRD Cafam cantilevers with Yokozuna Scott/Matthauser pads.
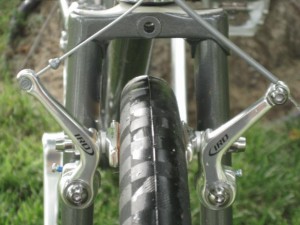
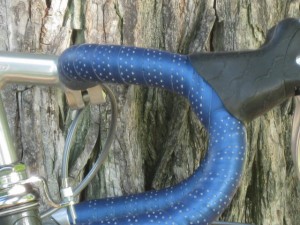
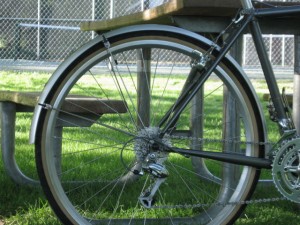
I used grey housing on all the cables to give a little bit of a custom look. I will wrap the handlebars after Karen has had a chance to ride the bike a few times and decides if the brake lever and handle bar positions are OK. Stainless steel water bottle cages by King Cage, fenders (probably SKS) will finish the bike, except for whatever racks and bags she uses for touring.
Independence Day
Every bicycle related, or outside related magazine or advertisement assures me I can improve on my personal best performance by closely following the training advice offered therein. Alright, I think, I want to do my best. Even if doing better than myself feels like a lot of pressure I decide I will have a go.
I’ve decided to train for the Java Man Triple Brew Pub Extreme Moderation Tour. My success in defeating my self will be judged loosely by these criteria:
– Moderation and balance.
– Being non-judgmental and humble.
– Living in the moment.
– Wattage, heart rate, miles and time don’t matter.
– Speed doesn’t matter either.
– People in automobiles waving at me in a friendly manner matters.
– Other people on bicycles and pedestrians acknowledging me in a friendly manner matters too.
Athletes generally attribute a large percentage of a successful performance to mental attitude. Actually, this could be one of my biggest challenges in this event. Smiling while riding(in moderation of course) moves me toward my goal, and saying hello to the faster rider who is overtaking me, whether they say hello or not, moves me toward my goal. Refraining from the urge to take that rider’s wheel to show that I can go faster too takes constant practice. Or is this just the recovering racer rationalizing the fact that he is now old and weak?
I give myself permission to go slow sometimes, but it feels good once in a while to breathe hard and feel the lungs working to bring air to the blood, and to feel the blood pumping and carrying that oxygen and some fuel to be consumed by my muscles in the magical process of making the pedals go around . And it’s neat to see my body get more efficient at doing those things, so that every ride seems a little easier. So I give myself permission to go fast sometimes too.
A baggedy shirt or a plain wool jersey keeps me cool and allows air to flow through the interstices of the brain, not constricting my thoughts and actions with the pretense of needing to be something I’m not. By the way, that person driving the car? They seem to be a little more agreeable to sharing the road when they see me dressed that way on a bike with fenders and lights and racks.
As Leo Woodland says “People talk to you if you’re on a bike and you give them time. You’re not threatening. You arrived by humble means and you have humble needs, like food and drink and a moment’s rest”
I am training myself to stop and, really, to look for reasons to stop.
I am training myself to ride a bicycle in a way that makes it look easy. No hammering, thank you.
Actually, now that I’ve created this event I realize that every time I go out on the bike I am a participant in it.
The current ride is all there is.
There was no ride before this and there will be no ride after it.
Chapter One- A Rookie Mistake
Now that I have all the parts, it’s time to start bolting them onto the bike. And the first part out of the box is this piece of jewelry:

Interloc Racing Design is a small company that has been around since 1984 and the moniker seems a little dated since they now make a lot of parts for touring and utility bikes. I need to confess that I didn’t consider the crankset/bottom bracket interface when I ordered the crank, and the bottom bracket that came with this frame has a spindle that is too short to use with this particular crankset.
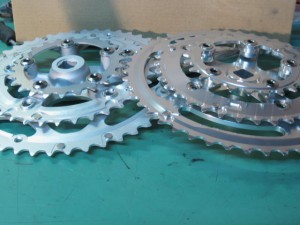
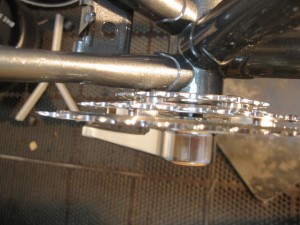
Since the interface is recessed on the IRD crankset, compared to the Sugino XD-2 I need either a 127.5 or 122 mm bottom bracket spindle, rather than the 107…so I ordered both and I will use the one that gives the best chainline. This is what I’m talkin’ about:
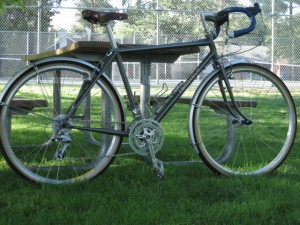
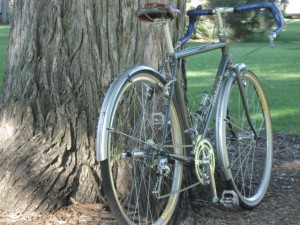
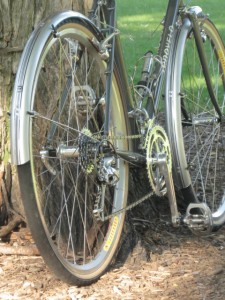
Meanwhile, here’s a taste of what the bike’s going to look like!
