Categories
Touring Bicycles

Black Schwinn Mixte Resurrection

A customer found this bike, an old Schwinn mixte, on Craigslist and bought it for his significant other. After bringing it to me to check for any obvious damage or misalignment he took the frame to a local paint shop and had it powder coated gloss black. Then he brought it back to me and we outfitted it with new components. I don’t know too much about Schwinn bikes except that there is enough history with that company to fill more than one book, but I don’t think this was a particularly high-end bike. But with new parts it rides surprisingly well and will make a nice commuter/day tripper.
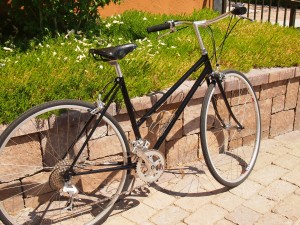
Profile of refurbished bike

She decided the Brooks B68s saddle was a keeper right out of the box. A 9 speed rear cassette and double chainrings provide a practical range of gears. The original bike had 27 inch wheels. The new wheels are 700c, a slightly smaller diameter, but work fine with the medium reach brake calipers.
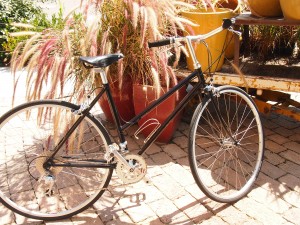
side view of schwinn mixte

The stem is the Nitto Technomic Deluxe 225. We could have got the bars as high or higher with the Nitto Dirt Drop stem but this was the aesthetically preferred solution. That actually is a huge cassette.
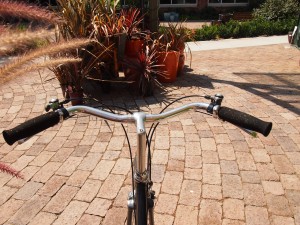
Ahearne/Map handlebars form rider's perspective

The Ahearne/Map handlebars have a slight rise and a nice ergonomic sweep and they look sportier than Albatross bars.
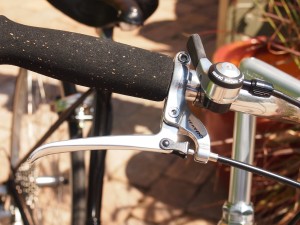
shifter and brake lever

Dimension cork blend grips. The Tektro FL-750 levers are very clean and add a nice vintage look. The IRD XC-Pro 9 speed indexed top mount thumb shifters are a top of the line, modern version of a tried and true design.
Not counting what he paid for the bike, with parts and my labor, this build ran about $1275.00. Not cheap, in fact a new Long Haul Trucker can be had for the same price. But the end result is a unique, sporty, classic looking bike. It was fun to put together and the new owner loves it.

Categories
Cockpit Shifters and Derailleurs

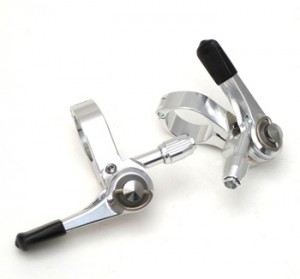
Top mount thumb shifters

So I had a Bridgestone MB-1 circa 1992, I think….might have been ’93. A poor fellow, down on his luck, or perhaps his brain addled from meth or crack cocaine, determined that he was deserving of such a bike. And so he took it. The Bike Hermit is always happy to help those less fortunate than himself. I hope the buzz that person received via my bike made his efforts worthwhile. That bike had Shimano XT top mount thumb shifters which remain my favorite gear shifting solution for straight or swept back handlebars. The shape was perfect. They could as well be called knuckle shifters because the cable tension releasing motion was just a twist of the hand with the index finger knuckle against the lever. Simple, intuitive and unobtrusive.

Even though the great and powerful Shimano decided to make those shifters obsolete others have stepped in to fill the void. Paul Component Engineering makes the Thumbies which are made to be used with the levers cannibalized from Shimano or Sram bar-end shifters.
These are great as long as you have some bar-end shifters. Otherwise it’s sort of an expensive option.

IRD or Interloc Racing Design (Racing. I know, right? But they make a lot of cool stuff) makes two versions of top-mount shifters- one version is friction only and will work with almost any rear cluster. The other version uses indexing for the rear derailleur shifter and only works with 9 speed cassettes.

The IRD Power Ratchet thumb shifters are friction only…no indexing. So they are compatible with almost any rear cog setup.

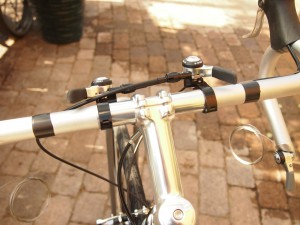
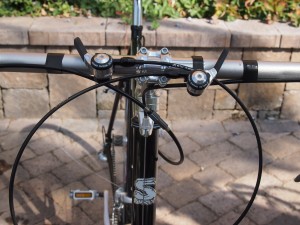
I’ve also been fascinated with the idea of mounting these on drop bars. On the tops and near the stem where they will be out of the way but easy to use. I had a Long Haul Trucker to put together last week and decided to try the IRD XC-Pro 9 speed shifters. The fixtures clamped to the 26.0 mm section of the handlebar without using the included shims (made for clamping to a thinner, mountain bike style bar). Offsetting the two levers slightly kept the cable housings from interfering with each other. Even so, the cable routing was a little wonky but I don’t think it looked too bad. With a little judicious trimming the cable housing could be made to fit close enough to the head tube of the bike that even a front rando bag such as a Gilles Berthoud would fit.

A slight offset allows for unusual but effective cable housing routing.

Another view of the IRD XC-Pro top mount shifter set up on drop bars.

I took the bike out for a ride and I have to say I was excited by how well the setup worked. The downtube shifters on my touring bike are the ultimate in simplicity but there have been times when taking one hand off the bars to shift did not seem like the most prudent thing to do. Top mount shifters on drop bars instead of bar end shifters would even preclude the need to move one’s hand to the end of the drops to shift. The more I think about it the more sense it makes. One downside could be the room these take up on the bars. Especially if a person wants to mount a computer and/or a headlight there. But the great thing about being in the bike industry is that this means there is a market thus created for handlebar extensions on which to mount those things. Actually, maybe one of those bar extensions would work for mounting top mount shifters. Hmmmmm…more experimenting and blog posting forthcoming.
Something along these lines perhaps:
Cockpit

Categories
Best Touring Saddle

Rivet Saddles

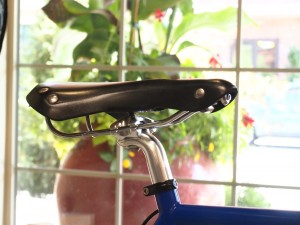
Rivet Pearl saddle in black

My personal quest for a comfortable bicycle saddle which I can sit on for consecutive hours in relative comfort came to an end (uh,huh,huh) when I tried the Gilles Berthoud Aspin saddle. But that solution didn’t work out for my wife and riding/touring partner. The shape wasn’t quite right. For her the Rivet Pearl saddle provides the best platform.

Rivet Cycle Works is a relatively new player…the saddles were introduced at the North American Handmade Bicycle Show in Sacramento this year (2012). The founder, Deb Banks is an ultra long distance rider. Like Paris-Brest-Paris long distance. She wanted to take the good things from all the currently available leather saddles and incorporate them into a dependable, comfortable product.

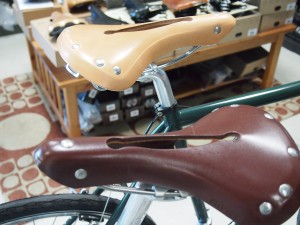
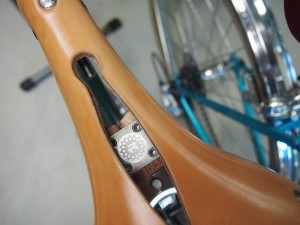
Rivet offers two models- the Pearl and the Diablo. The Diablo at 155mm wide and 280mm long is narrower than the Pearl, which measures 170mm wide and 280mm long. The Diablo is a little bit lighter as well. Both models feature a longitudinal cut-out in the top. Leather tabs on either side of the skirt extend underneath where they meet and are held together with a riveted metal plate. The attention to detail is apparent when one notices the Rivet logo on the metal plate visible through the cut-out. Rivet calls these “suspension” saddles. The extra thick, laminated leather tops are “firm but forgiving”. And the skirt tabs do not allow the saddle to flare out when the leather starts to soften with use. After several hundred miles the leather on Sky King’s saddle is noticeably softer and has some spring or give but the saddle is not developing a “hammock” shape.

Rivet Pearl saddles in natural and burgundy. Black and white also available.

The straight portion of the rails, the part that clamps to the seat tube, is about a two centimeters longer than the rails on a Brooks B17 so the fore and aft position is more adjustable. Both models come in steel rail and ti rail versions.

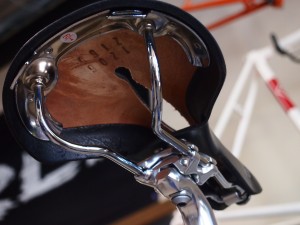
Rivet claims that the leather they use is waterproofed during the tanning process so that no further leather treatment is required. And the leather is thick….thicker than any other saddle we have seen. There is actually a second layer of leather laminated (finished side out) to the underside of each saddle, apparently to add structure to the leather and mitigate stretching but I would assume it helps with the weatherproofing too.

A layer of leather is laminated to the bottom. The rails are relatively long for a leather saddle….so you can dial in the position.

Some might hesitate to buy the first generation of a new product, but from what we’ve seen and used, I say go ahead…take a chance.. be a pioneer. Your friends and neighbors will be impressed. $150.00 for the steel rail versions and $250.00 for titanium rails.

Categories
Touring Bike Accessories

Surly Bill Trailer

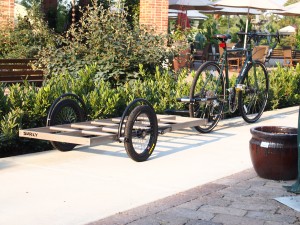
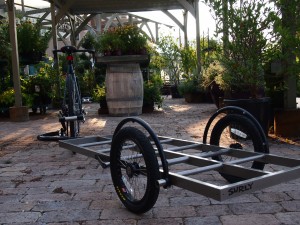
We recently ordered and built a Surly Bikes cargo trailer for a customer. This one is the so called Bill trailer. The shorter Surly trailer is the Ted. In typical Surly fashion these trailers are way better than they need to be. The beds and the hitch are made mainly of TIG welded 4130 ChroMoly steel. 304 stainless steel hardware is used where appropriate.

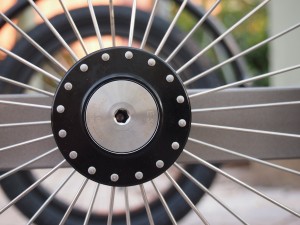
There are two sealed cartridge bearings on each wheel.

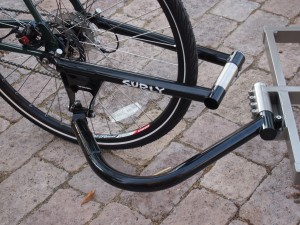
The trailers and the hitch are sold separately. The hitch will work with almost any bike by simply replacing the stock quick release skewer or thread on nuts with Surly’s proprietary parts. Surly’s own Ogre and Troll bike frames have a threaded hole in the rear dropout made to accept a 10×1 threaded bolt and the Surly hitch mount nuts.  The hitch and yoke assembly retails for $299.00. The Bill trailer retails for $750.00 and the Ted goes for $650.00

The Surly crew cultivates an impression of being a bunch of beer swilling louts and rad bro’s, but their engineers are top notch and these guys obviously ride bikes…a lot. And they actually use what they sell. It’s surprising to me and it bugs me when some manufacturers bring bikes or parts to market and the bike or part does not work as expected or advertised because of a minor, or not so minor, design flaw which could have been flagged and worked out if the the item had been ridden and used before being marketed. Here’s what makes me think these trailers were used in the real world before being sold:

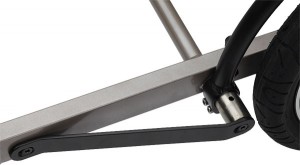
You see the bent piece of flat steel bolted to the frame and to the end of the wheel guard mount? I couldn’t figure out what that was for. It obviously is not structural. Then I took the trailer for a spin and when I was rolling it back in through the front door the piece of flat steel hit the door jamb and neatly kept the wheel from smacking into it which would have resulted in a jolt. I’m guessing that actually happened the first time someone took one of these out.


The articulating arm and adjustable sleeve at the trailer attachment make it possible to get the trailer level on any bike.

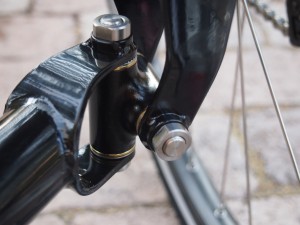
A compound knuckle joint connects the hitch to the yoke.

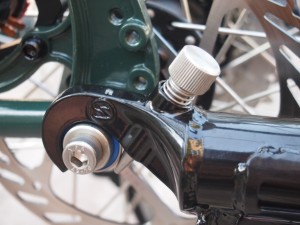
The fingers on the ends of the hitch are troughed to cradle the sealed bearing which is part of the attachment nut secured to the bike. The needle thumb screw holds it in place.

These trailers obviously are not suitable for bike touring and that is not the intention. But on the days when we miss the UPS driver and my Bob Yak is overloaded with boxes to ship I think one of these would be nice. The customer who bought this trailer is a carpenter. It would be fantastic to see him going down the road with an air compressor and a dozen two-by-fours strapped onto the the deck. Made for people who are serious about Using (with a capital U) their bicycles, these trailers are designed and made to last for a very long time.