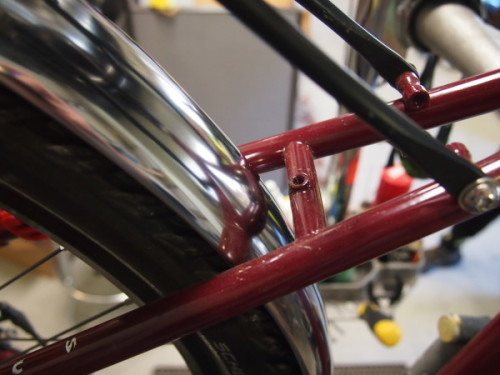
A bicycle with disc brakes can present some challenges when it comes to attaching fenders and, sometimes, racks. Especially tricky is the front wheel where the brake caliper is bolted onto the adapter on the back side of the left fork blade. In my experience the Gilles Berthoud stainless steel fenders are the perfect fender for the Surly Disc Trucker or the Long Haul Trucker for that matter. The single stay for both front and rear fenders is easier to deal with than the twin stay design of most composite fenders. The stays attach low on the backside of the front fender which not only looks elegant but cleanly routes the stay below the front brake caliper.
Having installed dozens of these fender sets, it occurred to me that some people might be interested in a short tutorial on how to go about it. So hopefully this will be useful.
Installation tools needed:
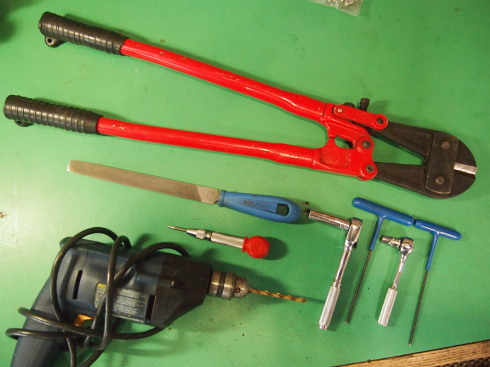
– Drill with a sharp 5mm or 13/64″ bit.
– Cloth tape measure or a piece of string to find the center of the fender.
– 10mm and 7mm socket or box wrenches
– 3mm and 2.5mm hex wrenches
– Bolt cutters or Dremel tool with a cutoff blade. (A hacksaw will work in a pinch).
– Metal file
– Metal punch to start drill bit
– Permanent marker (Sharpie)
Parts Included:
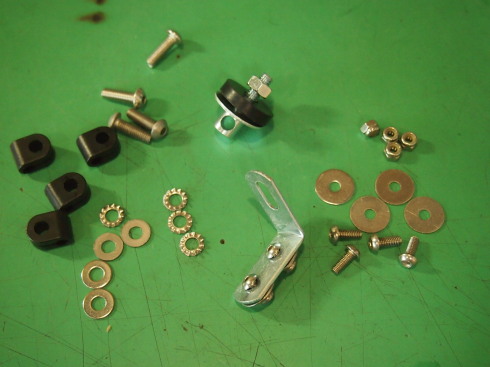
Front Fender:
The Gilles Berthoud fenders are packaged with an eyebolt or “daruma” bolt for the front fender. Berthoud assumes the bike will have either sidepull or centerpull brakes and the eye of the daruma bolt slips over the brake bolt and dangles down out of the bottom of the fork steer tube. If your bike has cantilever or disc brakes you will need a 5mm or 6mm bolt long enough to go completely through the fork crown (Hopefully your bike has a hole drilled through) with enough thread left over to screw on a nut with a lock washer. A 35mm bolt usually is long enough for this.
The front fender receives the dangling daruma bolt through the pre-drilled hole and is spaced away from the fork crown with the included metal fender washer and rubber washer. Berthoud also assumes the bike will have a 1″ steer tube so for a 1 1/8″ steer tube I use a larger fender washer than the one supplied.
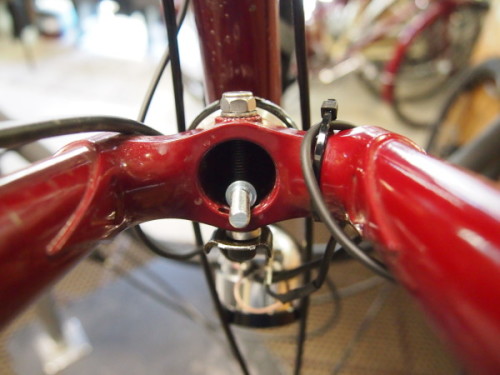
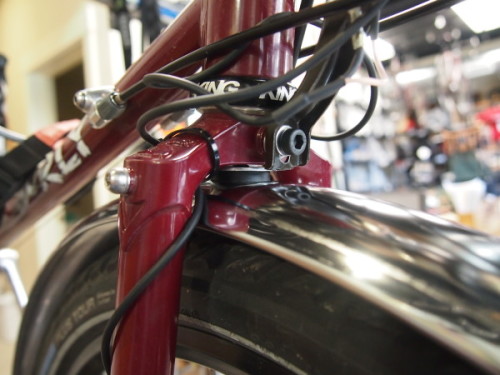
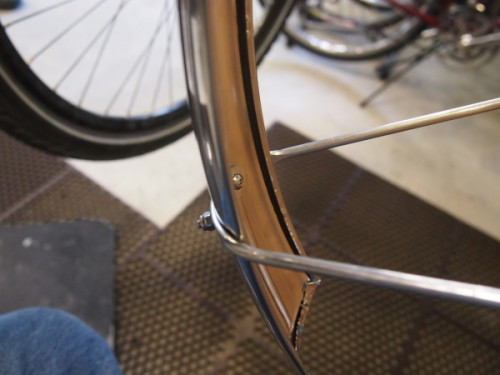
I usually bolt on the front stays before I make the fork crown attachment and I loosely screw the fender stay p-clamps to the holes in the fork dropout. Once the fender is in place at the fork crown I put the tire back on the bike and hold the back end of the fender in place while I line up the ends of the stays with the p-clamps and mark them with a sharpie where they will need to be cut. I snip off the ends with a pair of bolt cutters (the Dremel tool or a hack saw could be used here) and file the sharp edges before slipping them into the p-clamps for final tightening.
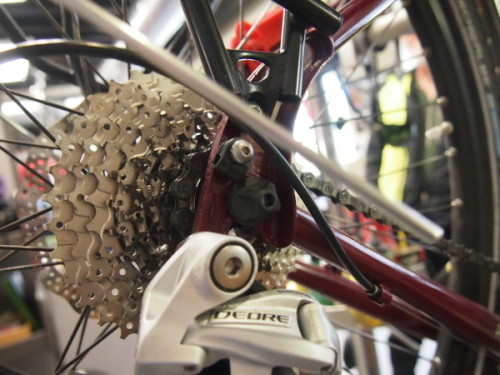
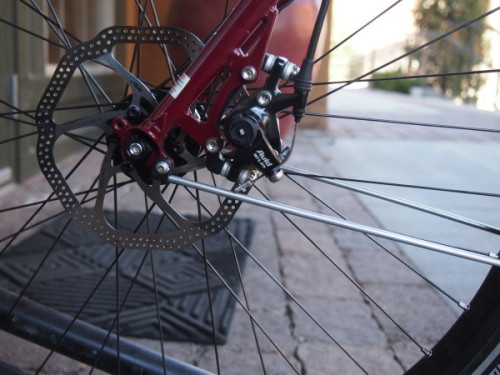
Rear Fender:
A bicycle with a well thought out design for the rear wheel disc brake adapter places the caliper inside the triangle created by the seatstay and chainstay, where it is out of the way of the fender stay attachments. As such, the rear fender is usually less of a challenge; at least relative to the disc brake. But the installation usually involves removing and replacing the wheel several times in order to make adjustments to the fender line.
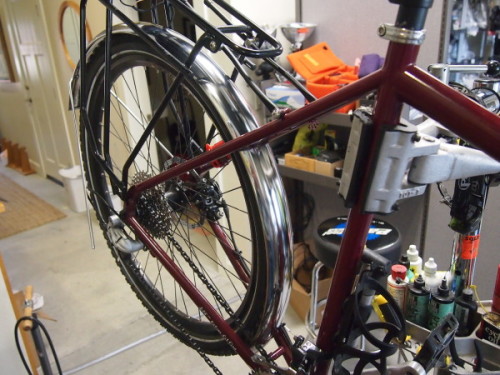
I start by holding the rear fender in place to see how much clearance there is at the front, between the chainstays and between the fender and the bridge between the chainstays. Usually, a spacer, which can be anything from a sawed off wine cork to a piece of aluminum tubing to 3 or 4 of those little washers that screw onto tube valve stems, is required between the bridge and the fender.
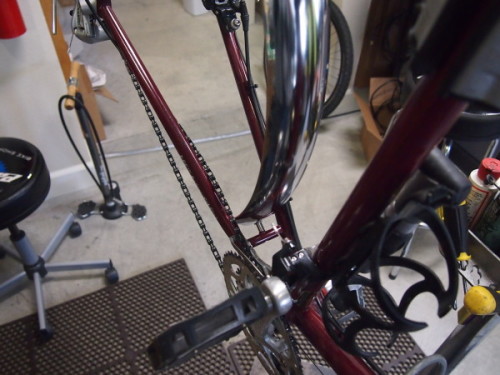
This is the first solid attachment I make. Again, the stays are bolted onto the fender before I start, so once I make the first attachment I can put the wheel back on and hold the rear end of the fender in place to mark where I want to cut the stays. Once those are cut to length and the sharp edges filed off they can be clamped into the p-clamps. There is one final, crucial step to installing the rear fenders. After the fender line has been established, and everything is held in place on the bike with the connections I have already made, it is time to drill a hole in the fender where it will be bolted onto the brake bridge. Here is the third assumption that Berthoud makes; that the bike in question has a threaded hole on the bottom of the brake bridge into which a bolt holding the fender can be screwed. If the bike does have the threaded hole then it is relatively simple to mark the spot on the fender and drill the hole. To find the spot to drill the hole for an L-bracket, bolt the bracket onto the brake bridge and, holding the fender at the desired clearance from the tire, mark the hole locations with the Sharpie.
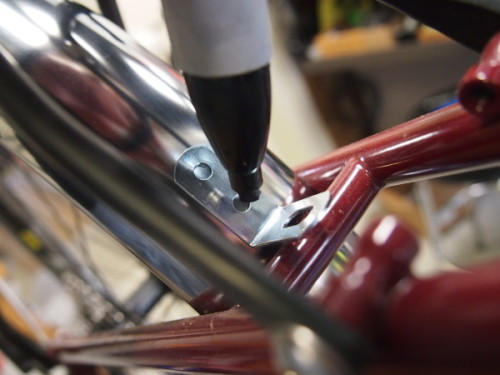
Mark the hole and find the center of the fender crown using the cloth tape measure or the string. The metal punch is sort of critical because stainless steel is hard and the drill bit will wander around before starting to cut if there is not some sort of indentation for a guide. A one-hand-held spring punch is ideal for this.
I just read through this instructional and it seems sort of complicated for the average person who doesn’t do this sort of thing everyday. I can say that installing fenders takes way more time than I can reasonably charge for. However, if one has some patience and a modicum of skill, or desire to learn, along with a few tools, it can be sort of rewarding. Then there is the opinion (mine) that a touring bike only looks complete after fenders have been installed. Hope this helps somebody. Please comment if I have left anything out or left you more confused than when you started reading.

