Author’s Note: This post was updated on Dec. 29, 2016. It was originally published on Feb. 20, 2015.
As interest in bikepacking and off-road bicycle travel continues to grow, many bike makers are offering machines that claim to be optimized for the task. We should know, as Surly’s line is full of bikes like the ECR, Ogre, Troll and Karate Monkey that are ideal vehicles for pedal-powered exploration. This level of specialization in bicycles can be a good thing but it also leaves many would-be bikepackers on the sidelines because they think they need a whole new bicycle to participate. While a shiny new bike can certainly make things easier and provide good motivation to get out and ride, you may discover that the best bikepacking bike is the one you already own.
With a few simple modifications or additions, any good-quality mountain bike can carry you and your gear into the backcountry. In this series of blog posts, we’ll guide you through the process and detail a few key points to consider when evaluating, upgrading and modifying your bike into a two-wheeled adventure steed that will take you places you never thought you could go.Especially since many key pieces of equipment (bags, lights, etc.) won’t come with any new bike, modifying the bike you already own can be a much more cost-effective path of entry.
In this post, we’ll take a look at the key qualities that good bikepacking bikes share and see if your bike fits the bill. A comfortable, durable, mechanically-sound bicycle is critical. The consequences of an ill-timed breakdown or failure can be quite serious when venturing far from home, so these are very important considerations. Assuming you own a mountain bike of some kind, wheel that thing in here and let’s have a look.
Evaluating your Bike for Trail-Worthiness
Before heading into the backcountry or sinking lots of money into expensive upgrades, you would be well advised to be sure your bike is up for the task. There is a certain standard of trail-worthiness that not all mountain bikes meet. This is mainly a question of reliability. Off-road riding is hard on equipment and many inexpensive, “entry-level” mountain bikes are built with more casual riding in mind.
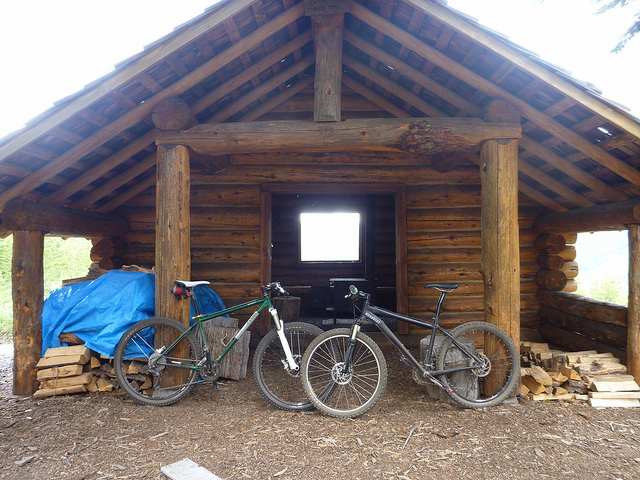
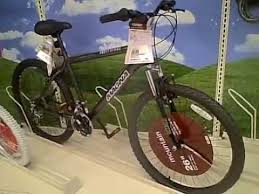
So, how do you know if your bike is trail worthy? If you purchased your bike at a bike shop and are already riding it regularly on singletrack with few mechanical issues you’re probably in good shape. If you bought your bike somewhere other than a specialty bicycle retailer your chances aren’t so hot. Bikes sold in many sporting goods and department stores are cheap for a reason and don’t typically hold up well when ridden often, especially off-road.
However, even many top-quality mountain bikes don’t make great bikepacking bikes. So, let’s dig into some of the nuances that set a potential bikepacking rig apart from the rest. Your bike doesn’t have to meet all of these criteria to work well but you’ll be more likely to enjoy the experience if you have most of these boxes checked.
What Makes a Good Bikepacking Bike?
Comfortable Riding Position
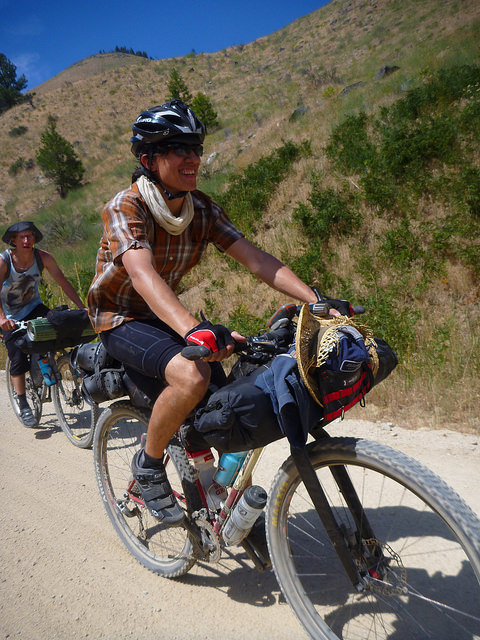
This is perhaps the most important consideration that we’ll discuss but also the most potentially challenging to get right. When you’re on the bike for hours at a time for days in a row, any potential source of discomfort can lead to frustrating pain or a debilitating injury. Other than employing the help of a skilled bicycle fit professional, the only way to know if you’ll encounter comfort issues is to put in the hours riding your bike. If you’re preparing for bikepacking you’ll want to do plenty of preparatory rides anyway, so listen carefully to your body for signs of problems as you ramp up the miles. A comfortable saddle and handlebar in the proper position are key elements in this equation. We’ll get deeper into fit issues in future posts. Assuming that you have a properly sized frame that you can ride comfortably, let’s take a look at some of the nuts and bolts of your bike.
Front Suspension or None at All
While full-suspension mountain bikes are becoming more common across all categories, they are often less than ideal for bikepacking on anything other than the roughest and most technical of routes. Suspension pivots and shock mounts take up valuable space in the front triangle, making frame bags difficult if not impossible to mount. All those moving parts also require regular maintenance and are often impossible to service in the field. You’d rather not be a hundred miles from the nearest bike shop when your rear shock blows a seal and stops holding air.

A suspension fork can be valuable if your route includes a good deal of rough terrain but can be overkill for routes consisting mainly of dirt roads or smoother trails. Much like rear suspension, a suspension fork adds weight and complexity, requires regular maintenance and can be a major problem if it fails. While rigid mountain bikes have become a relative rarity the simplicity they offer is appealing. If your bike is already equipped with a rigid fork you may be in luck!
The choice to ride front and/or rear suspension will be dictated by your bike, route, personal preference and budget. If your bike does have suspension, be sure it is in top condition before heading out on a long trip.
Big Wheels, Wide Tires
There are many good reasons that 29ers have taken over the mountain bike market in recent years. The bigger footprint, increased air volume and shallower angle of attack offered by wide 29″ tires deliver excellent traction and improve the bike’s ability to roll easily over larger obstacles. These attributes are especially helpful when the bike is loaded down, less maneuverable and harder to unweight over bumps. However, don’t despair if your bike has 26″ wheels or is one of the newer crop sporting 650b/27.5″ hoops. Wheel size won’t make or break your experience out on the trail but larger wheels certainly offer appealing comfort and performance benefits.
Regardless of wheel size, you can do yourself a big favor by using the widest, highest volume tires your frame can safely accommodate. Wide tires will provide a smoother ride, cushion your bike, load and body from bumps and provide improved traction. We’ll talk more about tires in a future post, so stay tuned for that.
Quality Components
For better or worse, the price of an “entry level” mountain bike is incredibly low these days. This is certainly a good thing for many riders as the cost of getting into cycling is lower than perhaps ever before. However, those “entry level” bikes reach their low price points by cutting corners somewhere. One common place for this cost-trimming is in the bike’s wheels.
Bicycle wheels endure tremendous forces, especially when carrying heavy loads over rough terrain. Low-quality wheels that break spokes, bend axles, dent easily and won’t stay true are a serious liability. You’ll want to be certain that your wheels are built on sturdy, double-wall rims with quality hubs and spokes to avoid problems. As shown in the cross-section diagrams below, double-wall rims feature a box section design that adds significant strength over the less-expensive single-wall design.

(Diagram from Velocity USA)
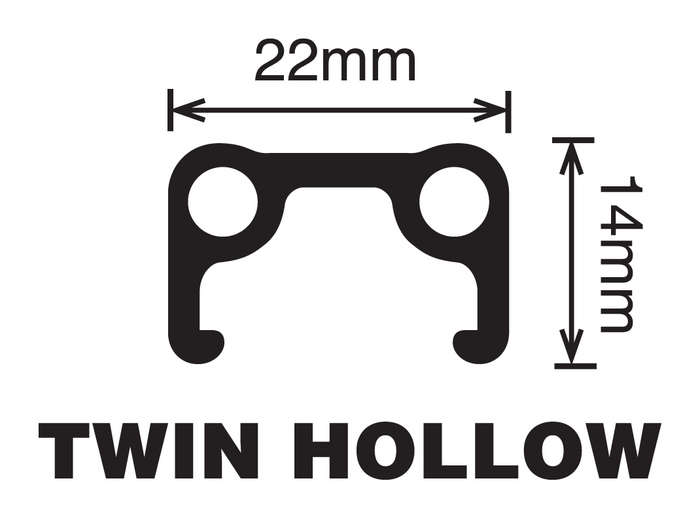
(Diagram from Velocity USA)
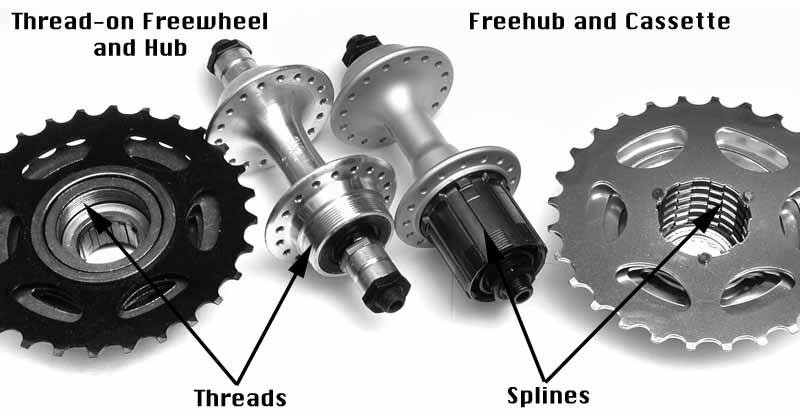
On the subject of hubs, most newer bikes are equipped with a “freehub” drive system rather than the older “freewheel” style. Bent or broken axles were common with “freewheel” rear hubs on mountain bikes because of the long section of axle protruding past the drive-side bearing. If you have a rear wheel using a threaded-on freewheel you’d be wise to consider an upgraded wheelset before loading the bike down. We build a significant number of bikepacking-worthy wheelsets here at Bike Touring News, so we’ll talk more about wheels in an upcoming post.
Other than wheels, you don’t really have too much to worry about. Even inexpensive brakes, shifters and drivetrain parts are surprisingly reliable and rarely fail when properly maintained. Higher-end parts will be lighter, more precise, offer performance benefits and are sometimes more durable but are not required. However, it is vital that all of your components are well maintained, not excessively worn and in good working order. It is wise to check and replace (if needed) your chain, cables/hydraulic fluid, brake pads, etc before heading for the hills to avoid problems on the trail. We have a series of blog posts on roadside repair and maintenance, so brush up there if you need a primer. Many trip-ending mechanicals are a result of poor maintenance and should be easily avoidable.
Metal Frame
Carbon fiber is everywhere in the bicycle industry. Carbon frames and components are showing up at surprisingly low price points and have (mostly) shaken off their reputation for fragility and premature failure. Modern carbon bikes and parts from reputable manufacturers are of very high quality and have proven reliable in demanding conditions. Many also offer extra protection in the form of tough, durable finishes, rock guards and the like. However, you’d still be wise to take extra care when bikepacking with a carbon frame. The combination of additional weight, frame bag straps, accumulated dirt, abrasion and vibration – in addition to normal hazards such as sharp rocks, severe crashes, etc – can cause serious damage to frame tubes of any kind but the problem can develop faster and have more severe consequences with carbon tubes. A good carbon bike can be a potent off-road weapon – especially for those looking to travel fast and light – but metal bikes will be more worry-free and probably longer-lived.

On the other hand, steel or aluminum bikes may suffer damage to their finish from the conditions presented by bikepacking but will rarely sustain serious damage to the tubes themselves. Regular cleaning and inspection is still important but is not as serious a concern as with carbon tubes. Though expensive, titanium may be an ideal material for bikepacking bikes due to its exceptional hardness and resistance to scratching or abrasion.
Summary
So, is your bike up for the challenge? You may already have your new bikepacking bike hanging in your garage, waiting to hit the trail! If your ride doesn’t cut the mustard, Bike Touring News offers a range of models from Surly that will do the job admirably without breaking the bank, like the ECR, Troll, Ogre or Long Haul Trucker. There comes a point where a new bike becomes a simpler, more cost-effective option. Feel free to give us a call, shoot us an email or stop by the shop if you want to talk about the pros and cons of your current bike!
Throughout this series of posts, we’ll dig deeper into some of the considerations outlined above and a few more in order to help you build the best possible bikepacking setup for your application and budget. In the next post we’ll explore various methods of carrying the supplies for your ride, so stay tuned for that! Follow us on Facebook, Instagram and Twitter @BikeTouringNews for the most up-to-date news and information.
What questions do you have about setting up a bike you already own for bikepacking? Sound off in the comments, give us a call or email and I’ll do my best to cover those topics of interest in a future post. Hey, thanks for reading!

