Categories
Idaho Our Trips Planning Resources Surly Bikes Touring Bike Tires

Testing the Pack Rat and Road Plus Tires on an April Fool’s Errand

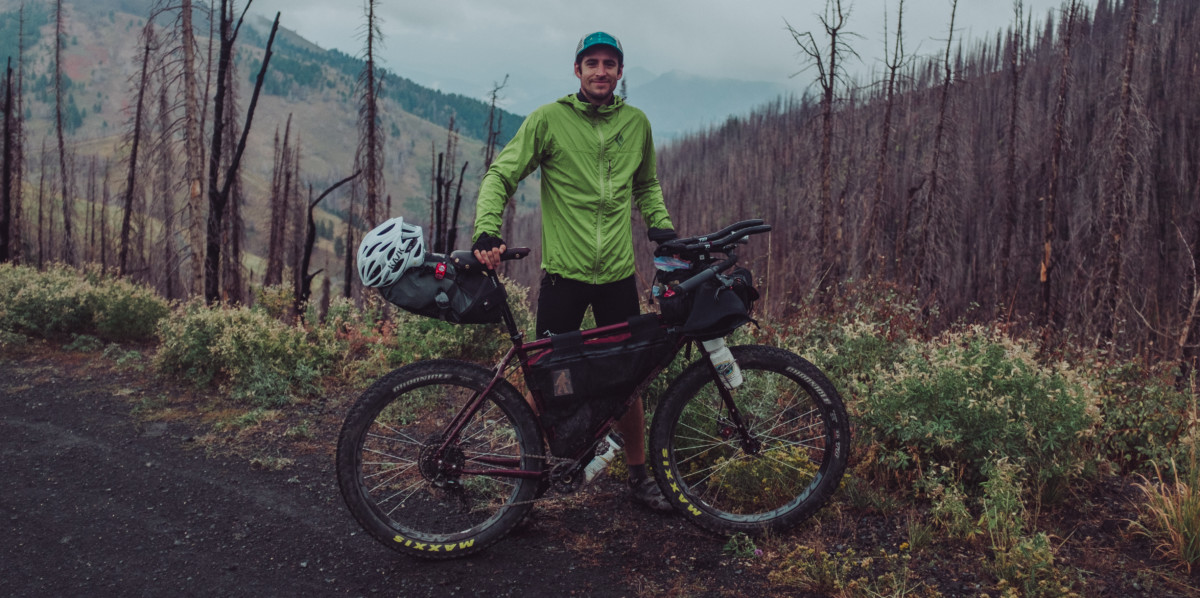
Back in December 2017, Surly announced the release of a new front-loading light touring bike – the Pack Rat.  I was excited about the possibilities from the moment I learned of this bike’s existence and Bike Touring News was one of the first shops to stock them.  In the intervening 4 months, Surly has released no fewer than three more new models – the “Allroad” Midnight Special, a redesign of the Pugsley expedition fatbike and the entry-level dirt touring Bridge Club.

What with all this newness in such a short period, I was a little afraid that the humble Pack Rat might be forgotten.  I had already had favorable impressions from brief rides around town, so I set out to test this bike’s capabilities on a weekend ride.  I wanted to know if the Pack Rat was capable of loaded touring over the mix of terrain we commonly encounter here in Idaho and if this was a platform I could recommend for two-wheeled exploration past the end of the pavement.
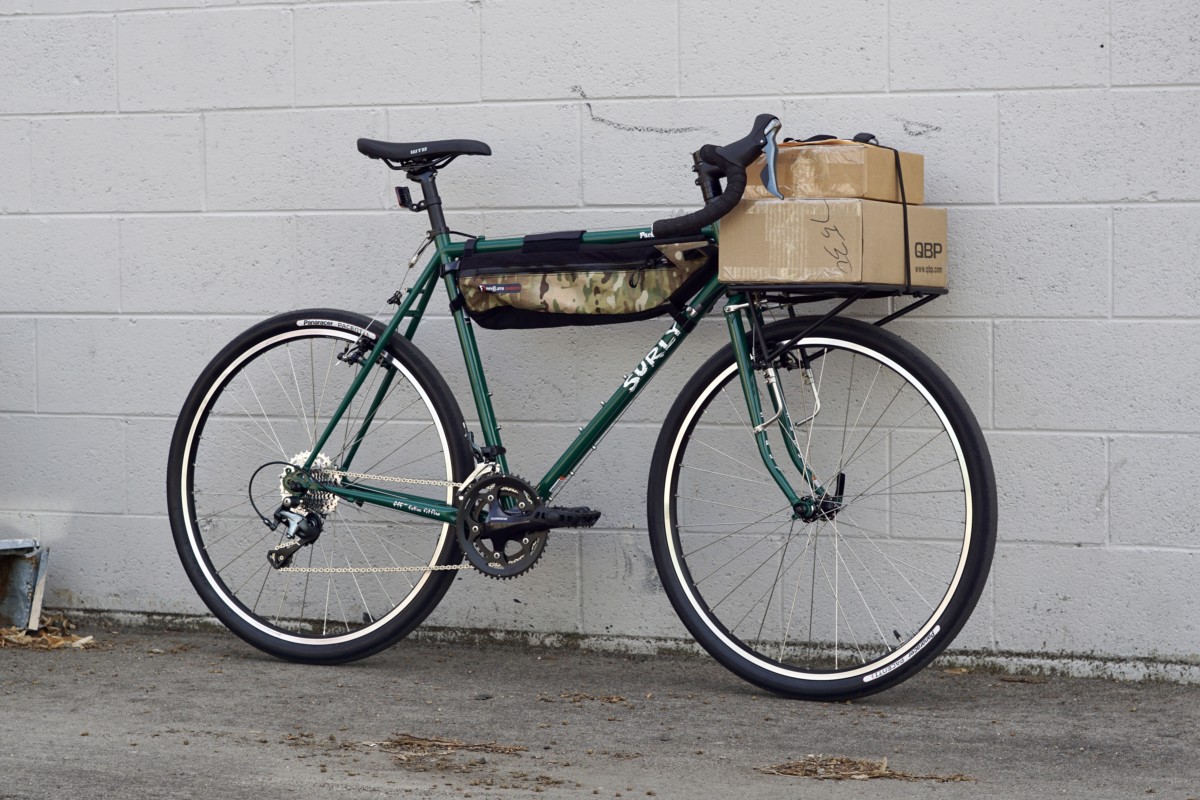
In order for this road test to be meaningful, I’m going to need you to hang with me in the Land of Make-Believe for just a little while.  Got your Imagination Cap on?  Good.

I’m going to make a statement that should be treated as fact for the duration of this post.  Ready?

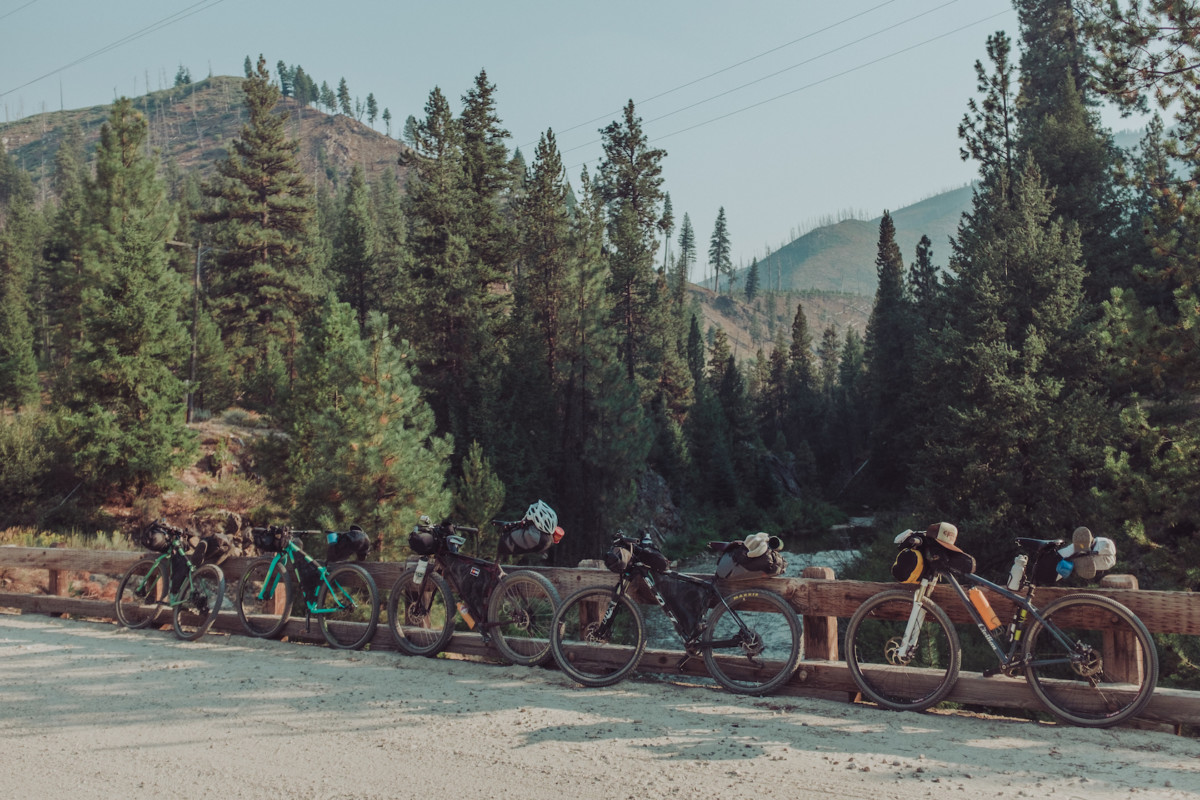
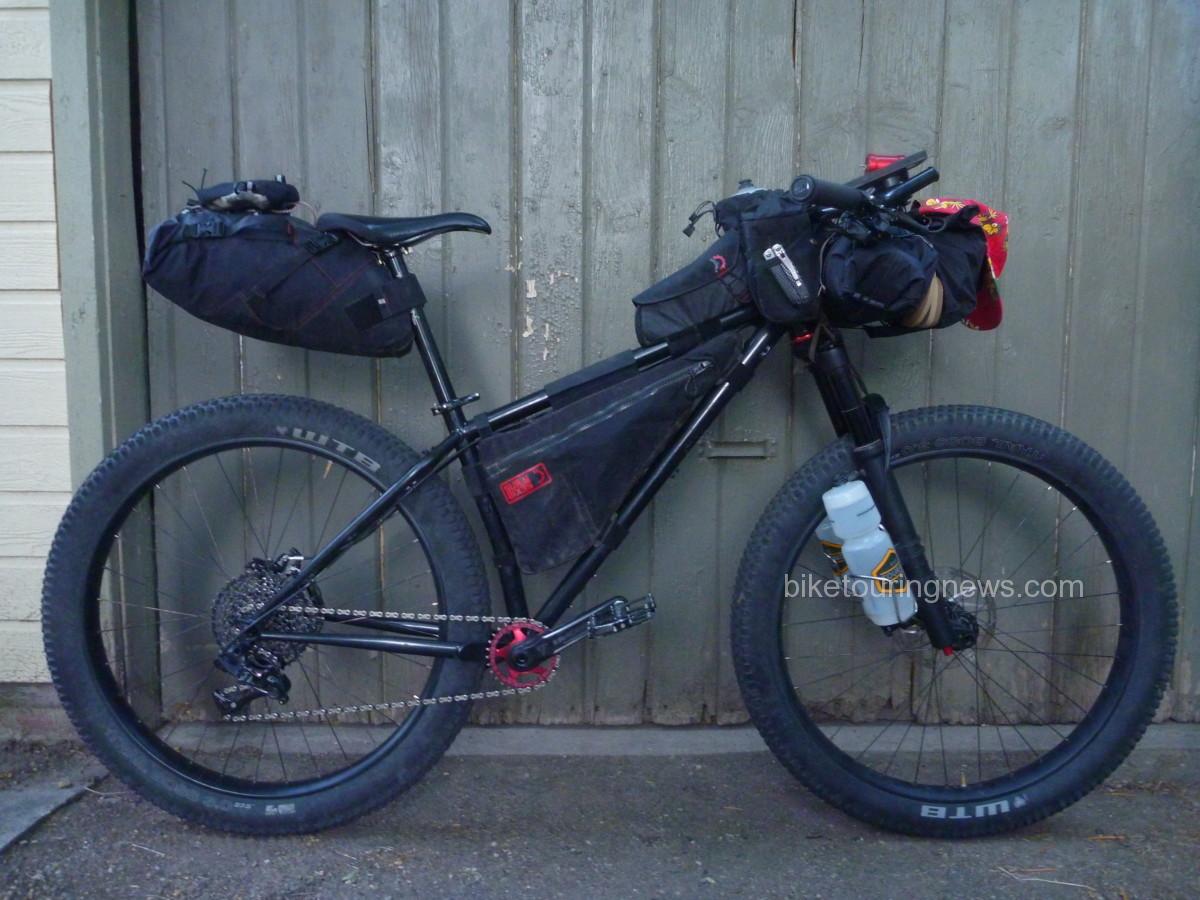
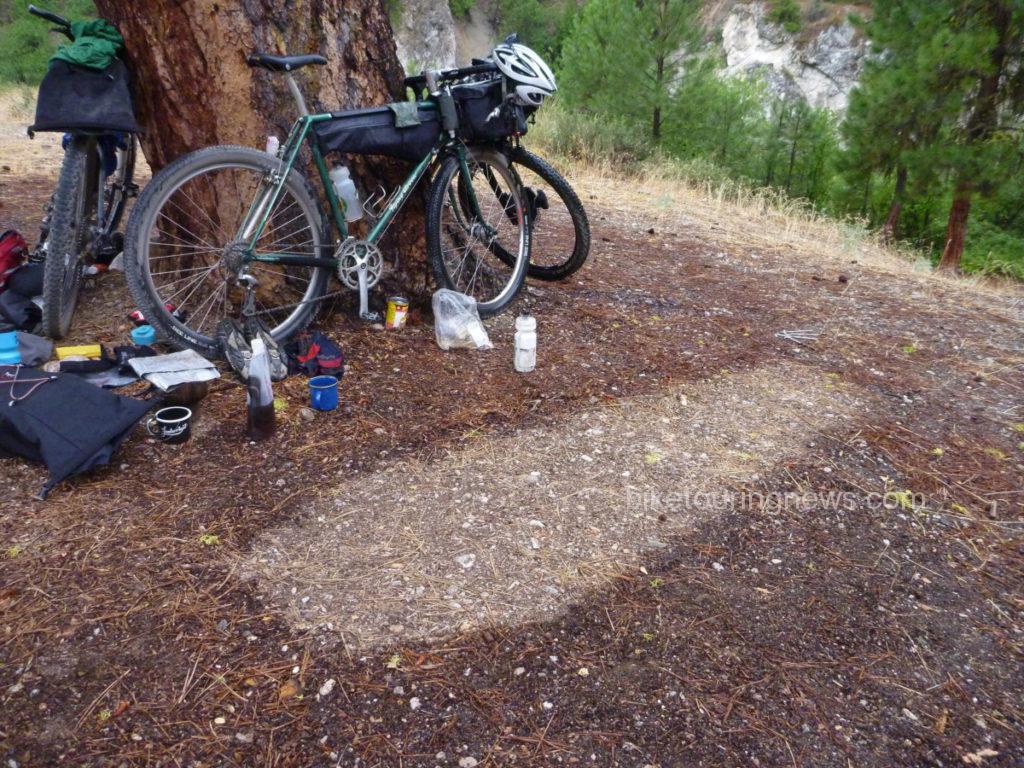
The bike pictured below is a Pack Rat.  Got it?
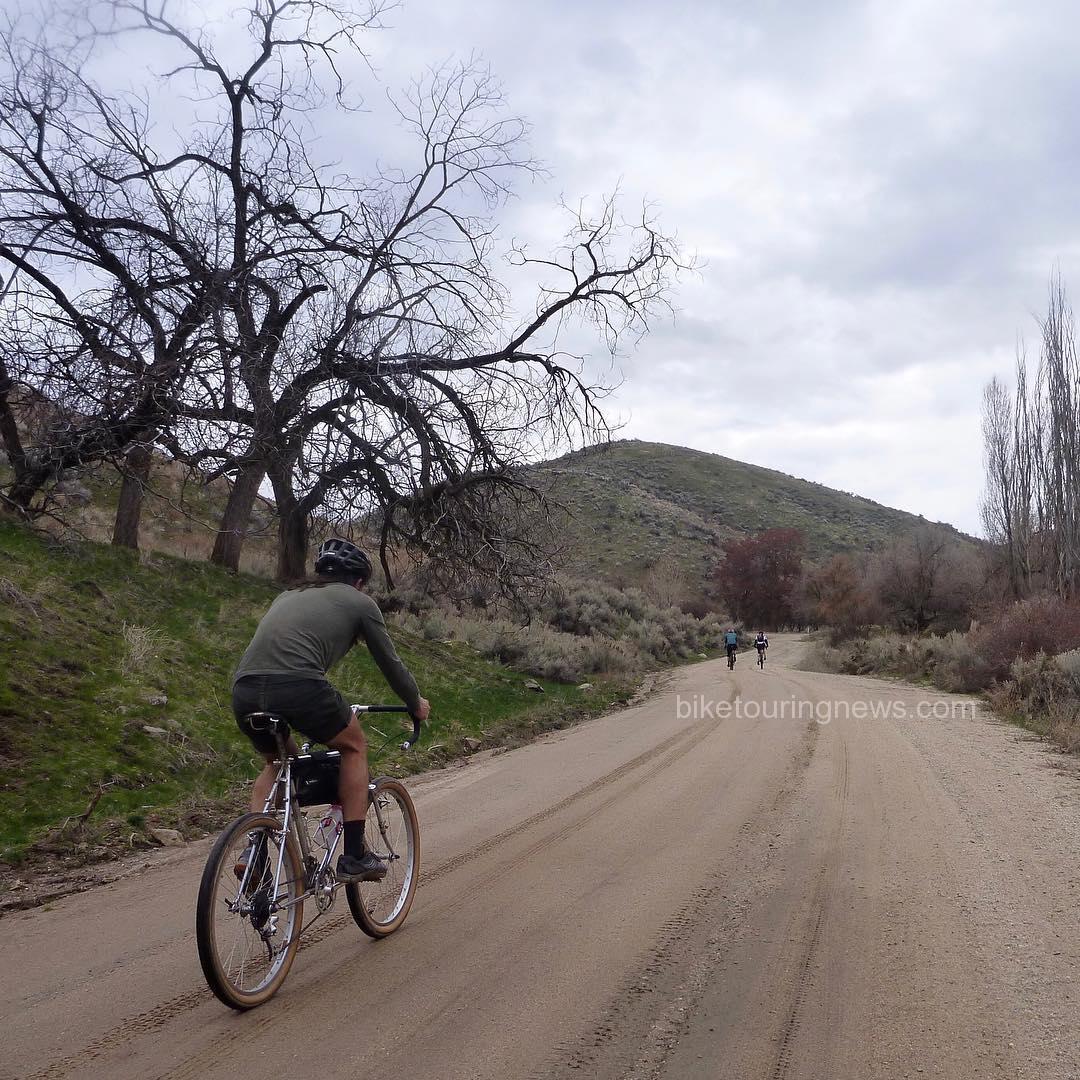
My old war horse of a touring bike – affectionately known as the Rando-Gnar – is nearly identical to the Pack Rat in every way that matters.  Both bikes are designed around 650b wheels with clearance for 47mm “Road Plus” tires.  Both feature geometry optimized for a front load.  Steel frames, drop bars, cantilever brakes, plenty of braze-ons for racks and cages.  Heck, they’re even (almost) the same color.  Nearly every component on the Rando-Gnar would move right over onto a Pack Rat frame.

In order to transform a stock Pack Rat into the bike you see above, all you need to do is mount a set of WTB Byway tires, drop the gearing down a bit and attach whatever racks and bags you deem necessary.  Boom, pow!  You’re ready to pack your gear and hit the road.

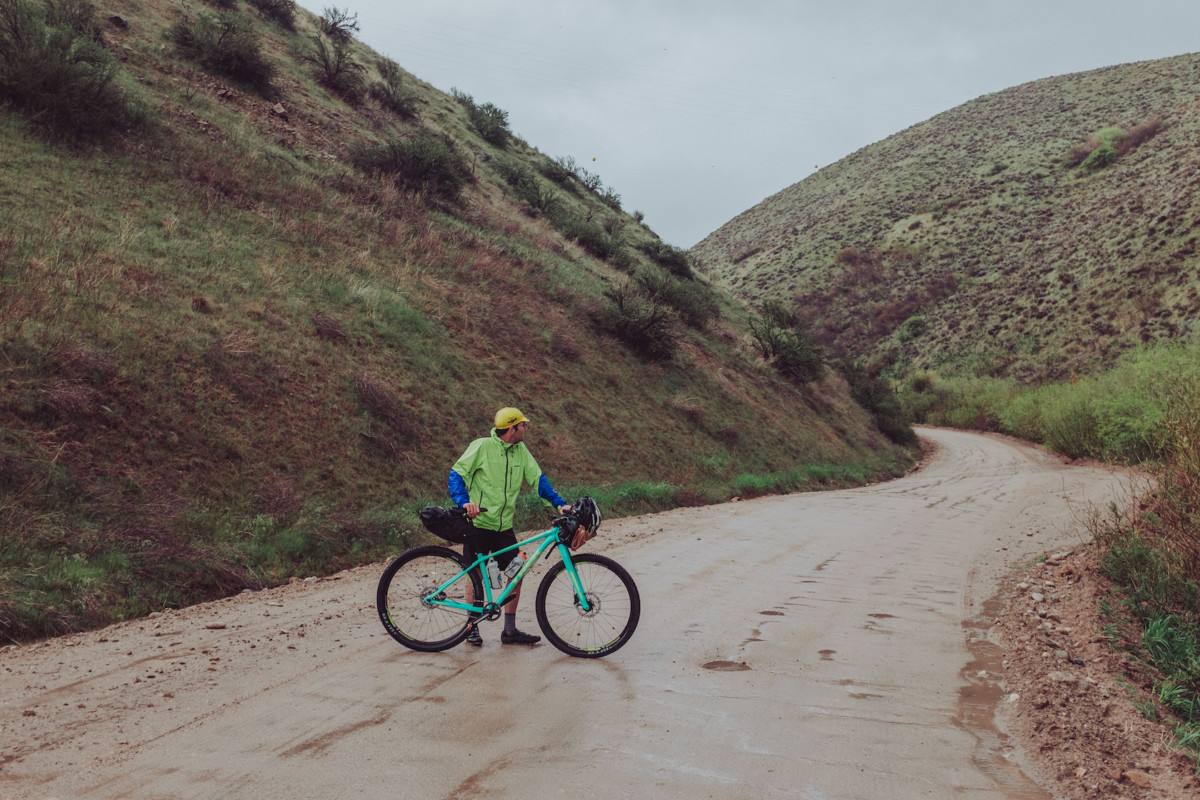
For this exploration of the Pack Rat’s touring capabilities, I mapped out a route that would cover around 160 miles of paved and dirt roads that would vary widely in condition.  I knew of one stretch of unmaintained road that would likely be in very poor condition.  The roads that climbed into the foothills of the Boise and Payette National Forests were more of an unknown quantity as I had not ridden them before.  I had some idea of what to expect and had been assured by a Forest Service Ranger that the roads were free of snow – though I had my doubts.  Most of the remainder consisted of varying qualities of pavement and maintained dirt roads.
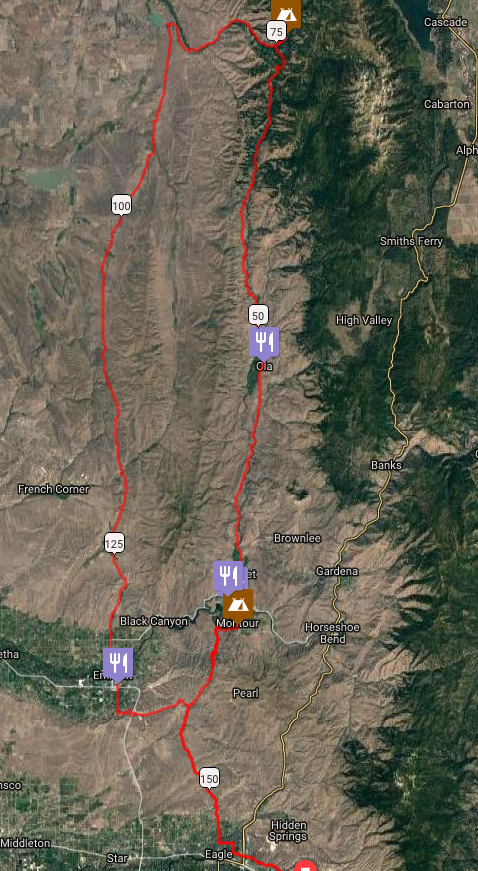
I set out from Boise on smooth pavement and re-adjusted to the ride of a loaded bike.  My haphazard packing strategy resulted in a heavier bike than I would have liked but I felt confident that I was well prepared for the unpredictable springtime weather and road conditions.  Rolling tubeless at 42psi, the Byways cruised down the pavement nearly as fast as a good racing tire.  I felt the weight of my load when the road turned uphill but the ride was speedy and efficient overall.

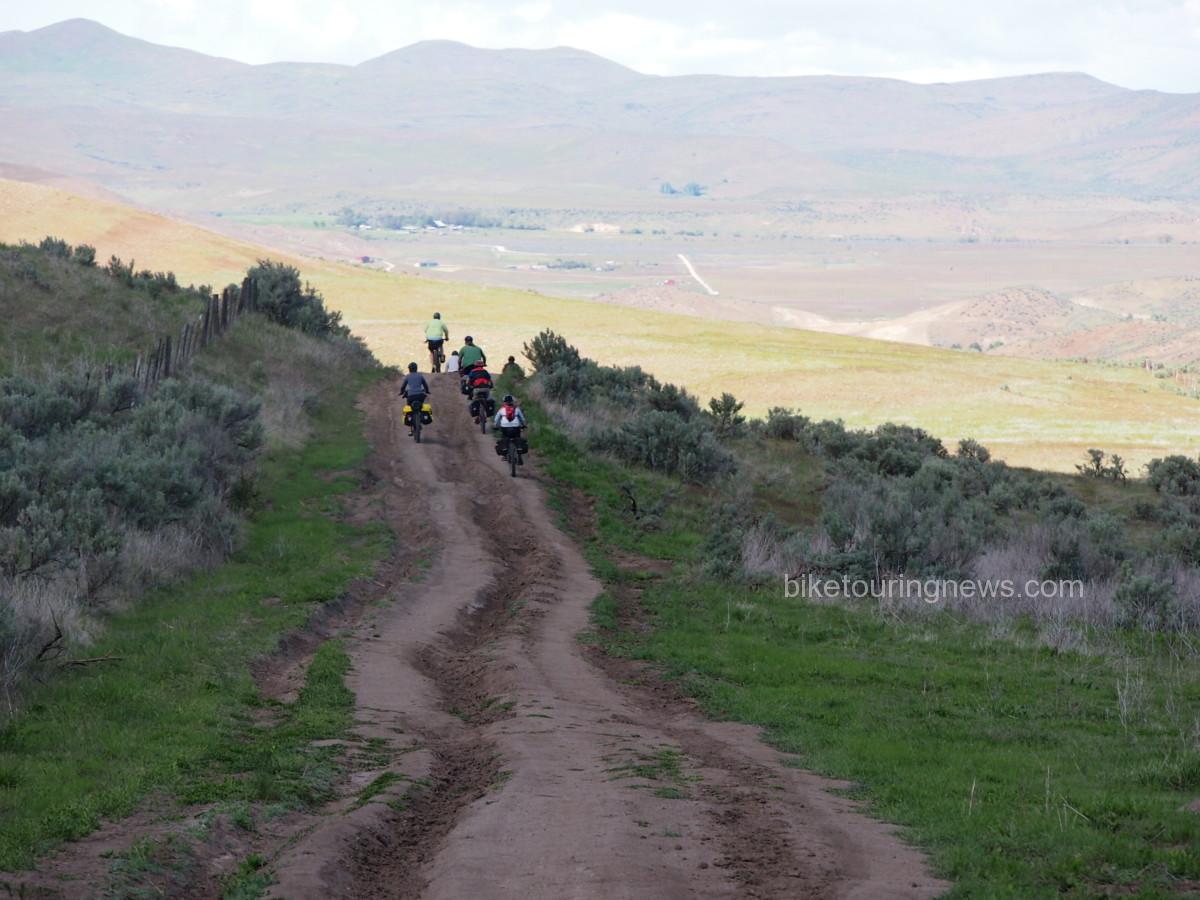
When the road turned to dirt in the rolling foothills north of Eagle, the Pack Rat pressed ahead with aplomb.  Traction was adequate for out-of-the-saddle riding over some of the steeper pitches, though I had to be conscious of my weight distribution to prevent the rear tire from slipping on looser ground.
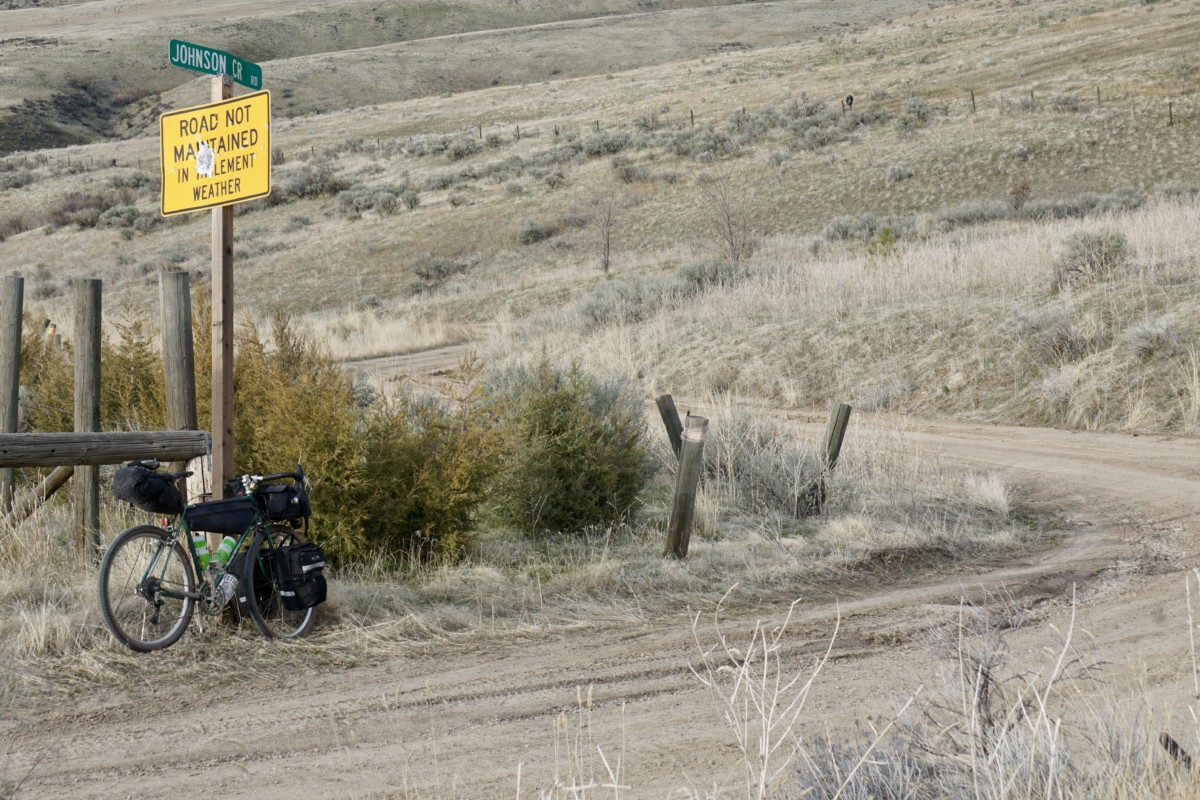
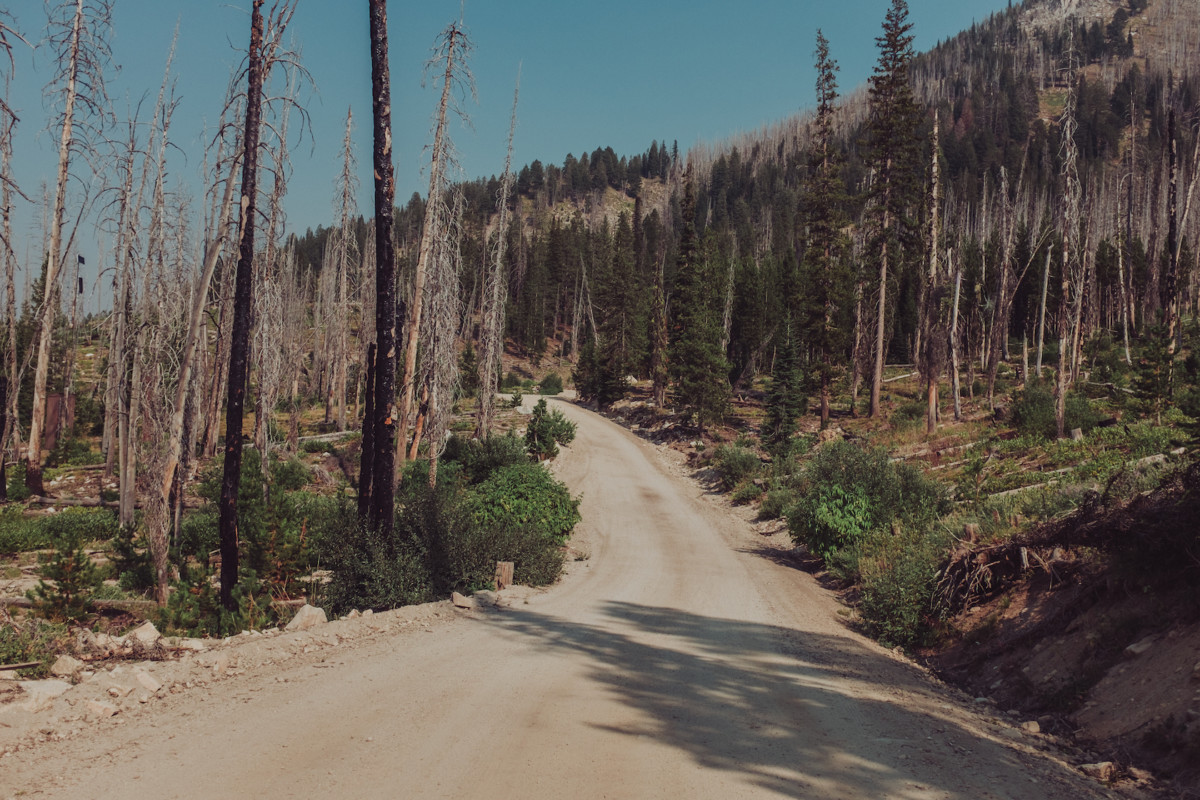
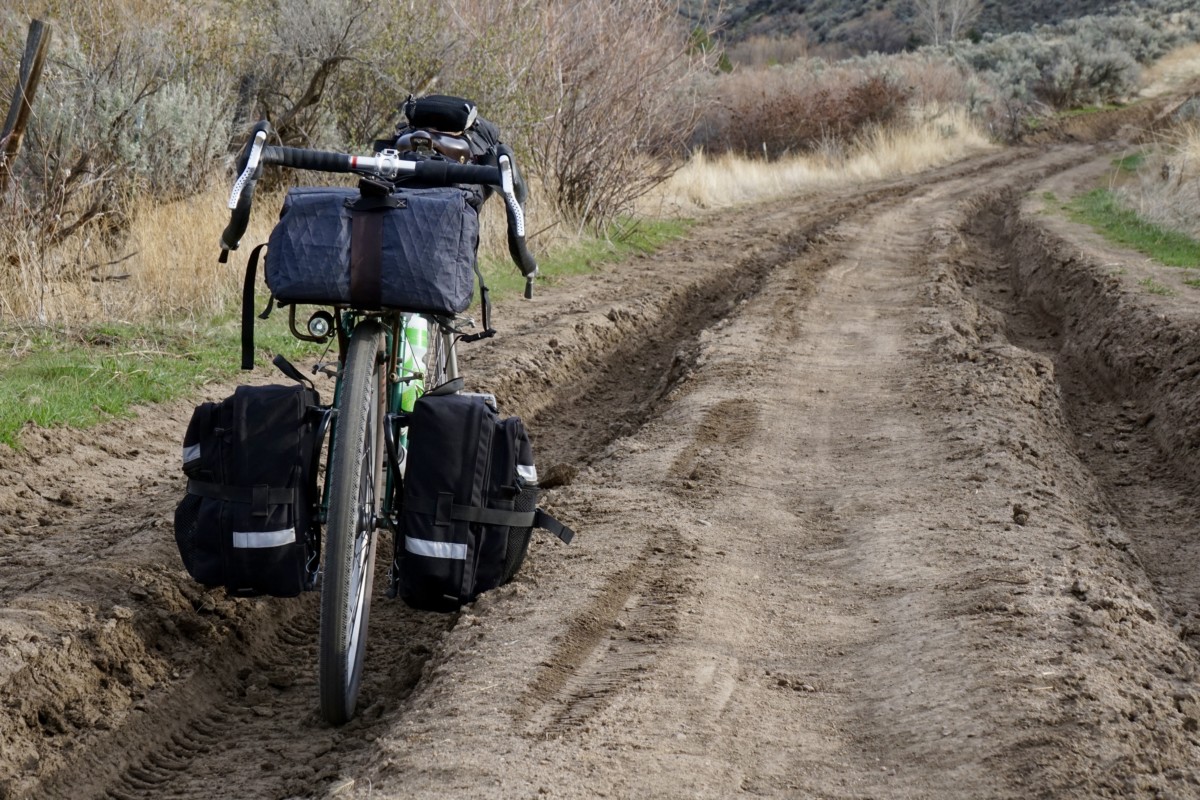
From the saddle at the top of Sand Hollow Road, our route descended the unmaintained Johnson Creek Road to the Payette River.  This road bears deep, rutted scars from heavy truck use in wet conditions and is very eroded in spots.  We rolled in, enjoying the views while keeping to the high ground between the ruts.
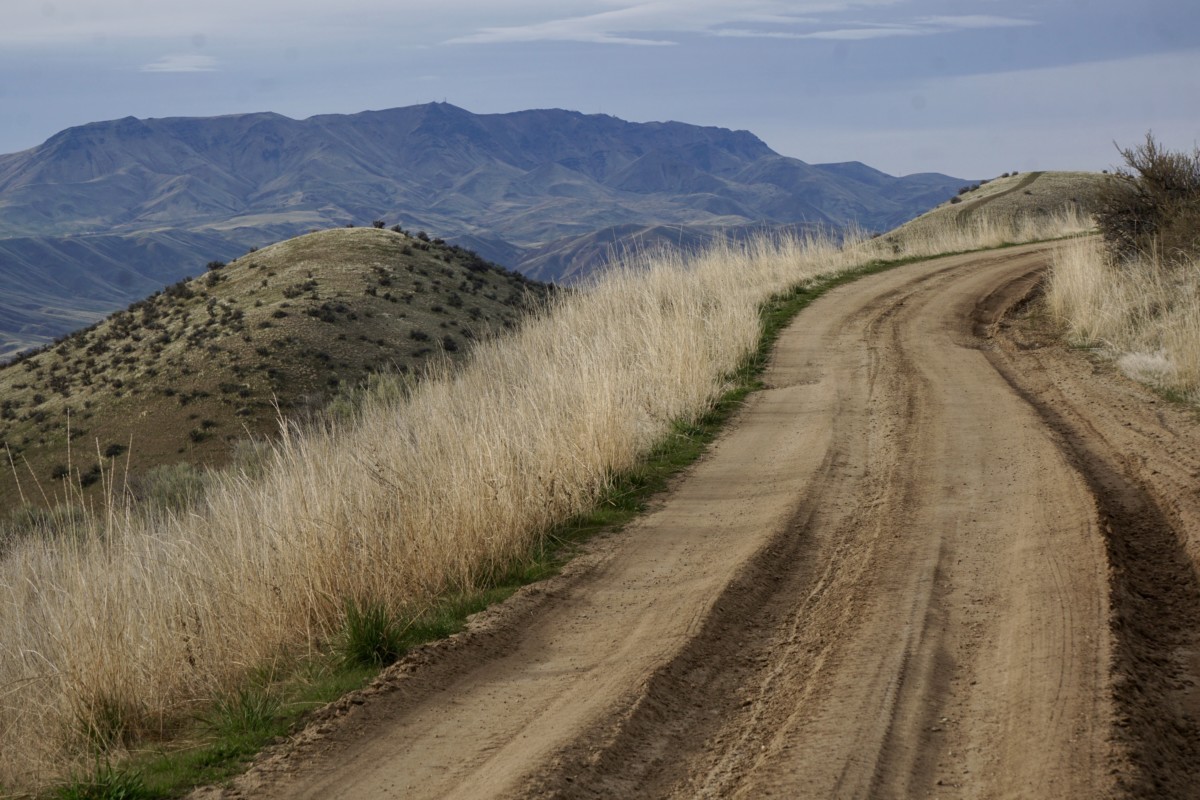
The ruts were nearly three feet deep in spots but the clay was hard and firmly packed, making for predictable traction even at off-camber angles.
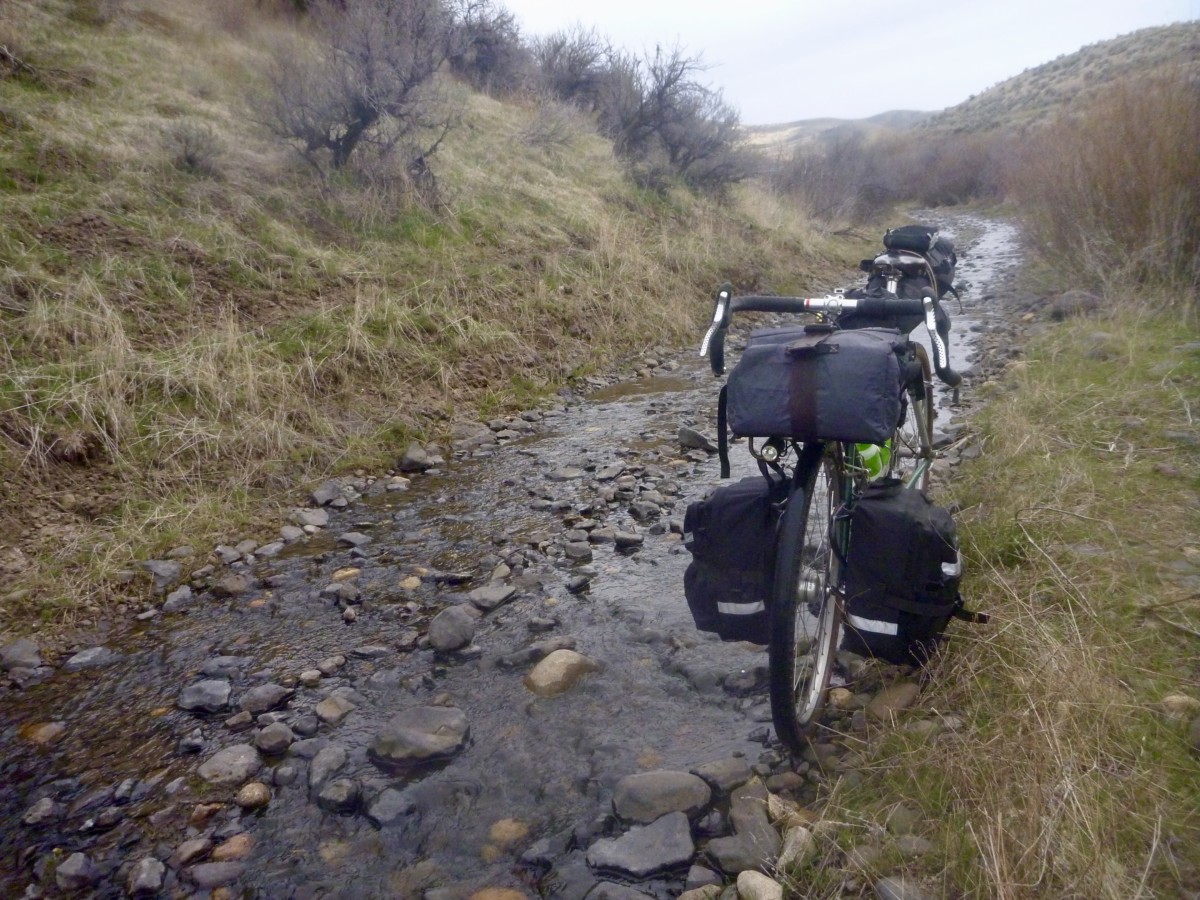
One section of the road has been completely taken over by the creek and presents about a quarter-mile of bumpy riding over loose, slippery river rocks.  I rode cautiously but never felt in danger of bottoming out my tires.
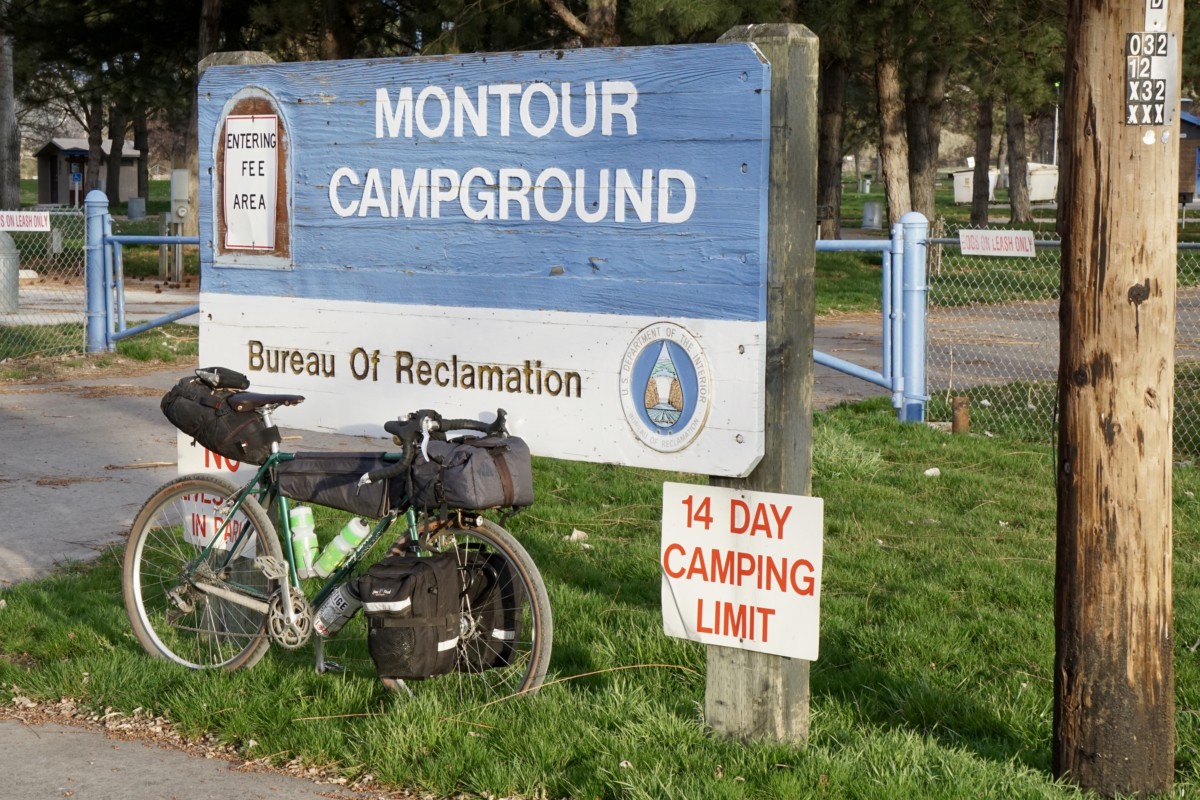
Johnson Creek Road drops into Shalerock Road, a wide and well-maintained dirt road that descends into the Montour Valley.  We basked in the dusky light on the descent to the Montour Campground for the first night’s camp.

After a hearty breakfast at the Triangle Cafe we struck out to the north the next morning, gradually gaining elevation on the paved Sweet/Ola highway.  The snowy mountaintops in the distance made me wonder about the elevation of the snow line.
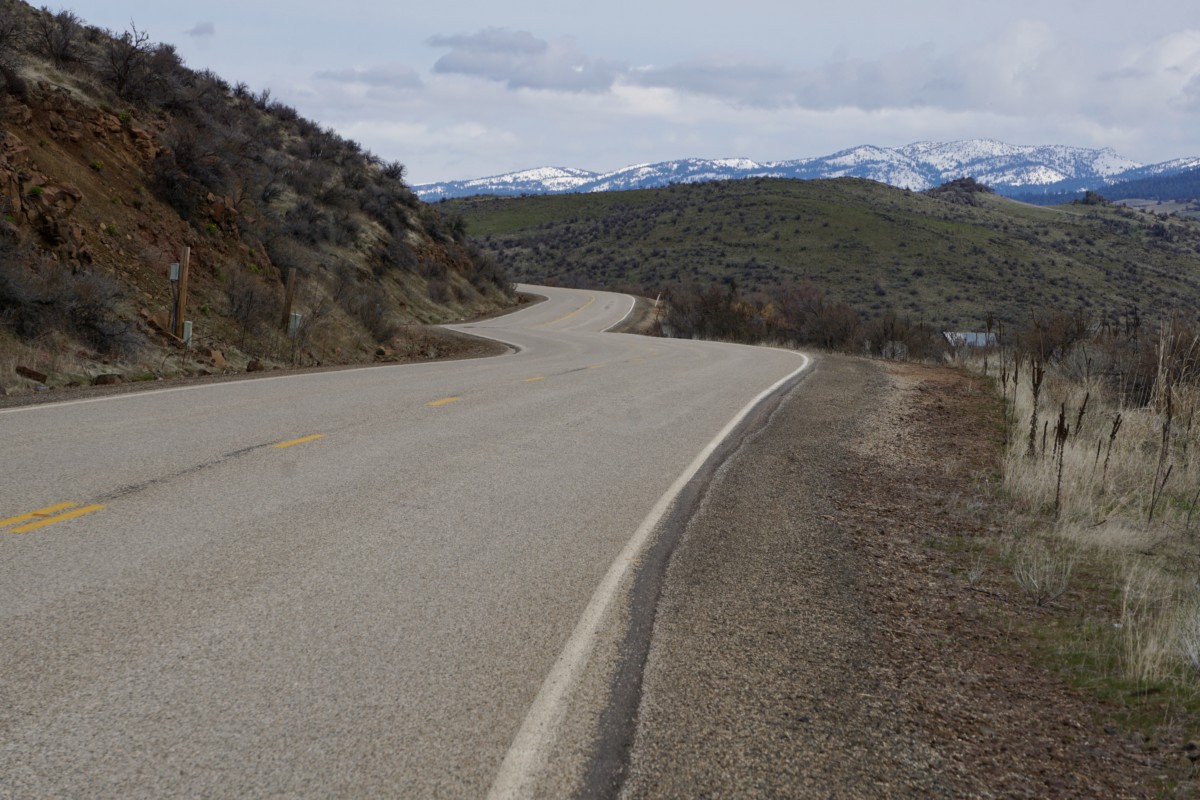
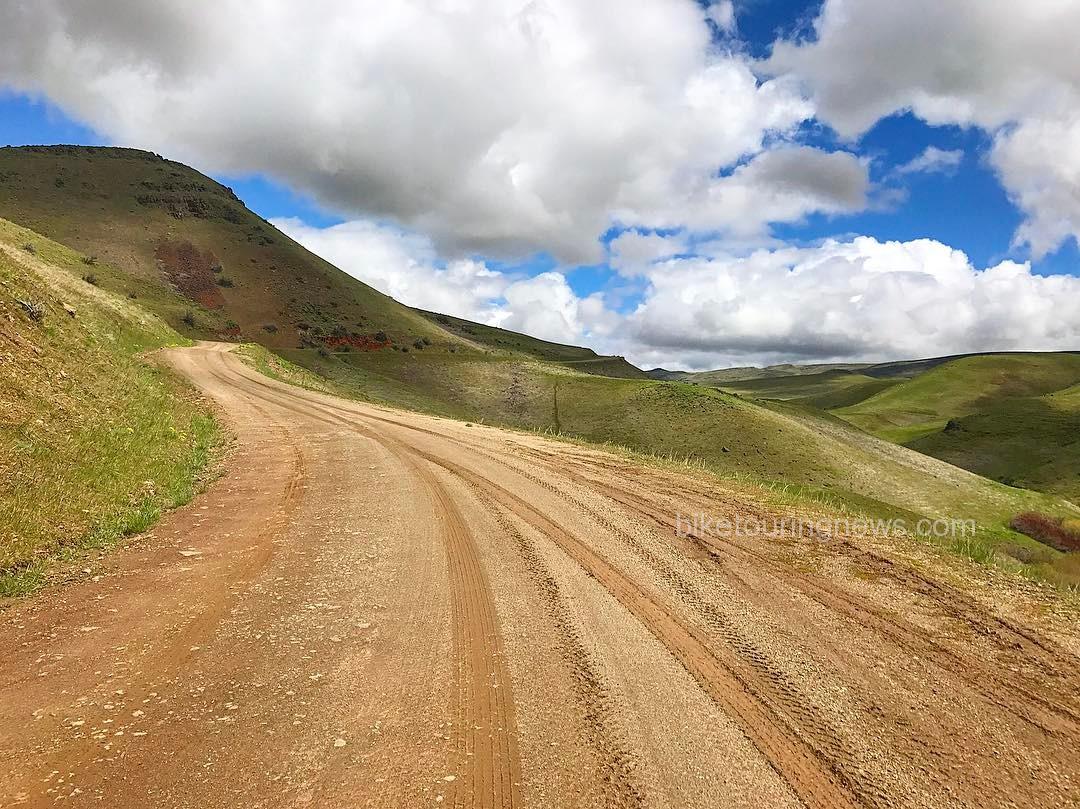
The road turns to dirt a couple of miles past the little town of Ola.  Conditions were excellent – nicely packed clay with a scattering of loose pea to marble-sized gravel.  The Pack Rat carried speed well and cornered confidently.
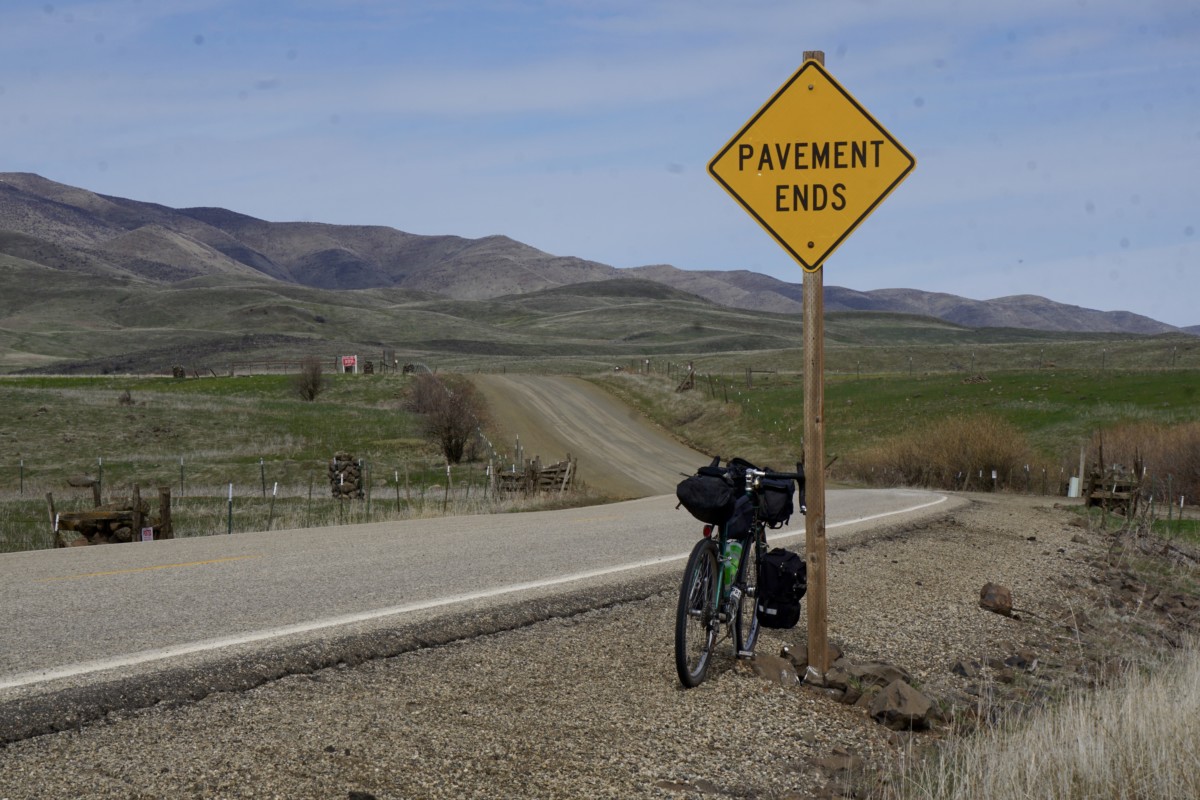
I was forced to adapt my pedaling rhythm to the lumpy terrain and the Pack Rat responded well – forging forward to crest each roller as I rose out of the saddle.
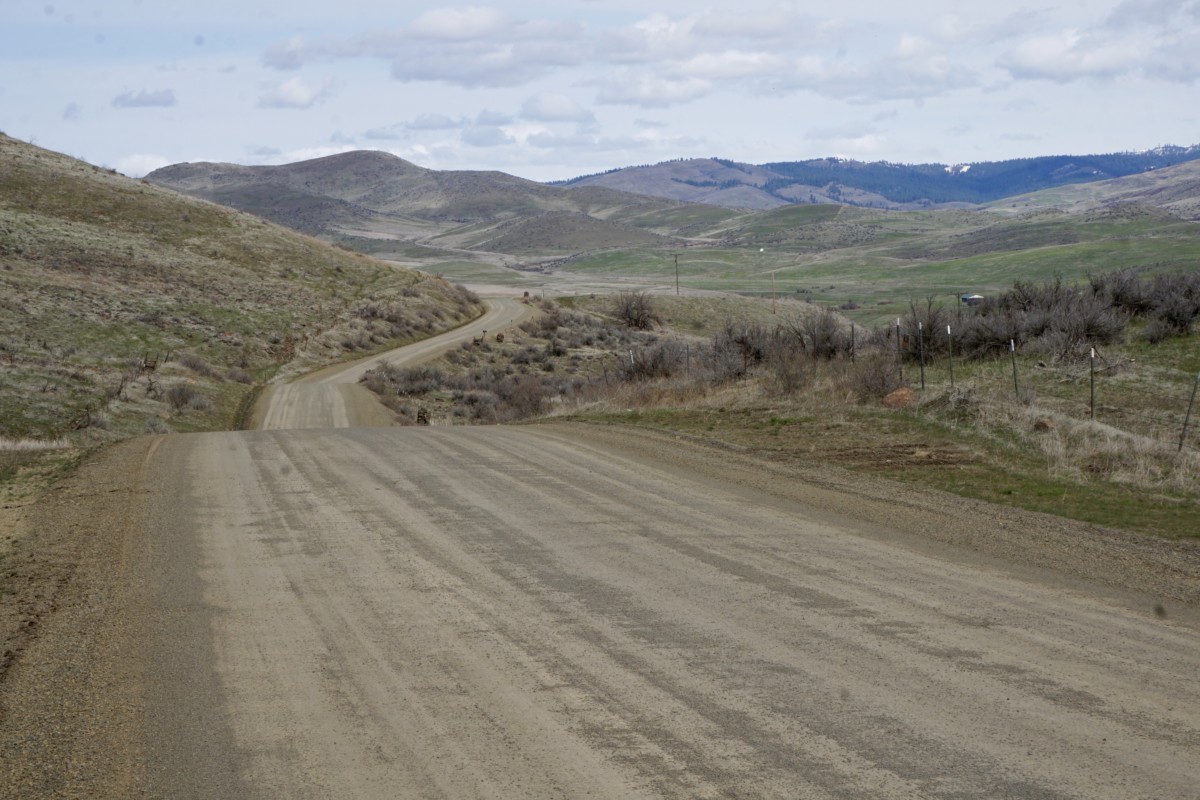
The Byway tires provided a sufficiently large contact patch and plenty of cushioning to keep the bike composed on the quick descents.  Momentum is everything when pedaling a loaded bike, so it was nice to have the confidence to let the bike run on the short downhills and carry good speed into the next climb.
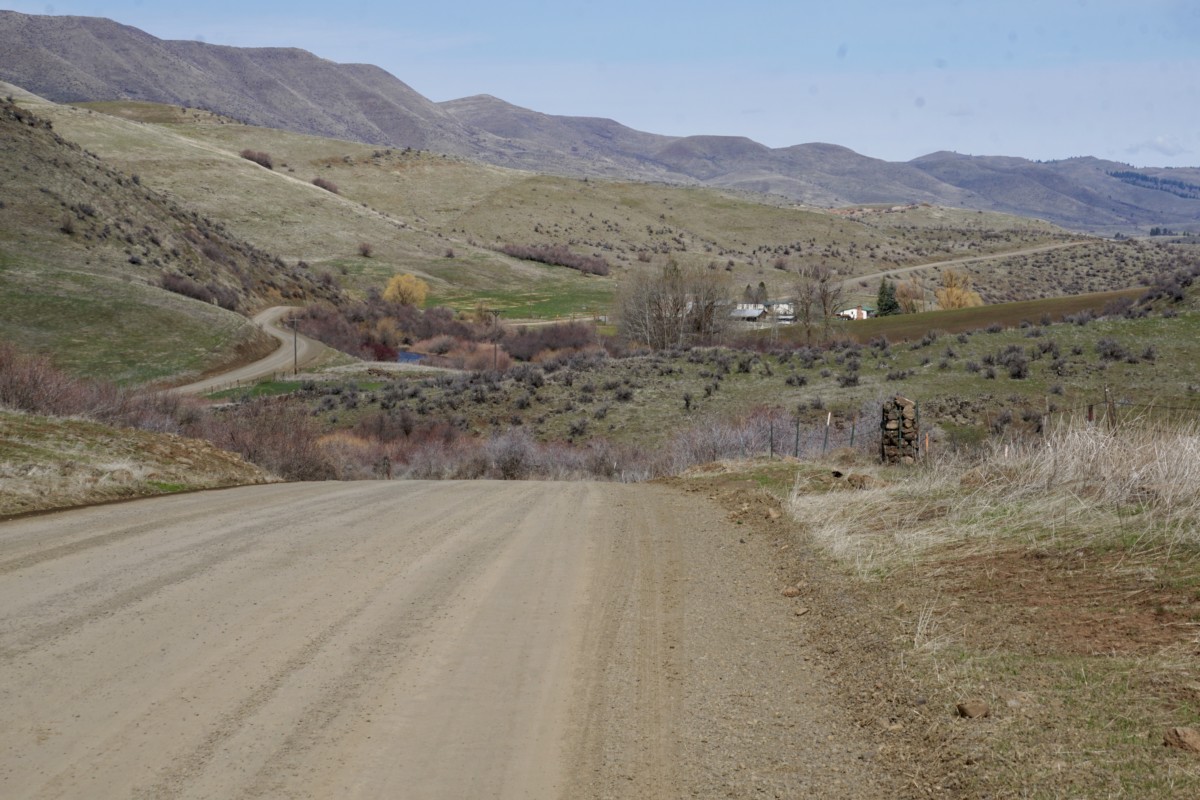
The road continued to wind its way north, following Squaw Creek toward its headwaters in the Payette National Forest.  We were getting close to 4,000 feet above sea level and entering the pine forest, so we began to encounter wet conditions and sections of slushy snow on the road.
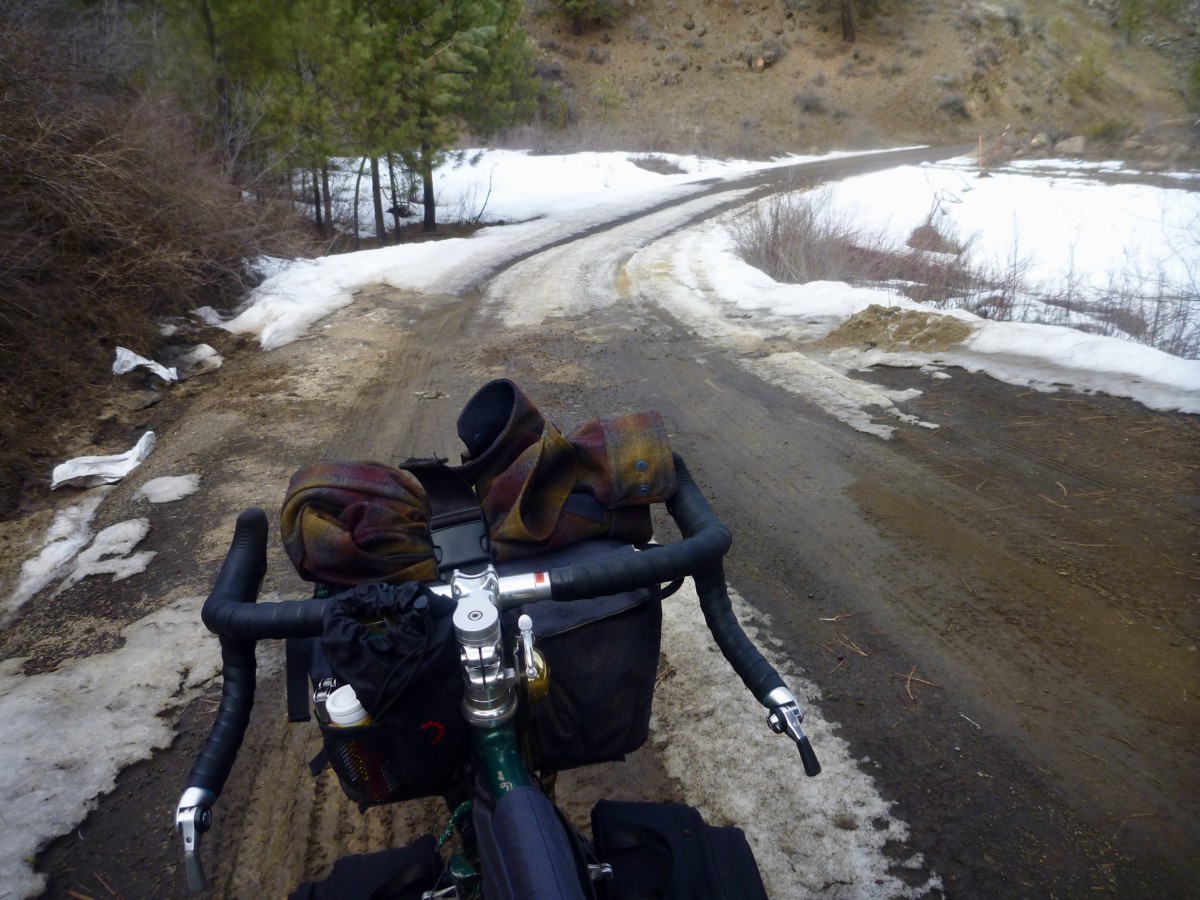
The 47mm tires sank somewhat into the softened road surface, slowing their roll and forcing me to work harder for the same speed.  However, they certainly provided more traction and flotation than narrower tires would have.
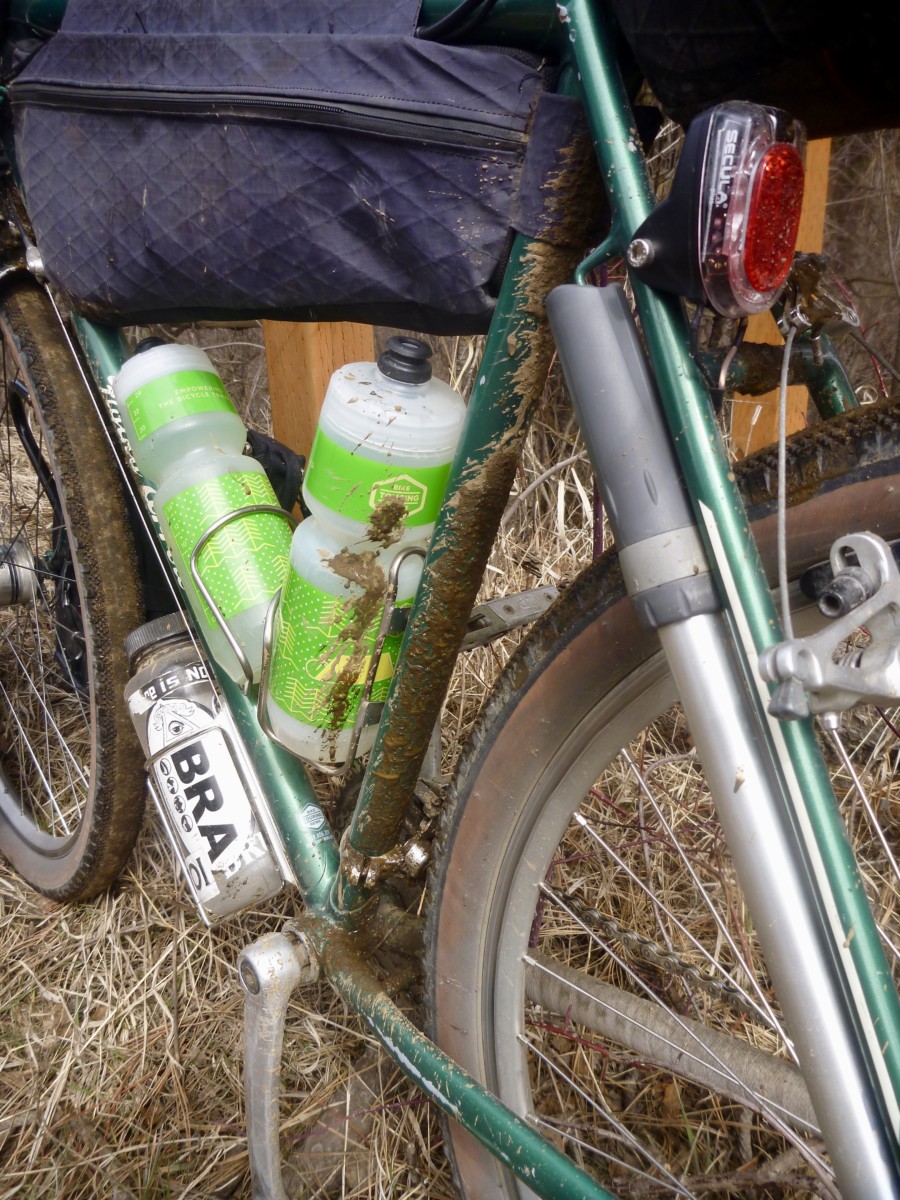
The road began to climb more steeply and the snowy stretches became longer until they became practically uninterrupted.
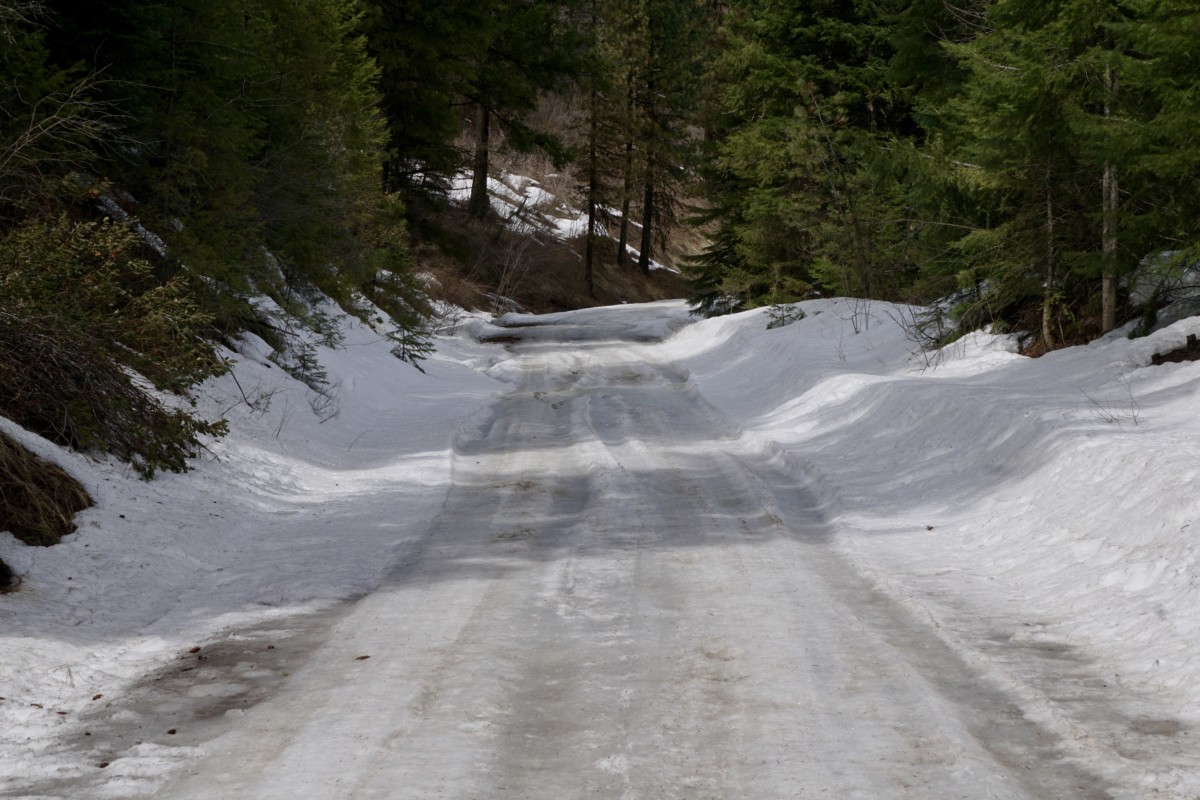
While the snow was not very deep, the Byway’s diamond tread didn’t provide enough bite for steering or pedaling through the slippery slush.  Likewise, the 47mm width was not sufficient to say on top of the crust layer.  I could ride brief stretches when the road leveled out but climbing was not possible.
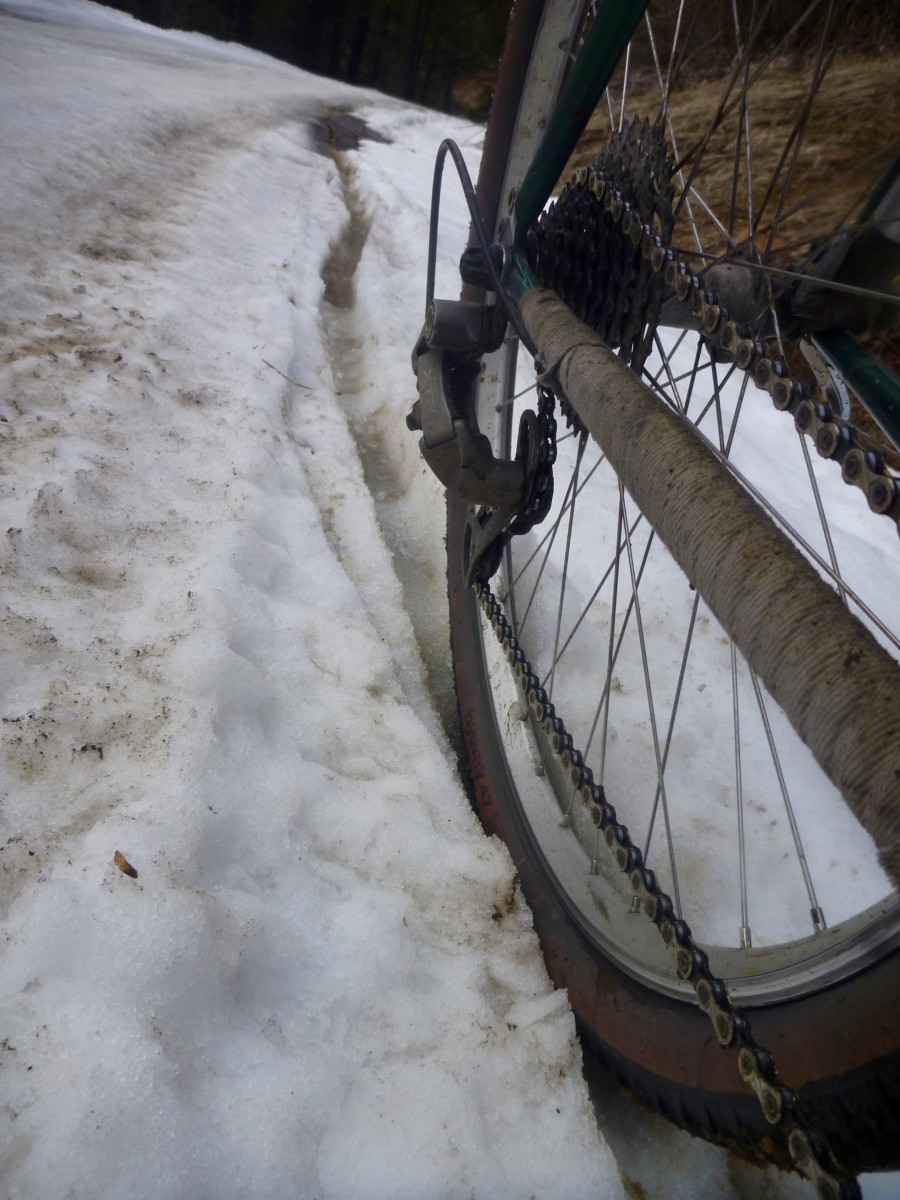
When I was able to ride, I was constantly attempting to correct my line and keep the bike from sliding out from under me.  A mountain bike with 2-3″ tires would have handled these conditions much better than the Pack Rat but would have also been sluggish on the pavement and smooth dirt roads.
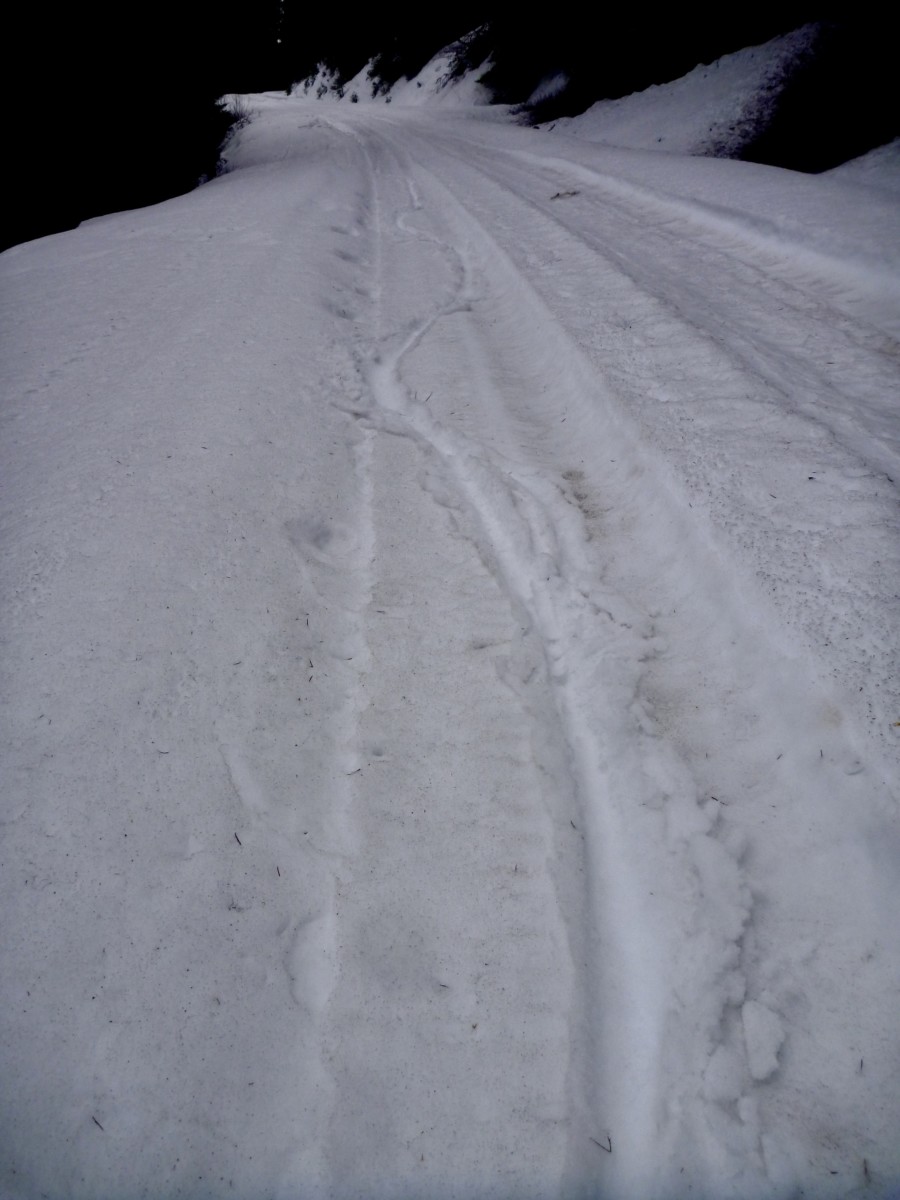
We pressed on despite the snow-covered road.  Traction was sufficient for walking and I didn’t think the pass was all that distant.  In hindsight, I probably should have paid attention to the omens and turned back.
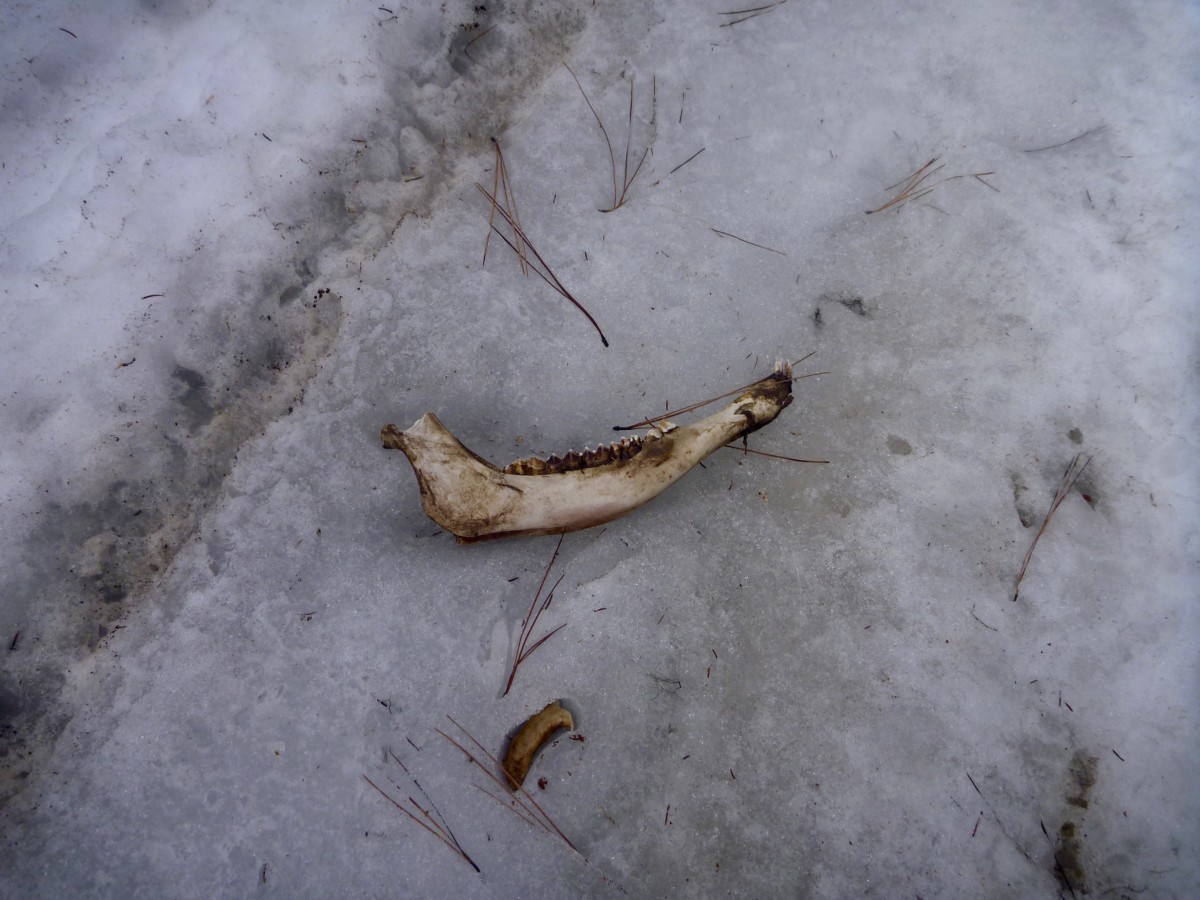
The snow continued to get deeper until it dragged at the bottom of my panniers.  The north-facing section of road just over the summit held drifts at least 3 feet deep.  I’m sure this road will be spectacular in a couple of months when all the snow is gone!  I don’t know how long it took to cover the 8 or 9 snowy miles but the time would definitely be measured in hours.
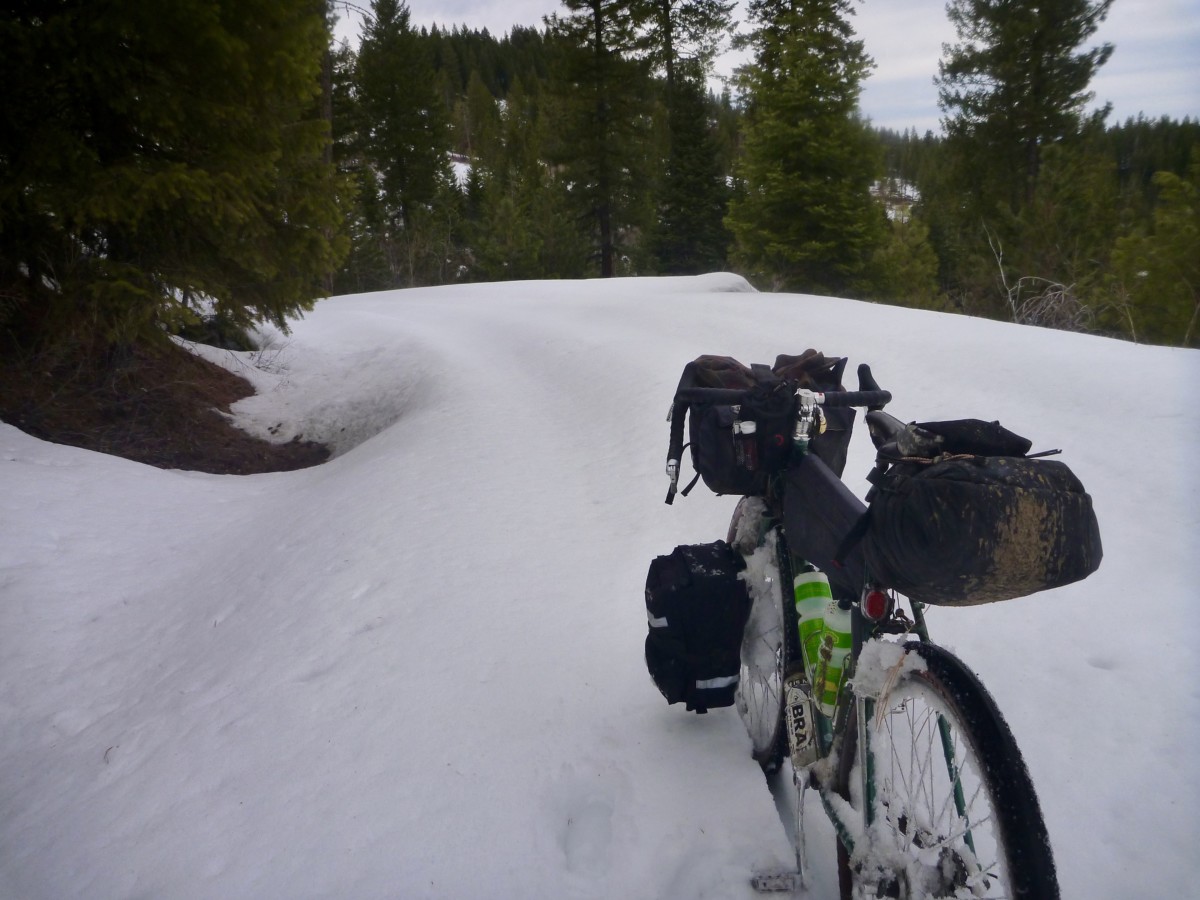
Clearly, these conditions were well outside the Pack Rat’s intended use.  Even a fatbike with 5″ tires would have been useless in snow that deep and wet.  I could have certainly saved myself some pain and suffering by turning back but I had made good time earlier in the day and knew I had sufficient daylight to get through.   I pushed, dragged, slipped and postholed over and down the pass, hoping that my planned campsite wouldn’t be under snow.
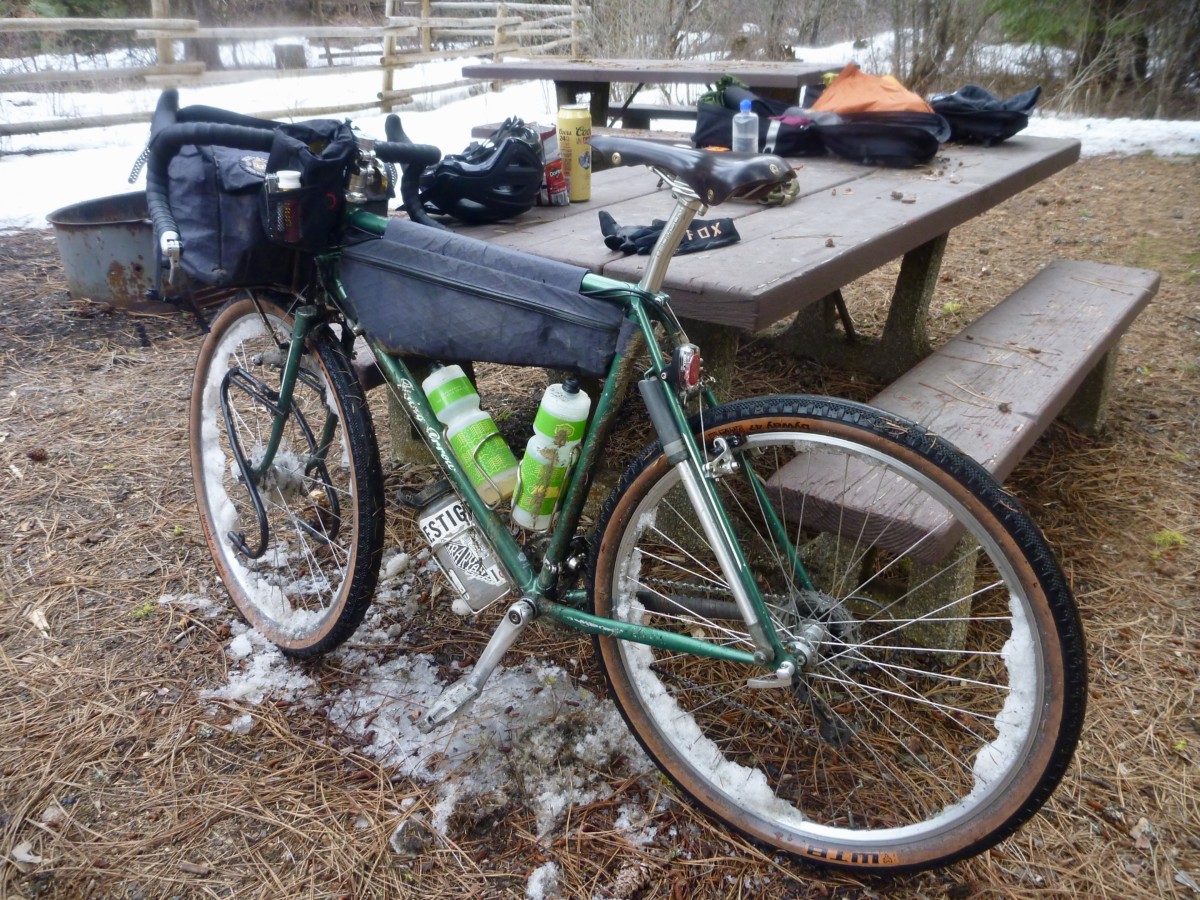
The campground still held some snow but there was plenty of dry ground.  I breathed a sigh of relief to have arrived and then set about drying my shoes and feet, eating food and doing my best to recover for tomorrow’s 90+ mile burn back to Boise.
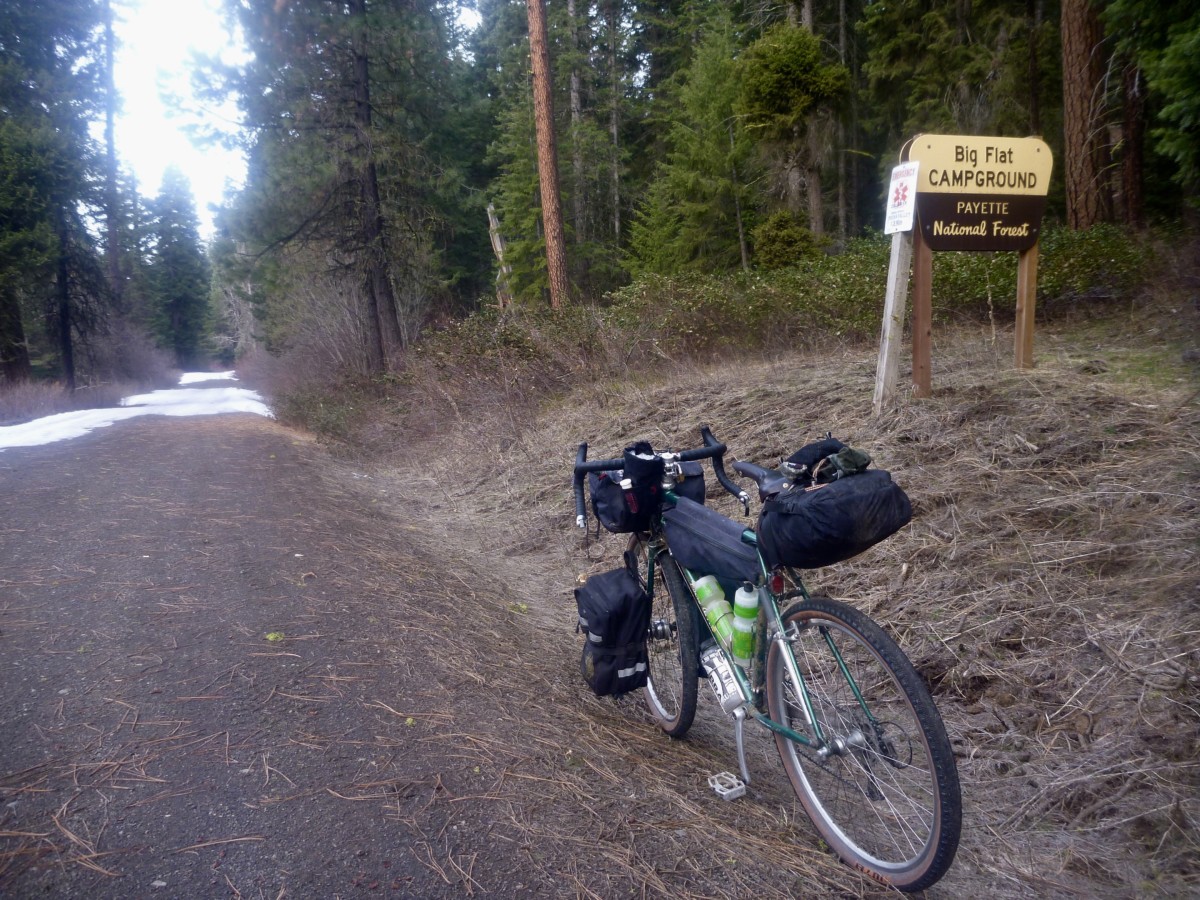
I slept deeply and woke feeling surprisingly fresh after the previous day’s exertions.  I made breakfast, pulled on my frozen shoes and hit the road just as the sun began to peek over the eastern ridge.  The forest service road had yet to shake off the night’s chill.  Yesterday’s soft, wet mud and slippery slush had hardened into frozen dirt and roughly textured ice.  The Pack Rat excelled in these conditions, though I rode the icy sections cautiously and did walk a couple of slicker stretches.
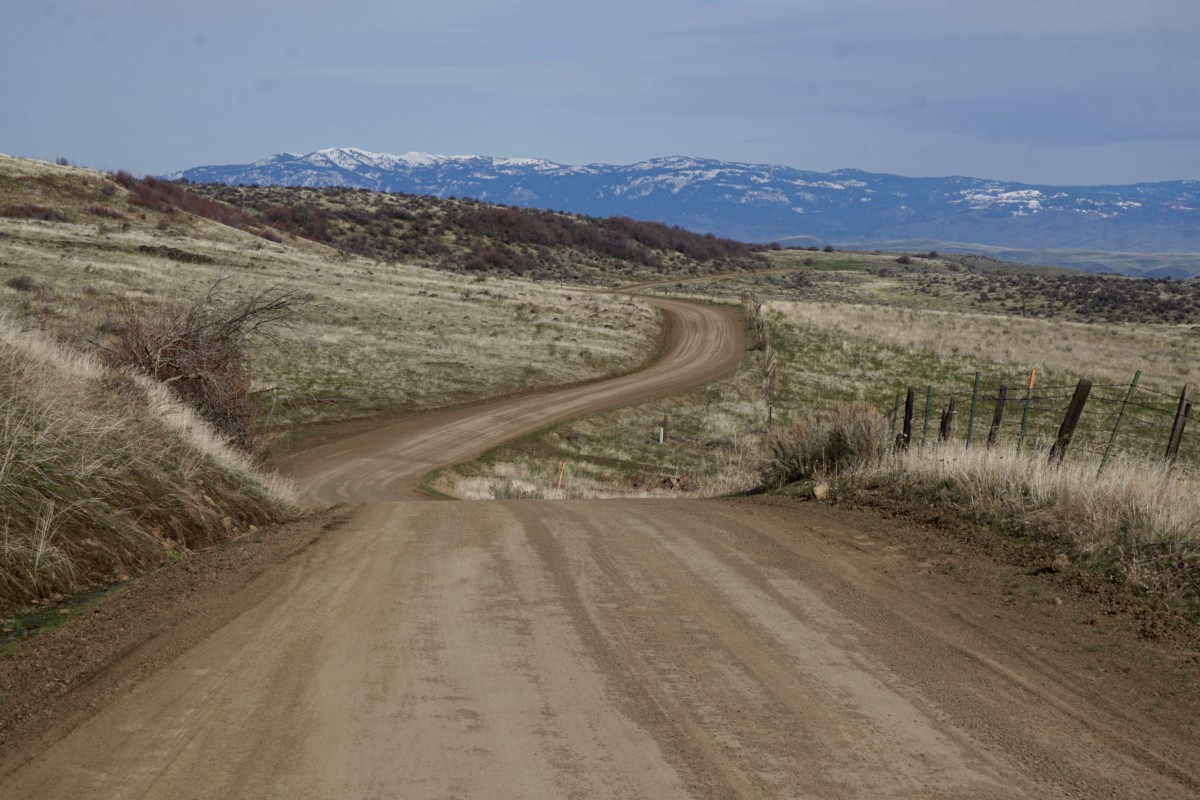
Before long, the road reemerged from the trees and dried completely.  Conditions on the southbound leg started off similar to the northbound side. The cloud-filtered sun warmed the air and I enjoyed the (mostly) downhill grades and undulating terrain.  The Pack Rat hummed along, carrying speed through the troughs and over the top of the endless rollers.
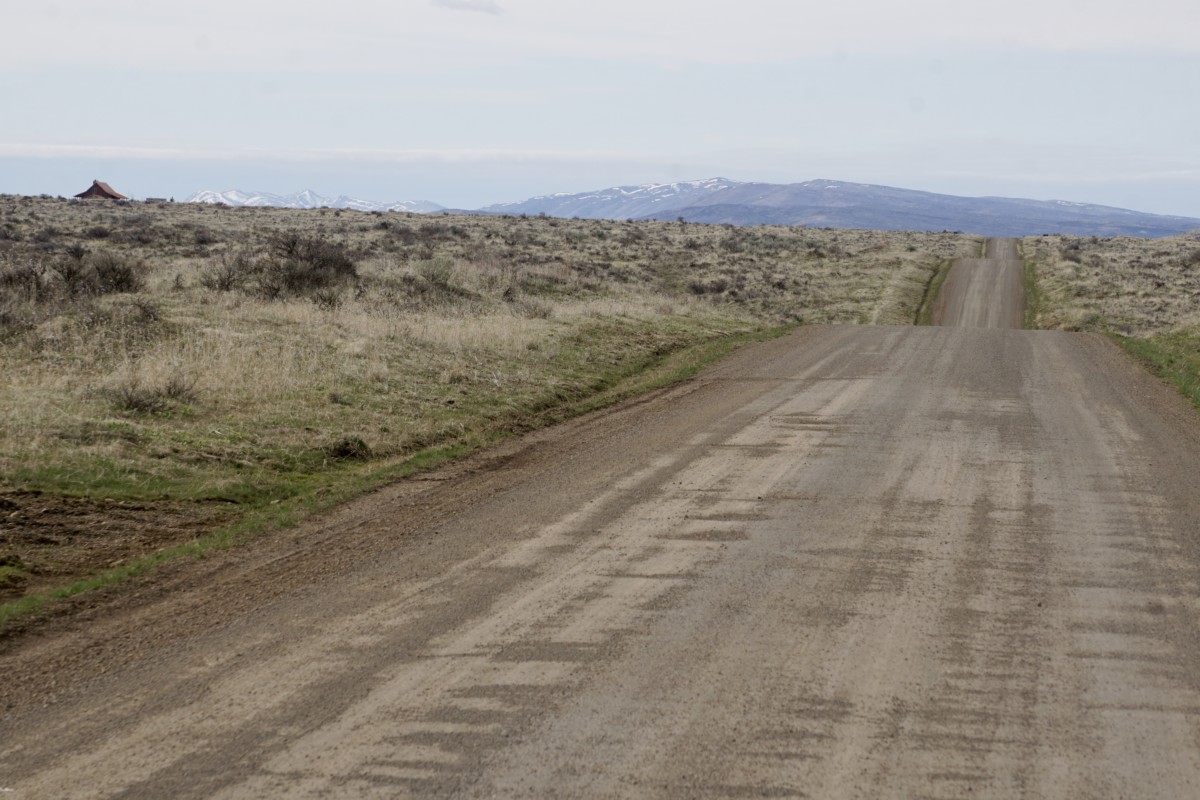
When we hit the Washington County line road conditions changed drastically.  The road had recently been graded and was evenly surfaced with 1-2″ size gravel.  I’d estimate the gravel had been laid no more than a week prior.  There were decent tracks laid down by auto traffic through most stretches but the rock lay in piles several inches deep in some spots.  Line choice was key, but the Pack Rat handled these challenging conditions admirably.  I’ve often felt that slimmer tires perform well in these kinds of conditions as they are narrow enough to push the loose rocks aside and grip on the hardpack beneath where a wider tire would float and roll on the top layer.
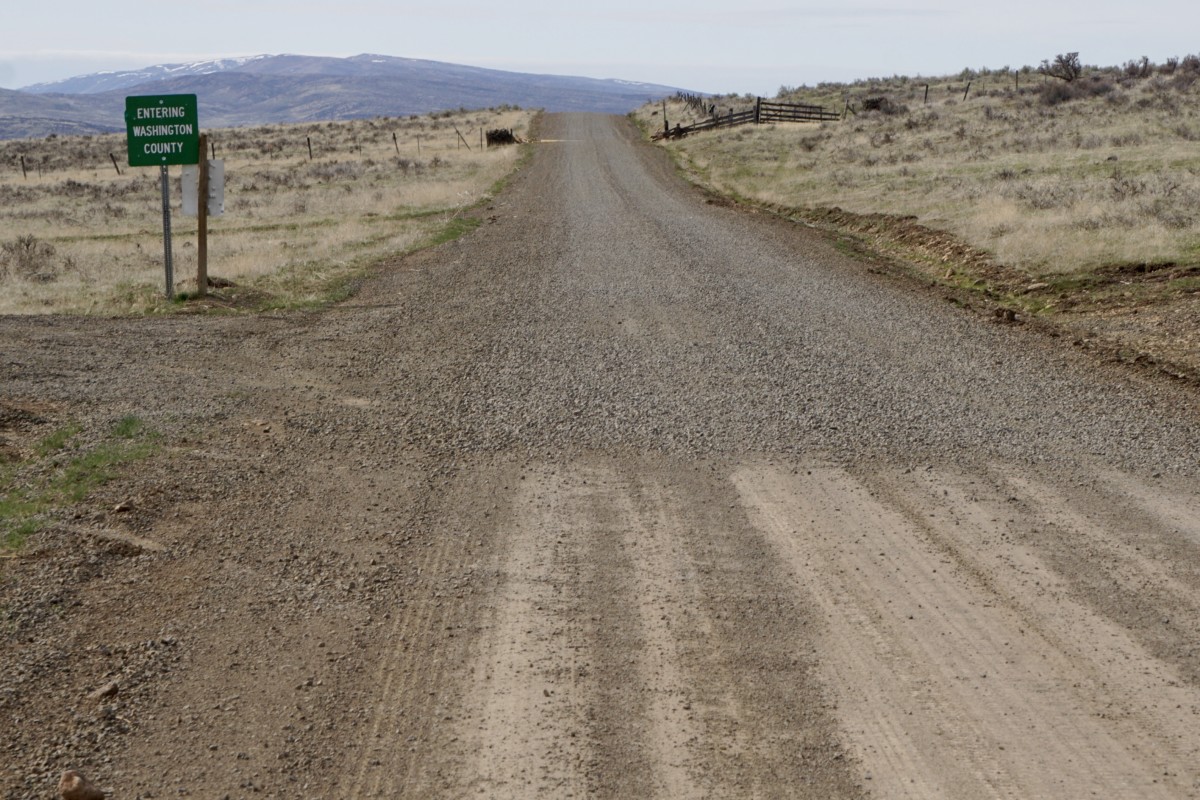
After turning off the recently-graded stretch of road conditions improved.  There were some seriously steep climbs on this leg of the ride that I would have wished away but the Pack Rat never held me back.  My legs had begun to tire and struggled to supply the necessary power.
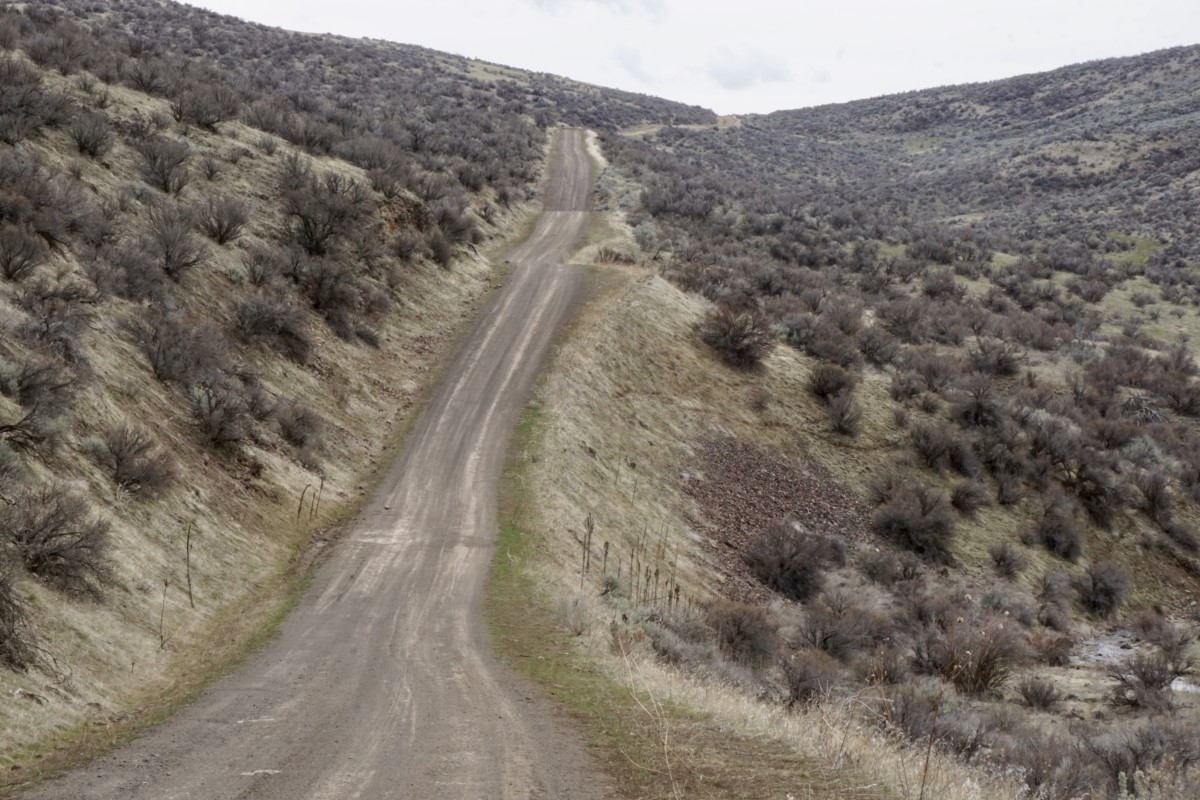
Approaching the town of Emmett, it began to look like the highway would be a better option than returning via yet more nasty rollers in the Eagle foothills.  My body was tired and shadows were getting long.  We spun our way down the paved highway shoulder into the valley, turned to the east and finished the final few miles back to Boise.  My pedal strokes were weak and I was happy to be on a bike that rolled efficiently and didn’t ask for much leg strength to maintain forward progress on the asphalt and chipseal.

Overall, I came away from this ride even more excited for the Pack Rat’s potential.  It may not be your go-anywhere touring bike.  There are plenty of roads, tracks and trails over seriously rugged terrain in Idaho where a little more bike (Ogre, Troll, ECR, Bridge Club, etc.) would be a better fit.  It also won’t carry a transcontinental load as well as the Long Haul or Disc Trucker.  However, if you want a bike to travel a mix of dirt and pavement with a light-to-medium load on the weekend, pull double-duty on the weekday commute and have a good time doing it, the Pack Rat is worth your attention.  If nothing else, it’ll get you out of town and into the fun stuff in a hurry!

Categories
Bike Touring Tips Bikepacking Idaho Other Tours and Rides

Looking Back On 2017 – Experiences and Insights for the First Time Bikepacker

Hey there, my name is Matthew Wordell. Earlier this fall when Ryan took over Bike Touring News, he asked me to write a brief retrospective on my experiences bikepacking Idaho in 2017. I live and work in Boise as a freelance photographer (InstagramWebsite). I’m fairly new to the sport and my hope is that some of what I write here will inspire that one person who has wanted to try bike touring or bikepacking to take the plunge and head out on their first ride. Full disclosure: This is my first attempt at writing a blog of this nature, so thanks in advance to those of you who finish the whole thing <3

For anyone reading this who isn’t already familiar with Bikepacking, this is a great definition from Bikepacking.com – 

“Simply put, bikepacking is the synthesis of mountain biking and minimalist camping; it evokes the freedom of multi-day backcountry hiking, with the range and thrill of riding a mountain bike. It’s about forging places less travelled, both near and afar, via singletrack trails, gravel, and abandoned dirt roads, carrying only essential gear. 

A common misconception is that bikepacking requires a small fortune to fully appreciate; the perfect bike, custom bags, and all the latest ultralight camping gear. While investing in quality gear is never a bad idea, it’s certainly not a necessity to get you up and running. Start by using what you own and picking a short overnight route near home (30-60 miles). Discover what you really need through experience.”

With that, here’s the official beginning of this blog:

Bikepacking in 2017 begins as any other year should – far too early, far too cold, and with little regard for the forecasts prediction of rain and cold. With my bags packed and work finished for the day, the itching desire to saddle up and head for Shaw Mountain becomes palpable. Hurriedly, I lock the door to my small North End apartment and ride through downtown Boise to meet several friends who will be joining for the evening. The plan, a quick sub-24 hour ride up to the ridge road where we’ve often set up for simple overnight campouts, cook dinner, drink whiskey, survive the cold, and bomb down the mountain for work in the morning. The landscape by Shaw Mountain offers a beautiful panoramic view of the city below, stars above, and a perfect silence I’ve come to love in wooded areas, away from trafficked dirt roads. I’m still astonished a place like this exists less than a two-hour ride from town.

For us, this ride is a tradition at the beginning of the year, something we simply like calling “Wednesdays Are For Bikepacking.” It’s our way of taking advantage of Boise’s proximity to forested and lesser traveled areas along the ridge between Bogus Basin and Shaw Mountain.

While making the final adjustments to our gear, a deep purple wash of clouds gathers across the western horizon, casting the day into inky purple darkness and casting doubt into our minds about whether or not it is really a good idea to follow through on the years first mid-week overnighter. None of us were really up for freezing to death on the first ride of the year, but it’s hard to say no to something we’ve looked forward to for so long. Nearly impossible this time after surviving the brutal snowpocalyptic winter that ravaged Idaho for months.

Thinking we could beat the rain to the ridge, we begin the climb. Cresting Reserve Road and descending toward the choppy gravel of Rocky Canyon Rd., the weather takes a quick turn for the worse, rain beginning to come down in sheets. Less than 25 minutes into the ride we’re soaked, frozen, and laughing uncontrollably. For a moment, I think we all hate it, each of us knowing that turning around and spending a warm night at home would be infinitely easier than the cold night ahead. But it was the inclement weather that confirmed what we had partially forgotten through the winter – what we really love about bikepacking.

Facing the unexpected and working through physical challenge isn’t something we experience all too often in day-to-day life. Routines dictate much of our schedule and for the lucky few (depending on what you consider lucky) who are self employed there’s still a healthy level of predictability you need to maintain in order to keep things afloat. Backpacking, bike touring, or any other sport that carries you beyond the routine and predictable motions of civilization provides an incredible opportunity to connect to the unknown, to face challenges, and to push through moments when giving up seems to be the only option. Finding joy in the pain, laughing at it with your friends. In the moment, this is the message I feel is being delivered to us by this god awful weather.

Reaching the top of the ridge, the storm finally breaks and sunlight explodes across the horizon, bathing the surrounding pine trees in purple and orange streaks of light. It’s a beautiful end to a short and painful ride and a great way to start the year. We stand together on the ridge taking it all in before piling into a small two person tent with our sleeping bags, cook kits, food, and whiskey. The tent is way too small, but it’s the only way we’ll be able to warm up before heading to our own tents and falling asleep for the night. It’s crazy to think home is less than 15 miles away. It’s a Wednesday night. We have work in the morning.

I’m fairly new to mountain biking and only recently discovered bikepacking in 2016, but it has completely changed my understanding of why I ride bikes. For readers who are interested in trying it out, I’ll try to include bits of information that hopefully make the first step a little less intimidating.

Each trip I take I learn something new about the equipment I use and my approach to riding – a new way to pack my bags, a better way to make coffee, a more efficient way to access certain types of gear, slower climbs, more snacks, taking time to swim in the middle of the day, and how to plan routes to keep the riding fun and the opportunities for beer plentiful. The process of trial and error is important in any sport, but I feel it’s especially important for bikepacking as the first couple rides can often feel the most intimidating. Never fear, everyone has their own idea of what works so it’s worth experimenting with your packing setup! Here’s a few pro tips to get you started:

  • For your first ride, try packing as light as possible to achieve maximum suffer points and garner extra kudos from all those ultralight riders on instagram who spend half their ride wondering if they actually needed that extra pair of wool underwear (they didn’t). For this all you’ll need is several packets of instant coffee, a cook kit for boiling water, and nothing more.
  • Once you’ve endured the pain of step one and have successfully realized camping is a lot more fun when you’re comfortable, you can now try packing a little heavier, a great way to impress yourself and your riding partner. For this “medium weight” approach, carefully stow away that handsome pour-over setup you’ve been dying to try out in the forest while the sun peaks over a wooded ridge, the steam of your fresh pot of boiling water lingering above a nearby brook, while you think to yourself more than once “can life get much better than this?” If you’re the lucky chap who remembered to grind your coffee before hitting the trail, then the answer to that question is yes. Absolutely yes.
  • Last but not least, there are the mystical few who have been called by Zeus himself to go “fully loaded.” Be careful who you discuss this approach with, a careless slip of the fully loaded tongue in the wrong company could lead to temporary lack of invitations to participate in those mid-summer bikepacking rides your buddies are all posting about on social media. Some will say this approach is unnecessary but if you’ve budgeted time for premium, grade-A nature-indulgence it might just be the right option for you. This setup requires a trip to your local co-op or natural foods store to purchase one pound of whole-bean single source coffee, your hand-operated burr grinder, and that freshly polished glass french press you haven’t used in two months. For the full effect of traveling “fully loaded,” pack a four-set of enamel mugs for you and your new friends who were laughing at the beginning of the ride but now realize you’re an absolute genius.

For me, I’ve had to strike a balance between efficient riding and efficient good times once I’ve reached my destination. For that reason, I usually opt for the pour-over approach with a few additions. A block of dubliner cheese, a mini Bota Box of seasonally appropriate wine, a bar of chocolate, and maybe a shooter or two of some hard alcohol to take the edge off a big downhill section or when you make camp way later than planned and end up taking a pitch-black midnight bath in that nearby freezing river.

In my opinion the best first rides are along rivers, the grades are more predictable, you can stop and swim if the day gets too hot, and you have all the water you need for dinner once you make camp. Pick one, find a place to park, pack up your bike, and ride until you find a badass spot to camp. Strangers will help you if you get into trouble. It’s something I have to remember every time I leave the house for one of these rides, people are willing to help if you need it. Don’t be afraid to ask for directions and recommendations, 95% of the time people know the area better than you do.

One of the most important lessons I’ve learned along the way is that shit breaks, gear fails, and people forget things. It sucks but it’s part of the fun (just don’t forget your sleeping bag and cook kit). Learning how to improvise and exist without the conveniences of everyday life is an oddly valuable skill and something you gain almost immediately while practicing any type of minimalist camping. On my first bikepacking trip, a friend and I didn’t have anything to use for chairs while eating dinner and lounging by the fire, so we decided to build make-shift stools out of pine bark. It seemed like a brilliant idea, but after kicking back for a few minutes we quickly discovered that his was infested with ants. Live and learn. Upon returning, we immediately went to REI and bought A-lite Monarch chairs and have packed them with us on nearly every trip since.

So yeah, back to 2017:

As May and June come into bloom, my rides seek out new vantage points, less traveled roads, more difficult climbs, lakes, rivers, and hot springs. I always have to include hot springs when possible. Normally I feel a drive to explore beyond the borders of my state, but this year it feels good to discover small towns in the mountains, talk to people who live there, learn of their favorite places to camp nearby, and wash myself in crystal clear river water at the end of a day. Its a year spent building my relationship with Idaho, deepening our connection, and discovering places I will surely return to year after year.

Almost every weekend, I find myself coursing like the wind along sweeping dirt roads, rambling through the high valleys, pine groves, and sagebrush of Boise National Forest, filling my body with a sense of freedom. Roads I’ve hardly noticed while driving become new passageways to a realization of the beauty that surrounds me here in this state. A sense of thankfulness with every turn, like my whole existence is breathing in the wild air of this place. It feels amazing. Each ride feels like a liberation from something, each experience building my confidence in the gear and skills I take with me.


Autumn arrives and the tone of life in the wilderness changes, nights are cooler, the weather holds longer in its whims. All through summer we’ve talked of a ride to Atlanta and the annual Atlanta-Days festival is fast approaching. Five of us decide to meet at Trinity Hot Springs just outside of Pine, ride to Featherville and begin the climb through Rocky Bar and over to the Middle Fork Boise River where we connect up to Atlanta. It’s an arduous ride complete with several stops for water and naps in the shade once we reach the top. Arriving in Atlanta as the sun slowly dips toward the horizon, we set up our tents near a group of rustic cabins on the edge of town, unload our bikes, and ride to a nearby water hole called “The Clubhouse.” My favorite part of any hard ride is swimming in ice cold water afterward and this spot was especially cold.

The next day we climb up Phifer Creek Road and traverse Trinity Mountain Road, probably sweating at least half of our body weight along the way. Of all the places I rode this summer, the road to Trinity Mountain is the most beautiful of them all. The views, the clean air, the lack of motorized traffic all combine for an incredible dust-free suffer fest on the way up, and an adrenaline filled flight down the backside. We camp at Big Trinity Lake that night, a bear demolishes an ice chest in the campsite next to us but I sleep right through it, the difficult ride working as an impenetrable sedative on my mind. The photographs below catalogue our trip. Enjoy!
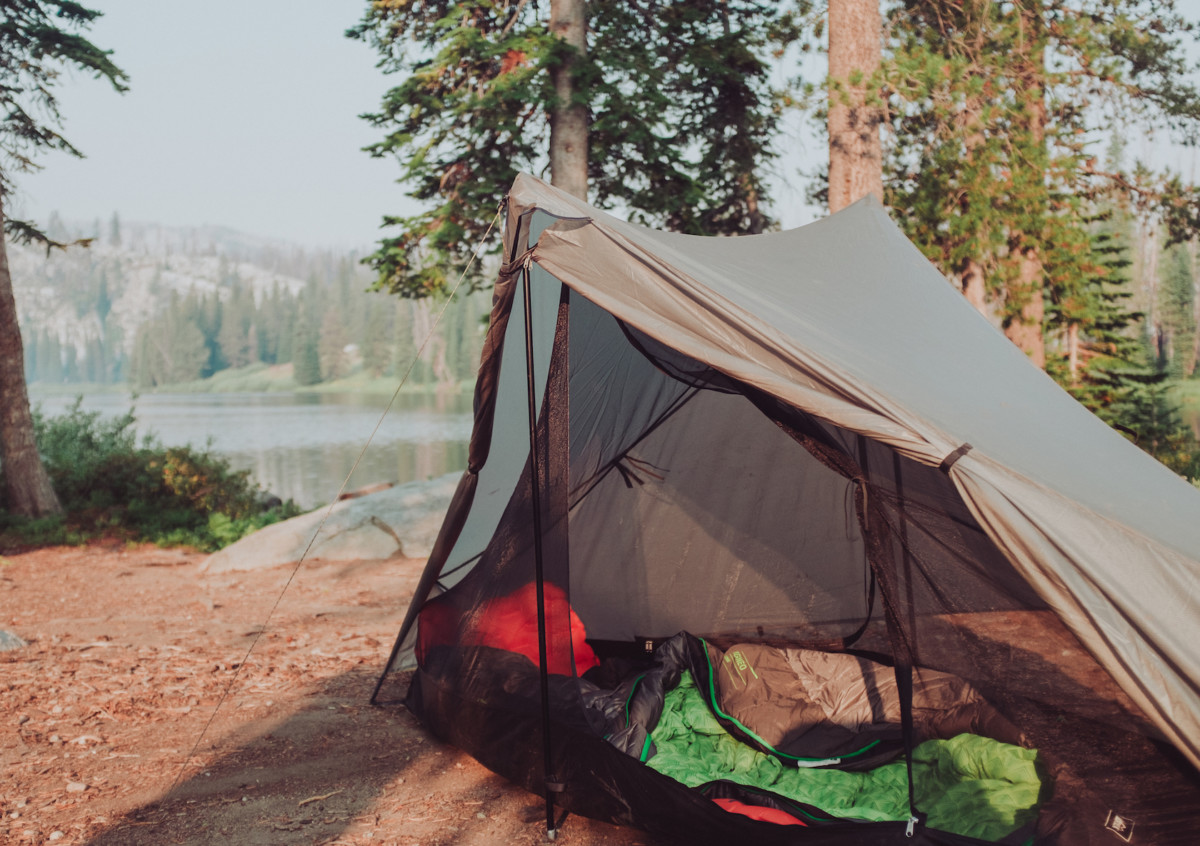
For anyone who is interested, I’m always changing my setup and trying new things. This is usually what I roll with:

Bike:

Clothing:

  • Patagonia capilene leggings
  • Arc’teryx thermal base layer top
  • Icebreaker wool socks for camp
  • 7 Mesh Bibs under shorts
  • Kask Mojito Helmet
  • Swiftwick socks for riding
  • Specialized BG Gel riding gloves
  • Cotton t-shirt
  • Sunglasses / cycling glasses
  • Chacos
  • A random beanie
  • Patagonia down sweater
  • Running shorts for camp / swimming / etc
  • Cycling cap or baseball cap

Electronics:

  • No-name rechargable battery pack
  • iPhone 6s
  • Fuji X100T digital camera
  • Blackdiamond Headlamp
  • Sinewave Cycles Beacon light & USB charging cables
  • Kindle (if I’m traveling alone)
  • Earbud headphones

Sleep setup:

  • Tarptent Notch with poles
  • REI Flash Pad
  • REI Igneo sleeping bag
  • Sea-to-Summit inflatable pillow

Other:

  • A-Lite Monarch Chair
  • Outpost Titanium Pot & Pan (lid)
  • Snowpeak Gigapower Pocket Stove
  • MSR Fuel Canteen
  • Good-to-Go dehydrated meal (Thai Curry changed my life)
  • Spork
  • Vapur 2 liter soft bottle
  • MSR Trail Shot water filter
  • REI pack towel
  • Tool kit (Parktool chair breaker, needle, thread, tire levers, Co2, mini hand-pump, patch kit, etc)
  • Pocket knife
  • Enamel mug
  • Collapsible Helix Coffee Maker + coffee grounds in a pill bottle
  • Tons of snacks
  • Beer / Mini Box of wine / Whiskey / Take your pick

Categories
Bike Touring Equipment Bike Touring Tips Bikepacking Other Planning Resources

Colorado Trail Race 2017 Gear Roundup

The epically wet and stormy 2017 running of the Colorado Trial Race pushed riders and their gear to the absolute limits.  The technical singletrack and massive elevation gain of the CT also reward a light-and-fast approach to packing.  There is no room for excess gear in the alpine.  However, improper or inadequate gear can have serious consequences on self-supported rides and definitely contributed to the large number of riders unable to finish the CTR this year.

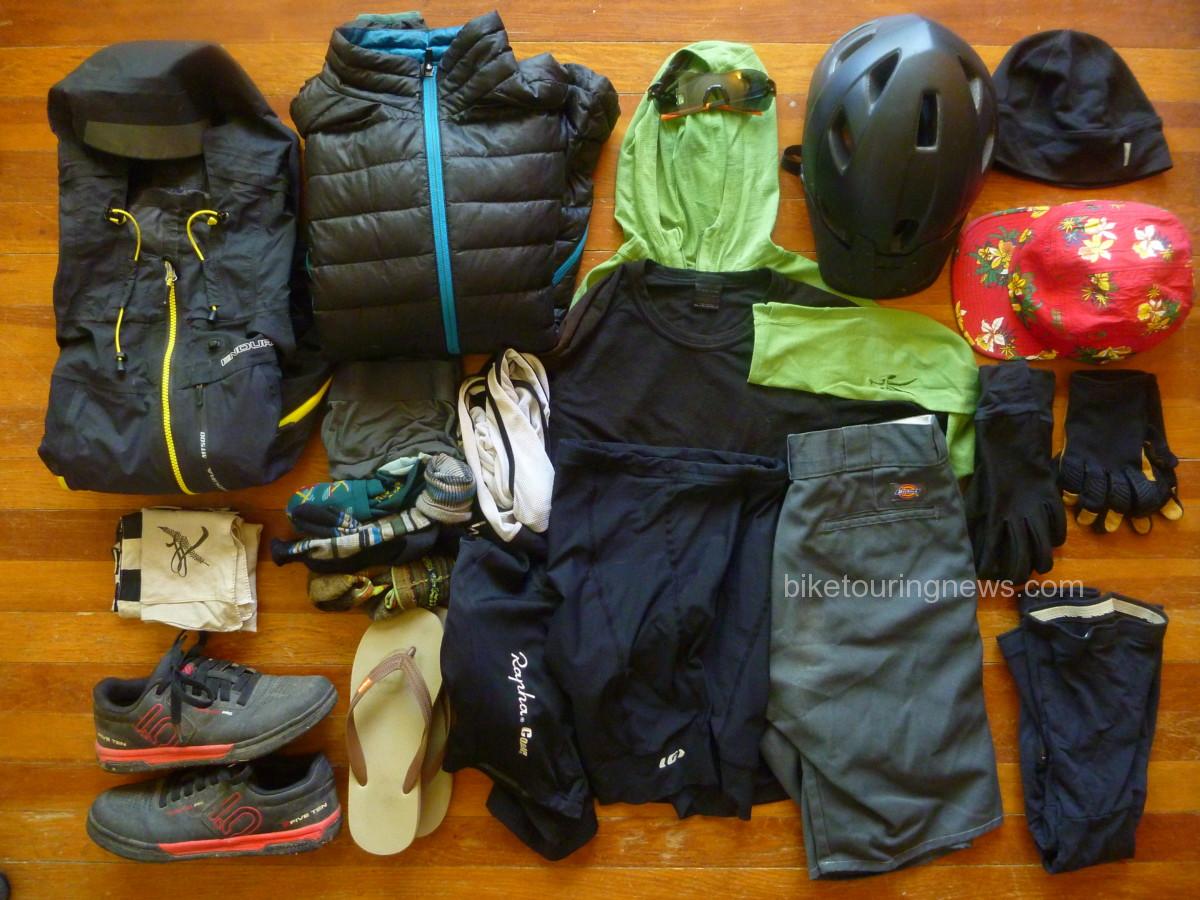
In this post, I’ll go over the gear I took on the trail, what worked and what didn’t.  The photos below were taken before departing for Colorado.  I’ve noted a handful of minor adjustments made on the final pack in Durango.

Clothing and Accessories

  • Icebreaker Wool T-Shirt, SS
  • Ibex Wool Pullover, LS w/hood
  • Dickies Cutoff Shorts
  • Rapha Bibshorts
  • Louis Garneau Tri Shorts (aka “Touring Undershorts”)
  • Rapha Wool Skullcap
  • Hike-a-Bike Cap (lost on the trail)
  • Handkerchief x2
  • Five10 Freerider Pro Shoes
  • Synthetic Boxer Briefs
  • Point6 Wool Socks, 1 light, 1 midweight
  • Wicking Synthetic Socks
  • Leg Warmers (swapped for knee warmers before the start)
  • Softshell Gloves
  • Trail Gloves (lost on the trail)
  • Sierra Designs Down Jacket
  • Endura MT500 Rain Jacket
  • Smith Sunglasses w/smoke, amber & clear lenses.
  • Giro Helmet
  • Grocery Store Sandals

Overall, my clothing selections were solid.  Many riders also brought rain pants, shoe covers and additional wet weather protection.  I definitely had wet legs and feet for much of the ride but don’t think additional rain gear would have helped with that situation.  The Endura MT-500 jacket was a standout performer.  While it isn’t the most packable, it breathes better than any rain gear I’ve ever owned and incorporates well-designed ventilation to keep it comfortable in warm temperatures.  The helmet-sized hood helped seal out rain and hail while conserving additional body heat.

While the rain jacket didn’t garner much attention from fellow riders, my shoe and pedal combination certainly did.  While flat pedals have made big inroads in other mountain bike disciplines, the vast majority of CTR riders ran clipless pedals.  Nearly every day of the ride I had at least one other rider make an envious comment about how comfortable my shoes looked as we pushed our bikes up one hellish rock pile or another.  In my opinion, flat pedals are the way to go for all but the strongest riders on loaded singletrack rides.   Five Ten’s rubber compounds provide excellent grip and the Freerider Pro’s sole delivers an optimal blend of pedaling stiffness and walking flexibility.  Despite the constantly wet conditions, I made it through at least 100 miles of hike-a-bike with no blisters or other significant foot issues.  Frequent dismounts and remounts are also much more fluid on flat pedals with no pedal binding to search for.

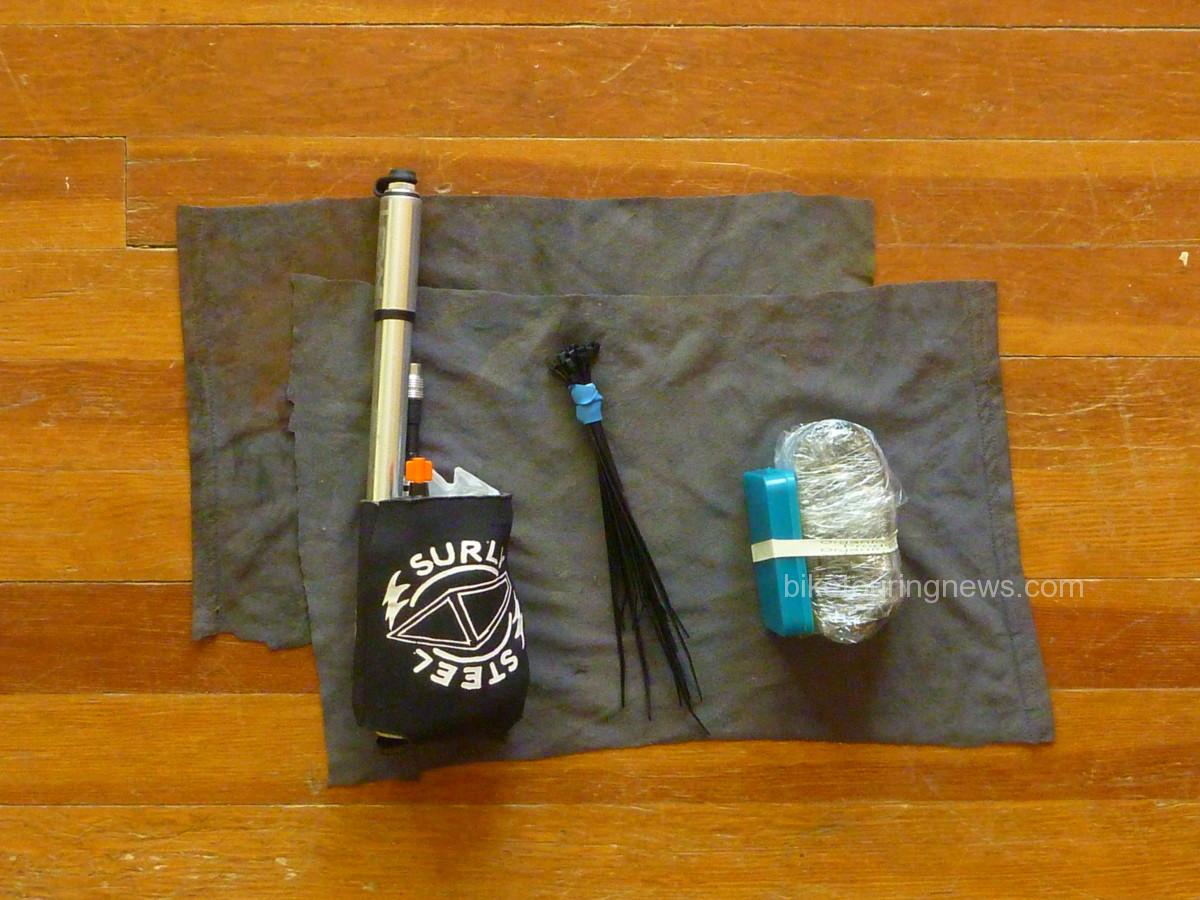
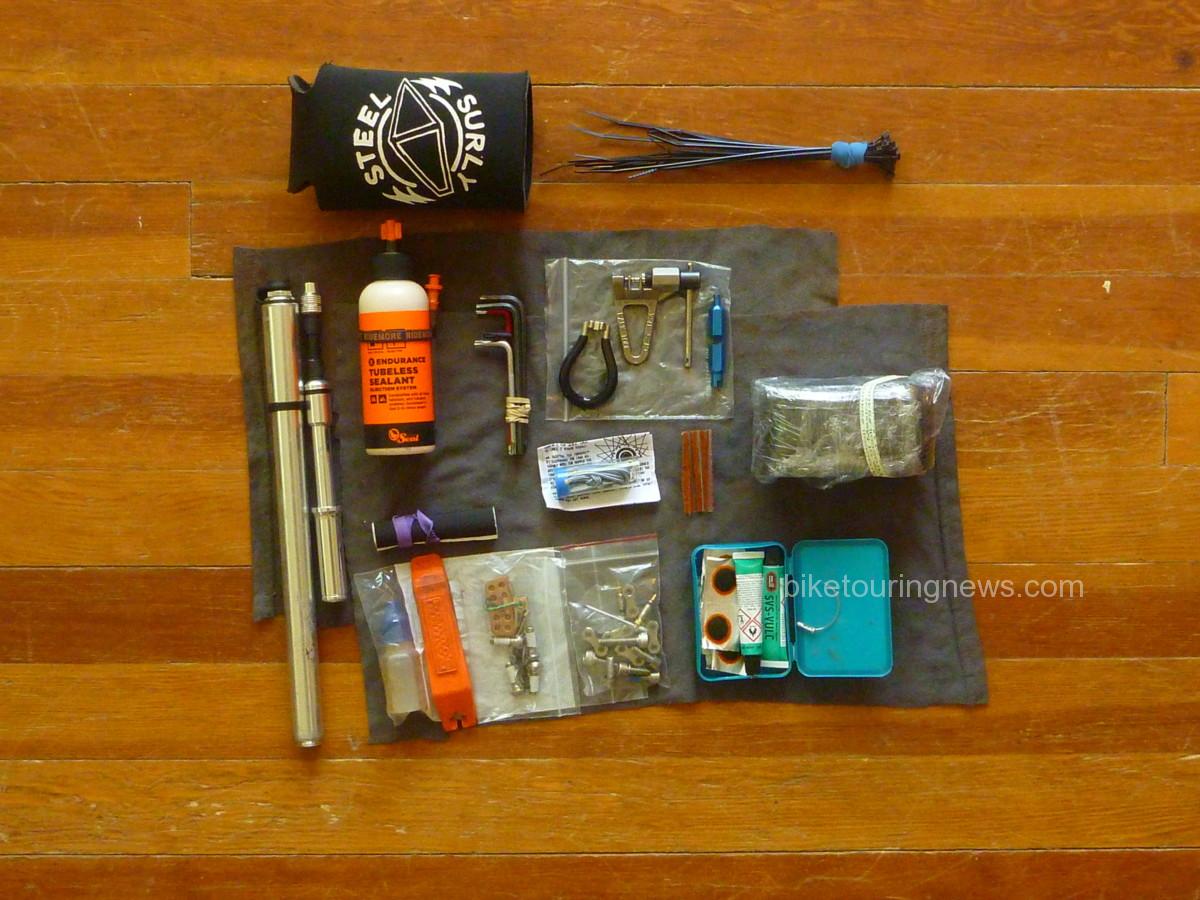
Yet another use for the Surly Insulated Sheath: stash pack for tools and spares!
Tools & Spares

  • Hex Wrenches:  5,4,3,2.5,2mm
  • Torx Wrenches:  T-25,20,10
  • Park Chain Tool
  • Fiber-Fix Spoke
  • Spoke Wrench, #0
  • Pedro’s Tire Lever
  • Valve Core Remover
  • Gear Repair Tape
  • Zip Ties
  • Chain Lube
  • Rags x2
  • 29er Tube
  • Lots o’ Patches
  • Patch Cement: 5g Tubes, x2
  • 11speed Quicklink x2
  • Spare Chain Links
  • Spare Hardware: M5, M6 bolts in assorted lengths
  • Spare Brake Pads
  • Curved Needle (business end protected with a cable crimp. Good thinking, Nic.)
  • Leatherman Wingman Multi-Plier
  • Tire Sealant, 4oz
  • Spare Valve Core x2

Thankfully, I found very little use for my tools and spares aside from the rags and chain lube.  The Ninja Gorilla was a rock-solid partner, handled everything the trail dished out with nary a squeak, creak, clunk or complaint.  Regardless, I wouldn’t have felt comfortable leaving many of these items behind on a ride this long.  I did pick up an additional set of brake pads in Leadville as I was concerned about burning through them on the long, wet descents.  I never wound up replacing the pads I started on but having 2 spare sets on board provided peace of mind.

Hydration and Nutrition

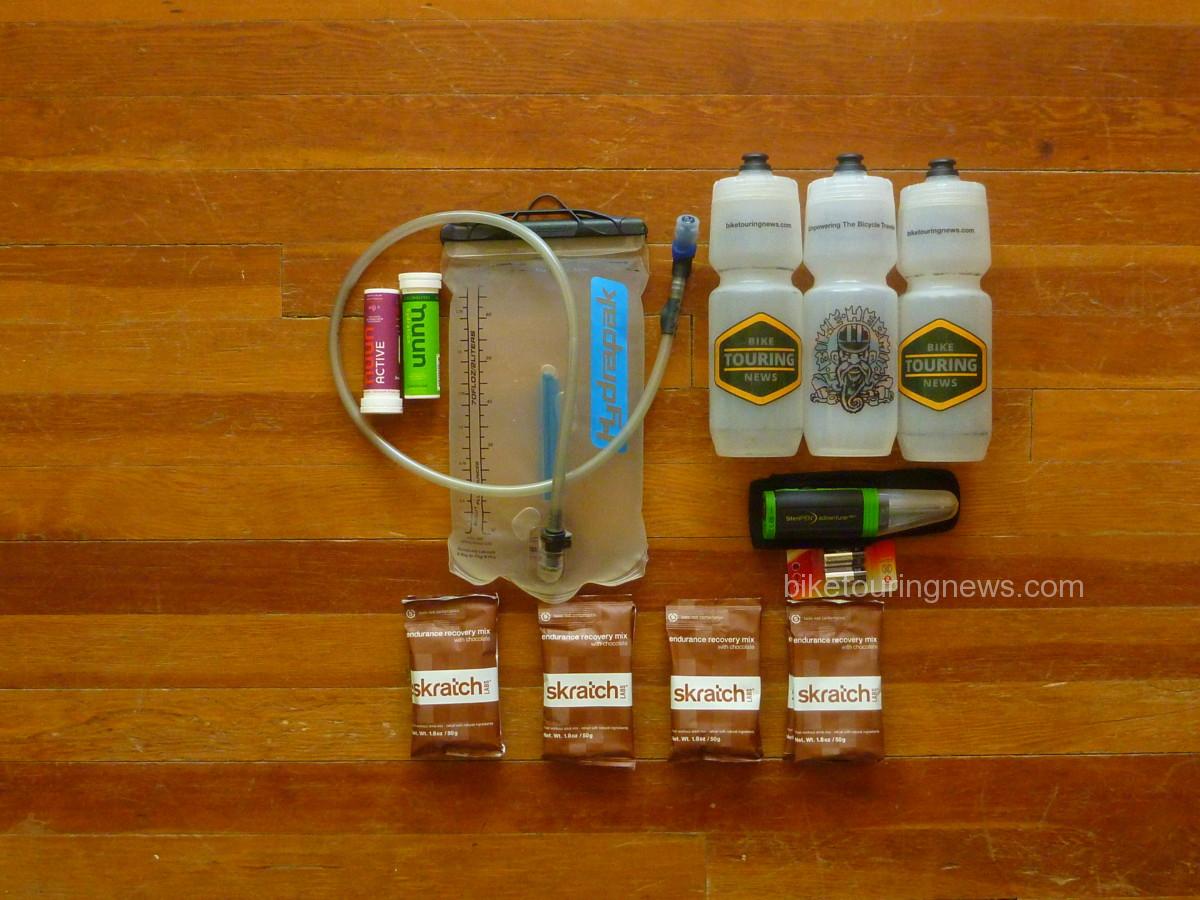
Water was especially abundant on the CT this year, so my three bottles provided more than enough capacity.  The Colorado Trail Guidebook and Databook provide only basic directional information for the Wilderness detours, so it was sometimes unclear how much water would be accessible along the detour routes.  For the most part, I started looking for a water source when I got down to only one bottle and had very little difficulty staying topped up.

The Steripen worked well for me on this trip.  While it may not be as fast as some filters, it is wonderfully packable and easy to use.  I anticipate this will be my go-to purification method on future bike trips, replacing the Sawyer filter I’ve used in the past.

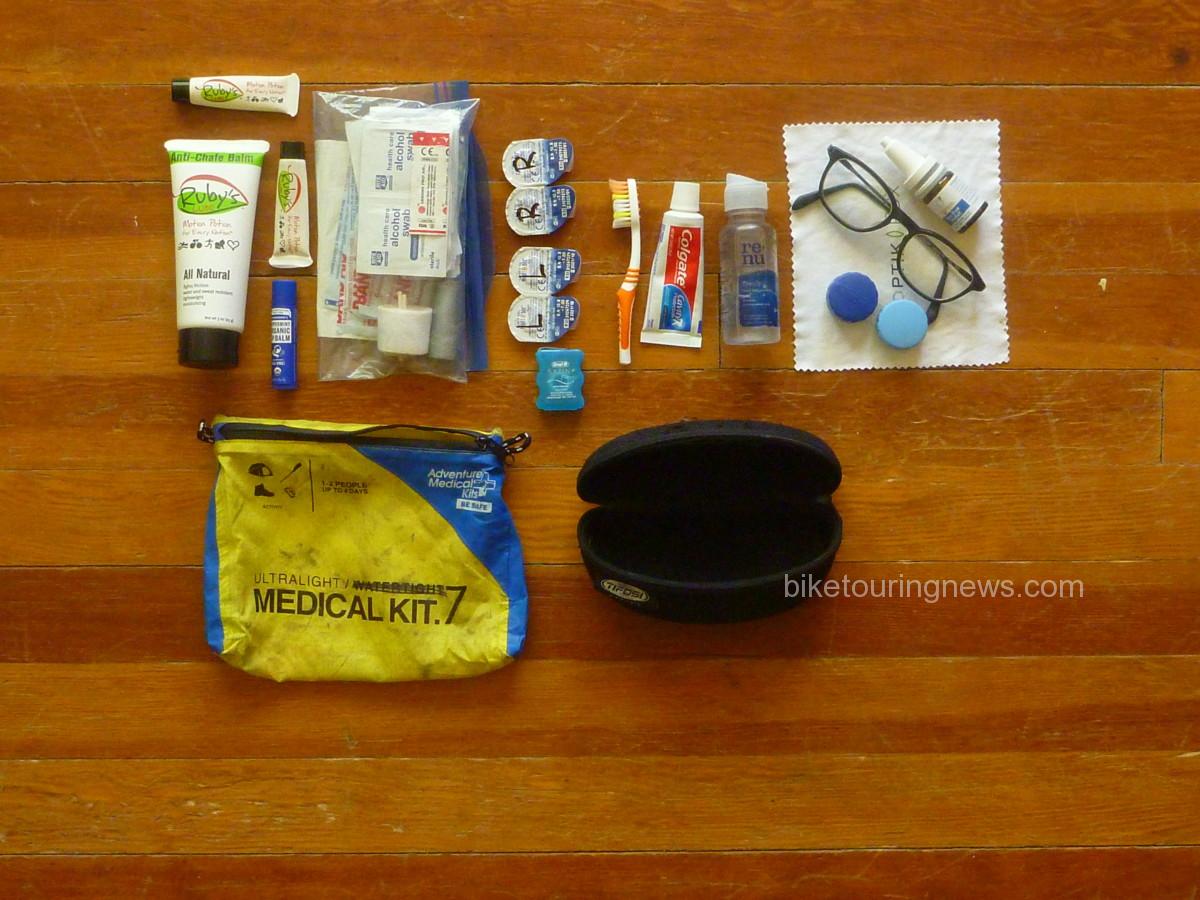
Hygiene and First Aid

  • Toothbrush
  • Toothpaste
  • Glasses
  • Spare Contacts x2
  • Contact Case
  • Contact Solution
  • Dry Eye Drops
  • Alcohol Wipes
  • Ruby’s Lube
  • Gauze Bandages
  • Athletic Tape
  • Duct Tape
  • Butterfly Bandages
  • Asst. Large Band-aids
  • Dr Bronner’s Lip Balm
  • Dental Floss

I didn’t find much use for any thing in this category other than my toothbrush, toothpaste, eye drops and a handful of alcohol wipes.  I was surprised that I never reached for the Ruby’s Lube but I spent so much time on my feet over the first 4 days that I didn’t have time to develop saddle sores or chafing.  I also experimented with extended-wear contacts on this ride.  The twice-daily ritual of sticking filthy fingers into my eyes to insert or remove contact lenses has generated infection problems in the past, so I hoped extended-wear lenses would be the solution.  I wore the same pair of lenses throughout the entire 9 days I spent on the trail with zero issues.  I used rewetting drops occasionally but found that my eyes stayed well-lubricated as long as I kept up with hydration.

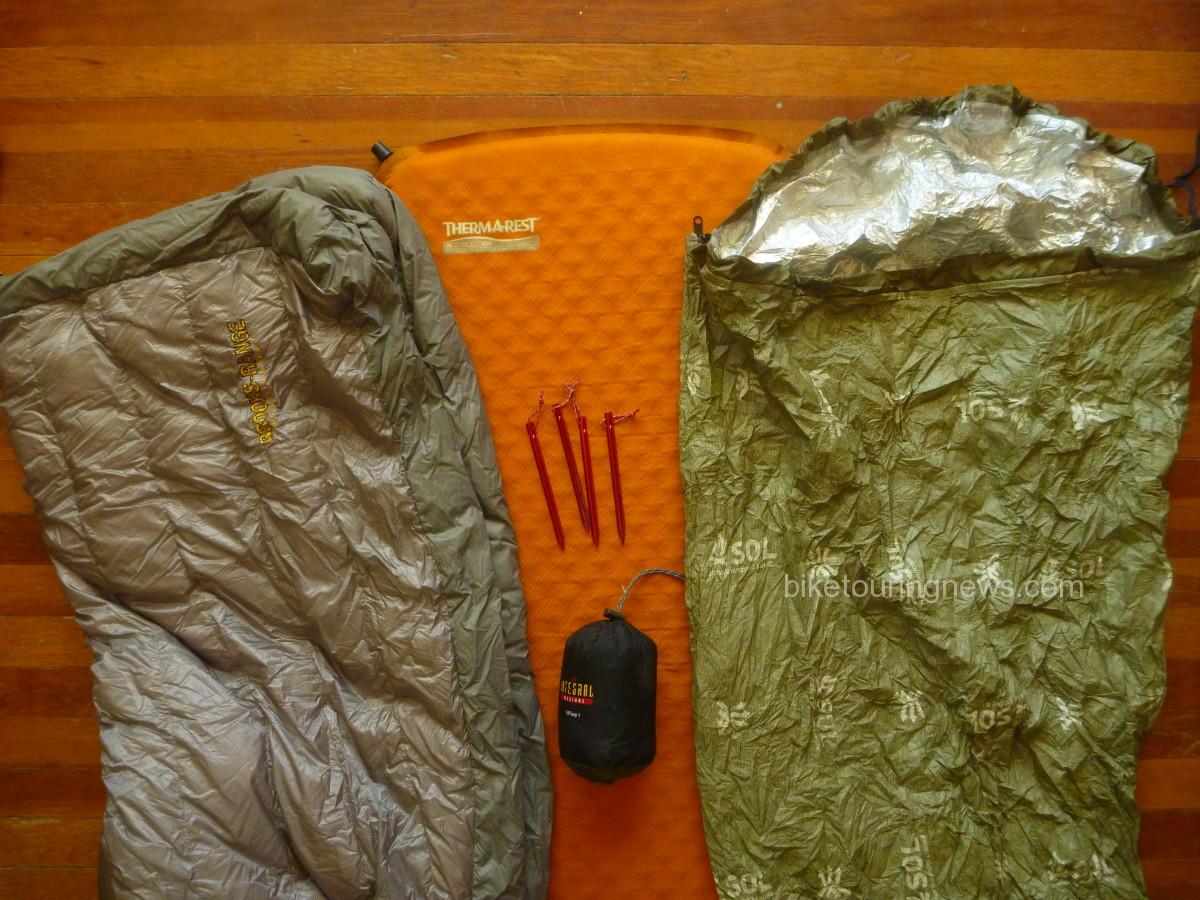
Sleep Kit

  • Brooks-Range 45-deg Down Quilt
  • Thermarest Prolite 3/4 Pad
  • Silnylon Tarp, 8x10ft
  • Stakes, 4
  • SOL Escape Bivy

This is the category that proved to be many riders’ downfall on the CTR this year.  Of the 42 riders who didn’t finish, I’d guess that a significant number were carrying inadequate shelter.  I spent a full 12 hours hunkered under my tarp just below Stony Pass waiting for the weather to clear.  Riders without proper shelter were forced to press on through the storm or retreat miles back down the road to find shelter, even all the way back into Silverton.  At least two riders who continued into the bad weather were forced to scratch after enduring miserable or even dangerous conditions.  I may have been among them if I hadn’t had that one little scrap of silicone-coated nylon.  The bivy and down quilt combination kept me comfortable across a wide range of temperatures.  I don’t think I would ever carry a more minimal sleep kit unless precipitation were completely out of the question.  Overall, I got good rest on the trail and that sleep bank allowed me to make relatively efficient progress while on the bike.

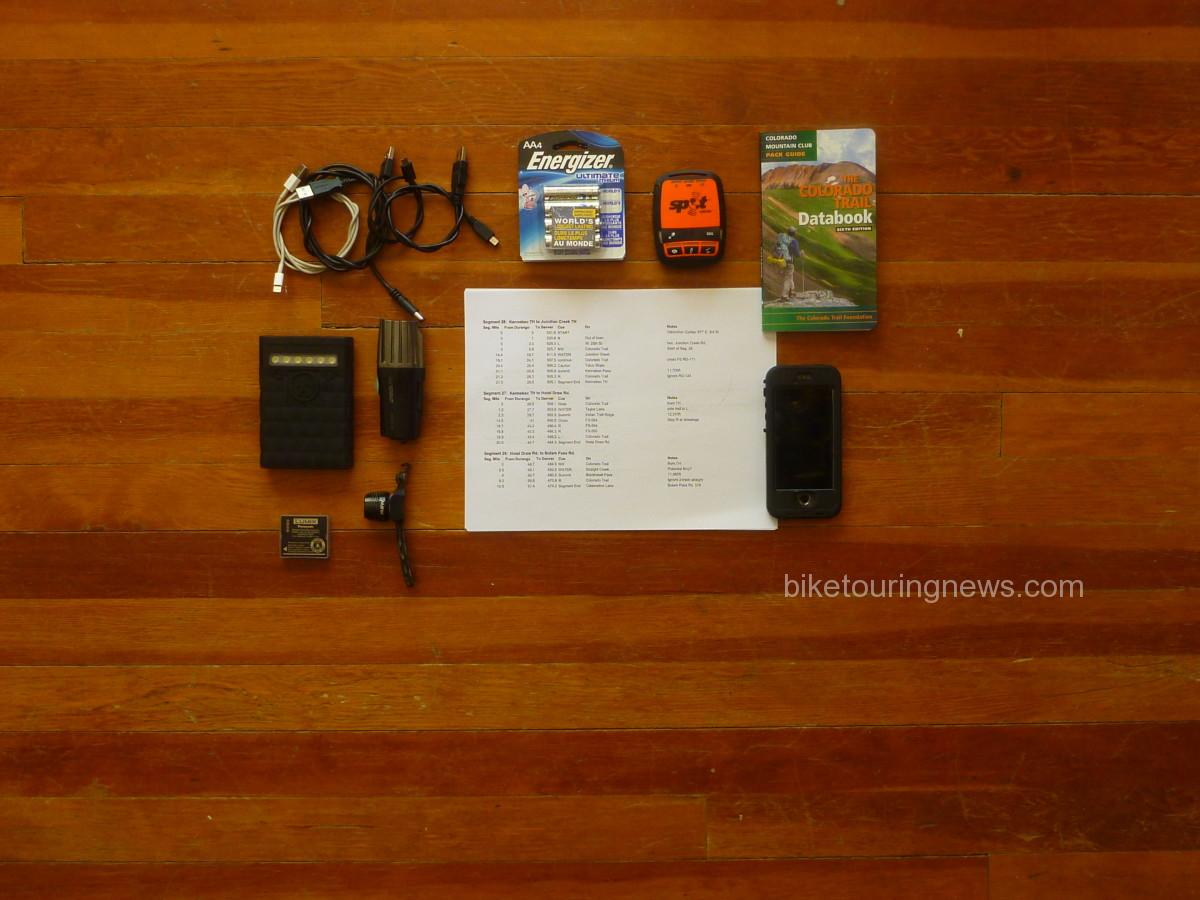
Electronics and Navigation

  • iPhone with GaiaGPS app, tracks and maps downloaded
  • Printed Cue and Resupply Notes
  • Colorado Trail Databook
  • Cache Battery
  • Helmet-Mount Light
  • Point&Shoot Camera and Spare Battery
  • Charging Cables
  • SPOT Tracker and Spare Batteries
  • Little Red Taillight

Generally speaking, navigation along the Colorado Trail is easy.  Junctions are mostly well-signed and confidence markers are frequently posted in between.  However, the bike detours can present navigational challenges.  With my iPhone mounted to the Rokform handlebar mount, I was able to double-check my routing with two presses of the home key.  This prevented many navigational miscues and kept me from making any costly mistakes.  However, wet touchscreens are difficult or impossible to navigate, so I had to take care to keep my phone from collecting water.  I used the Databook for its elevation profiles, water and campsite notes.  It wasn’t much help for navigation as this year’s CTR ran from Durango to Denver, contrary to the westbound route description in the Databook.  I created my own cue sheet as a navigational backup but used it more for distance estimation than navigation.

Another standout performer on this ride was the Sinewave Cycles Beacon headlight and USB charger.  This key piece of gear lit my way and kept my phone, helmet light and backup battery charged throughout the ride, despite the notoriously slow speeds common on most of the route.  Look for a more thorough review of the Beacon and its performance in a future post.

Luggage

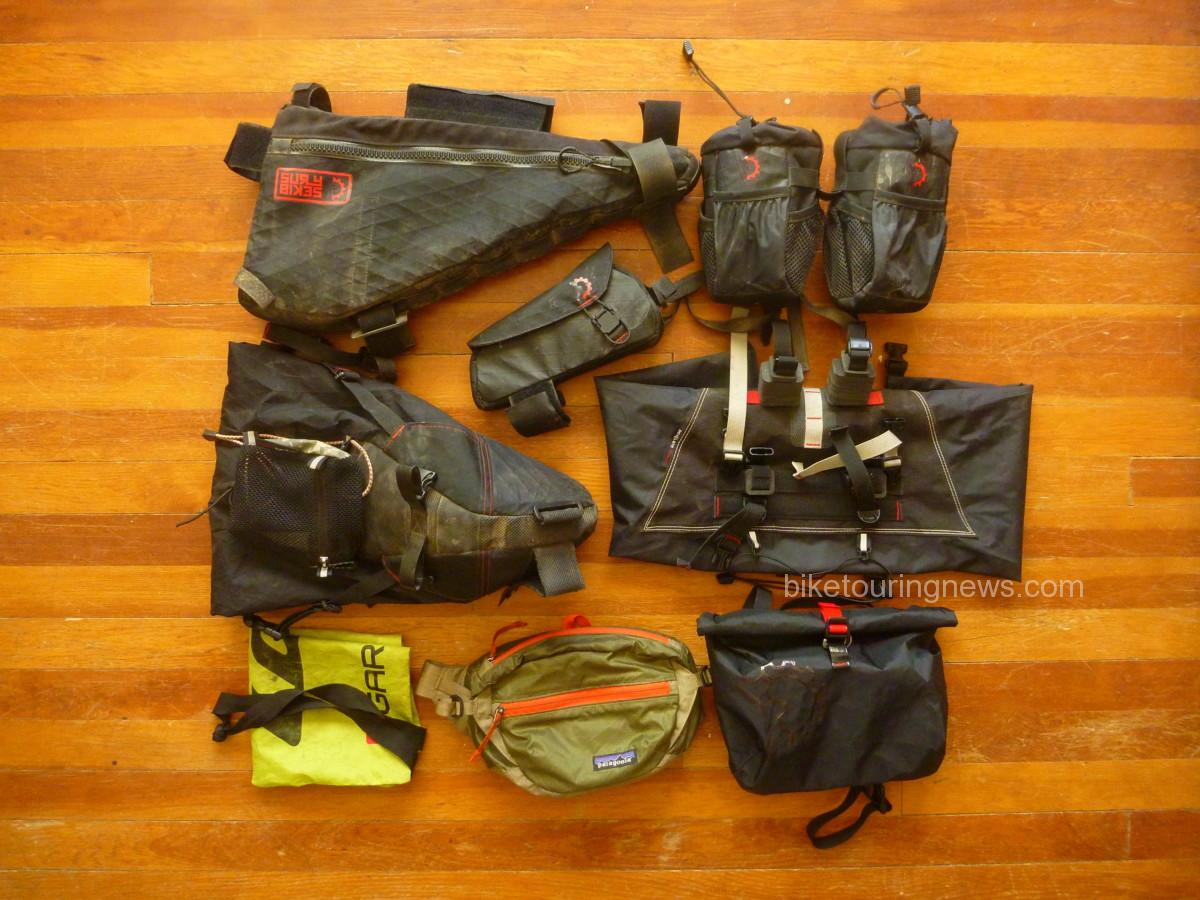
As usual, my Revelate kit was more than up to the task.  I added the Periphery Pocket at the last minute and was very happy to have a convenient spot to stuff my Databook, cues, gloves, charging cables or other quick-access items.  It also expanded my food-carrying capacity pretty significantly.  This may be my new favorite piece of Revelate gear, right up there with my Mountain Feedbags.

The hip pack was another handy addition that allowed me to further extend my food stores or carry my 70oz hydration bladder when needed.  I quickly forgot I was wearing it when it was unloaded.

Other than the synthetic socks (wore them for a few hours, were just too thin to be comfortable for long) and my hike-a-bike cap (wore on Day 1, sat in a wet heap strapped to my seat pack for 3 days, lost on the trail on day 5) I was very happy to have every piece of gear I brought on the ride.  While some riders are able to push the limits of minimalism much further, I felt like I maintained a good balance between keeping gear weight down without sacrificing safety or comfort to any great extent.  I also had just enough space left for all the calories I’d be toting for the long push from Silverton to Buena Vista.

What questions do you have about packing for singletrack bikepacking adventures?  Anything you’d like to know about the Colorado Trail experience?  What trips do you have coming up?  Sound off in the comments below and I’ll do my best to answer in a reply or future blog post.  Thanks for reading!


Categories
Idaho Our Trips Planning Resources Tours and Rides

Grindola Weekend Ride: May 19-21

Spring has finally arrived in southern Idaho and it’s time for a good overnight bike trip!  We’re planning a ride for next weekend and want you to come along!


Spring Riding


For the record, this is not an organized bike race or event and is unsupported, unsanctioned and in no way affiliated with Bike Touring News.  We are offering a suggested route and meeting place/time; nothing more.  You are 100% responsible for yourself and every aspect of your participation.


photo by David Jones / @awakenengage


Disclaimers aside, we hope you’ll join us for what we hope will be a great weekend!  Here’s one version of the plan:

Friday, May 19

  • Depart Bike Touring News (3853 Garden Center Way) at 4pm.  Ride to Montour Campground.
  • Approx. 27mi & 1,800ft elevation gain.  Mostly paved or well-graded dirt roads with some sustained climbing.
  • https://ridewithgps.com/routes/20783892
  • UPDATE:  The campground is open!  16 spaces available for overnight camping at $8.00/day, as well as dispersed tent camping for $3/day. Campsites are available on a first-come, first-served basis. Potable water and bathrooms are available.

Saturday, May 20

  • Ride the “Grindola” route mapped by David Robert Jones (@awakenengage)
  • Approx. 84mi & 6,500ft elevation gain.  Mostly rolling dirt roads with some sustained climbs and pavement sections.
  • https://ridewithgps.com/routes/20809180
  • Some riders are planning on splitting this segment into an overnighter, camping somewhere at the northern end of the route.
  • For purposes of camping Saturday night we are considering riding this counterclockwise, camping just after the Dodson Pass.

Sunday, May 21

  • Ride back to town via Friday’s route or an alternative.


Want to Trim some Miles?  Shorten the Trip!

There will also be a number of folks driving from Boise to Montour, either Friday night or Saturday morning.  Email [email protected] or call the shop to inquire about ride sharing.  Parking may be limited at the campground but perhaps we can leave cars at the Triangle Cafe.  This itinerary is only a suggestion and you’re welcome to make adjustments or do your own thing!


Rolling Johnson Creek


Bike Suggestions

Wide tires and low gears will make for happy riders.  We’d consider 35mm rubber the minimum, though some prefer the more exotic brand of suffering delivered by skinny tires on Idaho gravel.

We’re psyched to ride and hope you are too!  Call, email or comment with any questions!


photo by David Jones / @awakenengage
Categories
Bike Touring Equipment Bikepacking Planning Resources

The Best Shelter for Bikepacking: Three Opinions

We get lots of questions about shelter from folks getting started in bikepacking.  What shelter is best?  Can I use the ____ that I already own?  How do I know which shelter to bring on a given trip?  In this post, we’ll offer three perspectives on the best bikepacking shelter and try to answer some of those questions!

While many people already do some kind of camping, many shelters that would be appropriate for car camping or even backpacking are not well-suited for bike travel.  Space and weight are at a premium when traveling by bike, so heavy and bulky shelters are a liability.  In selecting a shelter for bikepacking, there are a few key factors to consider:

  • Sleeping Comfort
  • Protection from the Elements
  • Interior Space & Gear Storage
  • Ease of Site Selection & Setup
  • Packed Size/Weight

Obviously, many of the above factors can change dramatically depending on weather, environment or season.  Plan Ahead and Prepare for the conditions you expect to experience.  Any shelter will offer some level of versatility but some excel only in certain conditions.  Also, every person has their own preferences, likes and dislikes when it comes to shelter.  In this post, we’ll offer perspectives from the Bike Touring News crew on the different shelters we use.  What shelter do you prefer for bikepacking?  What did we miss?  Read through and add to the discussion with a comment below!

The Bike Hermit’s Preference:  The Hammock

Several years ago, I came across some articles about stealth camping – or “hiding in the woods” as some people call iton an obscure site called crazyguyonabike.com. The author’s choice of shelter was a Hennessy Hammock and – for some reason I can no longer remember – the idea of bike touring with a hammock appealed to me.

image of camp hammocks
Not many spots for a tent

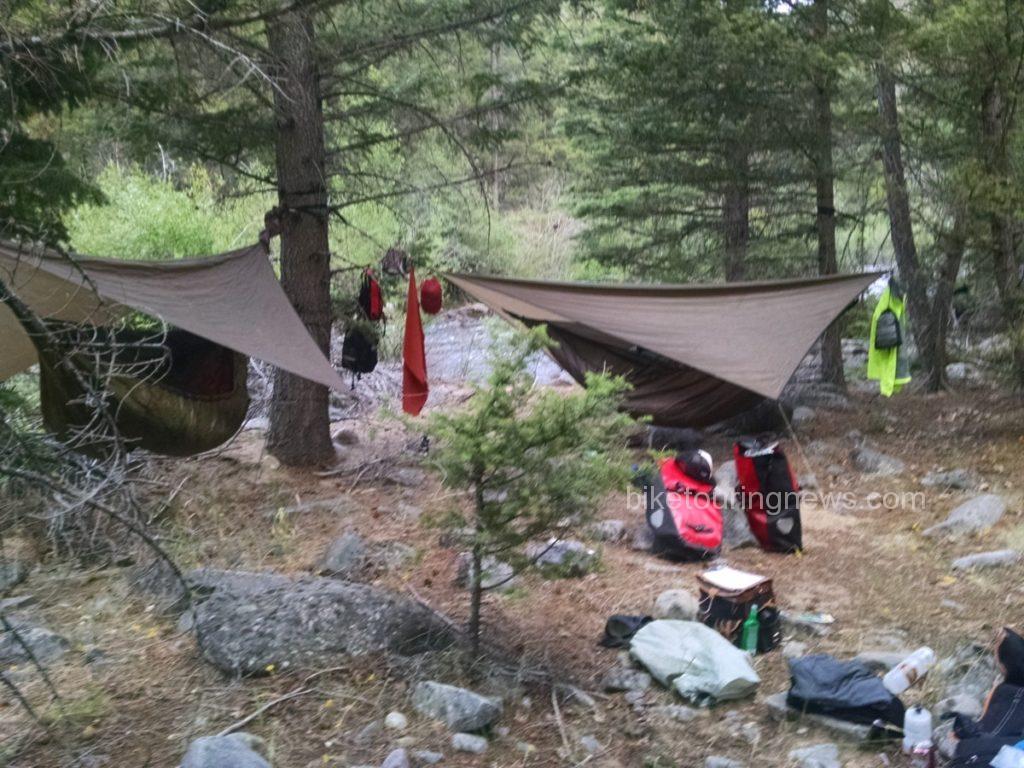
The design of my Hennessy Hammock impresses me every time I use it. The hammock is attached to and suspended from a ridge line which also supports the enclosing insect netting. A separate rain fly keeps the sleeper dry and/or out of the wind. Upgrading from the stock rain fly to the Monsoon rain fly creates a space around and under the hammock big enough to park the bicycle out of the rain. Hennessy sells a 4-season SuperShelter system consisting of a second layer of nylon on the bottom of the hammock which creates a sleeve where an insulating pad can be inserted. My experience is that the hammock is very cold to sleep in without the 4 season system.

Worries about sleeping in a “hammock” position and only being able to sleep on ones back are mitigated by the asymmetrical design of the Hennessy; once in the hammock the sleeper can put his feet to one side and his head to the other and the hammock offers a flatter, even if still not completely flat, support. I am not able to sleep face down but I can sleep comfortably on either side.  This is obviously a big plus for side sleepers who struggle for comfort when sleeping on the ground.

People always ask what I do when there are no trees. The rain fly, when staked at one end or tied to a sagebrush, and supported at a higher point by the bike or a tree or a fence post at the other end makes a dandy shelter. If the night is cold the hammock can be used laying on the ground under the rain fly as a sort of cocoon.  In this configuration, the hammock becomes a sort of tent/bivy/hammock hybrid shelter.  The benefit of sleeping suspended is lost and setup can be tricky but this capability extends the range of conditions where a hammock is functional.

image of bike and tarp
The Clickstand bike support as a tent pole!

On the last couple of trips I have been using Hennessy’s SnakeSkins which stay attached to the ridge line and simple slip over the entire hammock and pad and swallow the whole thing up leaving a long, fat, nylon snake that can be stuffed into one half of a pannier. This is a much faster way to set up and take down the hammock.

image of end of hammock
The SnakeSkins fold out of the way on the ridge line when the hammock is in use and just slide down from either end to make a quick stuff sack.


image of tarp tent
This was to be a very cold night. The fly was on top of me by morning with the weight of a heavy layer of frost. This is the Monsoon Fly.

Pros:

  • Very comfortable – none of the pressure points associated with sleeping on the ground
  • Warm enough for most conditions when used with the two layer insulation system
  • Can be used on uneven, sloping, rocky or wet terrain
  • Completely weatherproof
  • No condensation
  • Packs relatively small – no tent poles.

Cons:

  • Can’t always be suspended
  • Not necessarily lighter than a good tent
  • Not ideal for relaxing – minimal interior space
  • Not as private as a tent – hard to dress or undress in a hammock
  • Makes some people feel claustrophobic

Sky King’s Preference:  The Tent

While the Bike Hermit and Sky King are both huge fans of the Hennessy Hammock there are situations where a tent is a more practical shelter, especially in desert environs where trees are scarce.  Sleeping on the ground in a hammock is an option, though one without most of the hammock’s benefits.  Comparatively, a good tent offers increased comfort and space at roughly the same weight and pack size as the hammock, when divided among a team of two.

perfect for Desert Bike Packing
Big Agnes Angel Springs UL2 in the Owyhee Canyonlands

For our first couple of “let’s take the tent trips” we used our 3-person Kelty – a great tent. We bought it for backpacking primarily because it was roomy – with two vestibules and two doors – making for easy entry/exit and gear storage. However, it is a bit bulkier than we’d like for bike trips. We bit the bullet and now own a Big Agnes Angel Springs UL2. We gave up the double entrance, meaning someone is getting crawled over for the middle of night nature call. Like most tents, it incorporates a rain fly vestibule, allowing for a place to tuck gear out of the weather.

14495463_265649453829296_3002774429655013193_n

We carry the tent for most of our desert riding, especially in new terrain where we aren’t certain of the tree situation.  Site selection – especially in areas where large trees are few and far between – is relatively easy with a 2-person tent.  The tent’s footprint is relatively small, but very hard or soft ground can present guyline challenges.  On surfaces where stakes won’t hold or can’t penetrate, you’ll have to get creative as most tents must be staked out for a proper pitch.

Weight wise, the combination of tent and sleeping pads is roughly equal to that of two hammocks without pads. We can divide the load between bikes and packed volume equates to about the same as the hammock.  For teams of two who don’t mind sharing space and gear, a tent makes an appealing option.  Solo adventurers may find the packed weight and size burdensome unless they are willing to spend big bucks for high-end, ultra-light models.

Pros:

  • Easy entry and exit.
  • Relatively easy site selection.
  • Vestibule space to keep gear dry.
  • Space to sit up and move around inside, especially nice if bad weather hits.
  • Tent components can be divided between bikes, decreasing each rider’s load.

Cons:

  • Heavier and bulkier on average.
  • Higher cost for lightweight options.
  • Tent poles can be difficult to pack on a bike.
  • Potentially tedious and time-consuming setup and takedown.
  • Condensation can be an issue in certain conditions.


Ryan’s Preference:  The Bivy Sack

Bivy is short for “bivouac,” which is a fancy word for making camp.  “Bivouac Bags” or “Bivy Sacks” are essentially waterproof sleeping bag covers and have been used since time immemorial by soldiers, alpinists or anyone else who needs a simple shelter that can be quickly deployed in nearly any site.

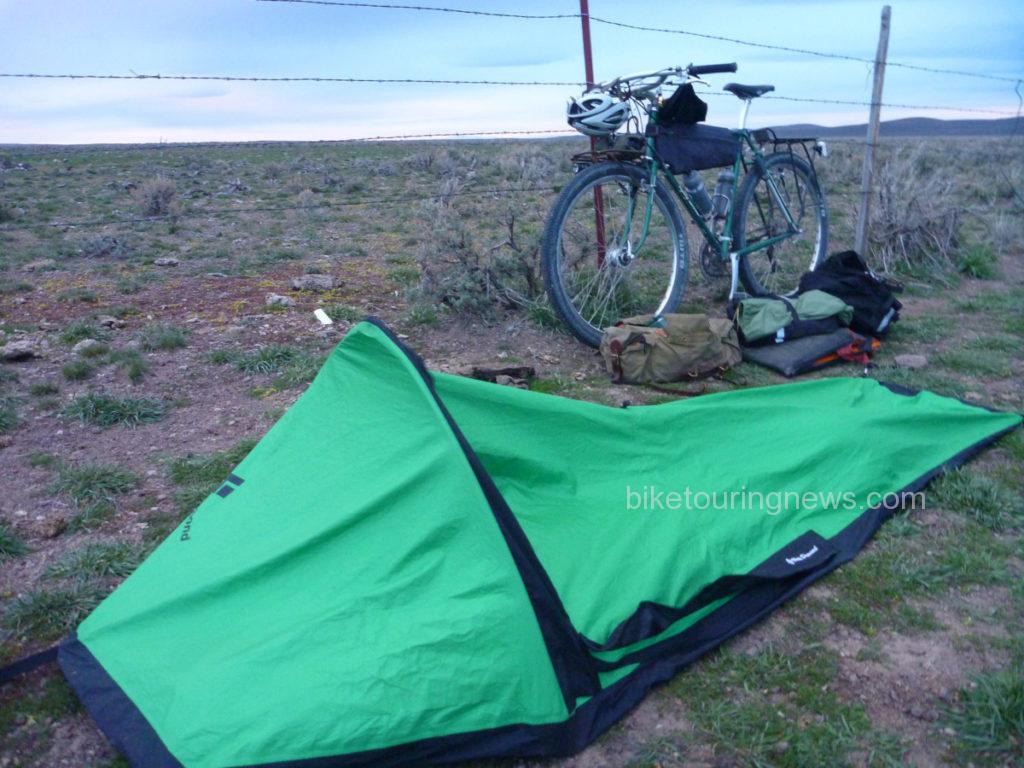
Twilight falls on the author’s campsite in the Owyhee desert.

There are a wide variety of bivy sacks on the market intended for a range of purposes.  Ultralight emergency bivvies are intended to help you survive an unplanned night out.  They are generally inexpensive, pack small, weigh next to nothing and offer little in terms of comfort.  Some ultra-minimalist bikepackers use shelters of this type for racing but they’re planning on sleeping 2-4 hours per night, if at all.

The more fully-featured bivvies are designed for alpine climbing or similar pursuits. They typically employ sturdier construction, waterproof/breathable fabrics and may even incorporate some kind of additional structure to increase space and ventilation.  If you’re looking for a full night’s sleep or expect anything other than perfect weather, this is the way to go.

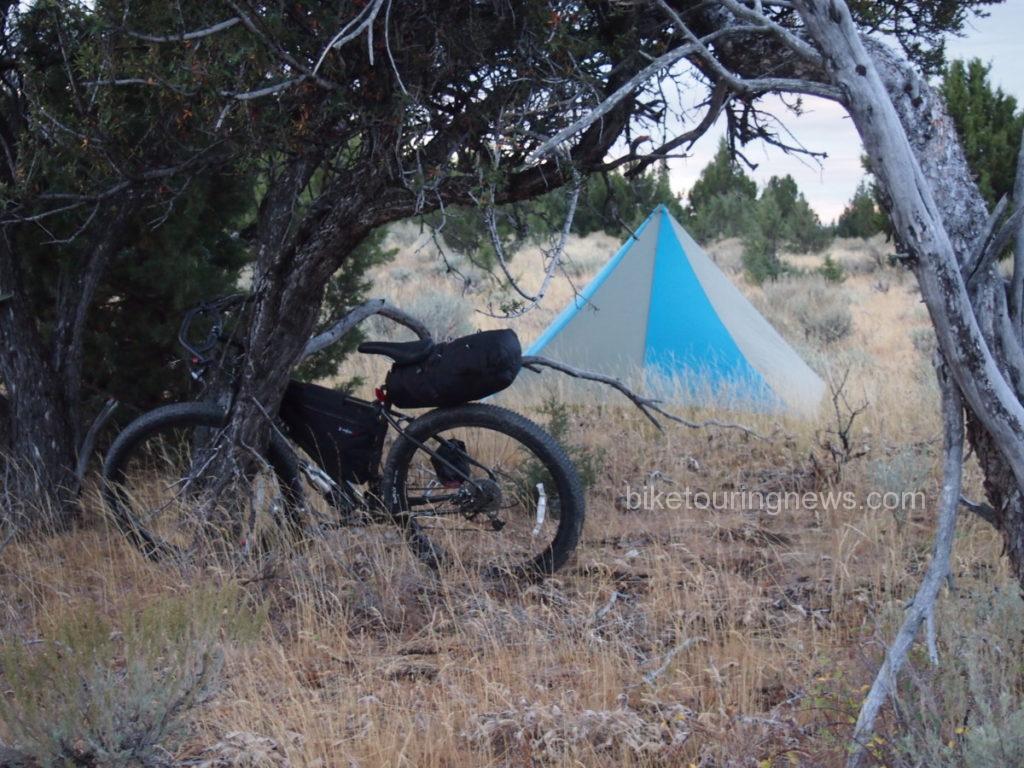
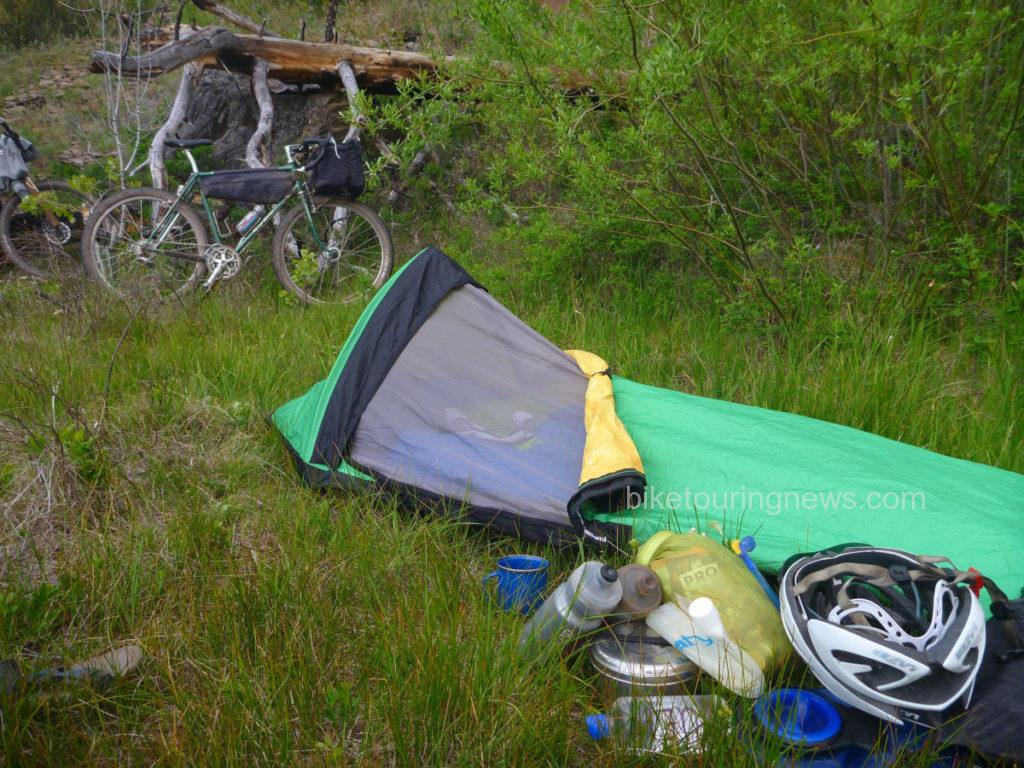
The insect mesh on some full-featured bivvies can be a major plus in buggy locations, such as this creekside camp on the 2014 Oregon Outback.

Even though a full-featured bivy can weigh as much or more than an ultra-light tent, it is significantly less expensive, more durable, simpler to pack and ultimately easy to deploy.  For me, this is the bivy’s main advantage.  Any piece of level ground large enough to lay on can be your campsite and the shelter is ready to use within seconds.  This allows you to spend more time riding and exploring rather than searching for an appropriate site to pitch your tent, hang your hammock or fly your tarp.  No stakes, guylines or trees required!  There is also nothing quite like laying on the earth with no roof over your head and watching for shooting stars on a clear night while you drift off to sleep!

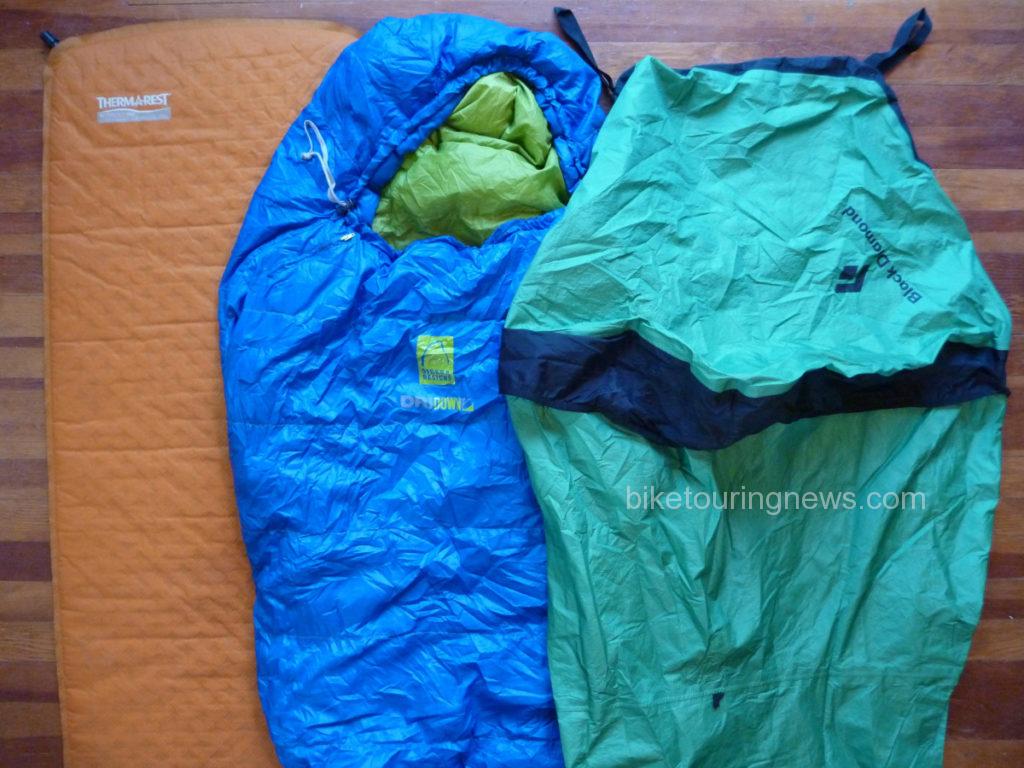
Sleep kit for the 2014 Smoke ‘n’ Fire 400. Simple and reliable.

A good waterproof/breathable fabric is the key to the bivy’s success.  The fabric used in my Black Diamond Bipod Bivy features a fuzzy, nappy surface on the inside, allowing it to absorb moisture and disperse it across a wider area of fabric.  This prevents droplets from forming and speeds moisture transport through the fabric.  I have had some condensation form on the floor panels (made from a different, less breathable material) but never on the upper portion of the bag.  I highly recommend that any bivy you purchase feature similar technology.

Also, consider the volume of your sleeping bag and pad.  You’ll lose the loft and warmth of your sleeping bag by cramming it into an undersized bivy, especially around the foot.  If in doubt, go for a larger size.  This is especially true if you plan to use a thicker, inflatable pad or a winter-weight bag.

A coffin-shaped rain shadow after a wet night on the Idaho Hot Springs Mountain Bike Route. Should have packed the tarp!

Even with the best breathable fabrics, it is always best to keep any bivy at least partially unzipped to allow moisture to vent out, especially if you’re going to bed wet or attempting to dry wet gear in the bag overnight.  Therefore, it is wise to bring along a tarp to create additional shelter if you expect wet conditions.  A tarp flown over the bivy allows you to leave the head open to vent moisture and prevent claustrophobia.  Nobody likes sleeping in a waterproof coffin (see photo above).  The tarp will also provide shelter for cooking, changing clothes, packing or other camp chores.  I use a simple 8×10′ silnylon tarp that packs to the size of a softball and weighs around 200g.

Pro:

  • Easy Site Selection
  • Ultra-Fast Setup & Takedown
  • Simple Packing
  • Inexpensive
  • View of the Sky!
Con:

  • Claustrophobic When Zipped
  • Minimal Interior Space
  • Condensation Issues
  • Loss of Loft in Sleeping Bag
  • Not Particularly Light

Conclusions

As we’ve learned, every different shelter has its merits and a set of ideal conditions for use.  You should select your bikepacking shelter taking those merits and conditions into account, along with your personal preferences and budget.  Every bike traveler is different, and so is every journey!  We hope this post has provided some guidance and that you’ll have many comfortable, peaceful nights out on your bikepacking trips!
What did we miss?  What shelter(s) do you use and why?  Let’s keep the discussion going in the comments below!  Thanks for reading!

Categories
Hermit's Workshop

Tune-Up For Touring the Southern Tier

photo of two bikes in the shop

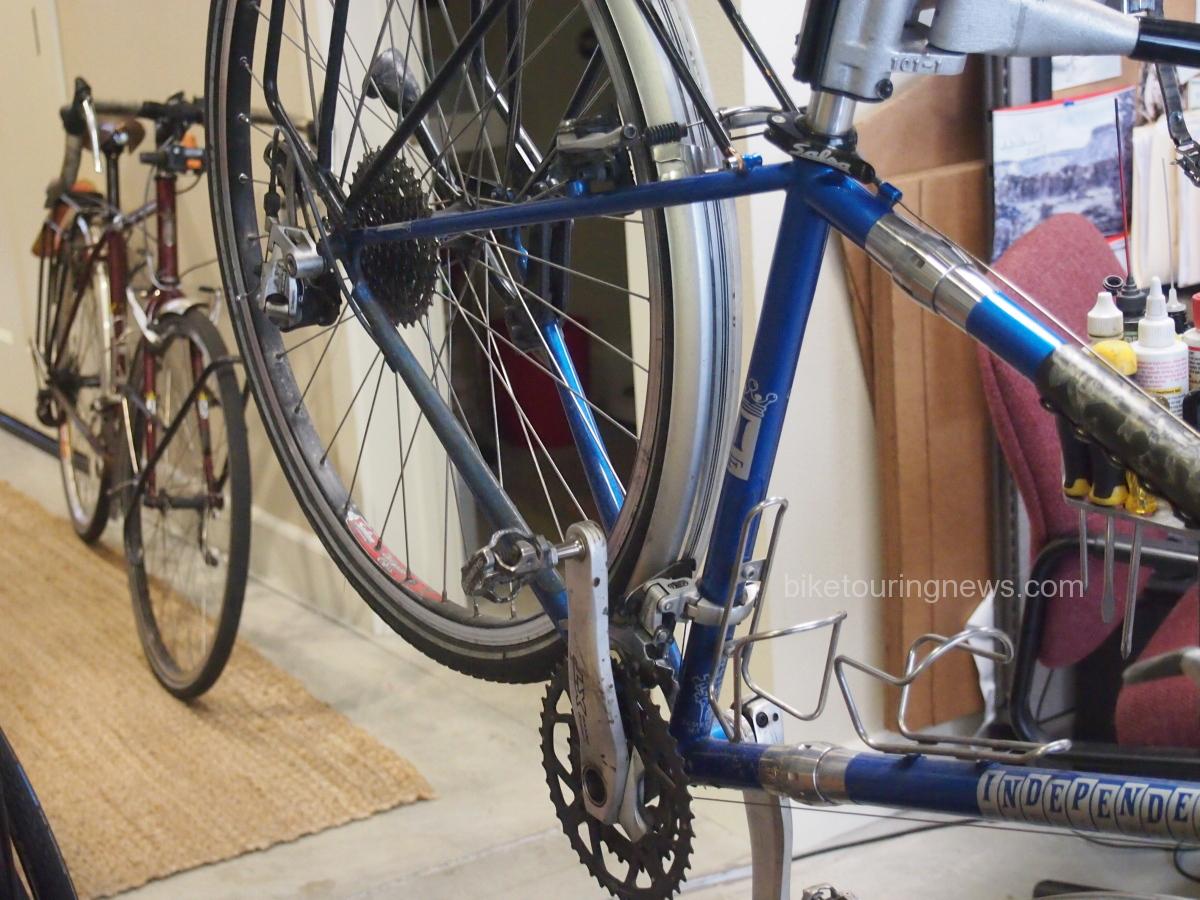
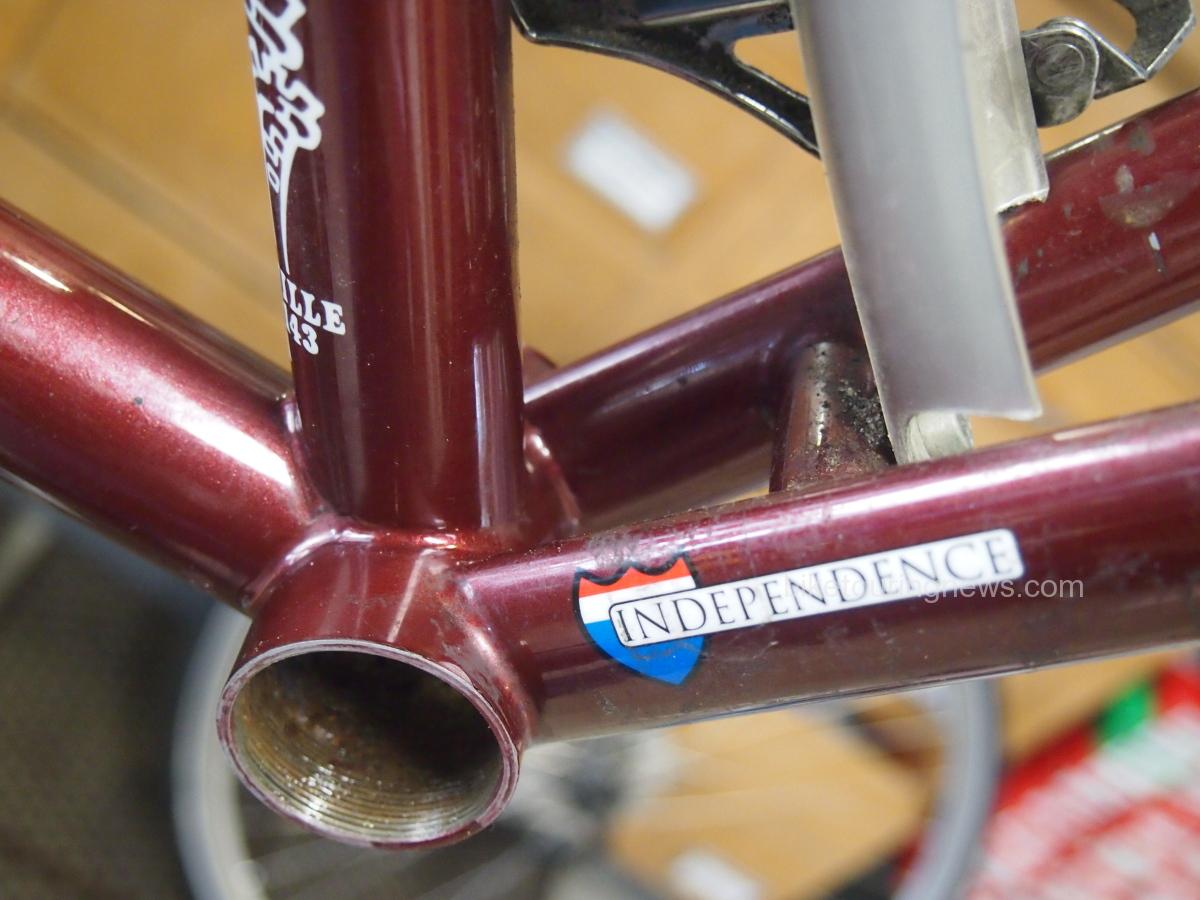
What should the cyclo-tourist do to make sure the bike is ready for a several week long bike tour? A brace of custom Independent Fabrications touring bikes were recently brought in to the shop to be prepared for a ride from Florida to New Mexico along the ACA Southern Tier route. These bikes have been well used over the years and provide a good example of what happens to components with many miles and little maintenance.

Drive Train
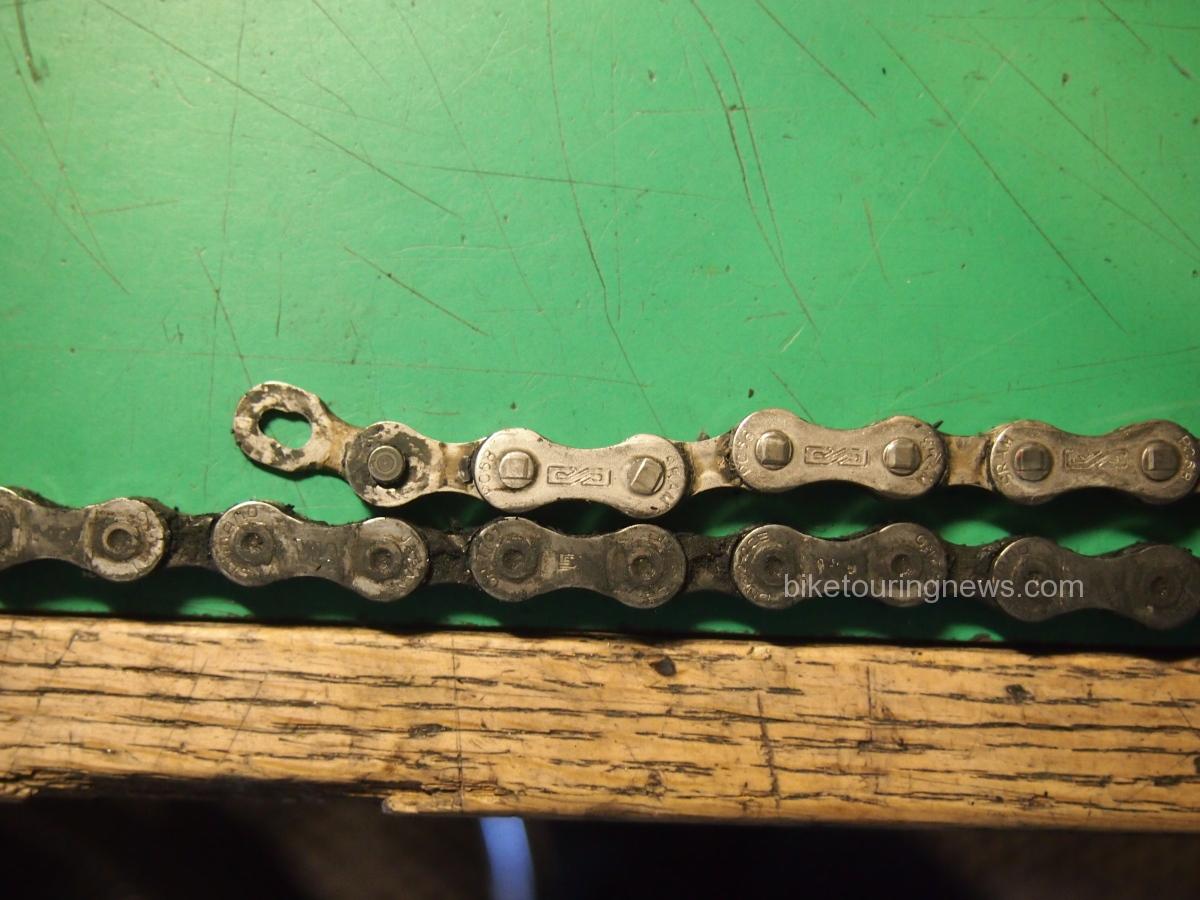
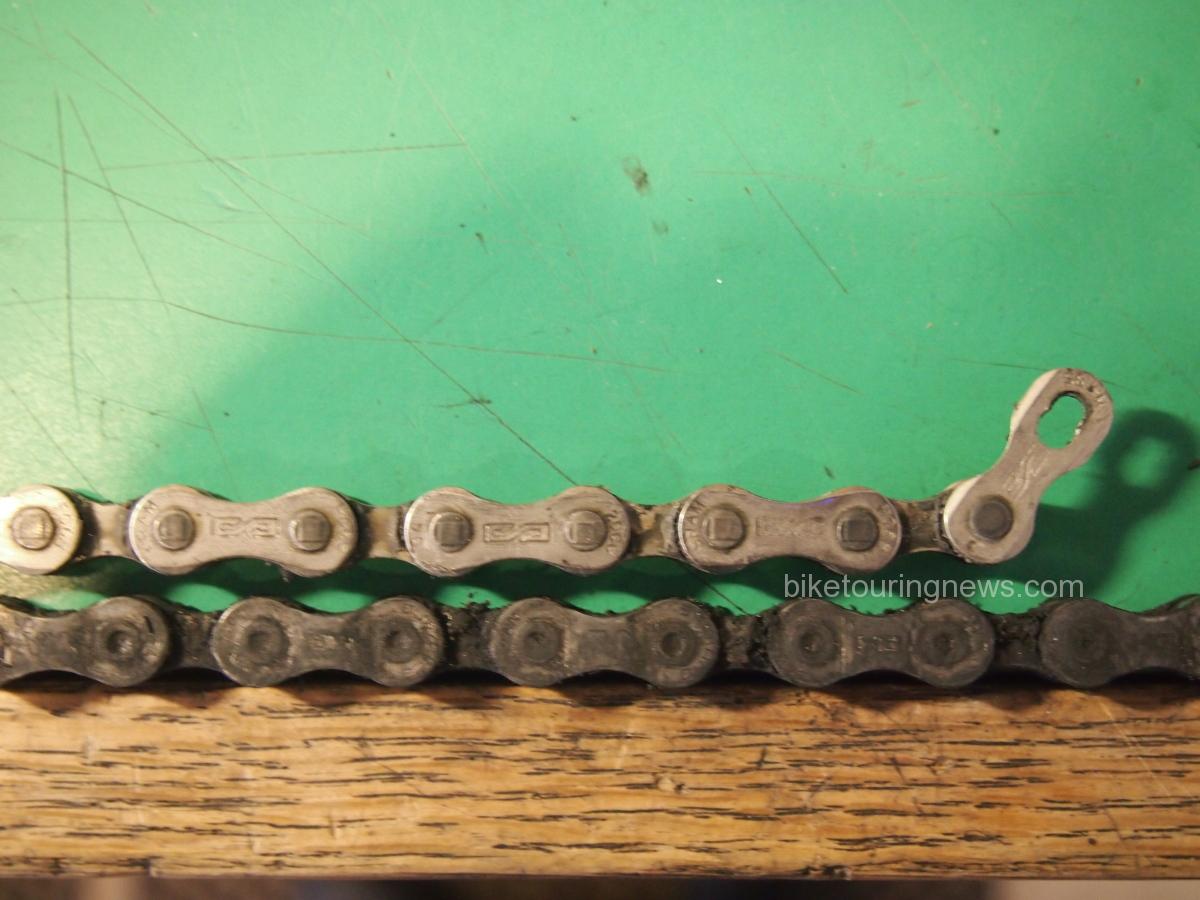
The rotating parts in the drive train will wear out first because- friction. And the weakest link in the drive train chain is- the chain. Chain links will not “stretch” but the pins which hold the links together, using a tight interference fit, will wear down as the links pivot around them. A chain with 116 links can elongate significantly when the pins connecting each link wear even a little bit. 800 miles of riding in sandy, wet conditions can cause enough wear to warrant replacing the chain. Even in dry conditions it’s a good idea to check the chain regularly after 1,000 miles or so. A new chain will have 1/2″ between the center of one pin and the center of the next and this can be measured with a tape measure or a specific chain wear checking tool. If there is 1/16″ or more elongation over 48 or so pins, which would be 24″, then it’s time to replace the chain before it starts to wear the teeth on the chain ring(s) and cassette cogs to the point that a new chain won’t match the new tooth profile.

In this case the chains on both bikes were worn to the point that there was no question that the chain rings and cassettes would all need to be replaced.

photo of two bike chains side by side
I lined up the pins on the old chain (bottom) with the pins on a newer chain, then checked the opposite end……….
photo of two bike chains
The older chain on the bottom has elongated in overall length by over half the length of one link
picture of bicycle chain rings
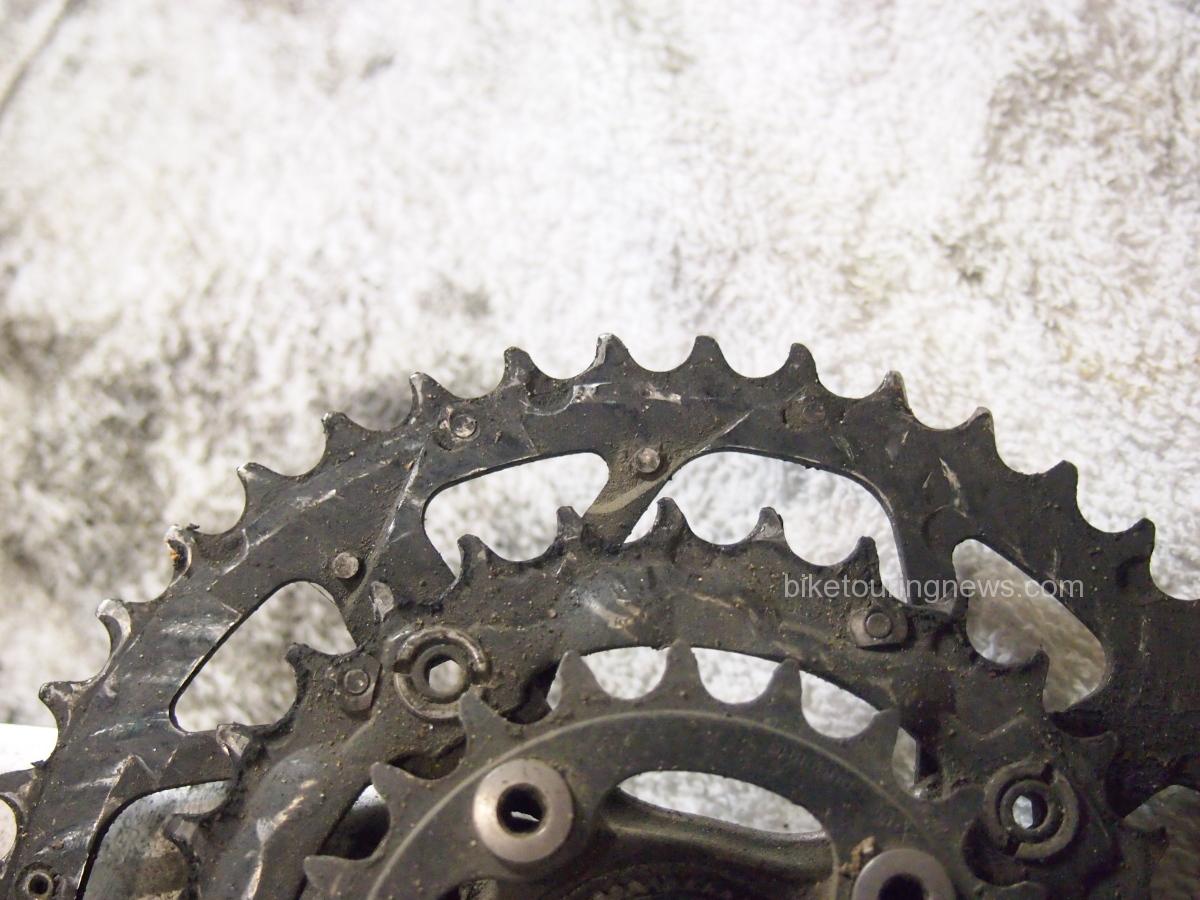
Notice the shark fin shape on most of the teeth on the old, worn rings. These now have a profile, or pitch, which will not match the pitch of a new chain

Replacing Chain Rings
To replace chain rings the crank set needs to come off the bike. There are several different standards for crank interfaces and each one of them requires a specific tool to remove the crank set. There are also varying chain ring bolt patterns across crank makes/models. Replacement chain rings need to be sourced which have the corresponding number of bolts and the same “bolt center diameter” (BCD) dimension. Most chainrings can normally be used on other manufacturers cranks as long as the number of bolts and the BCD is the same, but some manufacturers make that more difficult- in some cases making some of their own chainrings incompatible with even their own cranks of the same model which might be of a different vintage (looking at you Shimano). So it is best to get the rings from the same maker as the crank and with the same model designation.

Image showing alignment of chain rings.
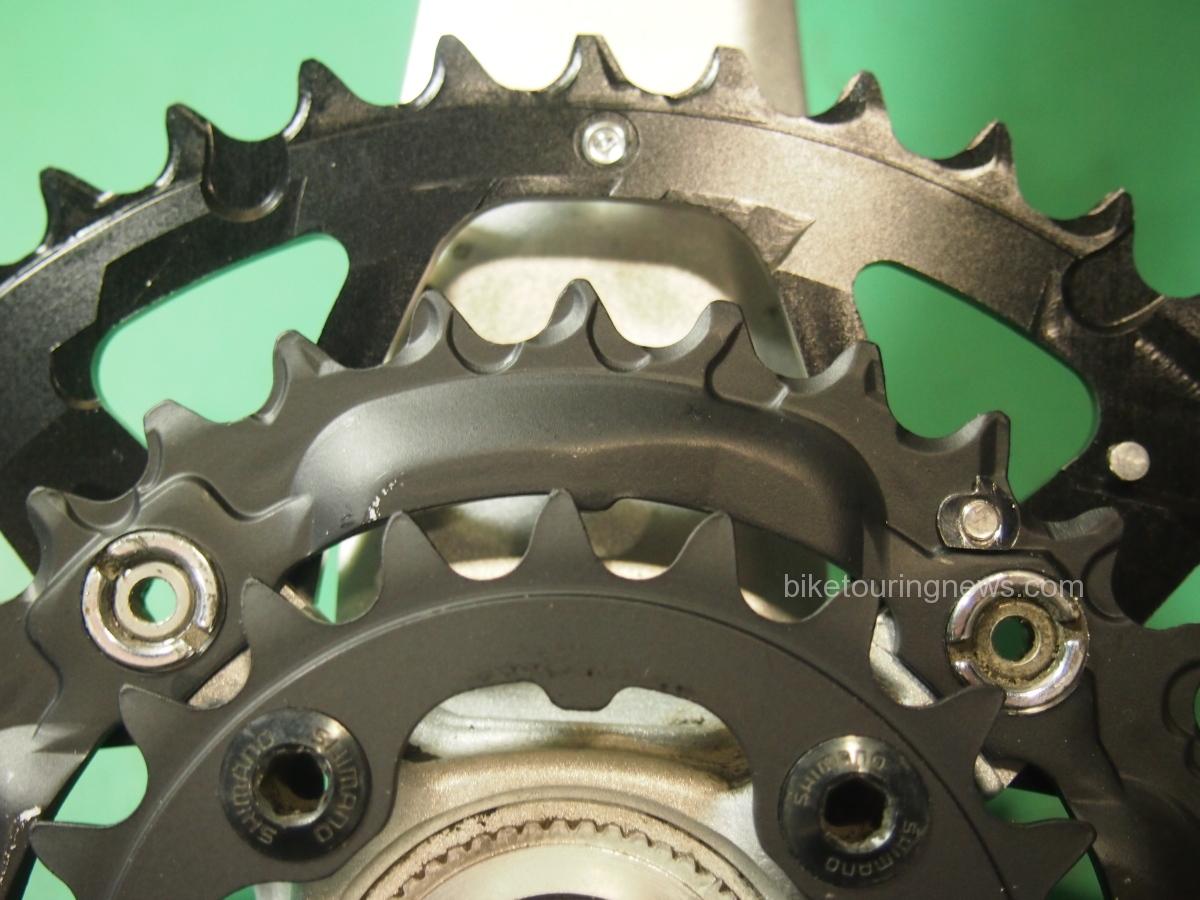
Make sure the new rings are aligned using the little tabs or pins between one pair of bolt holes
Image of new chain rings being attached
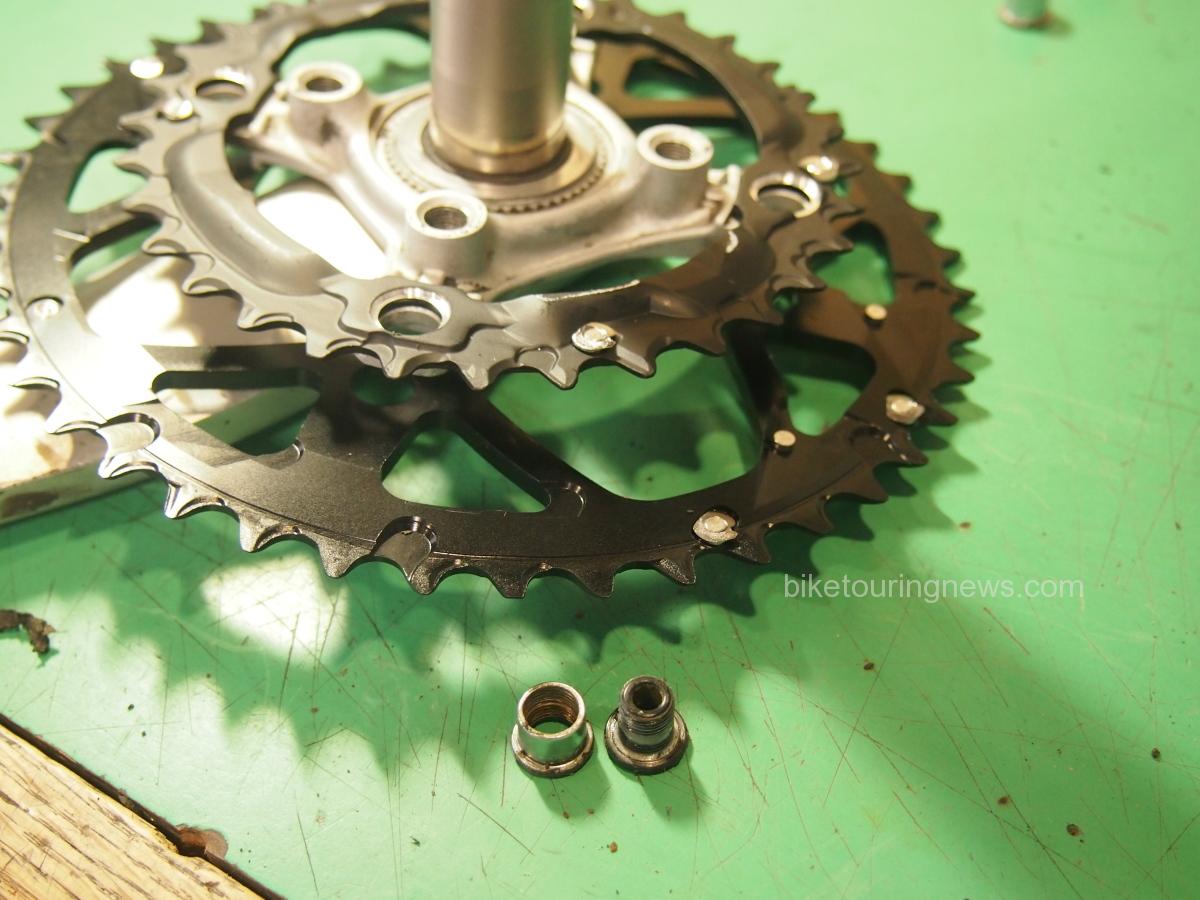
Pay attention to the bolts when removing the old rings. Put the new rings on the same way.

Bottom Bracket
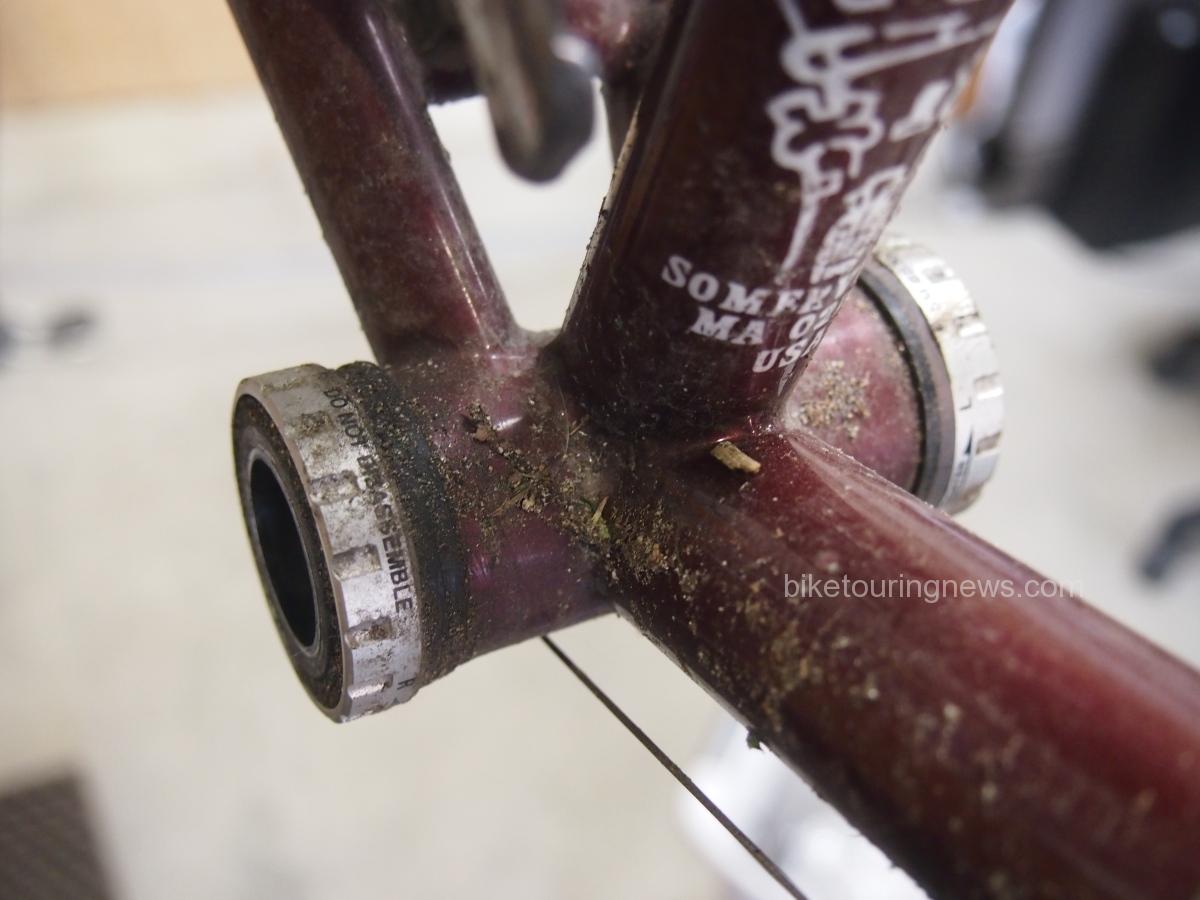
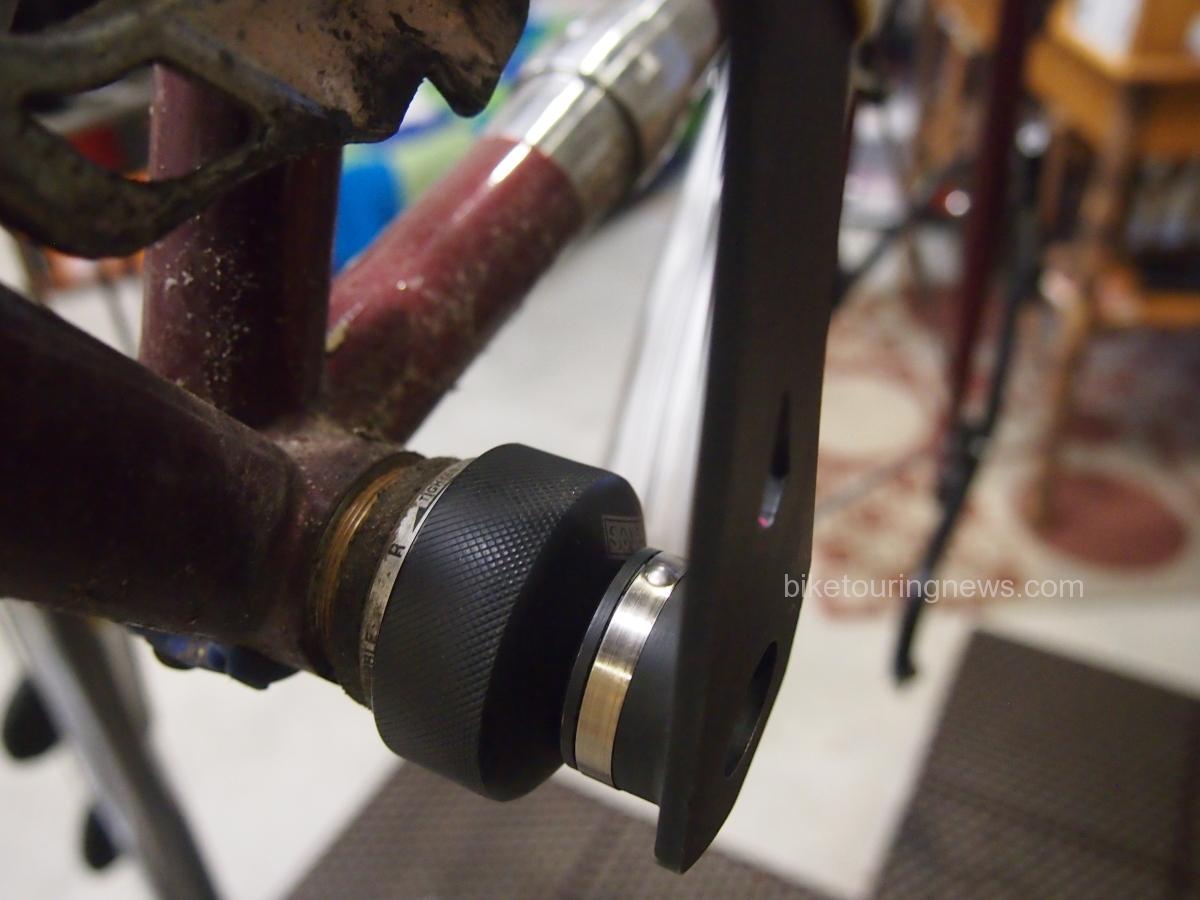
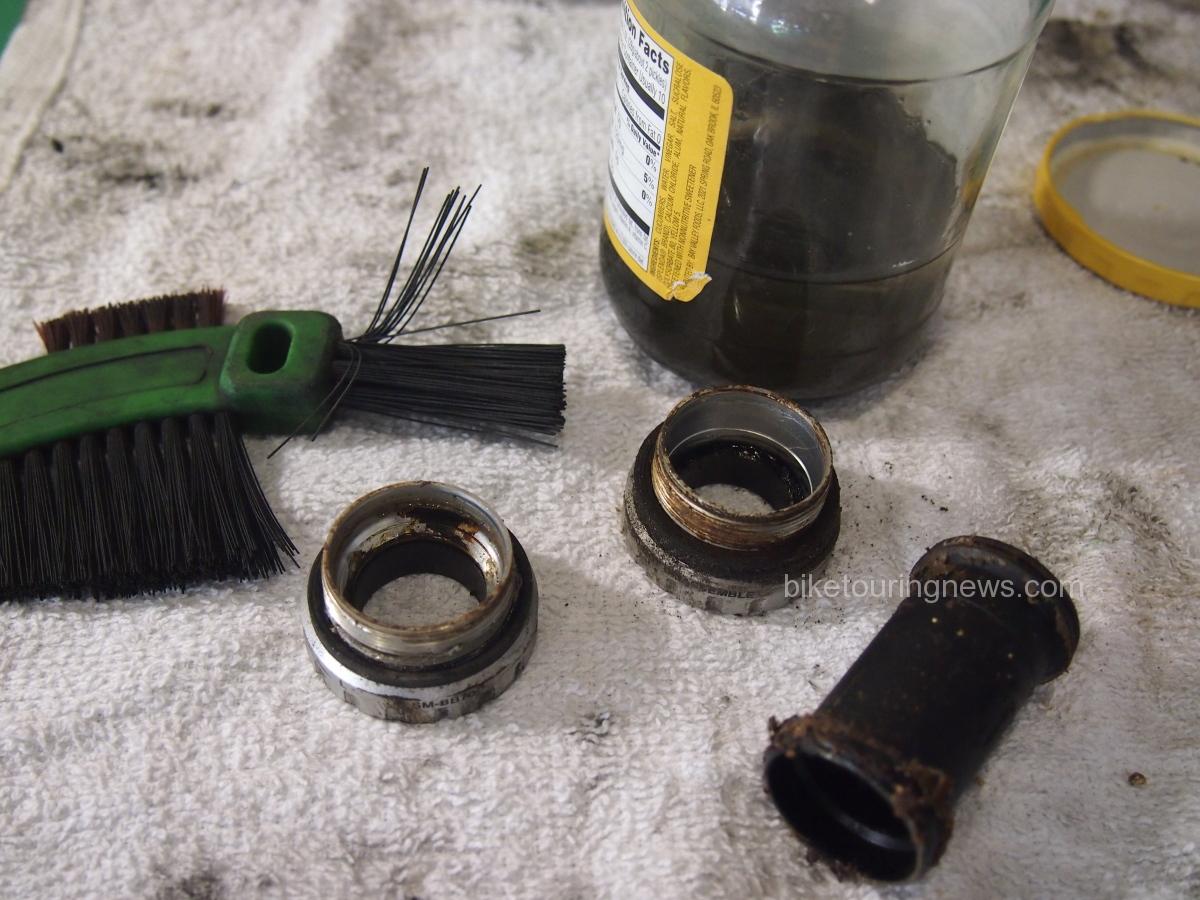
Usually if the bearings in the bottom bracket (in this case, the external bearings in bottom bracket cups) spin freely by hand with the crank removed, the bottom bracket won’t need any attention. Sometimes it’s a good idea to take it out anyway to check the inside of the bottom bracket shell for corrosion or water. These were pretty grungy and I quickly cleaned them with a stiff brush dipped in kerosene and then wiped them down.

image of dirty bike
Eeeeyewww….
image of bottom bracket removal tool
External bottom bracket cup tool
image of bottom bracket shell
All Clean! I will clean up the internal threads as well. Now is a good time to look over this high stress area for any hairline cracks in the bike’s frame.
image of bottom bracket cups and cleaning tools
Cleaning the bottom bracket cups with kerosene, while being careful to not contaminate the sealed bearings.

Cassette
Judging by how worn the chains were on these bikes it was assumed the teeth on the cogs of the cassette were worn beyond salvage, and so the cassettes were replaced. Details for that procedure are outlined in this post.

Wheels
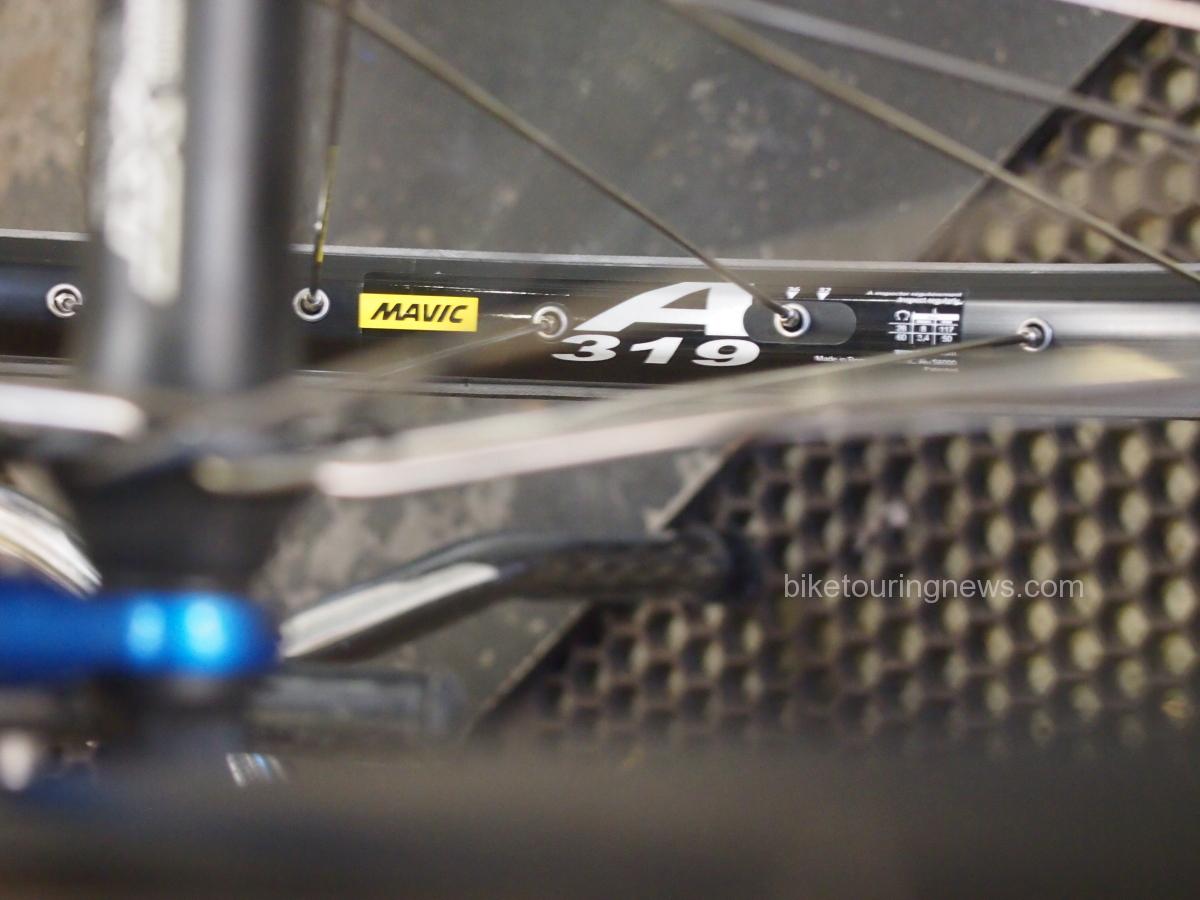
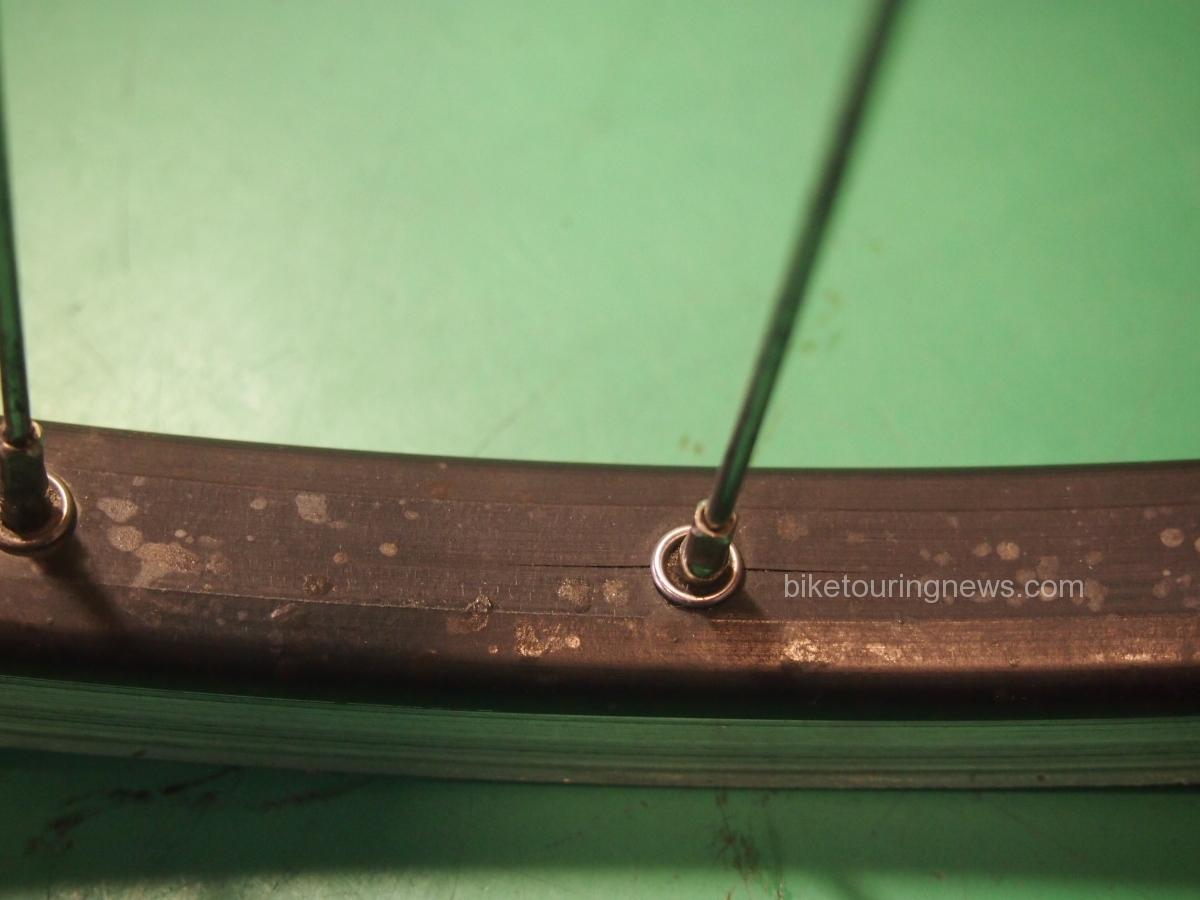
As outlined in this post, brake pads grinding the side of a rim can, over time, wear the walls of the rim so thin that the wheel fails. The wheels on these bikes showed significant rim wear and, upon further inspection, the rims were actually cracked at the spoke holes. Needless to say, new wheels were laced in the Hermit’s Workshop using the same hubs. The go to, economy, bullet-proof rim of choice in this case was the Mavic A319.

image of bike rim
Mavic’s A319 rim. Double wall, double eyelet, tight manufacturing tolerances.
image of cracked rim
The spoke holes are a high stress area on the rim.

Shifting and Brakes
Derailleurs
As long as the springs are still stiff and there is not excessive play at the hinged points and no pieces are broken off or bent, derailleurs can be cleaned, lubed and adjusted and will be almost good as new. I use the same stiff brush dipped in kerosene to get the big chunks off, then wipe everything off before blowing the grit out of the nooks and crannies with compressed air. Dri-Slide Bike Aid lubricant is a very thin petroleum based lube that will penetrate the tiniest voids and leave a dry film lubricant. This works great on the pivot points of derailleurs and brakes.

Cables and Housing
Fresh brake and shift cable and new housing will almost always improve the shifting and braking on the bike. Kits are sold which include everything needed except for a good set of cable cutters. Standard side cutters won’t work with these stranded cables and will just create a frayed, unusable mess and they will crush the ends of the housing.

Brakes
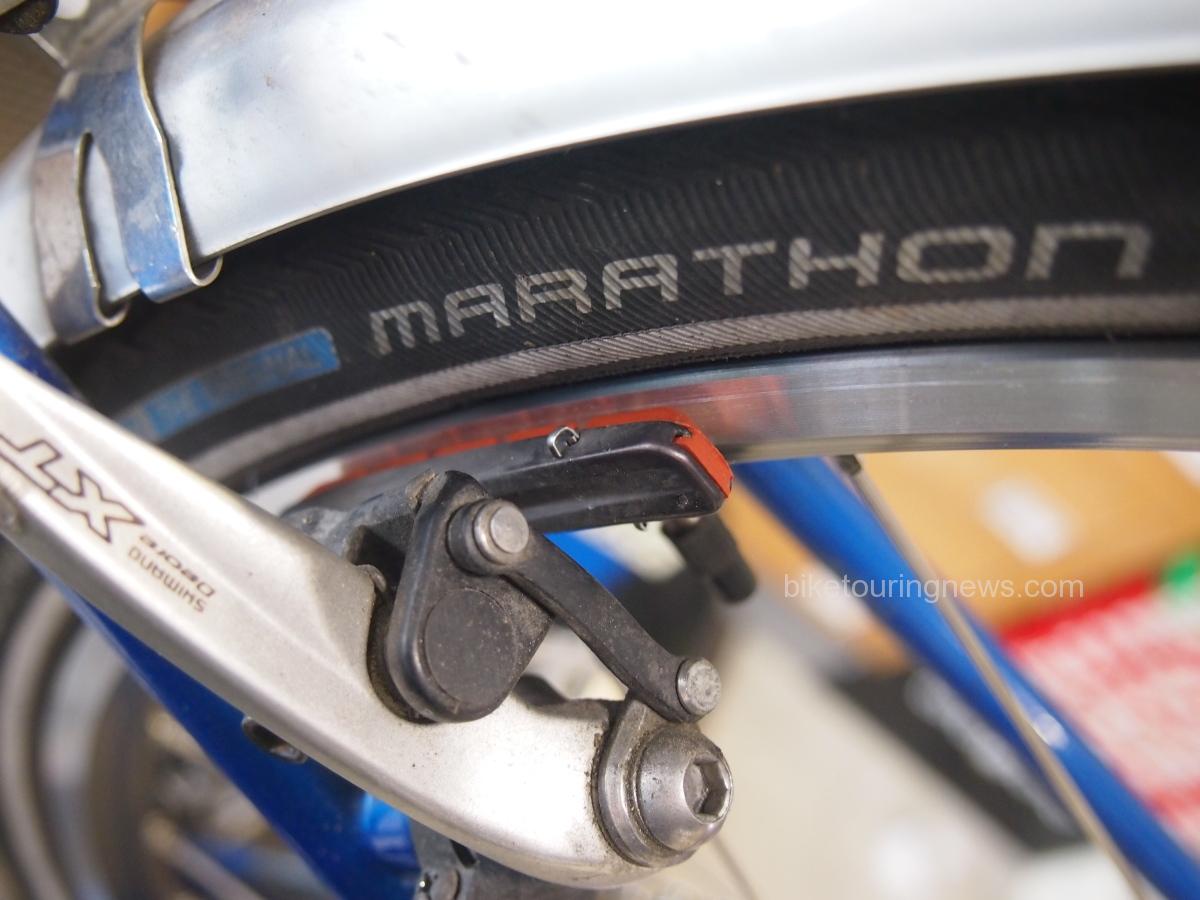
The pads on these rim brakes were old and brittle which reduces the efficiency and is hard on the rims. These particular shoes incorporate replaceable pad inserts which are held in place with a small cotter pin. If the shoe does not have replaceable inserts then the shoe itself can be replaced. Our selection of shoes, pads and cables should cover most situations.

image of brake shoe
Once the little pin is pulled out from the top of the holder, the old pad slides out towards the rear. A new pad slides in and a new pin presses in to hold the pad in place.

It’s almost time to take the bike out for a test spin to run it through all the gears and make sure the brakes work correctly. But first, checking to make sure all the bolts and connectors for all the components and accessories are tightened and that everything is adjusted properly will prevent any embarrassing (or painful) mishaps on the test ride. The last step, typically, is to install new handlebar tape. Now one can enjoy the satisfaction of a job well done and the confidence that the bike will perform well on tour.
image handlebar tape

Categories
Bike Touring Equipment Bike Touring Tips Bikepacking Touring Bicycles Touring Bike Components

The Best Bikepacking Bike is the One you Already Own: Part I

Author’s Note:  This post was updated on Dec. 29, 2016.  It was originally published on Feb. 20, 2015.

As interest in bikepacking and off-road bicycle travel continues to grow, many bike makers are offering machines that claim to be optimized for the task. We should know, as Surly’s line is full of bikes like the ECR, Ogre, Troll and Karate Monkey that are ideal vehicles for pedal-powered exploration. This level of specialization in bicycles can be a good thing but it also leaves many would-be bikepackers on the sidelines because they think they need a whole new bicycle to participate. While a shiny new bike can certainly make things easier and provide good motivation to get out and ride, you may discover that the best bikepacking bike is the one you already own.

With a few simple modifications or additions, any good-quality mountain bike can carry you and your gear into the backcountry. In this series of blog posts, we’ll guide you through the process and detail a few key points to consider when evaluating, upgrading and modifying your bike into a two-wheeled adventure steed that will take you places you never thought you could go.Especially since many key pieces of equipment  (bags, lights, etc.) won’t come with any new bike, modifying the bike you already own can be a much more cost-effective path of entry.

In this post, we’ll take a look at the key qualities that good bikepacking bikes share and see if your bike fits the bill. A comfortable, durable, mechanically-sound bicycle is critical. The consequences of an ill-timed breakdown or failure can be quite serious when venturing far from home, so these are very important considerations. Assuming you own a mountain bike of some kind, wheel that thing in here and let’s have a look.

Evaluating your Bike for Trail-Worthiness

Before heading into the backcountry or sinking lots of money into expensive upgrades, you would be well advised to be sure your bike is up for the task. There is a certain standard of trail-worthiness that not all mountain bikes meet. This is mainly a question of reliability. Off-road riding is hard on equipment and many inexpensive, “entry-level” mountain bikes are built with more casual riding in mind.

7598636072_d5d553779d_z
Two trail-worthy mountain bikes, ripe for a bikepacking conversion. Photo by the author.

So, how do you know if your bike is trail worthy? If you purchased your bike at a bike shop and are already riding it regularly on singletrack with few mechanical issues you’re probably in good shape. If you bought your bike somewhere other than a specialty bicycle retailer your chances aren’t so hot. Bikes sold in many sporting goods and department stores are cheap for a reason and don’t typically hold up well when ridden often, especially off-road.

magna
Department store mountain bikes are not a good option.

However, even many top-quality mountain bikes don’t make great bikepacking bikes. So, let’s dig into some of the nuances that set a potential bikepacking rig apart from the rest. Your bike doesn’t have to meet all of these criteria to work well but you’ll be more likely to enjoy the experience if you have most of these boxes checked.

What Makes a Good Bikepacking Bike?

Comfortable Riding Position

HowardandAlanIHSMTB
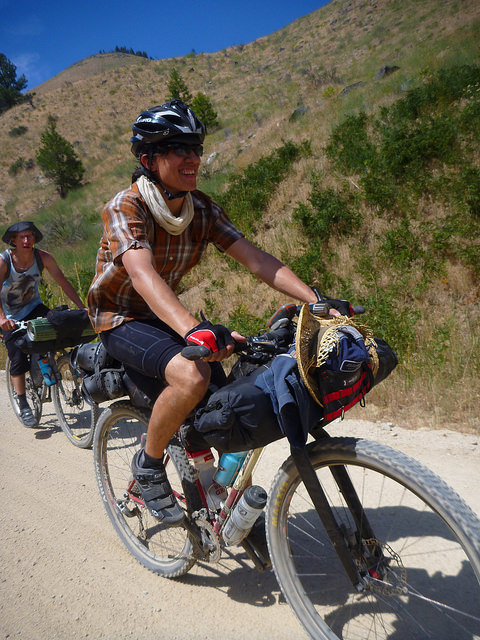
Two riders pedaling comfortably on the Idaho Hot Springs MTB Route. Photo by the author.

This is perhaps the most important consideration that we’ll discuss but also the most potentially challenging to get right. When you’re on the bike for hours at a time for days in a row, any potential source of discomfort can lead to frustrating pain or a debilitating injury. Other than employing the help of a skilled bicycle fit professional, the only way to know if you’ll encounter comfort issues is to put in the hours riding your bike. If you’re preparing for bikepacking you’ll want to do plenty of preparatory rides anyway, so listen carefully to your body for signs of problems as you ramp up the miles. A comfortable saddle and handlebar in the proper position are key elements in this equation. We’ll get deeper into fit issues in future posts. Assuming that you have a properly sized frame that you can ride comfortably, let’s take a look at some of the nuts and bolts of your bike.

Front Suspension or None at All

While full-suspension mountain bikes are becoming more common across all categories, they are often less than ideal for bikepacking on anything other than the roughest and most technical of routes. Suspension pivots and shock mounts take up valuable space in the front triangle, making frame bags difficult if not impossible to mount. All those moving parts also require regular maintenance and are often impossible to service in the field. You’d rather not be a hundred miles from the nearest bike shop when your rear shock blows a seal and stops holding air.

A suspension fork takes the edge off the rugged singletrack on the Idaho Hot Springs Mountain Bike Route.
A suspension fork takes the edge off the rugged singletrack on the Idaho Hot Springs Mountain Bike Route. Photo by the author.

A suspension fork can be valuable if your route includes a good deal of rough terrain but can be overkill for routes consisting mainly of dirt roads or smoother trails. Much like rear suspension, a suspension fork adds weight and complexity, requires regular maintenance and can be a major problem if it fails. While rigid mountain bikes have become a relative rarity the simplicity they offer is appealing. If your bike is already equipped with a rigid fork you may be in luck!

The choice to ride front and/or rear suspension will be dictated by your bike, route, personal preference and budget. If your bike does have suspension, be sure it is in top condition before heading out on a long trip.

Big Wheels, Wide Tires

There are many good reasons that 29ers have taken over the mountain bike market in recent years. The bigger footprint, increased air volume and shallower angle of attack offered by wide 29″ tires deliver excellent traction and improve the bike’s ability to roll easily over larger obstacles. These attributes are especially helpful when the bike is loaded down, less maneuverable and harder to unweight over bumps. However, don’t despair if your bike has 26″ wheels or is one of the newer crop sporting 650b/27.5″ hoops. Wheel size won’t make or break your experience out on the trail but larger wheels certainly offer appealing comfort and performance benefits.

Regardless of wheel size, you can do yourself a big favor by using the widest, highest volume tires your frame can safely accommodate. Wide tires will provide a smoother ride, cushion your bike, load and body from bumps and provide improved traction. We’ll talk more about tires in a future post, so stay tuned for that.

Quality Components

For better or worse, the price of an “entry level” mountain bike is incredibly low these days. This is certainly a good thing for many riders as the cost of getting into cycling is lower than perhaps ever before. However, those “entry level” bikes reach their low price points by cutting corners somewhere. One common place for this cost-trimming is in the bike’s wheels.

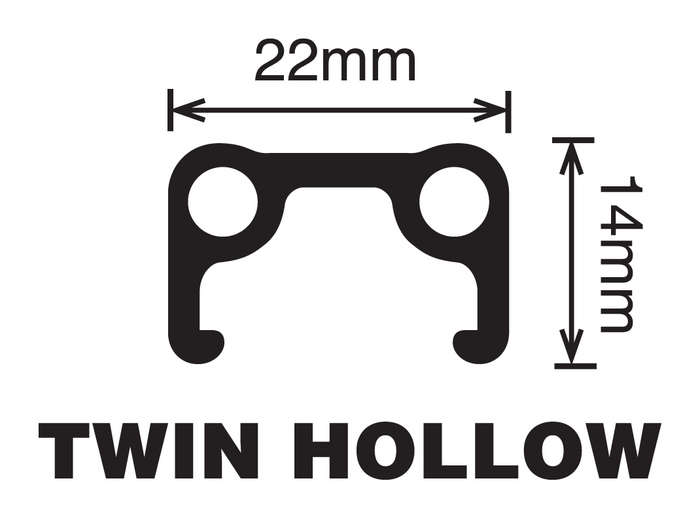
Bicycle wheels endure tremendous forces, especially when carrying heavy loads over rough terrain. Low-quality wheels that break spokes, bend axles, dent easily and won’t stay true are a serious liability. You’ll want to be certain that your wheels are built on sturdy, double-wall rims with quality hubs and spokes to avoid problems.  As shown in the cross-section diagrams below, double-wall rims feature a box section design that adds significant strength over the less-expensive single-wall design.

Blunt_35_No_Title_450_449
Double-wall rims – like Velocity’s Blunt 35 – provide much stronger wheels.
(Diagram from Velocity USA)
twin hollow
Single-wall rims are not typically strong and durable enough for trail riding or bikepacking.
(Diagram from Velocity USA)

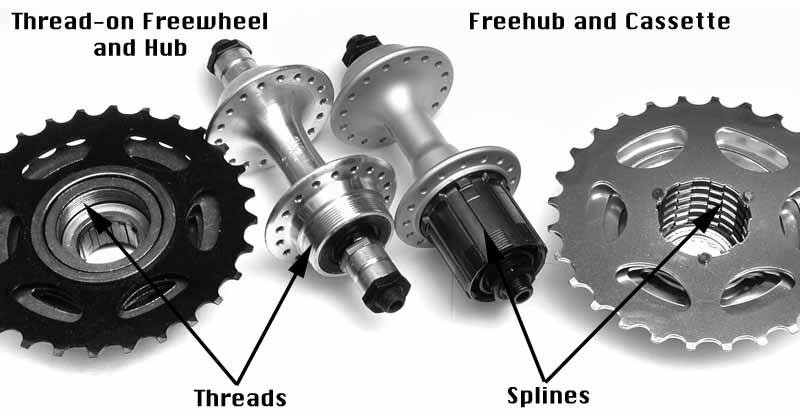
On the subject of hubs, most newer bikes are equipped with a “freehub” drive system rather than the older “freewheel” style.  Bent or broken axles were common with “freewheel” rear hubs on mountain bikes because of the long section of axle protruding past the drive-side bearing.  If you have a rear wheel using a threaded-on freewheel you’d be wise to consider an upgraded wheelset before loading the bike down. We build a significant number of bikepacking-worthy wheelsets here at Bike Touring News, so we’ll talk more about wheels in an upcoming post.

freewheel-vs-k7
Hub comparison from the late, great Sheldon Brown. sheldonbrown.com

Other than wheels, you don’t really have too much to worry about. Even inexpensive brakes, shifters and drivetrain parts are surprisingly reliable and rarely fail when properly maintained. Higher-end parts will be lighter, more precise, offer performance benefits and are sometimes more durable but are not required. However, it is vital that all of your components are well maintained, not excessively worn and in good working order. It is wise to check and replace (if needed) your chain, cables/hydraulic fluid, brake pads, etc before heading for the hills to avoid problems on the trail.  We have a series of blog posts on roadside repair and maintenance, so brush up there if you need a primer.  Many trip-ending mechanicals are a result of poor maintenance and should be easily avoidable.

Metal Frame

Carbon fiber is everywhere in the bicycle industry. Carbon frames and components are showing up at surprisingly low price points and have (mostly) shaken off their reputation for fragility and premature failure. Modern carbon bikes and parts from reputable manufacturers are of very high quality and have proven reliable in demanding conditions. Many also offer extra protection in the form of tough, durable finishes, rock guards and the like. However, you’d still be wise to take extra care when bikepacking with a carbon frame. The combination of additional weight, frame bag straps, accumulated dirt, abrasion and vibration – in addition to normal hazards such as sharp rocks, severe crashes, etc – can cause serious damage to frame tubes of any kind but the problem can develop faster and have more severe consequences with carbon tubes. A good carbon bike can be a potent off-road weapon – especially for those looking to travel fast and light – but metal bikes will be more worry-free and probably longer-lived.

P1160822
Four riders – all on metal frames – head into the Owyhee Desert. Photo by the author.

On the other hand, steel or aluminum bikes may suffer damage to their finish from the conditions presented by bikepacking but will rarely sustain serious damage to the tubes themselves. Regular cleaning and inspection is still important but is not as serious a concern as with carbon tubes. Though expensive, titanium may be an ideal material for bikepacking bikes due to its exceptional hardness and resistance to scratching or abrasion.

Summary

So, is your bike up for the challenge? You may already have your new bikepacking bike hanging in your garage, waiting to hit the trail! If your ride doesn’t cut the mustard, Bike Touring News offers a range of models from Surly that will do the job admirably without breaking the bank, like the ECR, Troll, Ogre or Long Haul Trucker.  There comes a point where a new bike becomes a simpler, more cost-effective option.  Feel free to give us a call, shoot us an email or stop by the shop if you want to talk about the pros and cons of your current bike!

Throughout this series of posts, we’ll dig deeper into some of the considerations outlined above and a few more in order to help you build the best possible bikepacking setup for your application and budget.  In the next post we’ll explore various methods of carrying the supplies for your ride, so stay tuned for that!  Follow us on Facebook, Instagram and Twitter @BikeTouringNews for the most up-to-date news and information.

What questions do you have about setting up a bike you already own for bikepacking?  Sound off in the comments, give us a call or email and I’ll do my best to cover those topics of interest in a future post.  Hey, thanks for reading!

Categories
Hermit's Workshop

Disc Brake Pads, When to Replace Them

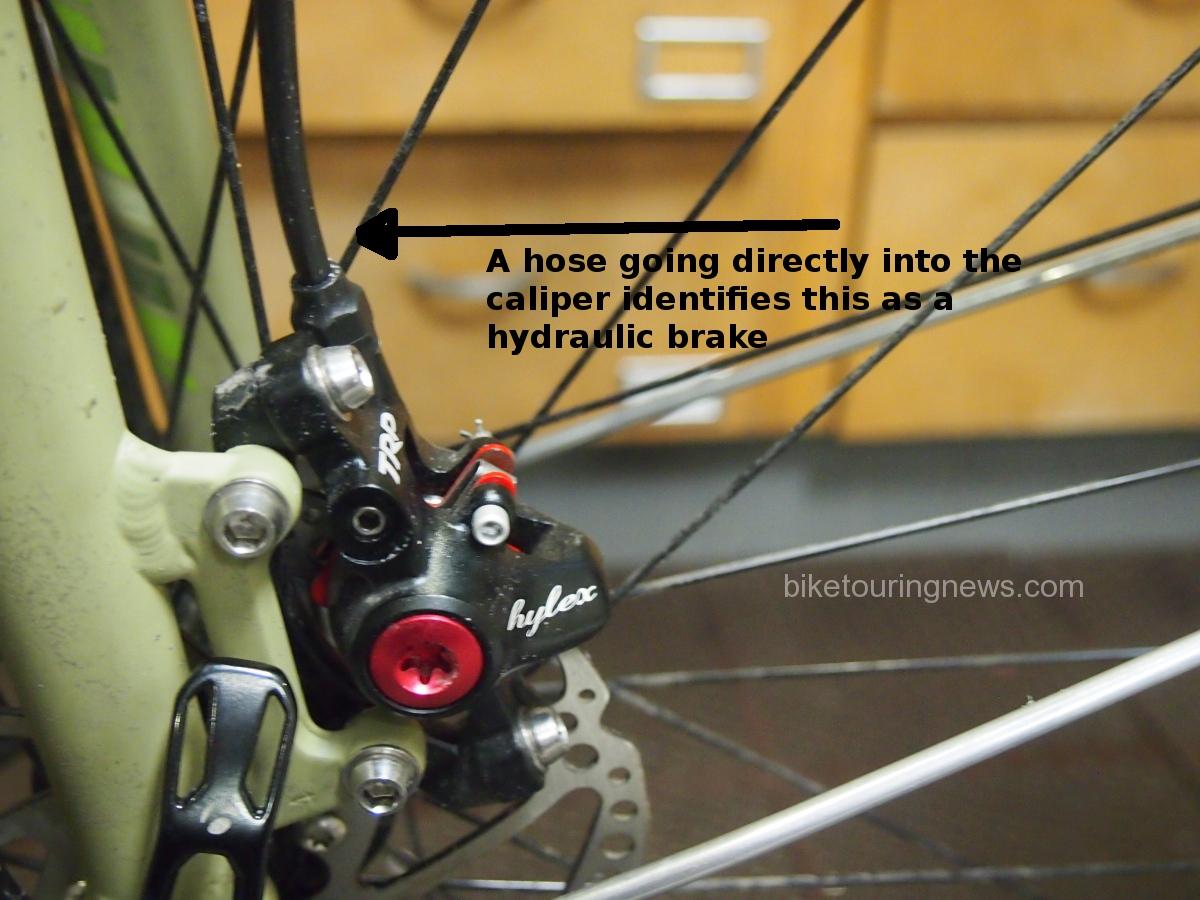
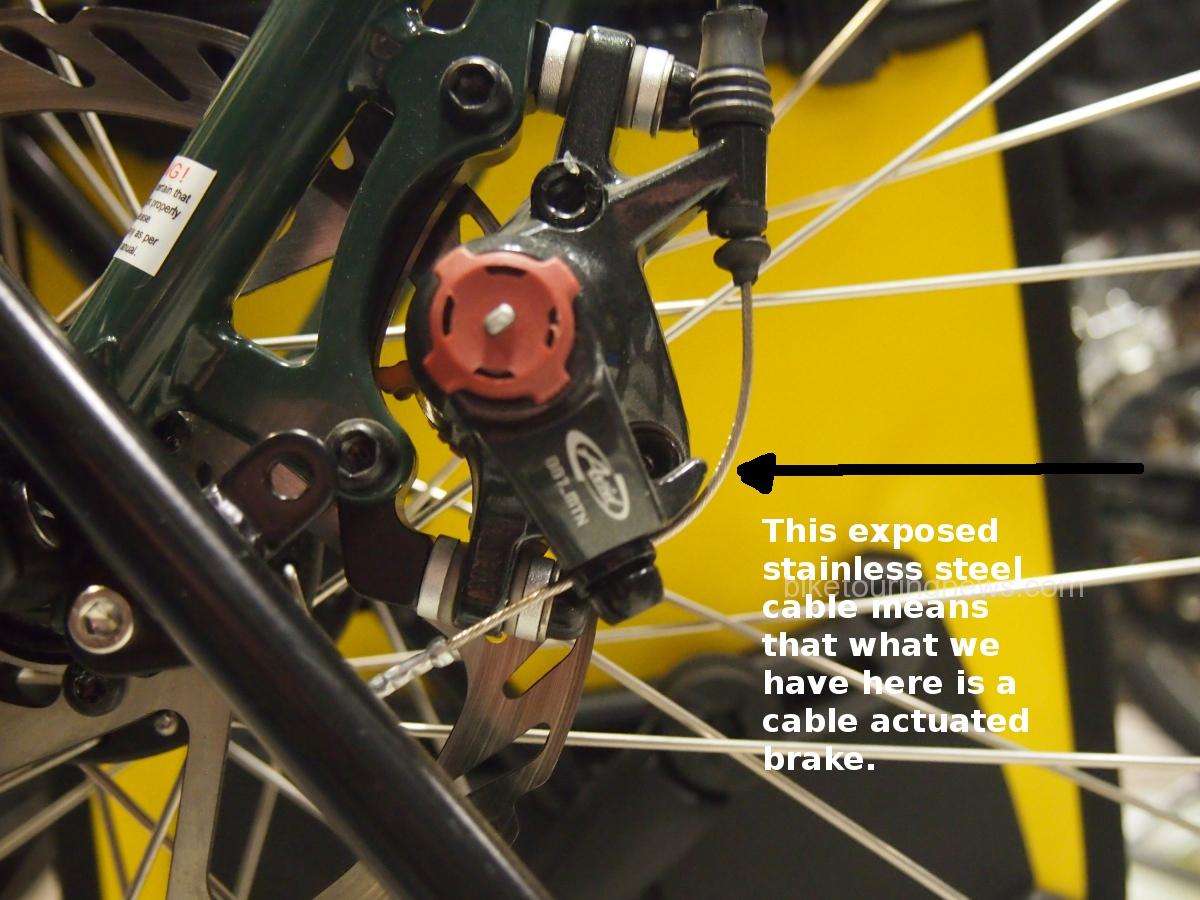
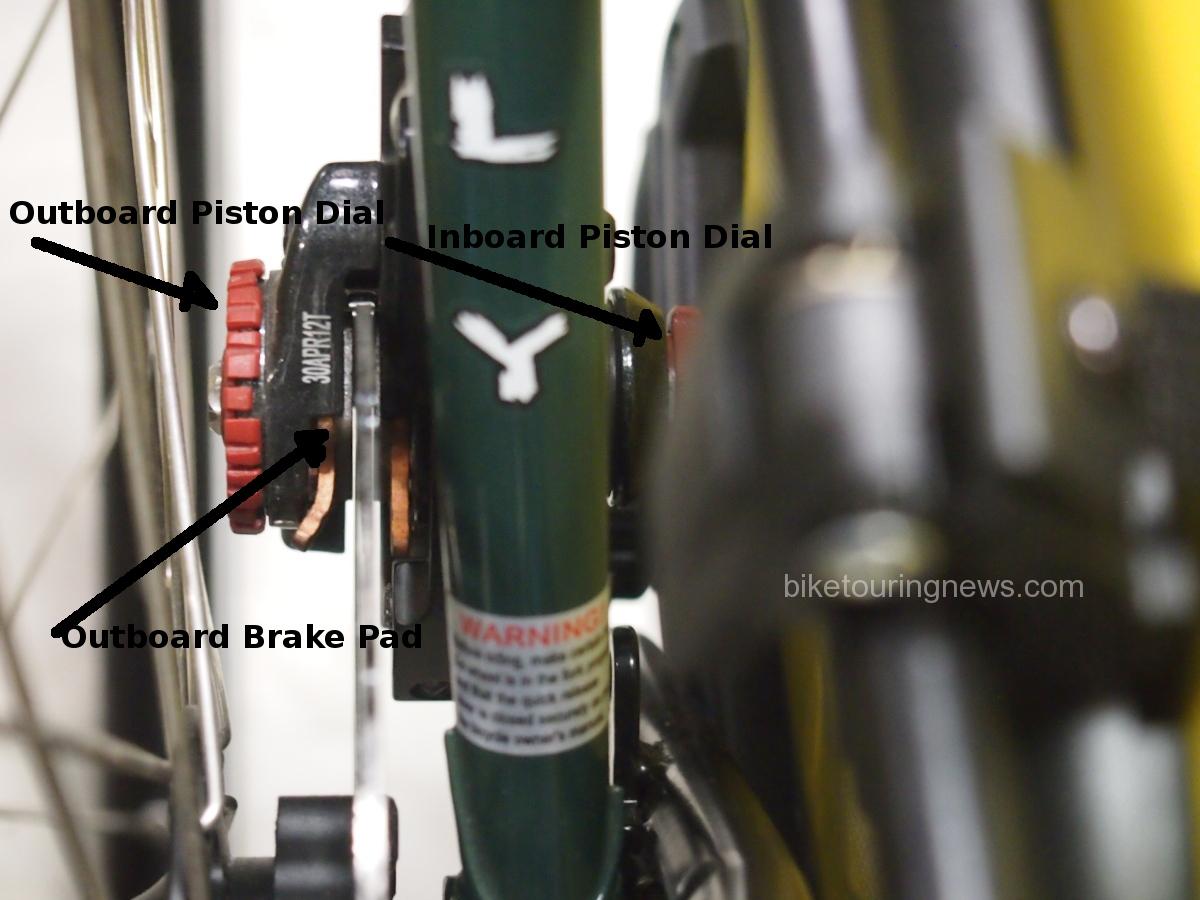
Disc brake pads, like rim brake pads, wear out. But unlike rim brake pads which are out in the open and easy to see, disc brake pads are hidden inside the brake caliper housing and are a part of the mysterious (to some) inner workings of disc brakes. Out of sight, out of mind. It’s not rare that a customer brings in their disc brake equipped bike and complains that the brakes are not working right. Sometimes all it needs is a cable and piston adjustment or, in the case of hydraulic disc brakes, a line bleed, but most often the pads are just worn down.  With cable actuated brakes there are dials on either the outboard side of the caliper or on both the outboard and inboard sides. As the pads wear the piston(s) need to be dialed in so the pad(s) move closer to the rotor. Close enough that when the brake lever is pulled the pads will clamp the rotor with enough force to stop the bike, but not so close that the pads rub on the rotor when the brake lever is released. Hydraulic disc brake have no such adjustment and rely on the hydraulic fluid to keep the correct pad to rotor spacing.

Hydraulic disc brakes will have a hydraulic line attached directly to the brake while a cable actuate brake will have a short section of braided steel cable attached to the brake.

p1015539

p1015538

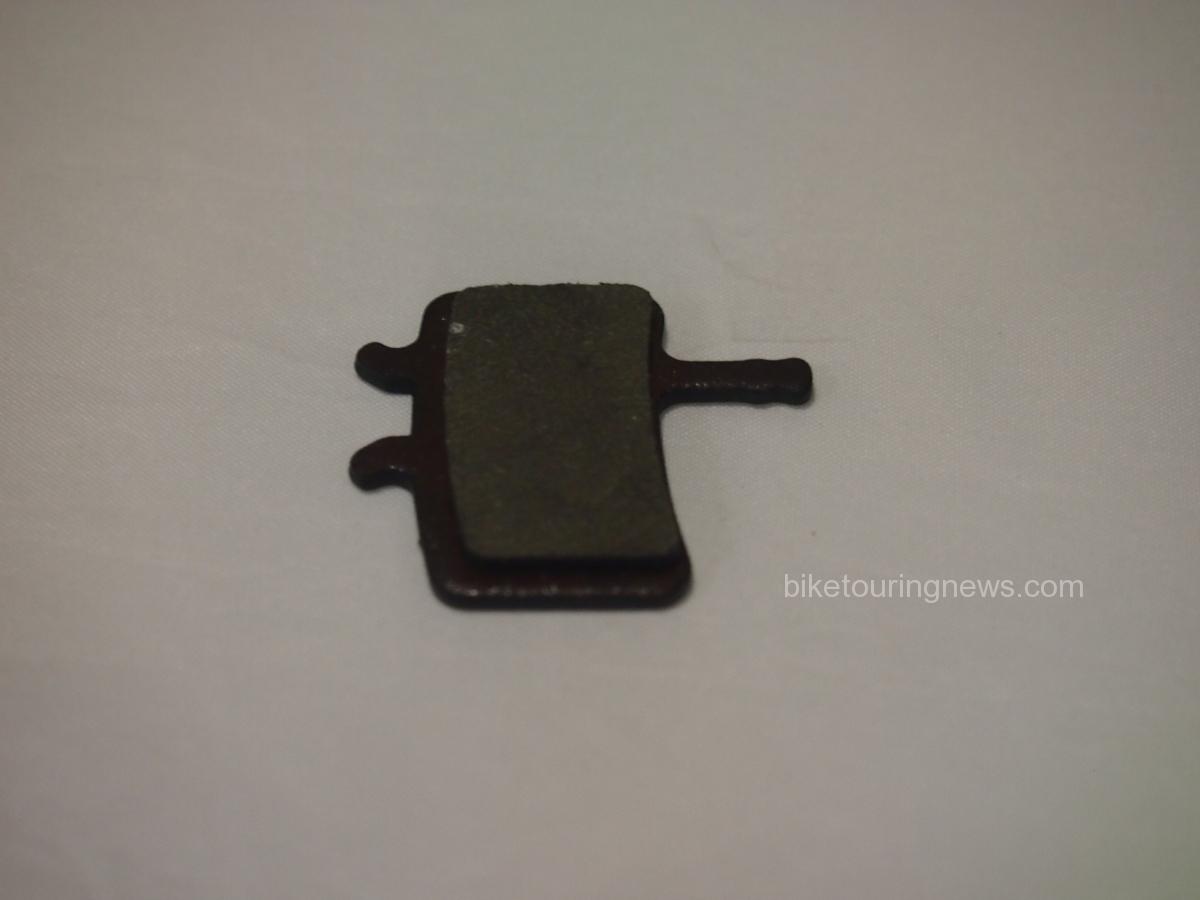
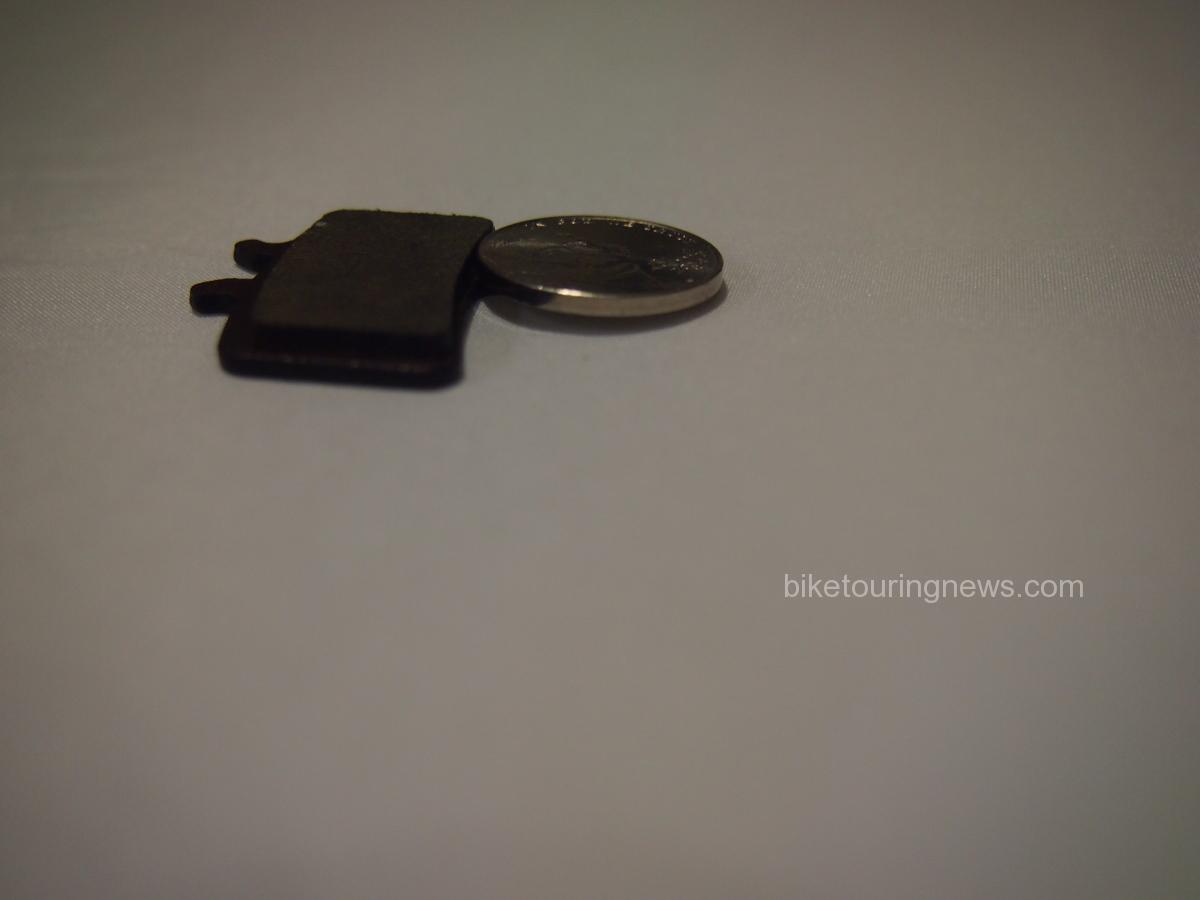
A thin block of braking compound is bonded to a steel or aluminum backing plate to form the brake pad. A pair of brake pads with a spring sandwiched between them are inserted into the brake caliper and held in place by the spring’s tension and/or with a bolt or a cotter pin. The spring also works to keep the pads separated and away from the rotor when not braking. The compound on a new brake pad is about as thick as a nickel. When, by visual inspection, the compound is as thick as a dime or less it is time to replace the pads.

BB7
An Avid BB7 brake pad
nickel thick
The braking compound on a new pad is about the thickness of a nickel.

By standing in front of the bike and sighting along the plane of the brake rotor where the rotor passes through the brake pads the thickness of the remaining brake compound can be seen, usually without removing the wheel. The rear pads can be checked the same way by sighting from the back of the bike. If it’s difficult to see, the wheel may need to be removed for easier access. Replacing disc brake pads is not difficult but it can be a little fiddly getting everything in the right place and adjusted. Every model or make of brake will have a slightly different process for changing the pads but instructions can be easily found on the manufacturer’s website.

view of disc brake rotor
This is the caliper of an Avid BB7 cable disc brake

Brakes are sort of important on a touring bike; being able to stop or slow down is good. This is one of those things we recommend people know how to deal with. Maybe not so much on an inn to inn tour or a cross country, credit card tour, but definitely for someone who will be out for weeks or months without the luxury of a decent bike shop or mechanic. Disc brake pads are small and light too so it’s easy to carry spares.

Categories
Bikepacking Planning Resources Saddlebags Touring Bike Accessories

6 Tips for Successful #BikeFishing!

Except on the most rugged of trails or in Wilderness areas where mechanized transport is not allowed, a bicycle is the ideal vehicle to transport you and your gear to your favorite fishing locations, especially if you’d rather escape from the crowds!  The hassle of finding a suitable place to park a truck on narrow, rugged roads allows the pedal-powered angler to access spots that motorized fisherfolk often overlook.  They’re too busy looking for a turnout big enough for their massive pickup!  Many streams have singletrack trails running alongside and there are countless lakes and ponds accessible only by bike or on foot.  If you prefer solitude to fishing conditions resembling the lunch line at Burger King, bikefishing is for you.

p1190682
It almost doesn’t matter if you’re catching fish when you’re in the middle of a scene like this.

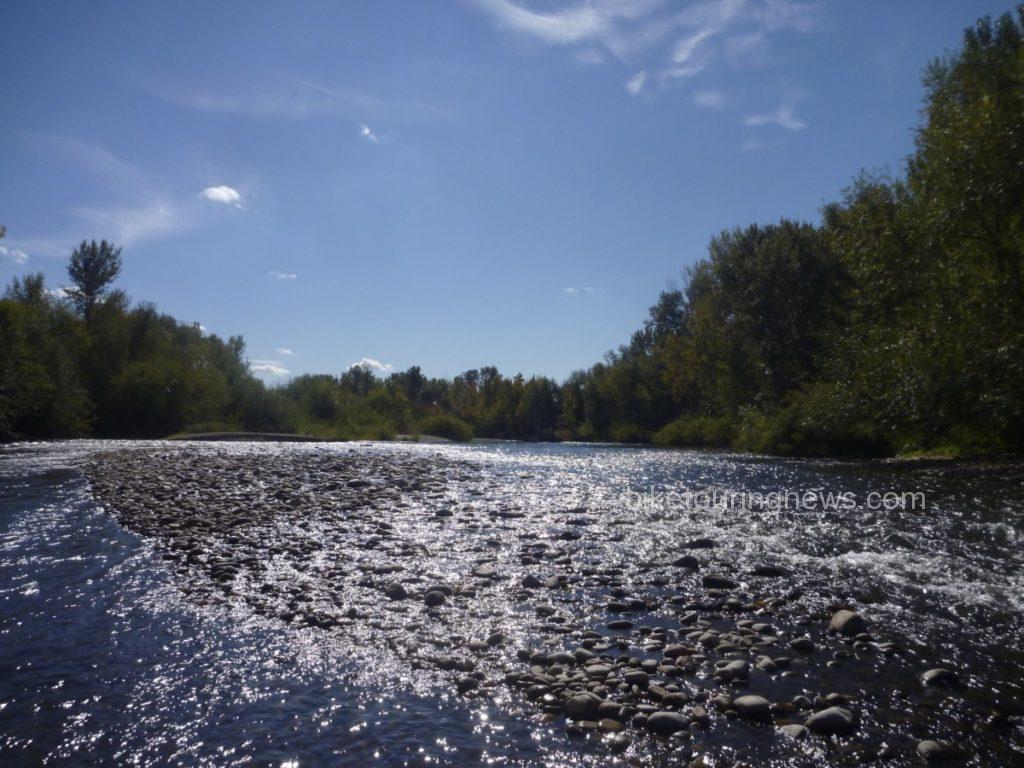
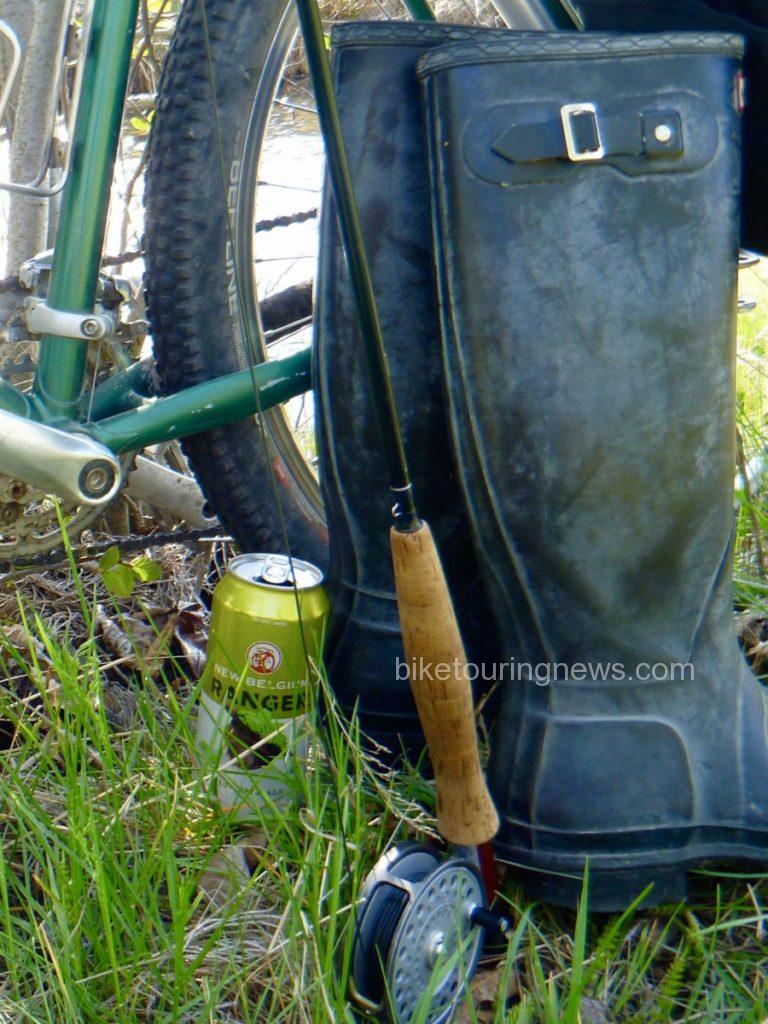
For me, fishing and bike riding have always gone hand-in-hand.  In fact, I was first motivated to pick up a fly rod by an experience I had on a bikepacking trip soon after moving to the Gem State.  I was pedaling my loaded bike on a backcountry dirt road paralleling one of central Idaho’s sparkling freestone streams.  Trout were easy to spy as I gazed down from road level into the riffles below.  Why wasn’t I down there in that beautiful river catching those fish!?  Since then, I’ve spent countless hours searching for fish in big rivers, small streams, alpine lakes and urban reservoirs by bicycle, on foot and occasionally with the aid of motor vehicles.  In this post, I’ll share some helpful tips from my experience to help you get out and fish by bicycle!  Feel free to chime in with your own thoughts and experiences in the comments below.

19042469174_33274fb769_o
The three B’s of fly fishing.

1:  Do your Homework! 

Plan ahead and prepare!  The amount of local knowledge and useful information accessible via the internet is a potent weapon in your arsenal.  Check fishing and weather reports so you can choose appropriate tackle, clothing and other gear, then leave the rest at home.  The USGS monitors water conditions for countless fisheries across the country.  Water temperature, level and flow are all useful pieces of information.  Local fish and game departments provide a wealth of information about fish stocking and species to expect in a particular piece of water.  Many fishing shops and outfitters post regularly-updated fishing reports online.  Stop into a local outfitter or fishing shop if you’re traveling far afield.  Good research and local knowledge may make the difference between catching one fish after another or getting skunked.

p1180704
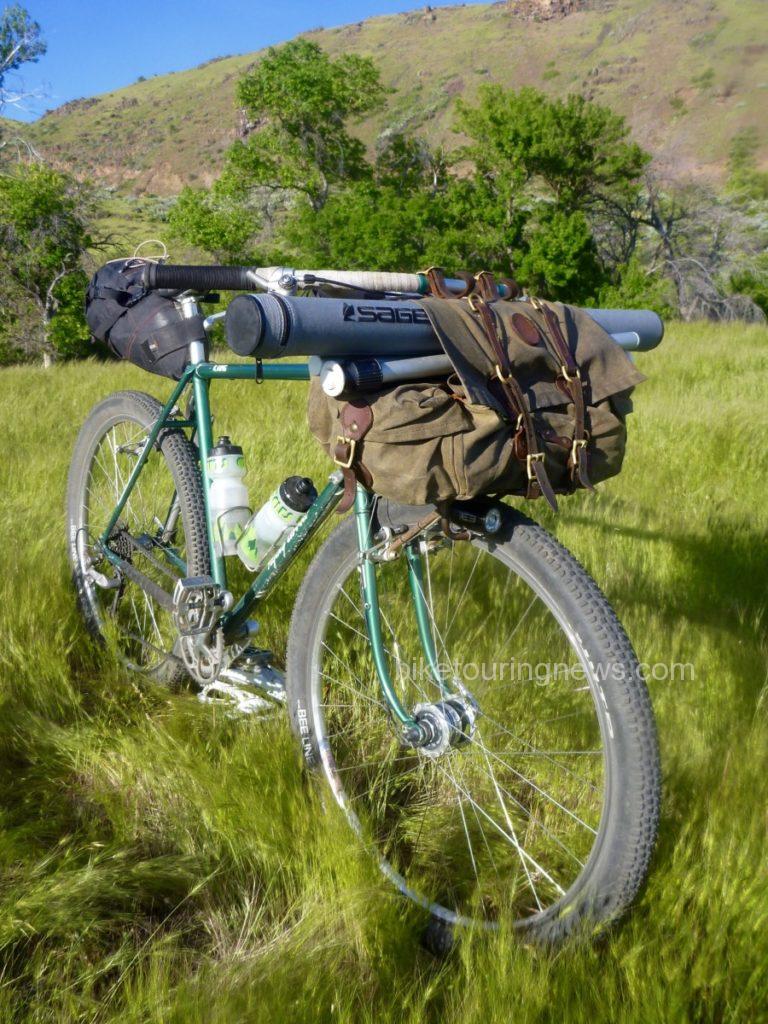
The author’s rig packed to fish a backcountry pond, complete with cheap inflatable boat!

2: Don’t Throw a Rod!

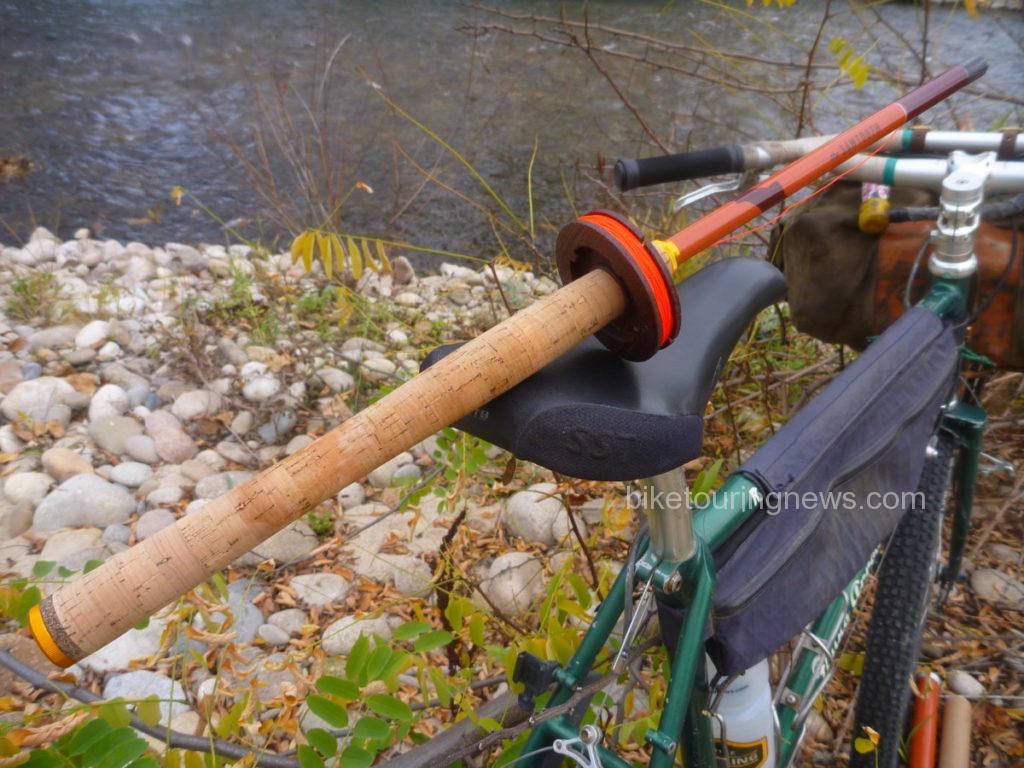
Fishing rods can be challenging items to carry by bike, even when broken down and stored in a tube.  Bags with a flap – like Ostrich’s S-2 Saddlebag or Frost River’s Gunflint Trail (see photo above) and Caribou Trail work great.  Alternatively, you can use toestraps or Surly’s Junk Straps to lash the tube to the deck of a rack.  I would never recommend riding your bike with a fully-assembled rod.  You’re just begging for a potentially expensive accident.  It is also easy to strap a rod tube to many backpacks.  This carrying method works great if you’ll need to do a good deal of walking, hiking or scrambling to access your fishing location.  Otherwise, I prefer to ditch the backpack and let the bike carry the load.

p1190133
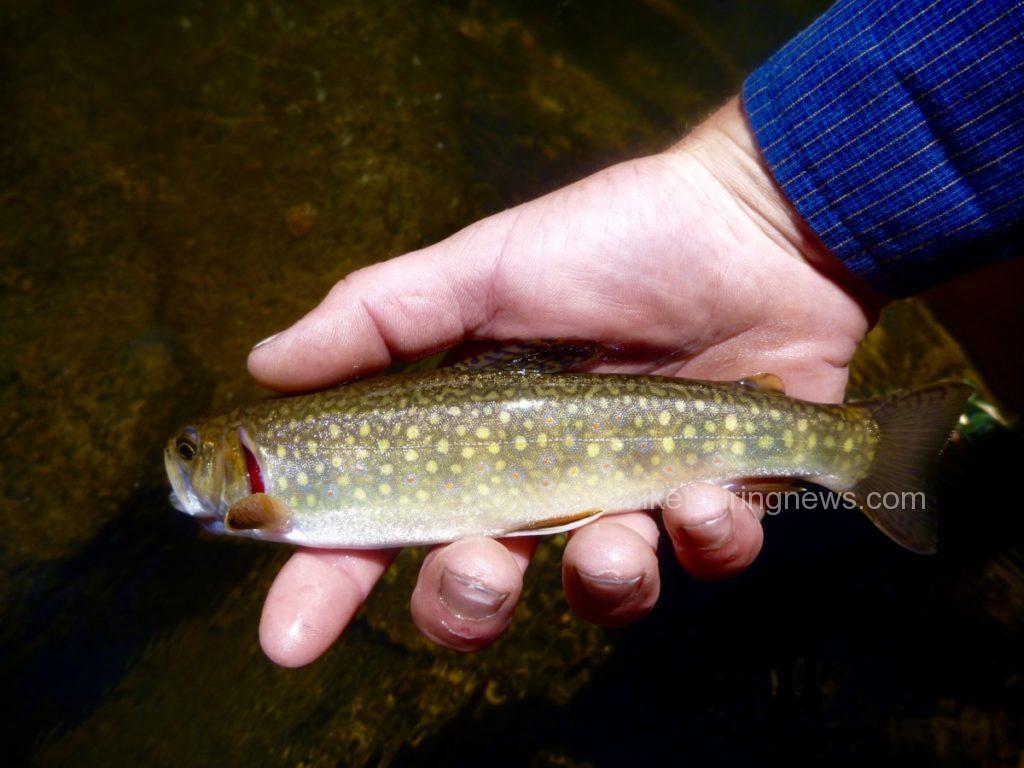
Brook trout caught from a hidden pool where few anglers venture.

3: Streamline your Setup! 

Do you really need multiple rods, reels, lines, a vest packed with gadgets and fly boxes with every imaginable imitation to catch fish?  Simplify, simplify.  You can’t just chuck your entire collection of outdoor gear in the back of the Subaru!  Space and weight are key considerations when fishing by bike.  While unnecessary gear will weigh you down and clutter your experience, you don’t want to leave critical equipment at home.  Tenkara rods may offer the ultimate in a simple fishing outfit.  With no reel and a featherweight telescopic rod that collapses into its 20″ handle, these fishing outfits are ideal equipment for the adventurous angler.

Tenkara: ultimate simplicity and packability!

4: Wade Wisely (or not at all)!

Waders and wading boots are the bulkiest, heaviest and most cumbersome pieces of gear in most anglers’ closets.  Leave them at home unless you really need them.  Fishing from the bank is a great option and may even be preferable.  The long reach afforded by Tenkara rods is a big advantage in this situation.  If you choose to wade in warm conditions, wet wading can be a real joy and big part of the fun.  Sturdy sandals, Crocs or water shoes work fine for footwear.  Even on the hottest days, neoprene socks or booties help you fish longer by keeping your feet warm and preventing irritating debris from getting next to your skin.  When the mercury dips, you’ll definitely want to stay dry.  Fish from the banks, wear rubber boots or consider bringing those waders along.  Wear heat-retaining layers to stay warm in the chilly water.  You don’t have a heated vehicle to retreat to if you get chilled, so don’t forget to layer up and bring spare dry, insulating layers in case you take an unexpected dunking!

p1190680
You too can go fishing with the Bike Hermit!

5: Use a Shuttle (When Appropriate)!

While pedaling from home on a bike loaded with everything you need for a day, week or month of human-powered travel and fishing adventure sounds like a great idea, it isn’t always practical or possible.  If you have access to a vehicle, take advantage!  Drive out with your bike and gear, find a place to park or camp and strike out on the bike from there.  Though perhaps not as idealistically appealing, this approach can deliver the best of both worlds.  Who doesn’t like to return to a well-appointed campsite with a dry change of clothes, fully-stocked cooler and comfortable chair after a long day on the river?  If the fishing – not the riding – is your main focus this may be the ideal approach.

p1190240
Finding solitude on a hidden creek very close to – but so far away from – the heavily-fished waters of Rocky Mountain National Park.

6: Be Flexible!

Fishing is unpredictable, so don’t get disappointed if you don’t find immediate success.  Like the old bumper sticker says, “a bad day of fishing is still better than a good day at work!”  Approach each situation with an open mind and don’t be afraid to try new, different or unorthodox techniques.  The bike also gives you practically unlimited access to water far off the beaten track, so explore those side streams, tributaries and hidden pools.  Small fish often represent big success!

I hope you’ll find these tips helpful and get out on your bike for a day of fishing soon!  Did I forget anything?  Share your #bikefishing ideas and experiences in the comments section below.  Thanks for reading!  Now get away from that screen and #getoutandfish!

Categories
Advocacy/Awareness Bike Touring Tips

Braving the Elements – biking in wet conditions

Don't forget to smile!
Don’t forget to smile!

Much laughter was exchanged on a recent S24O as we watched the clouds roll in and the rain begin to fall and one of our friends said “but the forecast said no rain until late tomorrow”.  The smug ones in the group put on our jackets, the others just rode faster :).  We’ve all been guilty of thinking off thinking; “nah, I don’t need (your missing item here)”.

In all seriousness, I write this as the days grow shorter and the weather starts to turn so I thought I’d create a check list of a few tips, must haves and some quick substitutes.

It’s raining – SLOW DOWN – BE AWARE – PAY ATTENTION

  1. Brake early and slowly. If the temperature is dropping, chances are small particle of ice are forming – ever slipped on black ice? It isn’t fun. Rim brakes will be contacting with wet rims, taking longer to stop.  Disc brakes might not be as affected but be prepared just the same.
  2. Turn on your lights – if you don’t have lights on your bike, you shouldn’t be riding a bike (we don’t claim to be neutral on this one)  Be visible. It’s grey and you will be less visible to motorists. The brighter you are the better.
  3. Pay attention to the road – puddles can hide metal grates and submerged plant debris plus you can’t always tell how deep they are or if a pothole lurks beneath.  Piles of wet leaves can be like hitting a patch of ice.  Sliding off a wet man hole cover or a slick railroad track makes for a hard landing. Don’t hug the curb, take the lane and go around the debris collecting in the gutter.
  4. Be extra alert.  Even if you are in Idaho, with it’s unique “Idaho stop” laws, stop at the stop sign and the red light, make eye contact with drivers.  As much as you want to, don’t tuck you chin down into the big hood you just pulled over your helmet – keep looking around.
  5. Again, slow down so if something unexpected pops up you can react.

Gear Up

  1.  Fenders – We are year round fender people and think touring bikes and commuting bikes without fenders just look naked.  Fenders not only keep your rear end and feet dry, they protect your bike from grit and grime. Investing in a solid pair makes a huge difference.  Plus it gives you another place for a tail light – sweet!
  • Not much comes to mind as a substitute for fenders. If you have racks, placing a piece of card board on the top of the rack will help and then put some plastic bags on your feet before you put them in your shoes.

2.  A decent rain jacket – buy once, cry once.  Invest in a breathable jacket that covers your tush. Zippered vents or zip off arms are awesome too.  Then take it with you, even if the weather forecast doesn’t call for rain.

  • Rain jacket still in the closet? Stop somewhere and beg for a plastic garbage bag, punch some holes for your arms and head and while you at it, get two small bags for your feet. If you are lucky stop at the dollar store and get a cheap poncho – you’ll be flapping but hopefully will stave off hypothermia.

3.  Waterproof Pants – There are fancy and not so fancy rain pants.  Some folks use the same pant they have for backpacking and carry a pant leg strap to keep them from catching the chain rings.  Make sure they fit well over your bike shorts or street clothes and fit under your rain jacket.  A pair with zippers and hook and loop closures on the bottom are great, making it easier to take on and off without having to remove your shoes.

  • Years ago we didn’t own rain pants but instead took some rain chaps we must of had from backpacking.  We did a week long trip and it poured every single day… Let’s say the chaps went into the trash before we even packed the bikes for home.  I haven’t seen it done but am sure one could get creative with garbage sacks.

4.  Booties or shoe covers – just make sure you get the size that fits over your shoe.  Road shoe covers don’t like MTB shoes.  Some shoe covers are just for rain, others are heavier for more warmth.

  • Okay, I have been known to slide my feet into plastic sacks on more than one occasion.  I also know someone who fashioned paper cups over the toes on a particularly cold and windy ride.

5.  Something on your head – Personally I (Sky King) like a helmet cover but the Bike Hermit likes a skull cap under his helmet.  We also know riders who have hoods on their riding rain jackets so the water doesn’t run down the neck. I still believe, a large chunk of heat loss is via your noggin so keep it covered when it’s cold and wet.

  • Something we never ride without is a bandanna, they can easily give light cover under a helmet in the rain.  As mentioned, a hood on the jacket – as long as you can still see.  The bike hermit actual owns a shower cap he uses as a saddle protection cover and a dollar store shower cap over your helmet or under you helmet would keep you head dry and be a good conversation starter.

6.  Full Fingered Gloves – Options galore here and  don’t rule out equestrian gloves – like bike gloves, they are meant to fit snug and tend to be less expensive than biking gloves.

  • Water proof gloves? We live in the high desert so ours tend to be insulated but not 100% water proof. Some of the “lobster” gloves which are sort of a cross between a glove and a mitten are extremely warm, the ones made of neoprene being almost too warm in many conditions.  Given all that, when it’s calling for wet and chilly, I pack two pairs of gloves.  Haven’t seen this yet but a dollar store pair of rubber gloves with a dollar store pair of one size fits all gloves would sure be toasty! (I may have to invest in that as my back up set).  In a real pinch take that trusty bandanna and split it in two and fashion some coverage – better than a poke in the eye with a sharp stick.

7.  Chemical foot and hand warmers – we buy these by the case.  Actually we just buy the foot ones as they also work for hands.  Come fall, a set lives in my front bag.

  • if it’s that cold a good flask of whiskey and a thermos of coffee seems like a plan to me.

8.  Reflective Bits –  anything to be more visible.  In today’s market there is reflective tape, reflective spoke covers, reflective vests – it’s cheap, just do it.

9. Something to wipe your glasses off with – now a defogging cloth is probably smart but again, having my bandanna I can dry my glasses, wipe my nose and cover my head.  I just have to remember which corner is for which purpose.

10.  Saddle covers – of course when you are riding your saddle is covered… We use ours for stops and for camping.  I love my Gilles Berthoud cover.  Brooks also makes one.

  • this is an easy thing to find a substitute for – we’ve all seen or used the plastic grocery bag.  The Bike Hermit’s shower cap is great and who hasn’t taken one of their panniers or dry bags and plopped it over their saddle at camp to keep off the rain, snow or dew.

So don’t let a little unsettled weather keep you from using the bike. Some of our most memorable rides have been riding home after dark in the rain on the multi-use-path. As someone who lives in Portland, OR might say when asked how they can ride in the rain ; “Just keep pedaling”