Categories
Bike Touring Tips Oregon Planning Resources

Mt.Hood or Bust: Part 1

A year ago, I began planning a bike trip. I planned to ride from Great Falls Montana to Bozeman Montana, but plans don’t always go as expected, “you’ll have this” as The Bike Hermit would say. So instead, on August 3rd, I found myself, on my bike, riding across Oregon towards the unincorporated community of Government Camp, 60 miles from Portland. After a stressful academic year learning to accept that sometimes plans change in ways that aren’t necessary appealing, a solo bike trip is just what I needed. I typed “Boise to Portland by bike” into google and I began working on my route. I figured I’d give myself a little over a week to get there. An annual reunion starting on the 11th of August gave me a timeline to stick with. As the departure date drew nearer, fire season was underway in Idaho and thick smoke loomed in the air. I had to changed plans yet again and rewrite my route to allow for a start in the mountains outside of Baker City Oregon, hoping to avoid not only the smoke but also the 90 degree temps expected over the next few days.

When planning, and re-planning, a route, you want to make sure you are honest about the number of miles you believe you can physically handle in a day. I picked 50, knowing that I could average 10 miles per hour and had previously accomplished 40 miles per day without dying. So with the number 50 in mind, I began looking for towns and/or campgrounds that could serve as starting and end points for my 8 days of travel. Realistically, I knew I could go 2 days without a resupply area, as long as I could track down water, I could carry all the food I would need and be perfectly happy without having to interact with other humans. I also tried to plan for the unforeseen circumstances that would prevent me from reaching my destination for the day, this meant making sure there were places to stop and spend the night in the middle of nowhere if necessary. My best advice for someone planning a trip like this, don’t expect everything to go smoothly, don’t expect to be at the destination that you’ve chosen on time, or even at all, learn to expect the unexpected.


Prep:

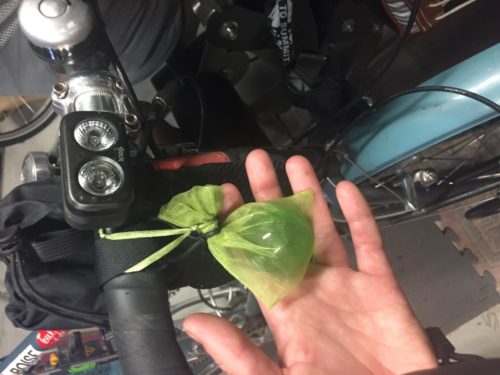
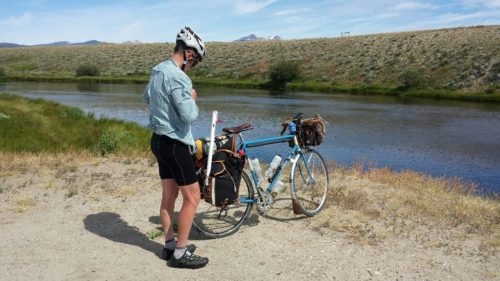
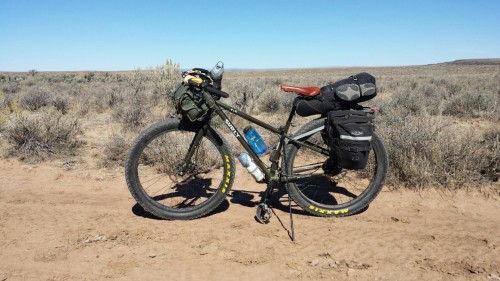
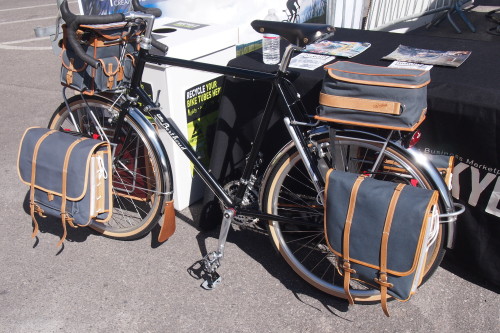
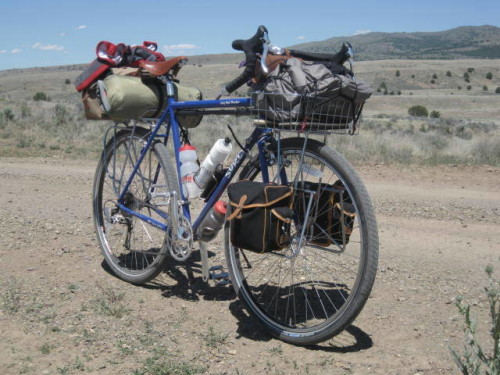
A lot goes into packing for a bike trip, The Bike Hermit was kind enough to share his trusted list of necessary items with me and I carefully weighed each one out and laid them on the floor of our garage. Considering that I have a Surly Long Haul Trucker with a 52cm frame, the standard Shimano XT-T780-L SGS rear derailleur, rear tubus logo evo rack, front tubus nova rack, Lone Peak panniers, and adding the weight of my packed items, my bike weighs exactly as it should. It weighs enough to carry everything I need for 8 days but not so much that I won’t be able to pedal it up steep mountain passes. So no, I didn’t weigh my gear or my bike and I honestly have no intention of doing so in the future. I made sure everything would fit into the two front Lone Peak panniers and two rear Gilles Berthoud panniers. I made sure I had enough food, enough water and enough items of clothing to be comfortable while riding and in camp. I did carry one extra item however, nothing necessary to be physically successful persay but essential to make my journey emotionally possible, a glass green sphere. Given to me by a close friend, it is meant to represent the spirit of a my friend Tom who passed away 11 years ago. Each year, a group of us meet to celebrate his life on the side of Mt.Hood and this bike ride would serve as a form of meditation as I reflected on the past year’s trials and tribulations as well as the 10+ years spent without my friend.


Day 1 Wednesday August 3rd: Wallowa-Whitman National Forest to Prairie City Oregon


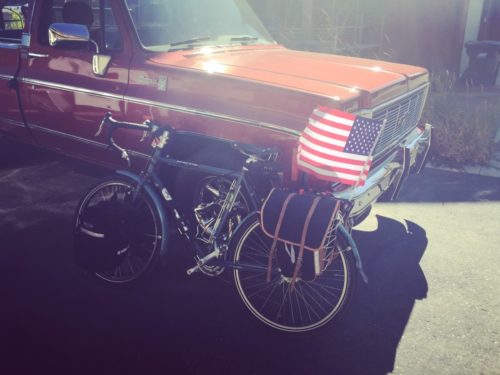
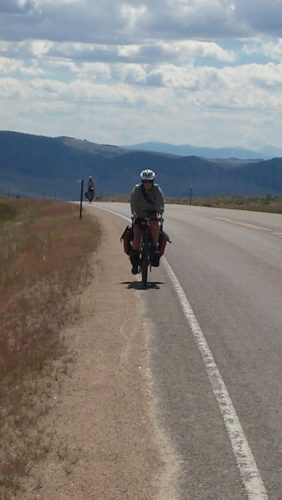
High in the mountains above Baker City Oregon, I had a frosty start. The only downside to traveling with a hennessy hammock as opposed to a tent is that trees are required for set up. The Wallowa-Whitman National Forest provides plenty of trees but in adequate spacing and the bend of the young saplings meant that no matter how hard I tried, I would end up sleeping on the ground. After instant coffee and instant oatmeal, I loaded up bertha for our first solo travel. The Bike Hermit had installed a large dollar store American flag to my rear rack the night before so sleeping bag, rear panniers and fly rod were carefully placed as to not disturb it’s placement. Photos were taken by proud parents and well wishes were given before I unceremoniously pedaled away, uphill, into a headwind.

I was giddy with excitement about being out on my own. It’s not as if I haven’t done many things on my own before, I’m almost 30 and have been living on my own since 19, but somehow this felt different, like suddenly I could eat all the cake and ice cream I wanted to, watch scary movies and stay up as late as I wanted. So what does that translate to into a world where your parents are bike touring legends. It means you can complain out loud to yourself as much as you want, it means you can stop whenever and wherever you feel like it and it means you don’t have to listen to The Bike Hermit say, “you’ll have this”. So off I went up the hill with a refreshing breeze nipping at my face. I stopped to take off some layers at the top of the first hill and in the distance I could see another cyclist pedaling uphill in my direction. I got so excited about waving and saying “Hi” that I almost biffed it in the deep gravel of the slow vehicle turn off.

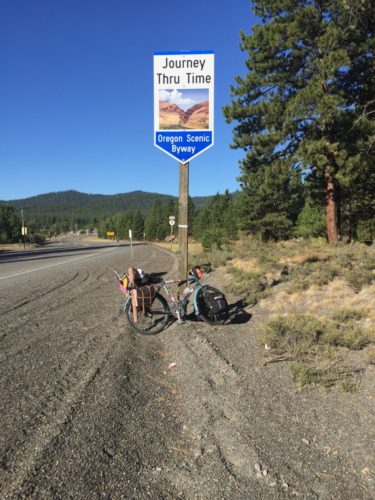
I was immediately impressed by the hospitality towards cyclists in this part of Oregon. Wide shoulders allowed me to feel comfortable on the road and nearly all of those who passed me slowed and/or gave me the lane, it was truly impressive. About 20 miles into my ride, ODOT was doing some work on highway 7. Several big trucks were hauling sand from their main site to somewhere up the road. About 200 feet from the turnoff to their main “dirt site” someone had constructed a pictograph of a water tap and a bicyclists, indicating that water was available and well as ample shade for taking a break. While I didn’t stop, I was happy to see this level of accommodation. Not long after this, I stopped to pee and while I was waiting for aforementioned large trucks to pass, one of them slowed to a near stop to inquire as to whether or not I was “broke down”. Again, this level of hospitality towards cyclists is just unreal and very much appreciated. I made it to my destination of Bates State Park around 12 noon, my expected arrival time for 38 miles of travel. While they had excellent hiker/biker spots, the generator running the sprinklers was enough to lead me to take over the day use pavilion. I made myself a biker fish taco, tuna on a tortilla, and pulled out my book to read. I was sound asleep within 30 seconds and found myself blinking awake nearly 2 hours later. It was still relatively cool and I felt reenergized. I took a look at my route map and decided I could push on a little further for the day. There were plenty of campsites and towns dotted along the route, making it possible for me to go anywhere from 10 to 40 more miles for the day. I recalled a mental note of The Bike Hermit explicitly telling me that “it’s all downhill from Bates to Dayville”. If you’ve read my previous blog, you’ll recall that the first rule of bike touring is that there is no such thing as “flat”, and relatively little “downhill”. So the first 10 miles found me climbing a mountain pass and cursing my father under my breath. I was relieved however when I reached the top and indeed, the rest of the way into Prairie City was literally all downhill.

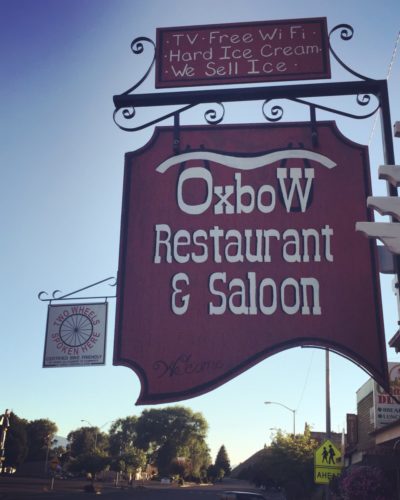
That little kid feeling took over again as I pulled into town, realizing that I could choose where to set up camp, where to eat dinner and eat all the ice cream that I wanted. While it wouldn’t normally be my first choice, I found a comfortable RV park on the edge of town. With the spaces having been built to accommodate for motor homes and fifth wheels, a cyclist will find themselves out of their element. The lack of trees forced me to use my rain fly as a tarp and prepare to sleep on the ground. There were a few trees across the creek and given the chance to do it over again, I probably would have asked the camp host if I could use them to anchor my hammock. The major perk of staying at an RV park is showers! Since it was my first day on bike, I wasn’t exactly at filthy hippie status yet but I decided that rinsing off the sunscreen and bug spray would probably allow me to sleep more soundly. The Bike Hermit had given me some solid advice about always carrying quarters for this exact purpose. I did not however have enough quarters to even get the water started. $1.75 for 10 minutes of shower time seemed excessive. Who needs a freaking 10 minute shower, especially when you are at an RV park, this isn’t the prom people, just rinse off and get it over with. I thought they should have some sort of system like the do-it-yourself car washes, you know put in a quarter for like 30 seconds of water, I could get behind that. After taking a PTA bath and successfully freaking out the family in the campsite next to me I rode into town to find food. Second rule of bike touring, always stop when there is food. When I ride into town, I usually put my trust in the other inhabitants of the camp and leave my panniers and camp gear set up at my site. I don’t travel with a bike lock as it would take up too much room, not to mention weight. Most businesses are okay with you pulling your bike inside, as long as there is room and you bat your eyelashes a few times. I took a Surly Junk strap with me and even though any half witted criminal could probably figure out how to unhook it, I wrapped it around my front wheel and frame and parked it outside, within viewing distance of my table. The Oxbow Restaurant offers one of the best mushroom swiss burgers I’ve enjoyed to date, which is saying something, trust me, and serves strong cocktails in mason. I always appreciate that hipster edge in the middle of nowhere oregon. After dinner, I  decided to explore the town of Prairie City. It didn’t take long, as the town consists of one main block and not much else. I noticed that they sold single cans of tall boy PBR’s and so I made my purchase of one beverage and one ice cream sandwich before returning to camp. At some point during the 3 block ride, a wave of exhaustion hit me and I made the decision to get in my sleeping bag without opening the PBR.
IMG_3259

Ready to hit the road

IMG_3250

The spirit of Tom

IMG_3254

Fully Loaded

IMG_3272

Sumpter Junction

IMG_3289

Best restaurant in Prairie City
Categories
Bike Touring Tips Montana Our Trips

The Pioneer Scenic Byway

Day 1 was not exactly what I had expected. I knew it wouldn’t be easy but this was down right miserable. The first 18 miles to Jackson MT were painful to say the least.  A head wind, of at least 75 miles per hour (no it was probably like 10-15 but still), and it was all uphill. Gradual uphill at first and then there was Big Hole Pass. At 7,400 feet, I have never been so happy to reach the top of a mountain that I wasn’t about to ski down. The rest of the ride into Jackson was downhill and so my faith in bike touring was restored. Rose’s Cantina in Jackson makes a great chicken sandwich and it was comforting to know that the Bike Hermit likes to stop for food whenever possible. Our waitress promised that the next 20 miles to Wisdom MT were flat, we smiled politely, knowing that there is no such thing as a flat road in bike touring.

The last time I was in Wisdom, I was on a fishing trip about 5 years ago. I was with my boyfriend at the time and we were clueless about the remote ranching towns of Montana. We came in on a Sunday afternoon with nothing but the Antler bar open for business. We drew straws for who would be the one to walk into this wild west looking establishment to inquire about getting a Montana fishing license. I’m pretty sure he lost, even though I was the one who eventually sucked it up and went inside. The heavy wooden door creaked as I took a deep breath and slowly pushed it open. The chatter of the mostly middle-aged, male crowd silenced as they turned to look at this 20 something city chick who had just walked in. I managed to squeak out a few words, explaining that we were from Oregon and hoping to fish the Big Hole River that evening. All but one continued to stare at me as if I was from another planet. The man that did respond appeared to have been in some horrible combine accident, as evidence by the hook that replaced his right hand. He used this hook to elaborately describe the locations we might want to explore and where we could possibly get a license to do so. I’m not going to lie, I have no idea what he said, I spent the entire interaction telling myself not to stare.

Long story short, Wisdom is full of the kind of characters you will be telling your friends about for years. Not to mention the very delicious homestyle food of the Crossing Cafe.


We were greeted on day 2 by a layer of frost covering the Hennessy Hammocks, thus a slow start ensued as we had to wait for the sun to warm our numb appendages and dry things out before packing them back into panniers. The most important meal of the day consisted of fresh coffee, homemade bagel sandwiches and sticky buns from The Crossing. As the sun rose in the sky, a shift in weather patterns gave us a much appreciated tail wind for the next 40 miles to Wise River. The day was not without it’s faults however. Being a novice bike tourer on a new to me bike, I was still getting the hang of the fancy new equipment. As the distance grew between myself, the Bike Hermit and Sky King, I was starting to worry that day 2 would find me abandon on the side of HWY 43. A quick stop to shed layers revealed to me that I had neglected to remove my click stand brake straps, which had been causing unnecessary resistance and explained my sluggish start. Thanks to this discovery and the little push from mother nature, the first 20 miles flew by. We made our first fishing stop of the day, on the Big Hole River. While the wind made casting difficult, the Bike Hermit landed his first Arctic Grayling on his borrowed Tenkara fly rod. Lunch consisted of leftover sweet roll, government approved ham and cheese sandwiches and underripe avocado slices. Despite the bleak description, lunch on the road is one of the most rewarding meals you will eat. Had the time allowed, I would have liked to fish the Big Hole longer but we still had 20 miles to go before reaching the town of Wise River, not including an estimated 10 beyond that to find a place to camp. By this point in time, I knew the rule about stopping for food and knew that a cheeseburger was in my near future, this helped when the last 5 miles proved to be more uphill than I would have preferred. This is where I made another of my many mistakes, I ate too much. The aforementioned lunch was not cutting it and the mushroom swiss burger at the Big Hole Club was too tempting to pass up. Back on the saddle I was sluggish and an old ski injury in my right meniscus was flaring up to the point that I was almost in tears. As is customary at the end of the day when you’re tired and sore, it was uphill with a headwind into the national forest where we planned to camp. After some seat height adjustments made by the Bike Hermit and some audible grunting sounds, we made it into public lands and began scouting an area to call home for the night. Crossing over the Wise River, Sky King and the Bike Hermit made the collective decision to stop, sub240babe did not get the message. By the time I realized I was about to run into the back of Sky King’s bike, it was too late, I swerved and attempted to click out of my pedals. What followed was a graceful slow motion crash into her panniers and a sharp turn into the side rail which nearly pitched me over into the river 30 feet below and left me with a nasty bruise on my right wrist. This was when I cried. I cried not because it hurt, but because I was exhausted, I was dirty and I was so over riding my bike 40+ miles a day. We set up camp, the Bike Hermit dug out a Kettlehouse Double Haul IPA for me to drink and we spent the rest of the evening catching brook trout as the sun faded over the Pioneer Mountains.


Day 3

Recharged and ready for what promised to be an epic day of fishing and riding, we eagerly ate our steel cut oats, cleaned up camp and hit the road. The first 30 ish miles of the Pioneer Scenic Byway are picturesque. I mean this place is straight out of dreamland, that is if you dream about trout streams and riding your bike in Montana. The Bike Hermit took the first opportunity to pull over and fish, I had a hunch that it would only get better, and so I pedaled on. The Wise River widens as the highway takes you upstream and several small bends followed by deep pools allow for plenty of places for trout to take refuge, unless of course you’re armed with a Sage Vantage 5 wt and a few mayfly patterns. You could easily spend 3 days biking just this 30 mile stretch, stopping to fish whenever and wherever you felt like it. As the river dropped further to the west, we began our ascent. Yeah so that pass I mentioned on day 1, while it was a hell of a lot steeper, the pioneer mountain climb is literally never ending, or at least that’s what my legs were telling me. I chased visions of the polka dot jersey up into the sky until we reached the “top”. 1st rule of bike touring, the top is never the top, you can NEVER reach the top. So after coming to the top of a mini Mt.Everest, the scenic byway turns to rolling hills with marshes more suitable for moose than trout and I go back to my counting to 100 to keep from laying down in the grass and declaring “just leave me here”. At last, there was a descent, a sweet, steep, beautiful descent. The downhill takes you past Elkhorn Hot Springs and Maverick Mountain Ski Area, before opening up into farmland for our last 10 miles back to the cars. I use this time for reflection. I hold on and look up, thanking the stars above for allowing me to have this adventure, and I begin thinking about the 22 oz Stone Vertical IPA I have waiting for me in the cooler back at the car.           

Cresting Big Hole Pass - whew
Cresting Big Hole Pass – whew

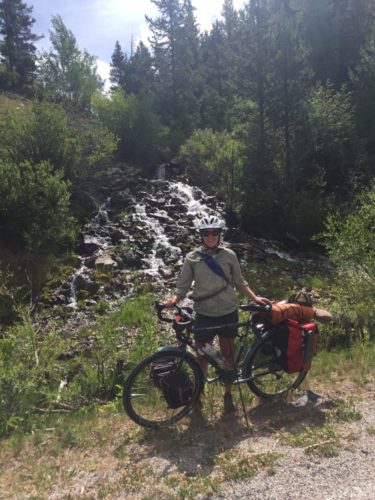
Ready to test the new rod. "bike helmet required"
Ready to test the new rod. “bike helmet required”

Saved by the river & a cool IPA

IMG_3045

A shot of The Wise River along the scenic bywayIMG_3036

“waterfall” photo op. Photo credit: Sky King

IMG_3015

VFW campground in Wisdom, MT. 10/10 would recommend.

Categories
Bike Touring Tips Montana Our Trips Tours and Rides

Stuff Bike Touring Chicks Say

In honor of my first real bike trip with Sky King and The Bike Hermit, I give you stuff bike touring chicks say…

Seriously, is this headwind for real? Is it always uphill? I hate bike touring. I should have trained more. That cheeseburger was a bad idea. Does that sign seriously say “chain up area”, sh*t. Pedal 1,2,3,4, pedal 1,2,3,4. Okay my legs aren’t working. My butt hurts. Do I have a flat? How much sugar is in these shot block things anyway? Was that guy cute? Do I look cute? Wow, it’s like so pretty out here. Oh crap, I’m in the middle of the road again. Oh crap, I almost went off the road again. I swear to god if the bike hermit says “you’ll have this in bike touring” one more time, i’m pushing him off his bike.

More to come about the actual trip, stay tuned!

xoxo

Sub24Obabe

Categories
Bike Touring Tips Oregon Our Trips

Crazy Guy on a Bike

Here’s a tip; go to Neil Gunton’s crazyguyonabike.com, “a free, independent website for hosting bicycle touring journals, forums and resources”, and read everything you could possibly want to know about bike touring. Our most recent journal is this one about riding the Old West Scenic Bikeway. I suppose everyone who enjoys reading these journals has a favorite writer. One of mine is Leo Woodland. If you go to the CGOAB site, you may get sidetracked from whatever else it was you were doing. You have been warned.

Categories
Bike Touring Tips

A Few Bike Touring Hacks

garbage bag bellows
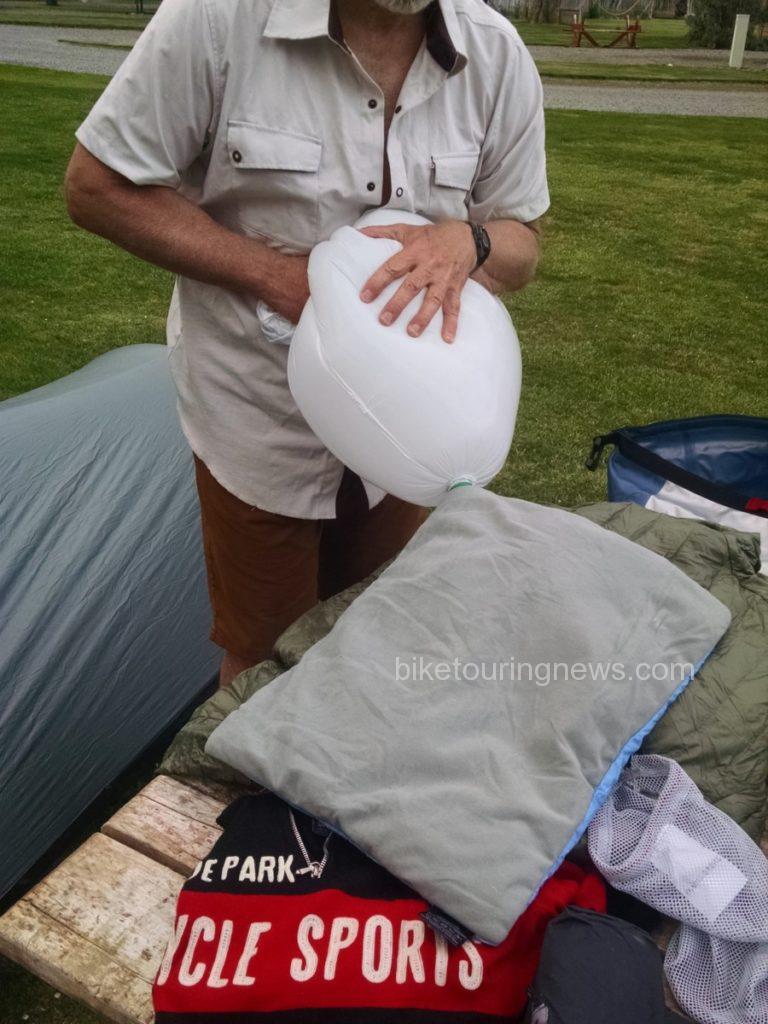
The DIY air mattress bellows pump: light, cheap, effective and recyclable

D.I.Y. Garbage Bag Bellows Air Pump
The outdoor gear maker Big Agnes makes a combination stuff sack/sleeping pad pump called the Pumphouse. It sells for $19.95 on their website. A quick Google search reveals several videos detailing how to make one out of a plastic garbage bag, an empty plastic bottle and a garden hose rubber washer. Conveniently, the outside diameter of the input valve on many back packing and bikepacking sleeping pads is 5/8″ or so; the same as the inside diameter of a garden hose washer. So the rubber washer will just fit snugly when slipped over the valve. Here’s how to make the bellows:
– The plastic bottle cap to be used needs to have a diameter of around 1″. Drill a hole through the center of the bottle cap just a little bit larger than 5/8″. (drilling this hole is easier with the cap still on the bottle).
– Cut the neck of the bottle off just below the cap and below the little drip ridge on the bottle. Use sandpaper to clean up all the rough edges.
– Cut off a small corner of the garbage sack to make a golf ball sized hole.
– Take the lid off the short section of the bottle neck and poke the corner of the garbage bag with the hole in it up through the neck. Fold an inch or so of the bag down around the threads and screw the cap back on. Now the cap with the hole in it should slip over the valve on the sleeping pad and the rubber washer will create a decently air-tight seal.
– Open up the top of the bag to trap air inside it and quickly fold and twist the top together to make a big balloon. Then squeeze the air out and into the sleeping pad.
Besides being quite a bit easier than blowing up your pad by mouth, this system has the added advantage of not introducing a bunch of moisture into the pad, which reduces the thermal insulation properties.

A Visual (and relative) Way to Gauge Tire Pressure
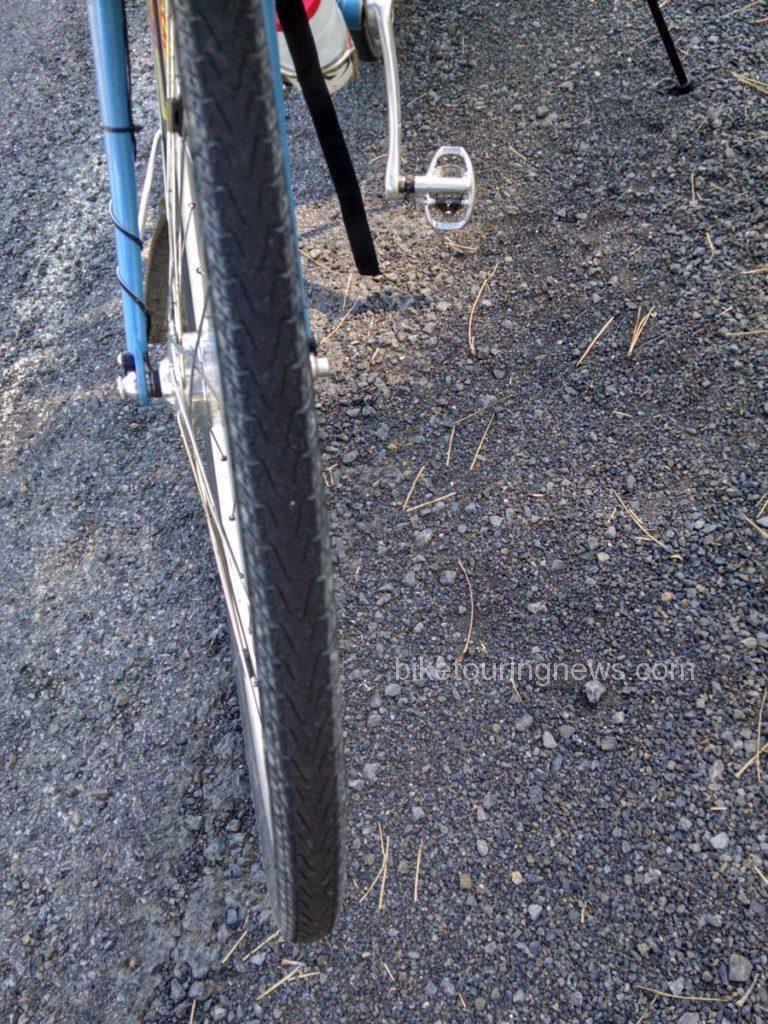
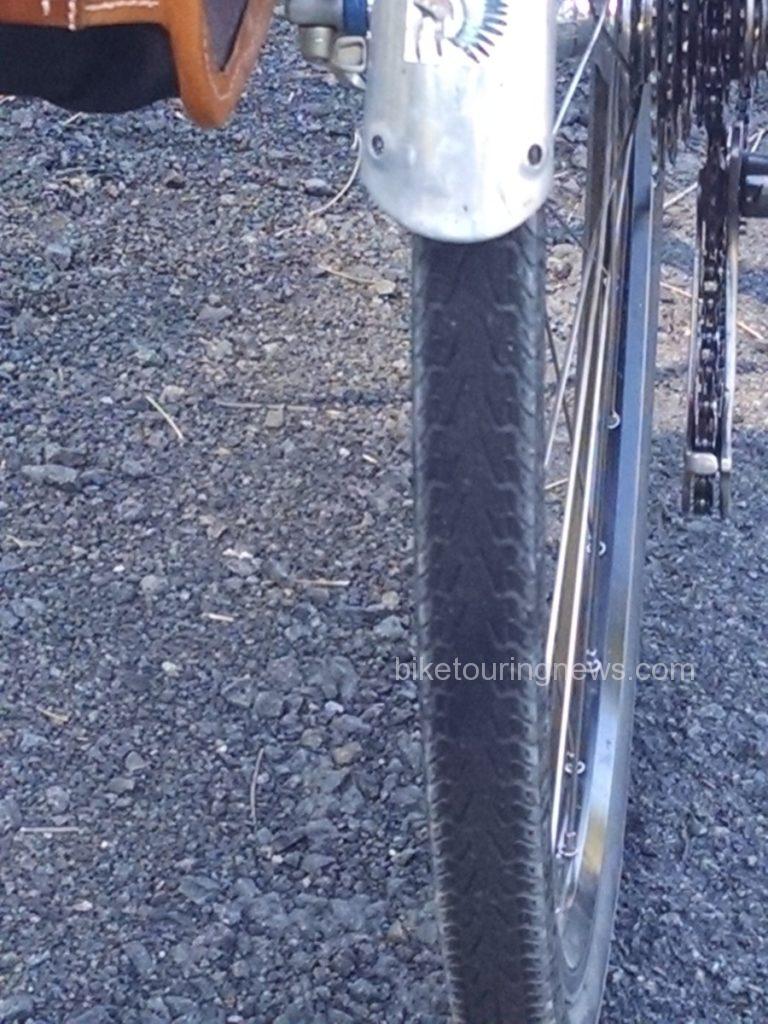
Our camp the previous night was in national forest about a mile down an unpaved road. After rolling on the asphalt for about an hour in the morning we took a break and I noticed that there was a black stripe around our tires, contrasted against the dust left on the casing and sidewalls of the tires. These stripes defined the width of the contact patch between the asphalt and the tires as the tire deformed under the weight of bike and rider. The stripe on the rear tire of my bike appeared to be a little bit wider than the stripe on the front tire. For handling and tire wear I prefer to have roughly the same amount of deformation and resultant tire contact patch width on both tires. On a loaded bike with more weight on the back tire, that tire will need more air. I put a few pumps into the rear tire to equalize things a bit.

tire wear
Front tire contact patch. You can see the black stripe of the asphalt against the dust from the gravel road on the sidewalls
tire wear considerations
The contact patch of the rear tire as indicated by the black stripe is a little bit wider than that on the front tire.

Riding a Loaded Bike on a Long Descent
At the top of our first summit G. asked if I had any tips for descending at speed on a loaded bike. The only one I could think of was to gain speed slowly to see how the bike was going to handle. If there was any shimmy in the front wheel I suggested he move his hands to different positions on the bars and/or to move his butt on the saddle to redistribute his weight. No gyrations were required on his part however because his Soma Saga touring bike was designed for this type of use and was solid and predictable at all speeds. At the bottom I asked if he had any insights about descending now that he was a pro. He did say he felt like he had more control when riding with his hands on the brake hoods (he uses drop bars). Riding with the hands on the hoods also makes it easy to reach the brake levers quickly in an emergency. Some people recommend this position because the rider is able to sit up higher and create a little bit of a sail effect with the upper body to help scrub speed. And speaking of shimmy; if the bike feels unstable or squirrely at speed it could be a tire pressure issue. A few more PSI or a few less in the front or rear or both tires might cure it. On really long descents in high temperatures rim brakes can heat the wheel rims to the point where the tires will overheat and a blowout could result. This would be bad, but there is not much to be done except to be aware of the possibility and take it easy.

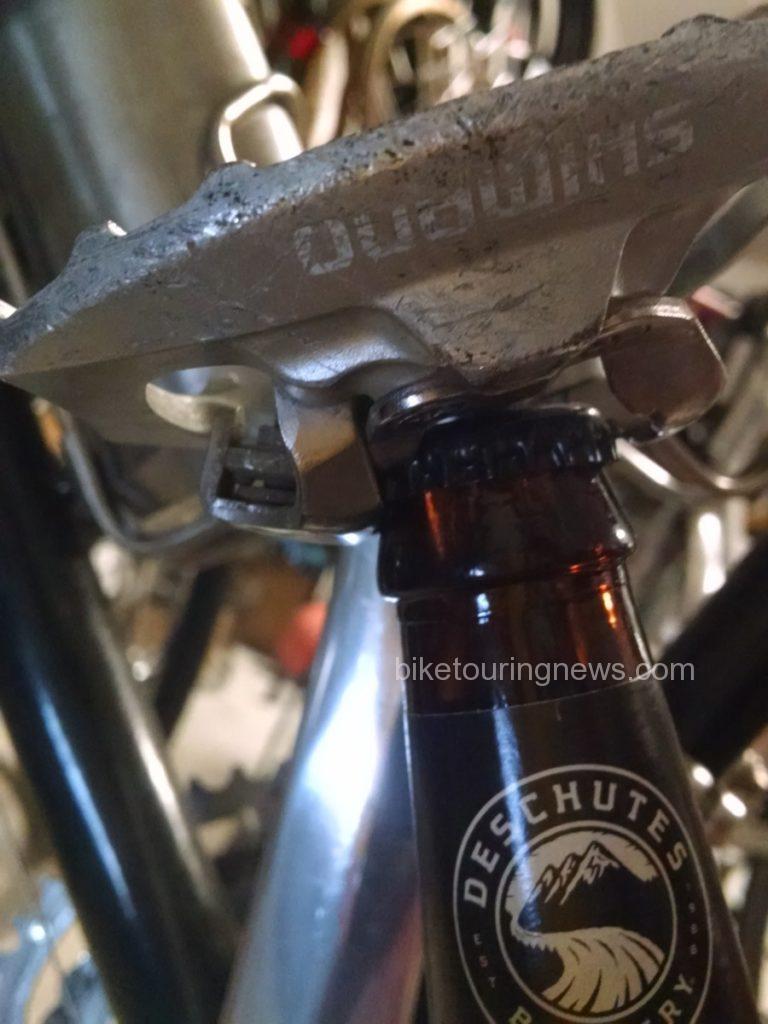
SPD Bottle Opener

pedal as bottle opener

Thanks for reading. Add your own bike touring hacks in the comments.

Categories
Hermit's Workshop The Touring Bicycle Wheel

When To Replace a Worn Wheel Rim

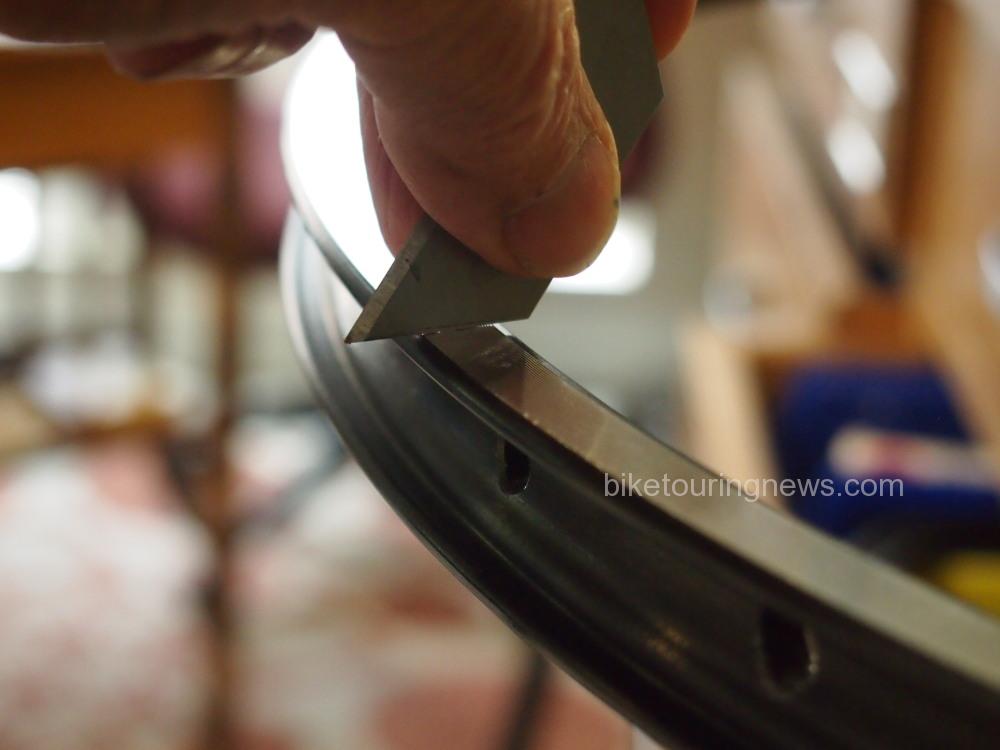
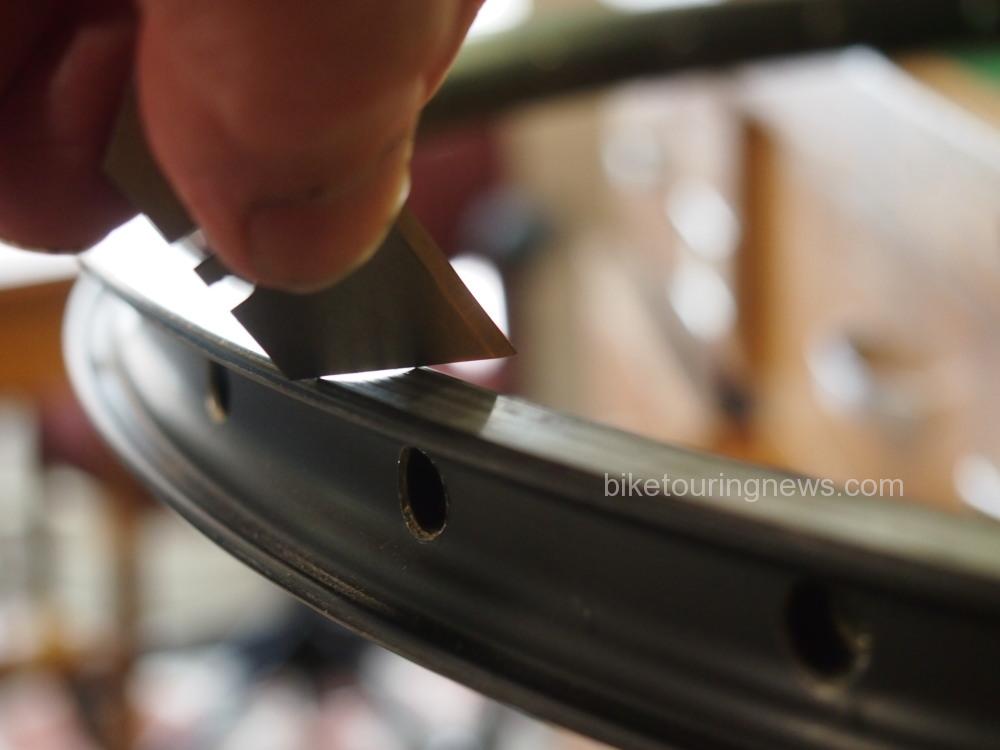
It’s early morning in Moab, Utah when the still air is violated by the sound of a small explosion and the clang of scraping metal. My friend’s rear wheel has come apart and is a twisted jumble of aluminum rim, steel spokes and rubber. For the first time, I realize that soft rubber brake pads can wear through metal. Sand and other grit in a slurry with oil and who knows what other chemicals get embedded in the pads and act like a grinding disc to wear away at the relatively soft aluminum braking surface of the rim. Once the braking surface becomes too thin to provide structure to the rim, the forces of the tire bead can blow it apart. Here is a visual example of what I am talking about.

The braking surface on a new rim is flat, if not a little concave.

A worn rim braking surface.

The concavity of the worn rim is visually apparent, but it can also be felt by the fingertips. Lots of times this is just a judgment call. Some rim makers machine a groove in the circumference of the rim’s braking surface and others create three or four small dots or indented holes at intervals around the rim. Once these indicators are no longer visible it is time to replace the rim.

Check your rim brake bicycle’s rims. If the braking surface feels like it has a little concavity to it, replace it before you go on the next long tour.

Categories
Bike Touring Tips Water Bottle Cages

The Watercarriers

Not to be confused with The Stars and The Watercarriers.
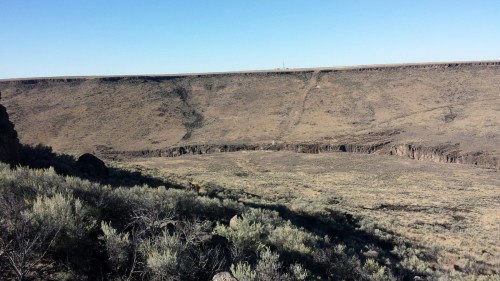
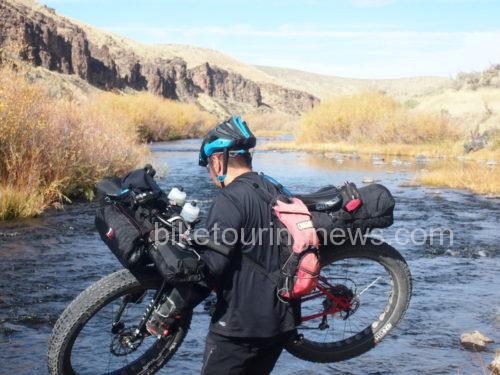
One particular overnight desert bikepacking trip in the desert of southern Idaho had the potential for a little extra discomfort. We had planned on being able to get water out of the river at the end of the ride, but the river gurgled along several hundred feet below us at the bottom of the vertical gap it is cutting through this volcanic plateau.

That's an 18" gas pipeline crossing the ditch down there and the river is maybe 450' below the line.
That’s an 18″ gas pipeline crossing the ditch down there and the river is maybe 450′ below the line.

We took a quick inventory of water we had on board and decided we wouldn’t die but that we would need to be careful. Ultimately we found a way down to the water by hiking a couple miles downstream. I was prompted to write this post about some ways to carry water on the bike.
-First is the good old hydration pack- 70 or 100 ounces (2 or 3 liters) carried on the rider’s back. Some people complain about the discomfort of carrying a back pack in hot weather, but to me it is worth it. Especially since you can stuff other things into the pack besides the water bladder.
-Standard water bottles fit in standard bottle cages which bolt to the bike carry 22 or 24 ounces (around .7 liter each) If the forks on the bike have bottle bosses you can carry one or two more bottles there. You can add additional mounts for standard cages, either on the fork or one of the bicycle main tubes, by using the Elite VIP Bottlecage Clips.
-The Revelate Designs Mountain Feedbag works well for carrying too and the new designs holds a 32 ounce nalgene.

Revelate Mt. Feedbags
Wendell shows off his crossing skills and a great shot of his Revelate Mt. Feedbags


-Topeak make the Modula bottle cage which mounts to the two standard bolt holes and is designed to carry the large plastic 1 to 1.5 liter bottles sold at most convenience stores.
Velo Orange Mojave bottle cage with 32 ounce (.95 liter) Nalgene bottle or 40 ounce (1.2 liter) Klean Kanteen. These bolt onto the standard two bolt mounts on most bikes or, even better, with three bolts using the mounts now found on some bikepacking bike forks and frames. Combine one of the VIP Bottlecage Clips with the two bosses on the bike for extra security.

Bikepacking bike
Sky King rolls with the VO Mojave cage and 32oz. Nalgene on the down tube.

-In locales without services but with access to surface water you will need a water filter or purifier. We use the Camelbak All Clear water bottle which incorporates an ultraviolet light in the cap which and will kill all the bugs in .75 liters of water (25 ounces) in 60 seconds. A mechanical filter like the Platypus GravityWorks is potentially a little bit faster.
-If there will be no access to surface water and no services then carry an additional 4 or 6 liters (135 or 203 ounces) in the MSR Dromedary bladder.

Every trip and every day will have different requirements for how much water needs to be carried. These are just a few ideas to think about. Let me know what I missed in the comments.

Like This Post? Sign up now and get our series of helpful tips emails- plus new subscribers get a 10% coupon for use in the Bike Touring News Store!

* indicates required


Categories
Bike Touring Equipment Bike Touring Tips

Eight Uses For The Surly Junk Strap

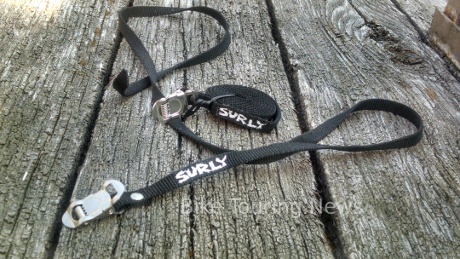
junk strapThe Surly Junk Strap is essentially a super long (48″) nylon toe clip strap. Toe clip straps are those straps which wrap around the rear edge of a pedal, through the eye of the toe clip and are cinched down to hold the rider’s foot in place. Not too many people use this type of pedal system anymore but the design made it easy to adjust the straps while riding and it was very secure. The same simplicity and strength makes these almost indispensable for bike touring and bikepacking.

Categories
Bike Touring Tips Touring Bicycles

How to Load a Touring Bike.

I have a strong memory of my first overnighter on “Bernard” my Gilles Berthoud Adventure Touring Bike.  I loaded him up the same way I had always loaded “Sky” my Rivendell Bleriot.  I pushed off and on the first small down hill immediately noticed a pronounced shimmy in the front wheel. WTH?,  I got off checked to see that all was attached correctly, it was.  I fought the shimmy the entire day (I should note that the Bike Hermit was not on this ride with me.) The return the next day was a bit better but not much.  I was crushed, thinking I had made a big mistake in buying this bike.  I expressed my dismay to the Bike Hermit and his first words – “Stacy this bike has a low trail geometry, you can’t pack it the same way as you did your Rivendell”…  “Oh”, I replied, “I didn’t know there was a difference between touring bikes.”

[Bike Hermit: “trail” refers to how far the center of the tire footprint on the road surface falls behind the imaginary point where the steering axis hits the road and it is a function of head tube angle, fork rake and tire size.

Trail is the distance between the two lines where they hit the road.
]

20141219_131824_resized
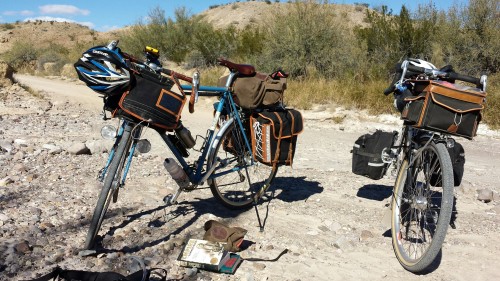
In this photo,the rear panniers on “Chief”, the A Homer Hilsen by Rivendell, sit much higher than my panniers on “Bernard”, the Gilles Berthoud. Typically, in our experience, a Rivendell bike does better with the weight on the back of the bike.

One thing I have learned in the last 15 months is that Bernard performs best with the load distributed between the front and the back.  He has these amazing custom Gilles Berthoud Racks that have low rails for panniers.  For short trips, I don’t really want to carry 4 panniers along with my front bag so getting the weight balanced can be a challenge.  On a short trip with a smaller load, I am better off with the weight being heavier in the front than the rear.  Attaching panniers to the low rider rack in the front and then strapping my sleeping bag on the rear rack makes for a much smoother ride.  Our recent trip to Texas I wasn’t really thinking and I had my lower rear rack but not my lower front rack so I had some challenges in getting my load balanced – I basically carried all of our food in my GB front rack bag. Then had the tent (sans poles) and my clothes in the rear panniers.  Next trip I am going to go ahead and bring 4 panniers, putting the smaller ones on the rear and the larger ones on the front.

OLYMPUS DIGITAL CAMERA
This photo of “Bernard” with a full set of panniers demonstrates how the low trail design is meant to be implemented.
atouringbike
Surly Long Haul Truckers and Surly Disc Truckers seem to be very forgiving when it comes to packing.

Obviously there are other design and construction details and considerations that affect how a bike handles when loaded. The type and design of racks used can affect handling too, as can the type and size and inflation pressure of tires. Most bikes billed as touring bikes should have the characteristics which will make them able to handle a load without becoming squirrely or unpredictable in handling. But every design will have its own unique nuances. Keeping in mind that an unloaded touring bike with rider aboard will have more weight on the rear wheel adds heft to the theory of biasing the added weight to the front of the bike.

The bottom line is that their are many factors which contribute to how a bike handles when carrying a rider and a passive load. That awareness means that, with some trial and error, it should be possible to optimize the load carrying setup on almost any bike.

Categories
Bike Touring Equipment Bike Touring Tips Idaho Tours and Rides

Lessons From the Trail: Doing it Better Next Time

We are always looking, hoping and striving for the best possible experience when we head out on a bike trip. Our free time to dedicate to these journeys is limited and valuable and we should do everything in our power to make the most of the opportunity. Many components in this alchemical equation are beyond our control. Weather, terrain, wild animals and innumerable other factors will all have a say in what we have to cope with out on the trail. We can try to plan and prepare for some of these unknowns but they are beyond our influence.

However, there are also key ingredients in an enjoyable bike trip that are wholly up to us. Our planning, preparation and packing all have the potential to make or break a trip. In hopes of improving our experience the next time, we look back upon returning to see what lessons can be learned. How did your planning, preparation and packing work out?  What worked and what didn’t?  What would you do differently next time? As you unpack, you have the opportunity to take a second look and assess your approach. Is there anything buried in the bottom of your bags that you had forgotten was there? Do you still have two pounds of food left over? By paying attention to these things during and after your trip, you’ll be able to learn from your mistakes and keep from repeating them in the future.

So, in hopes of offering some insight into this process, I’ll go through my unpacking and look back on the recent Smoke ‘n’ Fire 400. In doing so, I hope other new bikepackers and tourists will learn from my successes and failures so they can make their own mistakes rather than repeating mine! You may remember my Packing List and Planning posts on this blog. If you haven’t seen those I’d go back through them for the relevant background information.


Planning:

Overall, I’m pretty happy with my approach to the route. Given my lack of fitness and unfamiliarity with most of the terrain, I was well aware that any major setback could easily put me into a position where I would need an extra day to complete the route. So, I set out on Wednesday morning hoping to finish the ride before dark on Saturday but prepared to be out another night and finish on Sunday if needed. However, things went well out there and I was able to make it back to Boise’s Hyde Park neighborhood just before 7:00pm on Saturday. I was a bit disappointed to miss happy hour but the post-ride beer tasted just as sweet.

P1160142
Victory Beers in Boise!

My daily distance goals proved to be attainable, though perhaps more difficult to reach than I expected. I’ll also admit to underestimating the amount of time the tougher climbs would require and the physical toll they would take. When planning, it is easy to be overly optimistic and forget how grueling long climbs can be on a loaded bike and I fell into that trap. Because of my lack of respect for the climbs – especially the grind up to the Dollarhide summit – I fell short of my goal to reach Redfish Lake on the second night.  Looking back, I made the right call to stop and bed down rather than push on longer into the night. I made up the difference the next day over more level terrain and made it to Deadwood Reservoir on night 3 with daylight to spare.

P1150933
Dollarhide Summit

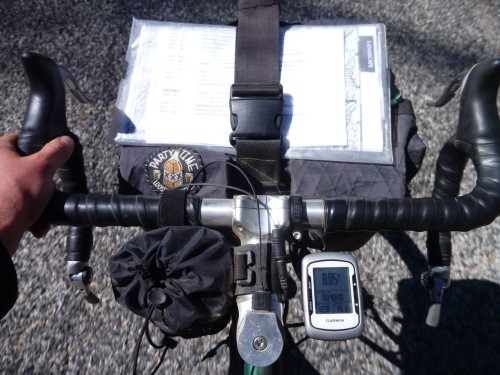
On a navigational side note, I did have some difficulties with my Garmin. I don’t know if other riders had similar experiences with their GPS equipment but my Edge 500 seemed to be struggling to communicate with its satellite and was very slow to update my position. Not a lot of satellites over Idaho, perhaps? I wasted a good deal of time standing still, waiting for it to re-find the route after going off-course. I was glad to have the Garmin but learned to keep the cue sheet handy to avoid missing turns. A handlebar bag with a map case is an ideal place to carry a map or cues and I’d like to experiment with different front carrying setups on future rides. Storing it under the strap on my handlebar bag works but is far from ideal.

P1160033
Cockpit Setup

Also, I was very happy with the Revelate Feed Bag and found it to be a perfect addition to my cockpit. The ease of access to my trail mix and other snacks was excellent and allowed me to keep a constant flow of food coming in. The outer mesh pockets also provided a perfect place to stuff energy bars, empty wrappers, my audio recorder and other small objects that I wanted to keep close at hand. The attachment was simple and secure, though the stabilizer strap that loops under the fork crown was just barely long enough for my bike. Riders on more modern mountain bikes with tall forks and short head tubes won’t have problems but folks with high handlebars and non-suspension corrected front ends may have to improvise an extension to the strap.


Preparation:

I was not in the best of shape coming into this event. Other than quick rips on the mountain bike up in the Boise foothills and riding to get around town, I haven’t been on the bike much since returning from my short trip on the Hot Springs route back in July. Given that less than three weeks intervened between my hearing of the event and taking the start on September 10, there really wasn’t time for training. Mostly, I just focused on sleeping well, getting quality food in me and drinking enough water. Given that I much prefer hoppy beverages to plain water, this can be a challenge! I was certainly well-rested and had the leftover base from my other long rides this summer to get through the Smoke ‘n’ Fire but suffered more than I would have liked. I made up for my lack of fitness with experience and a conservative approach to the event. I knew I couldn’t afford to take big risks.

P1150971
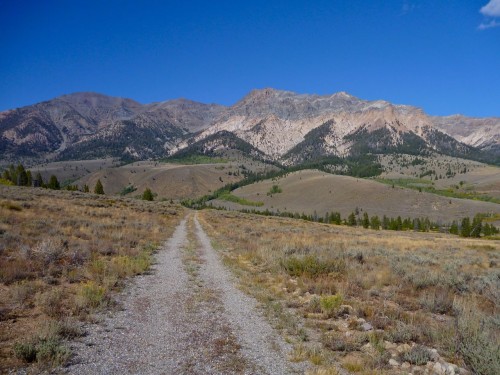
The Boulder Mountains seen from the Harriman Trail

Overall, I measured my efforts well, stayed within my limits and got through each day’s ride about as well as I could expect. I only had one cramp (while putting socks on in my bivy), consistently ate and digested well and only had a small handful of nagging aches and pains beyond the normal soreness and fatigue. I had some pain in my achilles tendons, usually a symptom of a too-high saddle. I dropped it 2-3mm on the second day and things improved a bit. I also had some minor saddle sores and chafing. This could also be attributed to the too-high saddle forcing me to rock my hips on the seat. This point illustrates the need to put in plenty of pre-trip miles on the bike you’ll be touring or bikepacking on. Had I been riding the RandoGnar and not my mountain bike for the weeks before the race I would have discovered the saddle issue beforehand and corrected it before it caused issues.

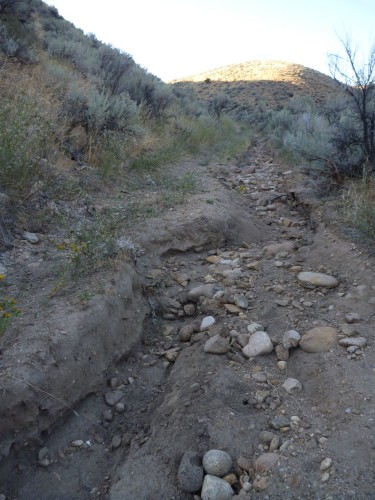
On a related bike-preparation note, this ride certainly pushed the limits of singletrack riding that I would knowingly undertake with my current handlebar configuration. I love all the hand and body positions that my long-reach, deep-drop handlebars offer on easier terrain but they place me at a disadvantage when things get steep, rough or technical. For future trips with more singletrack riding, I’d switch to a more upright handlebar configuration. Something like the Jones H-Bars might be ideal as they offer a wide range of hand and body positions and would put me in a stronger position to attack difficult terrain.

P1150812
Nasty, washed-out trail


Packing:

It is easy to nerd out over this department. Sure, there are map nerds and fitness nerds out there too with their own brand of dorkery but nobody nerds out like gear nerds. You know the signs. You’ve seen the shelves and closets overflowing with x-pac, down, silnylon, titanium and carbon fiber. I’m talking about computerized spreadsheets with a few-thousand bucks worth of outdoor gear and bike parts all described, tagged, weighed, starred, “faved” and color-coded. And of course, everyone’s favorite obsession – light weight – is actually kind of a big deal when you’re talking about pedaling the whole mess up and down mountains for a few days. However, any factor in your planning, preparation or packing stands to wreck your trip if you screw it up – no one more than the others – so don’t forget to do your due diligence in other areas. Don’t let the gear get in the way of the experience.

I try to choose gear that is space-efficient and functional and try not to obsess about the weight. I can’t afford to re-outfit myself with the ideal kit for every trip so I’d rather purchase gear that is versatile and durable. For the most part, I think I packed well. I used every piece of gear I carried except for the ones I always hope not to use: tools and first aid.

However, the colder-than-expected temperatures in the low twenties (one night set a record low near Stanley) certainly pushed the limits of my equipment. If I had gone any lighter on shelter or clothing I could have easily gotten dangerously cold. I had a tough time keeping warm through my second-night bivy at the bottom of the Williams Creek Trail, high up in the Wood River Valley.

P1160002
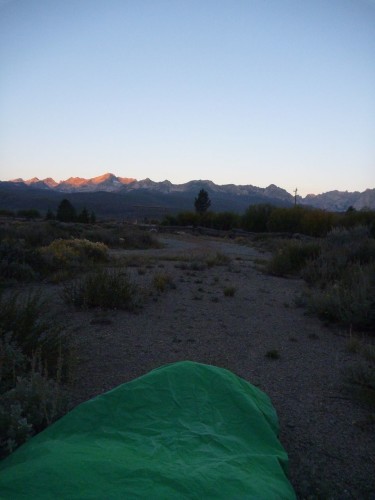
Daybreak in the Valley of the Sawtooths

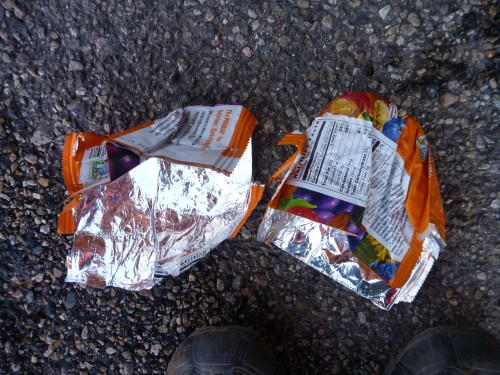
The frigid air seemed to sneak in through imaginary drafts in my bivy and sleeping bag though both were zipped and cinched tight except for a small breathing vent to prevent buildup of condensation inside the bivy. My feet suffered the worst of it. They were just starting to warm up and come back to life after some jumping jacks until I got back on the bike. The icy wind pierced my meshy shoes like needles. I improvised toe covers from a pair of ProBar wrappers (inserted over my socks, inside the shoes) which helped cut the chill and retain some heat.

P1160028
Putting the “PRO” in ImPROvisation

More substantial gloves, toe covers and/or chemical warmers in my shoes would have made the chilly mornings much less painful. Also, despite the lack of extra space in my bivy, I’ll be sleeping with my shoes on future trips where lows are expected to be below freezing. All the icy metal, plastic and carbon fiber in the soles of my shoes sucked the heat out of my feet faster than my blood could circulate.

Food-wise, I was pretty happy with what I carried and how much. I made one resupply stop in Stanley where I purchased some additional ride food (beef jerky, Baby Ruth, Snickers, Mr. Goodbar, two bananas) and supplements (pouch of chunk chicken, Ramen noodles) for my final dinner on the trail.

P1160069
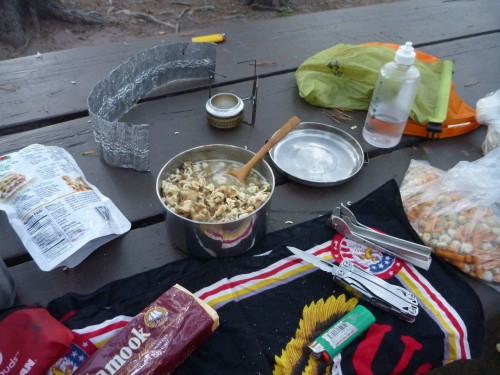
Dinner at Deadwood Reservoir: Lentil Soup with Chicken and Ramen

I stopped at some of the convenience/general stores along the way when they were available for cold drinks and to refill water. I also enjoyed a beverage stop with some new friends at the Featherville Saloon on day 1 and an amazing breakfast on the morning of day 3 at the Redfish Lake Lodge.

P1150869
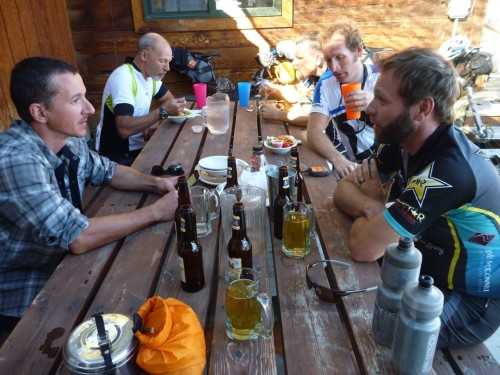
Frosty Beverages in Featherville
P1160021
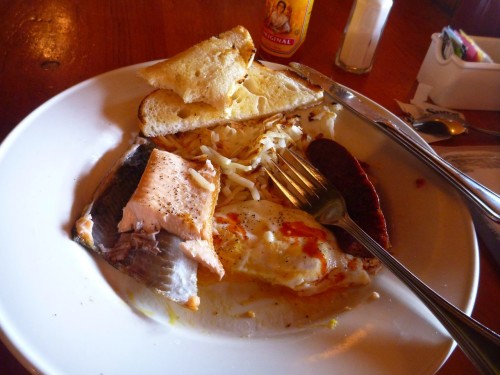
The “Northwest Breakfast” at Redfish Lake

Aside from these little luxuries, I ate and drank only what I carried and was able to ride safe in the knowledge that I had plenty of calories on board, could filter water from any of the many streams on the route and cook up a hot meal whenever appropriate. Conversely, with good route and resupply information, proper planning and measured riding, one could tackle this route (as many did) with a bare minimum of food on the bike, relying on services in towns and outposts along the way. Although a more expensive way to travel, this tactic certainly has its benefits as food gets heavy fast. It would have been easy to drop several pounds of weight off my bike by leaving the cookset and camp food at home but I would have had to sacrifice a good deal of my self-sufficiency and independence. For my purposes, it wasn’t worth it.

P1160099
Breakfast atop Scott Mountain

I rode into the darkness on both of the first two nights and found my lighting setup to be nearly ideal. The combination of the dynamo-powered headlight fixed to my front rack and the USB-rechargeable lamp on my helmet worked well in a variety of conditions. I could use the low, wide, bright beam cast by the dynamo light for most roads and supplement that light with the headlamp’s powerful spot for singletrack or whenever a more precisely-directed beam was needed.

P1150901
Helmet-Mounted Light at Five Points Campground

This system really proved itself on the second day. I had used the CygoLite for the last couple of hours on my first evening’s ride and continued to employ it while I cooked my dinner and made camp that night. I plugged it into the Sinewave Cycles Reactor as shadows began to grow long on the second day, got it topped back up to a full charge and used it for three or four solid hours on the second night to get me through the Fisher Creek/Williams Creek singletrack section under the light of the stars. This descent was one of the highlights of the trip and would not have been any fun at all with sub-par lighting.

P1150994
Last Rays of Sun Over the Sawtooths

Looking back, it is hard to see this ride as anything other than a great success.  Even so, I’m still looking forward to refining my approach to future rides and applying what I’ve learned.  I hope these posts have been helpful and entertaining.  Feel free to leave your questions and comments below.  Thanks for reading!