Categories
Idaho Our Trips Planning Resources Surly Bikes Touring Bike Tires

Testing the Pack Rat and Road Plus Tires on an April Fool’s Errand

Back in December 2017, Surly announced the release of a new front-loading light touring bike – the Pack Rat.  I was excited about the possibilities from the moment I learned of this bike’s existence and Bike Touring News was one of the first shops to stock them.  In the intervening 4 months, Surly has released no fewer than three more new models – the “Allroad” Midnight Special, a redesign of the Pugsley expedition fatbike and the entry-level dirt touring Bridge Club.

What with all this newness in such a short period, I was a little afraid that the humble Pack Rat might be forgotten.  I had already had favorable impressions from brief rides around town, so I set out to test this bike’s capabilities on a weekend ride.  I wanted to know if the Pack Rat was capable of loaded touring over the mix of terrain we commonly encounter here in Idaho and if this was a platform I could recommend for two-wheeled exploration past the end of the pavement.
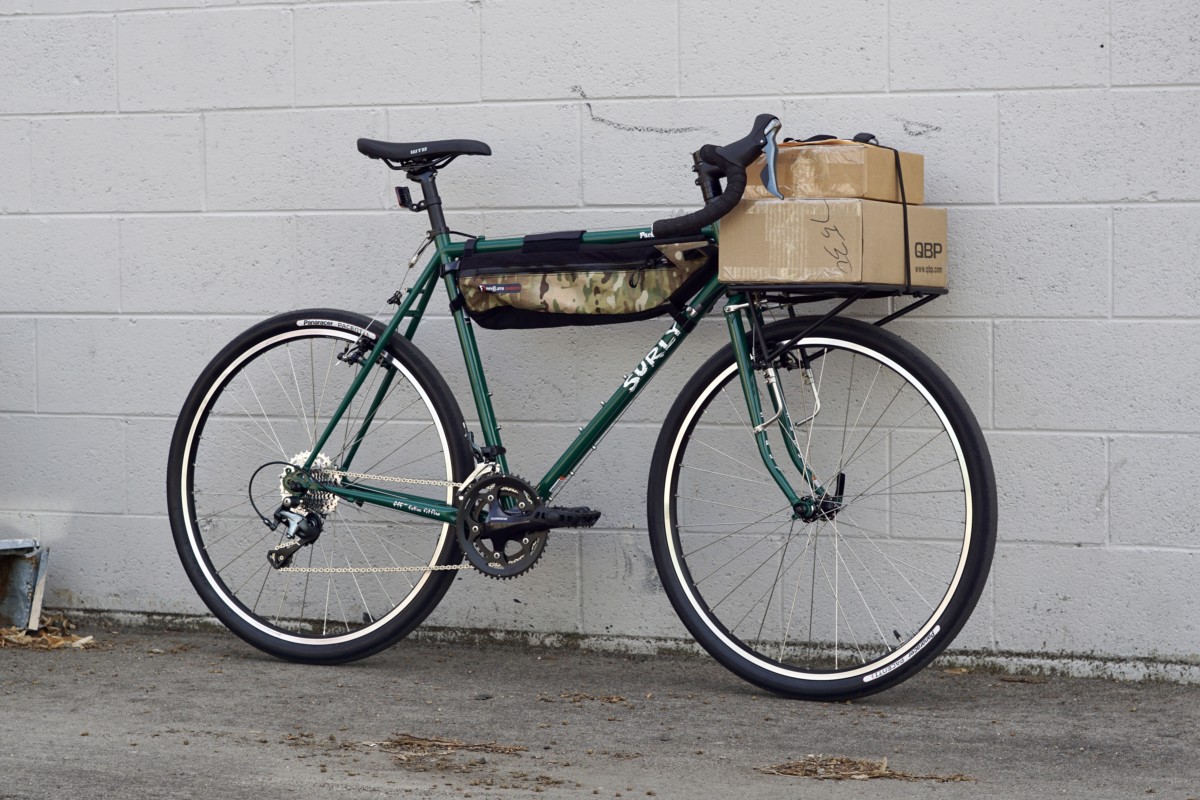
In order for this road test to be meaningful, I’m going to need you to hang with me in the Land of Make-Believe for just a little while.  Got your Imagination Cap on?  Good.

I’m going to make a statement that should be treated as fact for the duration of this post.  Ready?

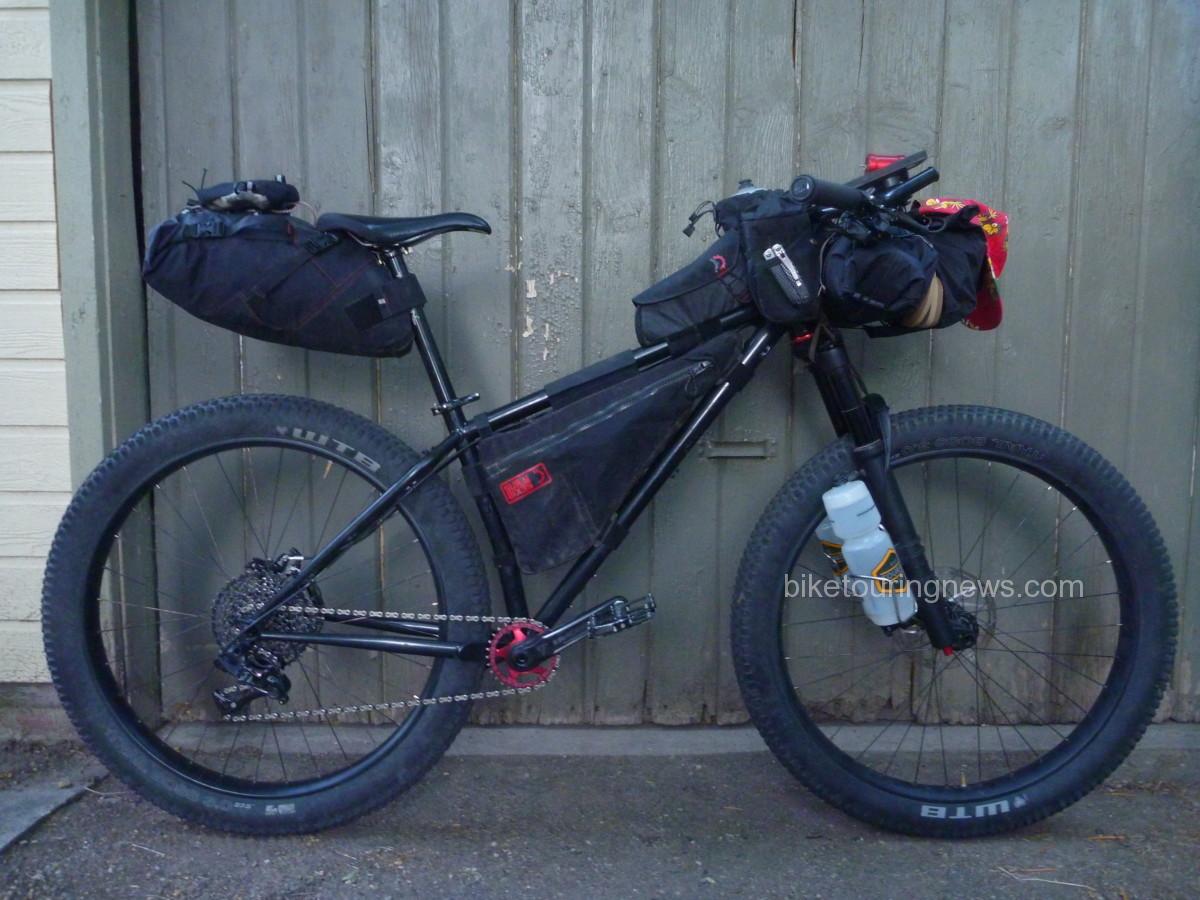
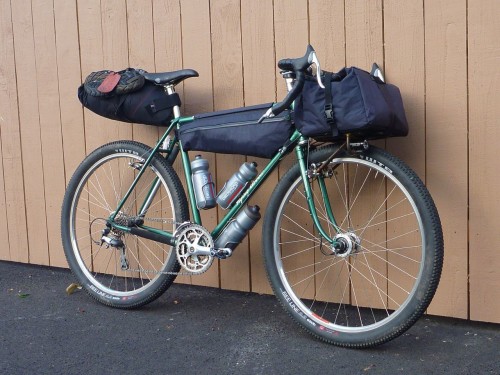
The bike pictured below is a Pack Rat.  Got it?
My old war horse of a touring bike – affectionately known as the Rando-Gnar – is nearly identical to the Pack Rat in every way that matters.  Both bikes are designed around 650b wheels with clearance for 47mm “Road Plus” tires.  Both feature geometry optimized for a front load.  Steel frames, drop bars, cantilever brakes, plenty of braze-ons for racks and cages.  Heck, they’re even (almost) the same color.  Nearly every component on the Rando-Gnar would move right over onto a Pack Rat frame.

In order to transform a stock Pack Rat into the bike you see above, all you need to do is mount a set of WTB Byway tires, drop the gearing down a bit and attach whatever racks and bags you deem necessary.  Boom, pow!  You’re ready to pack your gear and hit the road.

For this exploration of the Pack Rat’s touring capabilities, I mapped out a route that would cover around 160 miles of paved and dirt roads that would vary widely in condition.  I knew of one stretch of unmaintained road that would likely be in very poor condition.  The roads that climbed into the foothills of the Boise and Payette National Forests were more of an unknown quantity as I had not ridden them before.  I had some idea of what to expect and had been assured by a Forest Service Ranger that the roads were free of snow – though I had my doubts.  Most of the remainder consisted of varying qualities of pavement and maintained dirt roads.
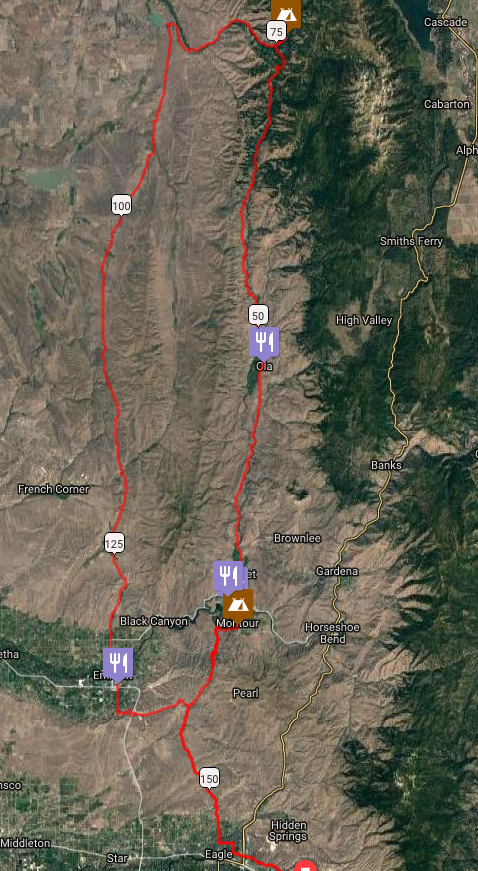
I set out from Boise on smooth pavement and re-adjusted to the ride of a loaded bike.  My haphazard packing strategy resulted in a heavier bike than I would have liked but I felt confident that I was well prepared for the unpredictable springtime weather and road conditions.  Rolling tubeless at 42psi, the Byways cruised down the pavement nearly as fast as a good racing tire.  I felt the weight of my load when the road turned uphill but the ride was speedy and efficient overall.

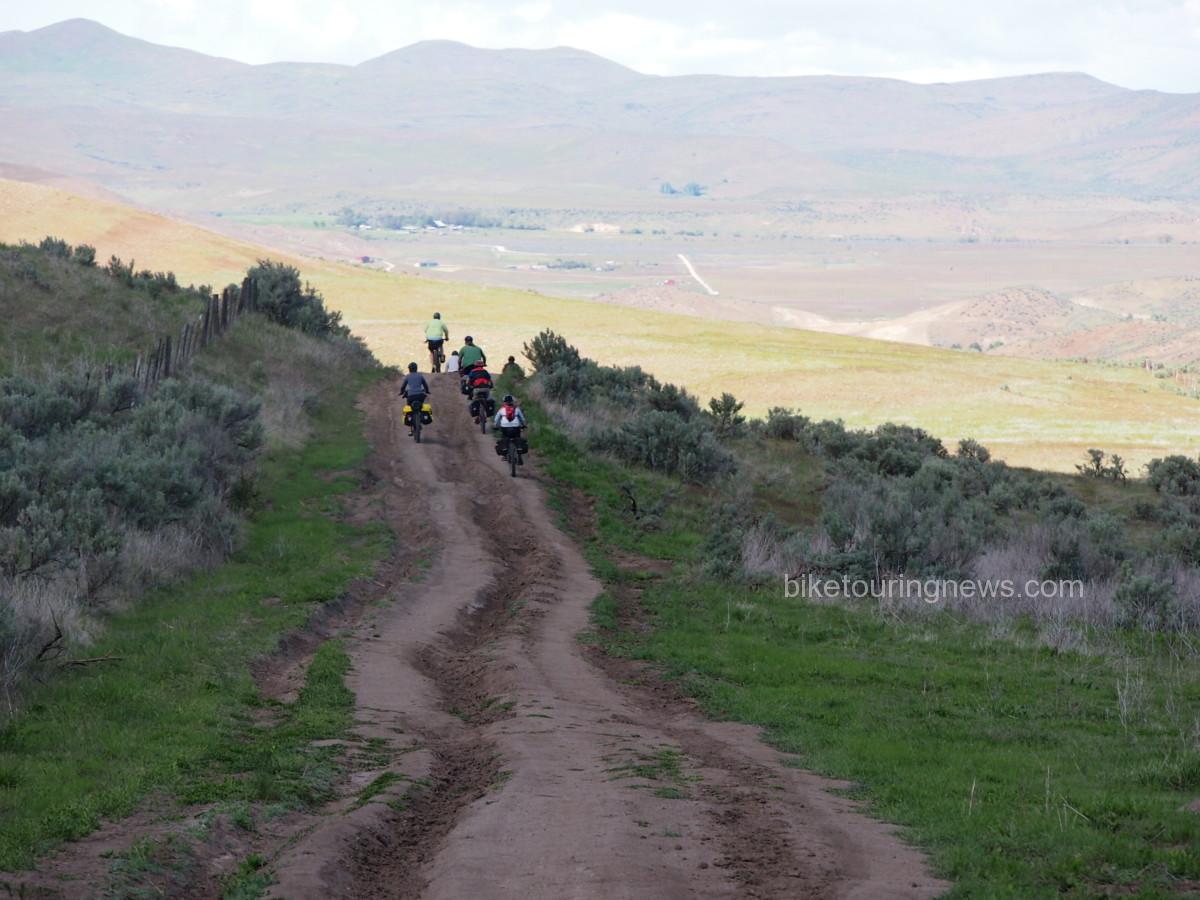
When the road turned to dirt in the rolling foothills north of Eagle, the Pack Rat pressed ahead with aplomb.  Traction was adequate for out-of-the-saddle riding over some of the steeper pitches, though I had to be conscious of my weight distribution to prevent the rear tire from slipping on looser ground.
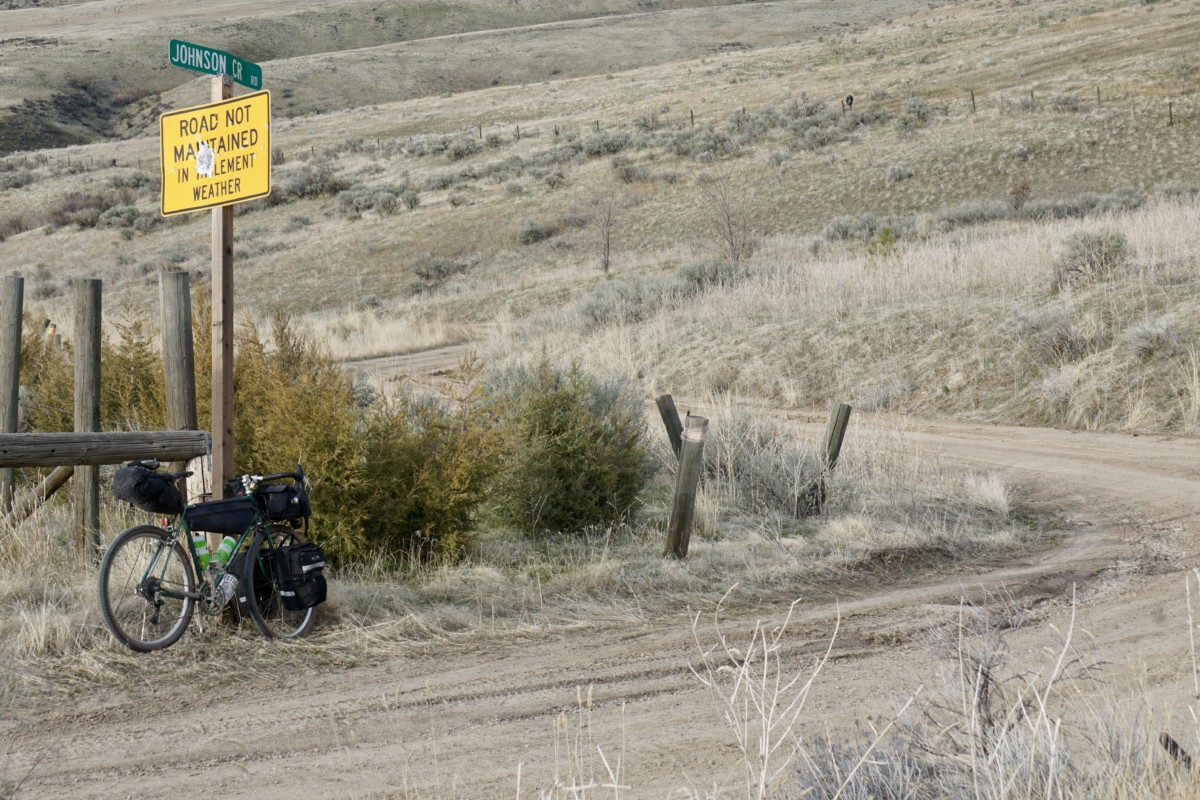
From the saddle at the top of Sand Hollow Road, our route descended the unmaintained Johnson Creek Road to the Payette River.  This road bears deep, rutted scars from heavy truck use in wet conditions and is very eroded in spots.  We rolled in, enjoying the views while keeping to the high ground between the ruts.
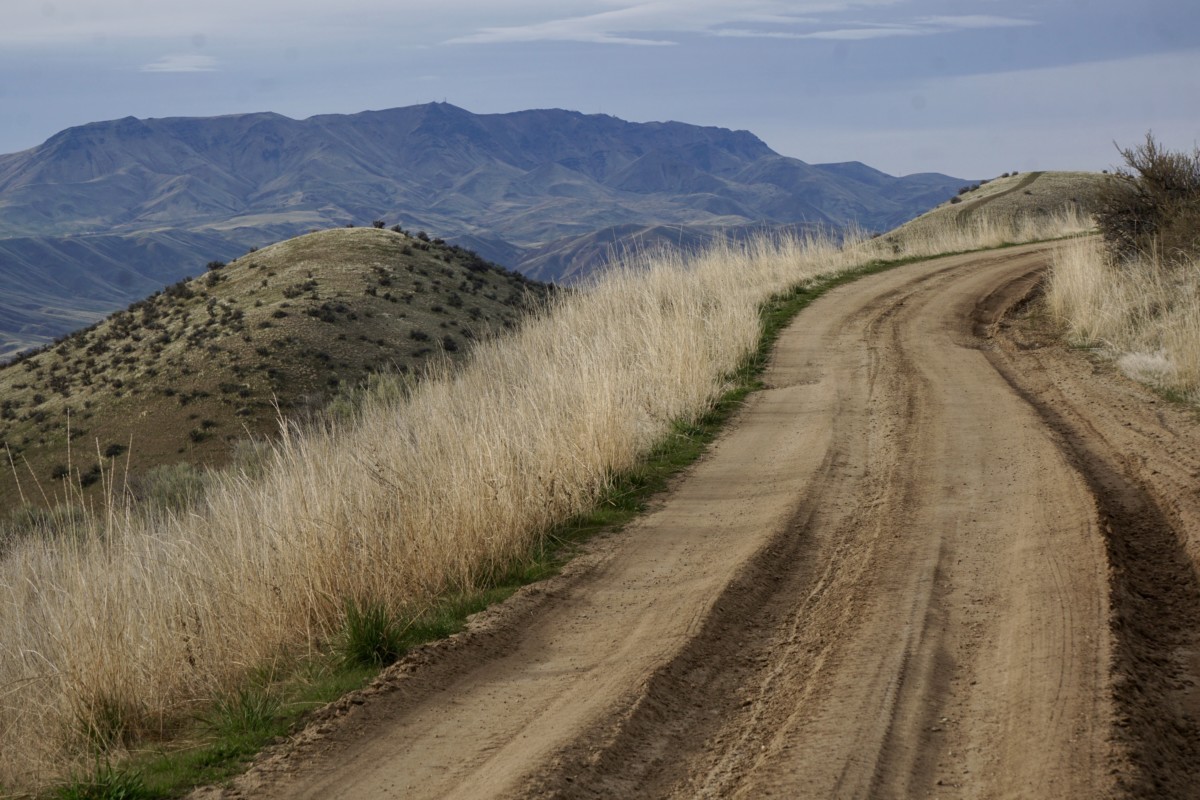
The ruts were nearly three feet deep in spots but the clay was hard and firmly packed, making for predictable traction even at off-camber angles.
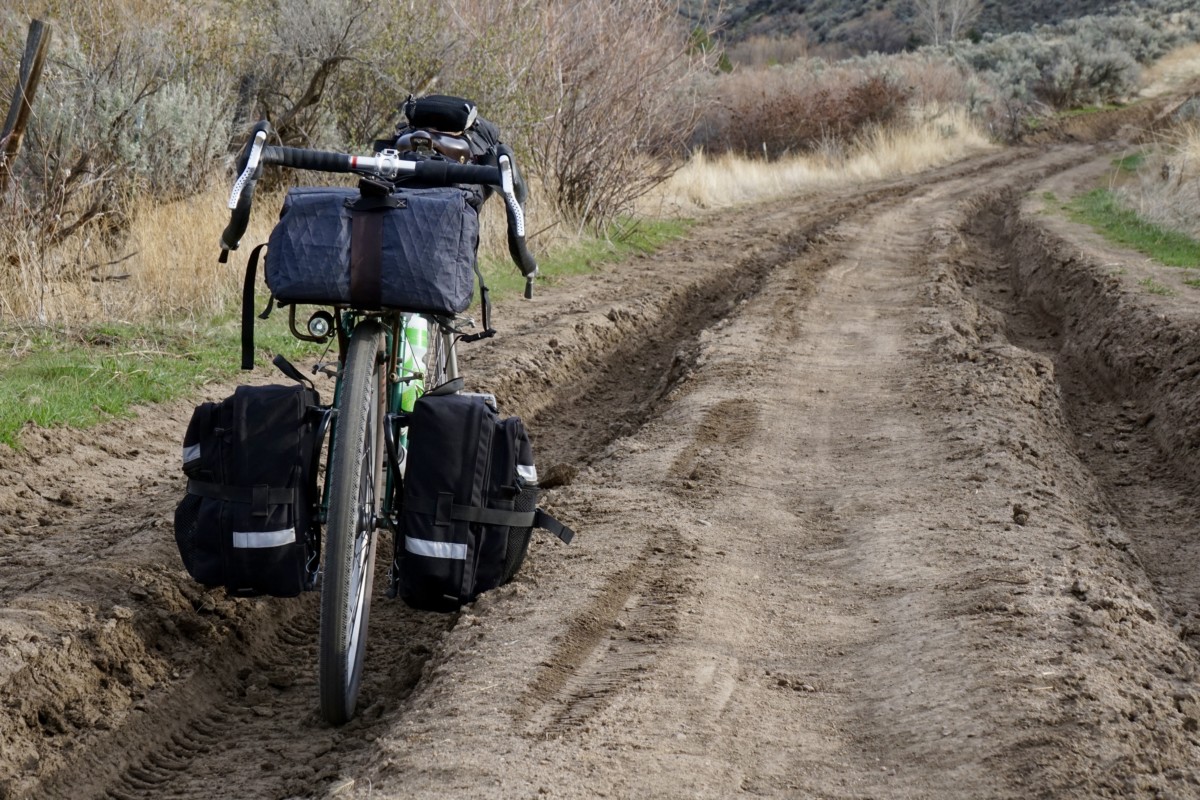
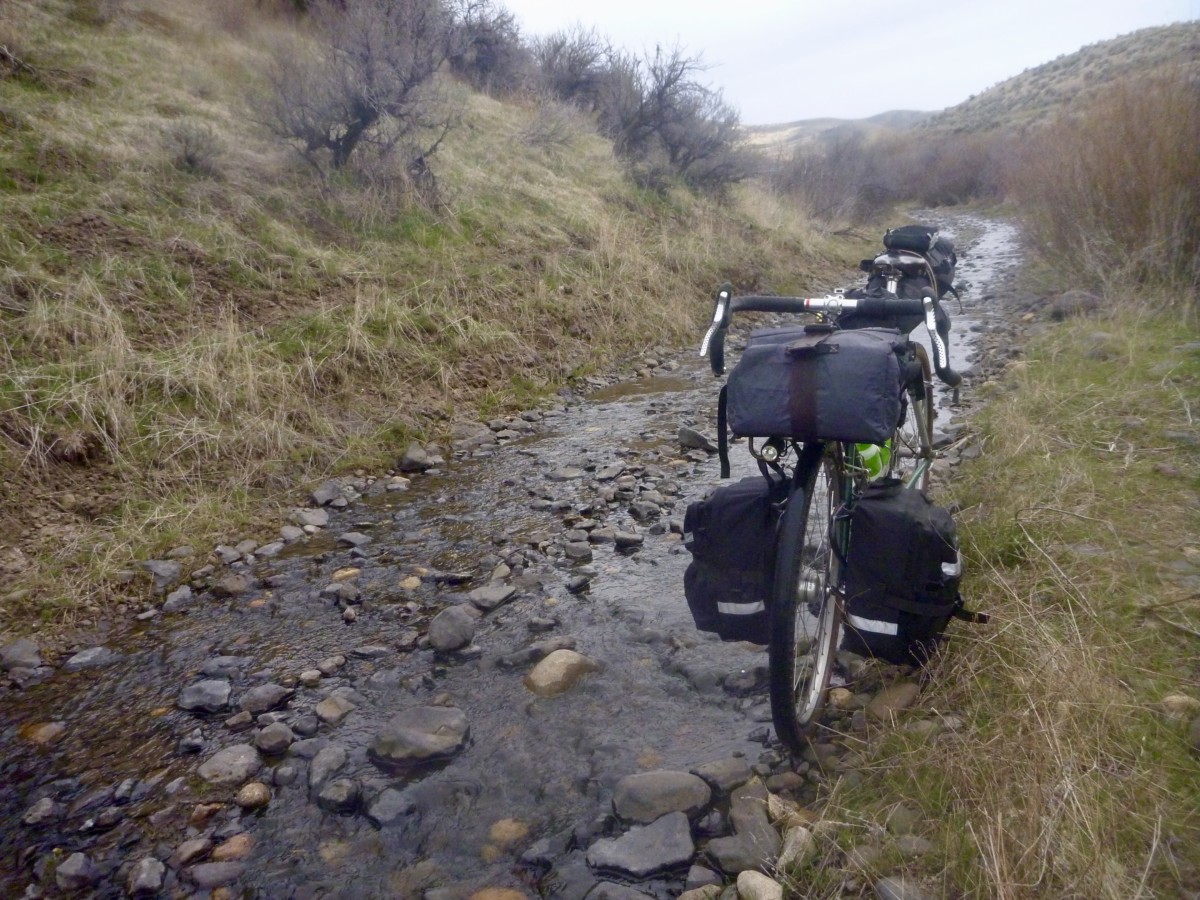
One section of the road has been completely taken over by the creek and presents about a quarter-mile of bumpy riding over loose, slippery river rocks.  I rode cautiously but never felt in danger of bottoming out my tires.
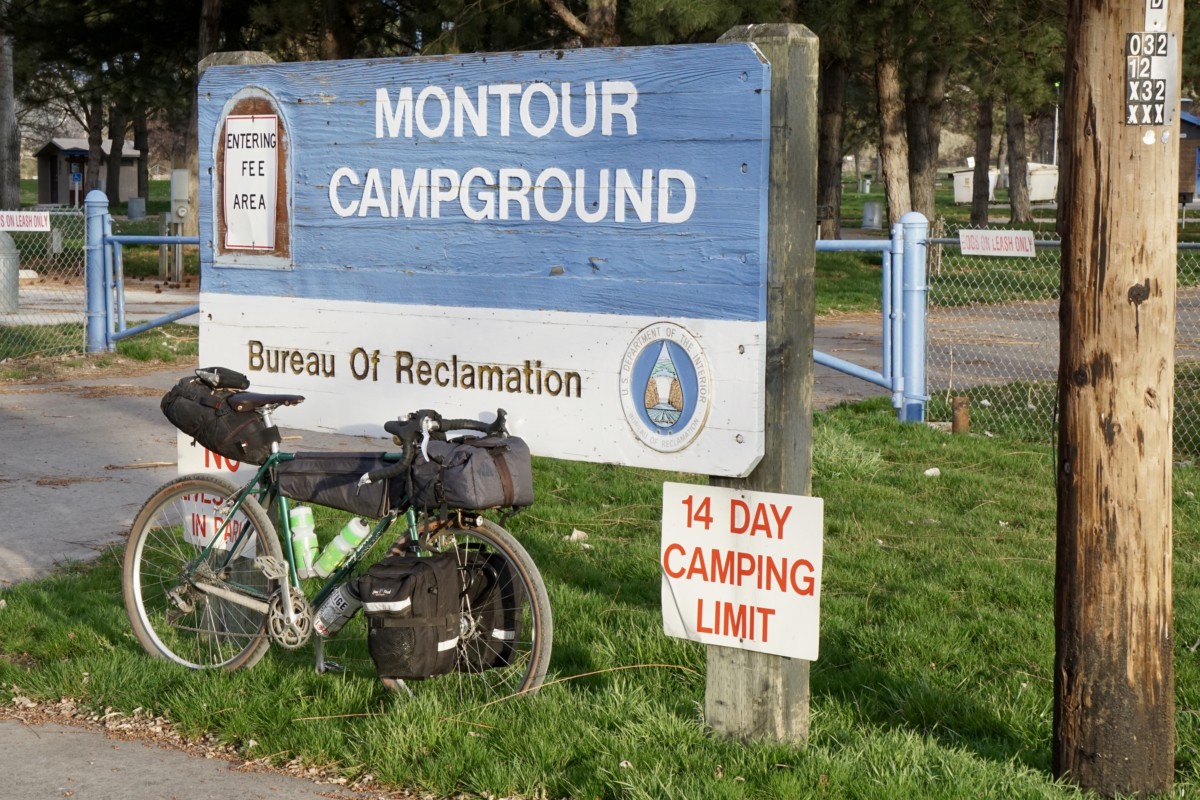
Johnson Creek Road drops into Shalerock Road, a wide and well-maintained dirt road that descends into the Montour Valley.  We basked in the dusky light on the descent to the Montour Campground for the first night’s camp.

After a hearty breakfast at the Triangle Cafe we struck out to the north the next morning, gradually gaining elevation on the paved Sweet/Ola highway.  The snowy mountaintops in the distance made me wonder about the elevation of the snow line.
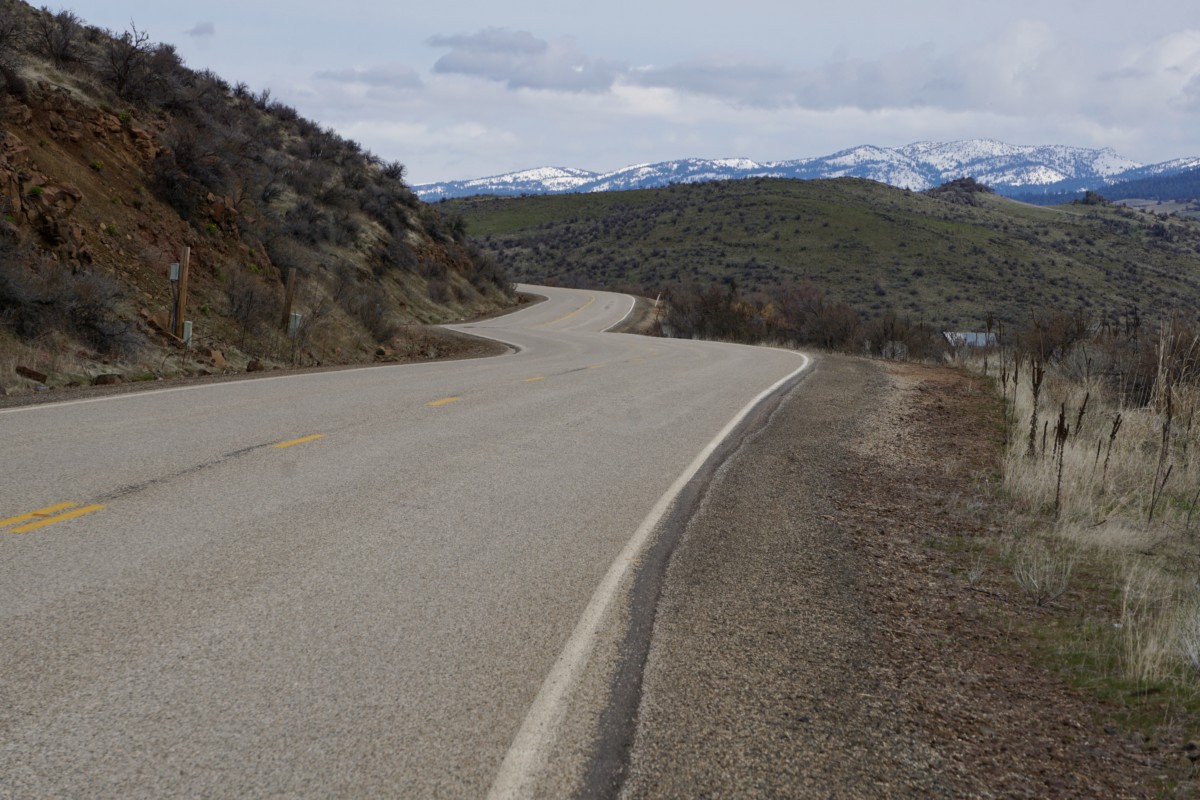
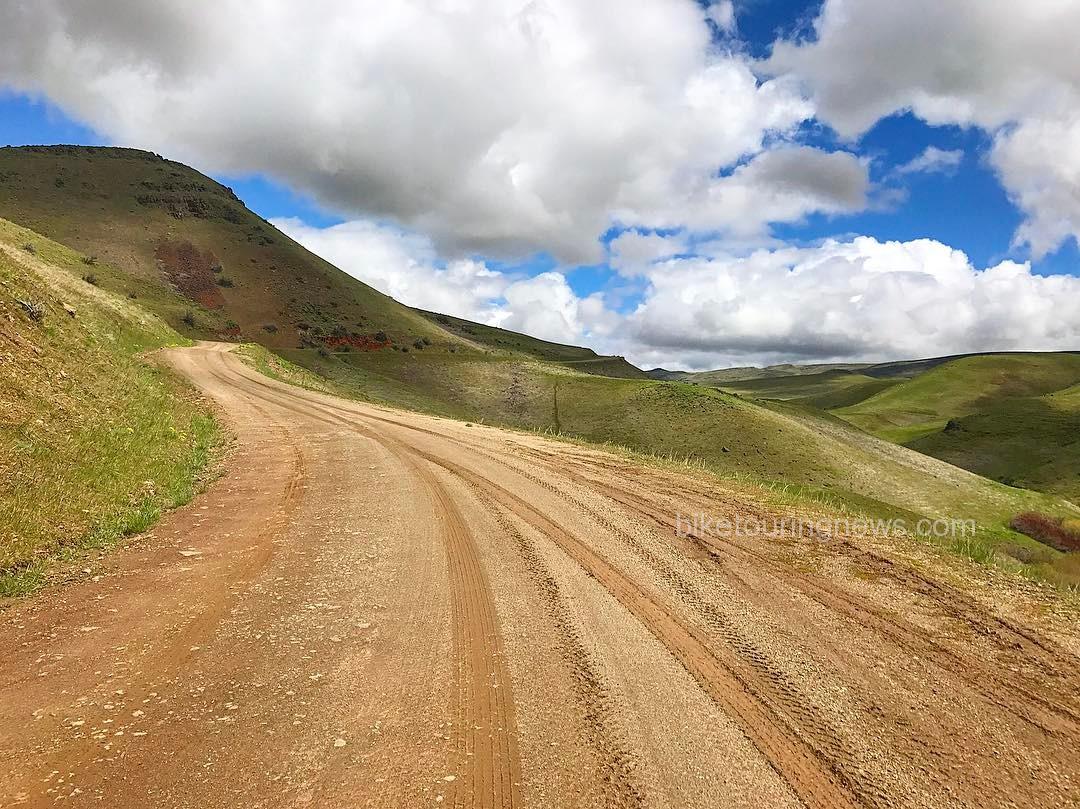
The road turns to dirt a couple of miles past the little town of Ola.  Conditions were excellent – nicely packed clay with a scattering of loose pea to marble-sized gravel.  The Pack Rat carried speed well and cornered confidently.
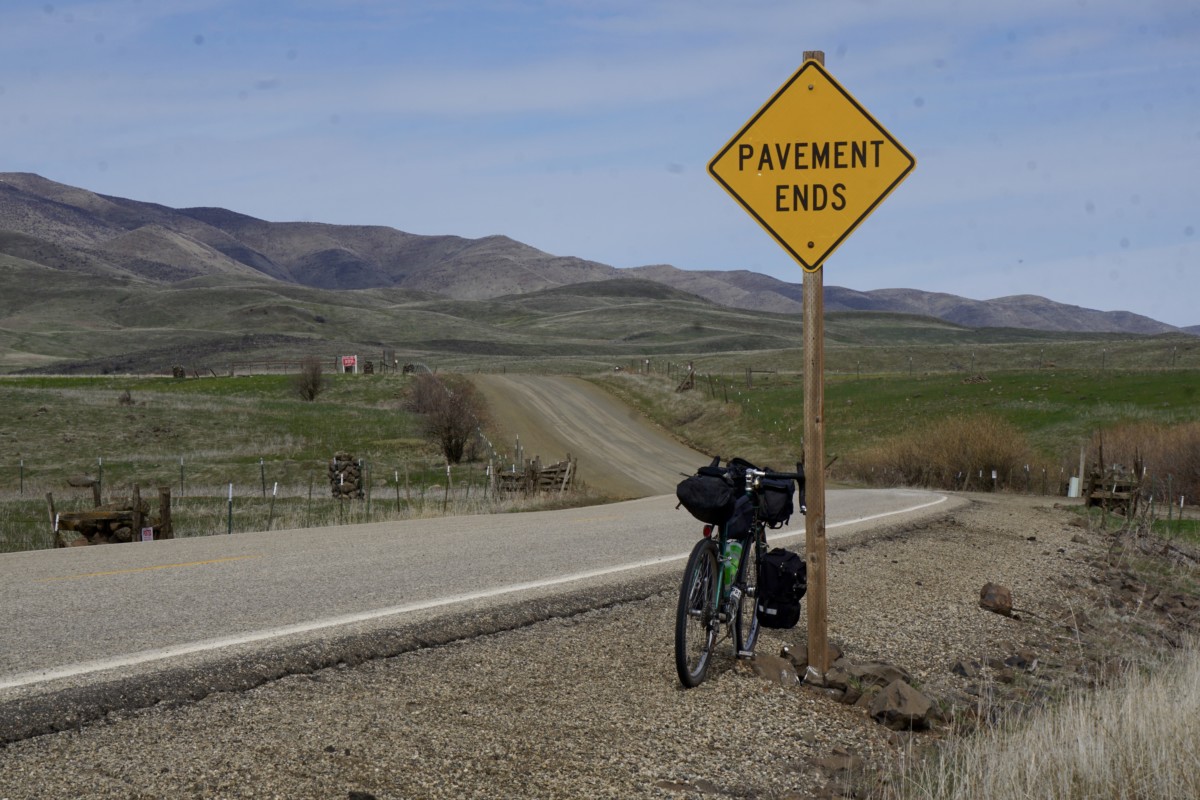
I was forced to adapt my pedaling rhythm to the lumpy terrain and the Pack Rat responded well – forging forward to crest each roller as I rose out of the saddle.
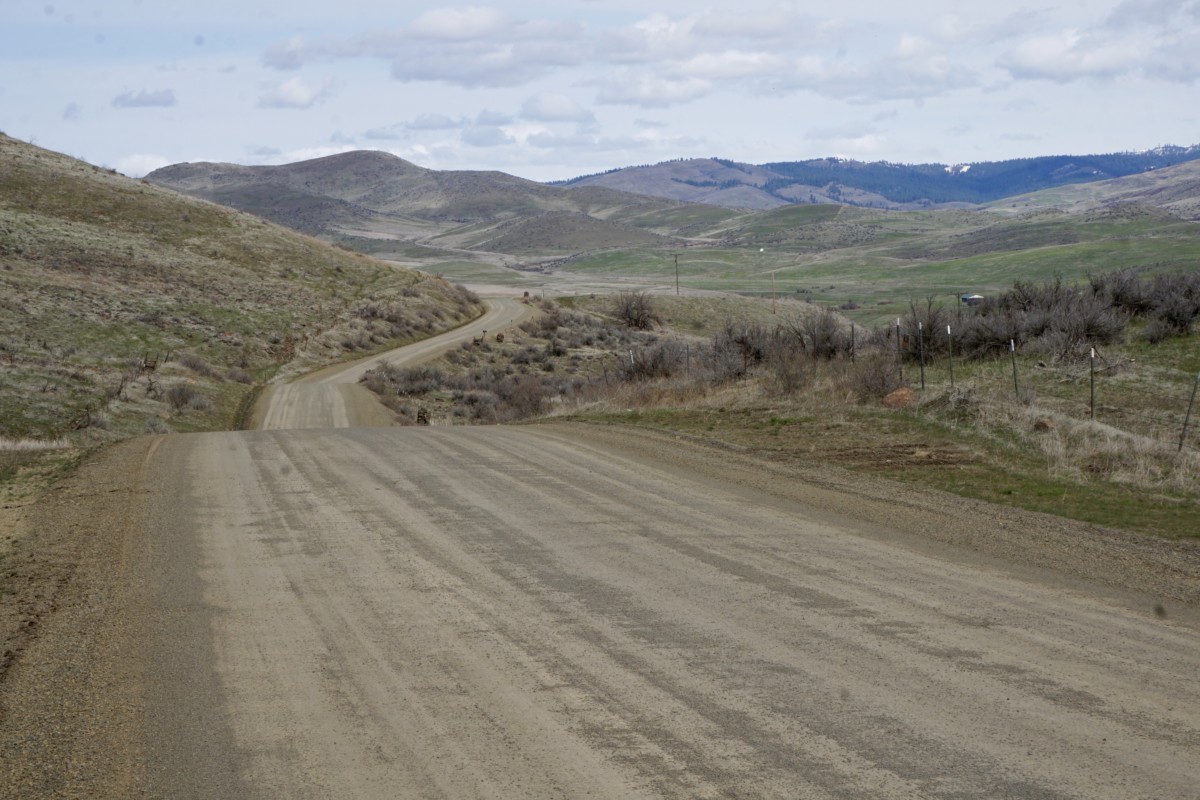
The Byway tires provided a sufficiently large contact patch and plenty of cushioning to keep the bike composed on the quick descents.  Momentum is everything when pedaling a loaded bike, so it was nice to have the confidence to let the bike run on the short downhills and carry good speed into the next climb.
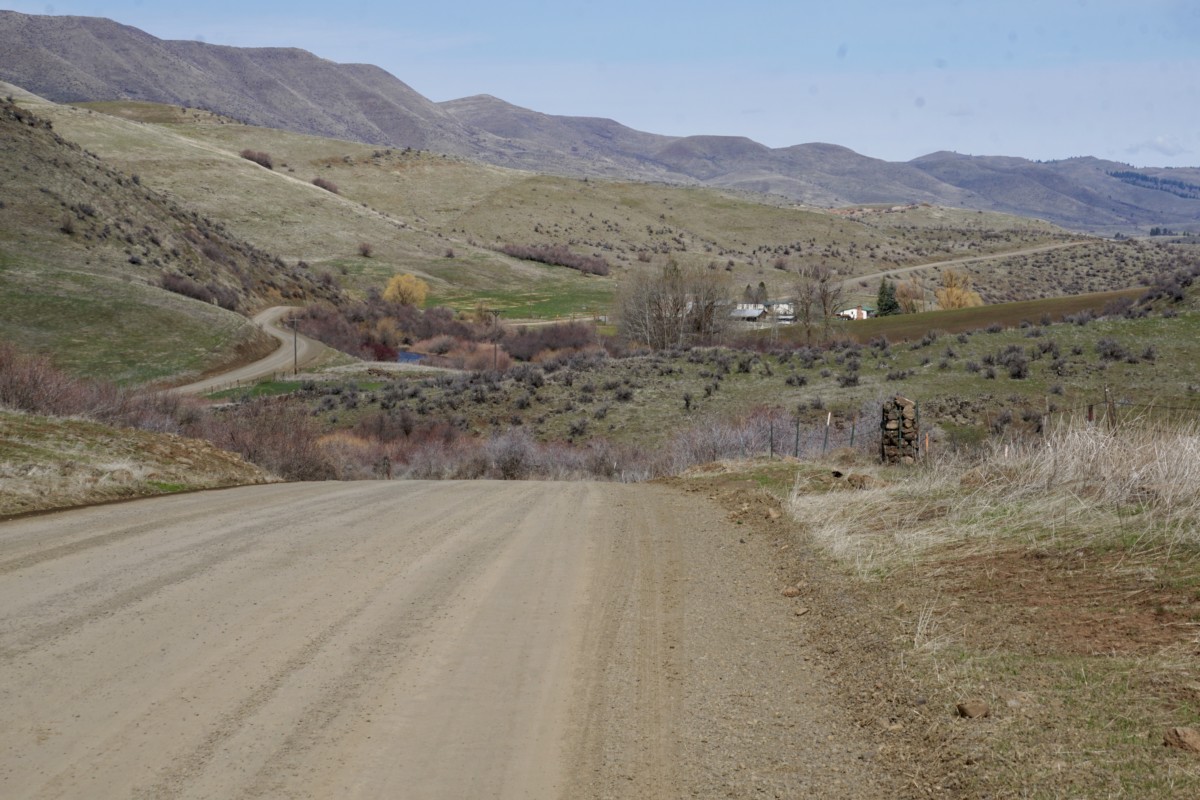
The road continued to wind its way north, following Squaw Creek toward its headwaters in the Payette National Forest.  We were getting close to 4,000 feet above sea level and entering the pine forest, so we began to encounter wet conditions and sections of slushy snow on the road.
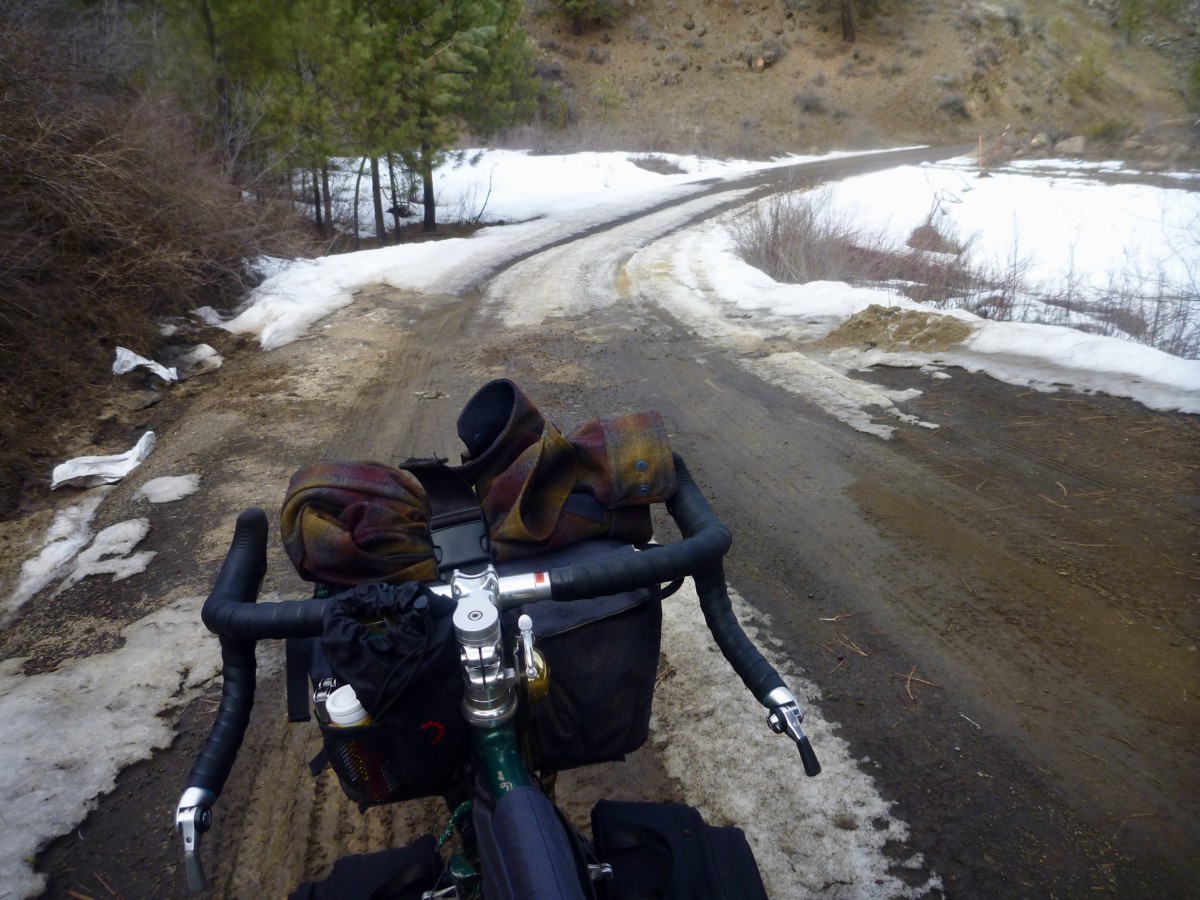
The 47mm tires sank somewhat into the softened road surface, slowing their roll and forcing me to work harder for the same speed.  However, they certainly provided more traction and flotation than narrower tires would have.
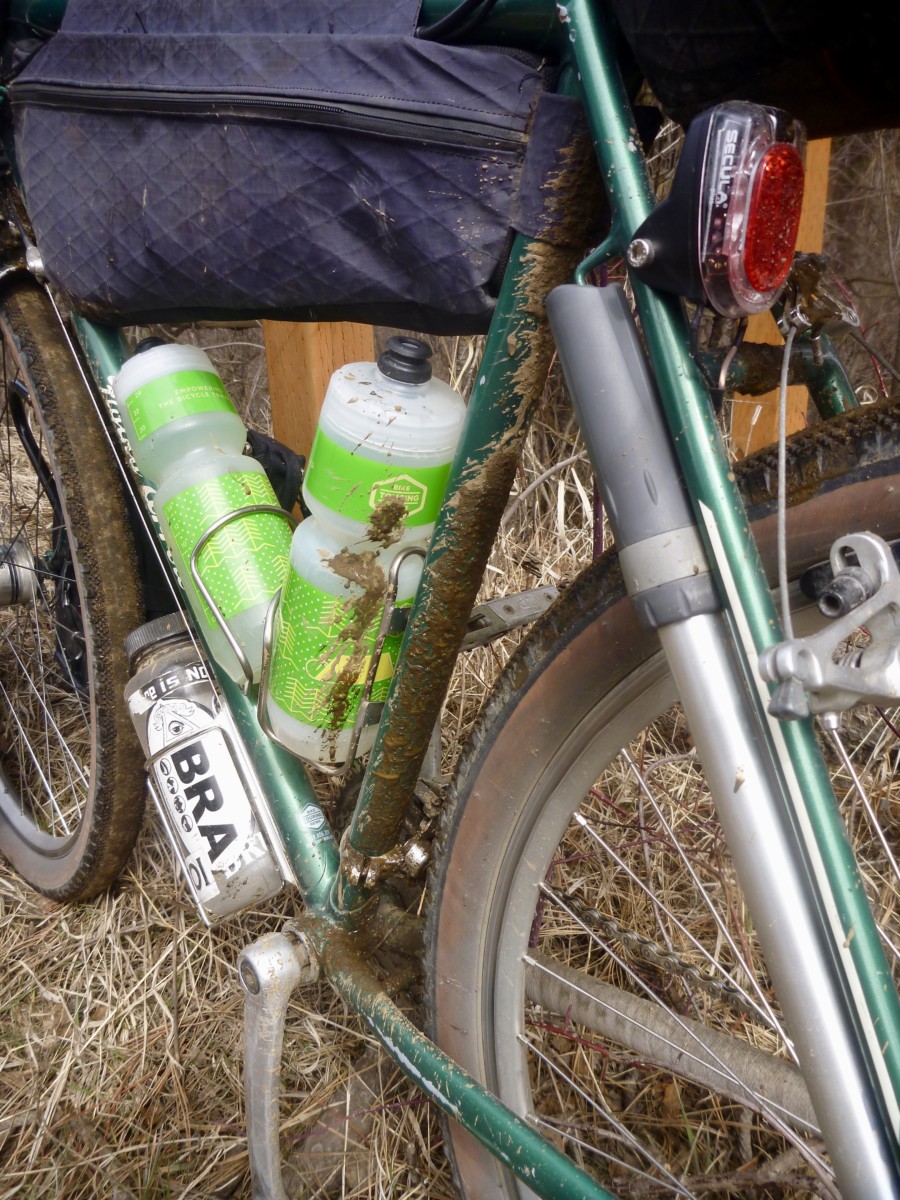
The road began to climb more steeply and the snowy stretches became longer until they became practically uninterrupted.
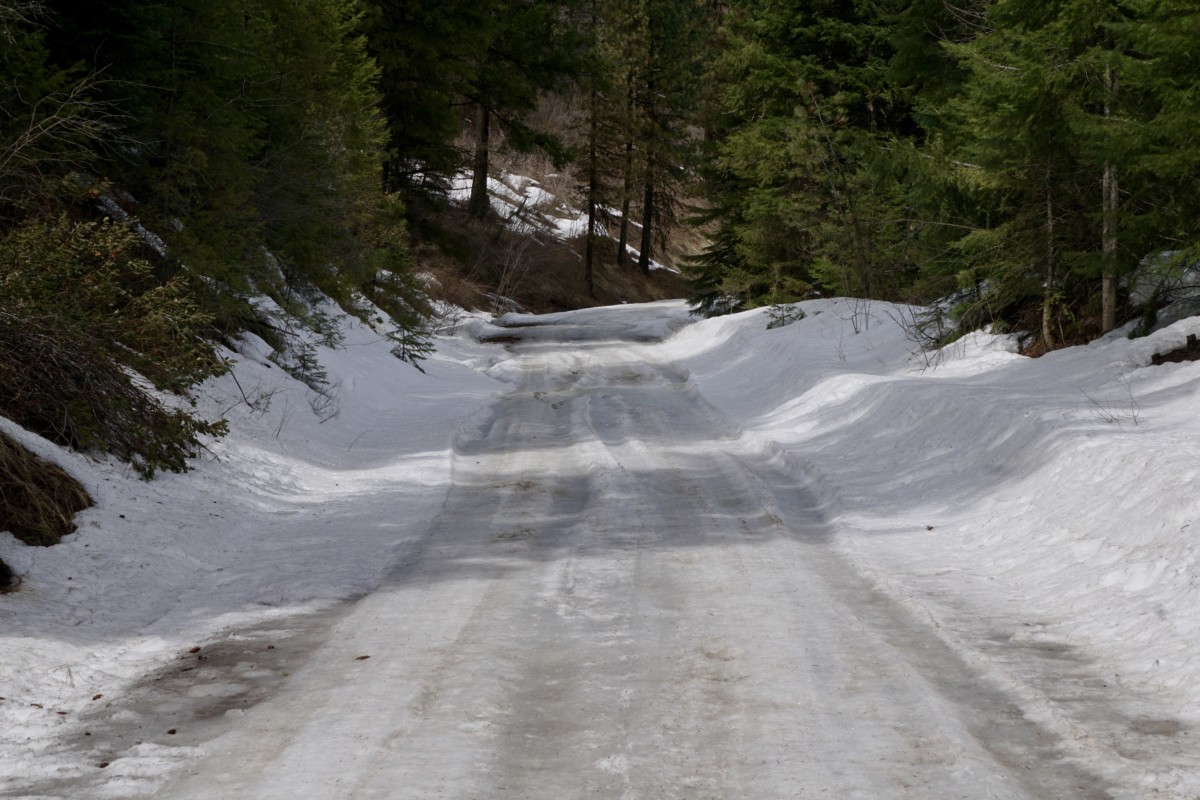
While the snow was not very deep, the Byway’s diamond tread didn’t provide enough bite for steering or pedaling through the slippery slush.  Likewise, the 47mm width was not sufficient to say on top of the crust layer.  I could ride brief stretches when the road leveled out but climbing was not possible.
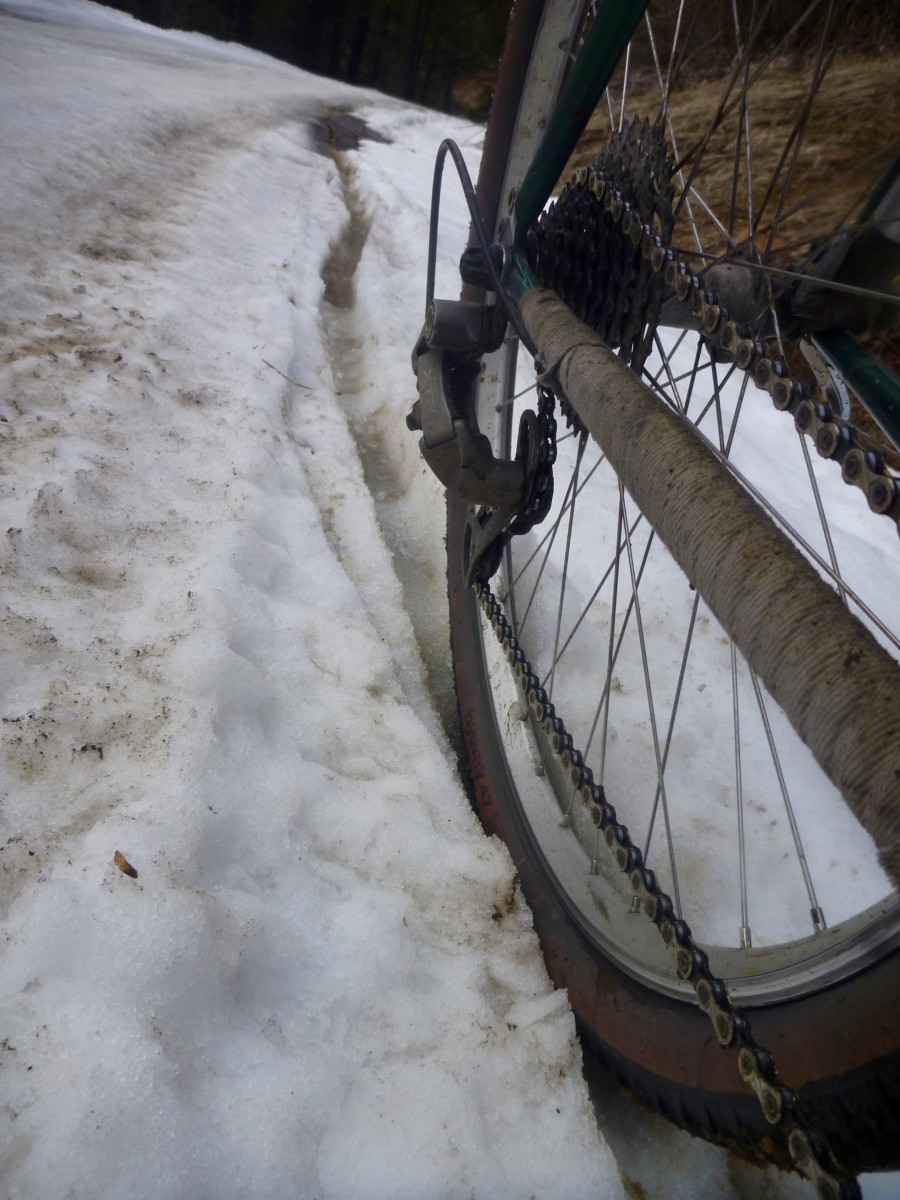
When I was able to ride, I was constantly attempting to correct my line and keep the bike from sliding out from under me.  A mountain bike with 2-3″ tires would have handled these conditions much better than the Pack Rat but would have also been sluggish on the pavement and smooth dirt roads.
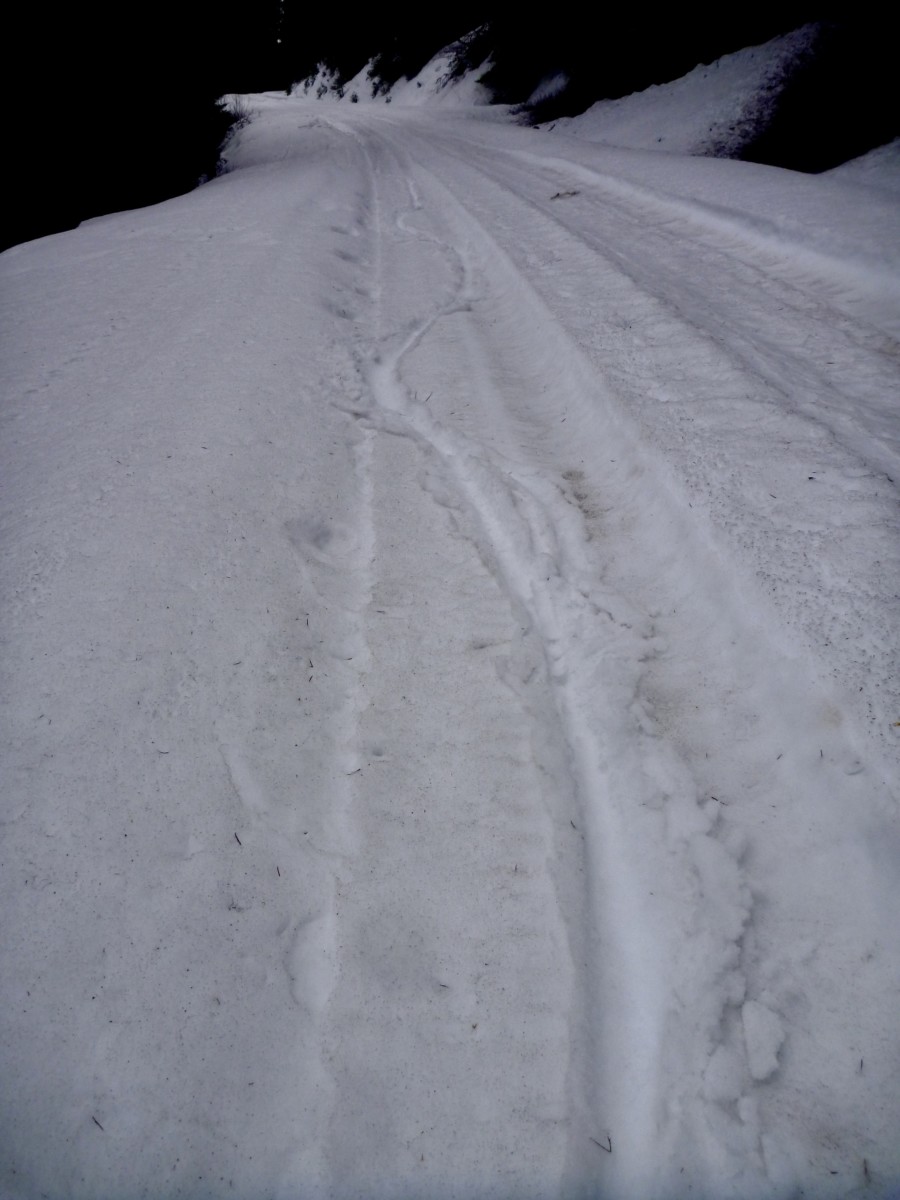
We pressed on despite the snow-covered road.  Traction was sufficient for walking and I didn’t think the pass was all that distant.  In hindsight, I probably should have paid attention to the omens and turned back.
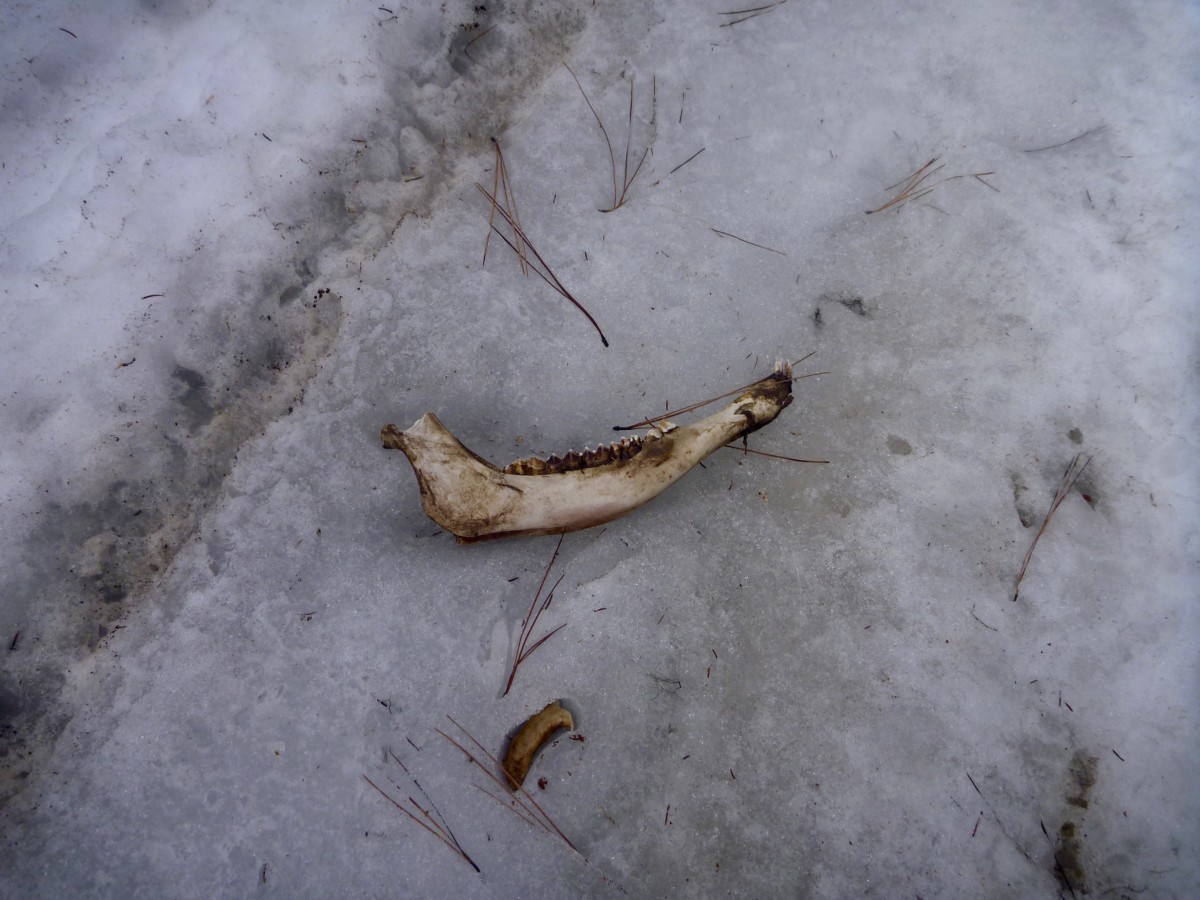
The snow continued to get deeper until it dragged at the bottom of my panniers.  The north-facing section of road just over the summit held drifts at least 3 feet deep.  I’m sure this road will be spectacular in a couple of months when all the snow is gone!  I don’t know how long it took to cover the 8 or 9 snowy miles but the time would definitely be measured in hours.
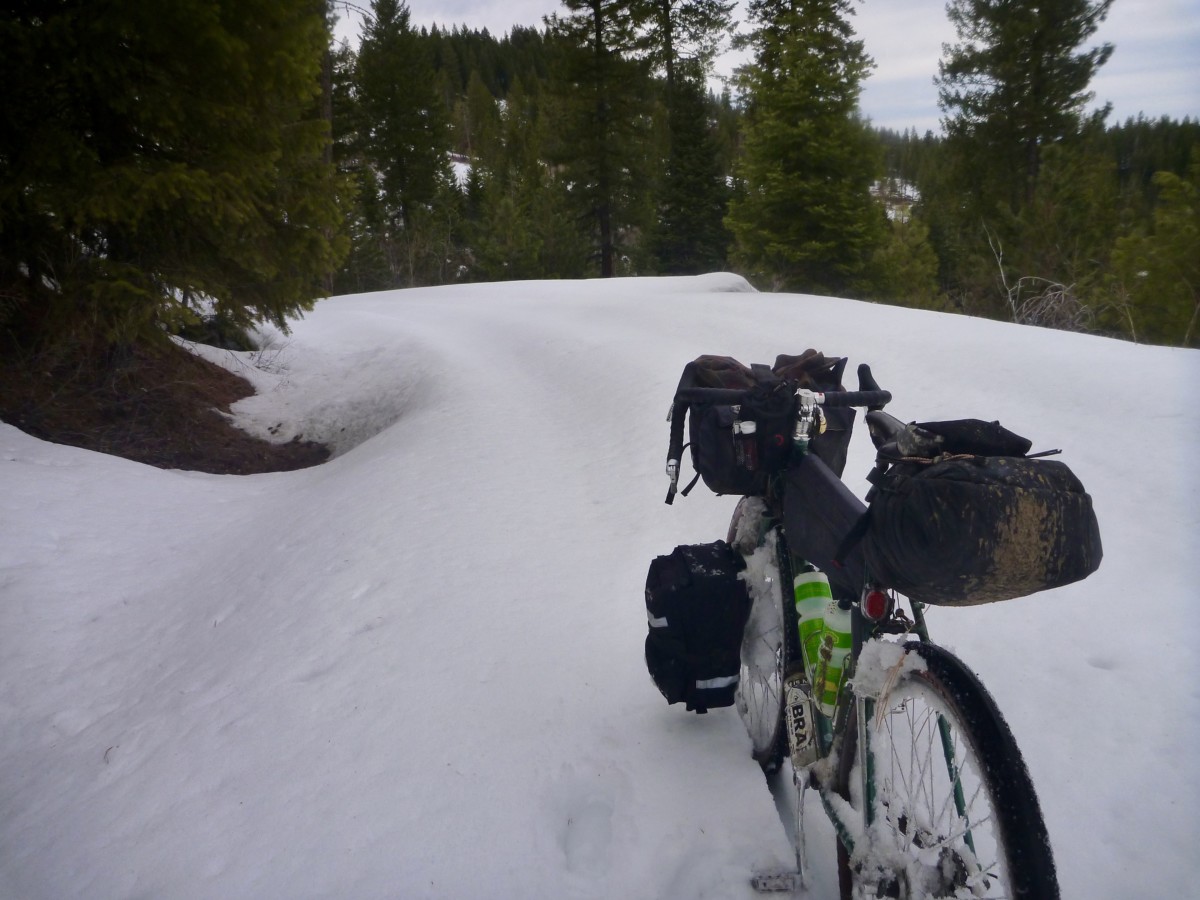
Clearly, these conditions were well outside the Pack Rat’s intended use.  Even a fatbike with 5″ tires would have been useless in snow that deep and wet.  I could have certainly saved myself some pain and suffering by turning back but I had made good time earlier in the day and knew I had sufficient daylight to get through.   I pushed, dragged, slipped and postholed over and down the pass, hoping that my planned campsite wouldn’t be under snow.
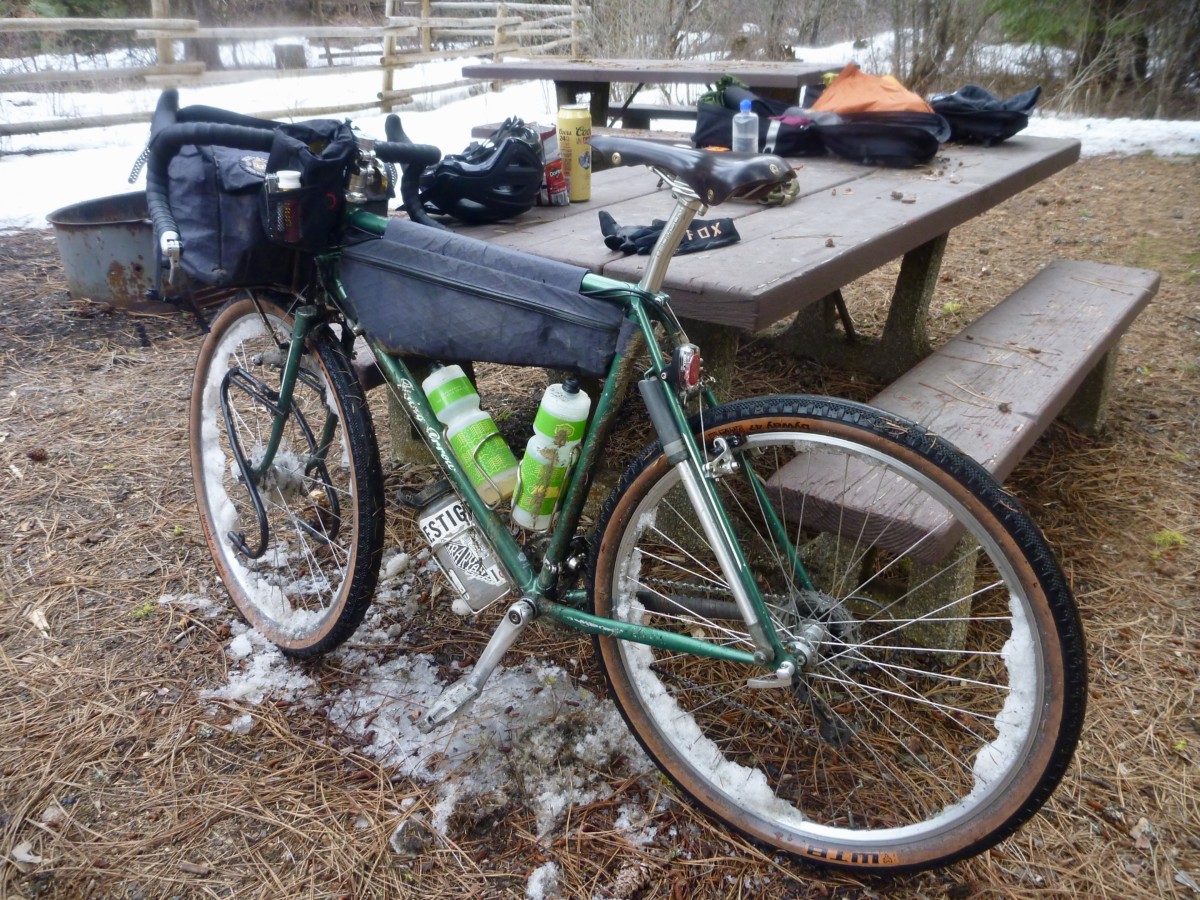
The campground still held some snow but there was plenty of dry ground.  I breathed a sigh of relief to have arrived and then set about drying my shoes and feet, eating food and doing my best to recover for tomorrow’s 90+ mile burn back to Boise.
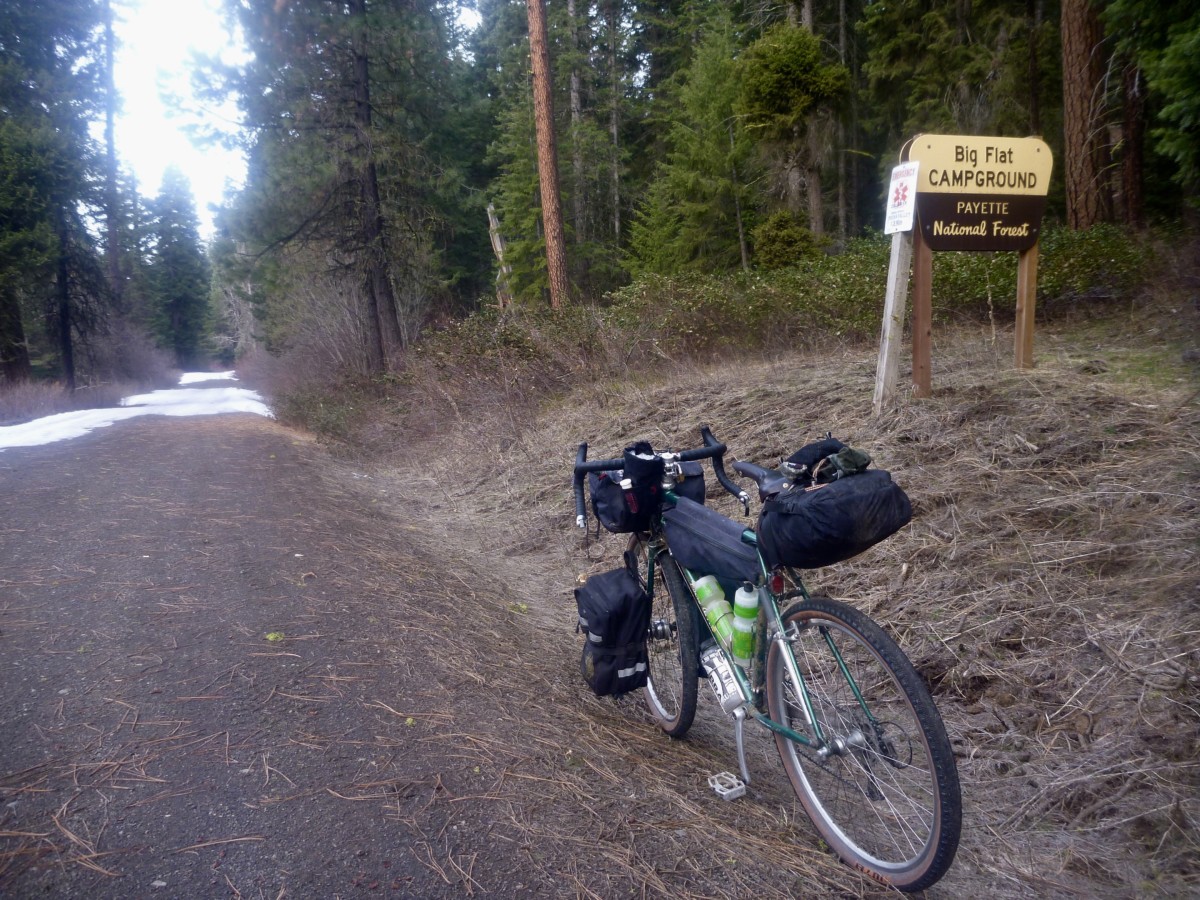
I slept deeply and woke feeling surprisingly fresh after the previous day’s exertions.  I made breakfast, pulled on my frozen shoes and hit the road just as the sun began to peek over the eastern ridge.  The forest service road had yet to shake off the night’s chill.  Yesterday’s soft, wet mud and slippery slush had hardened into frozen dirt and roughly textured ice.  The Pack Rat excelled in these conditions, though I rode the icy sections cautiously and did walk a couple of slicker stretches.
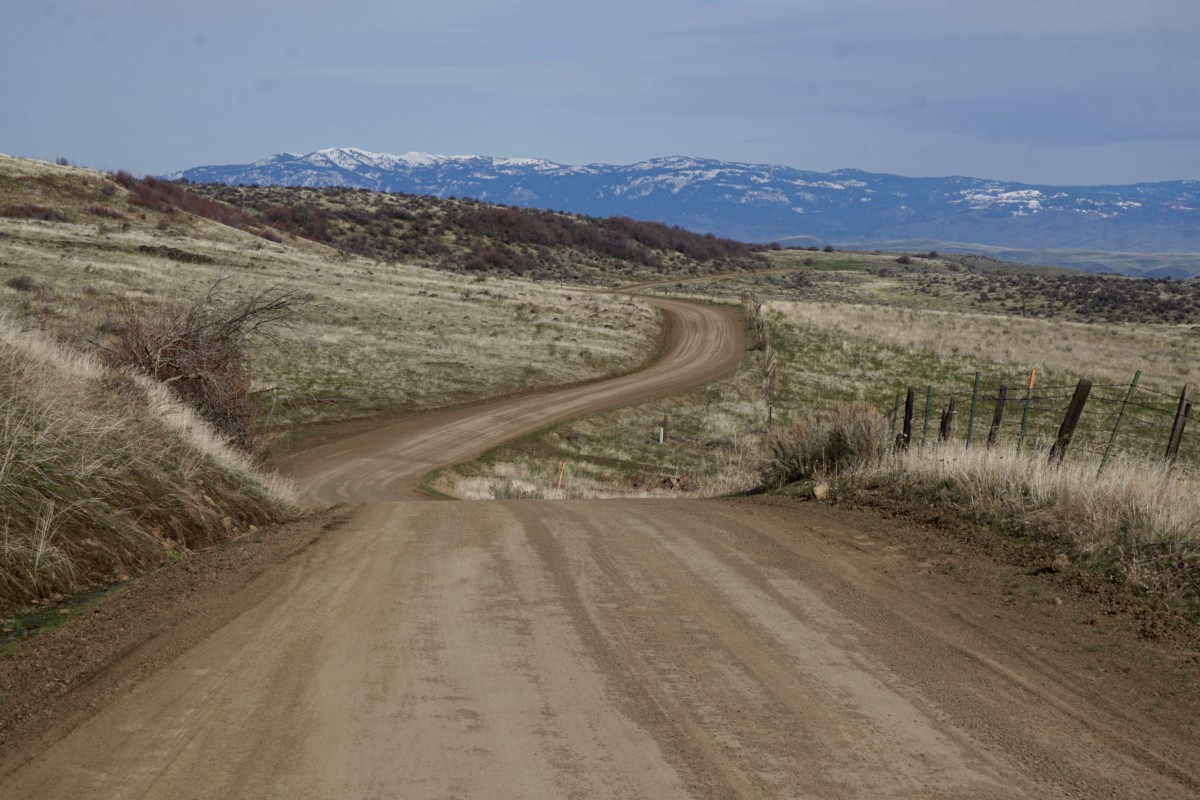
Before long, the road reemerged from the trees and dried completely.  Conditions on the southbound leg started off similar to the northbound side. The cloud-filtered sun warmed the air and I enjoyed the (mostly) downhill grades and undulating terrain.  The Pack Rat hummed along, carrying speed through the troughs and over the top of the endless rollers.
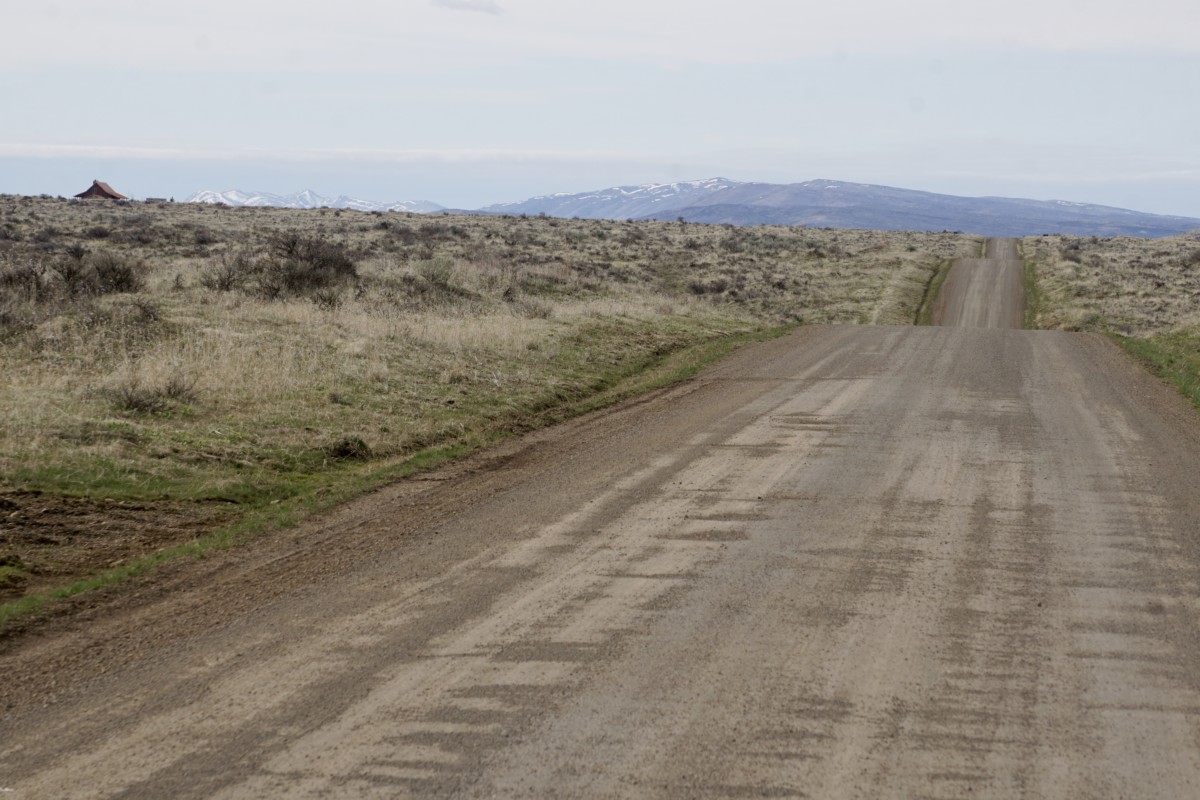
When we hit the Washington County line road conditions changed drastically.  The road had recently been graded and was evenly surfaced with 1-2″ size gravel.  I’d estimate the gravel had been laid no more than a week prior.  There were decent tracks laid down by auto traffic through most stretches but the rock lay in piles several inches deep in some spots.  Line choice was key, but the Pack Rat handled these challenging conditions admirably.  I’ve often felt that slimmer tires perform well in these kinds of conditions as they are narrow enough to push the loose rocks aside and grip on the hardpack beneath where a wider tire would float and roll on the top layer.
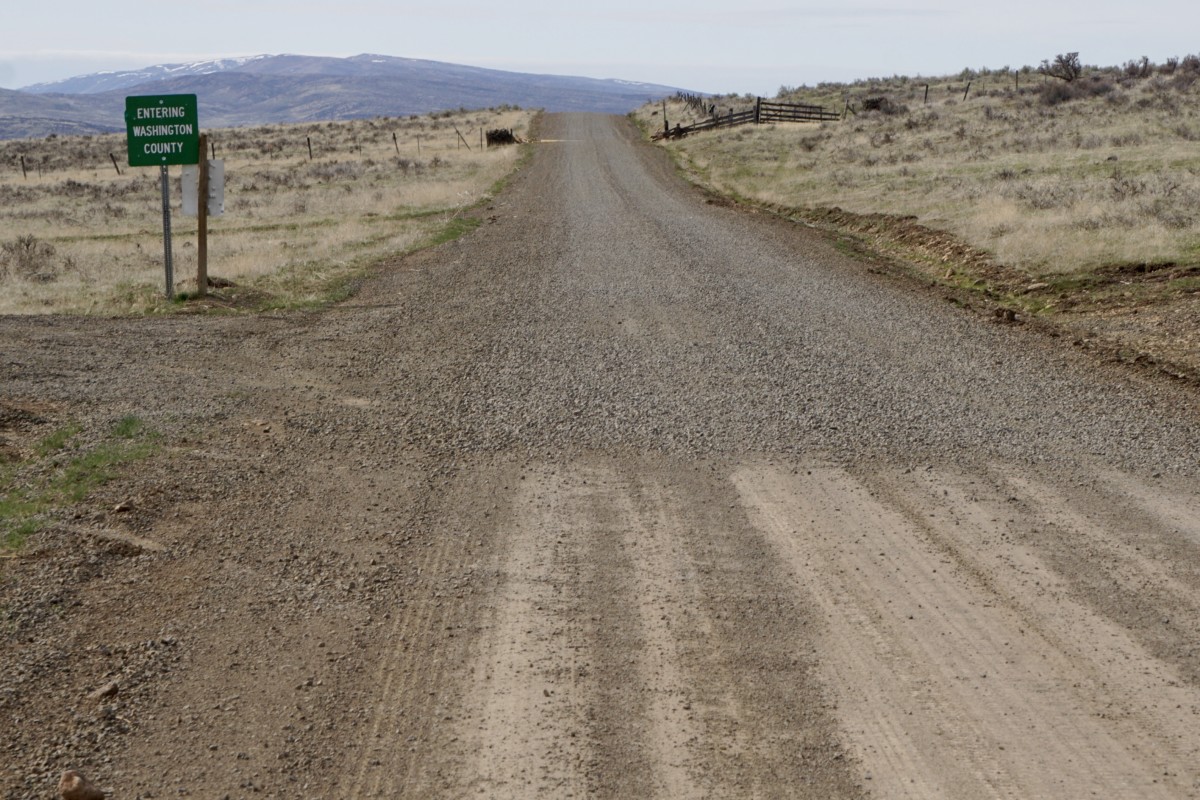
After turning off the recently-graded stretch of road conditions improved.  There were some seriously steep climbs on this leg of the ride that I would have wished away but the Pack Rat never held me back.  My legs had begun to tire and struggled to supply the necessary power.
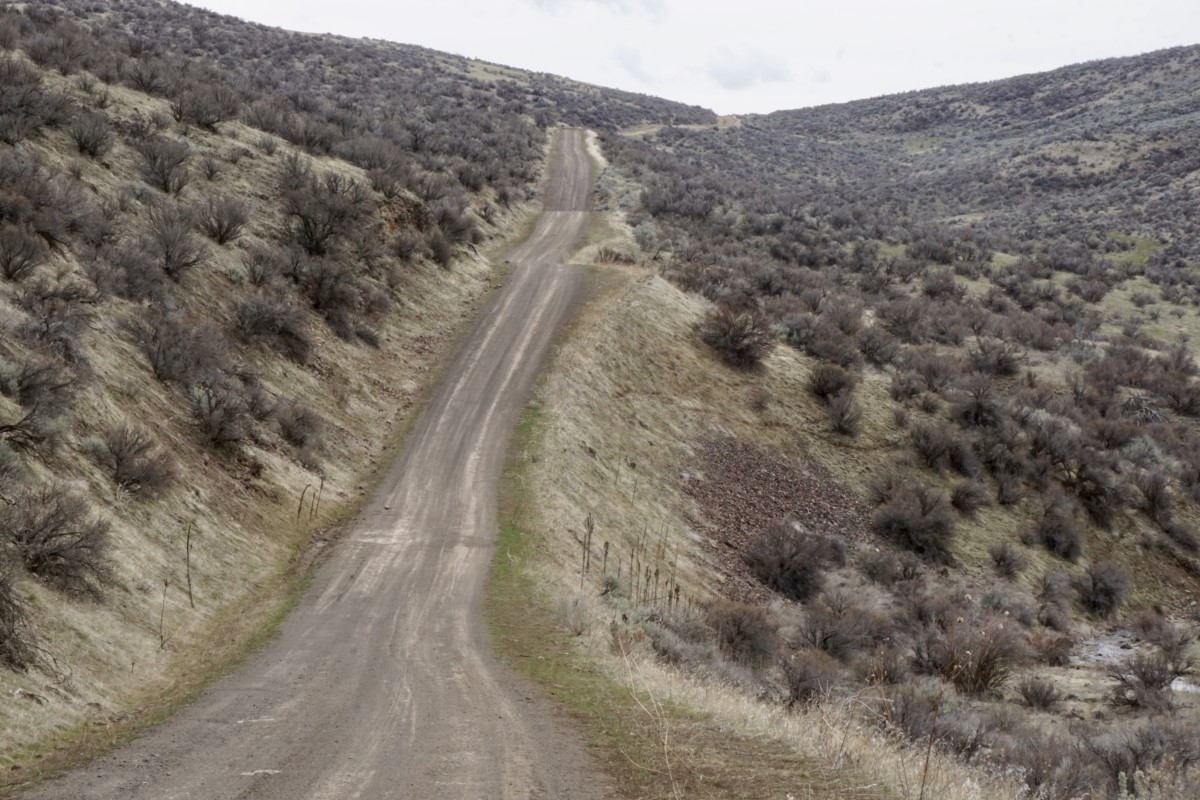
Approaching the town of Emmett, it began to look like the highway would be a better option than returning via yet more nasty rollers in the Eagle foothills.  My body was tired and shadows were getting long.  We spun our way down the paved highway shoulder into the valley, turned to the east and finished the final few miles back to Boise.  My pedal strokes were weak and I was happy to be on a bike that rolled efficiently and didn’t ask for much leg strength to maintain forward progress on the asphalt and chipseal.

Overall, I came away from this ride even more excited for the Pack Rat’s potential.  It may not be your go-anywhere touring bike.  There are plenty of roads, tracks and trails over seriously rugged terrain in Idaho where a little more bike (Ogre, Troll, ECR, Bridge Club, etc.) would be a better fit.  It also won’t carry a transcontinental load as well as the Long Haul or Disc Trucker.  However, if you want a bike to travel a mix of dirt and pavement with a light-to-medium load on the weekend, pull double-duty on the weekday commute and have a good time doing it, the Pack Rat is worth your attention.  If nothing else, it’ll get you out of town and into the fun stuff in a hurry!

Categories
Bike Touring Equipment Bike Touring Tips Bikepacking Other Planning Resources

Colorado Trail Race 2017 Gear Roundup

The epically wet and stormy 2017 running of the Colorado Trial Race pushed riders and their gear to the absolute limits.  The technical singletrack and massive elevation gain of the CT also reward a light-and-fast approach to packing.  There is no room for excess gear in the alpine.  However, improper or inadequate gear can have serious consequences on self-supported rides and definitely contributed to the large number of riders unable to finish the CTR this year.

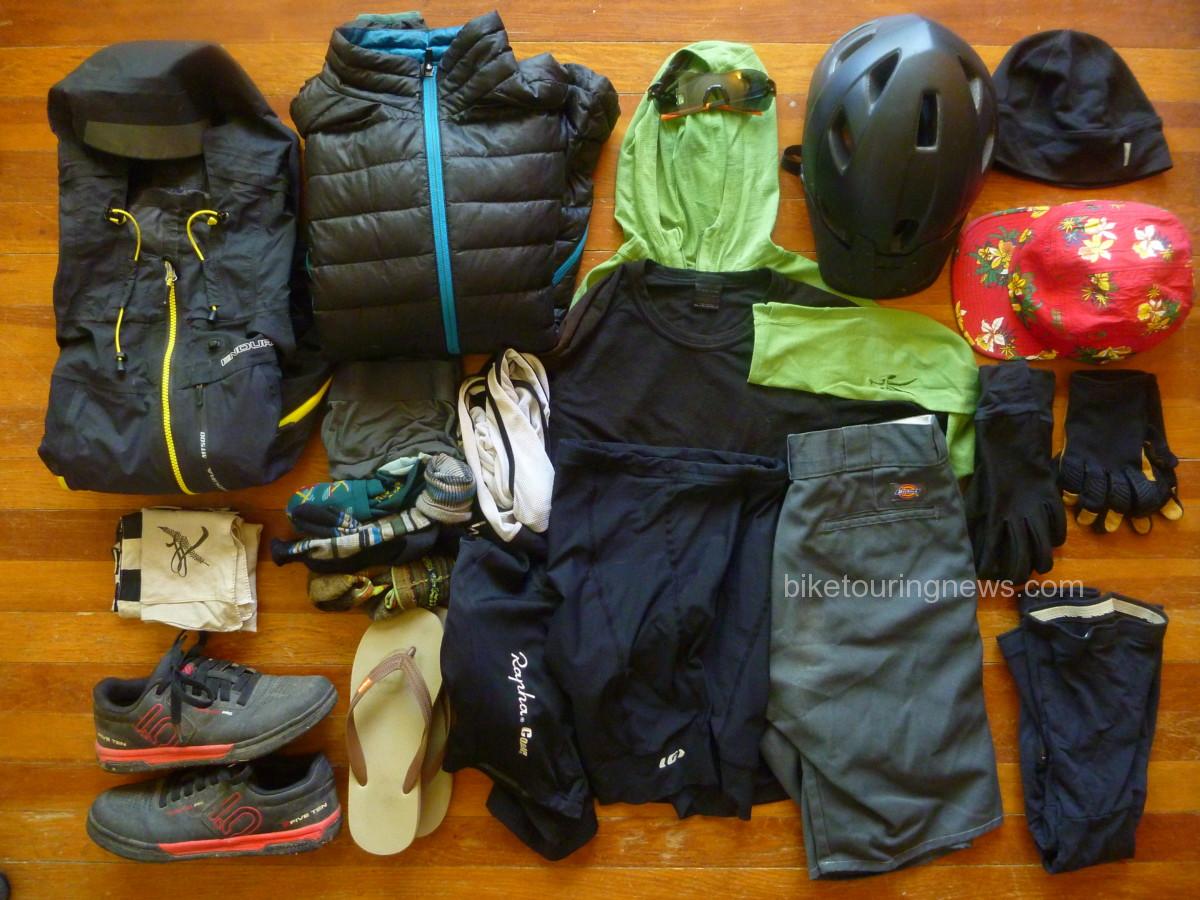
In this post, I’ll go over the gear I took on the trail, what worked and what didn’t.  The photos below were taken before departing for Colorado.  I’ve noted a handful of minor adjustments made on the final pack in Durango.

Clothing and Accessories

  • Icebreaker Wool T-Shirt, SS
  • Ibex Wool Pullover, LS w/hood
  • Dickies Cutoff Shorts
  • Rapha Bibshorts
  • Louis Garneau Tri Shorts (aka “Touring Undershorts”)
  • Rapha Wool Skullcap
  • Hike-a-Bike Cap (lost on the trail)
  • Handkerchief x2
  • Five10 Freerider Pro Shoes
  • Synthetic Boxer Briefs
  • Point6 Wool Socks, 1 light, 1 midweight
  • Wicking Synthetic Socks
  • Leg Warmers (swapped for knee warmers before the start)
  • Softshell Gloves
  • Trail Gloves (lost on the trail)
  • Sierra Designs Down Jacket
  • Endura MT500 Rain Jacket
  • Smith Sunglasses w/smoke, amber & clear lenses.
  • Giro Helmet
  • Grocery Store Sandals

Overall, my clothing selections were solid.  Many riders also brought rain pants, shoe covers and additional wet weather protection.  I definitely had wet legs and feet for much of the ride but don’t think additional rain gear would have helped with that situation.  The Endura MT-500 jacket was a standout performer.  While it isn’t the most packable, it breathes better than any rain gear I’ve ever owned and incorporates well-designed ventilation to keep it comfortable in warm temperatures.  The helmet-sized hood helped seal out rain and hail while conserving additional body heat.

While the rain jacket didn’t garner much attention from fellow riders, my shoe and pedal combination certainly did.  While flat pedals have made big inroads in other mountain bike disciplines, the vast majority of CTR riders ran clipless pedals.  Nearly every day of the ride I had at least one other rider make an envious comment about how comfortable my shoes looked as we pushed our bikes up one hellish rock pile or another.  In my opinion, flat pedals are the way to go for all but the strongest riders on loaded singletrack rides.   Five Ten’s rubber compounds provide excellent grip and the Freerider Pro’s sole delivers an optimal blend of pedaling stiffness and walking flexibility.  Despite the constantly wet conditions, I made it through at least 100 miles of hike-a-bike with no blisters or other significant foot issues.  Frequent dismounts and remounts are also much more fluid on flat pedals with no pedal binding to search for.

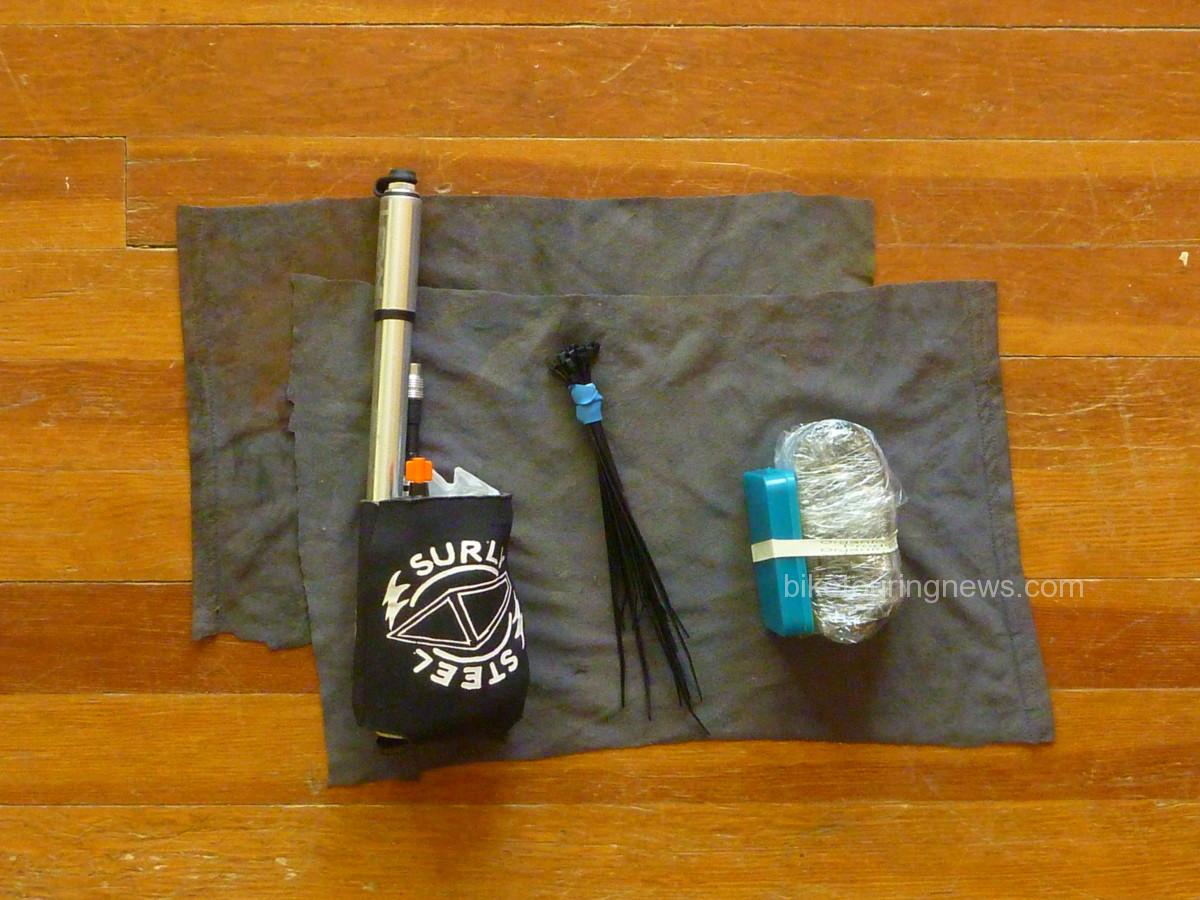
Yet another use for the Surly Insulated Sheath: stash pack for tools and spares!

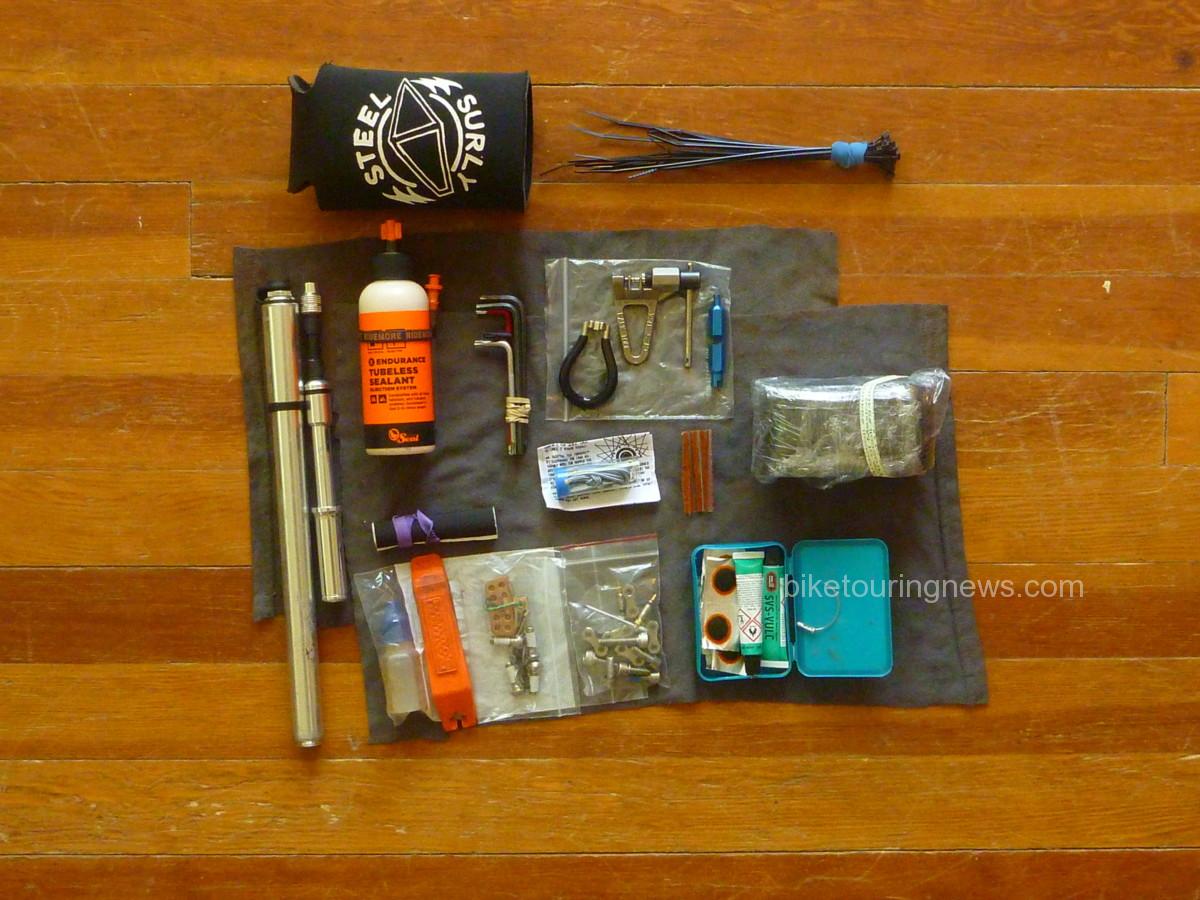
Tools & Spares

  • Hex Wrenches:  5,4,3,2.5,2mm
  • Torx Wrenches:  T-25,20,10
  • Park Chain Tool
  • Fiber-Fix Spoke
  • Spoke Wrench, #0
  • Pedro’s Tire Lever
  • Valve Core Remover
  • Gear Repair Tape
  • Zip Ties
  • Chain Lube
  • Rags x2
  • 29er Tube
  • Lots o’ Patches
  • Patch Cement: 5g Tubes, x2
  • 11speed Quicklink x2
  • Spare Chain Links
  • Spare Hardware: M5, M6 bolts in assorted lengths
  • Spare Brake Pads
  • Curved Needle (business end protected with a cable crimp. Good thinking, Nic.)
  • Leatherman Wingman Multi-Plier
  • Tire Sealant, 4oz
  • Spare Valve Core x2

Thankfully, I found very little use for my tools and spares aside from the rags and chain lube.  The Ninja Gorilla was a rock-solid partner, handled everything the trail dished out with nary a squeak, creak, clunk or complaint.  Regardless, I wouldn’t have felt comfortable leaving many of these items behind on a ride this long.  I did pick up an additional set of brake pads in Leadville as I was concerned about burning through them on the long, wet descents.  I never wound up replacing the pads I started on but having 2 spare sets on board provided peace of mind.

Hydration and Nutrition

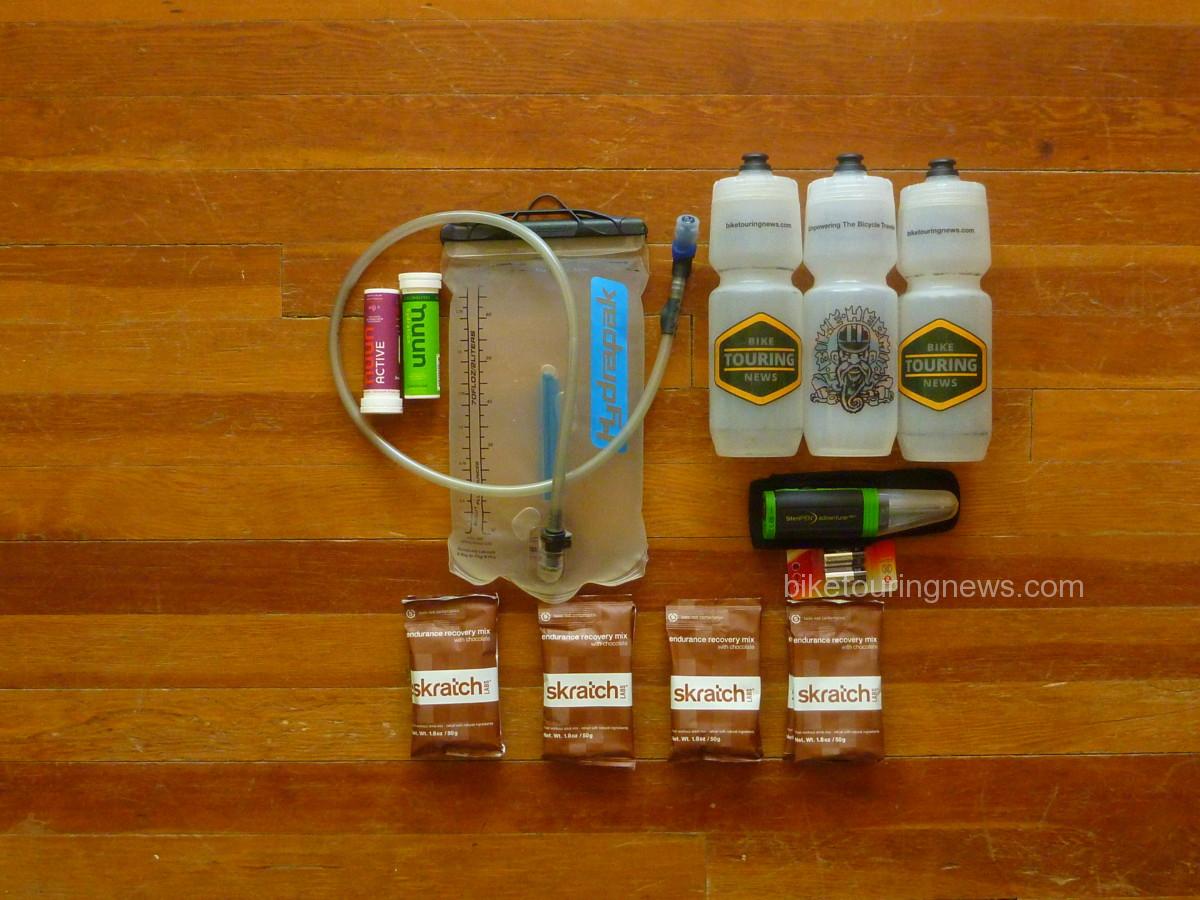
Water was especially abundant on the CT this year, so my three bottles provided more than enough capacity.  The Colorado Trail Guidebook and Databook provide only basic directional information for the Wilderness detours, so it was sometimes unclear how much water would be accessible along the detour routes.  For the most part, I started looking for a water source when I got down to only one bottle and had very little difficulty staying topped up.

The Steripen worked well for me on this trip.  While it may not be as fast as some filters, it is wonderfully packable and easy to use.  I anticipate this will be my go-to purification method on future bike trips, replacing the Sawyer filter I’ve used in the past.

Hygiene and First Aid

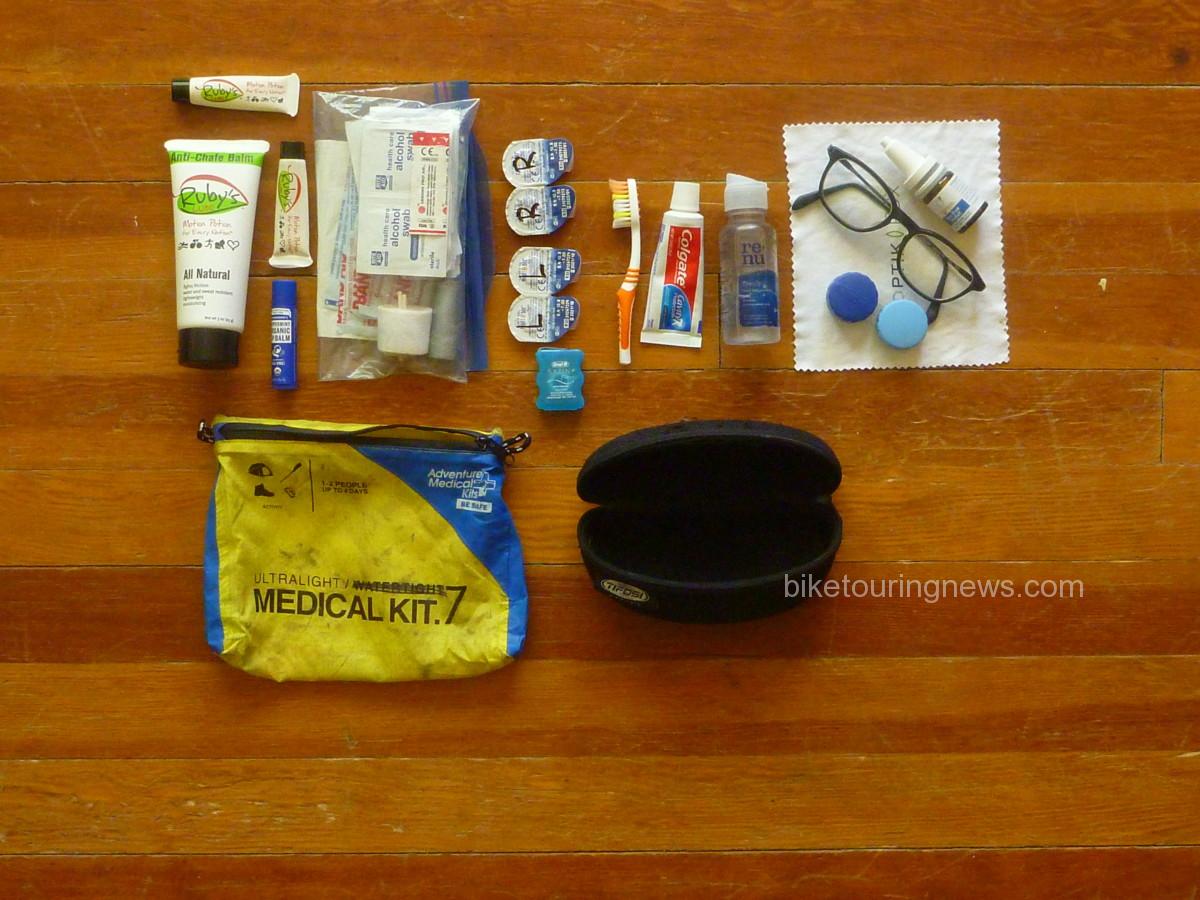
  • Toothbrush
  • Toothpaste
  • Glasses
  • Spare Contacts x2
  • Contact Case
  • Contact Solution
  • Dry Eye Drops
  • Alcohol Wipes
  • Ruby’s Lube
  • Gauze Bandages
  • Athletic Tape
  • Duct Tape
  • Butterfly Bandages
  • Asst. Large Band-aids
  • Dr Bronner’s Lip Balm
  • Dental Floss

I didn’t find much use for any thing in this category other than my toothbrush, toothpaste, eye drops and a handful of alcohol wipes.  I was surprised that I never reached for the Ruby’s Lube but I spent so much time on my feet over the first 4 days that I didn’t have time to develop saddle sores or chafing.  I also experimented with extended-wear contacts on this ride.  The twice-daily ritual of sticking filthy fingers into my eyes to insert or remove contact lenses has generated infection problems in the past, so I hoped extended-wear lenses would be the solution.  I wore the same pair of lenses throughout the entire 9 days I spent on the trail with zero issues.  I used rewetting drops occasionally but found that my eyes stayed well-lubricated as long as I kept up with hydration.

Sleep Kit

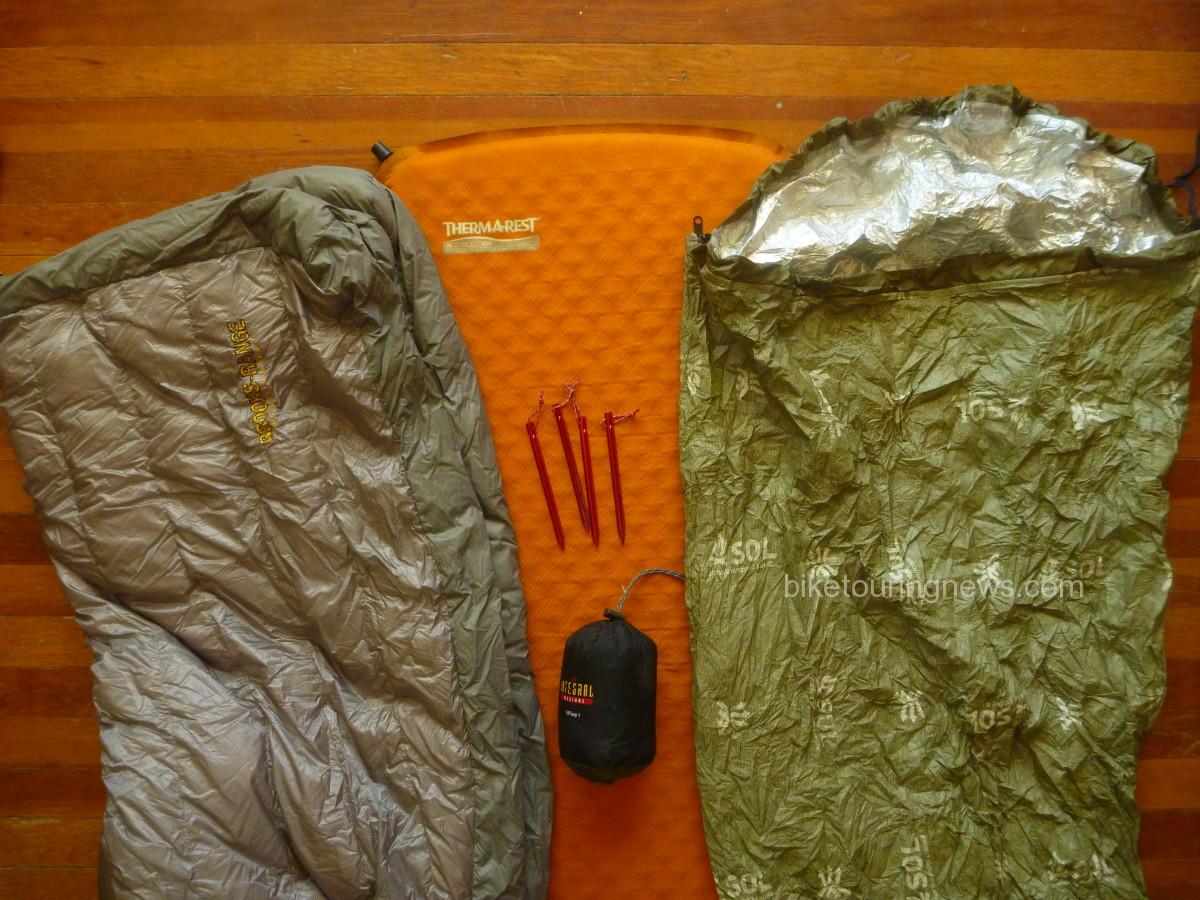
  • Brooks-Range 45-deg Down Quilt
  • Thermarest Prolite 3/4 Pad
  • Silnylon Tarp, 8x10ft
  • Stakes, 4
  • SOL Escape Bivy

This is the category that proved to be many riders’ downfall on the CTR this year.  Of the 42 riders who didn’t finish, I’d guess that a significant number were carrying inadequate shelter.  I spent a full 12 hours hunkered under my tarp just below Stony Pass waiting for the weather to clear.  Riders without proper shelter were forced to press on through the storm or retreat miles back down the road to find shelter, even all the way back into Silverton.  At least two riders who continued into the bad weather were forced to scratch after enduring miserable or even dangerous conditions.  I may have been among them if I hadn’t had that one little scrap of silicone-coated nylon.  The bivy and down quilt combination kept me comfortable across a wide range of temperatures.  I don’t think I would ever carry a more minimal sleep kit unless precipitation were completely out of the question.  Overall, I got good rest on the trail and that sleep bank allowed me to make relatively efficient progress while on the bike.

Electronics and Navigation

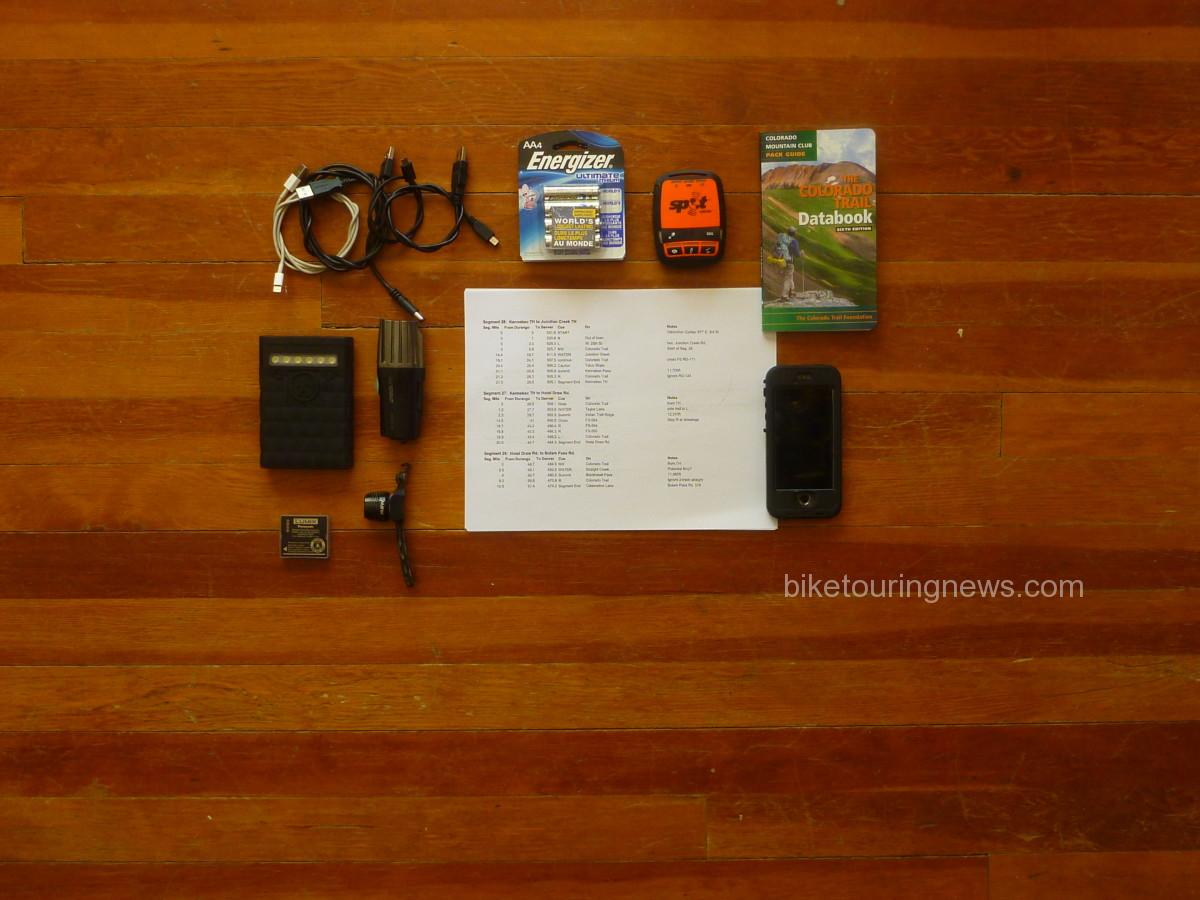
  • iPhone with GaiaGPS app, tracks and maps downloaded
  • Printed Cue and Resupply Notes
  • Colorado Trail Databook
  • Cache Battery
  • Helmet-Mount Light
  • Point&Shoot Camera and Spare Battery
  • Charging Cables
  • SPOT Tracker and Spare Batteries
  • Little Red Taillight

Generally speaking, navigation along the Colorado Trail is easy.  Junctions are mostly well-signed and confidence markers are frequently posted in between.  However, the bike detours can present navigational challenges.  With my iPhone mounted to the Rokform handlebar mount, I was able to double-check my routing with two presses of the home key.  This prevented many navigational miscues and kept me from making any costly mistakes.  However, wet touchscreens are difficult or impossible to navigate, so I had to take care to keep my phone from collecting water.  I used the Databook for its elevation profiles, water and campsite notes.  It wasn’t much help for navigation as this year’s CTR ran from Durango to Denver, contrary to the westbound route description in the Databook.  I created my own cue sheet as a navigational backup but used it more for distance estimation than navigation.

Another standout performer on this ride was the Sinewave Cycles Beacon headlight and USB charger.  This key piece of gear lit my way and kept my phone, helmet light and backup battery charged throughout the ride, despite the notoriously slow speeds common on most of the route.  Look for a more thorough review of the Beacon and its performance in a future post.

Luggage

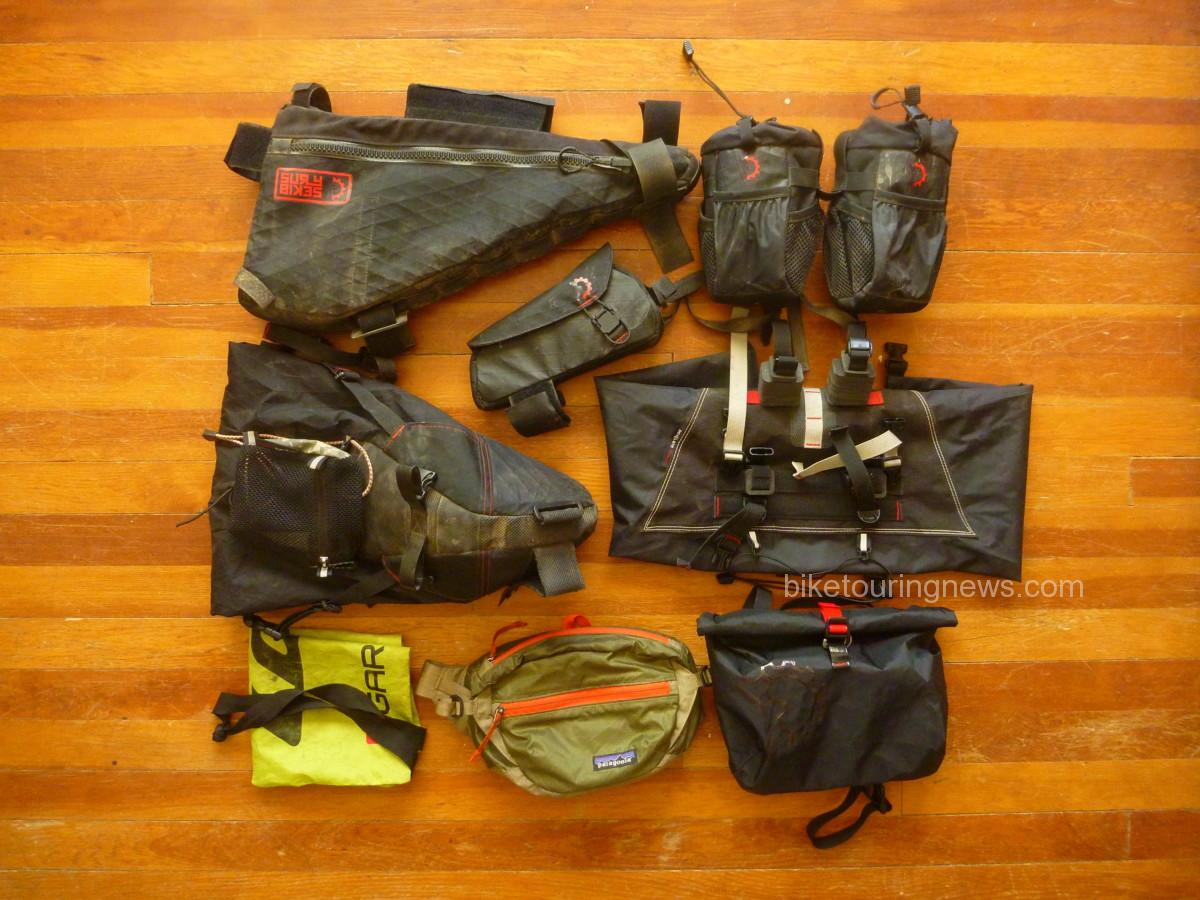
As usual, my Revelate kit was more than up to the task.  I added the Periphery Pocket at the last minute and was very happy to have a convenient spot to stuff my Databook, cues, gloves, charging cables or other quick-access items.  It also expanded my food-carrying capacity pretty significantly.  This may be my new favorite piece of Revelate gear, right up there with my Mountain Feedbags.

The hip pack was another handy addition that allowed me to further extend my food stores or carry my 70oz hydration bladder when needed.  I quickly forgot I was wearing it when it was unloaded.

Other than the synthetic socks (wore them for a few hours, were just too thin to be comfortable for long) and my hike-a-bike cap (wore on Day 1, sat in a wet heap strapped to my seat pack for 3 days, lost on the trail on day 5) I was very happy to have every piece of gear I brought on the ride.  While some riders are able to push the limits of minimalism much further, I felt like I maintained a good balance between keeping gear weight down without sacrificing safety or comfort to any great extent.  I also had just enough space left for all the calories I’d be toting for the long push from Silverton to Buena Vista.

What questions do you have about packing for singletrack bikepacking adventures?  Anything you’d like to know about the Colorado Trail experience?  What trips do you have coming up?  Sound off in the comments below and I’ll do my best to answer in a reply or future blog post.  Thanks for reading!


Categories
Idaho Our Trips Planning Resources Tours and Rides

Grindola Weekend Ride: May 19-21

Spring has finally arrived in southern Idaho and it’s time for a good overnight bike trip!  We’re planning a ride for next weekend and want you to come along!


Spring Riding


For the record, this is not an organized bike race or event and is unsupported, unsanctioned and in no way affiliated with Bike Touring News.  We are offering a suggested route and meeting place/time; nothing more.  You are 100% responsible for yourself and every aspect of your participation.


photo by David Jones / @awakenengage


Disclaimers aside, we hope you’ll join us for what we hope will be a great weekend!  Here’s one version of the plan:

Friday, May 19

  • Depart Bike Touring News (3853 Garden Center Way) at 4pm.  Ride to Montour Campground.
  • Approx. 27mi & 1,800ft elevation gain.  Mostly paved or well-graded dirt roads with some sustained climbing.
  • https://ridewithgps.com/routes/20783892
  • UPDATE:  The campground is open!  16 spaces available for overnight camping at $8.00/day, as well as dispersed tent camping for $3/day. Campsites are available on a first-come, first-served basis. Potable water and bathrooms are available.

Saturday, May 20

  • Ride the “Grindola” route mapped by David Robert Jones (@awakenengage)
  • Approx. 84mi & 6,500ft elevation gain.  Mostly rolling dirt roads with some sustained climbs and pavement sections.
  • https://ridewithgps.com/routes/20809180
  • Some riders are planning on splitting this segment into an overnighter, camping somewhere at the northern end of the route.
  • For purposes of camping Saturday night we are considering riding this counterclockwise, camping just after the Dodson Pass.

Sunday, May 21

  • Ride back to town via Friday’s route or an alternative.


Want to Trim some Miles?  Shorten the Trip!

There will also be a number of folks driving from Boise to Montour, either Friday night or Saturday morning.  Email [email protected] or call the shop to inquire about ride sharing.  Parking may be limited at the campground but perhaps we can leave cars at the Triangle Cafe.  This itinerary is only a suggestion and you’re welcome to make adjustments or do your own thing!


Rolling Johnson Creek


Bike Suggestions

Wide tires and low gears will make for happy riders.  We’d consider 35mm rubber the minimum, though some prefer the more exotic brand of suffering delivered by skinny tires on Idaho gravel.

We’re psyched to ride and hope you are too!  Call, email or comment with any questions!


photo by David Jones / @awakenengage
Categories
Bike Touring Equipment Bikepacking Planning Resources

The Best Shelter for Bikepacking: Three Opinions

We get lots of questions about shelter from folks getting started in bikepacking.  What shelter is best?  Can I use the ____ that I already own?  How do I know which shelter to bring on a given trip?  In this post, we’ll offer three perspectives on the best bikepacking shelter and try to answer some of those questions!

While many people already do some kind of camping, many shelters that would be appropriate for car camping or even backpacking are not well-suited for bike travel.  Space and weight are at a premium when traveling by bike, so heavy and bulky shelters are a liability.  In selecting a shelter for bikepacking, there are a few key factors to consider:

  • Sleeping Comfort
  • Protection from the Elements
  • Interior Space & Gear Storage
  • Ease of Site Selection & Setup
  • Packed Size/Weight

Obviously, many of the above factors can change dramatically depending on weather, environment or season.  Plan Ahead and Prepare for the conditions you expect to experience.  Any shelter will offer some level of versatility but some excel only in certain conditions.  Also, every person has their own preferences, likes and dislikes when it comes to shelter.  In this post, we’ll offer perspectives from the Bike Touring News crew on the different shelters we use.  What shelter do you prefer for bikepacking?  What did we miss?  Read through and add to the discussion with a comment below!

The Bike Hermit’s Preference:  The Hammock

Several years ago, I came across some articles about stealth camping – or “hiding in the woods” as some people call iton an obscure site called crazyguyonabike.com. The author’s choice of shelter was a Hennessy Hammock and – for some reason I can no longer remember – the idea of bike touring with a hammock appealed to me.

image of camp hammocks
Not many spots for a tent

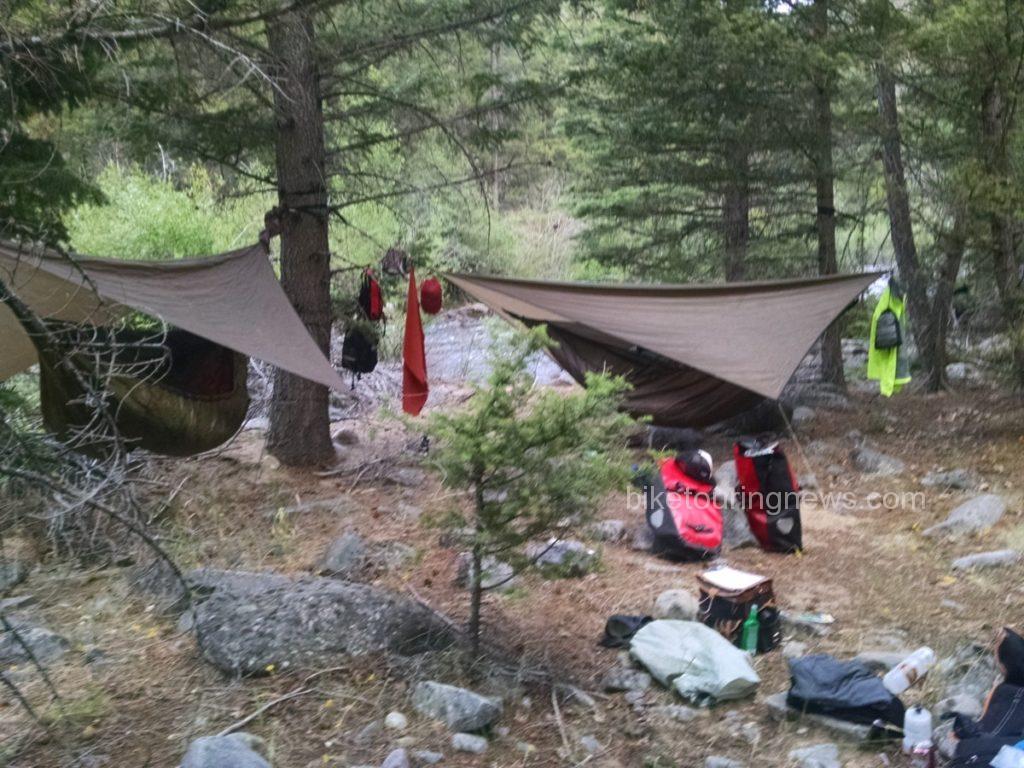
The design of my Hennessy Hammock impresses me every time I use it. The hammock is attached to and suspended from a ridge line which also supports the enclosing insect netting. A separate rain fly keeps the sleeper dry and/or out of the wind. Upgrading from the stock rain fly to the Monsoon rain fly creates a space around and under the hammock big enough to park the bicycle out of the rain. Hennessy sells a 4-season SuperShelter system consisting of a second layer of nylon on the bottom of the hammock which creates a sleeve where an insulating pad can be inserted. My experience is that the hammock is very cold to sleep in without the 4 season system.

Worries about sleeping in a “hammock” position and only being able to sleep on ones back are mitigated by the asymmetrical design of the Hennessy; once in the hammock the sleeper can put his feet to one side and his head to the other and the hammock offers a flatter, even if still not completely flat, support. I am not able to sleep face down but I can sleep comfortably on either side.  This is obviously a big plus for side sleepers who struggle for comfort when sleeping on the ground.

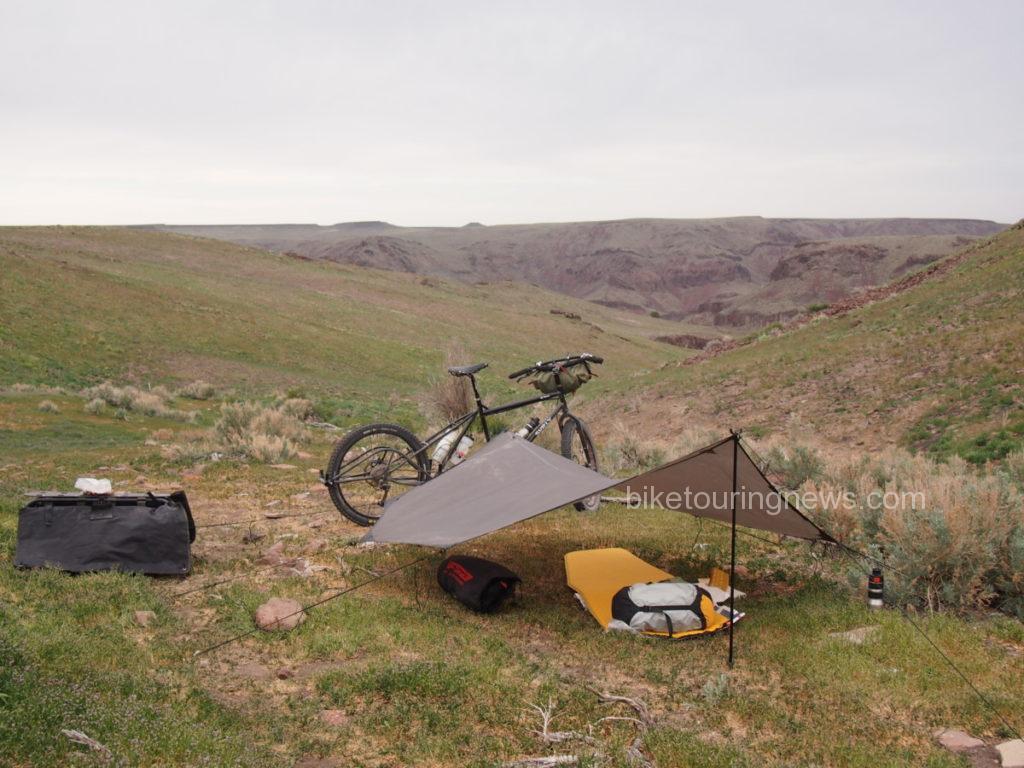
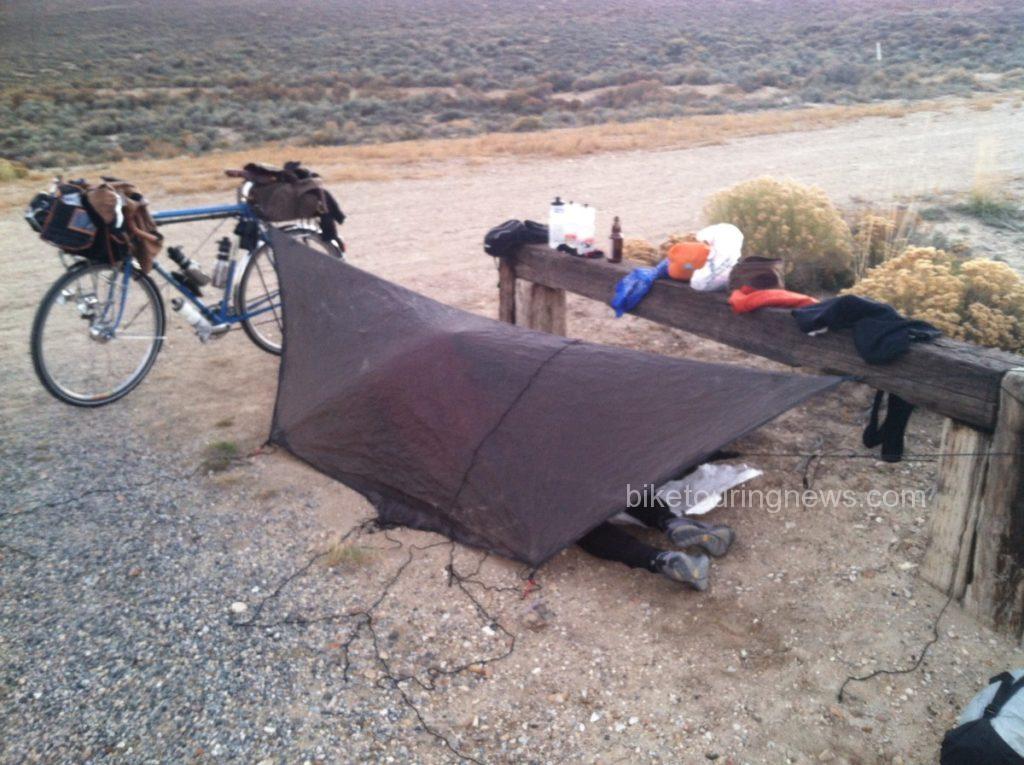
People always ask what I do when there are no trees. The rain fly, when staked at one end or tied to a sagebrush, and supported at a higher point by the bike or a tree or a fence post at the other end makes a dandy shelter. If the night is cold the hammock can be used laying on the ground under the rain fly as a sort of cocoon.  In this configuration, the hammock becomes a sort of tent/bivy/hammock hybrid shelter.  The benefit of sleeping suspended is lost and setup can be tricky but this capability extends the range of conditions where a hammock is functional.

image of bike and tarp
The Clickstand bike support as a tent pole!

On the last couple of trips I have been using Hennessy’s SnakeSkins which stay attached to the ridge line and simple slip over the entire hammock and pad and swallow the whole thing up leaving a long, fat, nylon snake that can be stuffed into one half of a pannier. This is a much faster way to set up and take down the hammock.

image of end of hammock
The SnakeSkins fold out of the way on the ridge line when the hammock is in use and just slide down from either end to make a quick stuff sack.


image of tarp tent
This was to be a very cold night. The fly was on top of me by morning with the weight of a heavy layer of frost. This is the Monsoon Fly.

Pros:

  • Very comfortable – none of the pressure points associated with sleeping on the ground
  • Warm enough for most conditions when used with the two layer insulation system
  • Can be used on uneven, sloping, rocky or wet terrain
  • Completely weatherproof
  • No condensation
  • Packs relatively small – no tent poles.

Cons:

  • Can’t always be suspended
  • Not necessarily lighter than a good tent
  • Not ideal for relaxing – minimal interior space
  • Not as private as a tent – hard to dress or undress in a hammock
  • Makes some people feel claustrophobic

Sky King’s Preference:  The Tent

While the Bike Hermit and Sky King are both huge fans of the Hennessy Hammock there are situations where a tent is a more practical shelter, especially in desert environs where trees are scarce.  Sleeping on the ground in a hammock is an option, though one without most of the hammock’s benefits.  Comparatively, a good tent offers increased comfort and space at roughly the same weight and pack size as the hammock, when divided among a team of two.

perfect for Desert Bike Packing
Big Agnes Angel Springs UL2 in the Owyhee Canyonlands

For our first couple of “let’s take the tent trips” we used our 3-person Kelty – a great tent. We bought it for backpacking primarily because it was roomy – with two vestibules and two doors – making for easy entry/exit and gear storage. However, it is a bit bulkier than we’d like for bike trips. We bit the bullet and now own a Big Agnes Angel Springs UL2. We gave up the double entrance, meaning someone is getting crawled over for the middle of night nature call. Like most tents, it incorporates a rain fly vestibule, allowing for a place to tuck gear out of the weather.

14495463_265649453829296_3002774429655013193_n

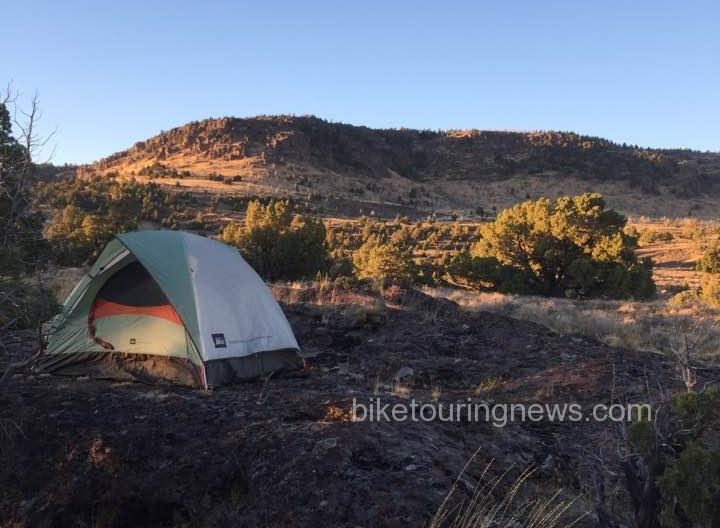
We carry the tent for most of our desert riding, especially in new terrain where we aren’t certain of the tree situation.  Site selection – especially in areas where large trees are few and far between – is relatively easy with a 2-person tent.  The tent’s footprint is relatively small, but very hard or soft ground can present guyline challenges.  On surfaces where stakes won’t hold or can’t penetrate, you’ll have to get creative as most tents must be staked out for a proper pitch.

Weight wise, the combination of tent and sleeping pads is roughly equal to that of two hammocks without pads. We can divide the load between bikes and packed volume equates to about the same as the hammock.  For teams of two who don’t mind sharing space and gear, a tent makes an appealing option.  Solo adventurers may find the packed weight and size burdensome unless they are willing to spend big bucks for high-end, ultra-light models.

Pros:

  • Easy entry and exit.
  • Relatively easy site selection.
  • Vestibule space to keep gear dry.
  • Space to sit up and move around inside, especially nice if bad weather hits.
  • Tent components can be divided between bikes, decreasing each rider’s load.

Cons:

  • Heavier and bulkier on average.
  • Higher cost for lightweight options.
  • Tent poles can be difficult to pack on a bike.
  • Potentially tedious and time-consuming setup and takedown.
  • Condensation can be an issue in certain conditions.


Ryan’s Preference:  The Bivy Sack

Bivy is short for “bivouac,” which is a fancy word for making camp.  “Bivouac Bags” or “Bivy Sacks” are essentially waterproof sleeping bag covers and have been used since time immemorial by soldiers, alpinists or anyone else who needs a simple shelter that can be quickly deployed in nearly any site.

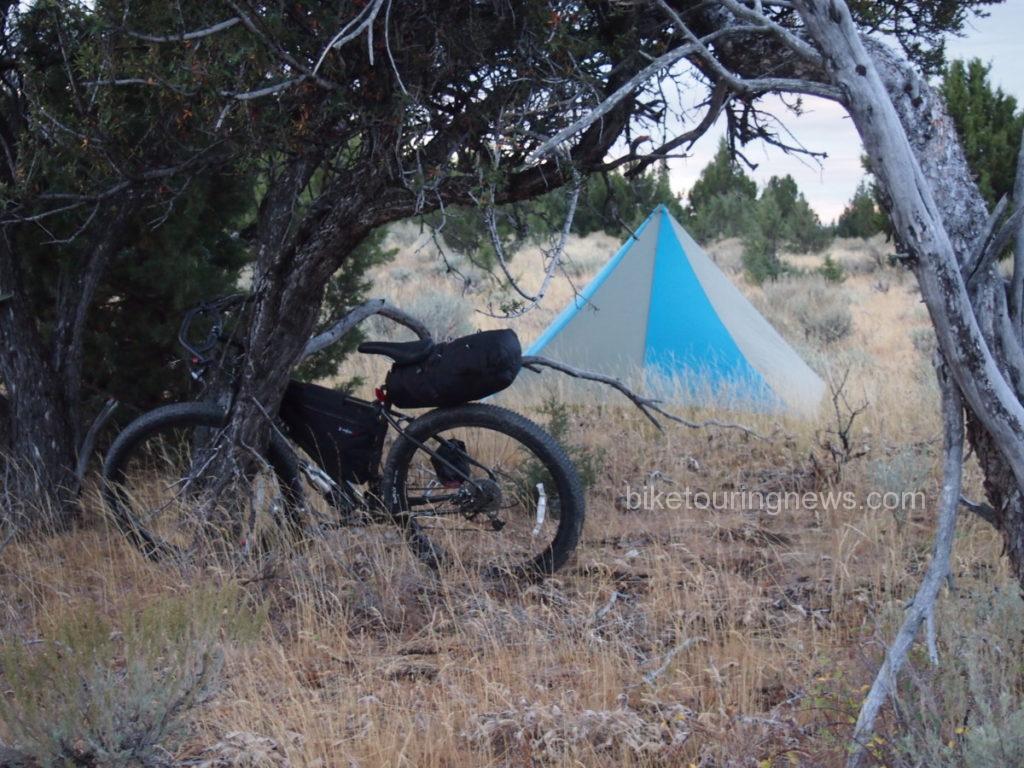
Twilight falls on the author’s campsite in the Owyhee desert.

There are a wide variety of bivy sacks on the market intended for a range of purposes.  Ultralight emergency bivvies are intended to help you survive an unplanned night out.  They are generally inexpensive, pack small, weigh next to nothing and offer little in terms of comfort.  Some ultra-minimalist bikepackers use shelters of this type for racing but they’re planning on sleeping 2-4 hours per night, if at all.

The more fully-featured bivvies are designed for alpine climbing or similar pursuits. They typically employ sturdier construction, waterproof/breathable fabrics and may even incorporate some kind of additional structure to increase space and ventilation.  If you’re looking for a full night’s sleep or expect anything other than perfect weather, this is the way to go.

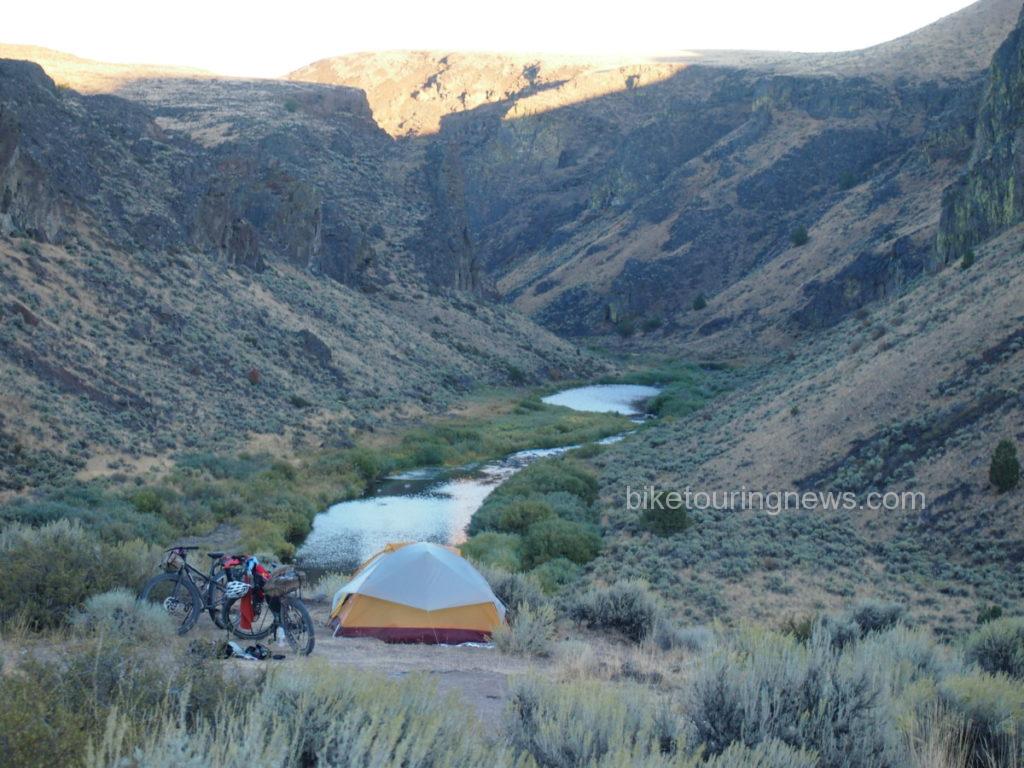
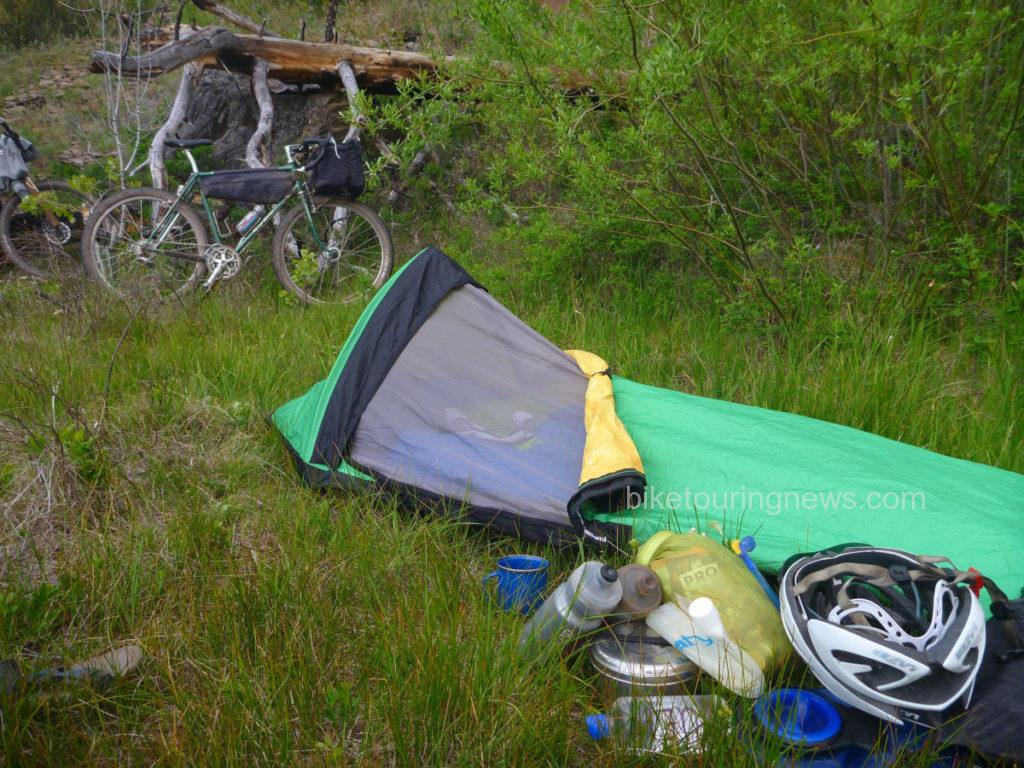
The insect mesh on some full-featured bivvies can be a major plus in buggy locations, such as this creekside camp on the 2014 Oregon Outback.

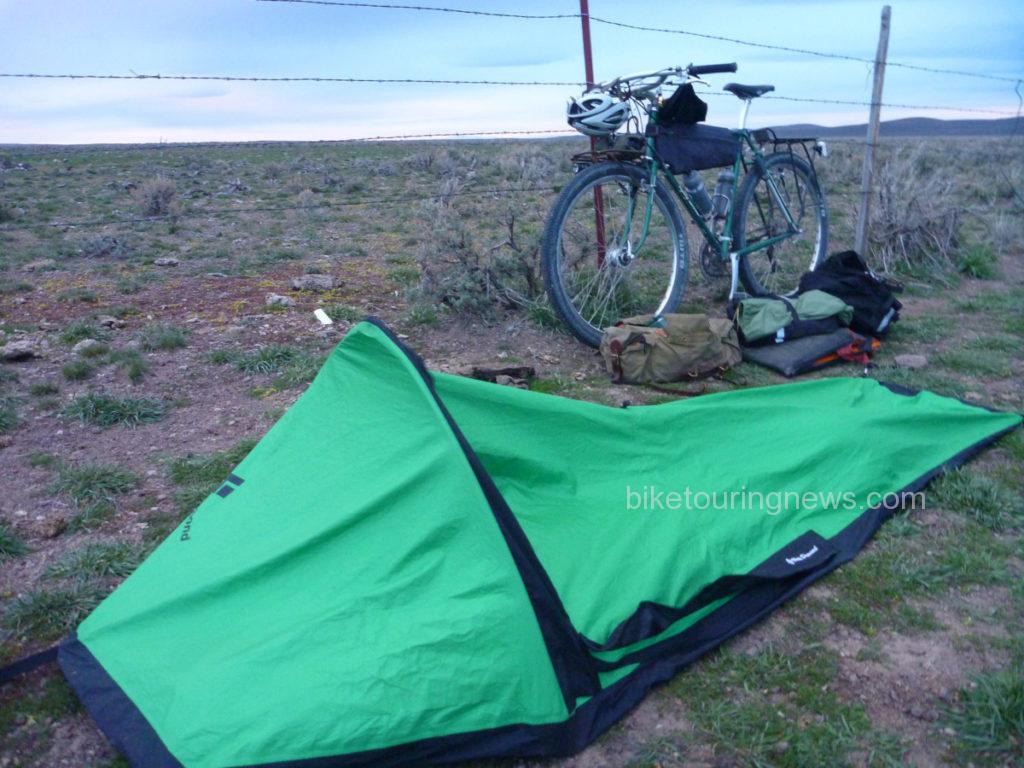
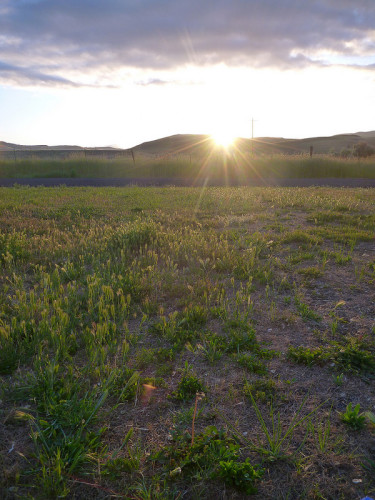
Even though a full-featured bivy can weigh as much or more than an ultra-light tent, it is significantly less expensive, more durable, simpler to pack and ultimately easy to deploy.  For me, this is the bivy’s main advantage.  Any piece of level ground large enough to lay on can be your campsite and the shelter is ready to use within seconds.  This allows you to spend more time riding and exploring rather than searching for an appropriate site to pitch your tent, hang your hammock or fly your tarp.  No stakes, guylines or trees required!  There is also nothing quite like laying on the earth with no roof over your head and watching for shooting stars on a clear night while you drift off to sleep!

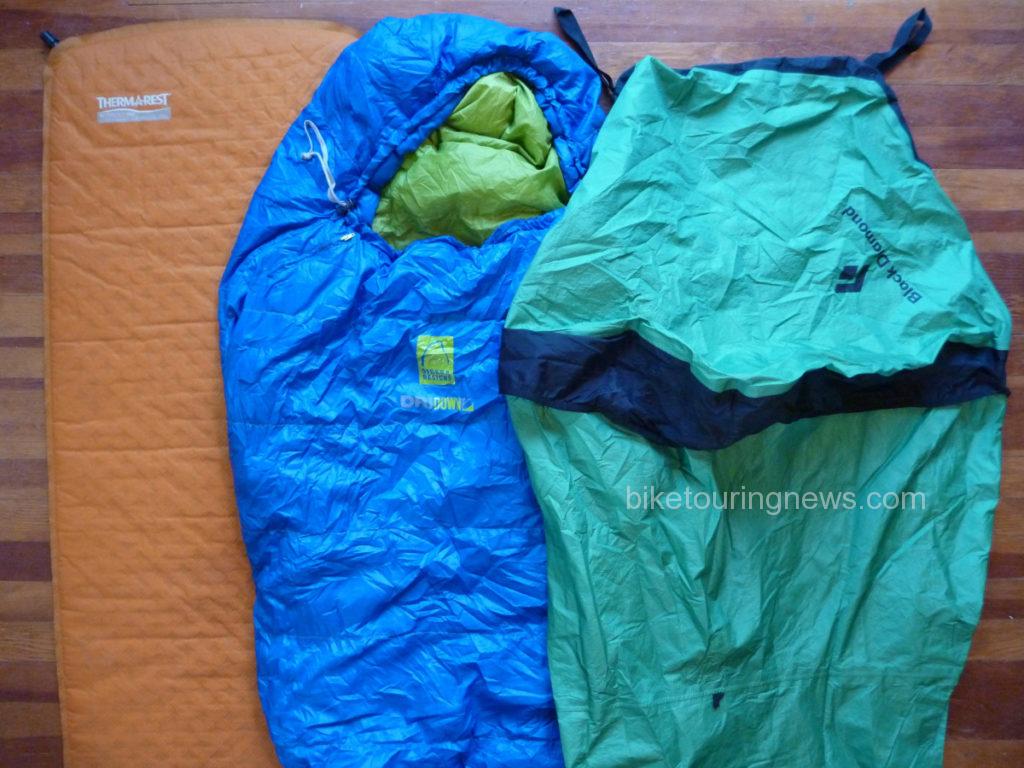
Sleep kit for the 2014 Smoke ‘n’ Fire 400. Simple and reliable.

A good waterproof/breathable fabric is the key to the bivy’s success.  The fabric used in my Black Diamond Bipod Bivy features a fuzzy, nappy surface on the inside, allowing it to absorb moisture and disperse it across a wider area of fabric.  This prevents droplets from forming and speeds moisture transport through the fabric.  I have had some condensation form on the floor panels (made from a different, less breathable material) but never on the upper portion of the bag.  I highly recommend that any bivy you purchase feature similar technology.

Also, consider the volume of your sleeping bag and pad.  You’ll lose the loft and warmth of your sleeping bag by cramming it into an undersized bivy, especially around the foot.  If in doubt, go for a larger size.  This is especially true if you plan to use a thicker, inflatable pad or a winter-weight bag.

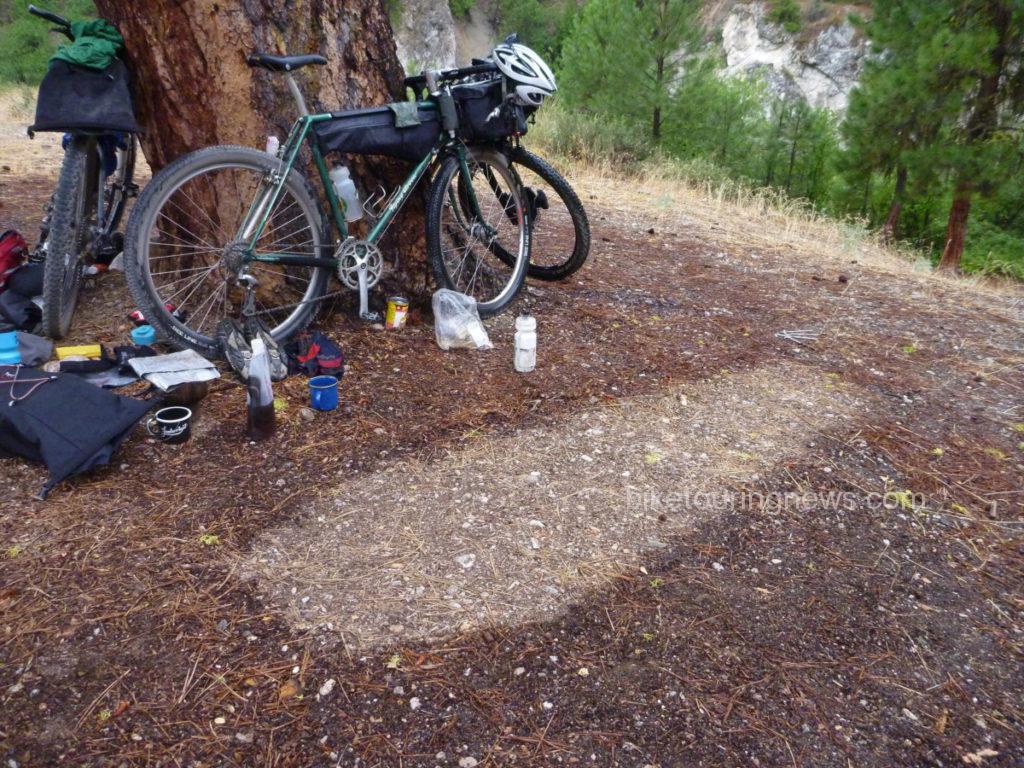
A coffin-shaped rain shadow after a wet night on the Idaho Hot Springs Mountain Bike Route. Should have packed the tarp!

Even with the best breathable fabrics, it is always best to keep any bivy at least partially unzipped to allow moisture to vent out, especially if you’re going to bed wet or attempting to dry wet gear in the bag overnight.  Therefore, it is wise to bring along a tarp to create additional shelter if you expect wet conditions.  A tarp flown over the bivy allows you to leave the head open to vent moisture and prevent claustrophobia.  Nobody likes sleeping in a waterproof coffin (see photo above).  The tarp will also provide shelter for cooking, changing clothes, packing or other camp chores.  I use a simple 8×10′ silnylon tarp that packs to the size of a softball and weighs around 200g.

Pro:

  • Easy Site Selection
  • Ultra-Fast Setup & Takedown
  • Simple Packing
  • Inexpensive
  • View of the Sky!
Con:

  • Claustrophobic When Zipped
  • Minimal Interior Space
  • Condensation Issues
  • Loss of Loft in Sleeping Bag
  • Not Particularly Light

Conclusions

As we’ve learned, every different shelter has its merits and a set of ideal conditions for use.  You should select your bikepacking shelter taking those merits and conditions into account, along with your personal preferences and budget.  Every bike traveler is different, and so is every journey!  We hope this post has provided some guidance and that you’ll have many comfortable, peaceful nights out on your bikepacking trips!
What did we miss?  What shelter(s) do you use and why?  Let’s keep the discussion going in the comments below!  Thanks for reading!

Categories
Bikepacking Planning Resources Saddlebags Touring Bike Accessories

6 Tips for Successful #BikeFishing!

Except on the most rugged of trails or in Wilderness areas where mechanized transport is not allowed, a bicycle is the ideal vehicle to transport you and your gear to your favorite fishing locations, especially if you’d rather escape from the crowds!  The hassle of finding a suitable place to park a truck on narrow, rugged roads allows the pedal-powered angler to access spots that motorized fisherfolk often overlook.  They’re too busy looking for a turnout big enough for their massive pickup!  Many streams have singletrack trails running alongside and there are countless lakes and ponds accessible only by bike or on foot.  If you prefer solitude to fishing conditions resembling the lunch line at Burger King, bikefishing is for you.

p1190682
It almost doesn’t matter if you’re catching fish when you’re in the middle of a scene like this.

For me, fishing and bike riding have always gone hand-in-hand.  In fact, I was first motivated to pick up a fly rod by an experience I had on a bikepacking trip soon after moving to the Gem State.  I was pedaling my loaded bike on a backcountry dirt road paralleling one of central Idaho’s sparkling freestone streams.  Trout were easy to spy as I gazed down from road level into the riffles below.  Why wasn’t I down there in that beautiful river catching those fish!?  Since then, I’ve spent countless hours searching for fish in big rivers, small streams, alpine lakes and urban reservoirs by bicycle, on foot and occasionally with the aid of motor vehicles.  In this post, I’ll share some helpful tips from my experience to help you get out and fish by bicycle!  Feel free to chime in with your own thoughts and experiences in the comments below.

19042469174_33274fb769_o
The three B’s of fly fishing.

1:  Do your Homework! 

Plan ahead and prepare!  The amount of local knowledge and useful information accessible via the internet is a potent weapon in your arsenal.  Check fishing and weather reports so you can choose appropriate tackle, clothing and other gear, then leave the rest at home.  The USGS monitors water conditions for countless fisheries across the country.  Water temperature, level and flow are all useful pieces of information.  Local fish and game departments provide a wealth of information about fish stocking and species to expect in a particular piece of water.  Many fishing shops and outfitters post regularly-updated fishing reports online.  Stop into a local outfitter or fishing shop if you’re traveling far afield.  Good research and local knowledge may make the difference between catching one fish after another or getting skunked.

p1180704
The author’s rig packed to fish a backcountry pond, complete with cheap inflatable boat!

2: Don’t Throw a Rod!

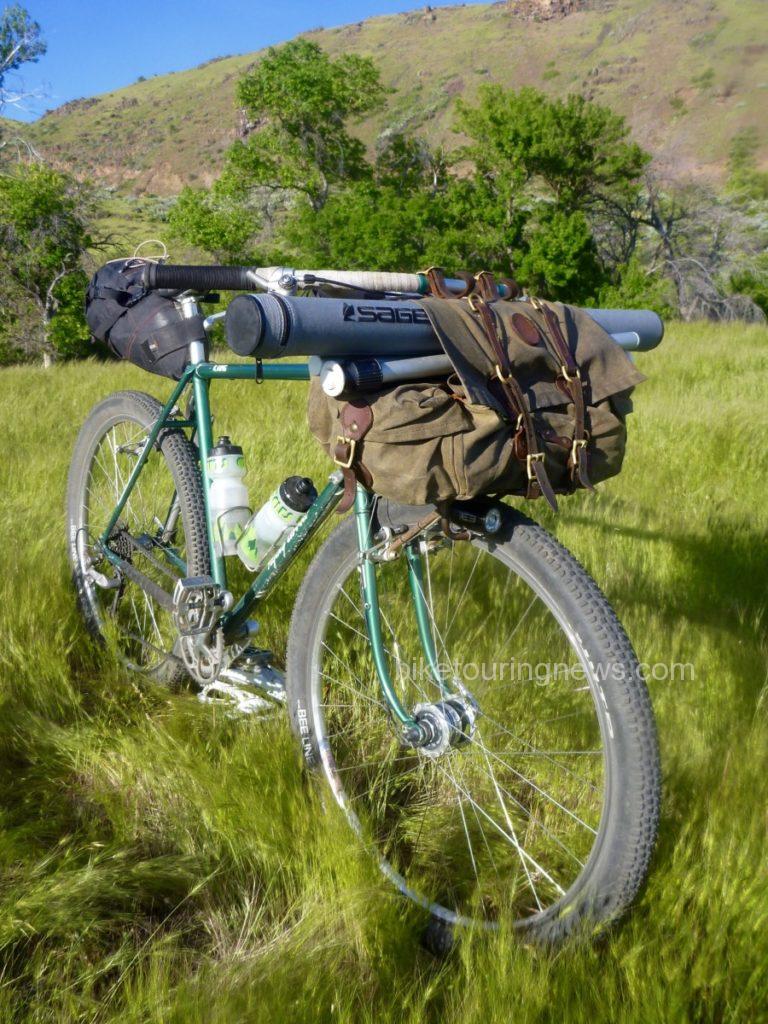
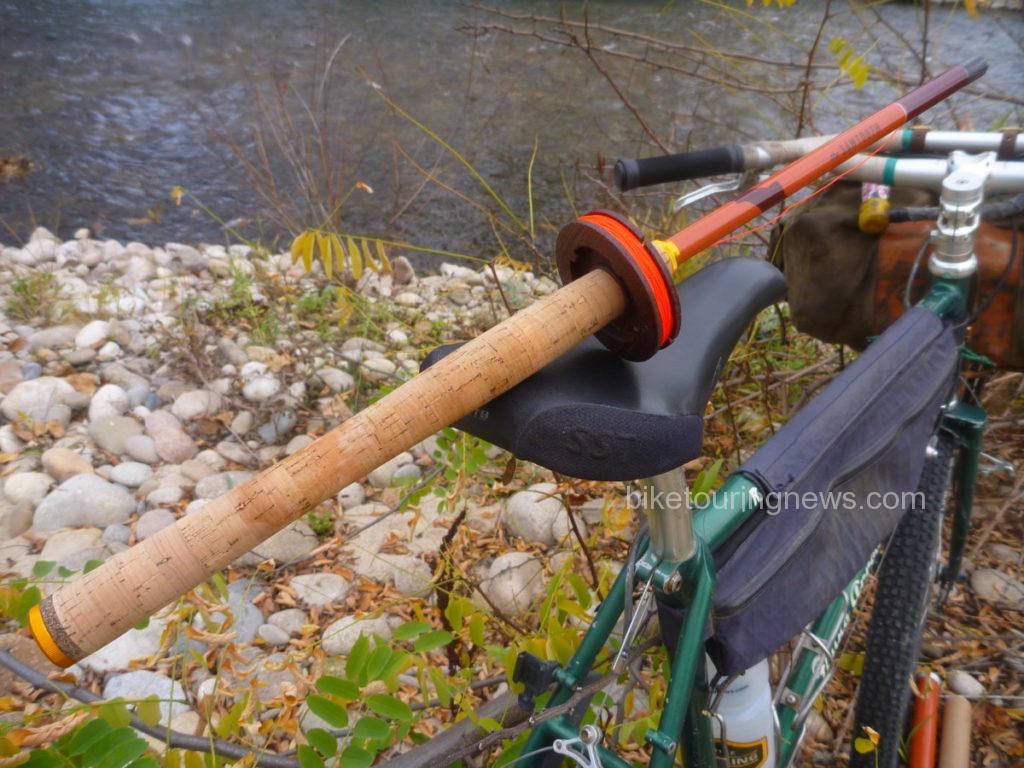
Fishing rods can be challenging items to carry by bike, even when broken down and stored in a tube.  Bags with a flap – like Ostrich’s S-2 Saddlebag or Frost River’s Gunflint Trail (see photo above) and Caribou Trail work great.  Alternatively, you can use toestraps or Surly’s Junk Straps to lash the tube to the deck of a rack.  I would never recommend riding your bike with a fully-assembled rod.  You’re just begging for a potentially expensive accident.  It is also easy to strap a rod tube to many backpacks.  This carrying method works great if you’ll need to do a good deal of walking, hiking or scrambling to access your fishing location.  Otherwise, I prefer to ditch the backpack and let the bike carry the load.

p1190133
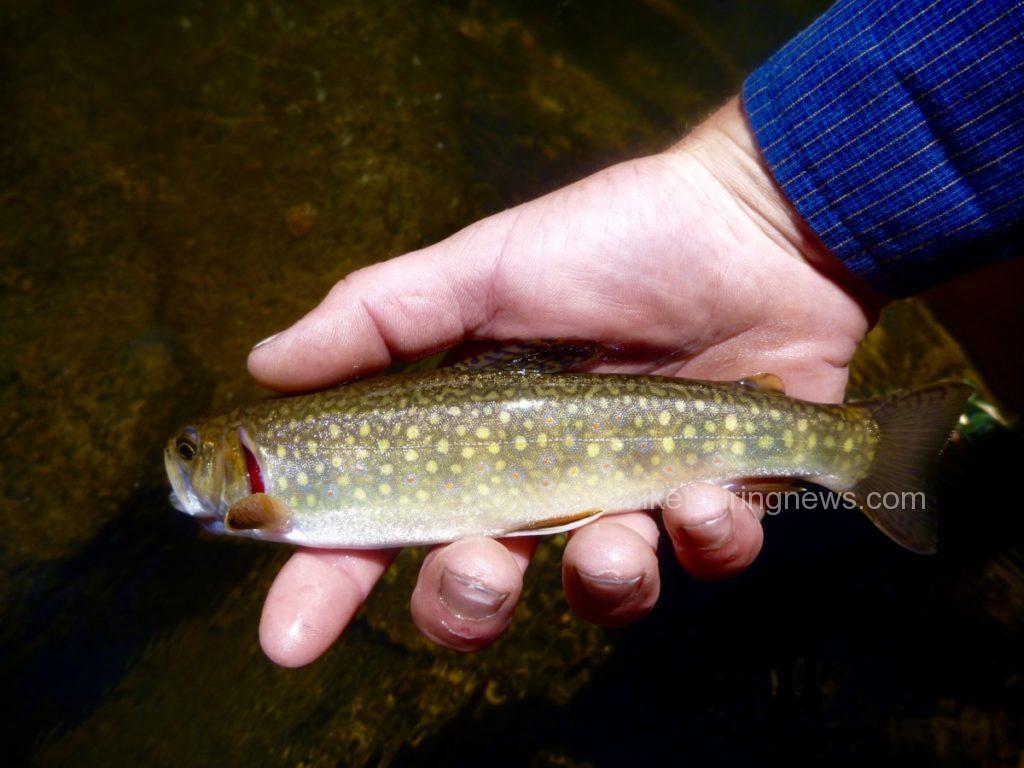
Brook trout caught from a hidden pool where few anglers venture.

3: Streamline your Setup! 

Do you really need multiple rods, reels, lines, a vest packed with gadgets and fly boxes with every imaginable imitation to catch fish?  Simplify, simplify.  You can’t just chuck your entire collection of outdoor gear in the back of the Subaru!  Space and weight are key considerations when fishing by bike.  While unnecessary gear will weigh you down and clutter your experience, you don’t want to leave critical equipment at home.  Tenkara rods may offer the ultimate in a simple fishing outfit.  With no reel and a featherweight telescopic rod that collapses into its 20″ handle, these fishing outfits are ideal equipment for the adventurous angler.

Tenkara: ultimate simplicity and packability!

4: Wade Wisely (or not at all)!

Waders and wading boots are the bulkiest, heaviest and most cumbersome pieces of gear in most anglers’ closets.  Leave them at home unless you really need them.  Fishing from the bank is a great option and may even be preferable.  The long reach afforded by Tenkara rods is a big advantage in this situation.  If you choose to wade in warm conditions, wet wading can be a real joy and big part of the fun.  Sturdy sandals, Crocs or water shoes work fine for footwear.  Even on the hottest days, neoprene socks or booties help you fish longer by keeping your feet warm and preventing irritating debris from getting next to your skin.  When the mercury dips, you’ll definitely want to stay dry.  Fish from the banks, wear rubber boots or consider bringing those waders along.  Wear heat-retaining layers to stay warm in the chilly water.  You don’t have a heated vehicle to retreat to if you get chilled, so don’t forget to layer up and bring spare dry, insulating layers in case you take an unexpected dunking!

p1190680
You too can go fishing with the Bike Hermit!

5: Use a Shuttle (When Appropriate)!

While pedaling from home on a bike loaded with everything you need for a day, week or month of human-powered travel and fishing adventure sounds like a great idea, it isn’t always practical or possible.  If you have access to a vehicle, take advantage!  Drive out with your bike and gear, find a place to park or camp and strike out on the bike from there.  Though perhaps not as idealistically appealing, this approach can deliver the best of both worlds.  Who doesn’t like to return to a well-appointed campsite with a dry change of clothes, fully-stocked cooler and comfortable chair after a long day on the river?  If the fishing – not the riding – is your main focus this may be the ideal approach.

p1190240
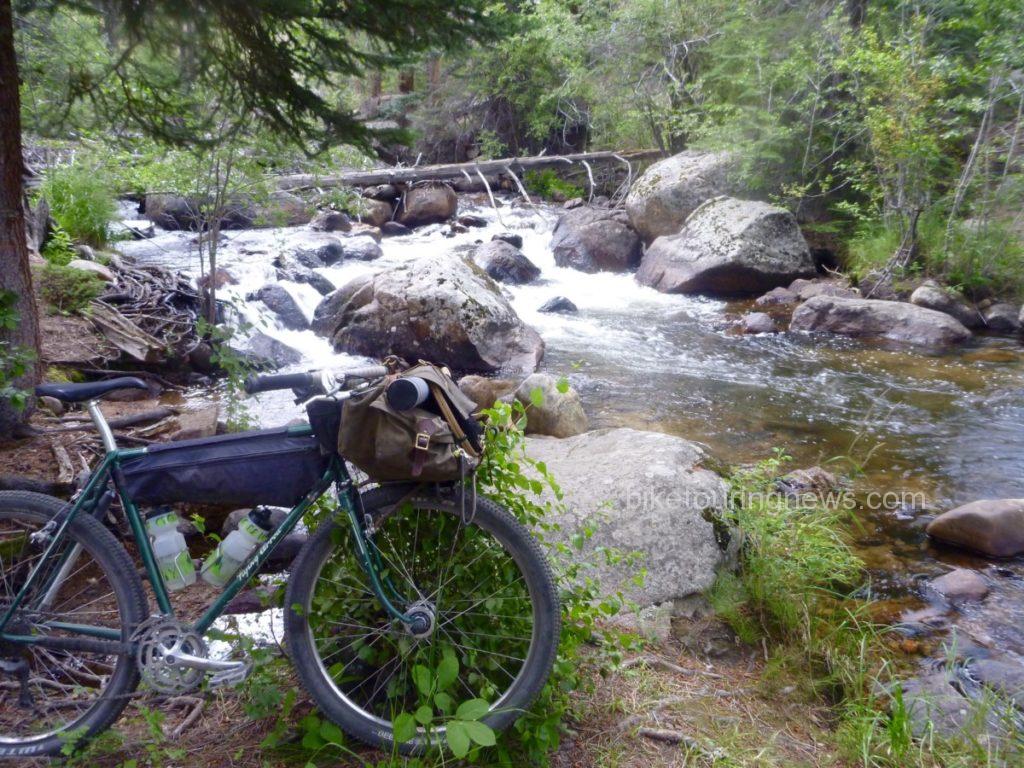
Finding solitude on a hidden creek very close to – but so far away from – the heavily-fished waters of Rocky Mountain National Park.

6: Be Flexible!

Fishing is unpredictable, so don’t get disappointed if you don’t find immediate success.  Like the old bumper sticker says, “a bad day of fishing is still better than a good day at work!”  Approach each situation with an open mind and don’t be afraid to try new, different or unorthodox techniques.  The bike also gives you practically unlimited access to water far off the beaten track, so explore those side streams, tributaries and hidden pools.  Small fish often represent big success!

I hope you’ll find these tips helpful and get out on your bike for a day of fishing soon!  Did I forget anything?  Share your #bikefishing ideas and experiences in the comments section below.  Thanks for reading!  Now get away from that screen and #getoutandfish!

Categories
Bike Touring Tips Oregon Planning Resources

Mt.Hood or Bust: Part 1

A year ago, I began planning a bike trip. I planned to ride from Great Falls Montana to Bozeman Montana, but plans don’t always go as expected, “you’ll have this” as The Bike Hermit would say. So instead, on August 3rd, I found myself, on my bike, riding across Oregon towards the unincorporated community of Government Camp, 60 miles from Portland. After a stressful academic year learning to accept that sometimes plans change in ways that aren’t necessary appealing, a solo bike trip is just what I needed. I typed “Boise to Portland by bike” into google and I began working on my route. I figured I’d give myself a little over a week to get there. An annual reunion starting on the 11th of August gave me a timeline to stick with. As the departure date drew nearer, fire season was underway in Idaho and thick smoke loomed in the air. I had to changed plans yet again and rewrite my route to allow for a start in the mountains outside of Baker City Oregon, hoping to avoid not only the smoke but also the 90 degree temps expected over the next few days.

When planning, and re-planning, a route, you want to make sure you are honest about the number of miles you believe you can physically handle in a day. I picked 50, knowing that I could average 10 miles per hour and had previously accomplished 40 miles per day without dying. So with the number 50 in mind, I began looking for towns and/or campgrounds that could serve as starting and end points for my 8 days of travel. Realistically, I knew I could go 2 days without a resupply area, as long as I could track down water, I could carry all the food I would need and be perfectly happy without having to interact with other humans. I also tried to plan for the unforeseen circumstances that would prevent me from reaching my destination for the day, this meant making sure there were places to stop and spend the night in the middle of nowhere if necessary. My best advice for someone planning a trip like this, don’t expect everything to go smoothly, don’t expect to be at the destination that you’ve chosen on time, or even at all, learn to expect the unexpected.


Prep:

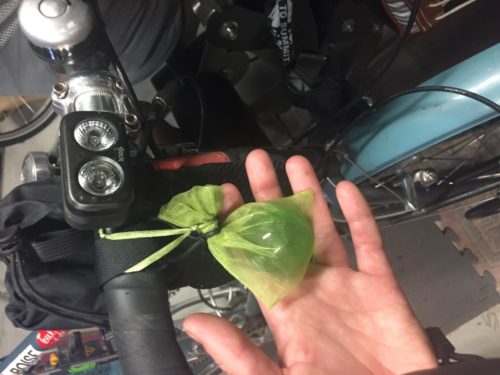
A lot goes into packing for a bike trip, The Bike Hermit was kind enough to share his trusted list of necessary items with me and I carefully weighed each one out and laid them on the floor of our garage. Considering that I have a Surly Long Haul Trucker with a 52cm frame, the standard Shimano XT-T780-L SGS rear derailleur, rear tubus logo evo rack, front tubus nova rack, Lone Peak panniers, and adding the weight of my packed items, my bike weighs exactly as it should. It weighs enough to carry everything I need for 8 days but not so much that I won’t be able to pedal it up steep mountain passes. So no, I didn’t weigh my gear or my bike and I honestly have no intention of doing so in the future. I made sure everything would fit into the two front Lone Peak panniers and two rear Gilles Berthoud panniers. I made sure I had enough food, enough water and enough items of clothing to be comfortable while riding and in camp. I did carry one extra item however, nothing necessary to be physically successful persay but essential to make my journey emotionally possible, a glass green sphere. Given to me by a close friend, it is meant to represent the spirit of a my friend Tom who passed away 11 years ago. Each year, a group of us meet to celebrate his life on the side of Mt.Hood and this bike ride would serve as a form of meditation as I reflected on the past year’s trials and tribulations as well as the 10+ years spent without my friend.


Day 1 Wednesday August 3rd: Wallowa-Whitman National Forest to Prairie City Oregon


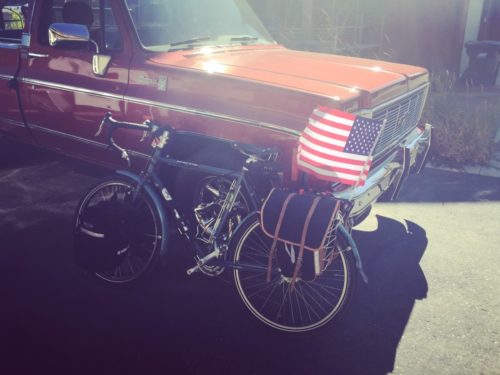
High in the mountains above Baker City Oregon, I had a frosty start. The only downside to traveling with a hennessy hammock as opposed to a tent is that trees are required for set up. The Wallowa-Whitman National Forest provides plenty of trees but in adequate spacing and the bend of the young saplings meant that no matter how hard I tried, I would end up sleeping on the ground. After instant coffee and instant oatmeal, I loaded up bertha for our first solo travel. The Bike Hermit had installed a large dollar store American flag to my rear rack the night before so sleeping bag, rear panniers and fly rod were carefully placed as to not disturb it’s placement. Photos were taken by proud parents and well wishes were given before I unceremoniously pedaled away, uphill, into a headwind.

I was giddy with excitement about being out on my own. It’s not as if I haven’t done many things on my own before, I’m almost 30 and have been living on my own since 19, but somehow this felt different, like suddenly I could eat all the cake and ice cream I wanted to, watch scary movies and stay up as late as I wanted. So what does that translate to into a world where your parents are bike touring legends. It means you can complain out loud to yourself as much as you want, it means you can stop whenever and wherever you feel like it and it means you don’t have to listen to The Bike Hermit say, “you’ll have this”. So off I went up the hill with a refreshing breeze nipping at my face. I stopped to take off some layers at the top of the first hill and in the distance I could see another cyclist pedaling uphill in my direction. I got so excited about waving and saying “Hi” that I almost biffed it in the deep gravel of the slow vehicle turn off.

I was immediately impressed by the hospitality towards cyclists in this part of Oregon. Wide shoulders allowed me to feel comfortable on the road and nearly all of those who passed me slowed and/or gave me the lane, it was truly impressive. About 20 miles into my ride, ODOT was doing some work on highway 7. Several big trucks were hauling sand from their main site to somewhere up the road. About 200 feet from the turnoff to their main “dirt site” someone had constructed a pictograph of a water tap and a bicyclists, indicating that water was available and well as ample shade for taking a break. While I didn’t stop, I was happy to see this level of accommodation. Not long after this, I stopped to pee and while I was waiting for aforementioned large trucks to pass, one of them slowed to a near stop to inquire as to whether or not I was “broke down”. Again, this level of hospitality towards cyclists is just unreal and very much appreciated. I made it to my destination of Bates State Park around 12 noon, my expected arrival time for 38 miles of travel. While they had excellent hiker/biker spots, the generator running the sprinklers was enough to lead me to take over the day use pavilion. I made myself a biker fish taco, tuna on a tortilla, and pulled out my book to read. I was sound asleep within 30 seconds and found myself blinking awake nearly 2 hours later. It was still relatively cool and I felt reenergized. I took a look at my route map and decided I could push on a little further for the day. There were plenty of campsites and towns dotted along the route, making it possible for me to go anywhere from 10 to 40 more miles for the day. I recalled a mental note of The Bike Hermit explicitly telling me that “it’s all downhill from Bates to Dayville”. If you’ve read my previous blog, you’ll recall that the first rule of bike touring is that there is no such thing as “flat”, and relatively little “downhill”. So the first 10 miles found me climbing a mountain pass and cursing my father under my breath. I was relieved however when I reached the top and indeed, the rest of the way into Prairie City was literally all downhill.

That little kid feeling took over again as I pulled into town, realizing that I could choose where to set up camp, where to eat dinner and eat all the ice cream that I wanted. While it wouldn’t normally be my first choice, I found a comfortable RV park on the edge of town. With the spaces having been built to accommodate for motor homes and fifth wheels, a cyclist will find themselves out of their element. The lack of trees forced me to use my rain fly as a tarp and prepare to sleep on the ground. There were a few trees across the creek and given the chance to do it over again, I probably would have asked the camp host if I could use them to anchor my hammock. The major perk of staying at an RV park is showers! Since it was my first day on bike, I wasn’t exactly at filthy hippie status yet but I decided that rinsing off the sunscreen and bug spray would probably allow me to sleep more soundly. The Bike Hermit had given me some solid advice about always carrying quarters for this exact purpose. I did not however have enough quarters to even get the water started. $1.75 for 10 minutes of shower time seemed excessive. Who needs a freaking 10 minute shower, especially when you are at an RV park, this isn’t the prom people, just rinse off and get it over with. I thought they should have some sort of system like the do-it-yourself car washes, you know put in a quarter for like 30 seconds of water, I could get behind that. After taking a PTA bath and successfully freaking out the family in the campsite next to me I rode into town to find food. Second rule of bike touring, always stop when there is food. When I ride into town, I usually put my trust in the other inhabitants of the camp and leave my panniers and camp gear set up at my site. I don’t travel with a bike lock as it would take up too much room, not to mention weight. Most businesses are okay with you pulling your bike inside, as long as there is room and you bat your eyelashes a few times. I took a Surly Junk strap with me and even though any half witted criminal could probably figure out how to unhook it, I wrapped it around my front wheel and frame and parked it outside, within viewing distance of my table. The Oxbow Restaurant offers one of the best mushroom swiss burgers I’ve enjoyed to date, which is saying something, trust me, and serves strong cocktails in mason. I always appreciate that hipster edge in the middle of nowhere oregon. After dinner, I  decided to explore the town of Prairie City. It didn’t take long, as the town consists of one main block and not much else. I noticed that they sold single cans of tall boy PBR’s and so I made my purchase of one beverage and one ice cream sandwich before returning to camp. At some point during the 3 block ride, a wave of exhaustion hit me and I made the decision to get in my sleeping bag without opening the PBR.

IMG_3259

Ready to hit the road

IMG_3250

The spirit of Tom

IMG_3254

Fully Loaded

IMG_3272

Sumpter Junction

IMG_3289

Best restaurant in Prairie City

Categories
Bike Touring Tips Idaho Planning Resources

Planning and Goal-Setting for the Smoke ‘n’ Fire 400

By the time you’ll be reading this post, I’ll be headed eastward out of Boise with thirty-some other weirdos on a counter-clockwise loop central Idaho known as the Smoke ‘n’ Fire 400.  You’ve probably already seen all the stuff I’m carrying with me.  Now I’d like to share some of my hopes, dreams and plans for the ride.

I’m not really sure what to expect from myself as this will be my first long-distance solo bikepacking trip.  On previous trips I’ve traveled with friends, ridden fairly hard during the day but spent plenty of time relaxing in camp and hanging out along the way to enjoy shady spots, roadside bars, swimming holes, hot springs and other amusements.  On this ride, I’ll be on my own, free to ride at my own pace and set my own agenda.  I don’t intend to ride so fast, hard and long that I miss all the grandeur around me and neglect opportunities to enjoy my surroundings.  There is more to be gained from this event than simply posting a fast time.  I don’t do these kinds of rides to set records but rather to explore the world within and without me, to push my own limits and see what lies around the next bend.  I’m especially excited to have another opportunity to see more of my new home state and lay the groundwork for more Idaho adventures.

Given that my fitness has declined somewhat from the midpoint of summer, I’m trying to be cautiously optimistic in my planning for this trip.  The route totals almost precisely 400 miles and roughly 33,500 feet of climbing.  The distance is roughly the same but elevation total is more than twice that of the Oregon Outback and I spent a solid four days on that route.  However, during those four days I spent more time standing still than moving.  This ride will give me a chance to see what happens if I invert that balance and spend as much time as possible in motion without sacrificing the quality of my experience.  Perhaps you share a similar curiosity and wonder what you might be capable of outside the boundaries and restrictions you find yourself constrained by.

So, my optimistic plan is to finish in four days, averaging 100 miles per day and arriving back in Boise late on Saturday.  This is achievable if things go well and I have very few navigation, physical or mechanical problems but would be a seriously big ask given my relative lack of fitness and experience in these events.

Reference this route map from RideWithGPS to follow along.

The itinerary for the four-day plan would look something like this:

  1. Boise to Five Points campground
  2. Five Points to Redfish Lake
  3. Redfish to Deadwood Reservoir
  4. Deadwood to Boise

The more conservative plan is to finish in five days, averaging 80 miles per day and getting home sometime on Sunday.  Given the freedom and flexibility I’ll have to keep pedaling, I’ll hope to do better than this but won’t be disappointed if circumstances conspire against me.

The five-day itinerary would be roughly:

  1. Boise to Featherville
  2. Featherville to North Fork campground
  3. North Fork to Redfish Lake
  4. Redfish to Deadwood Reservoir
  5. Deadwood to Boise

Overall, I’m thrilled to have this chance to see some new parts of Idaho while exploring the edges of my ability as a rider.  I hope you’ll follow my progress and that of my fellow participants via the Trackleaders race tracking page.  I’ll also be tweeting from the field where possible.  Follow me @rspinnaking.  I’ll be using the hashtag #snf400.

After the ride is over, look to this blog for stories of success and failure, beauty and desolation, life and death from the first running of the Smoke ‘n’ Fire 400.

Thanks for reading.

14151194837_73b9502d29_c

Categories
Bike Touring Equipment Hermit's Workshop Idaho Planning Resources

Packing for the Smoke ‘n’ Fire 400

Greetings!  I’m a new voice here so I’ll briefly introduce myself.  My name is Ryan King and I’ll be riding the inaugural Smoke ‘n’ Fire 400 bikepacking race with the support of the good folks at Bike Touring News.  I’ve done a small handful of rides like this, including the Oregon Outback in May of this year and a four-day trip on the Idaho Hot Springs Mountain Bike Route in July but this will be my first solo, race-type bikepacking trip.  I’ve always sought out new ways to push my limits as a rider and am excited (and a little nervous) about seeing what I’m capable of through this test.  As a first-time “racer” I’m no expert at any of this so I hope that I can offer some insight into my approach to this event and help others learn from my successes and mistakes while encouraging them to undertake similar challenges of their own.

Bicycle travel can be as simple or complex as you want to make it.  I think this is part of why I enjoy a bikepacking-style approach and make every effort to streamline and simplify my trip rather than finding ways to bring more and more gear.  This takes a good deal of planning and head-scratching sometimes but the joyful freedom of pedaling a bike packed with everything you need and nothing you don’t is well worth the extra work ahead of time.

So, let’s get down to the nitty-gritty.  What do you bring on such a journey and how do you carry it?  Let’s start with the “how” and then get into the “what” after that.


Luggage

For me, the first decision isn’t so much what to pack as how to carry it.  The carrying capacity offered by traditional rack-and-pannier setups is appealing (and ideal for longer trips) but their bulk makes them impractical when one intends to travel light and fast over more rugged terrain.  The benefits of bikepacking-style luggage have been extolled elsewhere but the main advantages for my purposes are lighter overall weight, improved aerodynamics and more clearance on narrow trails or when pushing the bike.

My setup differs slightly from the “standard” bikepacking kit in a couple of ways.  First, I prefer not to carry a backpack or hydration pack so I use a half-frame bag that fits under the top tube with room for water bottles in their cages.  The frame bag does fit a 100 oz. hydration bladder to stretch my water-carrying ability when needed.  Also, my bike is built around drop bars and a medium-size front rack, so I use a rack mounted handlebar bag rather than a handlebar harness.  This allows me to carry odd shaped, non-compressible items and offers fairly easy access to all of the bag’s contents without having to unpack.  For routes consisting of roads and easy singletrack, I find this setup to be ideal.

Although it can create something of a packing nightmare when trying to find space for everything, I find it important to place constraints on the amount of gear I’m able to carry by not allowing myself a place to put it.  This forces a higher level of planning and prioritization that pays off if done right.  Of course, there are potentially serious consequences to leaving a key piece of gear at home but experience and research will be your guide when it comes to what really matters.  Overall, a lighter bike is more fun to ride, you’ll get up the climbs with greater ease, cover rough terrain more easily and be able to enjoy your time in the saddle much more.  If your trip involves more time spent in camp than on the bike, you’ll want to pack very differently.

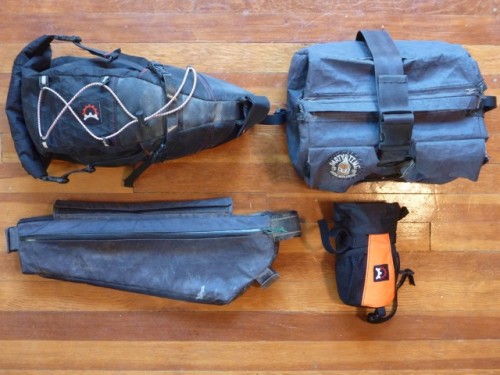
Here’s my luggage for the Smoke ‘n’ Fire:

P1150752


Sleep Kit

This is one department where opinions are as varied as the riders espousing them.  Some will sleep very little or plan to use lodging along the route, carrying only the bare minimum for survival if forced to camp.  Others will carry a full-size tent, air mattress and perhaps even a camp chair.  Others prefer a hammock rather than sleeping on the ground.  In wet climates a synthetic-fill bag may outperform down which loses its loft when wet.  As outdoor gear gets lighter and more packable, there are lots of good options for bikepacking-friendly gear in this department if you have the coin to spend.  My low-budget approach forces some compromise and I carry more weight and bulk in sleep kit than I would prefer but I know I’ll stay dry and warm in anything but full-on winter conditions.

P1150755

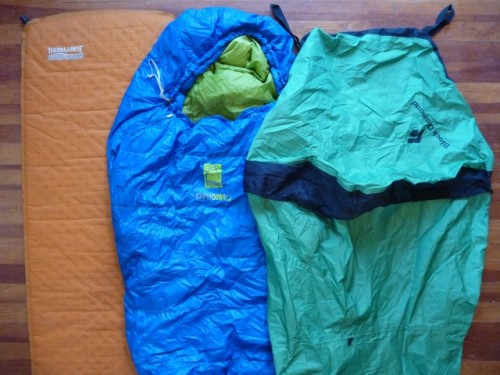
  • Therma-Rest Prolite 3 Sleeping Pad, Small
  • Sierra Designs Zissou 23° Sleeping Bag, 700-fill “Dri-Down”
  • Black Diamond (Bibler) Bipod Bivy w/single pole and 4 stakes


Tools, Spares, First Aid 

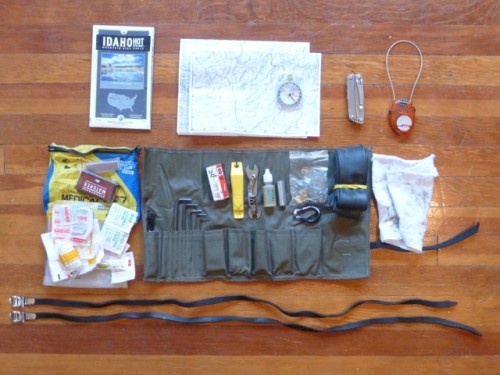
One of the great joys of traveling by bike is its efficiency.  On a bicycle you have ability to cover an immense amount of distance each day, even over terrain that would stop a four-wheel-drive truck in its tracks.  However, one mechanical issue at the wrong time will turn your amazing machine into a glorified luggage cart.  If you don’t like the idea of pushing or dragging your bike for miles on end it is critical to carry the tools needed to fix common mechanicals and know how to use them.  Most modern bikes require only a handful of hex wrenches to perform the majority of adjustments or repairs you’d need to make on the road.  Don’t go off the deep end preparing for every potential catastrophe and weigh yourself down with several pounds of hardened steel that you’ll never use.  If you maintain and service your bike before your trip, you shouldn’t have to perform major repairs in the field.  There also comes a point where you have to place your trust in your equipment and hope for the best.  Your tool needs will vary depending on your bike and route but my tool roll holds pretty much the same kit I would take on a long day ride with the addition of a few “just in case” items.

My first-aid kit looks small by comparison but I tend to ride very carefully on trips like this and rarely suffer much more than the odd abrasion.  The Smoke ‘n’ Fire route is never too far from major roads or outposts of civilization, so I’ll rely on outside medical aid in case of anything more severe.

I plan to use my GPS unit and cue sheet for primary navigation but always like to have good old paper maps as a backup.  I don’t like to place too much trust in electronics.

P1150759

  • Idaho Hot Springs MTB Route Map (shows 90% of Smoke ‘n’ Fire route)
  • Relevant photocopied map pages from Benchmark’s Idaho Road and Recreation Atlas
  • Compass
  • Leatherman Wingman multi-plier
  • Bakoda Cable Lock (for a little peace of mind when making resupply stops)
  • First Aid Kit w/ alcohol swabs, misc. bandages, anti-chafe cream, moleskin patches, waterproof matches.
  • DIY Tool Roll with 6, 5, 4, 3, 2mm hex wrenches, vulcanizing patches and glue, 9 and 10-spd quick-links, tire lever, DIY multitool with chain tool, 8, 9, 10mm open wrenches and bottle opener, chain lube, duct tape, spare Crank Bros cleat, misc. spare hardware, spoke wrench, tube, rag.
  • DIY leather “Junk Straps”
  • Not Pictured: Topeak Road Master Blaster frame pump (on bike)


Electronics

The escape from our screen-filled, flickering electronic world of ones and zeros is an appealing feature of these kinds of rides.  They allow you an opportunity to get back to a more immediate, unplugged, unfiltered, simplified existence.  This is why I carry a minimum of electronic distractions.  I brought an iPod on the Oregon Outback thinking I might need the music for extra motivation but never used it.  I’m constantly shocked and amazed by the desire people have to carry all the mess and noise of the modern world with them into the backcountry.  However, I do appreciate GPS technology for simple route-following and ride tracking, love my digital camera and struggle to imagine a world before high-powered LED lighting.  The lynchpin of this setup is the dynamo hub on my bike which powers my main headlight and a USB charger that allows me to recharge most of my devices on the go.

P1150765

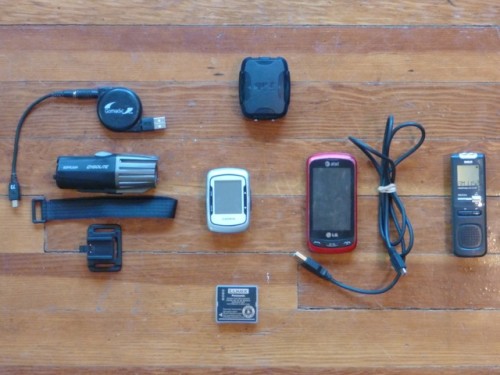
  • Cygolite Expilion 700 USB-rechargable headlamp w/helmet mount
  • Garmin Edge 500
  • Gomadic Charging Cable (specific to Edge 500, also charges the Cygolite)
  • SPOT Tracker
  • Cell Phone & Charging Cable
  • Digital Voice Recorder (easier than a paper journal for ride notes)
  • Spare Battery for Panasonic Lumix DMC-TS2 (Camera not pictured. Guess why.)
  • On Bike, Not Pictured: Supernova E3 Pro Headlamp and Sinewave Cycles Reactor USB Charger, powered by Shimano DH-3N80 generator hub. Portland Design Works Radbot Taillight


Clothing

Similar to tools and spares, this is another department where it is easy to overpack in a vain attempt to be prepared for anything.  In my estimation, if there isn’t a time where I’m wearing nearly every article of clothing I packed, I brought too much.  I’ve fallen in love with wool shirts as opposed to the wicking synthetics typically used in technical clothing.  They seem to hold just enough sweat or water next to my skin to allow it to cool me off when hot and never feel chilly or clammy when cold.  For a trip like this where I don’t plan to spend much time in towns or in camp I don’t bring changes of clothes.  I’ll be stinking to high heaven after a few days but bringing extra clothes just for the luxury of feeling a little more “civilized” isn’t worth it to me.  However, with early morning temperatures expected to be below freezing in the high places I want to give myself the best chance of staying warm.

P1150768

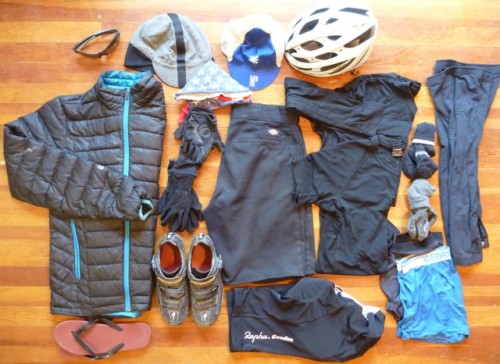
  • Smith Pivlock v90 sunglasses, platinum lens
  • Wool cycling cap w/earflaps
  • Generic cotton cycling cap
  • Lazer Genesis helmet
  • Sierra Designs Gnar Lite down jacket
  • Pearl Izumi cut-off half-finger gloves
  • Seirus softshell long-finger gloves
  • Dickies cut-off shorts
  • Icebreaker wool long-sleeve
  • Icebreaker wool short-sleeve
  • Wool socks, thin
  • Wool socks, thick
  • Leg Warmers
  • Synthetic (quick drying) underwear for hot spring or river dips
  • Icebreaker wool underwear
  • Rapha bibshorts
  • Specialized Pro MTB shoes
  • Cheap flip-flops
  • Not Pictured: Giro Insulated Vest


Hygiene and Hydration

I tend to keep things pretty simple here as well, especially for short trips like this.  I find some kind of electrolyte supplement to be a big help for warding off cramps.  I also get tired of plain water and like having one bottle of water and one of some kind of drink mix on the bike at all times, mixing up the flavors for some variety.  It’s easy to get sick of a particular taste when you’re sucking it down hour after hour, day after day.

For a trip this short, I’ll make do with quick stream baths to get the worst of dust and dirt off but would never go without my toothbrush!  However, I will use alcohol wipes in my first-aid kit to keep my backside clean.  The last thing I want to deal with is an infected saddle sore.

P1150769

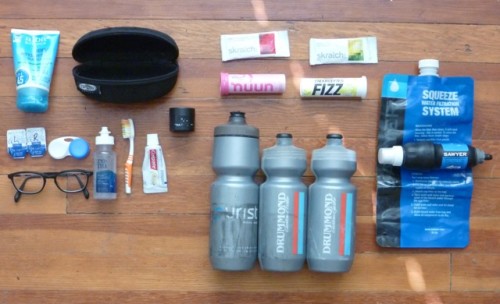
  • Sunscreen
  • Hardshell sunglass case for glasses and toiletries
  • Spare contact lenses
  • Lens Case
  • Contact Solution
  • Glasses
  • Toothbrush
  • Toothpaste
  • Chamois cream
  • Skratch Labs drink mixes
  • Nuun electrolyte tablets
  • Hammer Fizz electrolyte tablets
  • Sawyer Squeeze water filter and bag
  • Water Bottles, two 22 oz., one 26 oz.


Cooking and Nutrition

This is one area that I tend to overprepare in.  In an ideal world, I would carry just enough food to get me to my next resupply location without going hungry.  In the real world, I’d always rather have a little extra.  I also never know what I might find at unfamiliar stores so I prefer to carry a larger supply of food that I know packs well and keeps my fire fueled rather than making do with whatever I can get my hands on.   Also, this prevents me from being at the mercy of small country markets that often have irregular and unpredictable business hours.  There is comfort in the knowledge that if shit hits the fan I won’t be going hungry.

For rides like the Smoke ‘n’ Fire, some light-and-fast purists will leave the cookset at home.  For me, the comforting, morale-boosting ritual of preparing and enjoying a warm meal or hot beverage is well worth the extra gear and preparation time.  I prefer to cook simple dehydrated meals where I can just boil a small pot of water and add food.  This allows me to carry my simple, compact and lightweight alcohol stove.  There are lots of dehydrated food options at grocery stores with well-stocked bulk departments in addition to the freeze-dried meals available at outdoor stores.  Typically, I’ll carry oatmeal with dried fruit, granola or trail mix for breakfast and some kind of soup or bean mix for dinner.  I’ll supplement these bases with whatever I pick up along the way.  Jerky, smoked fish, tuna packets, summer sausage and cheese are favorites for quick protein and require no additional cooking.  I’ll also try to pick up fresh fruit where possible and eat it immediately since it doesn’t pack well.  When time and funding allows, a break for a hot meal in town is always a morale booster and gives me a chance to take on extra calories that I don’t have to carry.

On the bike, I’ll eat just about anything.  I like prepackaged food bars for ease of carrying/consumption, calorie density and variety of flavors/nutrients.  ProBars are among my favorites and I rarely get tired of them.  I’m excited to try out Revelate’s handlebar-mounted feedbag on this trip as it will allow me to have a bag of trail mix or other snacks easily accessible for one-hand munching.  In the past, I’ve finished trips with huge quantities of trail mix left over because it is so difficult to eat while riding and I’m typically eating my breakfast or dinner if I’m in camp.

For many of us, a hot cup of coffee in the morning is not a luxury but a necessity.  However, coffee beans and the apparatus needed to prepare them can be difficult to justify carrying and create additional waste that must be dealt with in a responsible way.  Fortunately, Starbuck’s VIA or Mount Hagen instant coffee packets are a workable substitute.  I’d much rather drink VIA than actual Starbuck’s coffee; at least it isn’t burned yet.  I also enjoy a warm cup of caffeine-free tea in the evenings while taking in the stars.  Lemon ginger tea with a splash of whiskey is a pretty delightful nightcap!

P1150777


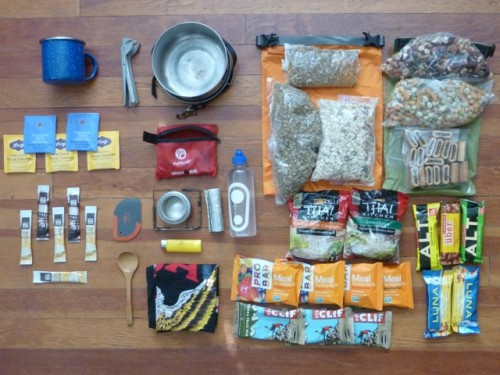
  • Enameled Cup
  • Pot Gripper
  • MSR 1-liter stainless steel pot w/lid
  • 1 cup Refried Bean mix
  • 3 cups Lentil Soup mix
  • 4 cups Oatmeal w/dried mixed fruit
  • 2 Thai Noodle Soup packets
  • Trail Mix
  • Sesame Cheddar Sticks and Wasabi Peas
  • Fig Bars
  • 12 assorted Energy Bars
  • Handkerchief
  • Bamboo Spoon
  • Pot Scraper
  • DIY Beer Can Alcohol Stove
  • DIY Bicycle Spoke Pot Stand
  • DIY Aluminum Foil Windscreen
  • Denatured Alcohol
  • Lighter
  • Starbuck’s VIA Instant Coffee
  • Assorted caffeine-free Tea Bags

I think that’s everything!  Did I forget anything?  Now for the task of packing it all into my bags and onto the bike!  Packing strategies also vary widely but that’s a topic for another post.  Until then, here’s a photo of the Rando-Gnar all packed up at the start of the Oregon Outback.

P1140035

In my next pre-ride post I’ll get into some of the planning, strategizing and goal-setting I like to do when assessing a route.  Follow the link to read on!

Thanks for reading; I look forward to your comments and feedback!

[Looking for more Smoke ‘n’ Fire content?  Check out Ryan’s post-ride recap here.]


Categories
Planning Resources

Bike Overnight Reconnaisance

Exploring off the beaten path, the stream uses the road.
I thought this was a desert.

Saturday we decided to reconnoiter a potential overnight bike trip. East of town is a reservoir surrounded by a patchwork of state, federal and private land blanketing the foothills. Riding for about 15 miles from our front door on the highway and green belt put us at the top of the dam at the lower end of the reservoir. Traveling past a gate and a sign prohibiting aggressive behavior (dang) we started up the dirt road leading up the draw hoping it eventually connected to the network of roads on the other side. I think at this point we were on private land, but it was hard to tell because there was really no signage. No matter because the road continued to deteriorate  and actually became the stream bed for large sections. The grapefruit size rocks and loose sand would have been easier to navigate with some wider tires at a lower inflation. And Sky King’s rear tire picked up a goathead thorn and flatted. I wasn’t going to admit this but we violated the 7 P’s ie; proper prior planning prevents piss poor performance, in that we only had one spare tube for Sky King’s bike.

Trail side flat repair
Bike Down!

But it wasn’t all a bust. We had fun and we found out what we wanted to, namely that this course would be less than enjoyable on these bikes when the bikes are loaded with gear for overnight camping. And it also nourished the seed of an idea for adventure or expedition touring. A seed which will be further nurtured until it sprouts into some sort of as yet unknown mis-adventures!

Riding past a nice little spot by the stream.
Sky King navigates past a lovely site.
Offroad touring
The Bike Hermit approacheth.
Categories
Planning Resources

Bike Touring, Keeping It Simple

Carry what you need and no more.

Like any good hermit, the Bike Hermit is constantly attempting to simplify.  And why go on a bike tour if not, at least in part, to enjoy being unencumbered by unnecessary external superficialities, and by too much gear?
The Italian impressionist Carlotti said“Beauty is a summation of the parts working together in such a way that nothing is needed to be added, taken away or altered”.
Architect Ludwig Mies van der Rohe adopted the motto “Less is more” to describe his aesthetic tactic of arranging the numerous necessary components of a building to create an impression of extreme simplicity.

When traveling on the bike the kit can be pared down to the basics required for survival and comfort. And if it is possible to travel for two weeks with a certain amount of bike touring gear then, unless traveling in a more remote region, the cyclo tourist should be able to exist in relative comfort for longer periods carrying the same provisions.

The bike hermit offers this outline of what can be taken on a two week or longer self-supported bike tour. While not an exhaustive, or even a very detailed list, it includes the core considerations for the bicycle traveler and can be modified by the individual according to their desire. Overall weight should not be a driving force behind the decision making process in what to take, but at the same time carrying more than is needed is senseless. The given weights include the weight of the luggage/bags/panniers if indicated.

Hennessy Hammock Super Shelter and rain pants in dry-bag                                  1lb   10.4 oz

Hennessy Hammock Ultralight Backpacker                                                                    2lb     6.8 oz

Front left pannier: Stove/ cook kit                                                                                      3lb       .8 oz

Front right pannier: toiletries, camp towels, sun screen, etc.                                    3 lb       .4 oz

Front handlebar bag: food, fuel canister, spare tube, patch kit, cell phone            7lb  11.8  oz

Spare tire                                                                                                                            12.4 oz

Small leather handlebar bag: pepper spray, knife, multi-tool, headlamp               1lb    5.6 oz

18 Liter Saddlebag: Clothes, chain lube, spare parts.                                                     9lb    5.8 oz

Sleeping bag                                                                                                                            3lb    2.8 oz

3, 24 oz water bottles- full                                                                                                      4lb     12 oz

Total weight comes to a little over 37 pounds. No need to go crazy about this stuff. Relax, be happy.