Categories
Bike Touring Tips Bikepacking Idaho Other Tours and Rides

Looking Back On 2017 – Experiences and Insights for the First Time Bikepacker

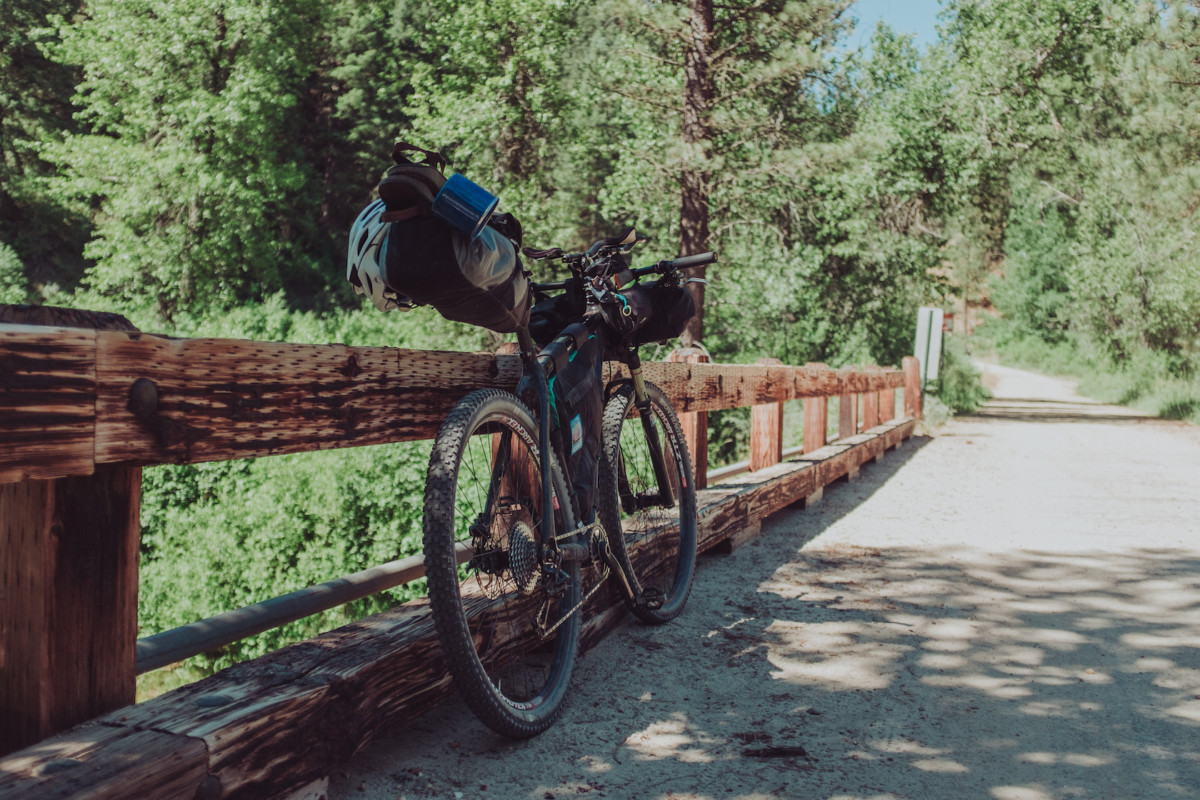
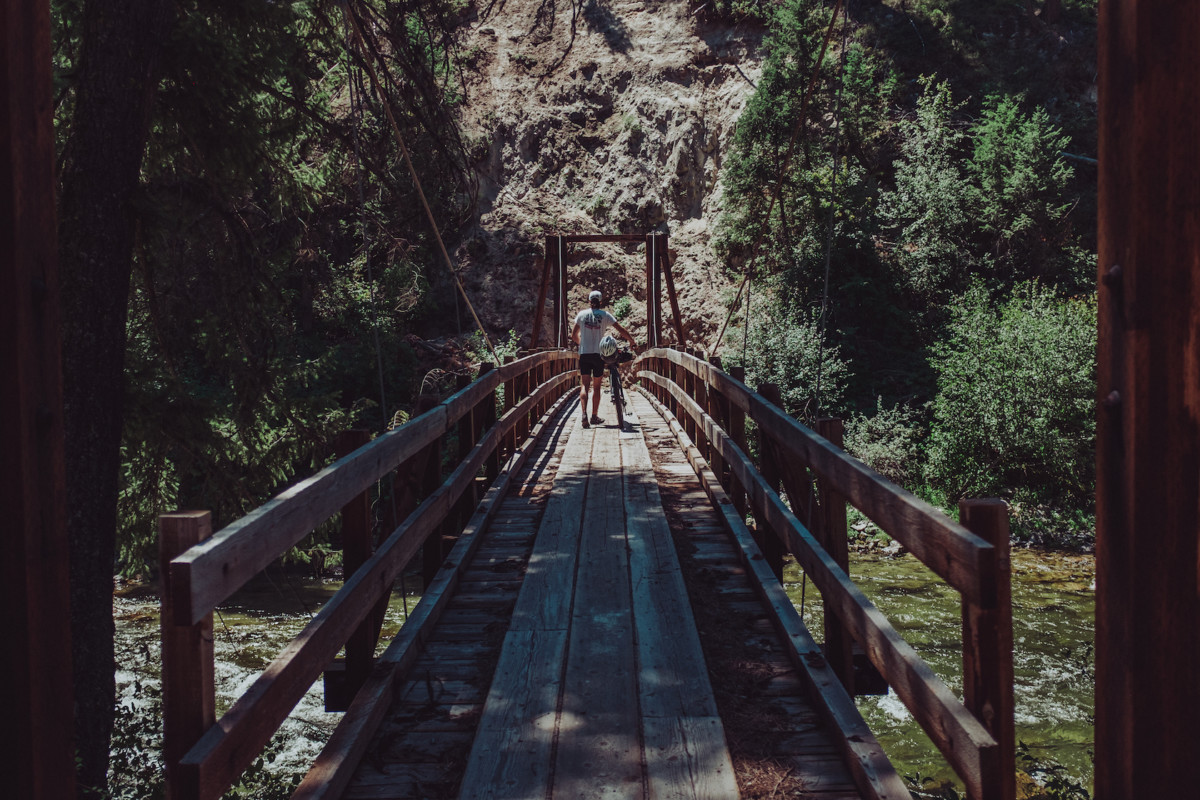
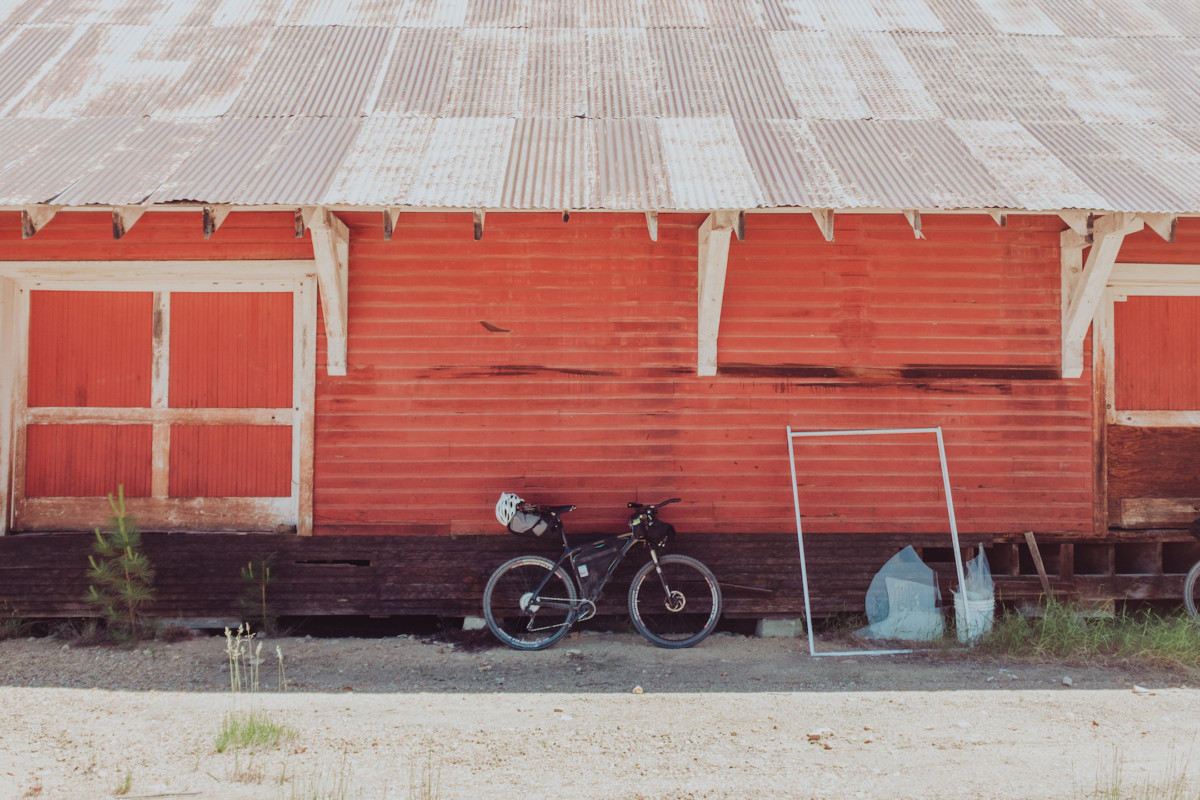
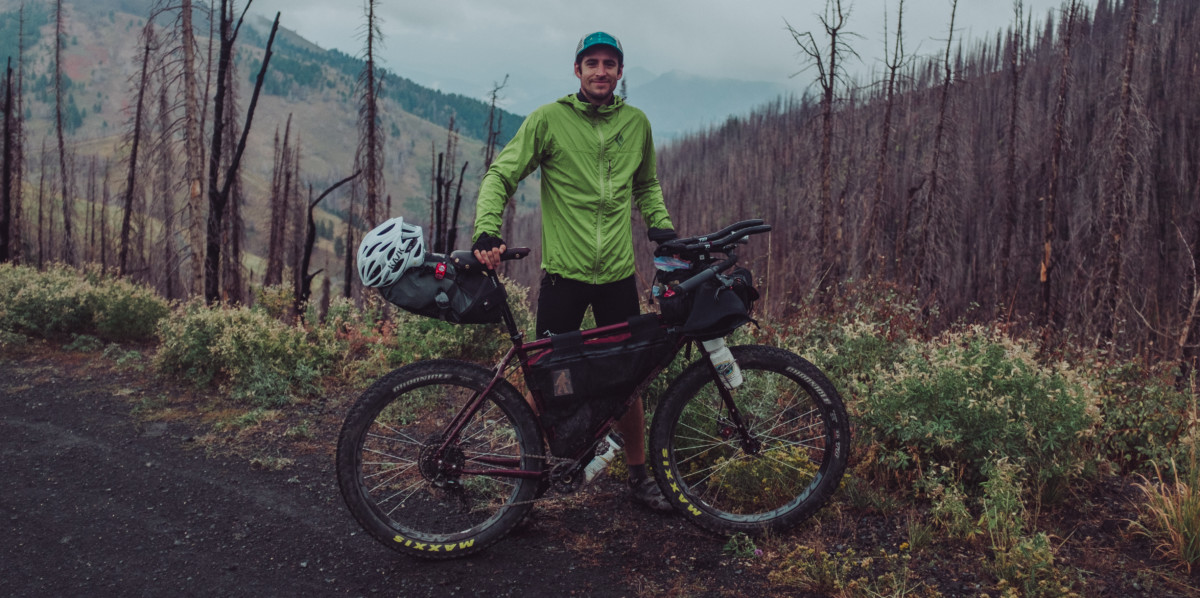
Hey there, my name is Matthew Wordell. Earlier this fall when Ryan took over Bike Touring News, he asked me to write a brief retrospective on my experiences bikepacking Idaho in 2017. I live and work in Boise as a freelance photographer (InstagramWebsite). I’m fairly new to the sport and my hope is that some of what I write here will inspire that one person who has wanted to try bike touring or bikepacking to take the plunge and head out on their first ride. Full disclosure: This is my first attempt at writing a blog of this nature, so thanks in advance to those of you who finish the whole thing <3

For anyone reading this who isn’t already familiar with Bikepacking, this is a great definition from Bikepacking.com – 

“Simply put, bikepacking is the synthesis of mountain biking and minimalist camping; it evokes the freedom of multi-day backcountry hiking, with the range and thrill of riding a mountain bike. It’s about forging places less travelled, both near and afar, via singletrack trails, gravel, and abandoned dirt roads, carrying only essential gear. 

A common misconception is that bikepacking requires a small fortune to fully appreciate; the perfect bike, custom bags, and all the latest ultralight camping gear. While investing in quality gear is never a bad idea, it’s certainly not a necessity to get you up and running. Start by using what you own and picking a short overnight route near home (30-60 miles). Discover what you really need through experience.”

With that, here’s the official beginning of this blog:

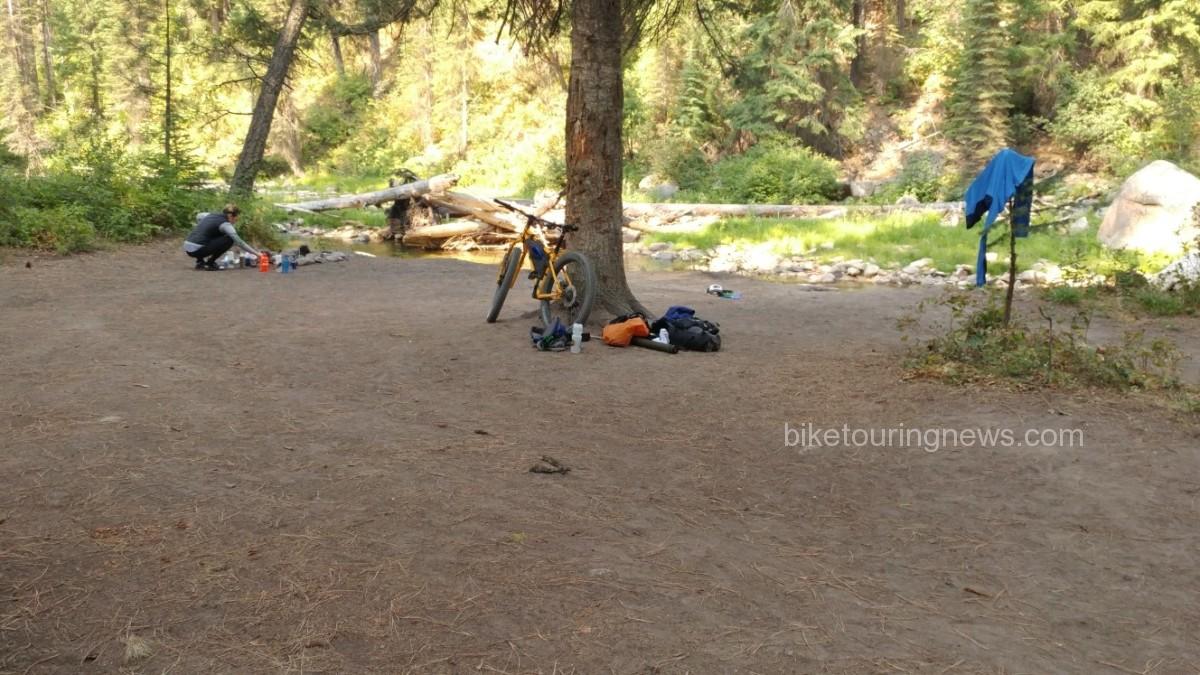
Bikepacking in 2017 begins as any other year should – far too early, far too cold, and with little regard for the forecasts prediction of rain and cold. With my bags packed and work finished for the day, the itching desire to saddle up and head for Shaw Mountain becomes palpable. Hurriedly, I lock the door to my small North End apartment and ride through downtown Boise to meet several friends who will be joining for the evening. The plan, a quick sub-24 hour ride up to the ridge road where we’ve often set up for simple overnight campouts, cook dinner, drink whiskey, survive the cold, and bomb down the mountain for work in the morning. The landscape by Shaw Mountain offers a beautiful panoramic view of the city below, stars above, and a perfect silence I’ve come to love in wooded areas, away from trafficked dirt roads. I’m still astonished a place like this exists less than a two-hour ride from town.

For us, this ride is a tradition at the beginning of the year, something we simply like calling “Wednesdays Are For Bikepacking.” It’s our way of taking advantage of Boise’s proximity to forested and lesser traveled areas along the ridge between Bogus Basin and Shaw Mountain.
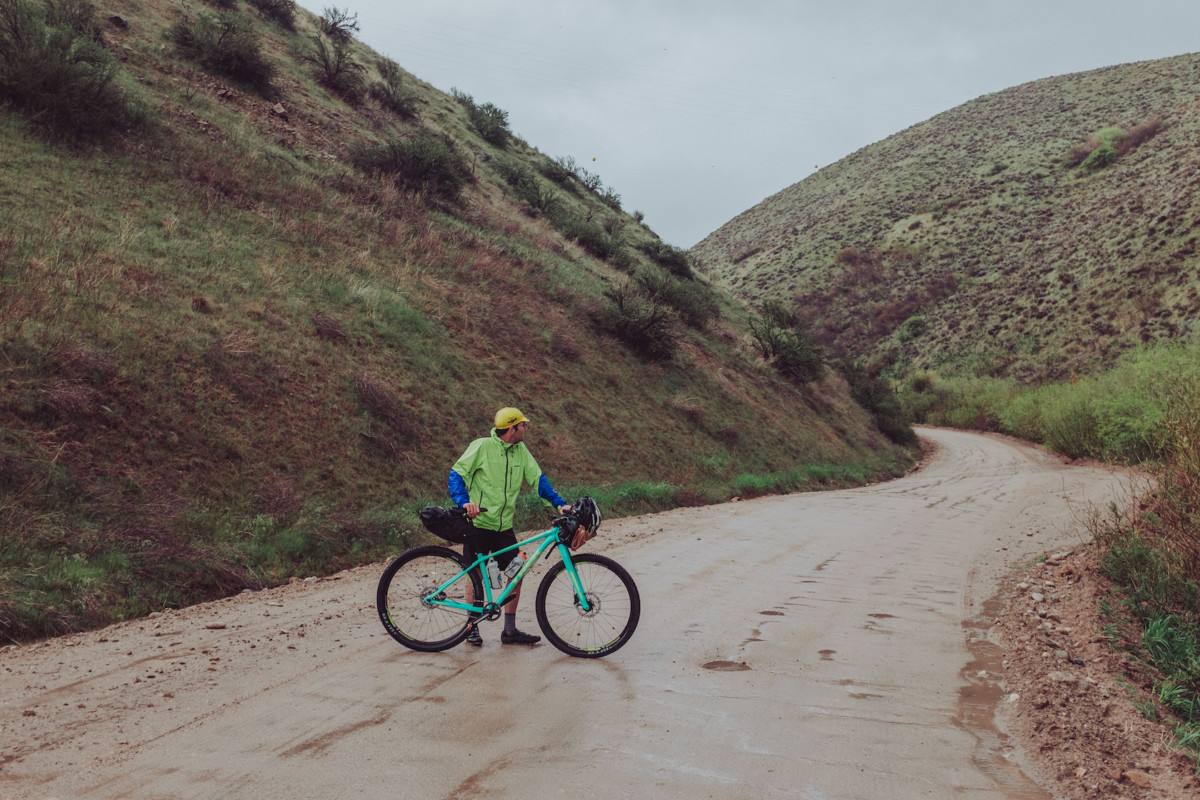
While making the final adjustments to our gear, a deep purple wash of clouds gathers across the western horizon, casting the day into inky purple darkness and casting doubt into our minds about whether or not it is really a good idea to follow through on the years first mid-week overnighter. None of us were really up for freezing to death on the first ride of the year, but it’s hard to say no to something we’ve looked forward to for so long. Nearly impossible this time after surviving the brutal snowpocalyptic winter that ravaged Idaho for months.

Thinking we could beat the rain to the ridge, we begin the climb. Cresting Reserve Road and descending toward the choppy gravel of Rocky Canyon Rd., the weather takes a quick turn for the worse, rain beginning to come down in sheets. Less than 25 minutes into the ride we’re soaked, frozen, and laughing uncontrollably. For a moment, I think we all hate it, each of us knowing that turning around and spending a warm night at home would be infinitely easier than the cold night ahead. But it was the inclement weather that confirmed what we had partially forgotten through the winter – what we really love about bikepacking.

Facing the unexpected and working through physical challenge isn’t something we experience all too often in day-to-day life. Routines dictate much of our schedule and for the lucky few (depending on what you consider lucky) who are self employed there’s still a healthy level of predictability you need to maintain in order to keep things afloat. Backpacking, bike touring, or any other sport that carries you beyond the routine and predictable motions of civilization provides an incredible opportunity to connect to the unknown, to face challenges, and to push through moments when giving up seems to be the only option. Finding joy in the pain, laughing at it with your friends. In the moment, this is the message I feel is being delivered to us by this god awful weather.

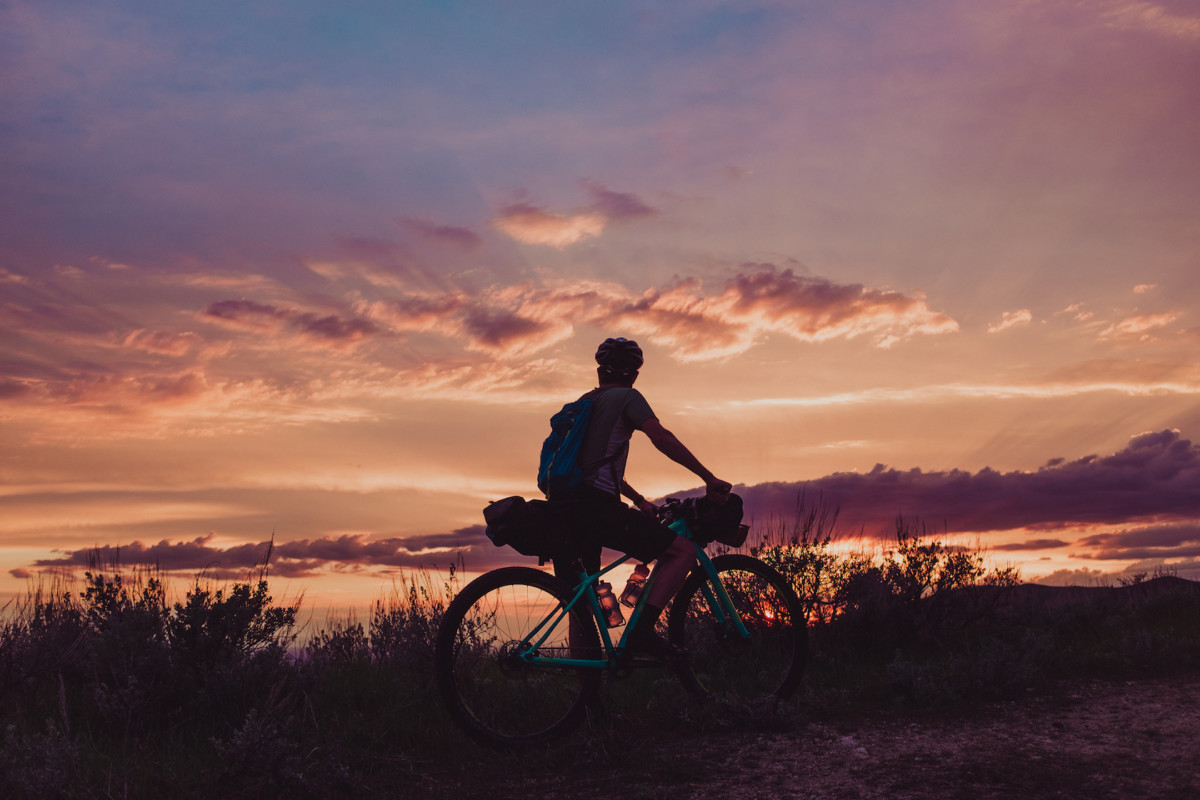
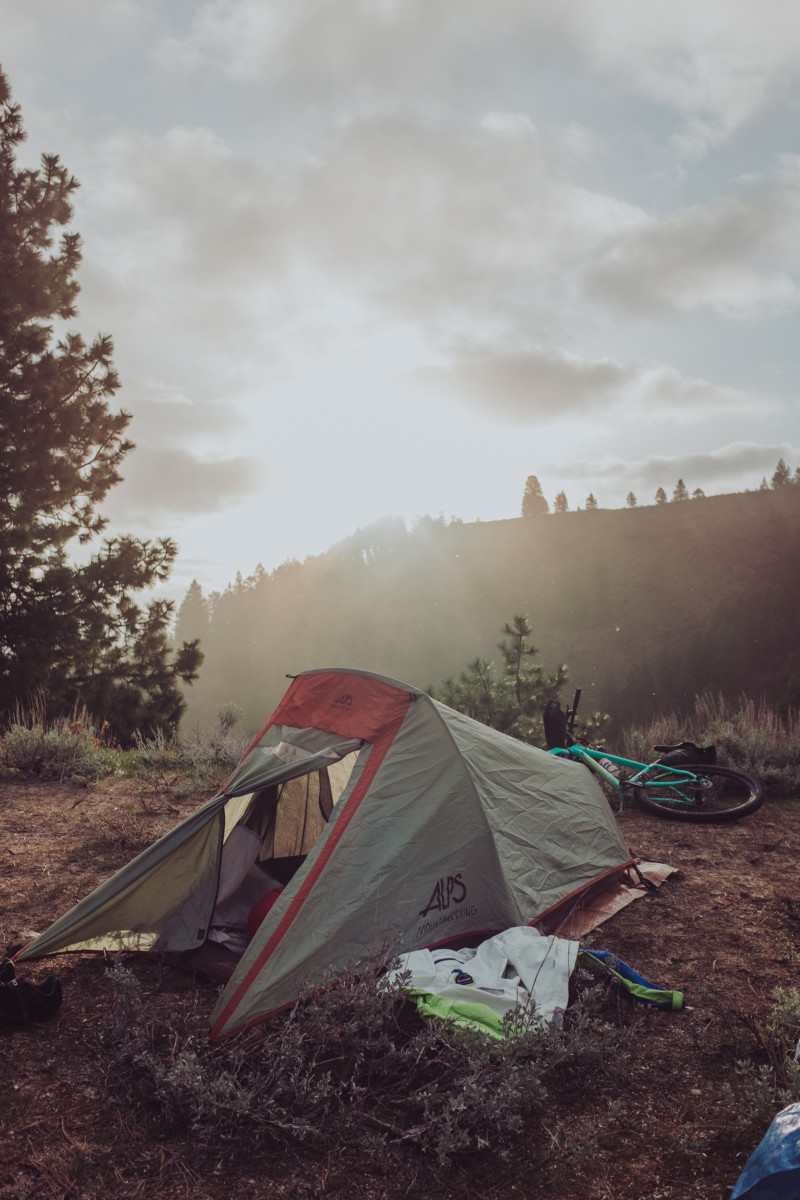
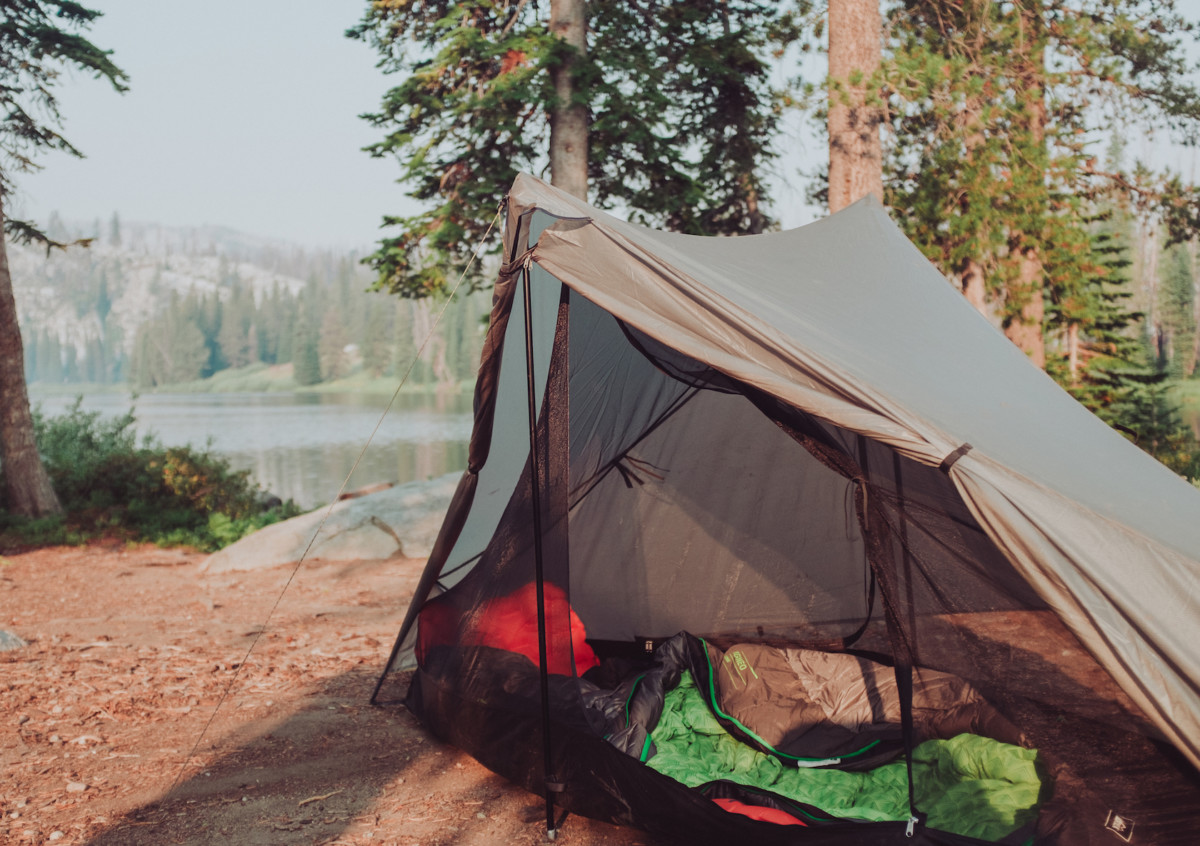
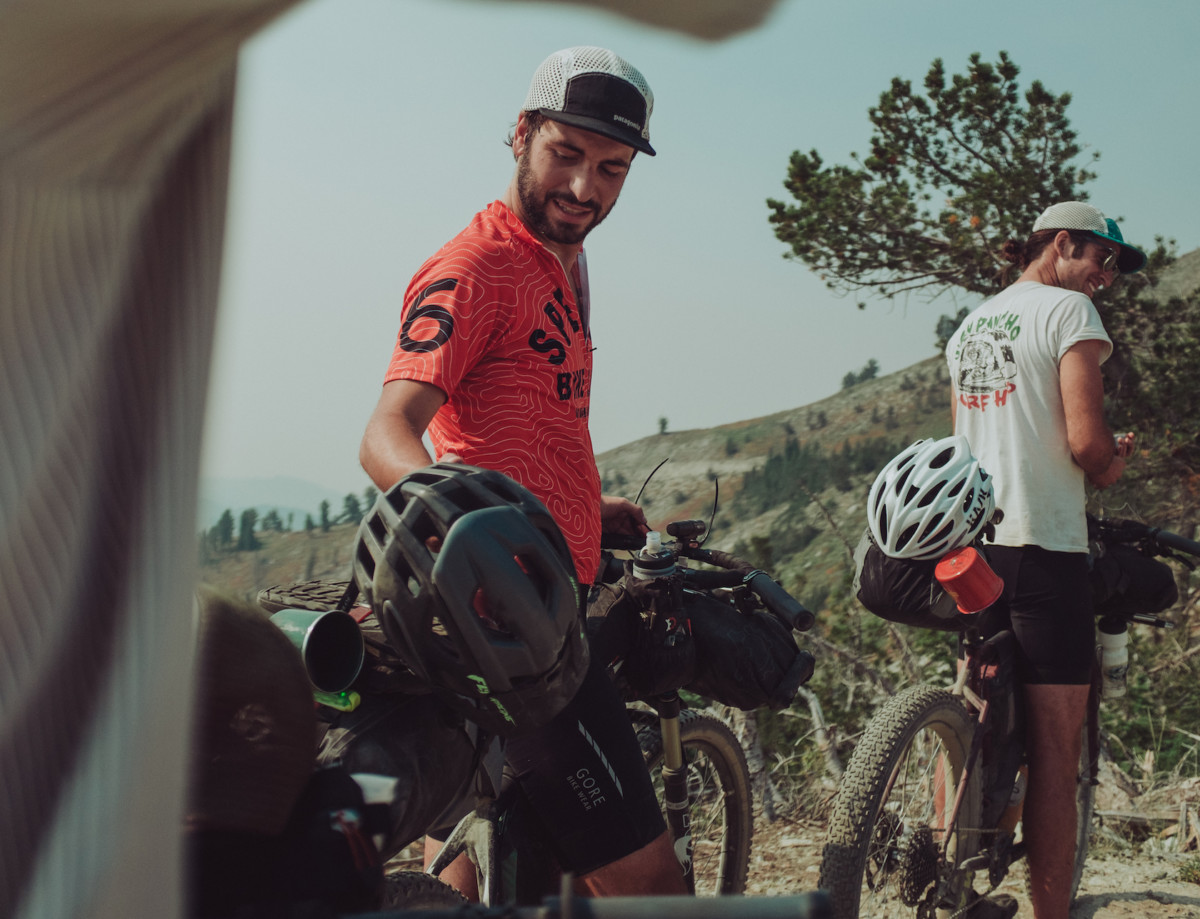
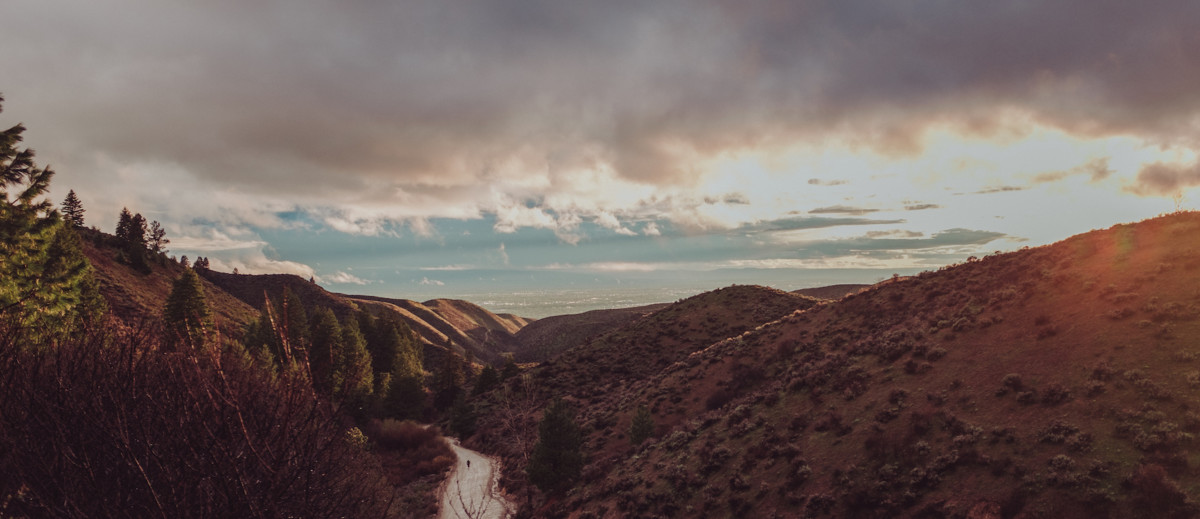
Reaching the top of the ridge, the storm finally breaks and sunlight explodes across the horizon, bathing the surrounding pine trees in purple and orange streaks of light. It’s a beautiful end to a short and painful ride and a great way to start the year. We stand together on the ridge taking it all in before piling into a small two person tent with our sleeping bags, cook kits, food, and whiskey. The tent is way too small, but it’s the only way we’ll be able to warm up before heading to our own tents and falling asleep for the night. It’s crazy to think home is less than 15 miles away. It’s a Wednesday night. We have work in the morning.
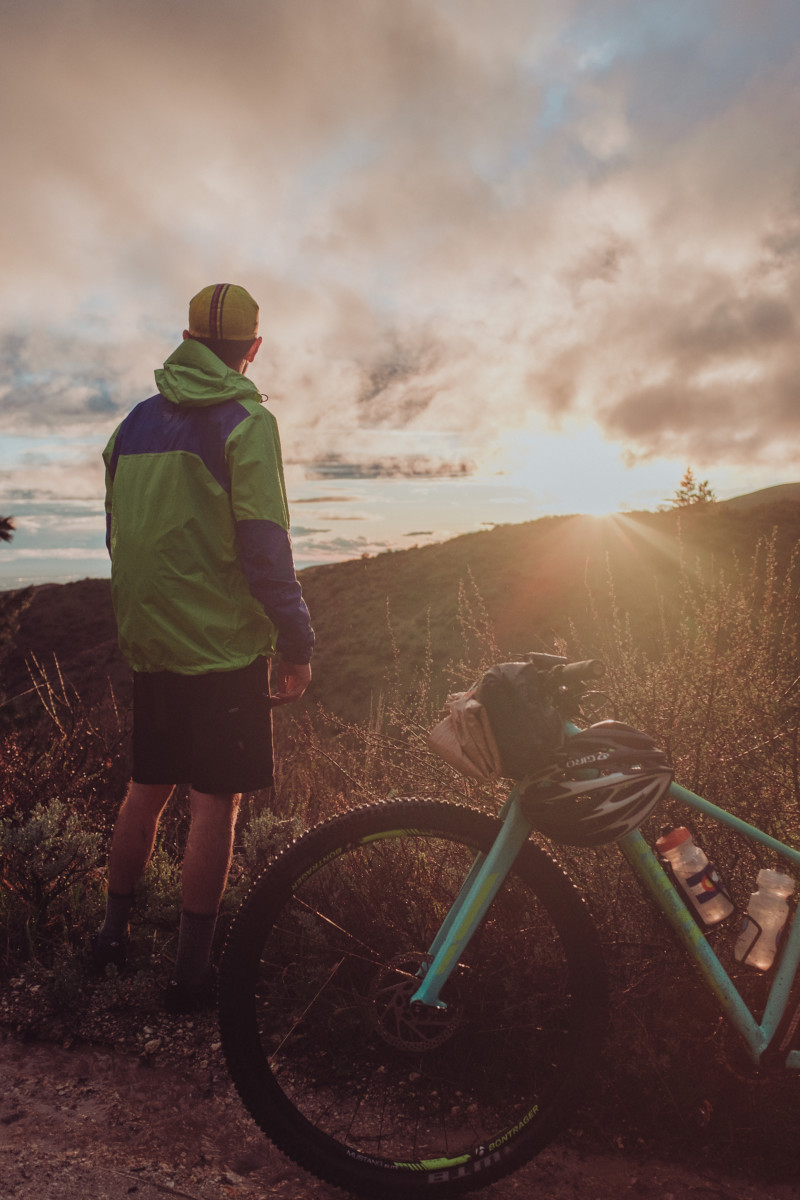
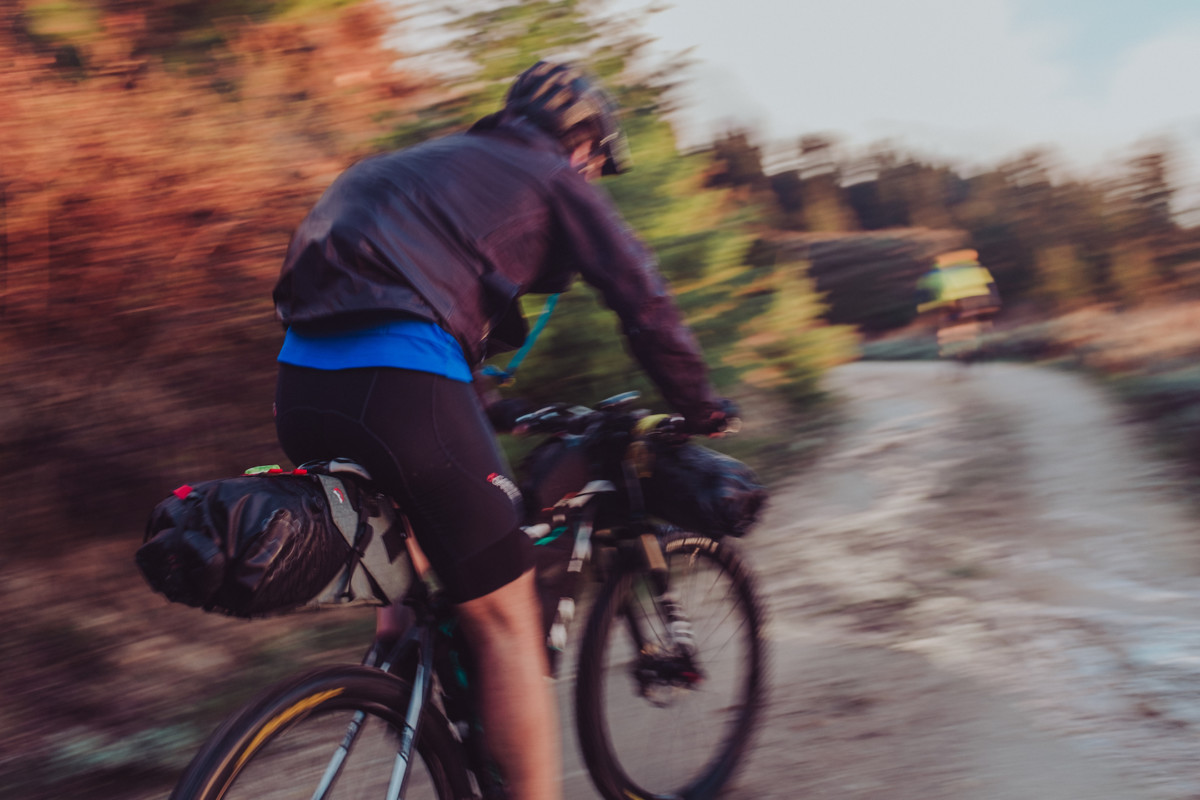
I’m fairly new to mountain biking and only recently discovered bikepacking in 2016, but it has completely changed my understanding of why I ride bikes. For readers who are interested in trying it out, I’ll try to include bits of information that hopefully make the first step a little less intimidating.

Each trip I take I learn something new about the equipment I use and my approach to riding – a new way to pack my bags, a better way to make coffee, a more efficient way to access certain types of gear, slower climbs, more snacks, taking time to swim in the middle of the day, and how to plan routes to keep the riding fun and the opportunities for beer plentiful. The process of trial and error is important in any sport, but I feel it’s especially important for bikepacking as the first couple rides can often feel the most intimidating. Never fear, everyone has their own idea of what works so it’s worth experimenting with your packing setup! Here’s a few pro tips to get you started:

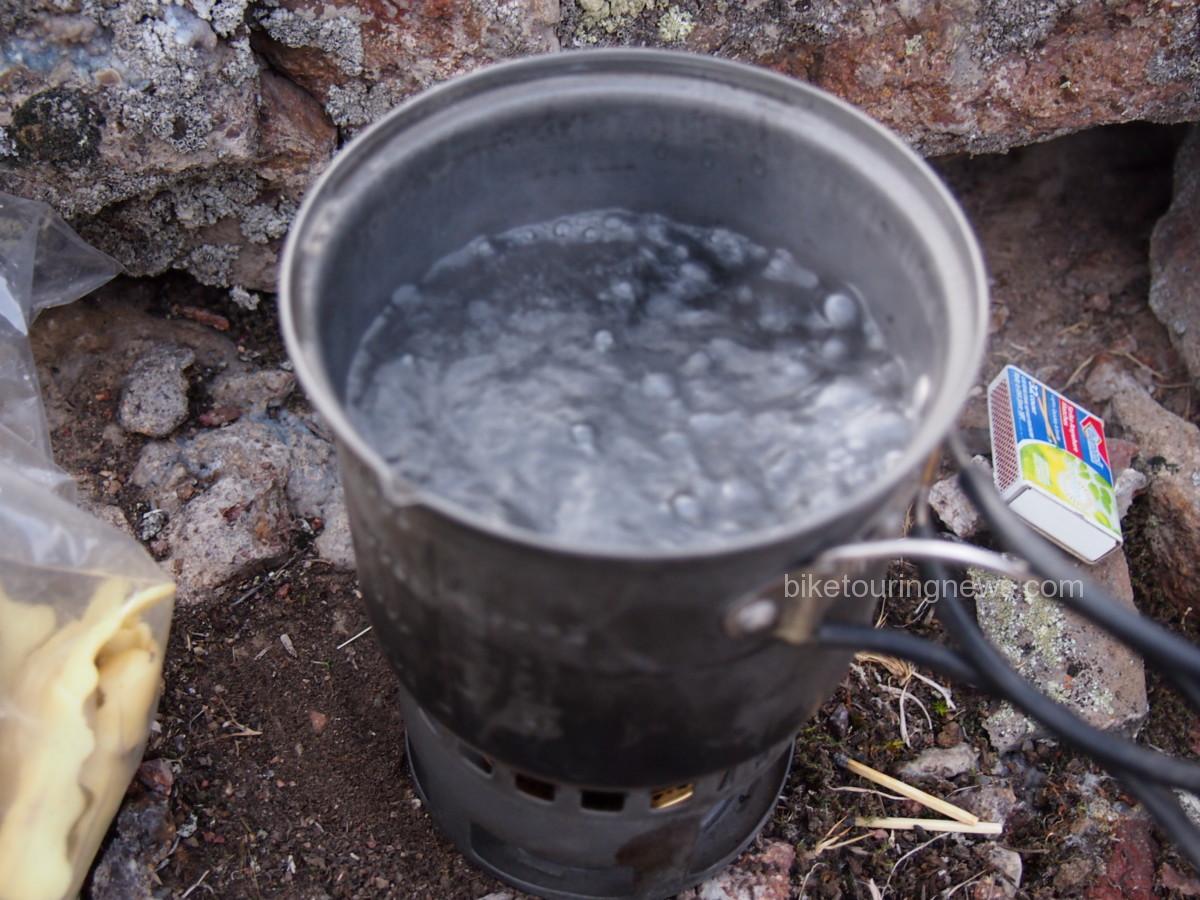
  • For your first ride, try packing as light as possible to achieve maximum suffer points and garner extra kudos from all those ultralight riders on instagram who spend half their ride wondering if they actually needed that extra pair of wool underwear (they didn’t). For this all you’ll need is several packets of instant coffee, a cook kit for boiling water, and nothing more.
  • Once you’ve endured the pain of step one and have successfully realized camping is a lot more fun when you’re comfortable, you can now try packing a little heavier, a great way to impress yourself and your riding partner. For this “medium weight” approach, carefully stow away that handsome pour-over setup you’ve been dying to try out in the forest while the sun peaks over a wooded ridge, the steam of your fresh pot of boiling water lingering above a nearby brook, while you think to yourself more than once “can life get much better than this?” If you’re the lucky chap who remembered to grind your coffee before hitting the trail, then the answer to that question is yes. Absolutely yes.
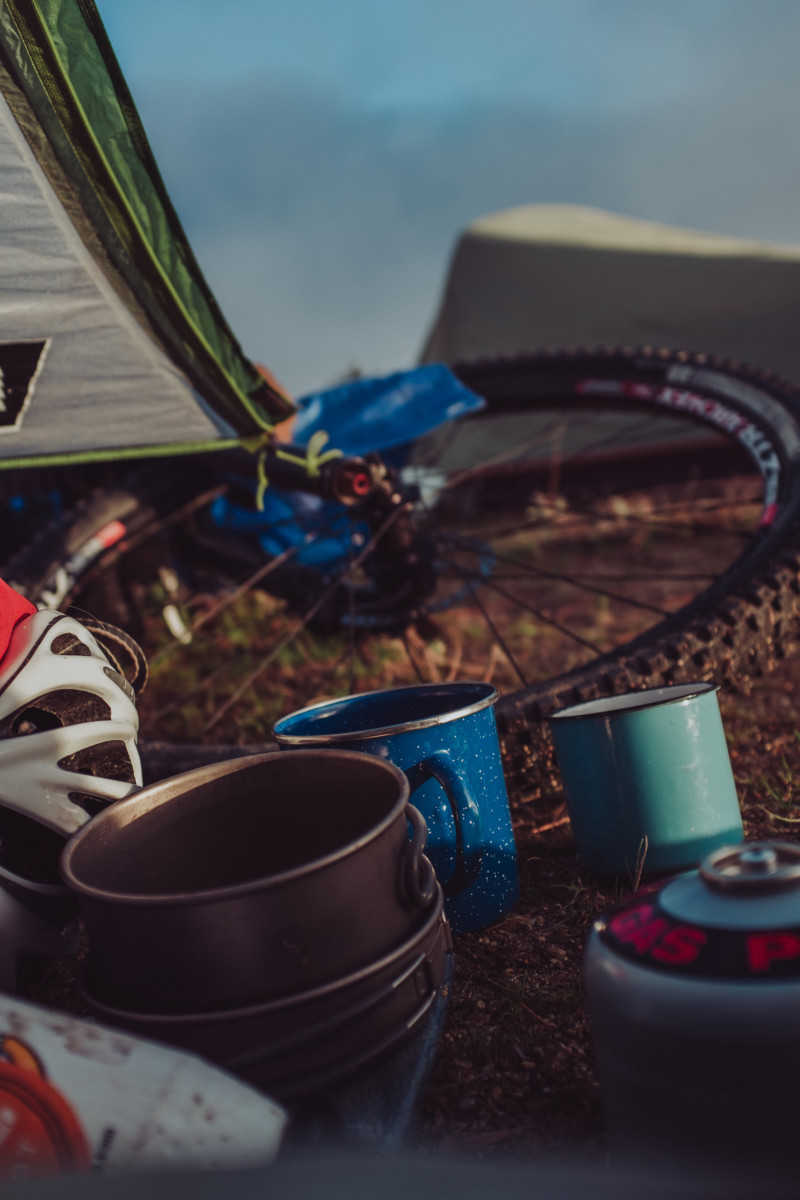
  • Last but not least, there are the mystical few who have been called by Zeus himself to go “fully loaded.” Be careful who you discuss this approach with, a careless slip of the fully loaded tongue in the wrong company could lead to temporary lack of invitations to participate in those mid-summer bikepacking rides your buddies are all posting about on social media. Some will say this approach is unnecessary but if you’ve budgeted time for premium, grade-A nature-indulgence it might just be the right option for you. This setup requires a trip to your local co-op or natural foods store to purchase one pound of whole-bean single source coffee, your hand-operated burr grinder, and that freshly polished glass french press you haven’t used in two months. For the full effect of traveling “fully loaded,” pack a four-set of enamel mugs for you and your new friends who were laughing at the beginning of the ride but now realize you’re an absolute genius.

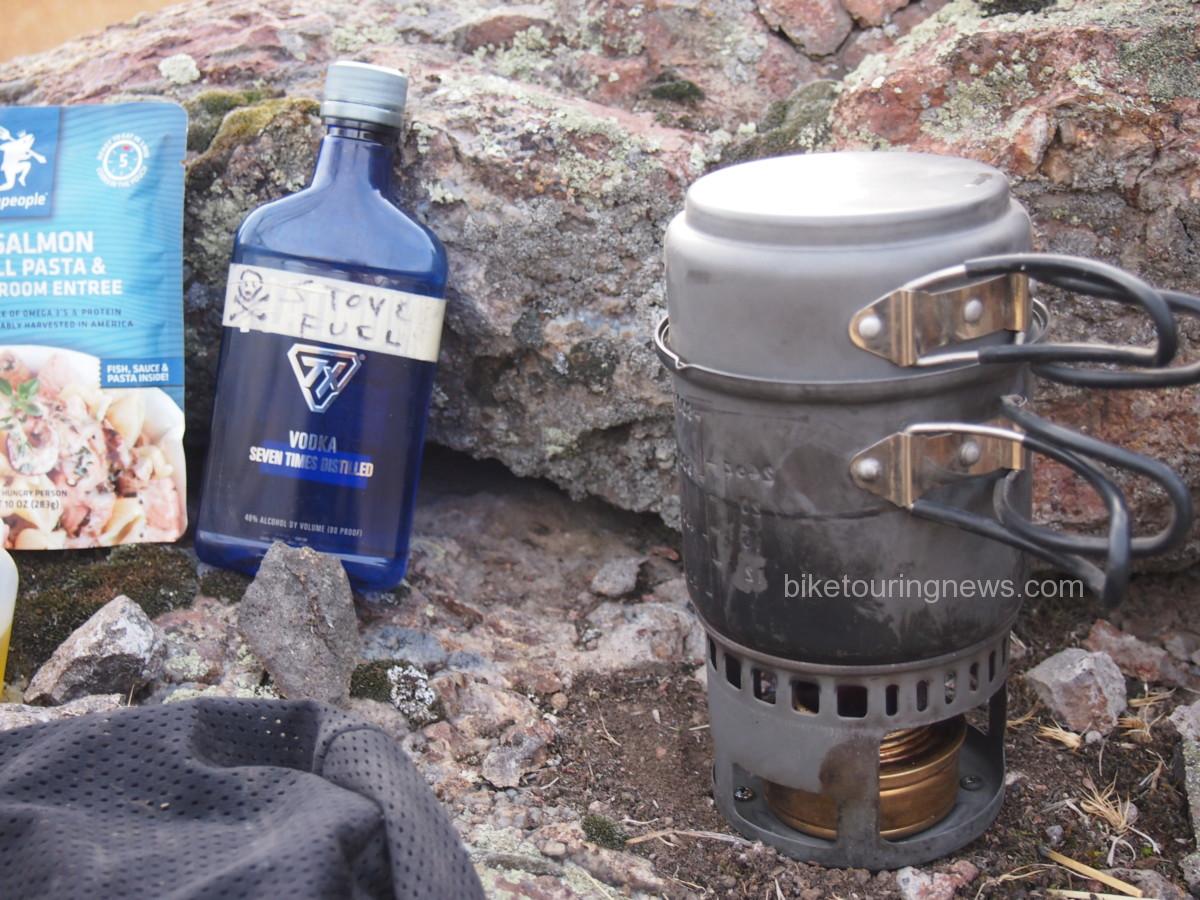
For me, I’ve had to strike a balance between efficient riding and efficient good times once I’ve reached my destination. For that reason, I usually opt for the pour-over approach with a few additions. A block of dubliner cheese, a mini Bota Box of seasonally appropriate wine, a bar of chocolate, and maybe a shooter or two of some hard alcohol to take the edge off a big downhill section or when you make camp way later than planned and end up taking a pitch-black midnight bath in that nearby freezing river.

In my opinion the best first rides are along rivers, the grades are more predictable, you can stop and swim if the day gets too hot, and you have all the water you need for dinner once you make camp. Pick one, find a place to park, pack up your bike, and ride until you find a badass spot to camp. Strangers will help you if you get into trouble. It’s something I have to remember every time I leave the house for one of these rides, people are willing to help if you need it. Don’t be afraid to ask for directions and recommendations, 95% of the time people know the area better than you do.

One of the most important lessons I’ve learned along the way is that shit breaks, gear fails, and people forget things. It sucks but it’s part of the fun (just don’t forget your sleeping bag and cook kit). Learning how to improvise and exist without the conveniences of everyday life is an oddly valuable skill and something you gain almost immediately while practicing any type of minimalist camping. On my first bikepacking trip, a friend and I didn’t have anything to use for chairs while eating dinner and lounging by the fire, so we decided to build make-shift stools out of pine bark. It seemed like a brilliant idea, but after kicking back for a few minutes we quickly discovered that his was infested with ants. Live and learn. Upon returning, we immediately went to REI and bought A-lite Monarch chairs and have packed them with us on nearly every trip since.

So yeah, back to 2017:

As May and June come into bloom, my rides seek out new vantage points, less traveled roads, more difficult climbs, lakes, rivers, and hot springs. I always have to include hot springs when possible. Normally I feel a drive to explore beyond the borders of my state, but this year it feels good to discover small towns in the mountains, talk to people who live there, learn of their favorite places to camp nearby, and wash myself in crystal clear river water at the end of a day. Its a year spent building my relationship with Idaho, deepening our connection, and discovering places I will surely return to year after year.

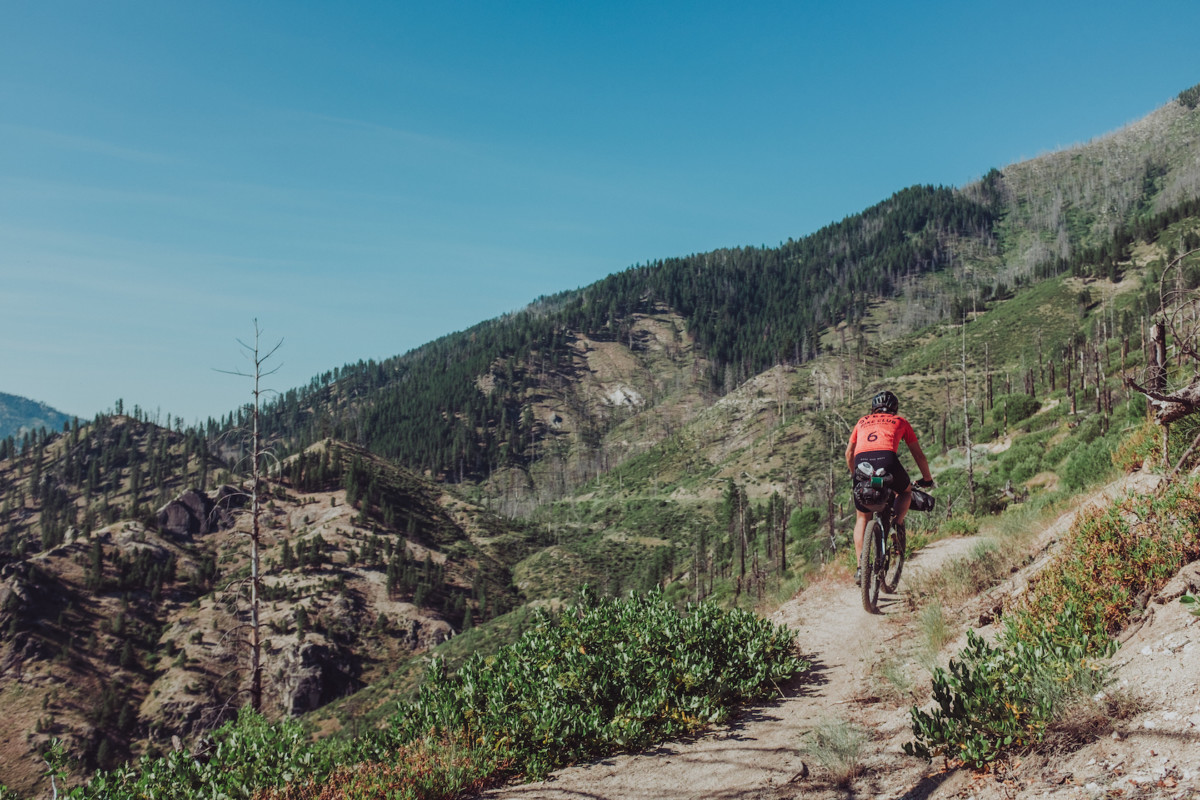
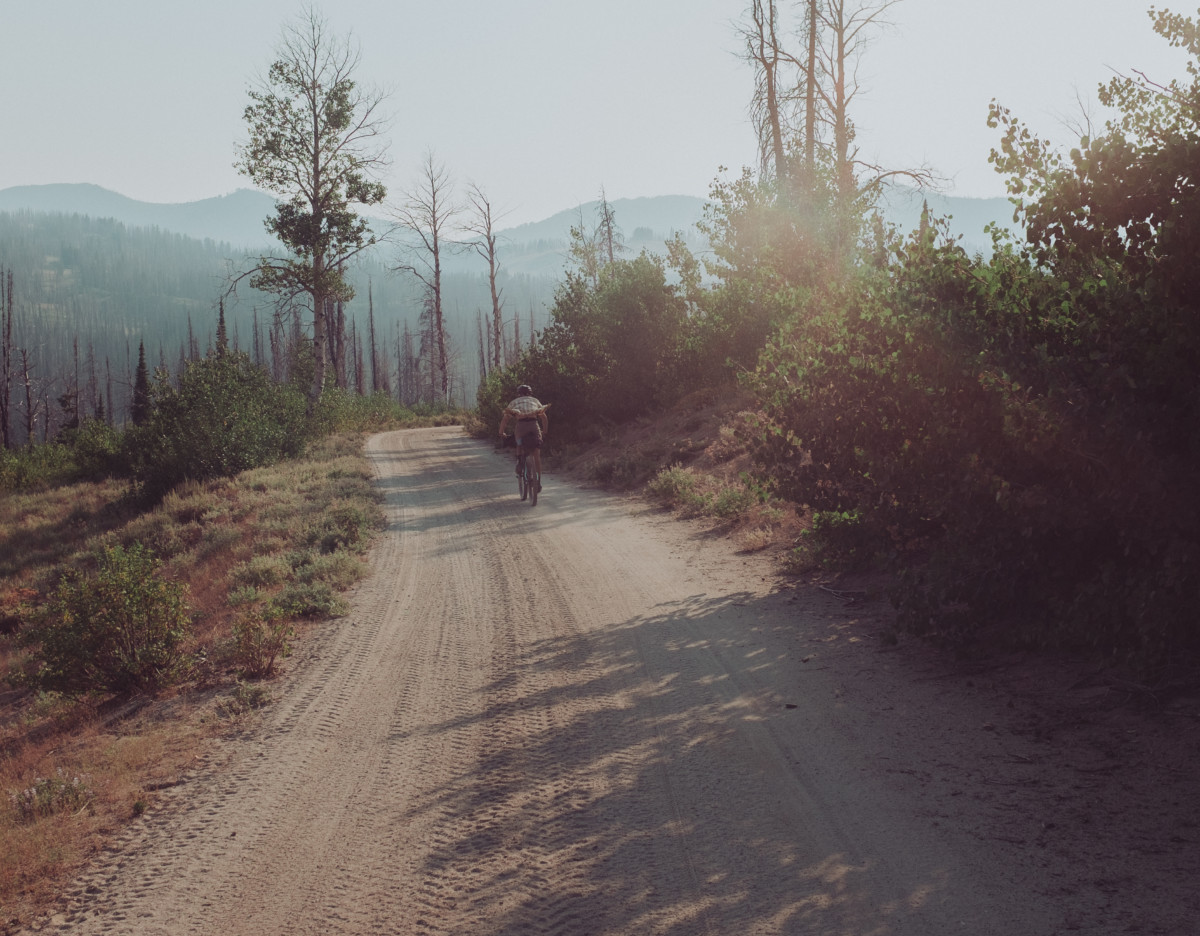
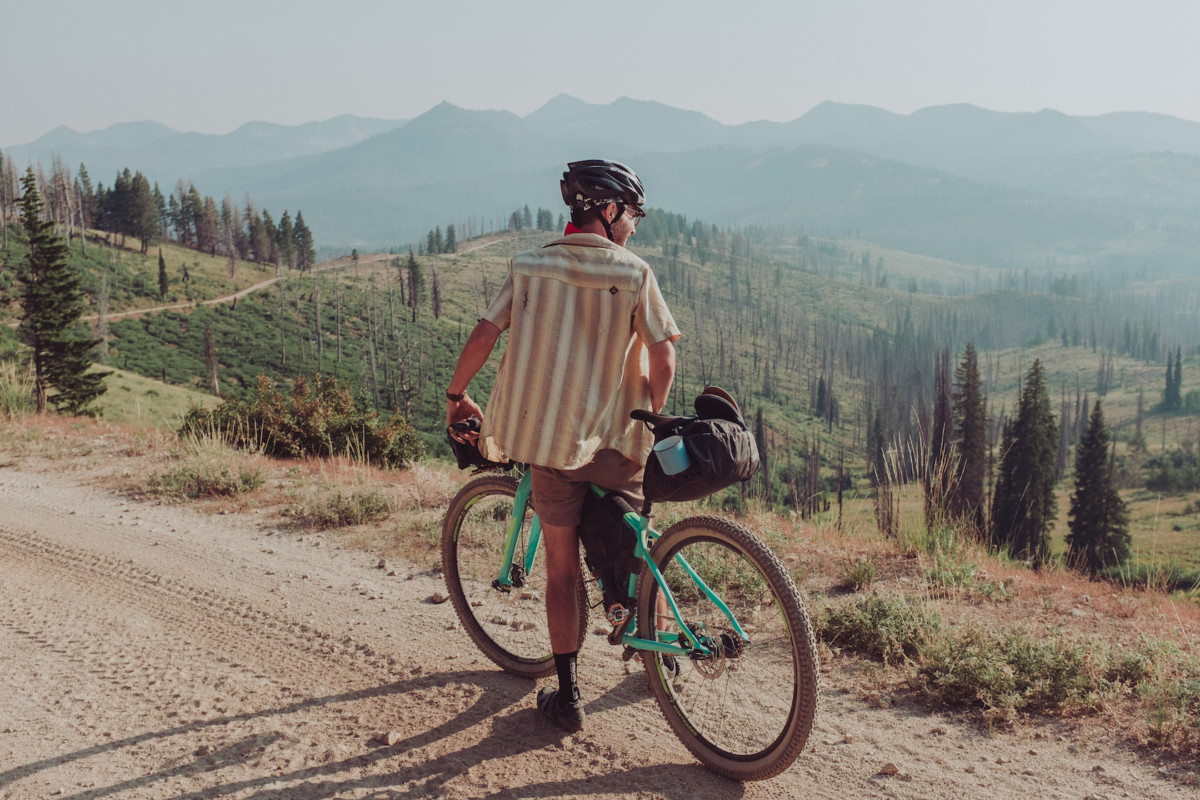
Almost every weekend, I find myself coursing like the wind along sweeping dirt roads, rambling through the high valleys, pine groves, and sagebrush of Boise National Forest, filling my body with a sense of freedom. Roads I’ve hardly noticed while driving become new passageways to a realization of the beauty that surrounds me here in this state. A sense of thankfulness with every turn, like my whole existence is breathing in the wild air of this place. It feels amazing. Each ride feels like a liberation from something, each experience building my confidence in the gear and skills I take with me.
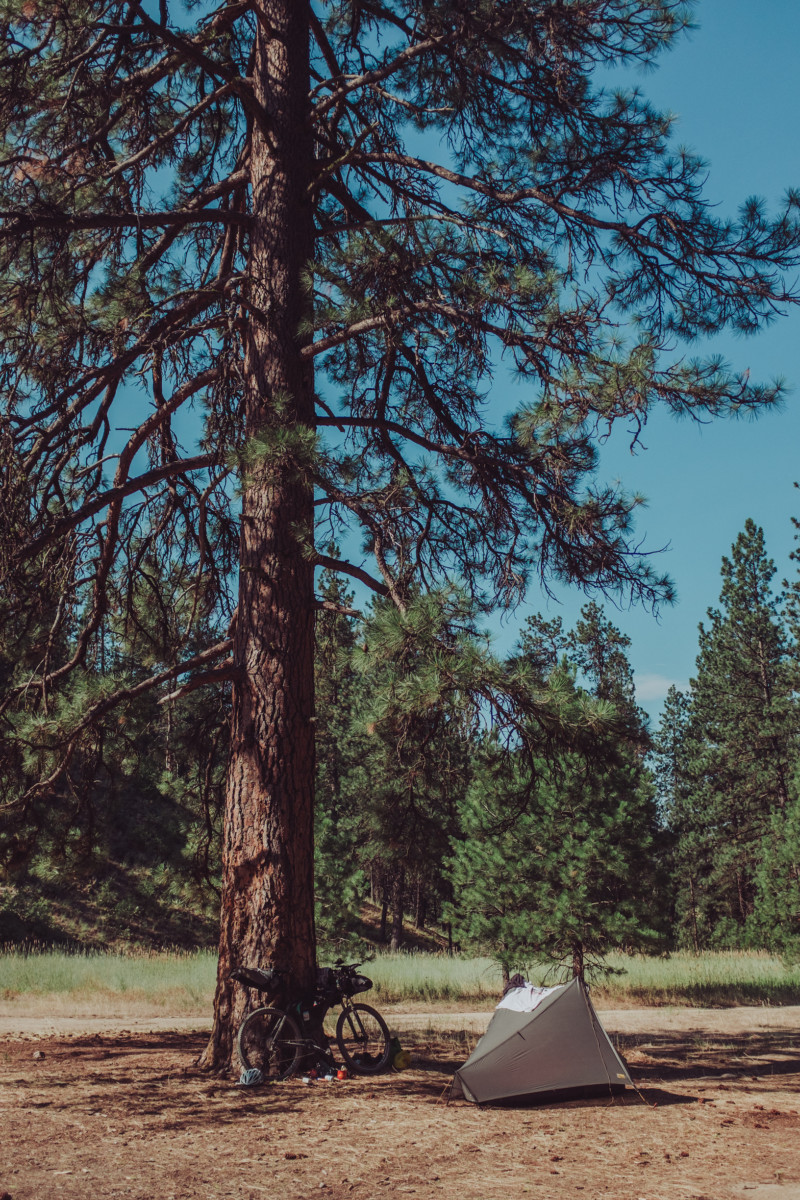
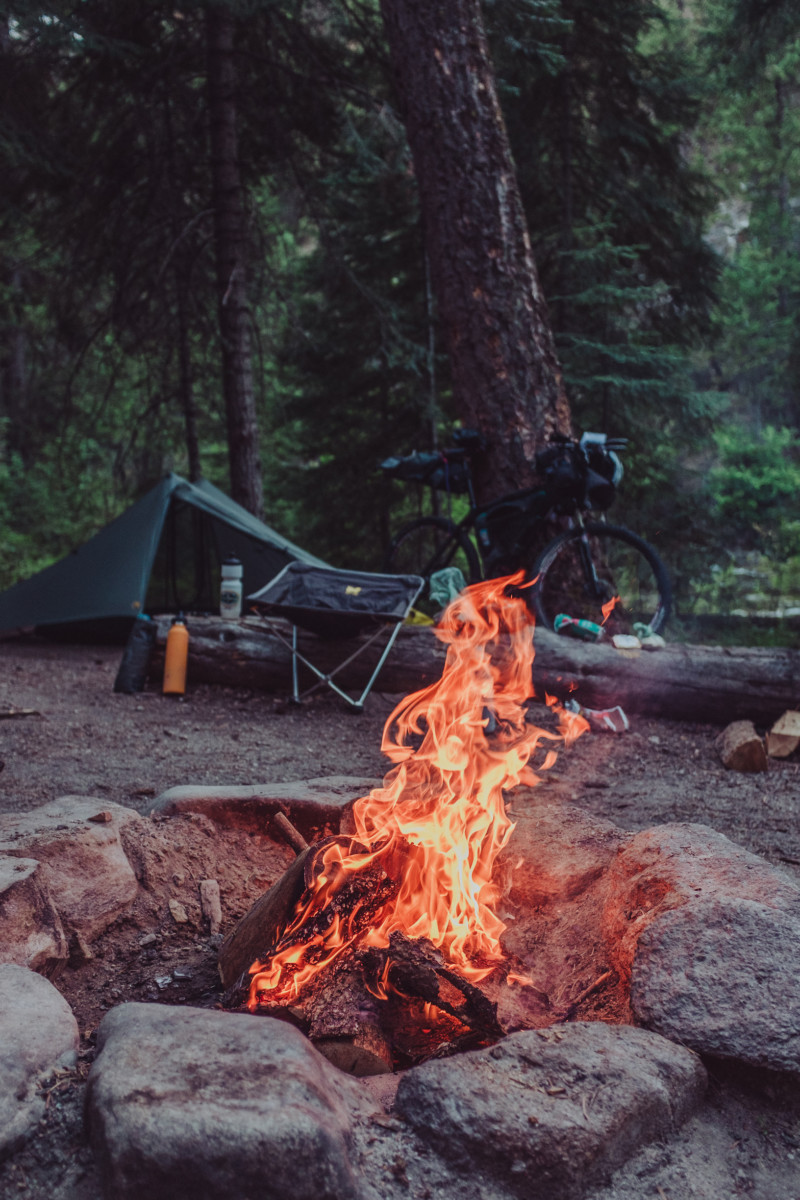
 

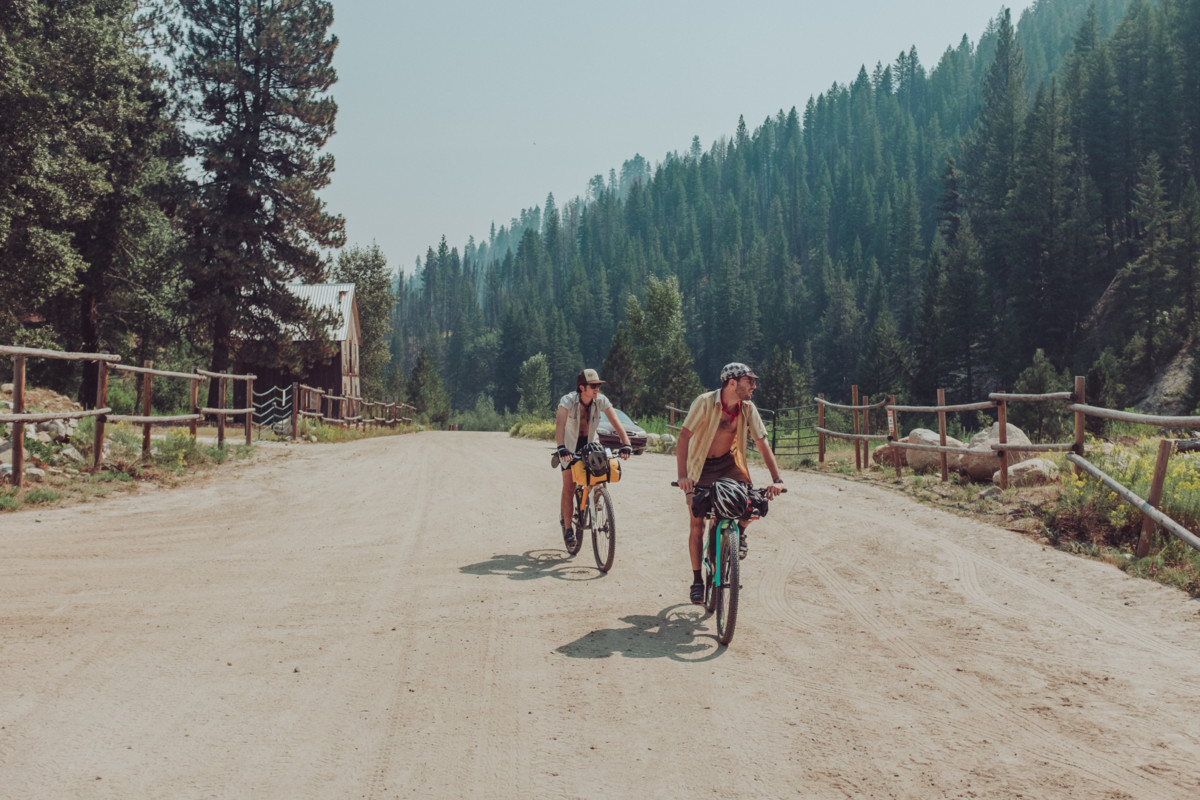
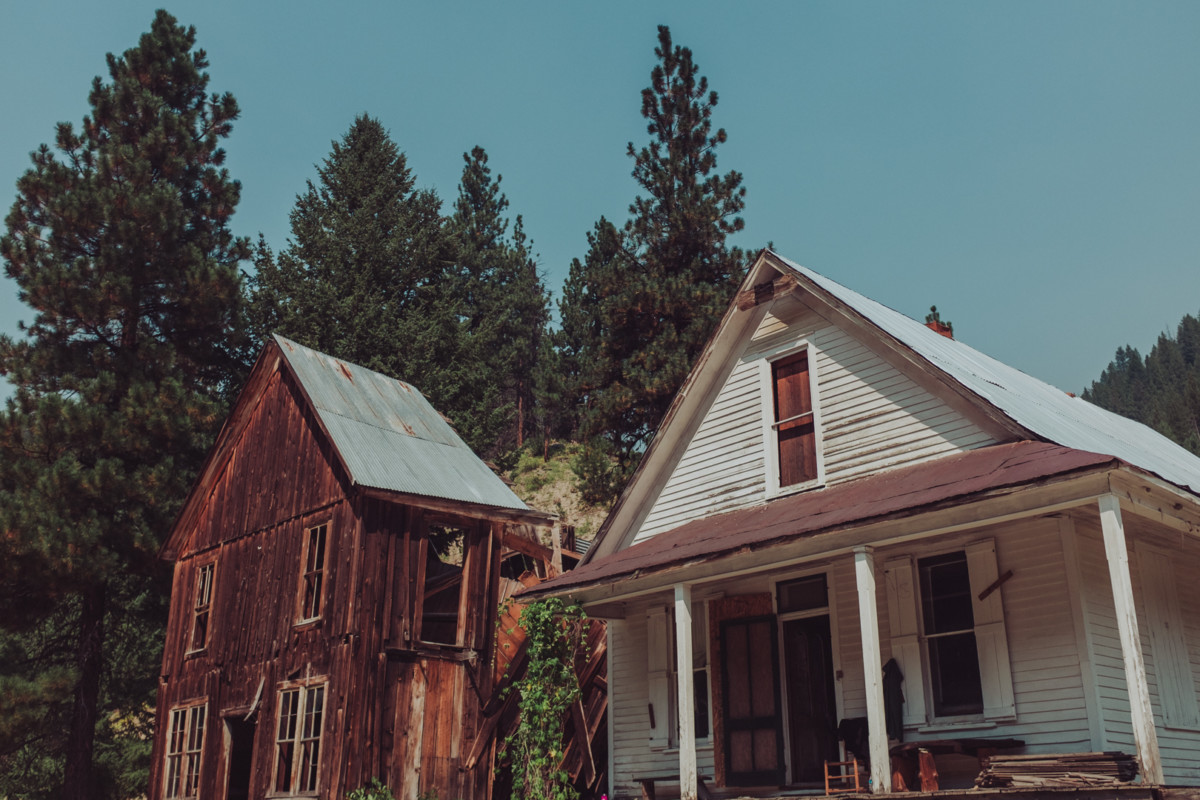
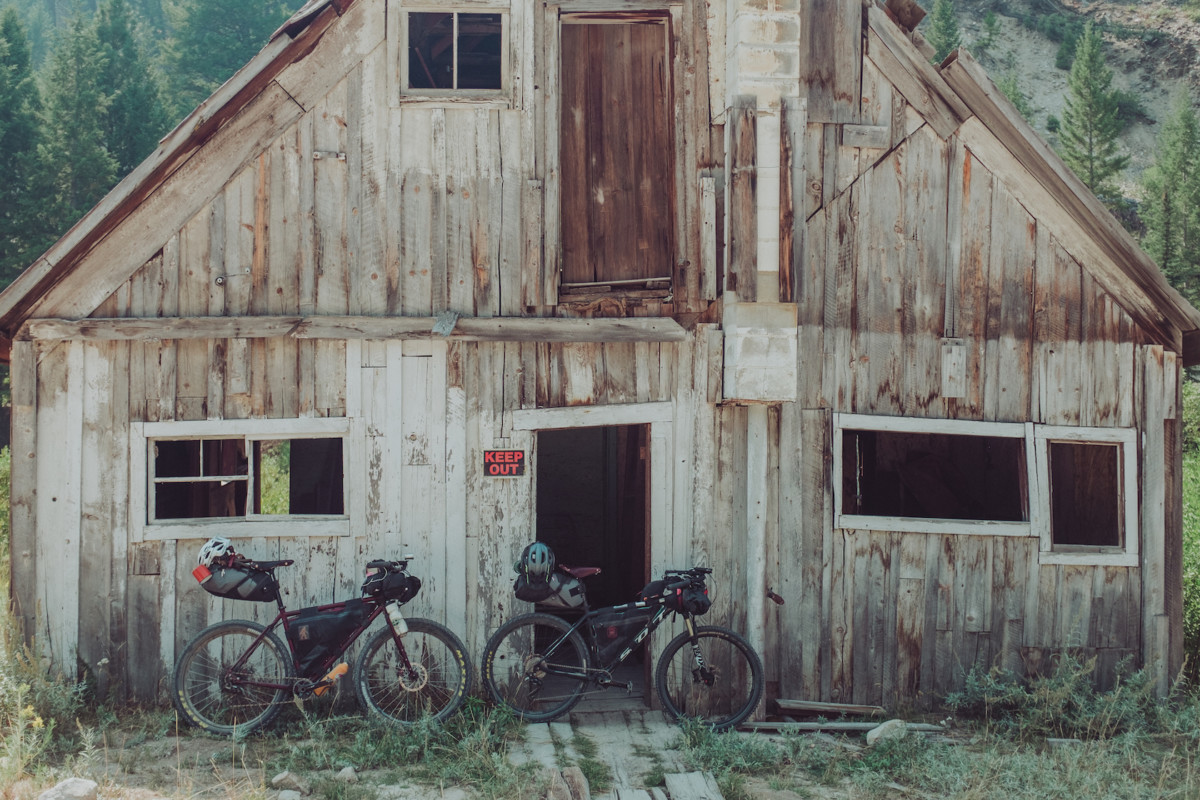
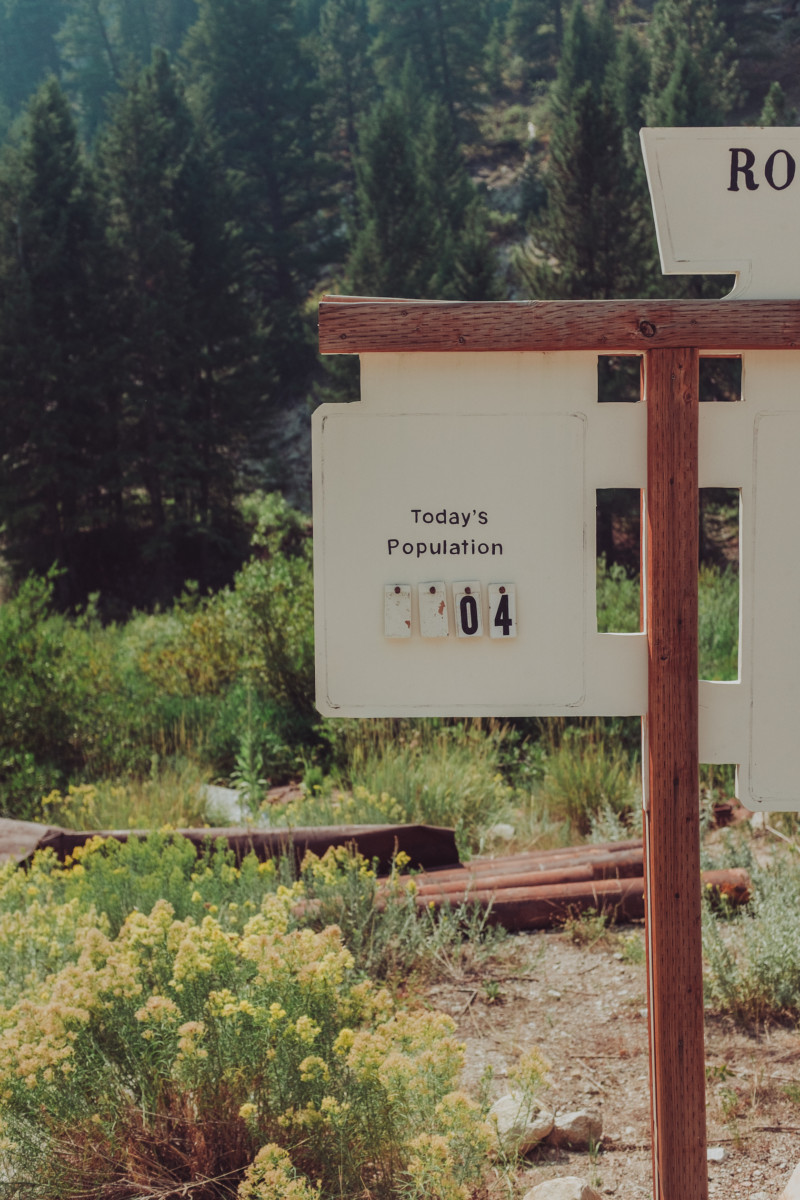
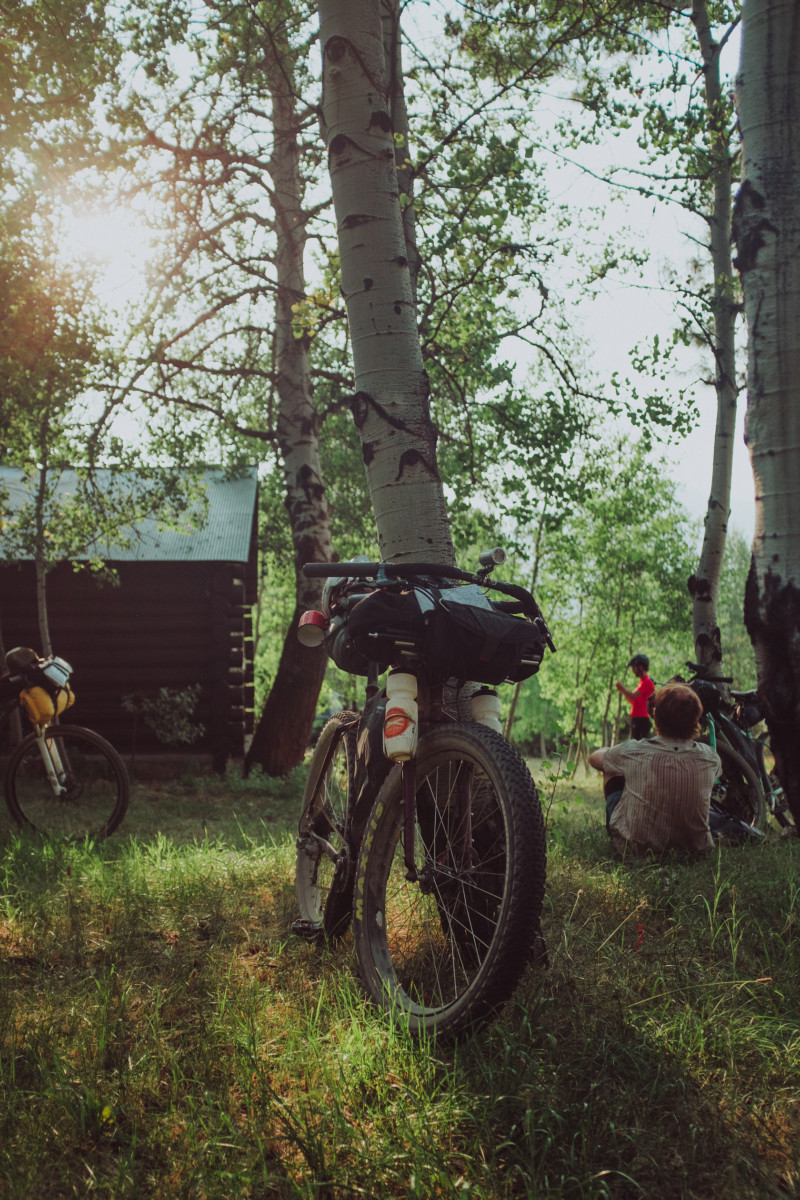
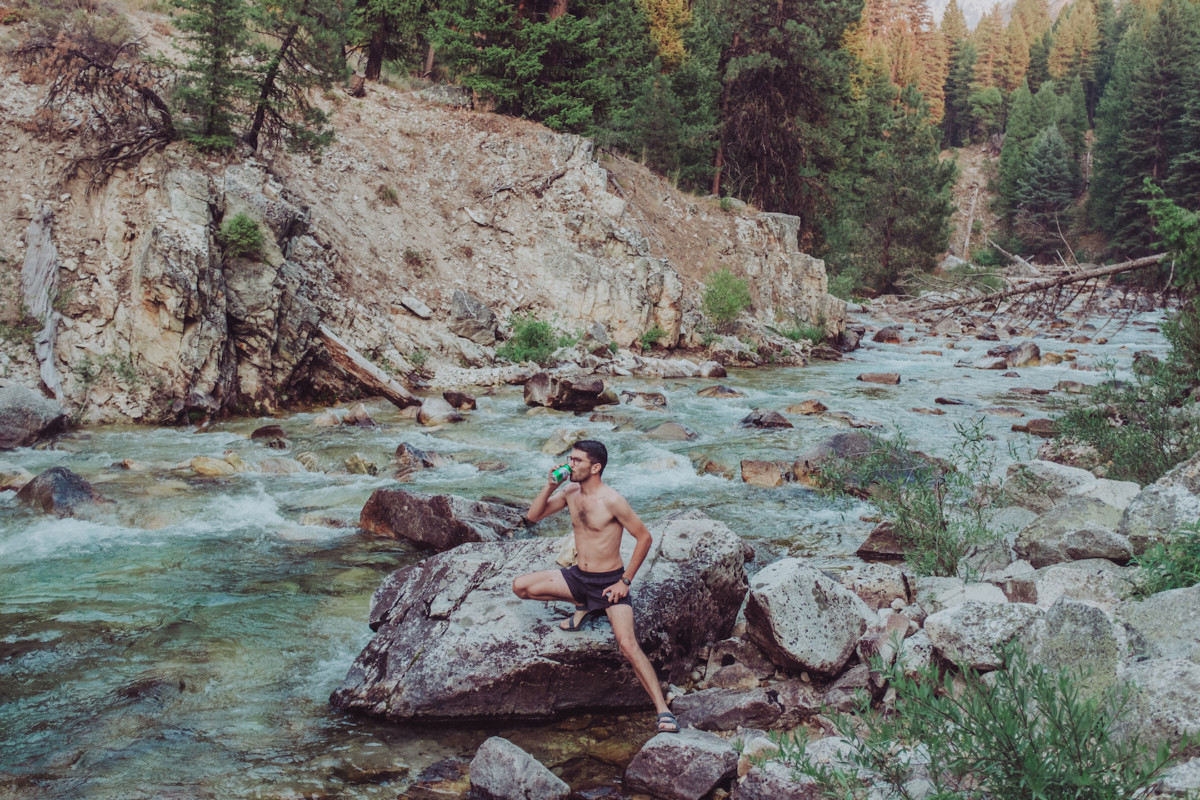
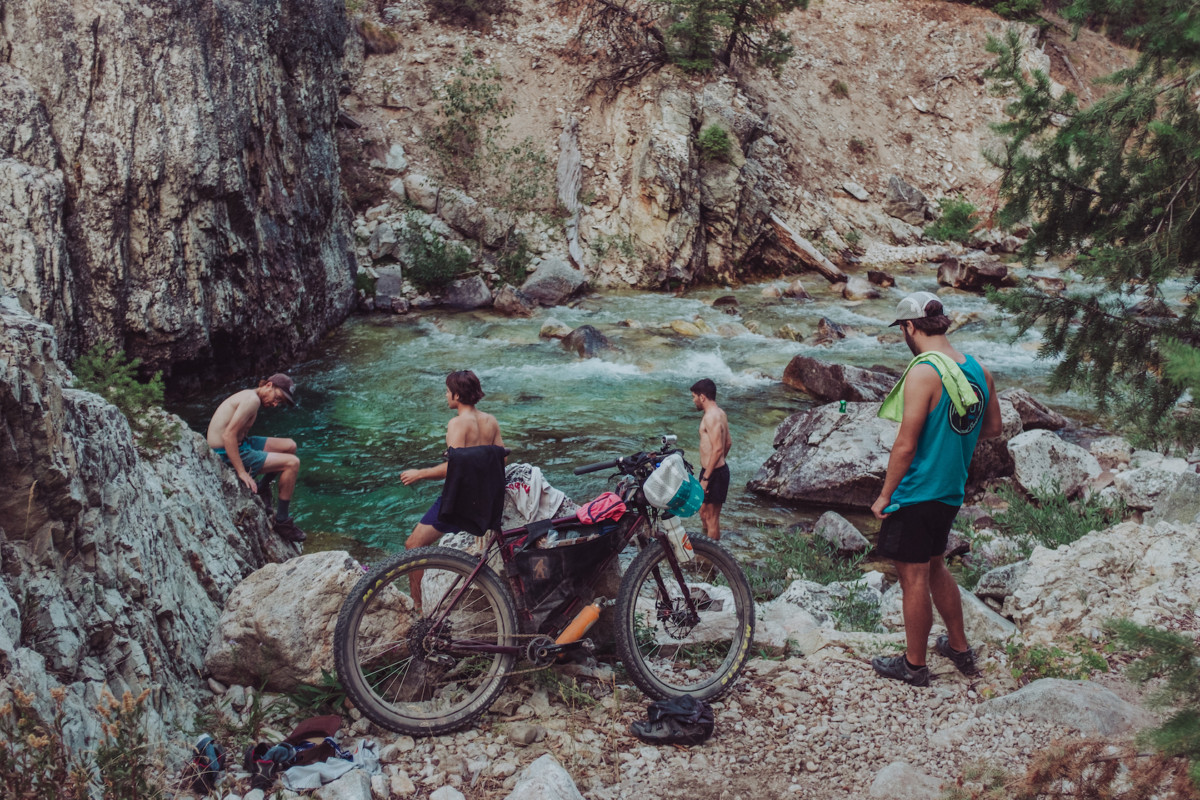
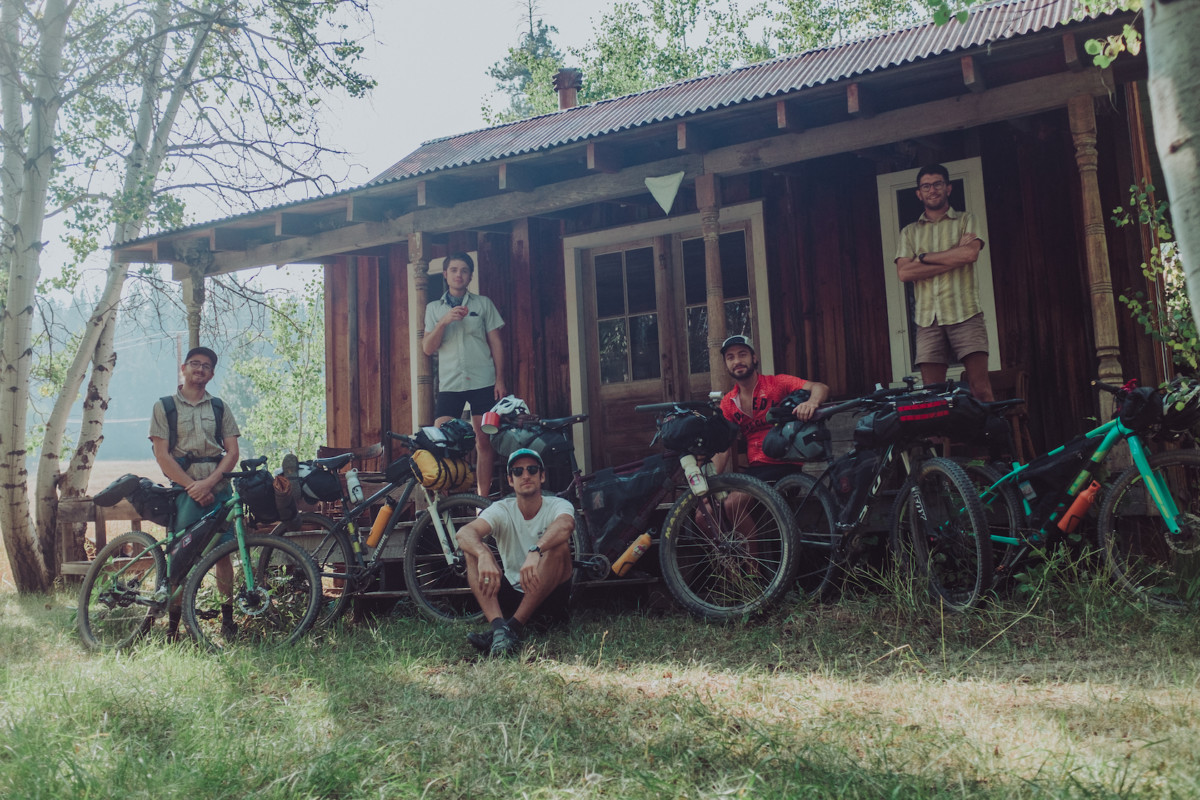
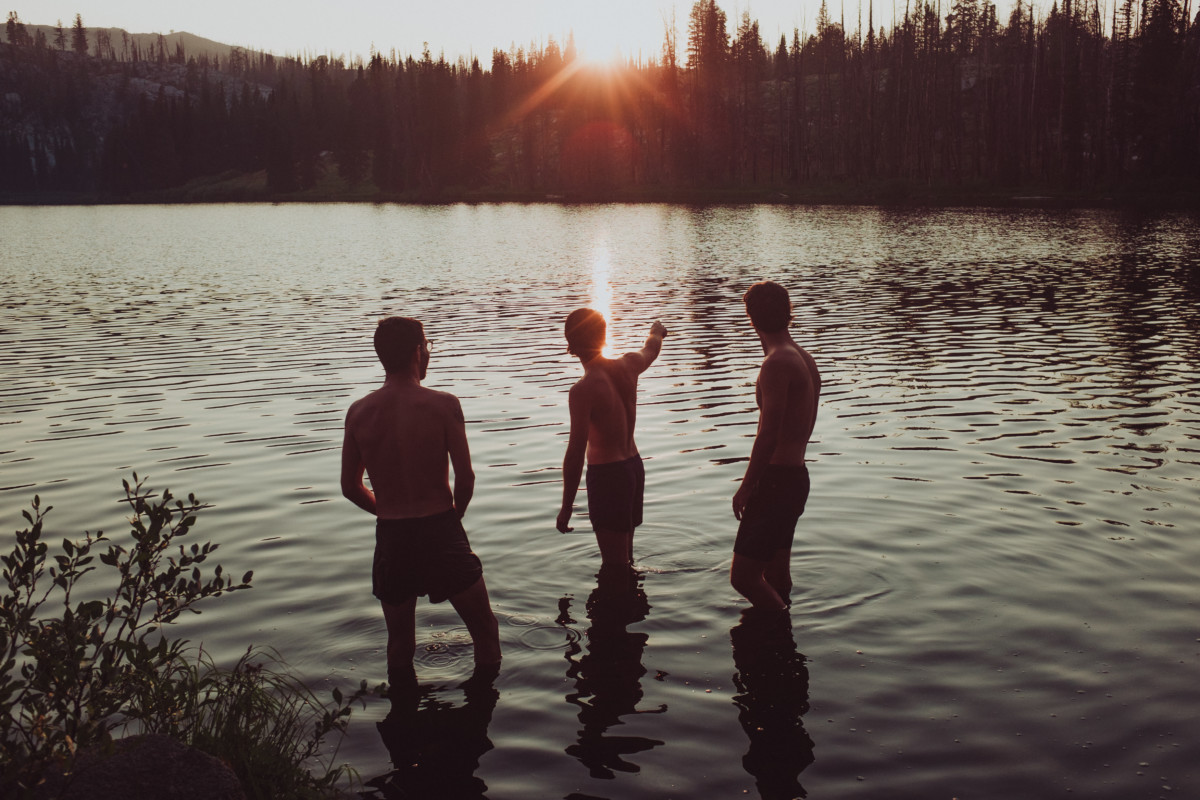
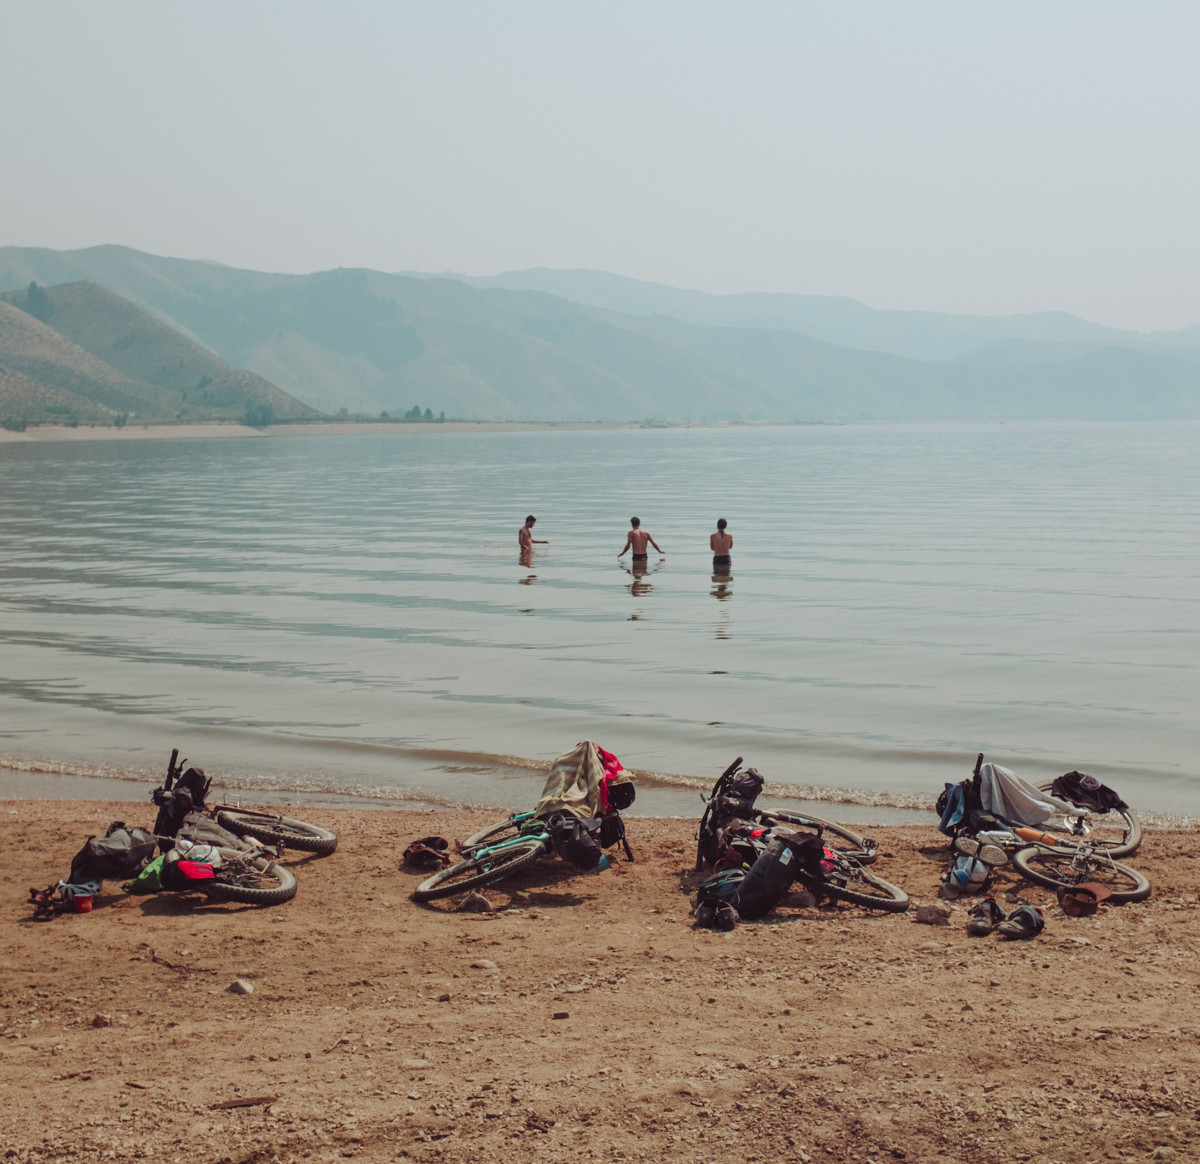
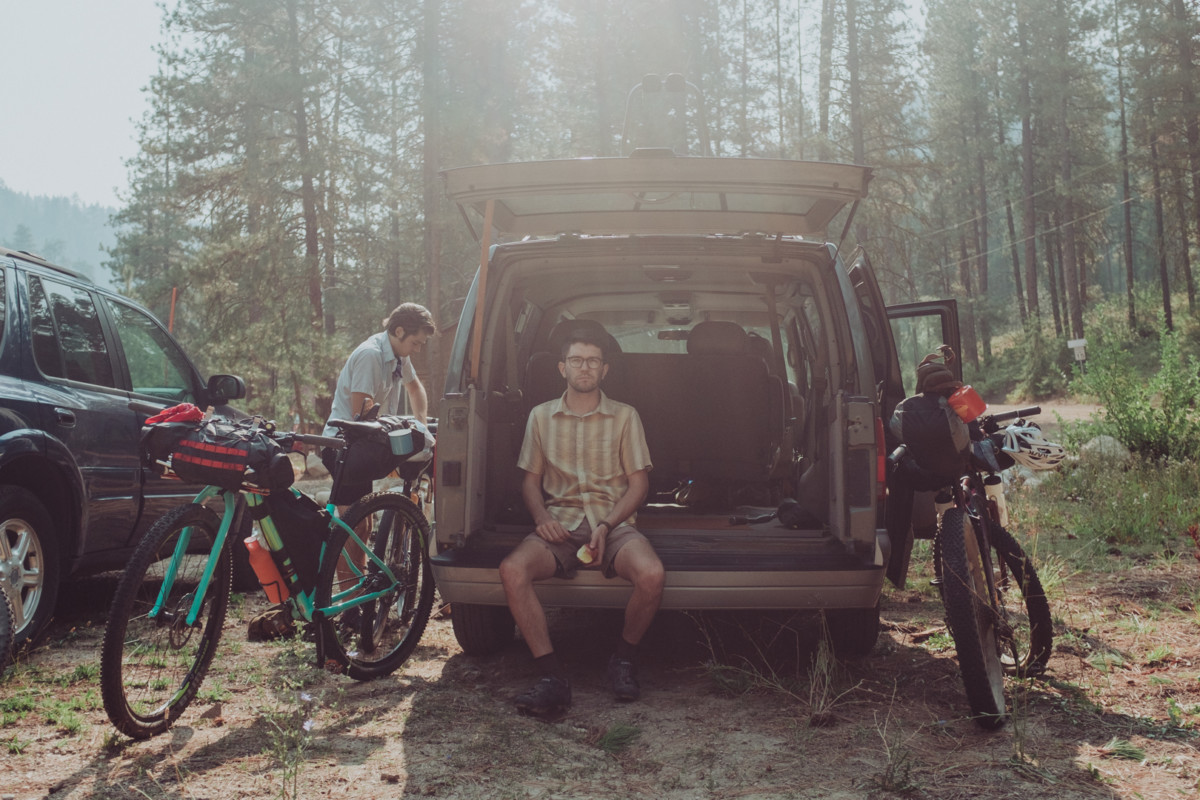
Autumn arrives and the tone of life in the wilderness changes, nights are cooler, the weather holds longer in its whims. All through summer we’ve talked of a ride to Atlanta and the annual Atlanta-Days festival is fast approaching. Five of us decide to meet at Trinity Hot Springs just outside of Pine, ride to Featherville and begin the climb through Rocky Bar and over to the Middle Fork Boise River where we connect up to Atlanta. It’s an arduous ride complete with several stops for water and naps in the shade once we reach the top. Arriving in Atlanta as the sun slowly dips toward the horizon, we set up our tents near a group of rustic cabins on the edge of town, unload our bikes, and ride to a nearby water hole called “The Clubhouse.” My favorite part of any hard ride is swimming in ice cold water afterward and this spot was especially cold.

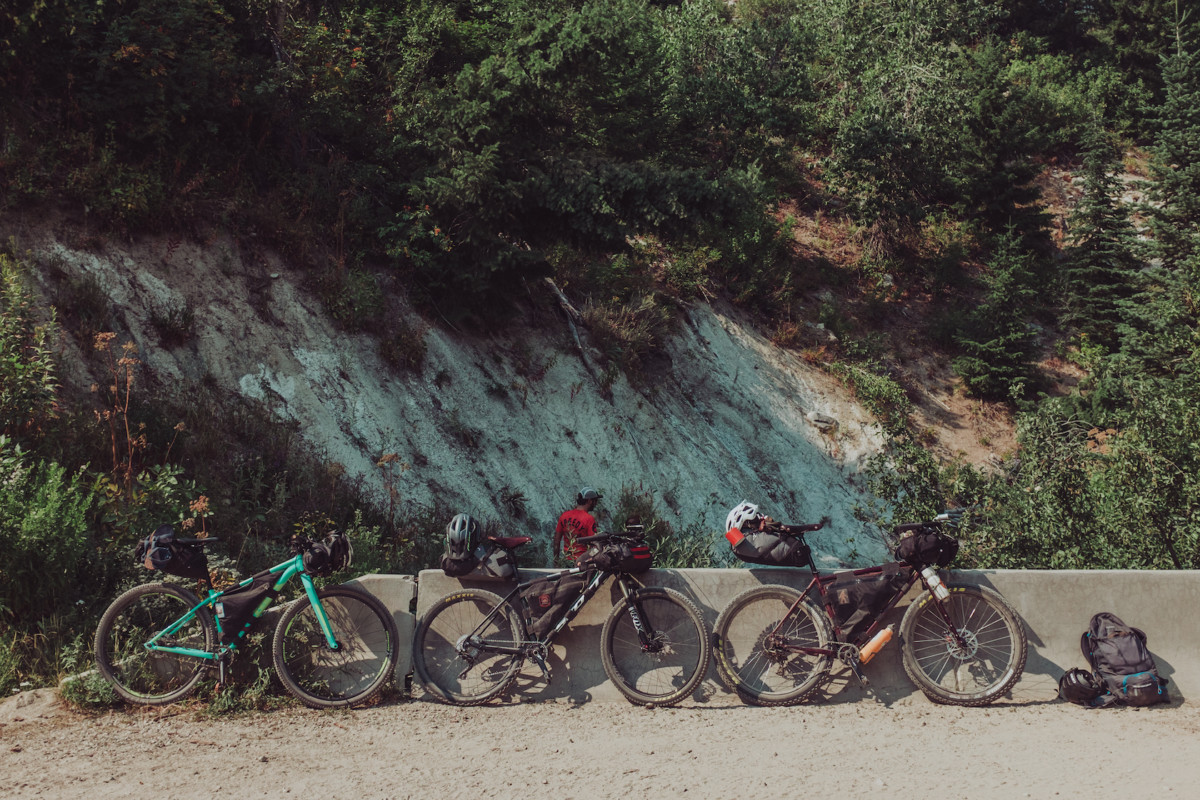
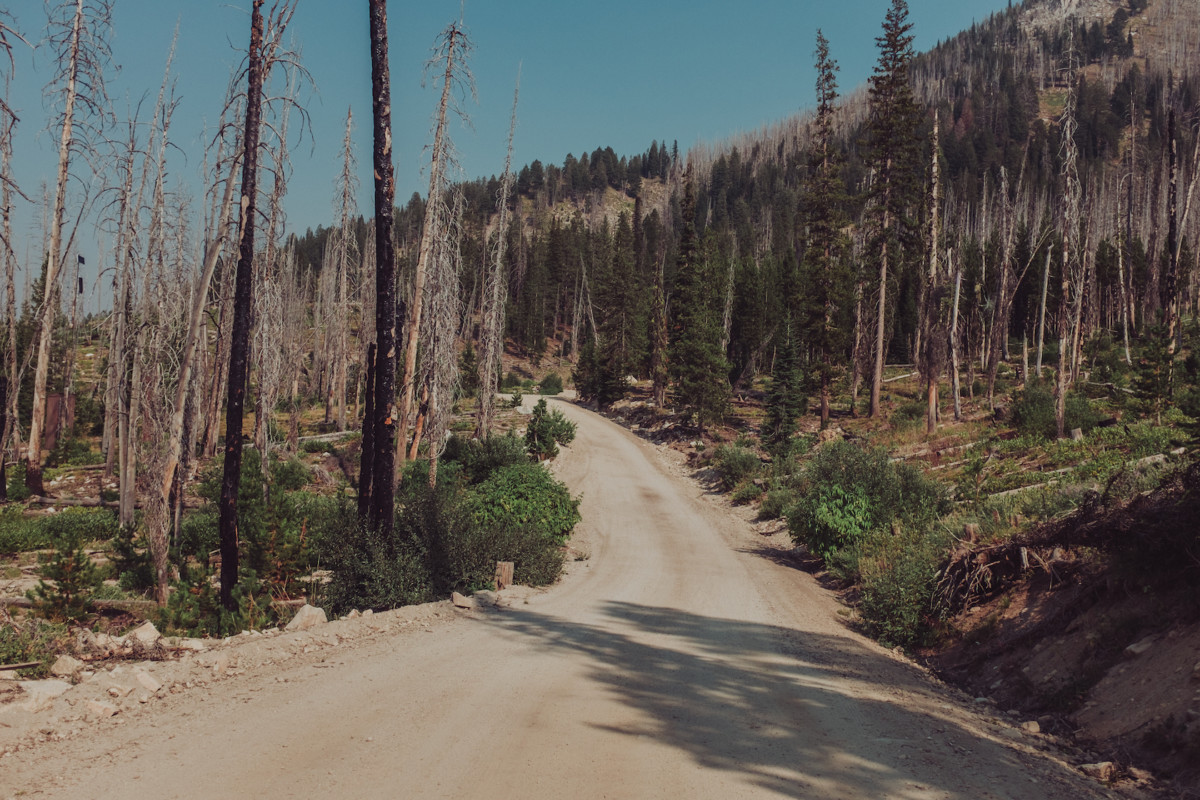
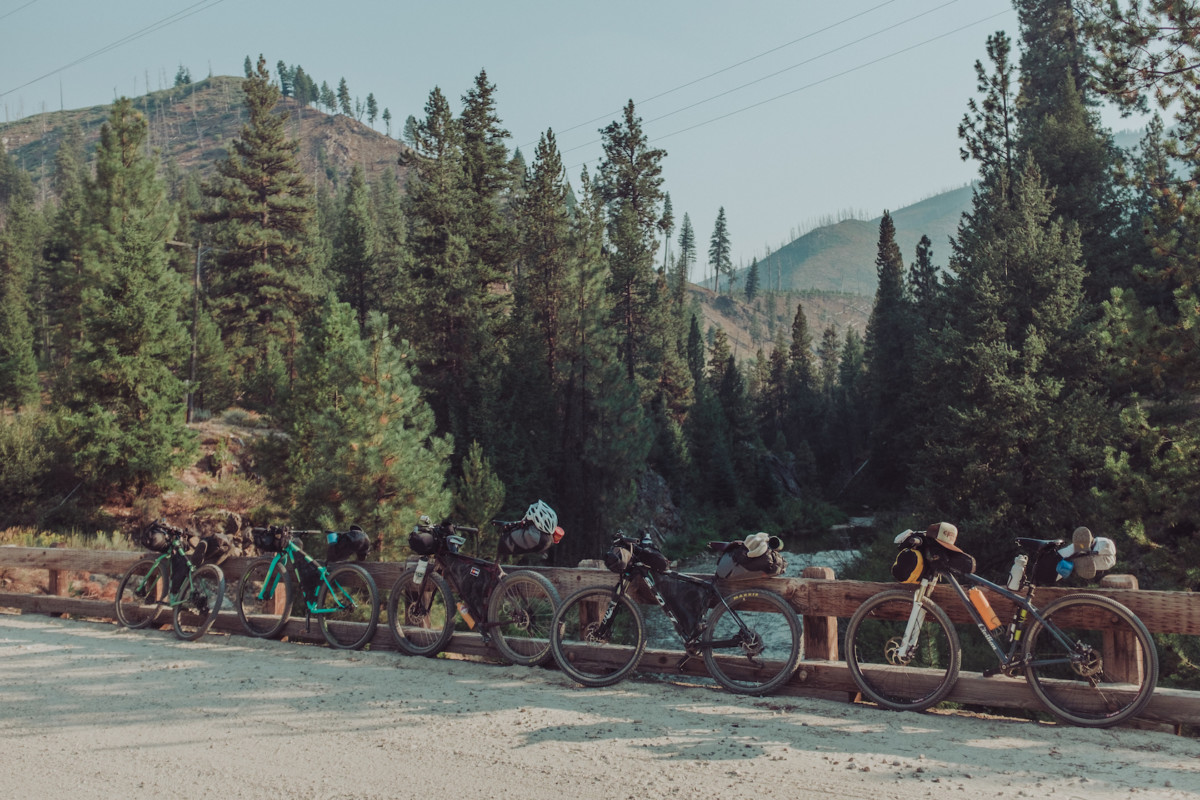
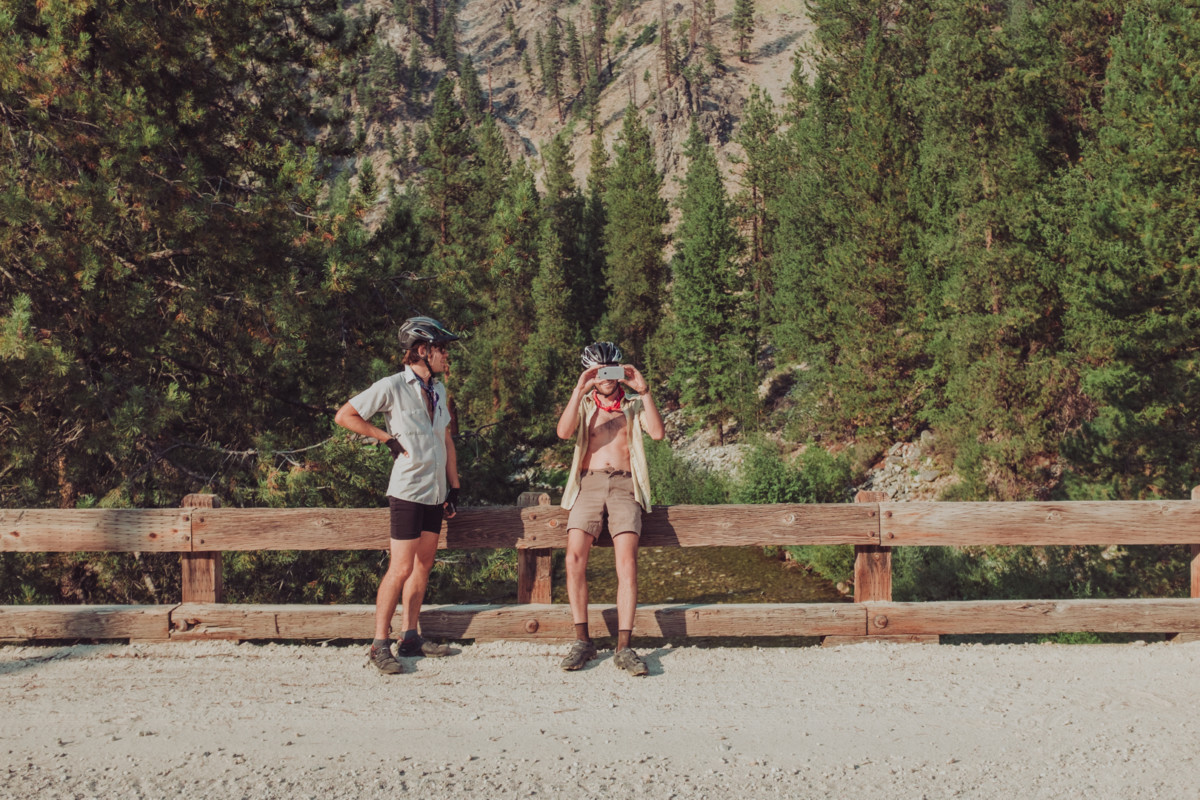
The next day we climb up Phifer Creek Road and traverse Trinity Mountain Road, probably sweating at least half of our body weight along the way. Of all the places I rode this summer, the road to Trinity Mountain is the most beautiful of them all. The views, the clean air, the lack of motorized traffic all combine for an incredible dust-free suffer fest on the way up, and an adrenaline filled flight down the backside. We camp at Big Trinity Lake that night, a bear demolishes an ice chest in the campsite next to us but I sleep right through it, the difficult ride working as an impenetrable sedative on my mind. The photographs below catalogue our trip. Enjoy!

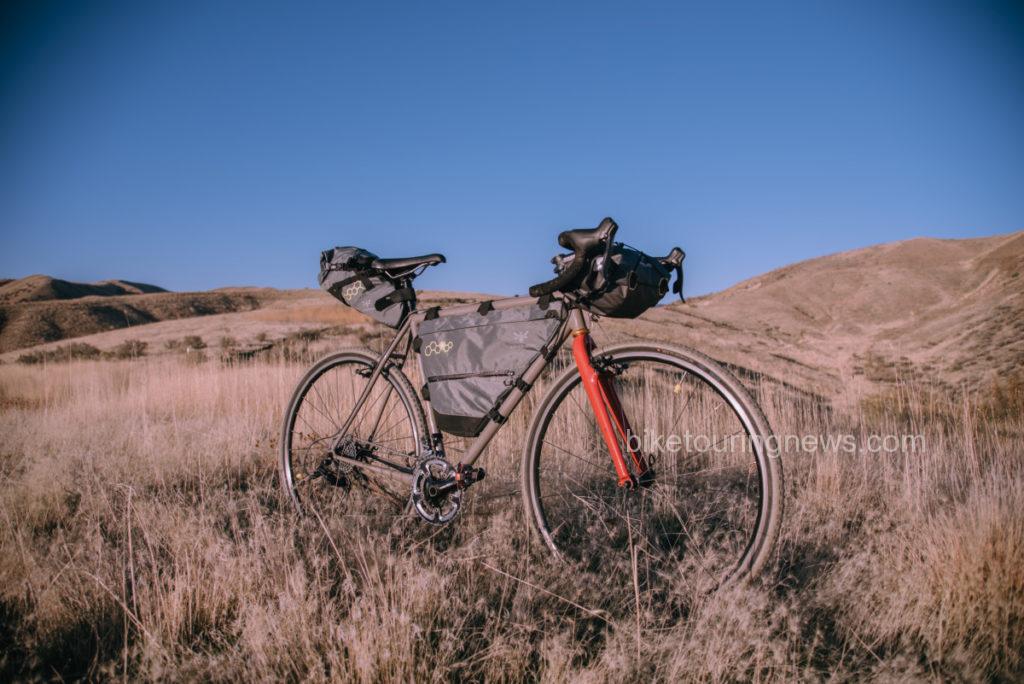
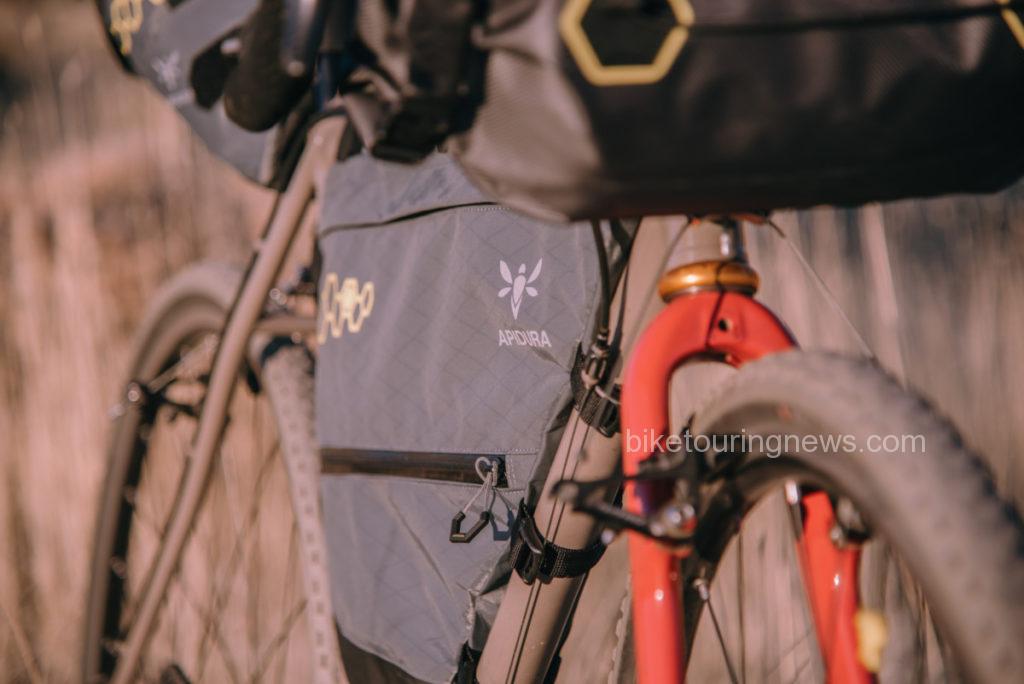
For anyone who is interested, I’m always changing my setup and trying new things. This is usually what I roll with:

Bike:

Clothing:

  • Patagonia capilene leggings
  • Arc’teryx thermal base layer top
  • Icebreaker wool socks for camp
  • 7 Mesh Bibs under shorts
  • Kask Mojito Helmet
  • Swiftwick socks for riding
  • Specialized BG Gel riding gloves
  • Cotton t-shirt
  • Sunglasses / cycling glasses
  • Chacos
  • A random beanie
  • Patagonia down sweater
  • Running shorts for camp / swimming / etc
  • Cycling cap or baseball cap

Electronics:

  • No-name rechargable battery pack
  • iPhone 6s
  • Fuji X100T digital camera
  • Blackdiamond Headlamp
  • Sinewave Cycles Beacon light & USB charging cables
  • Kindle (if I’m traveling alone)
  • Earbud headphones

Sleep setup:

  • Tarptent Notch with poles
  • REI Flash Pad
  • REI Igneo sleeping bag
  • Sea-to-Summit inflatable pillow

Other:

  • A-Lite Monarch Chair
  • Outpost Titanium Pot & Pan (lid)
  • Snowpeak Gigapower Pocket Stove
  • MSR Fuel Canteen
  • Good-to-Go dehydrated meal (Thai Curry changed my life)
  • Spork
  • Vapur 2 liter soft bottle
  • MSR Trail Shot water filter
  • REI pack towel
  • Tool kit (Parktool chair breaker, needle, thread, tire levers, Co2, mini hand-pump, patch kit, etc)
  • Pocket knife
  • Enamel mug
  • Collapsible Helix Coffee Maker + coffee grounds in a pill bottle
  • Tons of snacks
  • Beer / Mini Box of wine / Whiskey / Take your pick
Categories
Bikefishing Bikepacking Idaho Idaho Hot Springs Mountain Bike Route Other Our Trips Surly Bikes

Middle Fork Sub24O


A few months back, I came across a small article about a Sub24O ride from Crouch, ID to Boiling Hot Springs. After posting said article to Facebook, I find that I have 3 general types of friends, the kind that will click that little ‘heart button’ and then comment something like “you are so badass, I wish I could do something like this”, well dude you could, and you should. Then there are the people, who you probably haven’t spoken to in years, that will like and share the post and then go do it on their own, with their own bike touring squad. The best kind, however, are the ones that text you later, with genuine interest, and over tacos you start to develop a plan. Many beers and several puns later, a weekend was chosen and the gears were put in motion (pun intended).

The thing is about drinking beer while planning a bike trip, some of the fine details get lost in translation… A bit of advice I’ll share with you, something I’ve learned in my bike touring endeavors, always have a plan B, in fact always have at least a plan B, probably a plan C, and just for good measure, keep plan D tucked away in your back pocket. The weekend I picked for this adventure just so happened to be the first weekend after the start of Boise State’s Fall Semester, and with my touring partner in the middle of earning his MBA, he had to back out at the last minute. I’ve toured alone before, see ‘Crazy girl rides across Oregon’, so I had no qualms about setting out on my own, but when the Bike Hermit and Sky King caught wind of the trip, they felt it necessary to join in on the fun. And so, after a few beers, I left the two of them to pour over maps of the route that I had planned for months, double checking all the details and making sure I hadn’t just made the whole thing up.

The next morning I pulled up to Bike Touring News at 0900, gear spread across the entirety of the garage, Revelate frame bags, Surly junk straps, Hennessy Hammocks, BTN water bottles and various bits of clothing needing to be packed and loaded into the truck. I tried to keep my cool as I stuffed my sleeping gear into my handlebar bag, a Revelate SweetRoll that was fighting back. An hour later, we were heading out, driving in circles so the Bike Hermit could find an ethanol free gas station (Horseshoe Bend does have ethanol free for future reference). As the temps rose into the high 80’s we pulled into Crouch, finding a spot suitable for overnight parking, next to the log cabin that doubles as the town hall. Thankfully the City of Crouch offers free WIFI, thus I was able to get a shot of the fully loaded Karate Monkey off to my many instagram followers (all 50 of them). At noon, I headed up Middle Fork Rd, a few minutes ahead of the Bike Hermit and Sky King.

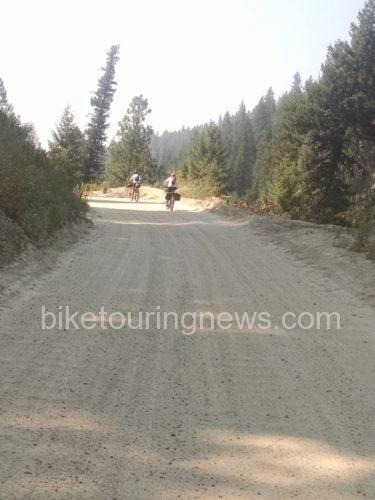
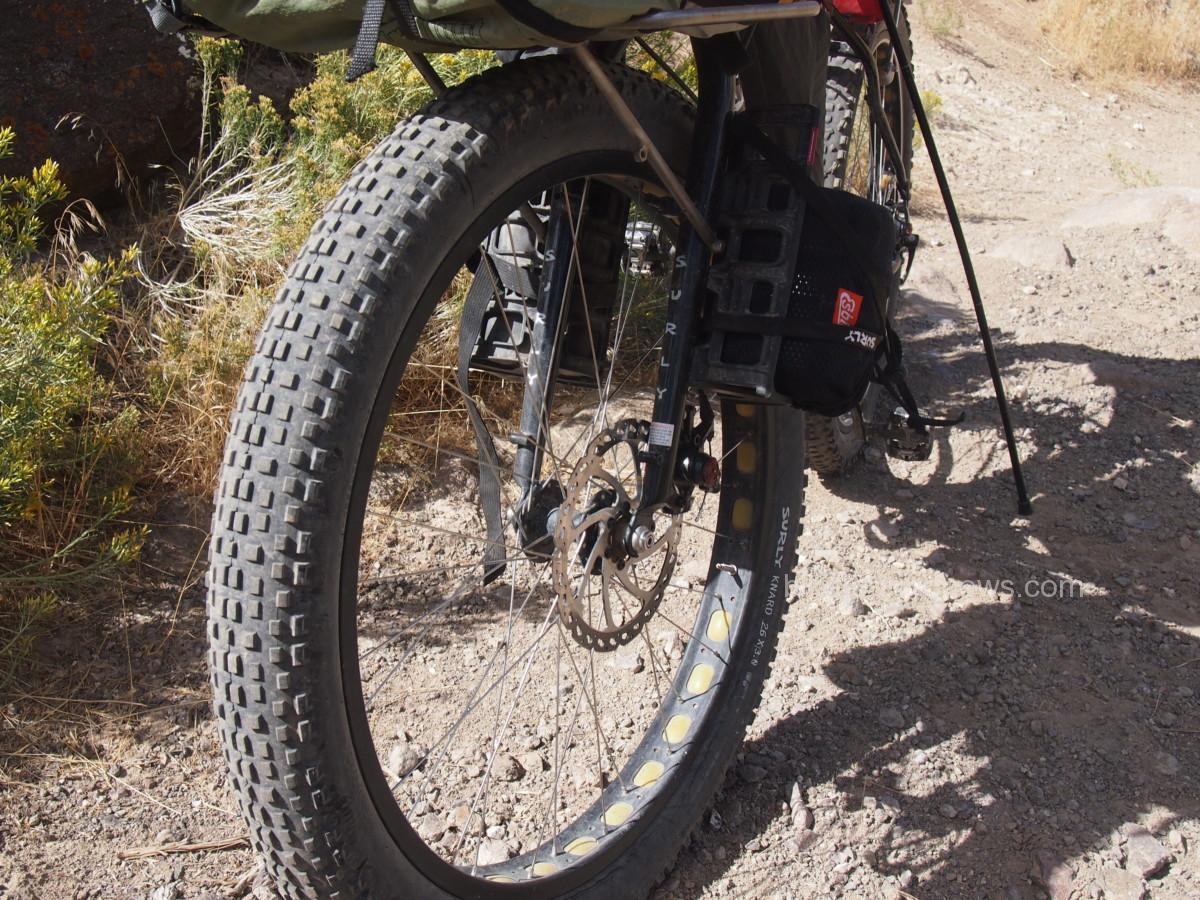
The first 8 or so miles are rolling pavement flowing past a mixture of old barns, open fields and modern homes perched along the Middle Fork of the Payette River. Once the road hits the boundary of the Boise National Forest, it turns to gravel with both designated and primitive camp spots every few miles. The steady climb takes you past several fishing and/or swimming opportunities, which despite their remote location seem to surge with popularity on weekends. Most of the motorists and ATV users were respectful to the ‘Share The Road’ signage, but without doubt, we did encounter the occasional driver who seemed to give zero shits about the lives of cyclists. I would highly recommend bringing an extra handkerchief to tie up bandit style for this exact reason, protecting yourself from the intermittent dust bowls. The 16 miles of gravel transitions from washboard, to packed dirt, to deep layers, making us thankful for the 3” tires in place on the Surly ECR, Troll and Karate Monkey.

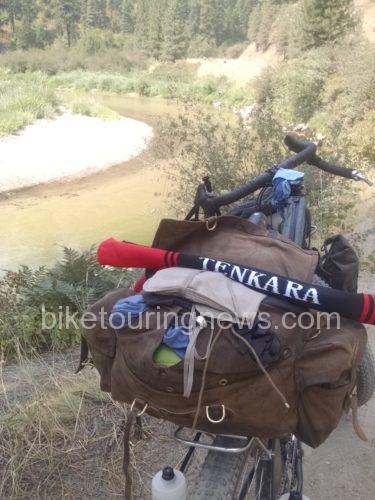
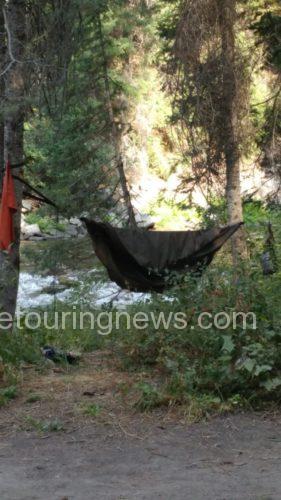
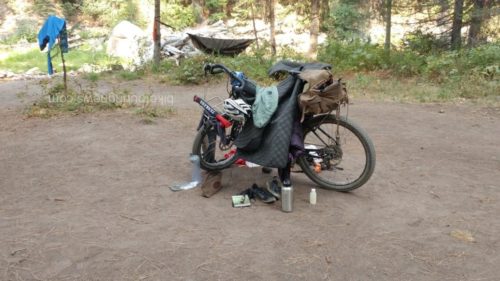
In late August, the Middle Fork runs at just above 100 CFS, making it the perfect time to access the natural hot springs requiring river crossings to access. The low flow also leaves small pockets above sections of rapids where brook trout made futile attempts to hide from the Bike Hermit’s Tenkara Rod. The short distance from Crouch to our destination allowed us for plenty of time to stop and fish with daylight left to set up camp. At mile 16, the road forks, the east taking you along the traditional main route of the Idaho Hot Springs trail, the north taking you up to Boiling Hot Springs, our intended destination. Sky King’s research showed that the designated camp spot at Boiling Springs would cost $16.00, more than the cost of gas to get from Boise to Crouch, leading us to look for a primitive spot along the river. Just below Silver Creek, along a stretch of river where several trout could be seen with the naked eye jumping in the afternoon sunlight, we set up camp for the night. IPA’s supplied by Mother Earth Brewing were cooled in the sub 60 degree water and fly rods were rigged for slaying. As the sun set below the canyon, the fishing slowed and Sky King whipped up a delicious riverside happy hour consisting of crackers, cheese and red peppers. After refueling, the Bike Hermit and I headed north in search of undiscovered trout waters, scurrying down steep embankments to the deep pockets protected by downed trees and large boulders. We fished until dark before drifting off in Hennessy Hammocks to the sound of the river bubbling close by. 

The quiet of the remote location and the lack of sun in the canyon allowed us to sleep in well past 0900 and we took our time packing up in the cool morning air. The Bike Hermit revealed his ninja fast packing skills, training from coffee drinking, jogger pants wearing, sunday breakfast type guy into the Bike Hermit in less than 10 minutes, a real Clark Kent to Superman type moment.
It wasn’t until we had gone a few miles before we realized how much of a steady climb we had undertaken the day before, making it a true Sunday Funday. The extra time allowed us to stopped at Fire Crew Hot Springs, the Bike Hermit fished while Sky King and I explored the warm pools on the west side of the river. We came out of the canyon in the late Sunday afternoon heat, making the last few miles a bit harsh. Thankfully The Dirty Shame serves up a good burger and the squad was once again smiling while reliving tales from the past 24 hours.

Bike Touring News endorses this ride for numerous reasons

  • quick overnighter not far from home with options to go further.
  • road surface is doable – could ride w/ 32 mm tires (mildly rough – washboards, sand and gravel)
  • gradual climbing
  • great shake down trip for new gear, new bike packers, new bikes etc.
  • plenty of water at various campgrounds along the way (or take a filter)
  • hot springs (is on the Adventure Cycling Idaho Hot Springs Route)
  • successful fishing


Categories
Bike Touring Equipment Bike Touring Tips Bikepacking Other Planning Resources

Colorado Trail Race 2017 Gear Roundup

The epically wet and stormy 2017 running of the Colorado Trial Race pushed riders and their gear to the absolute limits.  The technical singletrack and massive elevation gain of the CT also reward a light-and-fast approach to packing.  There is no room for excess gear in the alpine.  However, improper or inadequate gear can have serious consequences on self-supported rides and definitely contributed to the large number of riders unable to finish the CTR this year.

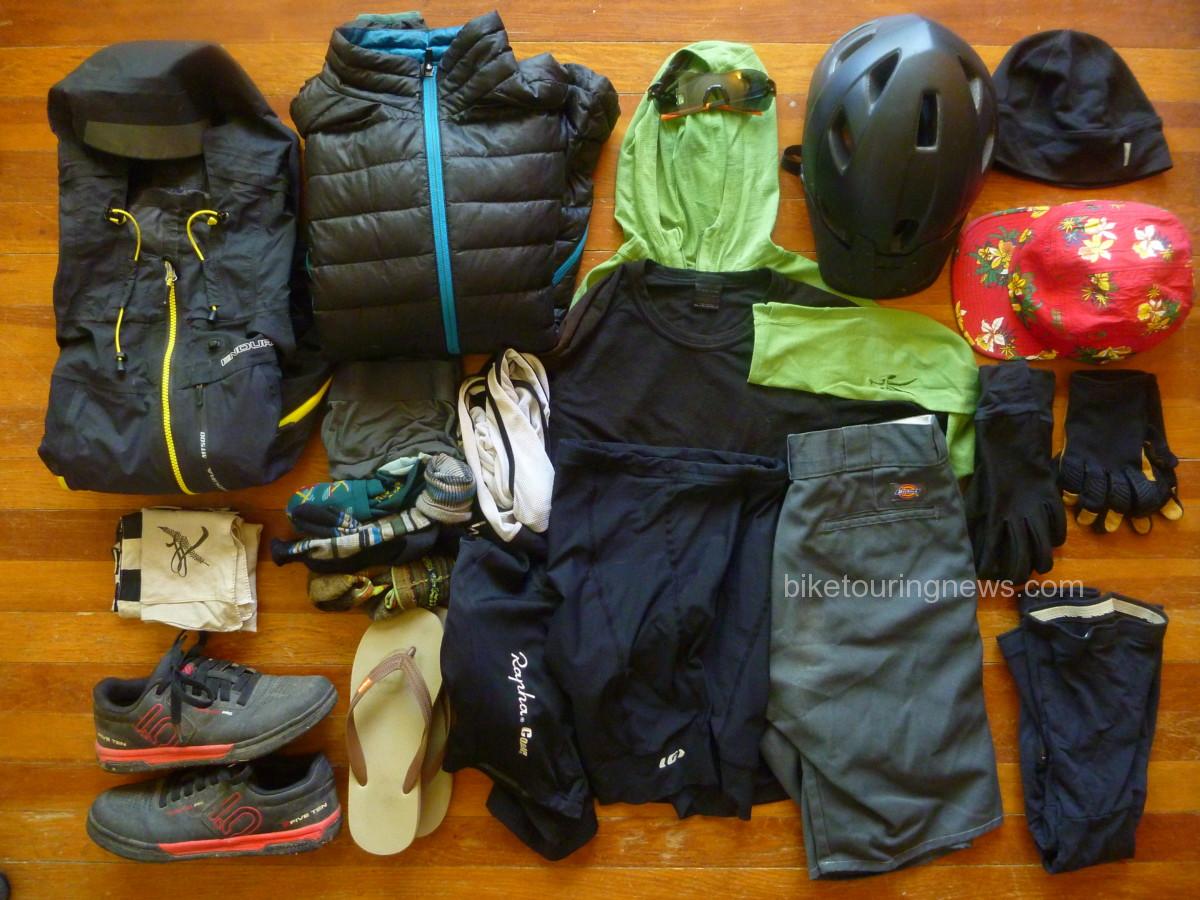
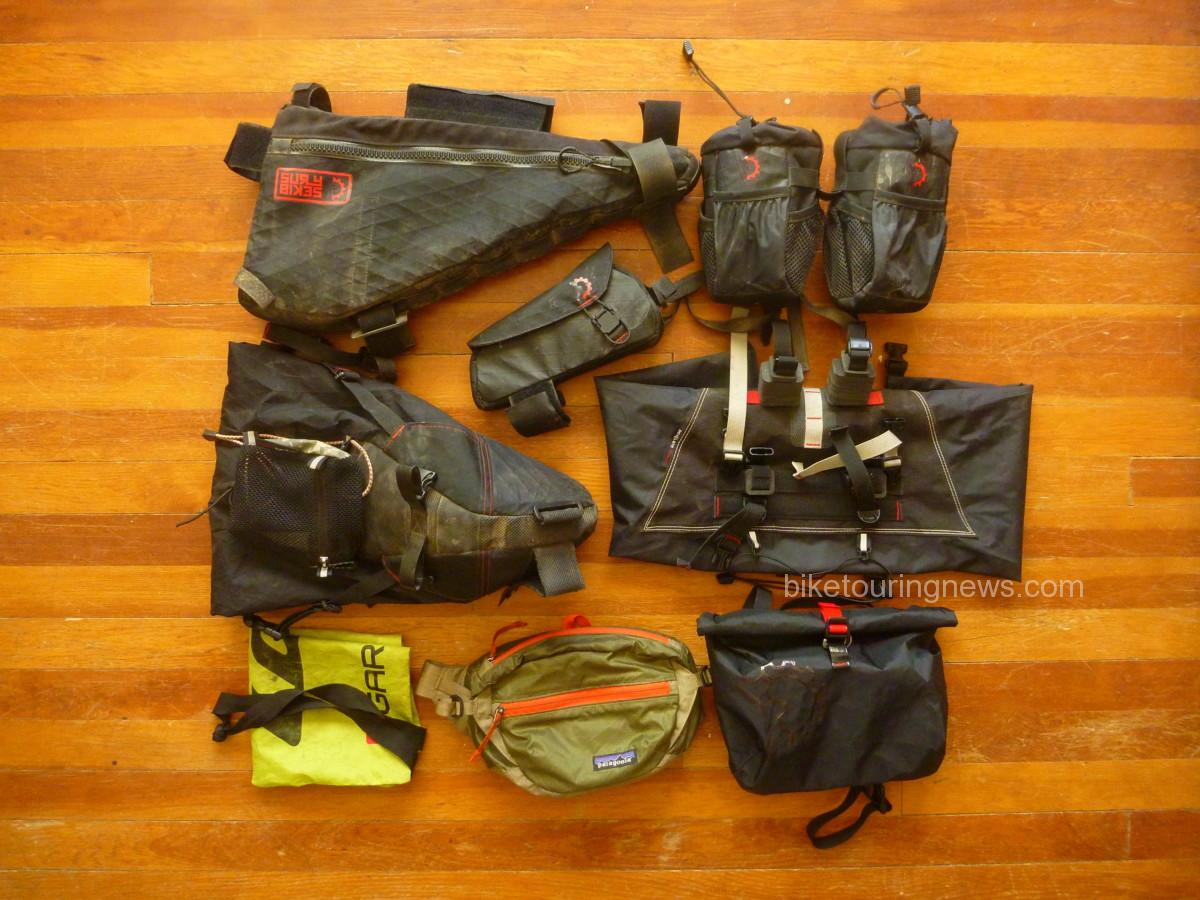
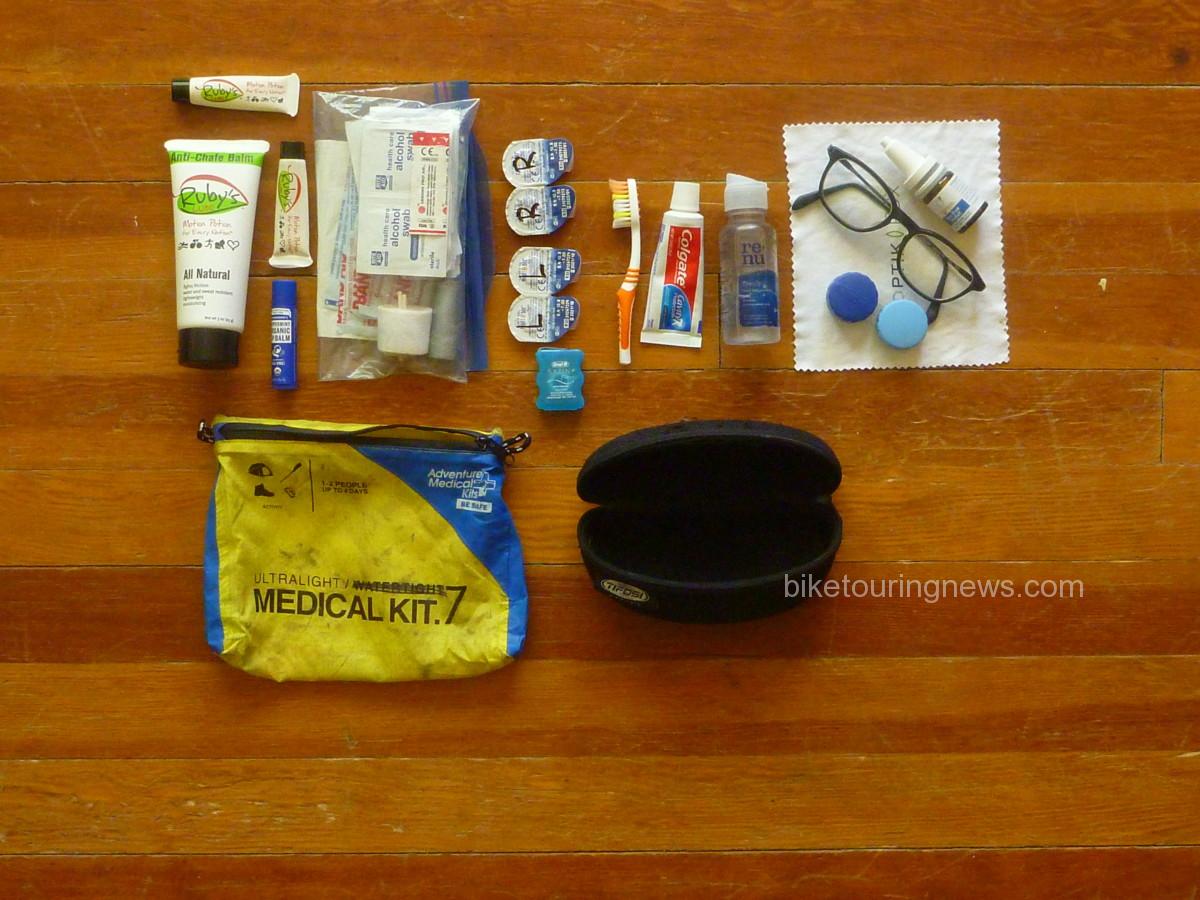
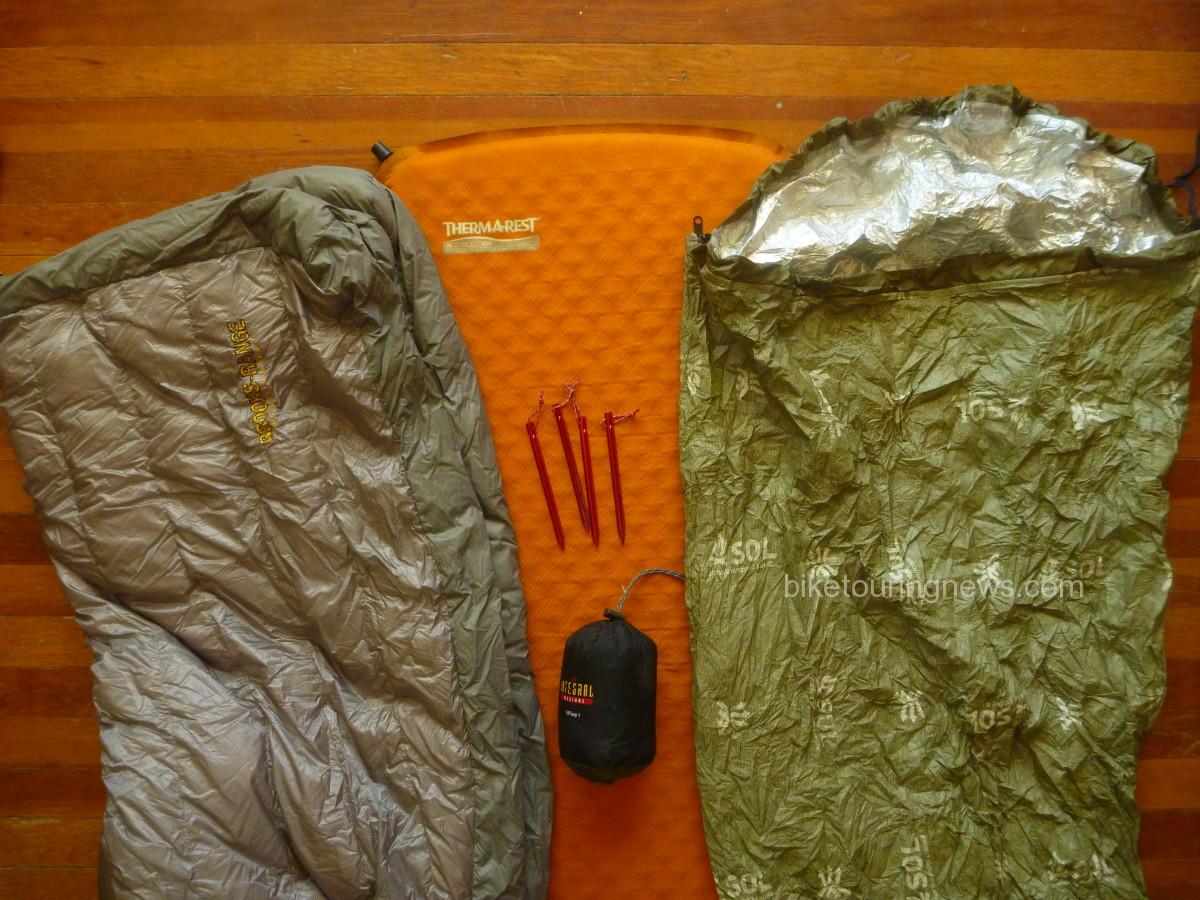
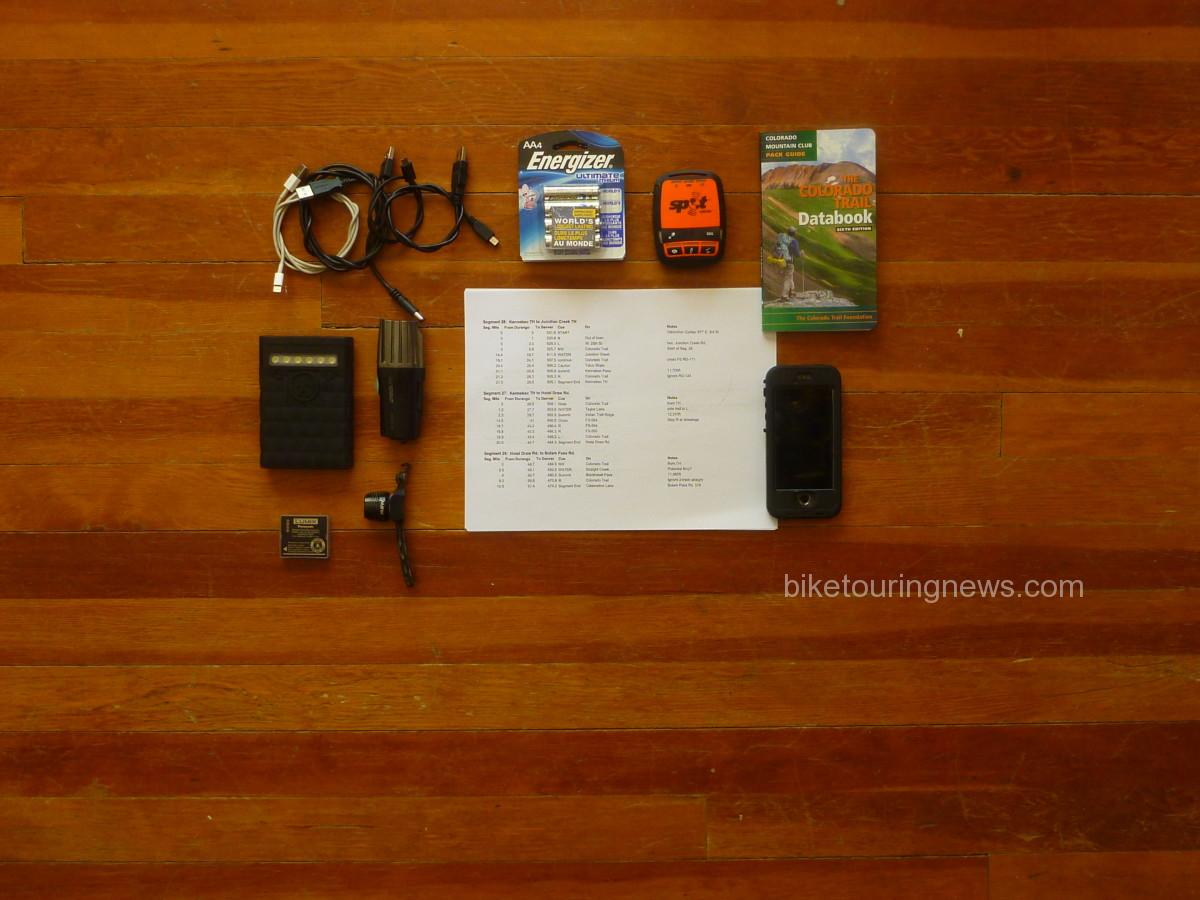
In this post, I’ll go over the gear I took on the trail, what worked and what didn’t.  The photos below were taken before departing for Colorado.  I’ve noted a handful of minor adjustments made on the final pack in Durango.

Clothing and Accessories

  • Icebreaker Wool T-Shirt, SS
  • Ibex Wool Pullover, LS w/hood
  • Dickies Cutoff Shorts
  • Rapha Bibshorts
  • Louis Garneau Tri Shorts (aka “Touring Undershorts”)
  • Rapha Wool Skullcap
  • Hike-a-Bike Cap (lost on the trail)
  • Handkerchief x2
  • Five10 Freerider Pro Shoes
  • Synthetic Boxer Briefs
  • Point6 Wool Socks, 1 light, 1 midweight
  • Wicking Synthetic Socks
  • Leg Warmers (swapped for knee warmers before the start)
  • Softshell Gloves
  • Trail Gloves (lost on the trail)
  • Sierra Designs Down Jacket
  • Endura MT500 Rain Jacket
  • Smith Sunglasses w/smoke, amber & clear lenses.
  • Giro Helmet
  • Grocery Store Sandals

Overall, my clothing selections were solid.  Many riders also brought rain pants, shoe covers and additional wet weather protection.  I definitely had wet legs and feet for much of the ride but don’t think additional rain gear would have helped with that situation.  The Endura MT-500 jacket was a standout performer.  While it isn’t the most packable, it breathes better than any rain gear I’ve ever owned and incorporates well-designed ventilation to keep it comfortable in warm temperatures.  The helmet-sized hood helped seal out rain and hail while conserving additional body heat.

While the rain jacket didn’t garner much attention from fellow riders, my shoe and pedal combination certainly did.  While flat pedals have made big inroads in other mountain bike disciplines, the vast majority of CTR riders ran clipless pedals.  Nearly every day of the ride I had at least one other rider make an envious comment about how comfortable my shoes looked as we pushed our bikes up one hellish rock pile or another.  In my opinion, flat pedals are the way to go for all but the strongest riders on loaded singletrack rides.   Five Ten’s rubber compounds provide excellent grip and the Freerider Pro’s sole delivers an optimal blend of pedaling stiffness and walking flexibility.  Despite the constantly wet conditions, I made it through at least 100 miles of hike-a-bike with no blisters or other significant foot issues.  Frequent dismounts and remounts are also much more fluid on flat pedals with no pedal binding to search for.

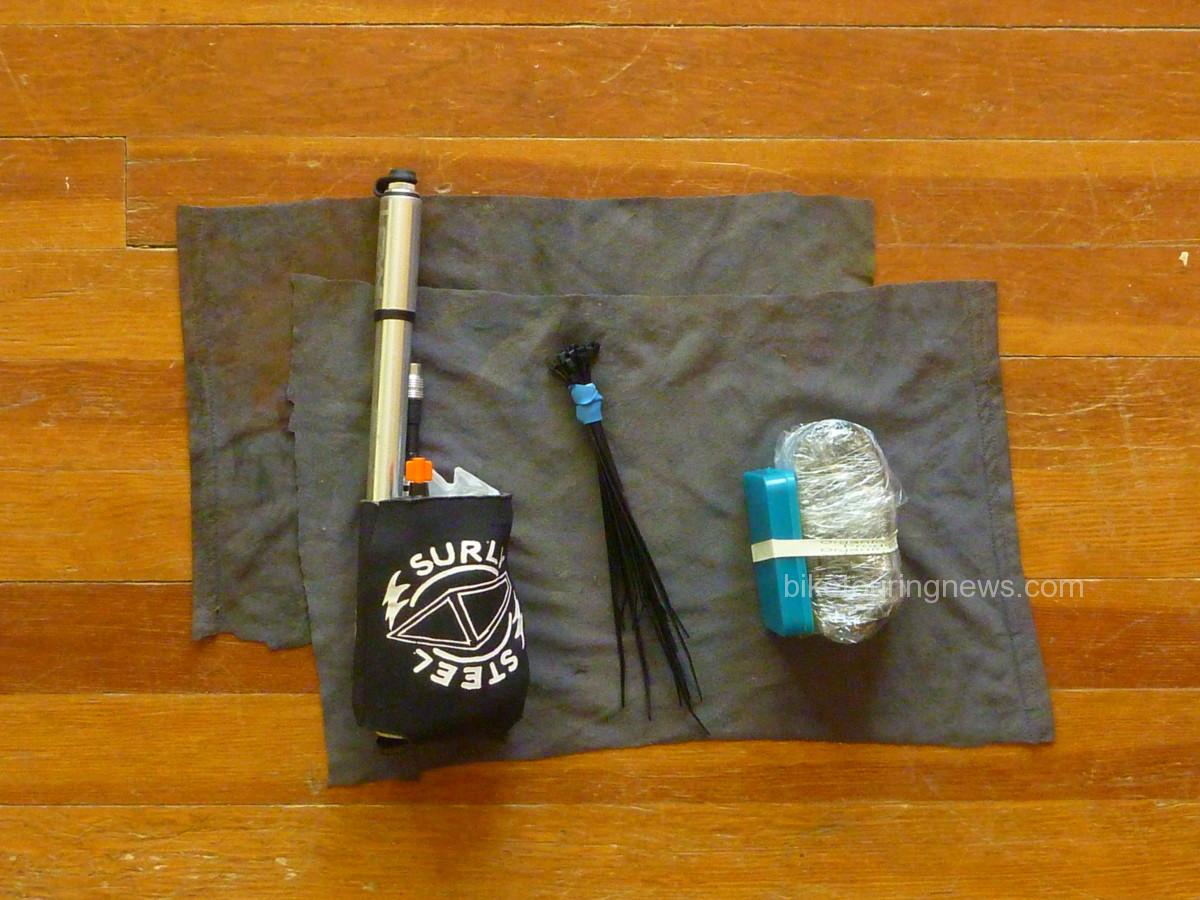
Yet another use for the Surly Insulated Sheath: stash pack for tools and spares!

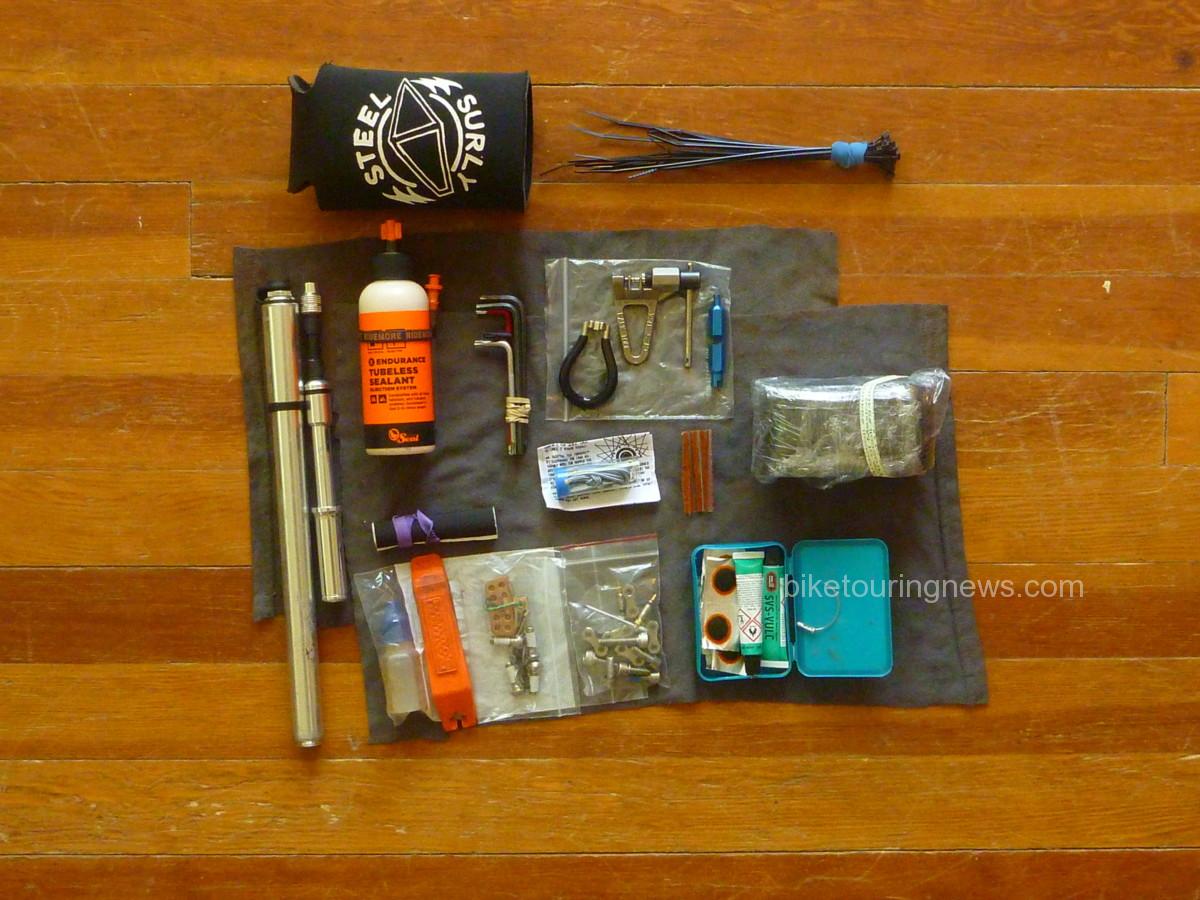
Tools & Spares

  • Hex Wrenches:  5,4,3,2.5,2mm
  • Torx Wrenches:  T-25,20,10
  • Park Chain Tool
  • Fiber-Fix Spoke
  • Spoke Wrench, #0
  • Pedro’s Tire Lever
  • Valve Core Remover
  • Gear Repair Tape
  • Zip Ties
  • Chain Lube
  • Rags x2
  • 29er Tube
  • Lots o’ Patches
  • Patch Cement: 5g Tubes, x2
  • 11speed Quicklink x2
  • Spare Chain Links
  • Spare Hardware: M5, M6 bolts in assorted lengths
  • Spare Brake Pads
  • Curved Needle (business end protected with a cable crimp. Good thinking, Nic.)
  • Leatherman Wingman Multi-Plier
  • Tire Sealant, 4oz
  • Spare Valve Core x2

Thankfully, I found very little use for my tools and spares aside from the rags and chain lube.  The Ninja Gorilla was a rock-solid partner, handled everything the trail dished out with nary a squeak, creak, clunk or complaint.  Regardless, I wouldn’t have felt comfortable leaving many of these items behind on a ride this long.  I did pick up an additional set of brake pads in Leadville as I was concerned about burning through them on the long, wet descents.  I never wound up replacing the pads I started on but having 2 spare sets on board provided peace of mind.

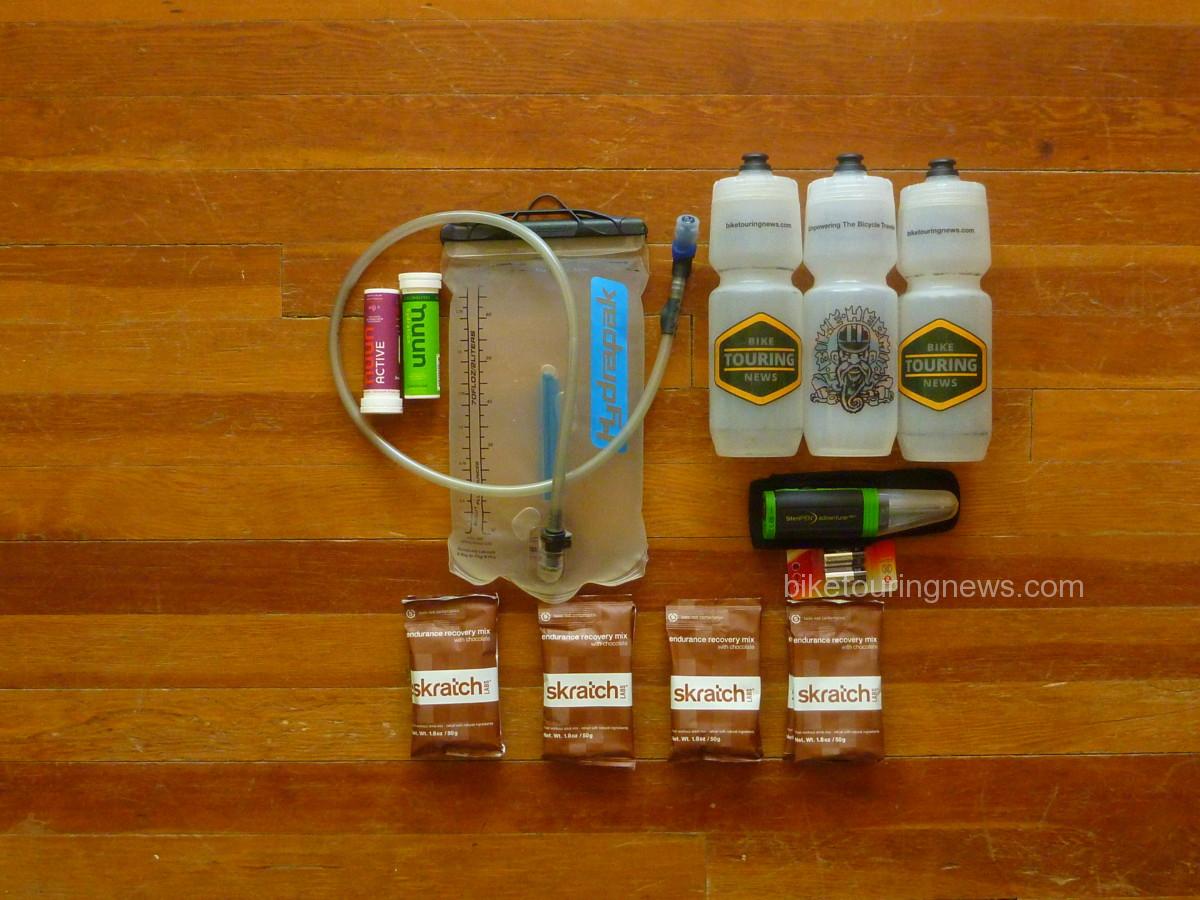
Hydration and Nutrition

Water was especially abundant on the CT this year, so my three bottles provided more than enough capacity.  The Colorado Trail Guidebook and Databook provide only basic directional information for the Wilderness detours, so it was sometimes unclear how much water would be accessible along the detour routes.  For the most part, I started looking for a water source when I got down to only one bottle and had very little difficulty staying topped up.

The Steripen worked well for me on this trip.  While it may not be as fast as some filters, it is wonderfully packable and easy to use.  I anticipate this will be my go-to purification method on future bike trips, replacing the Sawyer filter I’ve used in the past.

Hygiene and First Aid

  • Toothbrush
  • Toothpaste
  • Glasses
  • Spare Contacts x2
  • Contact Case
  • Contact Solution
  • Dry Eye Drops
  • Alcohol Wipes
  • Ruby’s Lube
  • Gauze Bandages
  • Athletic Tape
  • Duct Tape
  • Butterfly Bandages
  • Asst. Large Band-aids
  • Dr Bronner’s Lip Balm
  • Dental Floss

I didn’t find much use for any thing in this category other than my toothbrush, toothpaste, eye drops and a handful of alcohol wipes.  I was surprised that I never reached for the Ruby’s Lube but I spent so much time on my feet over the first 4 days that I didn’t have time to develop saddle sores or chafing.  I also experimented with extended-wear contacts on this ride.  The twice-daily ritual of sticking filthy fingers into my eyes to insert or remove contact lenses has generated infection problems in the past, so I hoped extended-wear lenses would be the solution.  I wore the same pair of lenses throughout the entire 9 days I spent on the trail with zero issues.  I used rewetting drops occasionally but found that my eyes stayed well-lubricated as long as I kept up with hydration.

Sleep Kit

  • Brooks-Range 45-deg Down Quilt
  • Thermarest Prolite 3/4 Pad
  • Silnylon Tarp, 8x10ft
  • Stakes, 4
  • SOL Escape Bivy

This is the category that proved to be many riders’ downfall on the CTR this year.  Of the 42 riders who didn’t finish, I’d guess that a significant number were carrying inadequate shelter.  I spent a full 12 hours hunkered under my tarp just below Stony Pass waiting for the weather to clear.  Riders without proper shelter were forced to press on through the storm or retreat miles back down the road to find shelter, even all the way back into Silverton.  At least two riders who continued into the bad weather were forced to scratch after enduring miserable or even dangerous conditions.  I may have been among them if I hadn’t had that one little scrap of silicone-coated nylon.  The bivy and down quilt combination kept me comfortable across a wide range of temperatures.  I don’t think I would ever carry a more minimal sleep kit unless precipitation were completely out of the question.  Overall, I got good rest on the trail and that sleep bank allowed me to make relatively efficient progress while on the bike.

Electronics and Navigation

  • iPhone with GaiaGPS app, tracks and maps downloaded
  • Printed Cue and Resupply Notes
  • Colorado Trail Databook
  • Cache Battery
  • Helmet-Mount Light
  • Point&Shoot Camera and Spare Battery
  • Charging Cables
  • SPOT Tracker and Spare Batteries
  • Little Red Taillight

Generally speaking, navigation along the Colorado Trail is easy.  Junctions are mostly well-signed and confidence markers are frequently posted in between.  However, the bike detours can present navigational challenges.  With my iPhone mounted to the Rokform handlebar mount, I was able to double-check my routing with two presses of the home key.  This prevented many navigational miscues and kept me from making any costly mistakes.  However, wet touchscreens are difficult or impossible to navigate, so I had to take care to keep my phone from collecting water.  I used the Databook for its elevation profiles, water and campsite notes.  It wasn’t much help for navigation as this year’s CTR ran from Durango to Denver, contrary to the westbound route description in the Databook.  I created my own cue sheet as a navigational backup but used it more for distance estimation than navigation.

Another standout performer on this ride was the Sinewave Cycles Beacon headlight and USB charger.  This key piece of gear lit my way and kept my phone, helmet light and backup battery charged throughout the ride, despite the notoriously slow speeds common on most of the route.  Look for a more thorough review of the Beacon and its performance in a future post.

Luggage

As usual, my Revelate kit was more than up to the task.  I added the Periphery Pocket at the last minute and was very happy to have a convenient spot to stuff my Databook, cues, gloves, charging cables or other quick-access items.  It also expanded my food-carrying capacity pretty significantly.  This may be my new favorite piece of Revelate gear, right up there with my Mountain Feedbags.

The hip pack was another handy addition that allowed me to further extend my food stores or carry my 70oz hydration bladder when needed.  I quickly forgot I was wearing it when it was unloaded.

Other than the synthetic socks (wore them for a few hours, were just too thin to be comfortable for long) and my hike-a-bike cap (wore on Day 1, sat in a wet heap strapped to my seat pack for 3 days, lost on the trail on day 5) I was very happy to have every piece of gear I brought on the ride.  While some riders are able to push the limits of minimalism much further, I felt like I maintained a good balance between keeping gear weight down without sacrificing safety or comfort to any great extent.  I also had just enough space left for all the calories I’d be toting for the long push from Silverton to Buena Vista.

What questions do you have about packing for singletrack bikepacking adventures?  Anything you’d like to know about the Colorado Trail experience?  What trips do you have coming up?  Sound off in the comments below and I’ll do my best to answer in a reply or future blog post.  Thanks for reading!


Categories
Bikepacking Our Trips

Colorado Trail Race 2017 Bike Setup

At 4:00am on Sunday, July 23, I’ll be among the group of bikepackers setting out from Durango to ride the 525 miles to Denver along the Colorado Trail.  This will be an adventure unlike anything I’ve ever undertaken, with challenges unlike anything I’ve ever faced.  The route is 60% singletrack and tallies nearly 70,000 feet of climbing, much of which will be hike-a-bike.  Average elevation is around 10,000 feet with a high point of 13,271 feet and several sustained sections above treeline.  The ruggedness of this route is difficult to overstate.  Bikepacking.com rates the CT’s difficulty as 9 out of 10.  Idaho’s Smoke’n’Fire 400 – probably the most difficult bikepacking route I’ve undertaken to date – scored a paltry 6/10.

The relentless climbs and rugged terrain of the Colorado Trail demand a sturdy, reliable bike that is equipped for the rigors of alpine riding.  My rigid dirt touring bike – known as the Rando-Gnar – would be far outgunned on the steep, rocky Colorado Trail.  Many experienced CT riders say they would never ride the route on anything other than a full-suspension bike but it has been completed (and rather quickly) on rigid singlespeeds as well.  For me, the extra cost, maintenance, failure potential and packing difficulties presented by full-suspension outweigh the potential benefits.  A good hardtail would have to do.

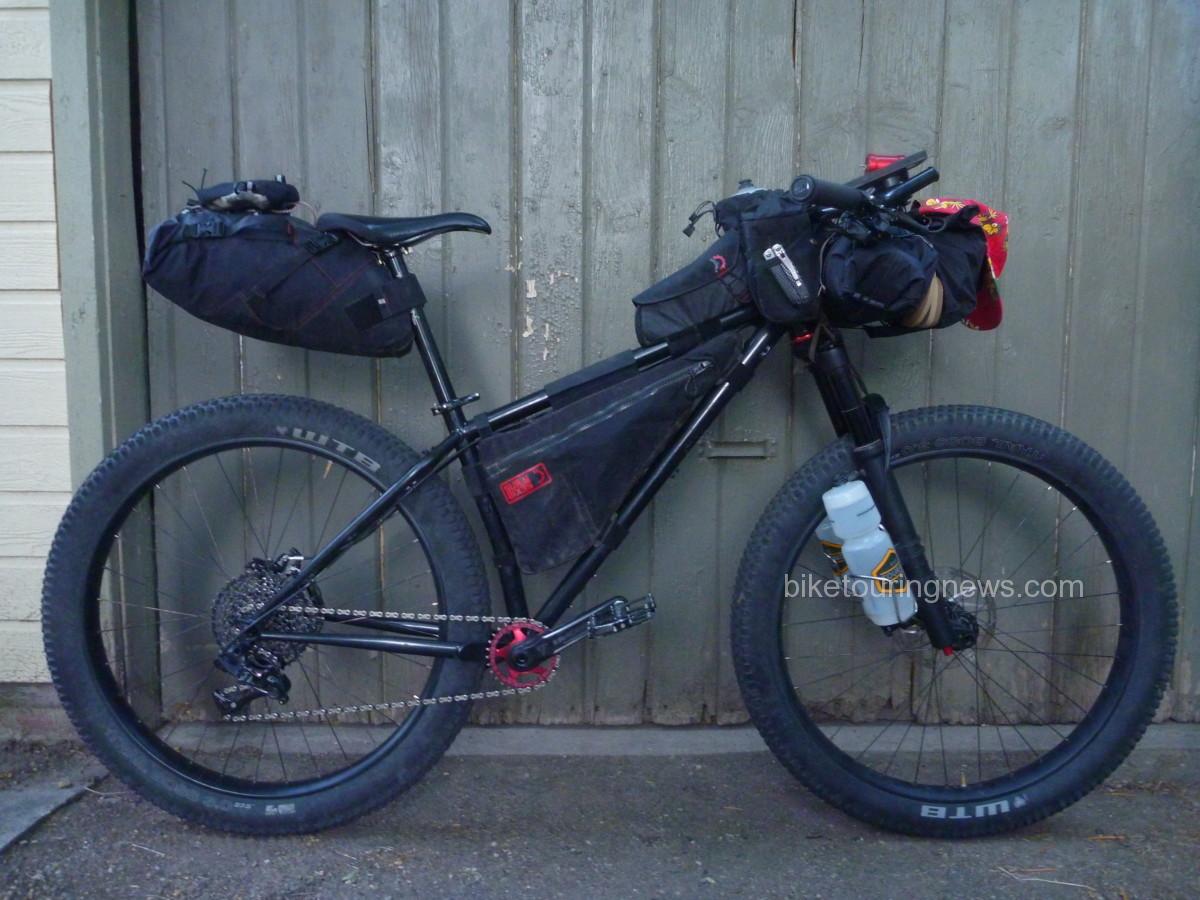
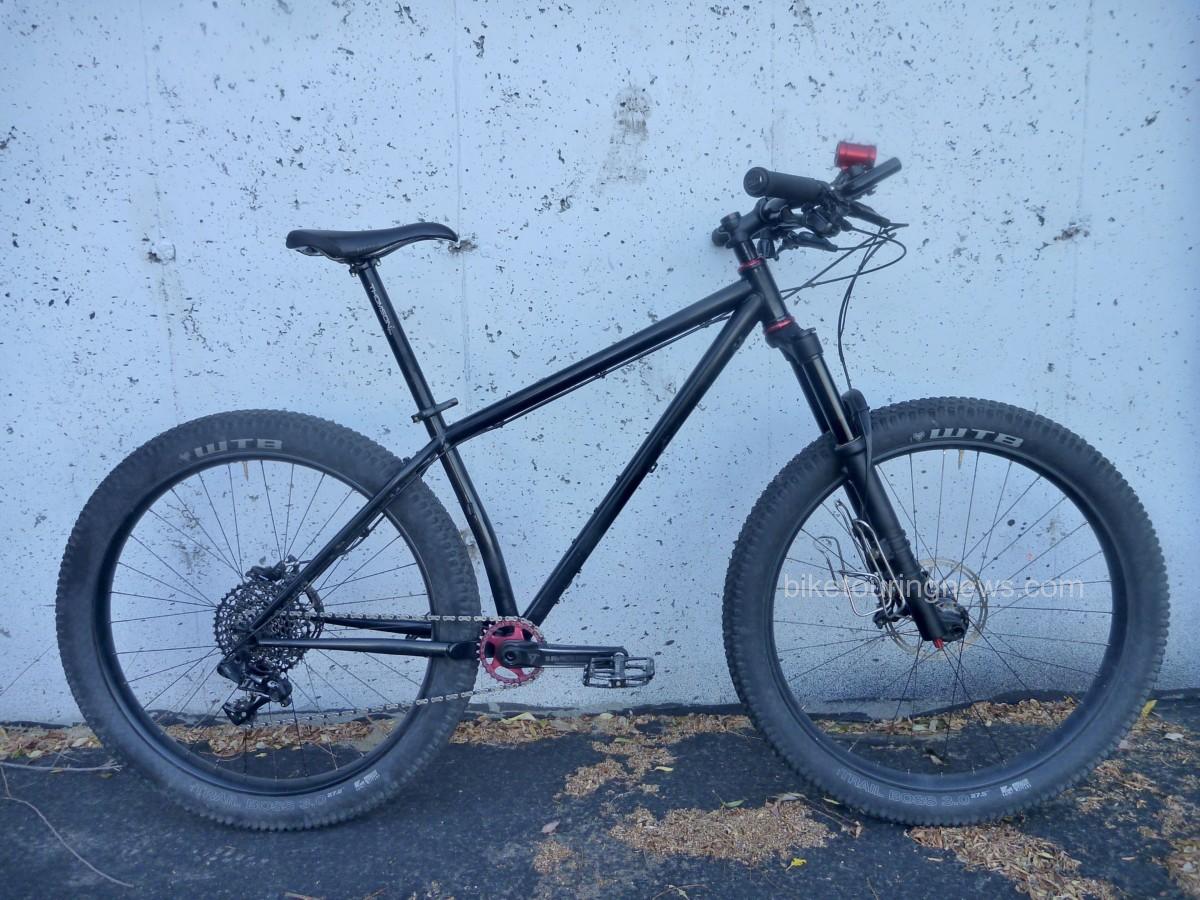
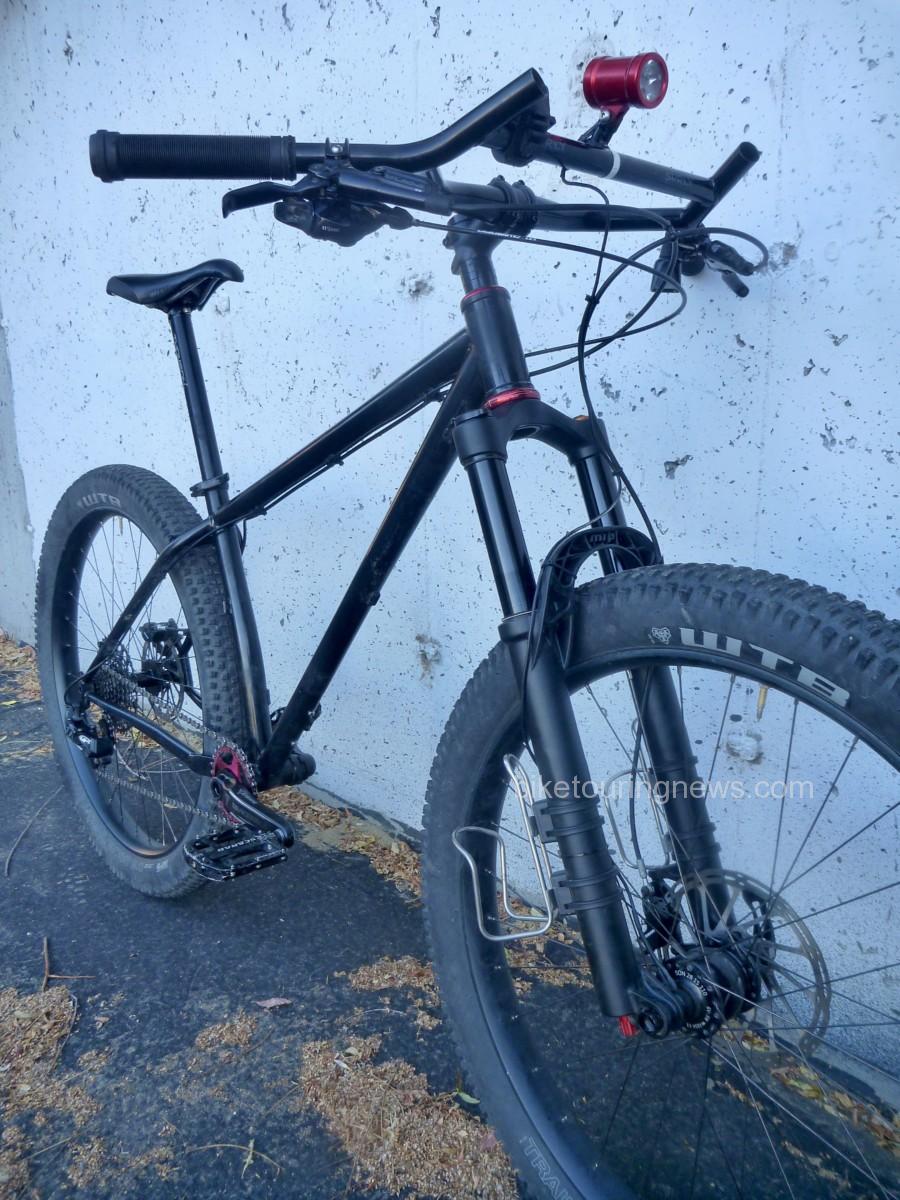
While the CTR was the catalyst for the Ninja Gorilla’s construction, this is by no means a CTR-specific bike.  Overall, I wanted to build a bike that would serve well on the CT but would be ideal for rugged, trail-heavy bikepacking adventures closer to home.  When Surly announced their redesigned Karate Monkey built around a 650b wheel and 3″ tire (aka 27.5+, B+, mid-fat…) I knew it would be the first choice for my high-altitude bikepacking rig.  I was fortunate to score one of the first framesets to hit the market and started ordering the rest of the build kit as finances allowed.  The Ninja Gorilla took its maiden voyage in late April and has been a killer ride ever since.

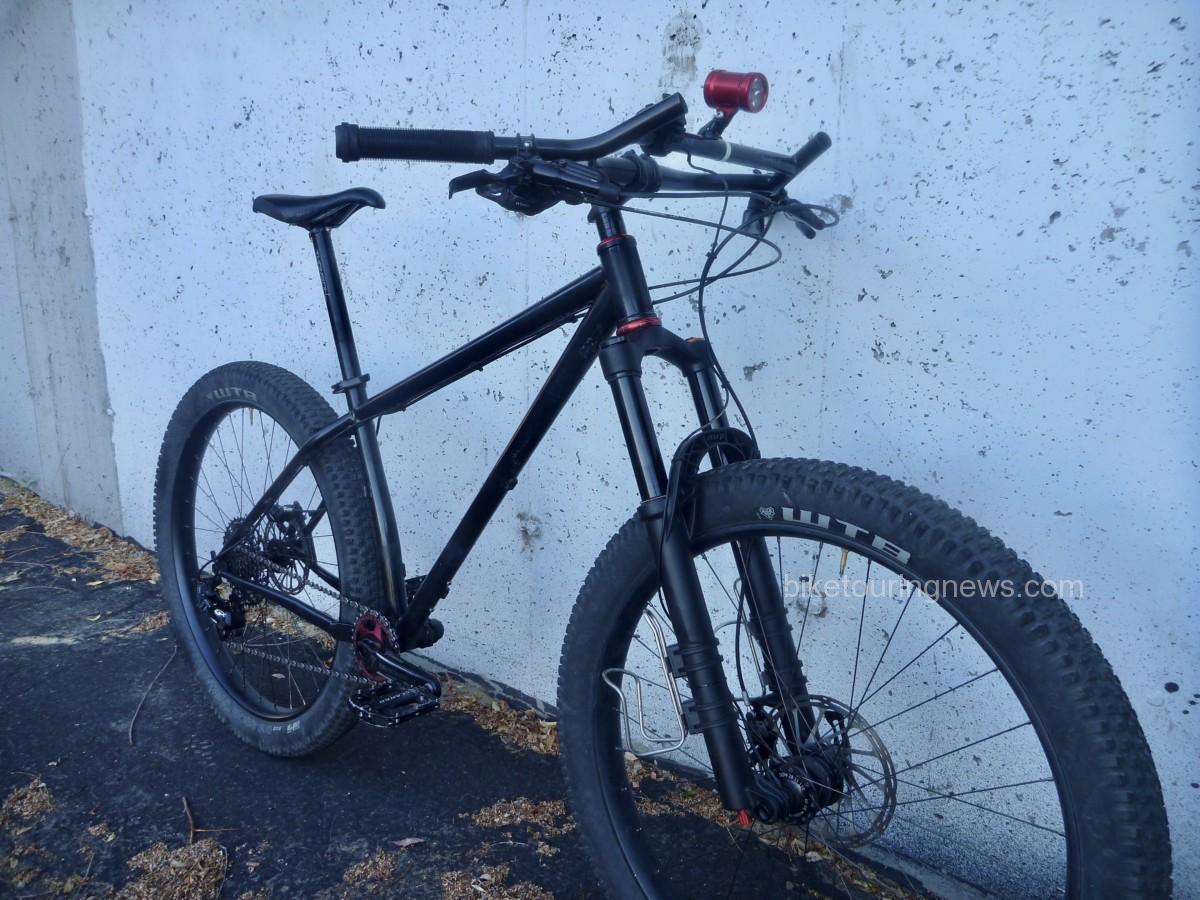
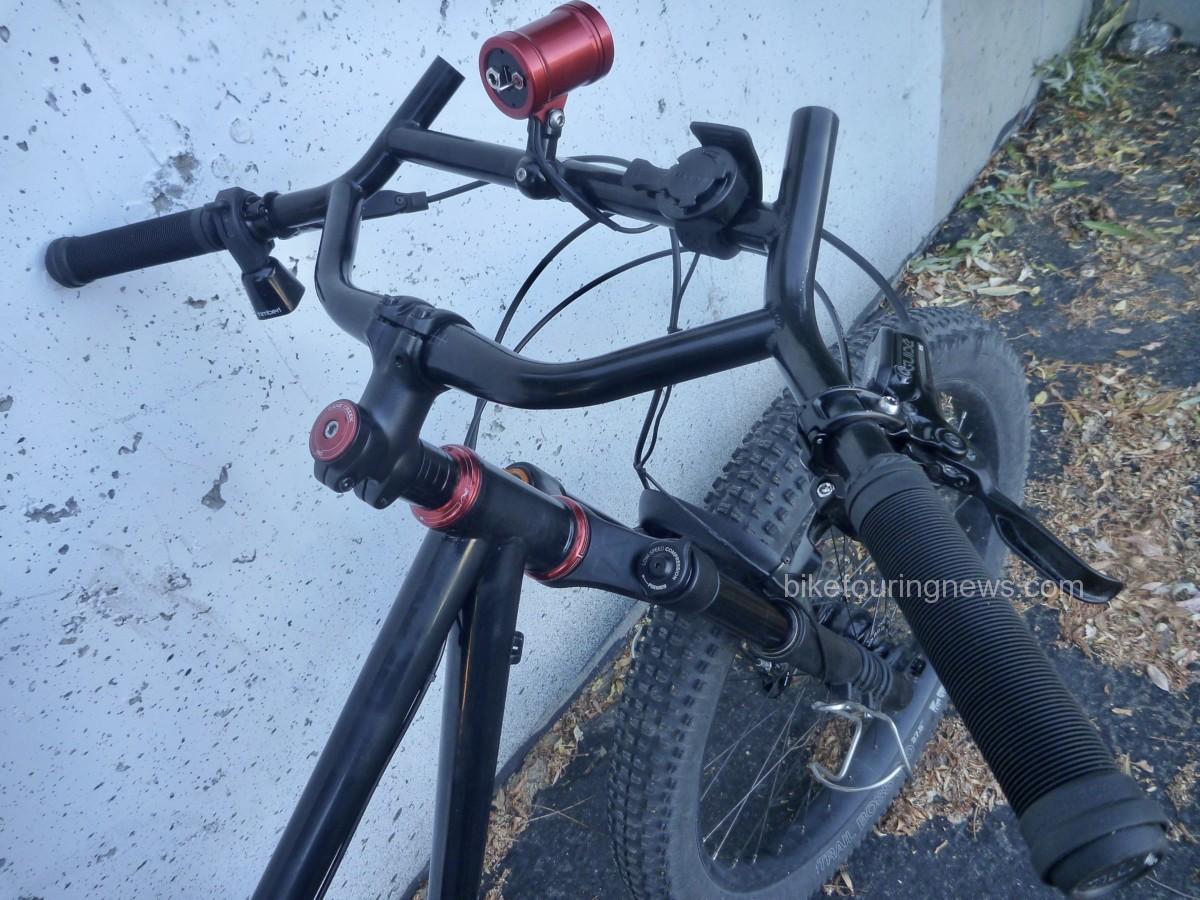
Surly’s Moloko bar provides a useful range of hand positions and gear attachment options.  Clocking 35 degrees of sweep and 735mm of width, these are an alternative to the Jones Loop-H Bars on the Rando-Gnar that provide a fit and feel more similar to traditional riser bars.

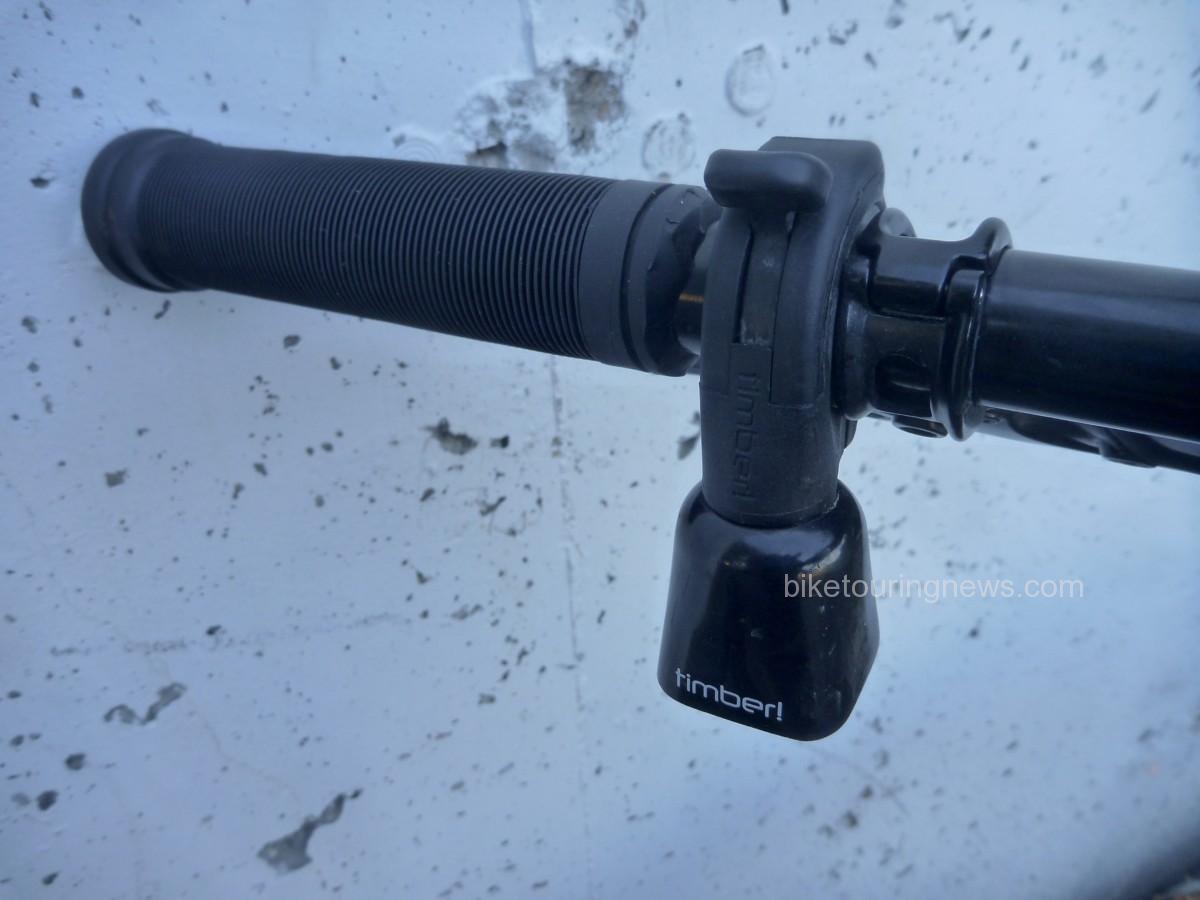
No component on this bike provides more smiles per dollar than the TimberBell!  Push down on the lever to release the clapper and allow the bell to ring with the motion of the bike.  Pull the lever back up to silence the clapper.  Dawn patrol rides have been a regular component of my preparation for the CTR.  Those early morning hours can often be surprisingly busy as folks hustle to fit in their rides, runs or walks before work.  I’ve generated many more smiles with the TimberBell’s pleasant, passive ring than with the kindest “Good morning!” I can muster.  Every now and then I’ll release the clapper and jingle my handlebars just for fun or for a morale boost on a tough climb.  You can’t help but smile when the TimberBell rings!

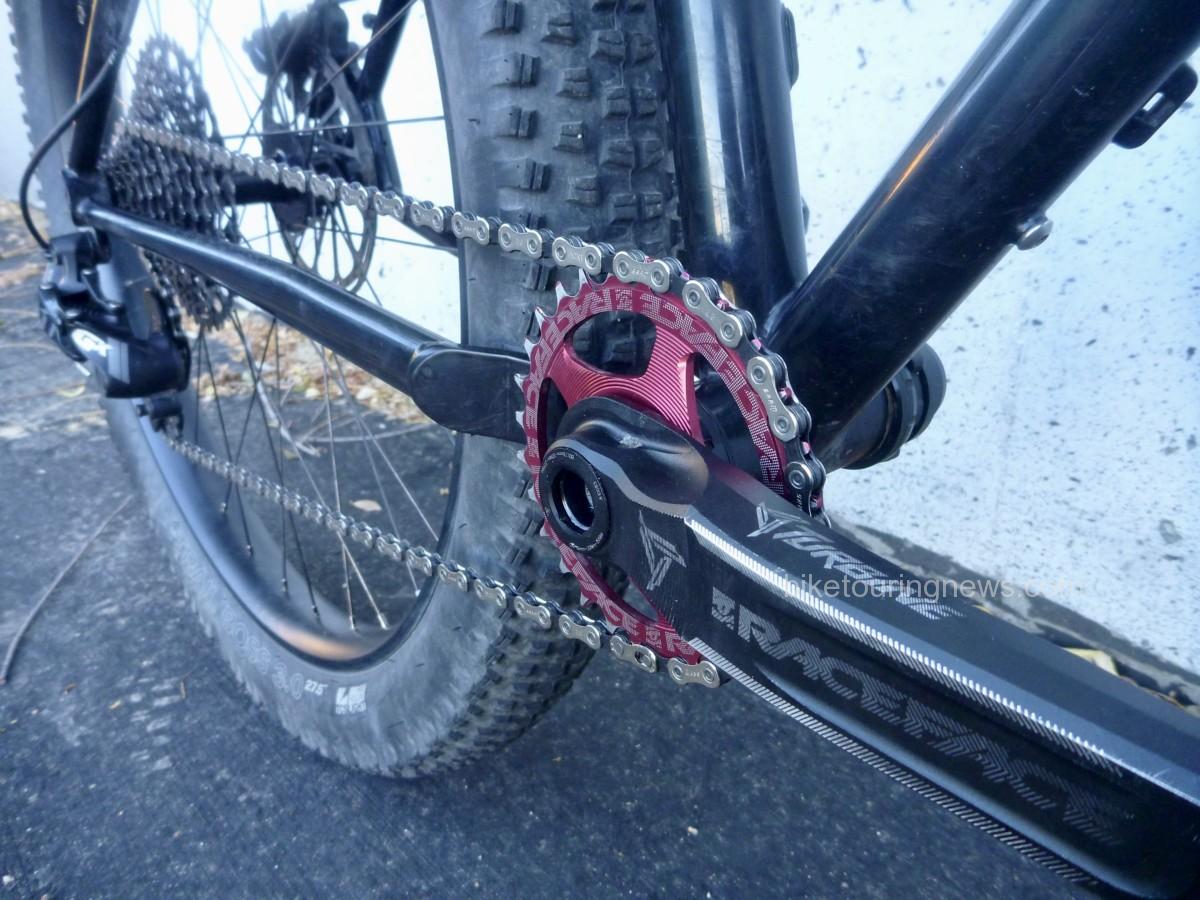
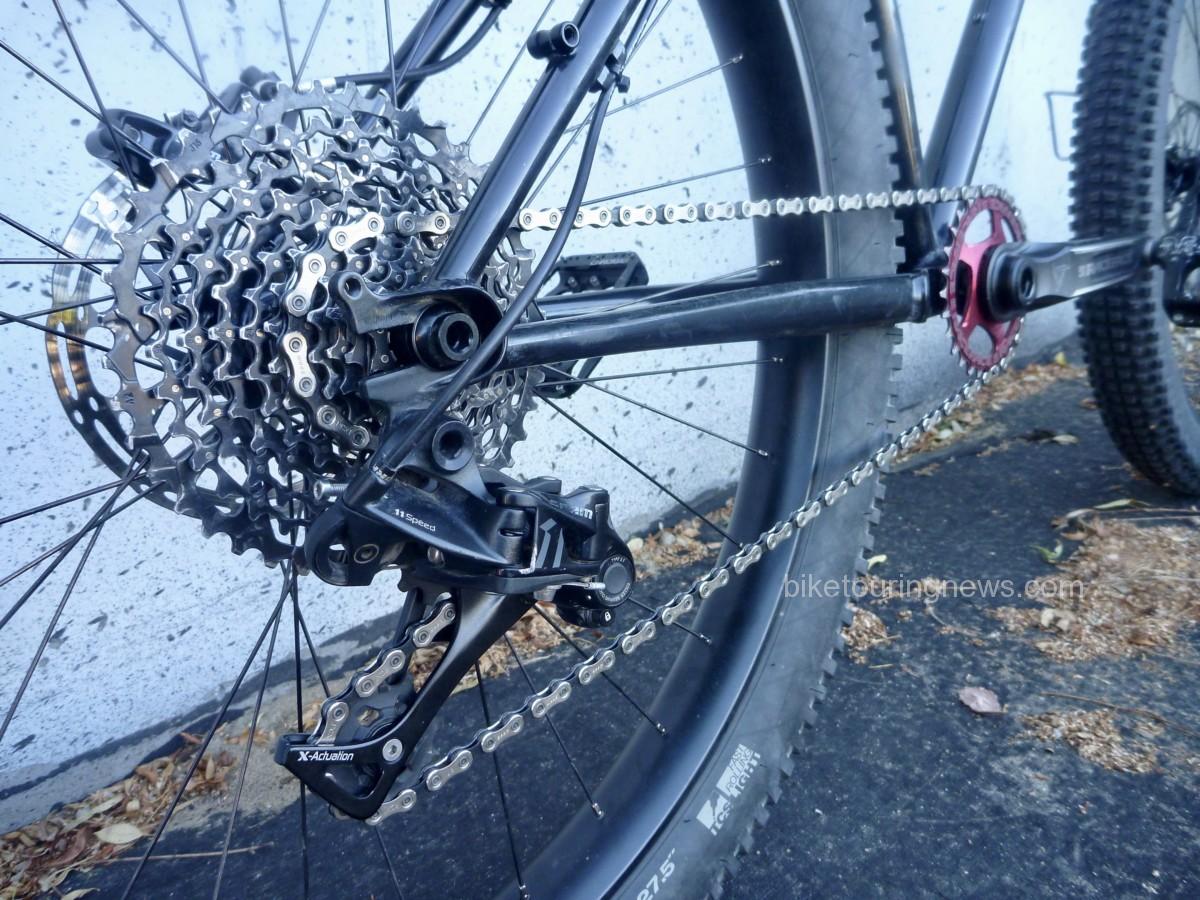
Drivetrain.  Boring.  It’s Sram GX 1×11 with a Race Face crankset, 28 x 10-42t.  I chose Race Face’s Turbine Cinch for its wide range of chainring and spindle options, strength to weight ratio and good looks.  The direct-mount chainring offers smaller tooth counts than spidered systems, so I selected a 28t ring to lower my range slightly.

The SRAM XG-1150 cassette features 100% steel cogs with pinned construction, delivering the shifting performance of higher-end 11-speed groups with improved durability, a minimal weight penalty and a much more affordable price.  This is the advancement that has brought 1×11 groups into the everyman’s price point.

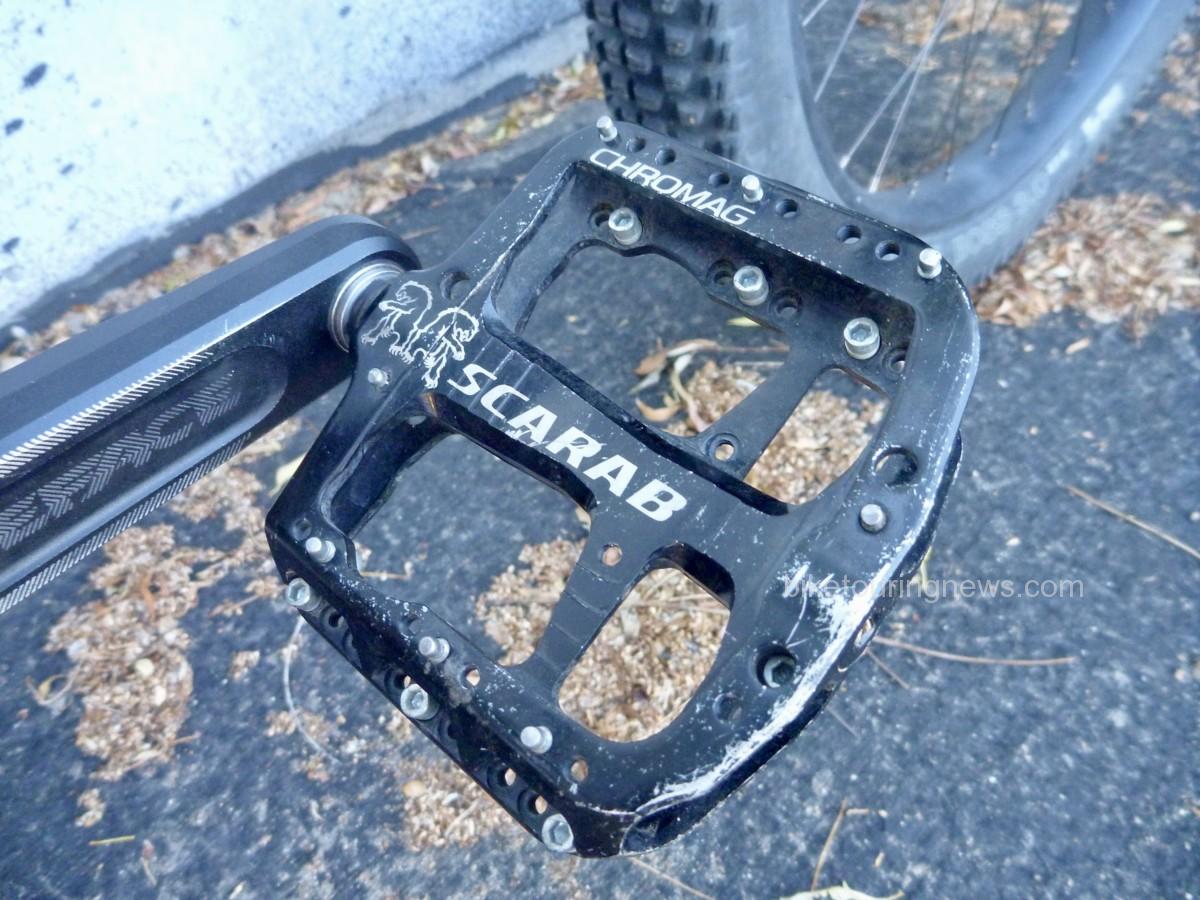
With rare exceptions, I’ve ridden flat pedals exclusively for the past 2 years.  Chromag’s Scarab pedals are some of the smoothest and most comfortable I’ve tried.  Their thin, concave body cradles the foot and the multitude of pin positions provide customizeable traction.  The walkability of flat pedal shoes and the ability to vary my foot position on the pedals over long days in the saddle far outweigh any efficiency benefit provided by clipless.  The ease of dismounting, remounting and hike-a-bike comfort all combine to make flat pedals ideal for me on bikepacking trips.

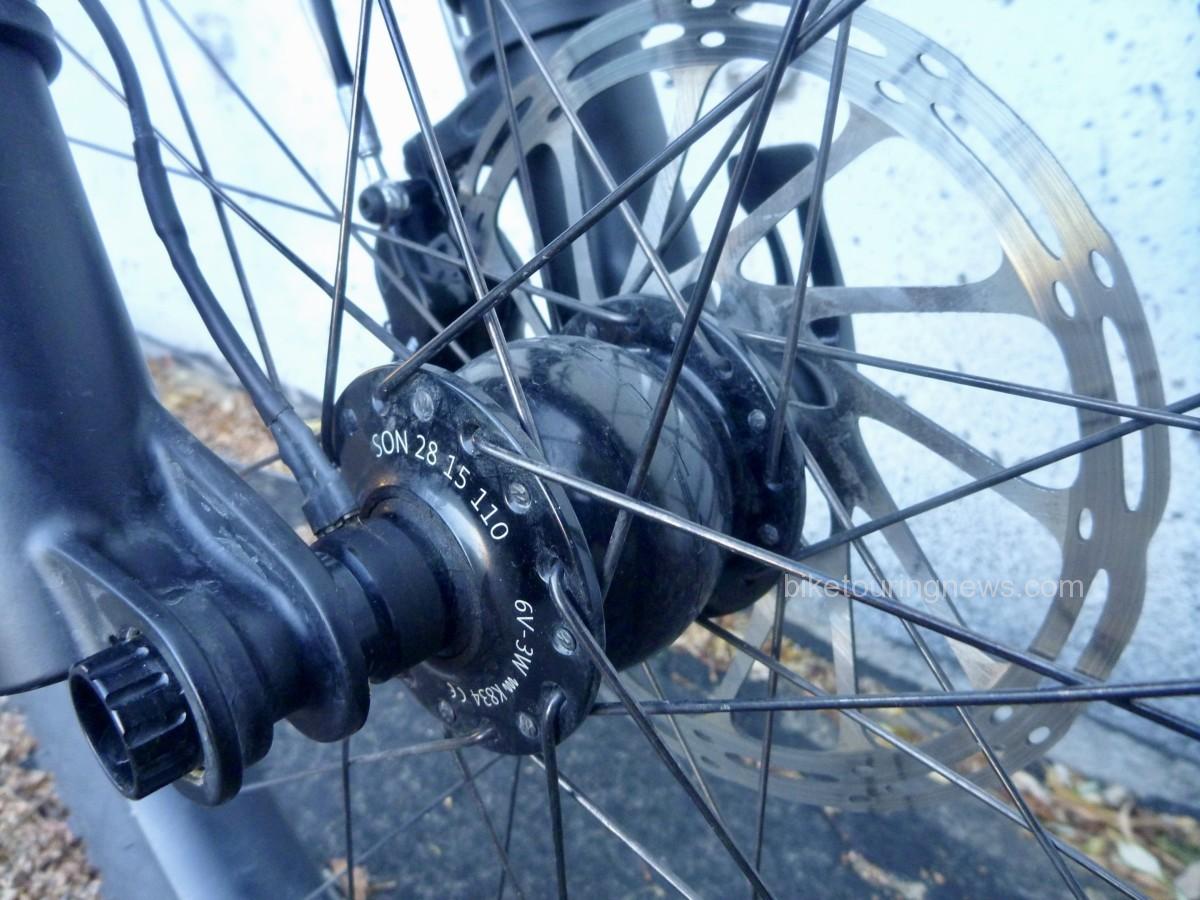
The hand-built wheelset features WTB’s Scraper i45 rims (debadged) laced to a DT Swiss 350 rear hub and a SON28 dynamo up front.  DT’s star ratchet freehub and quality cartridge bearings are legendary for their reliability, as are Schmidt’s dynamo systems.  Many riders eschew the dynamo for the CT and similar singletrack-heavy routes as speeds are generally too low to provide consistent power output.  However, I knew I’d be using the bike for much more than just the CT and dynamo power would be worth the extra investment.  Honestly, if I could have a dynamo on every bike I own, I would.  Maybe one day…

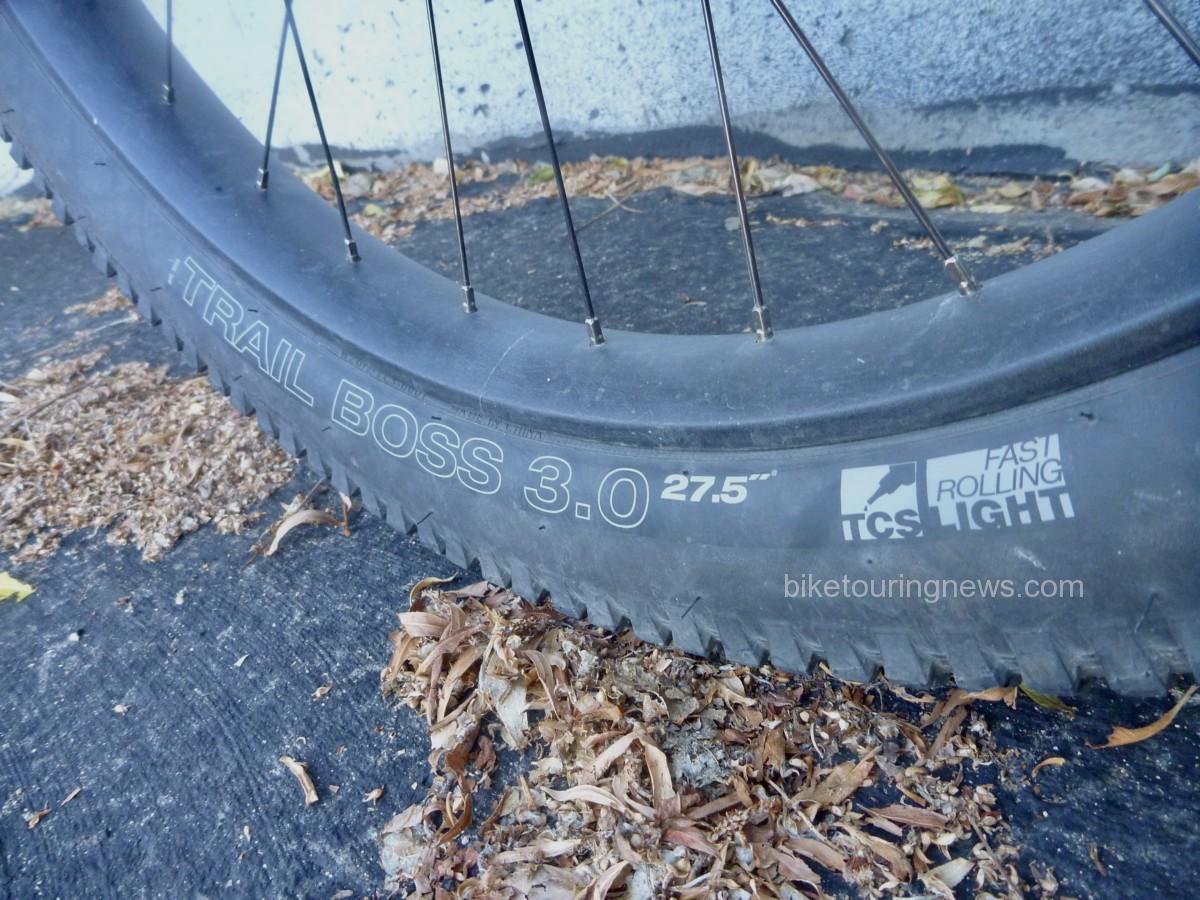
I chose WTB’s Trail Boss tires for their even tread pattern that rolls well on dirt roads or two-track but with the cornering knobs to keep the bike on track in the sketchy stuff.  Many riders and commenters recommend reinforced casings for the CT, so I’m hoping to get away with the “light” sidewalls.  Tubeless setup on the Scraper i45 rims was flawless and has been trouble-free with no burping or loss of air.

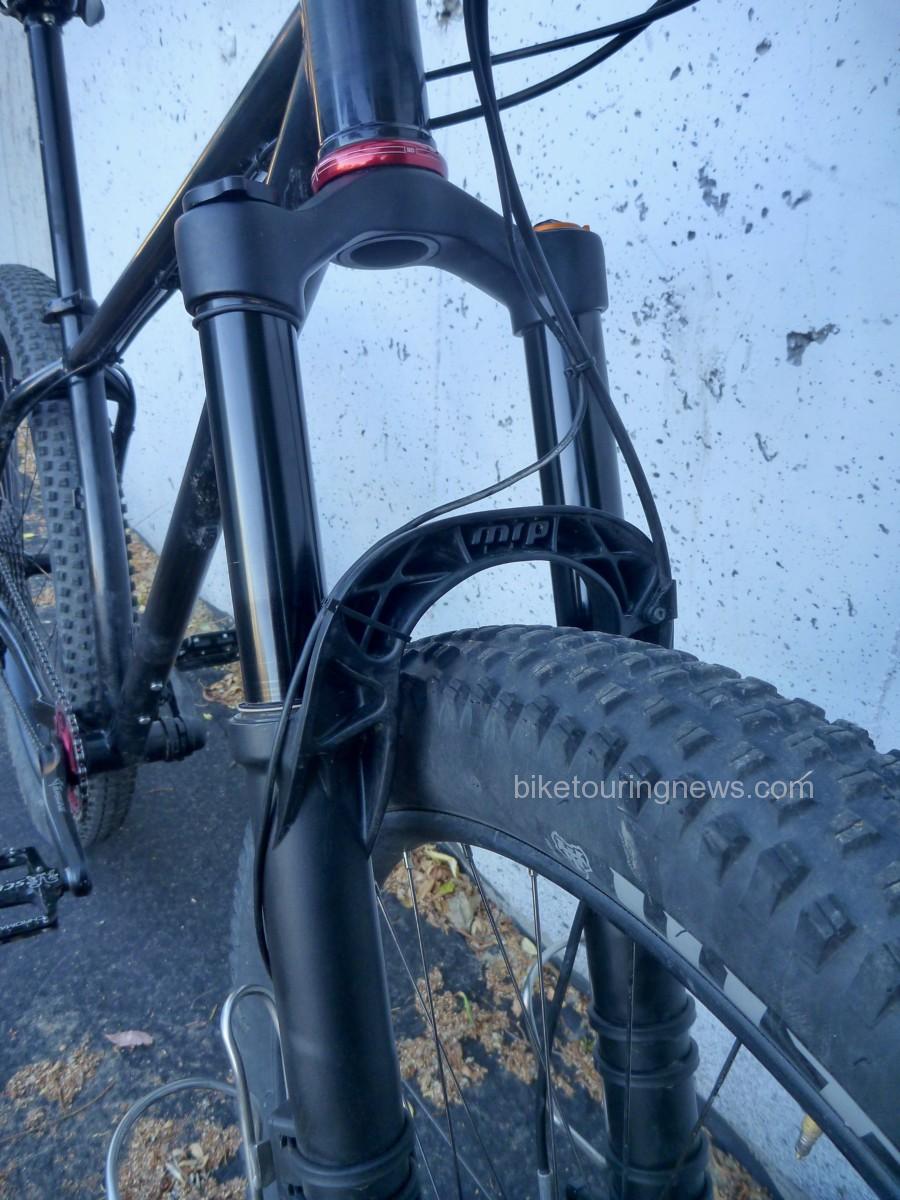
Even with the stock steel fork, this is an impressively capable bike.  The 3″ tires steamroll rough trail and provide excellent traction.  However, you won’t forget you’re on a rigid bike, especially on fast descents.  I knew that I’d want a suspension fork to keep my front wheel on the trail when things get dicey.  With the MRP Ribbon fork installed, this beast takes on a completely different character.  Assembled (and partially fabricated) in Grand Junction, the Ribbon is designed with high-altitude adventure in mind.  This is easily the most adjustable, highly tuneable suspension fork I’ve ever experienced.  Setup is relatively straightforward, even with the multitude of possible adjustments.  Following MRP’s guidelines, I was able to dial in a setup that rode high in the travel and maintained a bottomless feel while still providing some suppleness over small bumps.  Travel is smooth and plush with very little seal friction, even right out of the box.  The OutCast arch lends sculptural appeal and makes this fork unmistakable, even with the decals removed.  With the appropriate crown races installed, swapping back and forth between rigid and suspension forks is a relatively simple task, allowing me to dial in my setup for a variety of future trips.

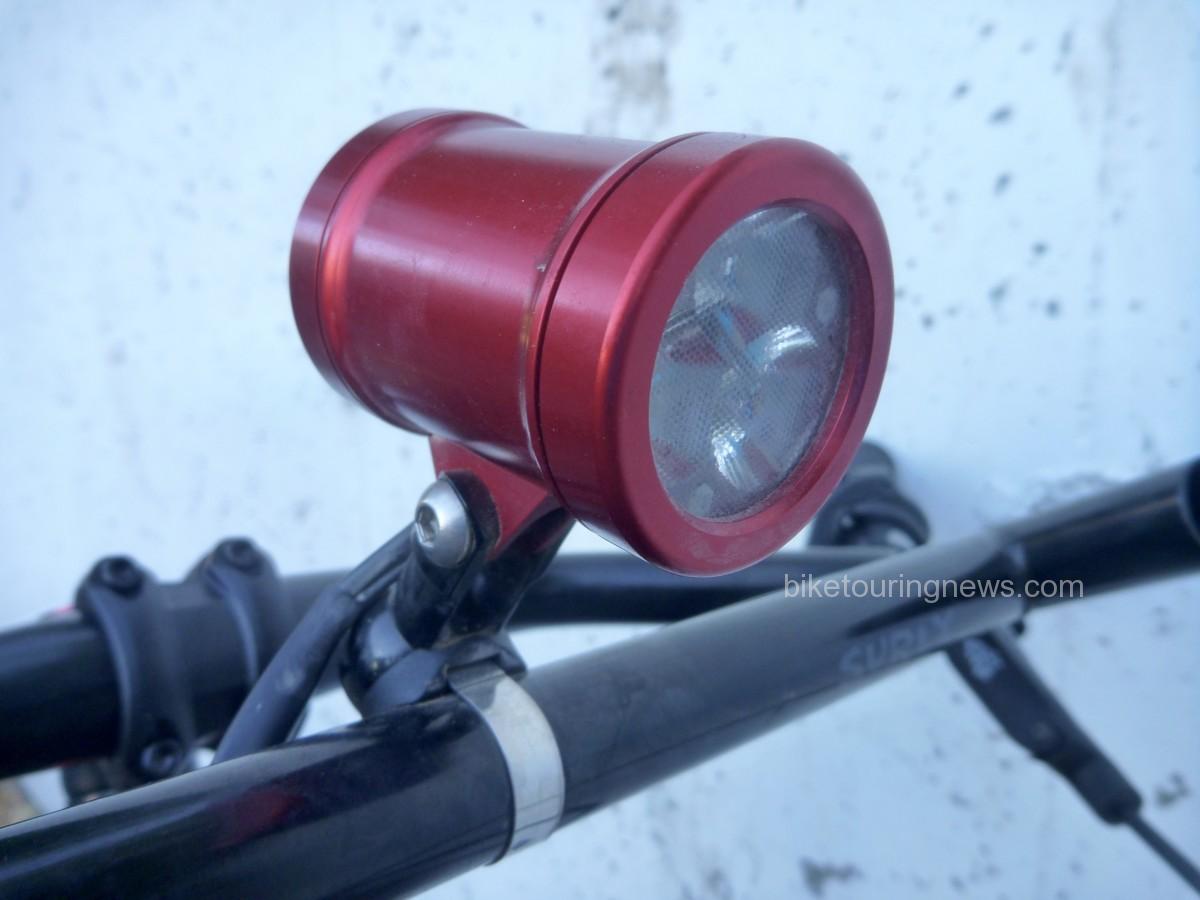
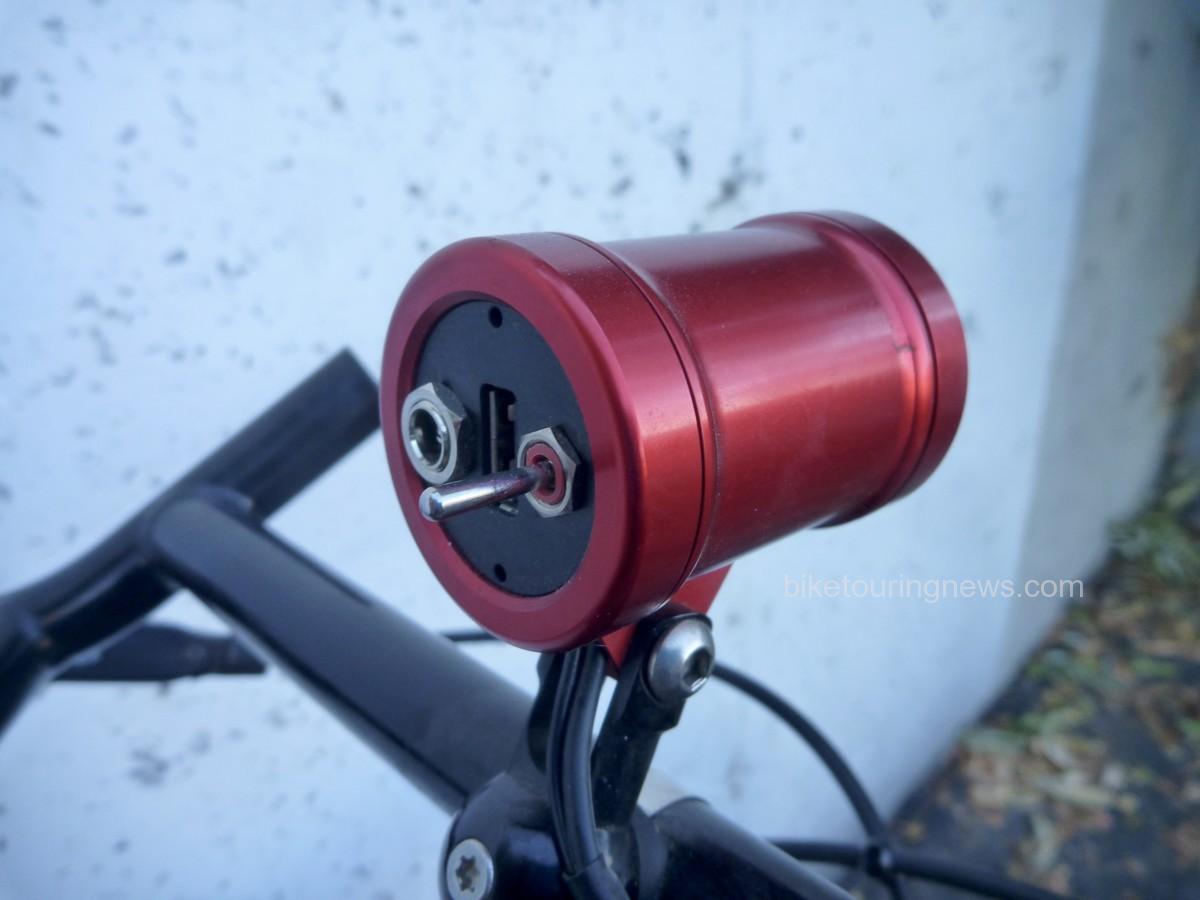
The Sinewave Cycles Beacon headlight is the icing on the cake of this build.  For the pavement or dirt road rider, dynamo lighting had already advanced to a very high level.  Busch + Muller, Schmidt and others make excellent lights that are ideal for those speeds and terrain.  However, the trail rider has mostly been forced to rely on battery-powered lights that provide the broad, even illumination required to navigate off-road terrain safely and confidently after dark.  In addition, singletrack speeds are often insufficent for a dynamo light to provide consistent output, resulting in annoying flickering or even total loss of light.

The Beacon solves these problems.  With a wide, symmetrical beam pattern, this light provides plenty of illumination around the fringes of the trail.  It also incorporates a power input feature to provide stable lighting no matter what your speed.  Simply plug in your external battery using the included cable and flip the switch up for the full 750-lumen output or down for medium power.  The Beacon draws from the battery as needed but the dynamo provides more power as speed increases, eventually taking over completely preventing unnecessary battery drain.  A USB charging output is supplied as well, allowing you to charge your battery or other devices when speeds allow.

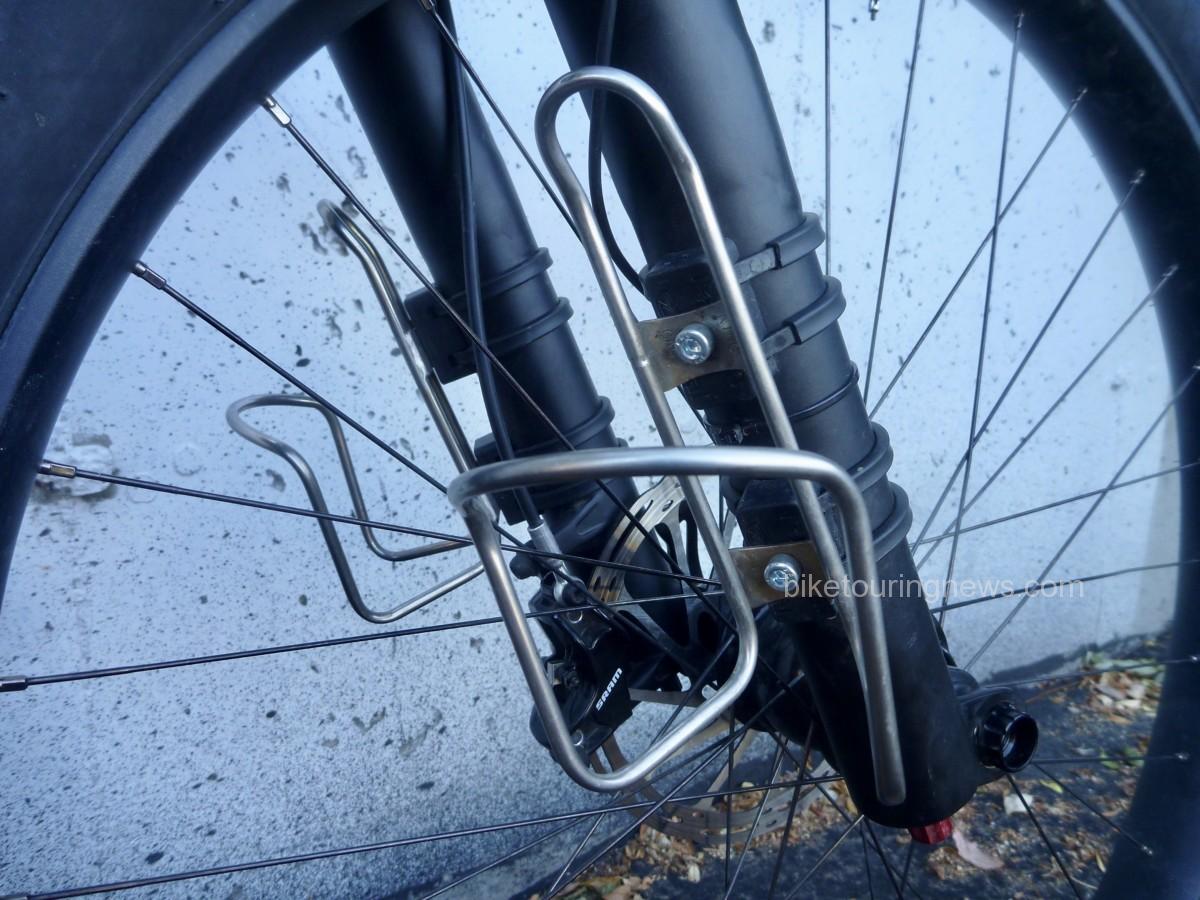
Having grown accustomed to the fork-mounted cages on the rigid fork, I knew I’d want to mount cages to the suspension lowers to maintain my water capacity.  Zefal’s new Gizmo cage mounts provide rock-solid attachment points.  As far as I’m concerned, King Cage’s stainless bottle cages are the only cages worth owning.

Overall, I’m absolutely stoked on this bike.  It is far and away the most capable, versatile mountain bike I’ve ever owned.  While it isn’t a bargain build, there also aren’t any blingy parts or unnecessary fluff.  Components were chosen for an ideal blend of affordability and reliability.  The only exception may be the Cane Creek 110 headset.  I’ll admit it; I paid the premium price over the more affordable 40-series because it came in red.

While anything could happen out there, I’m 100% confident in the Ninja Gorilla and know that it won’t be the bike’s fault if I struggle on the Colorado Trail!  I’ll be going through my gear and packing setup in my next post, so keep an eye out for that in the coming days.  As always, thanks for reading and feel free to share your thoughts, questions or personal experiences in the comments below.


Categories
Bike Touring Equipment Bikepacking Planning Resources

The Best Shelter for Bikepacking: Three Opinions

We get lots of questions about shelter from folks getting started in bikepacking.  What shelter is best?  Can I use the ____ that I already own?  How do I know which shelter to bring on a given trip?  In this post, we’ll offer three perspectives on the best bikepacking shelter and try to answer some of those questions!

While many people already do some kind of camping, many shelters that would be appropriate for car camping or even backpacking are not well-suited for bike travel.  Space and weight are at a premium when traveling by bike, so heavy and bulky shelters are a liability.  In selecting a shelter for bikepacking, there are a few key factors to consider:

  • Sleeping Comfort
  • Protection from the Elements
  • Interior Space & Gear Storage
  • Ease of Site Selection & Setup
  • Packed Size/Weight

Obviously, many of the above factors can change dramatically depending on weather, environment or season.  Plan Ahead and Prepare for the conditions you expect to experience.  Any shelter will offer some level of versatility but some excel only in certain conditions.  Also, every person has their own preferences, likes and dislikes when it comes to shelter.  In this post, we’ll offer perspectives from the Bike Touring News crew on the different shelters we use.  What shelter do you prefer for bikepacking?  What did we miss?  Read through and add to the discussion with a comment below!

The Bike Hermit’s Preference:  The Hammock

Several years ago, I came across some articles about stealth camping – or “hiding in the woods” as some people call iton an obscure site called crazyguyonabike.com. The author’s choice of shelter was a Hennessy Hammock and – for some reason I can no longer remember – the idea of bike touring with a hammock appealed to me.

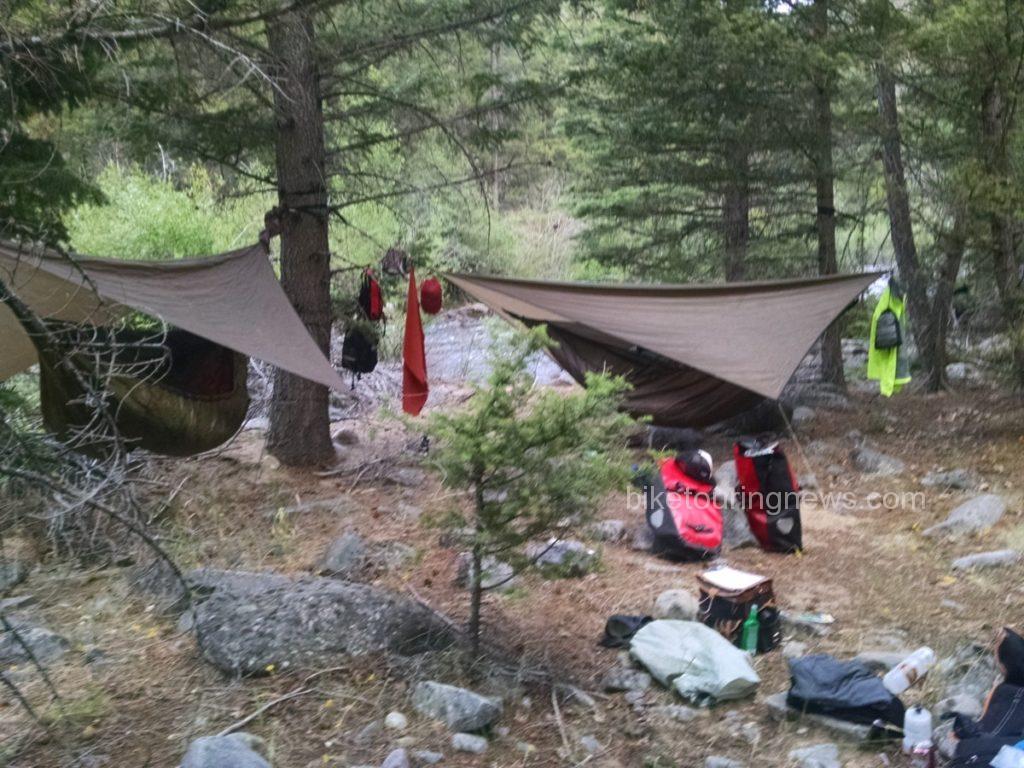
image of camp hammocks
Not many spots for a tent

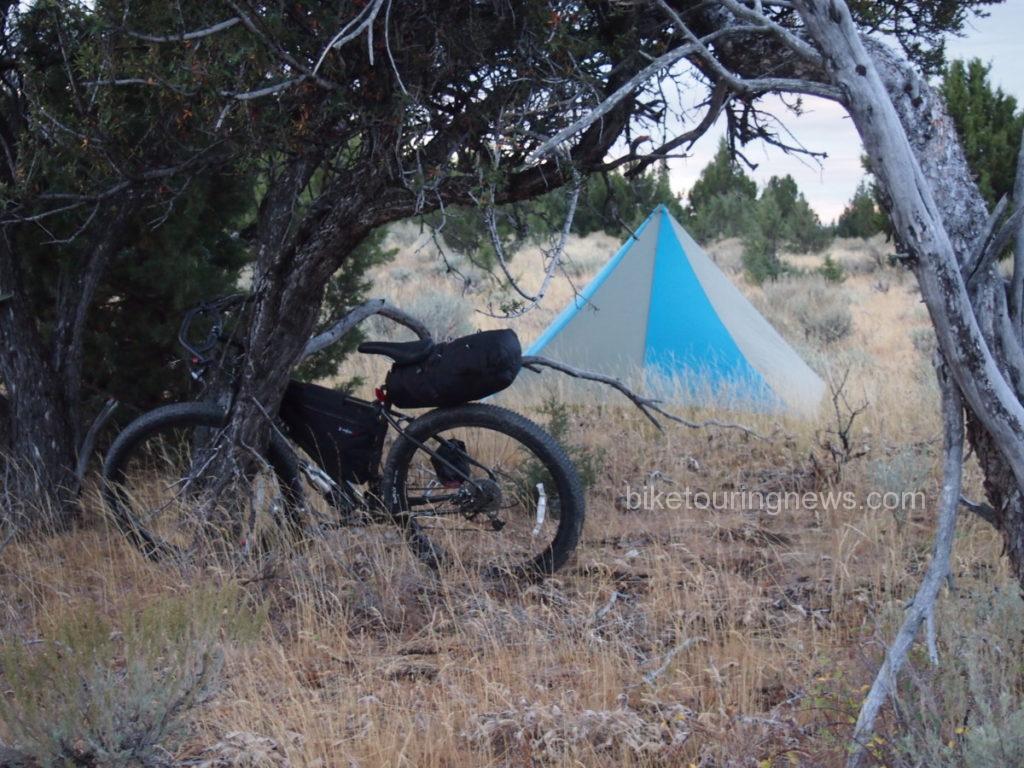
The design of my Hennessy Hammock impresses me every time I use it. The hammock is attached to and suspended from a ridge line which also supports the enclosing insect netting. A separate rain fly keeps the sleeper dry and/or out of the wind. Upgrading from the stock rain fly to the Monsoon rain fly creates a space around and under the hammock big enough to park the bicycle out of the rain. Hennessy sells a 4-season SuperShelter system consisting of a second layer of nylon on the bottom of the hammock which creates a sleeve where an insulating pad can be inserted. My experience is that the hammock is very cold to sleep in without the 4 season system.

Worries about sleeping in a “hammock” position and only being able to sleep on ones back are mitigated by the asymmetrical design of the Hennessy; once in the hammock the sleeper can put his feet to one side and his head to the other and the hammock offers a flatter, even if still not completely flat, support. I am not able to sleep face down but I can sleep comfortably on either side.  This is obviously a big plus for side sleepers who struggle for comfort when sleeping on the ground.

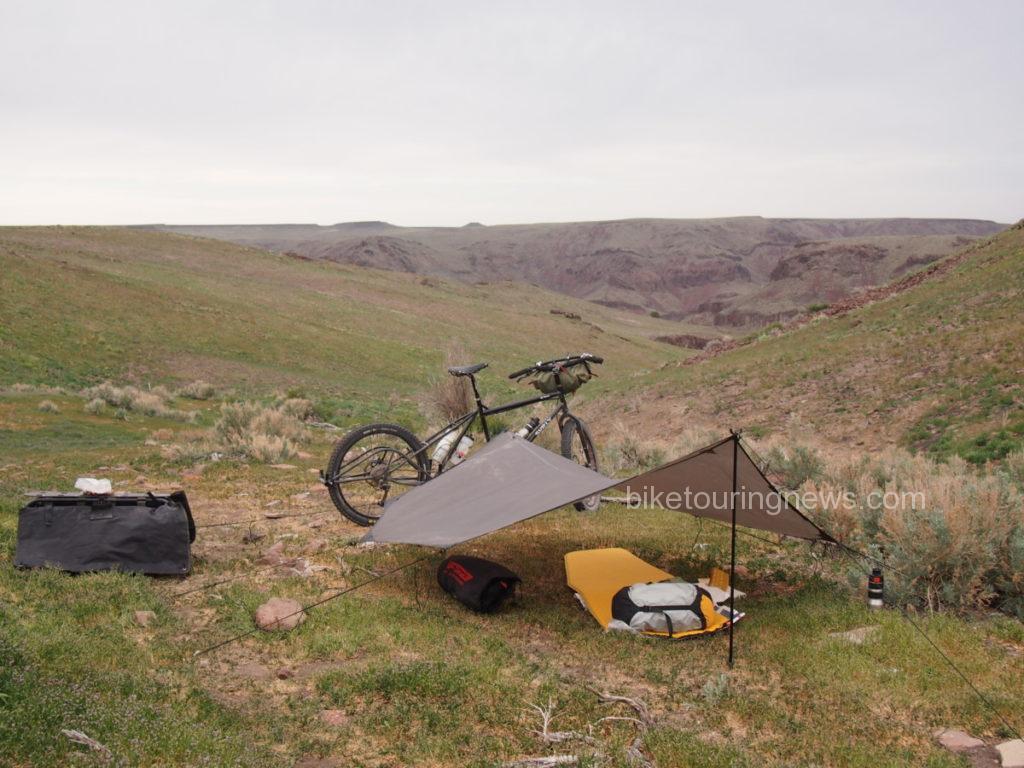
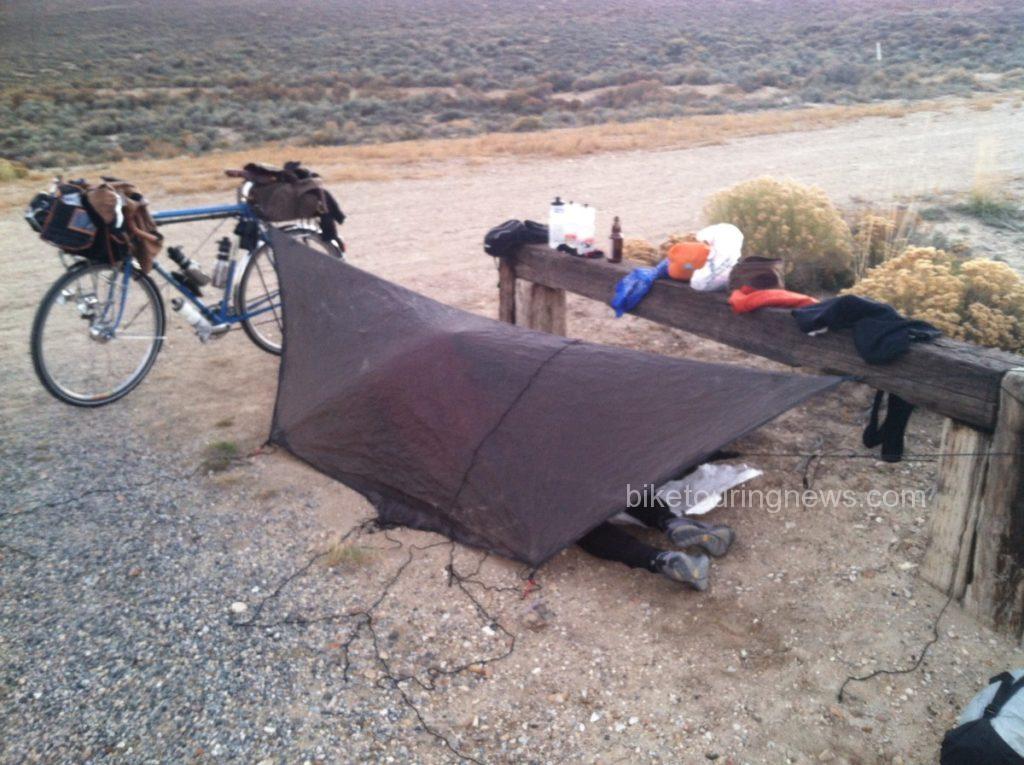
People always ask what I do when there are no trees. The rain fly, when staked at one end or tied to a sagebrush, and supported at a higher point by the bike or a tree or a fence post at the other end makes a dandy shelter. If the night is cold the hammock can be used laying on the ground under the rain fly as a sort of cocoon.  In this configuration, the hammock becomes a sort of tent/bivy/hammock hybrid shelter.  The benefit of sleeping suspended is lost and setup can be tricky but this capability extends the range of conditions where a hammock is functional.

image of bike and tarp
The Clickstand bike support as a tent pole!

On the last couple of trips I have been using Hennessy’s SnakeSkins which stay attached to the ridge line and simple slip over the entire hammock and pad and swallow the whole thing up leaving a long, fat, nylon snake that can be stuffed into one half of a pannier. This is a much faster way to set up and take down the hammock.

image of end of hammock
The SnakeSkins fold out of the way on the ridge line when the hammock is in use and just slide down from either end to make a quick stuff sack.


image of tarp tent
This was to be a very cold night. The fly was on top of me by morning with the weight of a heavy layer of frost. This is the Monsoon Fly.

Pros:

  • Very comfortable – none of the pressure points associated with sleeping on the ground
  • Warm enough for most conditions when used with the two layer insulation system
  • Can be used on uneven, sloping, rocky or wet terrain
  • Completely weatherproof
  • No condensation
  • Packs relatively small – no tent poles.

Cons:

  • Can’t always be suspended
  • Not necessarily lighter than a good tent
  • Not ideal for relaxing – minimal interior space
  • Not as private as a tent – hard to dress or undress in a hammock
  • Makes some people feel claustrophobic

Sky King’s Preference:  The Tent

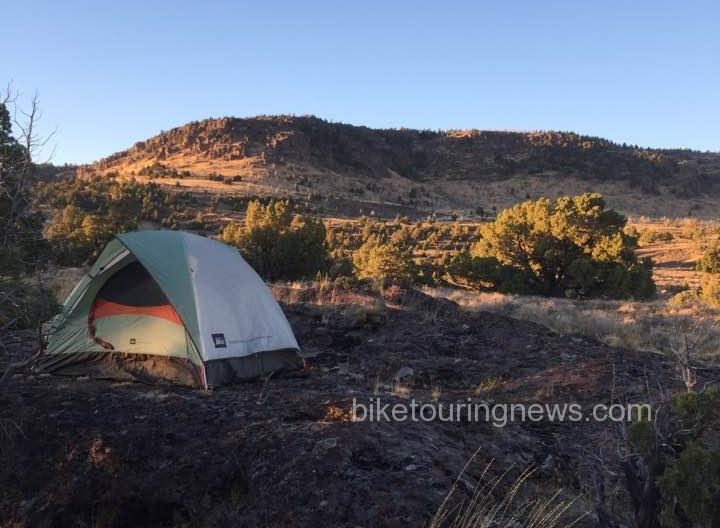
While the Bike Hermit and Sky King are both huge fans of the Hennessy Hammock there are situations where a tent is a more practical shelter, especially in desert environs where trees are scarce.  Sleeping on the ground in a hammock is an option, though one without most of the hammock’s benefits.  Comparatively, a good tent offers increased comfort and space at roughly the same weight and pack size as the hammock, when divided among a team of two.

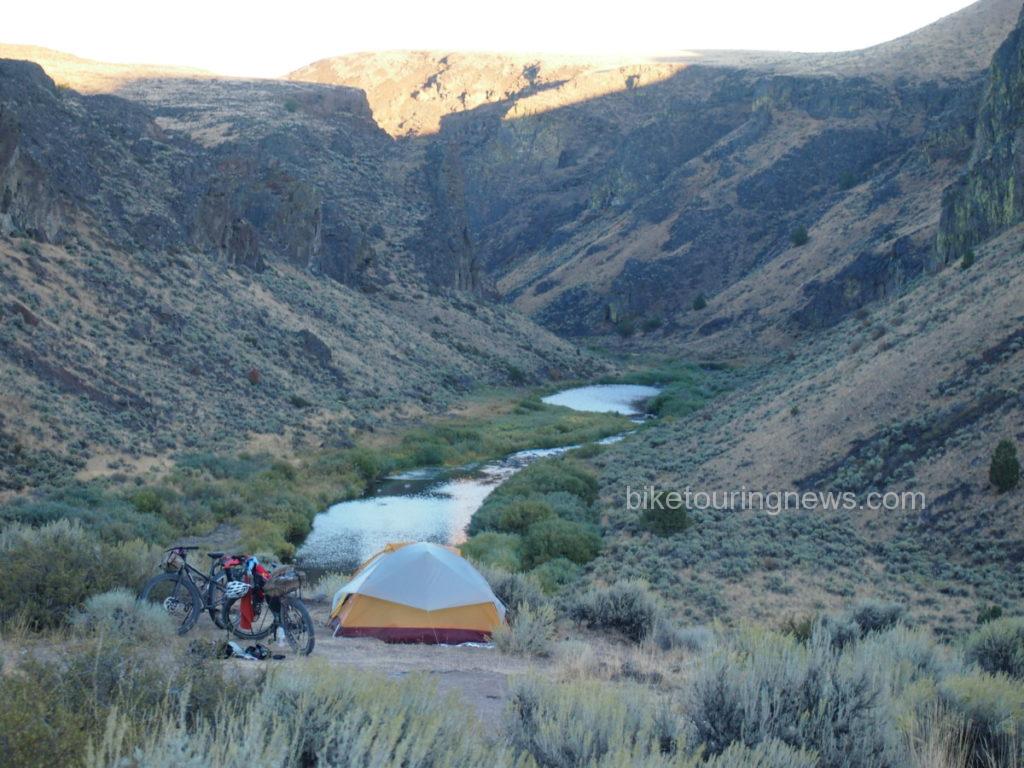
perfect for Desert Bike Packing
Big Agnes Angel Springs UL2 in the Owyhee Canyonlands

For our first couple of “let’s take the tent trips” we used our 3-person Kelty – a great tent. We bought it for backpacking primarily because it was roomy – with two vestibules and two doors – making for easy entry/exit and gear storage. However, it is a bit bulkier than we’d like for bike trips. We bit the bullet and now own a Big Agnes Angel Springs UL2. We gave up the double entrance, meaning someone is getting crawled over for the middle of night nature call. Like most tents, it incorporates a rain fly vestibule, allowing for a place to tuck gear out of the weather.

14495463_265649453829296_3002774429655013193_n

We carry the tent for most of our desert riding, especially in new terrain where we aren’t certain of the tree situation.  Site selection – especially in areas where large trees are few and far between – is relatively easy with a 2-person tent.  The tent’s footprint is relatively small, but very hard or soft ground can present guyline challenges.  On surfaces where stakes won’t hold or can’t penetrate, you’ll have to get creative as most tents must be staked out for a proper pitch.

Weight wise, the combination of tent and sleeping pads is roughly equal to that of two hammocks without pads. We can divide the load between bikes and packed volume equates to about the same as the hammock.  For teams of two who don’t mind sharing space and gear, a tent makes an appealing option.  Solo adventurers may find the packed weight and size burdensome unless they are willing to spend big bucks for high-end, ultra-light models.

Pros:

  • Easy entry and exit.
  • Relatively easy site selection.
  • Vestibule space to keep gear dry.
  • Space to sit up and move around inside, especially nice if bad weather hits.
  • Tent components can be divided between bikes, decreasing each rider’s load.

Cons:

  • Heavier and bulkier on average.
  • Higher cost for lightweight options.
  • Tent poles can be difficult to pack on a bike.
  • Potentially tedious and time-consuming setup and takedown.
  • Condensation can be an issue in certain conditions.


Ryan’s Preference:  The Bivy Sack

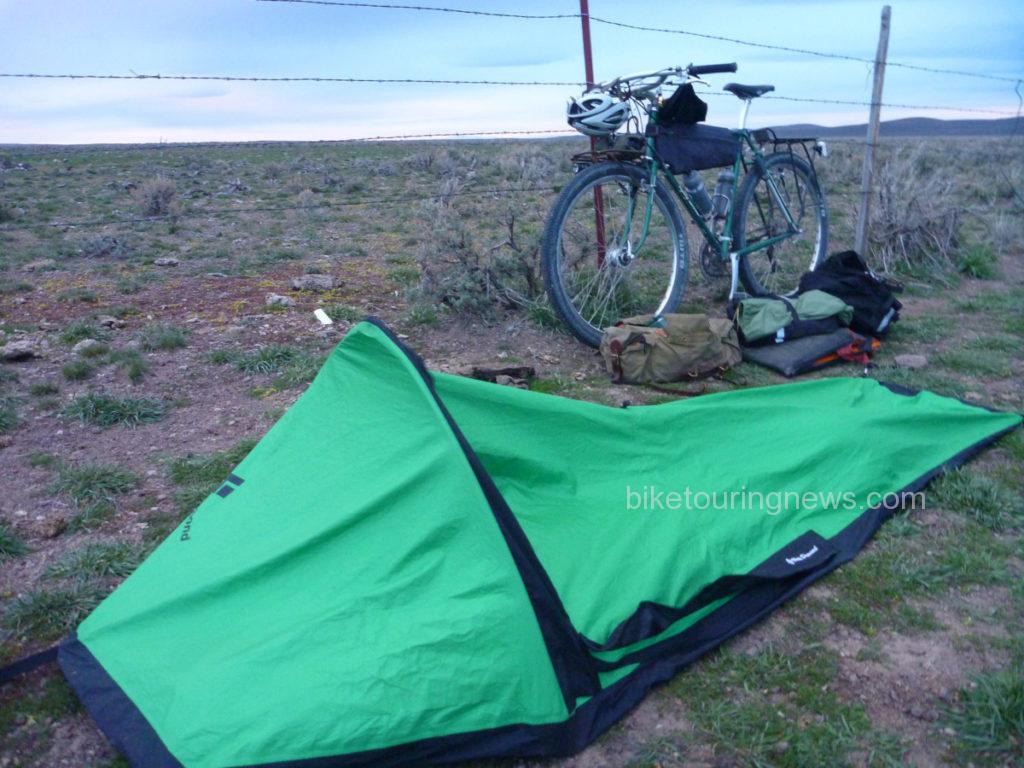
Bivy is short for “bivouac,” which is a fancy word for making camp.  “Bivouac Bags” or “Bivy Sacks” are essentially waterproof sleeping bag covers and have been used since time immemorial by soldiers, alpinists or anyone else who needs a simple shelter that can be quickly deployed in nearly any site.

Twilight falls on the author’s campsite in the Owyhee desert.

There are a wide variety of bivy sacks on the market intended for a range of purposes.  Ultralight emergency bivvies are intended to help you survive an unplanned night out.  They are generally inexpensive, pack small, weigh next to nothing and offer little in terms of comfort.  Some ultra-minimalist bikepackers use shelters of this type for racing but they’re planning on sleeping 2-4 hours per night, if at all.

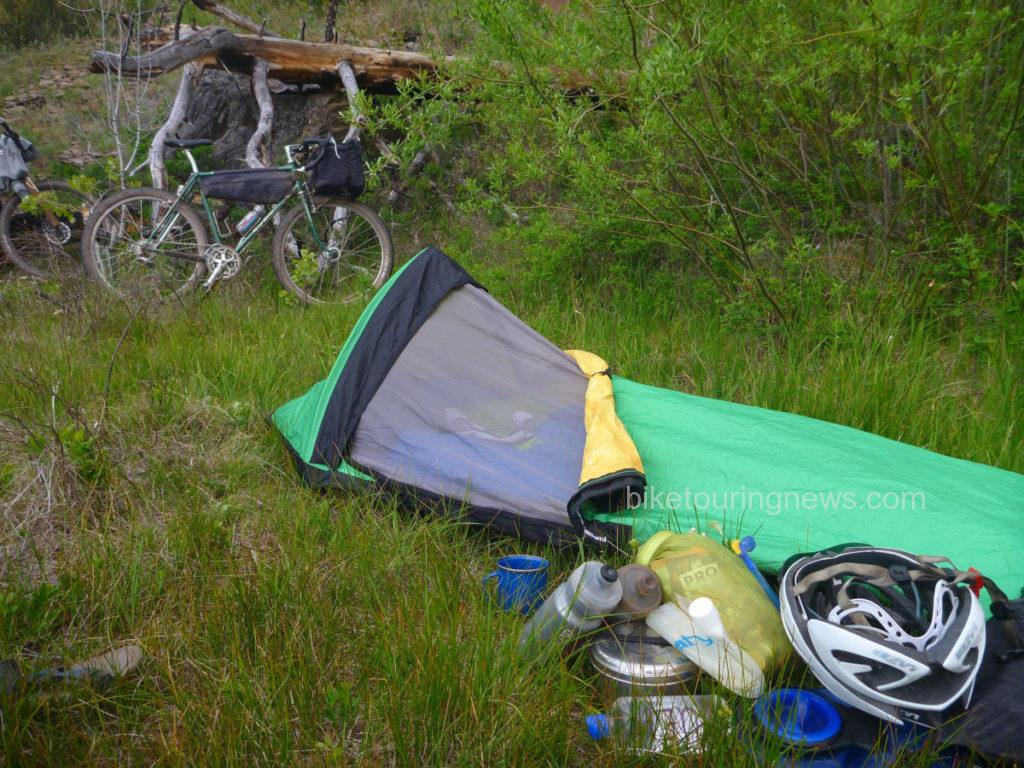
The more fully-featured bivvies are designed for alpine climbing or similar pursuits. They typically employ sturdier construction, waterproof/breathable fabrics and may even incorporate some kind of additional structure to increase space and ventilation.  If you’re looking for a full night’s sleep or expect anything other than perfect weather, this is the way to go.

The insect mesh on some full-featured bivvies can be a major plus in buggy locations, such as this creekside camp on the 2014 Oregon Outback.

Even though a full-featured bivy can weigh as much or more than an ultra-light tent, it is significantly less expensive, more durable, simpler to pack and ultimately easy to deploy.  For me, this is the bivy’s main advantage.  Any piece of level ground large enough to lay on can be your campsite and the shelter is ready to use within seconds.  This allows you to spend more time riding and exploring rather than searching for an appropriate site to pitch your tent, hang your hammock or fly your tarp.  No stakes, guylines or trees required!  There is also nothing quite like laying on the earth with no roof over your head and watching for shooting stars on a clear night while you drift off to sleep!

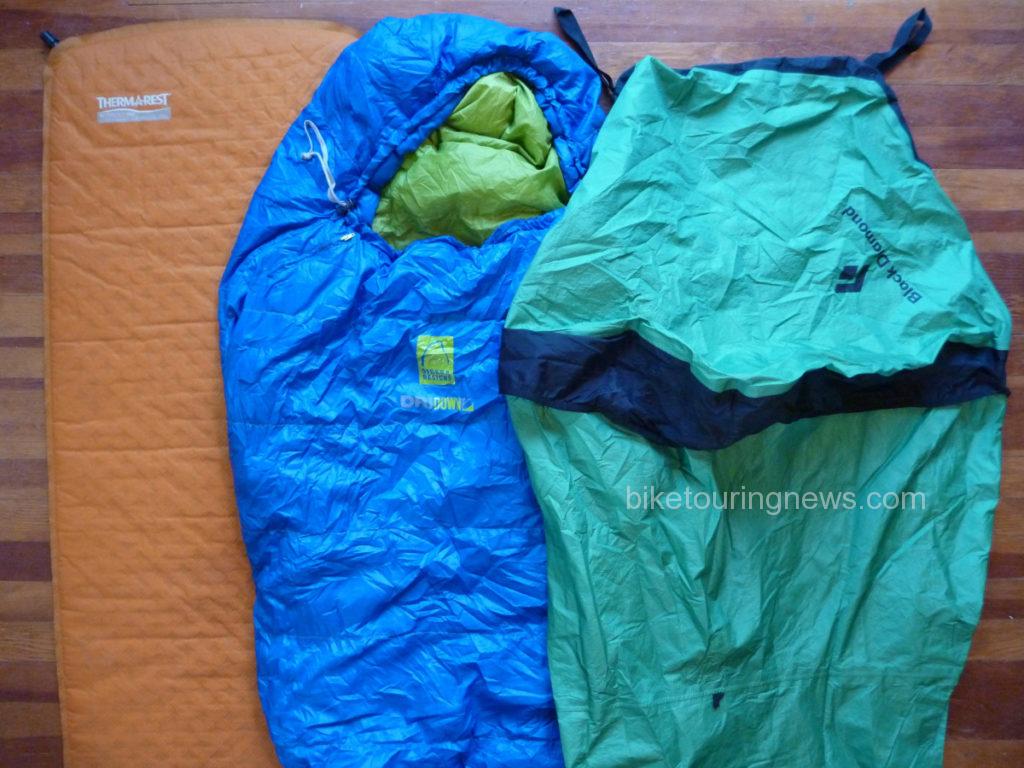
Sleep kit for the 2014 Smoke ‘n’ Fire 400. Simple and reliable.

A good waterproof/breathable fabric is the key to the bivy’s success.  The fabric used in my Black Diamond Bipod Bivy features a fuzzy, nappy surface on the inside, allowing it to absorb moisture and disperse it across a wider area of fabric.  This prevents droplets from forming and speeds moisture transport through the fabric.  I have had some condensation form on the floor panels (made from a different, less breathable material) but never on the upper portion of the bag.  I highly recommend that any bivy you purchase feature similar technology.

Also, consider the volume of your sleeping bag and pad.  You’ll lose the loft and warmth of your sleeping bag by cramming it into an undersized bivy, especially around the foot.  If in doubt, go for a larger size.  This is especially true if you plan to use a thicker, inflatable pad or a winter-weight bag.

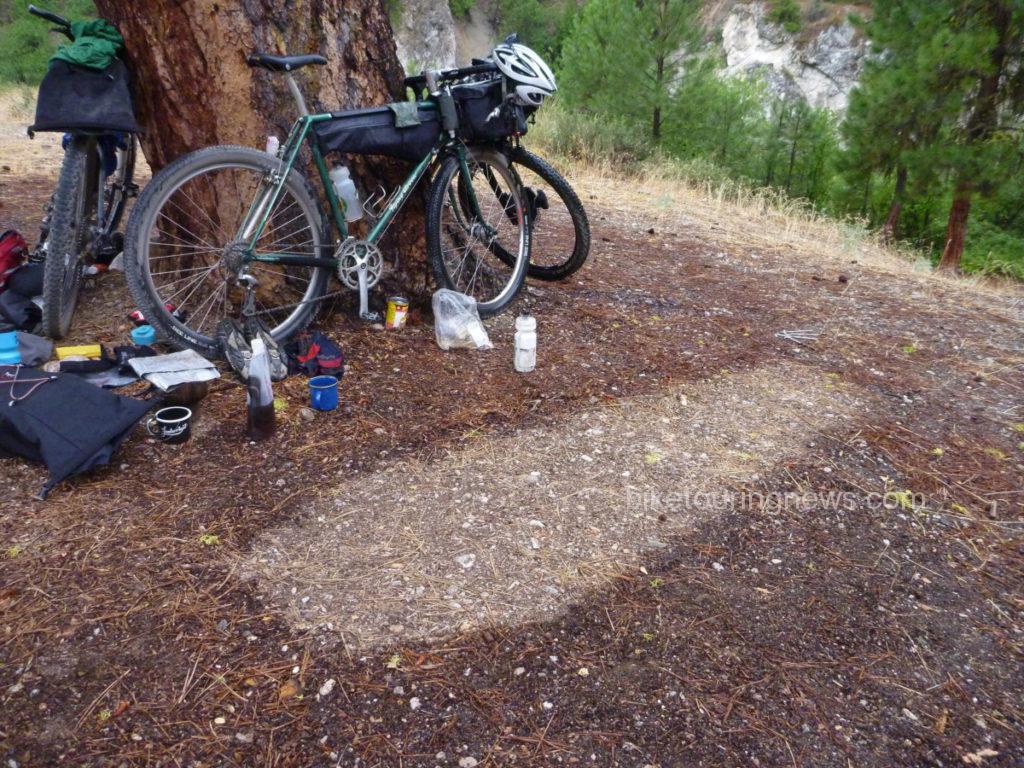
A coffin-shaped rain shadow after a wet night on the Idaho Hot Springs Mountain Bike Route. Should have packed the tarp!

Even with the best breathable fabrics, it is always best to keep any bivy at least partially unzipped to allow moisture to vent out, especially if you’re going to bed wet or attempting to dry wet gear in the bag overnight.  Therefore, it is wise to bring along a tarp to create additional shelter if you expect wet conditions.  A tarp flown over the bivy allows you to leave the head open to vent moisture and prevent claustrophobia.  Nobody likes sleeping in a waterproof coffin (see photo above).  The tarp will also provide shelter for cooking, changing clothes, packing or other camp chores.  I use a simple 8×10′ silnylon tarp that packs to the size of a softball and weighs around 200g.

Pro:

  • Easy Site Selection
  • Ultra-Fast Setup & Takedown
  • Simple Packing
  • Inexpensive
  • View of the Sky!

Con:

  • Claustrophobic When Zipped
  • Minimal Interior Space
  • Condensation Issues
  • Loss of Loft in Sleeping Bag
  • Not Particularly Light

Conclusions

As we’ve learned, every different shelter has its merits and a set of ideal conditions for use.  You should select your bikepacking shelter taking those merits and conditions into account, along with your personal preferences and budget.  Every bike traveler is different, and so is every journey!  We hope this post has provided some guidance and that you’ll have many comfortable, peaceful nights out on your bikepacking trips!

What did we miss?  What shelter(s) do you use and why?  Let’s keep the discussion going in the comments below!  Thanks for reading!

Categories
Bike Touring Equipment Bikepacking The Touring Bicycle Wheel Touring Bicycles Touring Bike Components

The Best Bikepacking Bike Pt. III: Wheels

The stakes are high when traveling far into the backcountry by bicycle.  The potential success or failure of your trip is (literally) riding on your wheels.  A mechanical malfunction at the wrong time can leave you in a very serious situation.  Like teeth, taxes or electricity, your bicycle wheels are easy to ignore when they aren’t causing problems, but can leave you in a world of pain and trouble when things go bad.  Fortunately, most of these kinds of problems can be prevented by choosing appropriate equipment and ensuring it is well-maintained before heading out for a trip.  This is especially true when talking about wheels.

In this post, we’ll discuss what makes a good bikepacking wheel, how to evaluate your current wheels and some points to consider when shopping for new wheels.  Hopefully we’ll be able to help you enjoy your bikepacking adventures with no wheel-related malfunctions!

Reliable wheels are essential when traveling though rough, remote areas.

In general, we think good bikepacking wheels should be durable and reliable above all else.  Gram-saving components will make precious little difference in the ride of your bike when loaded down with 35 pounds of gear and failures are much more than a minor inconvenience when you’re two days from the nearest town.  Fortunately, most truly trail-worthy mountain bike wheels are built to handle pretty rough treatment and won’t suffer greatly under the added stress applied by a loaded bike.  However, many lower-end wheelsets are not built with long-term durability in mind.

Are your wheels ready for bikepacking?  Many stock wheelsets are not.  Bike manufacturers often cut cost on wheels when spec’ing bikes for middle-of-the-curve riders.  Even many high-end bikes are shipped with inferior wheels that don’t hold up to hard riding.  However, it isn’t always easy to tell a high-quality wheel from a cheap look-alike.  In addition, even top-flight wheels can be a liability if they’re nearing the end of their useful life.

There are a few ways to evaluate your wheels for quality and condition, so let’s get into those:

Consider their Service Record

Assuming you’ve put some hard miles on your wheels, perhaps the simplest measure of quality is their service record on the trail.  So, how have your wheels performed so far?  Have they needed regular re-truing?  Have you broken any spokes?  Do the hubs make any funny noises or need repeated bearing adjustments?  If so, you’d be wise to consider repairing or upgrading your wheels before taking off into the woods.  If they’ve taken some abuse with no ill-effects you’re likely to be in good shape.  If you’re unsure about any of these points, a trusted mechanic can help assess your wheels.

However, just because you haven’t had issues yet doesn’t mean they won’t crop up in the future.  The key here is preventative maintenance.  We’ll talk more about that in a bit.  For now, let’s take a closer look at your wheels and see if we can evaluate them for quality and condition.

Check Those Spokes 

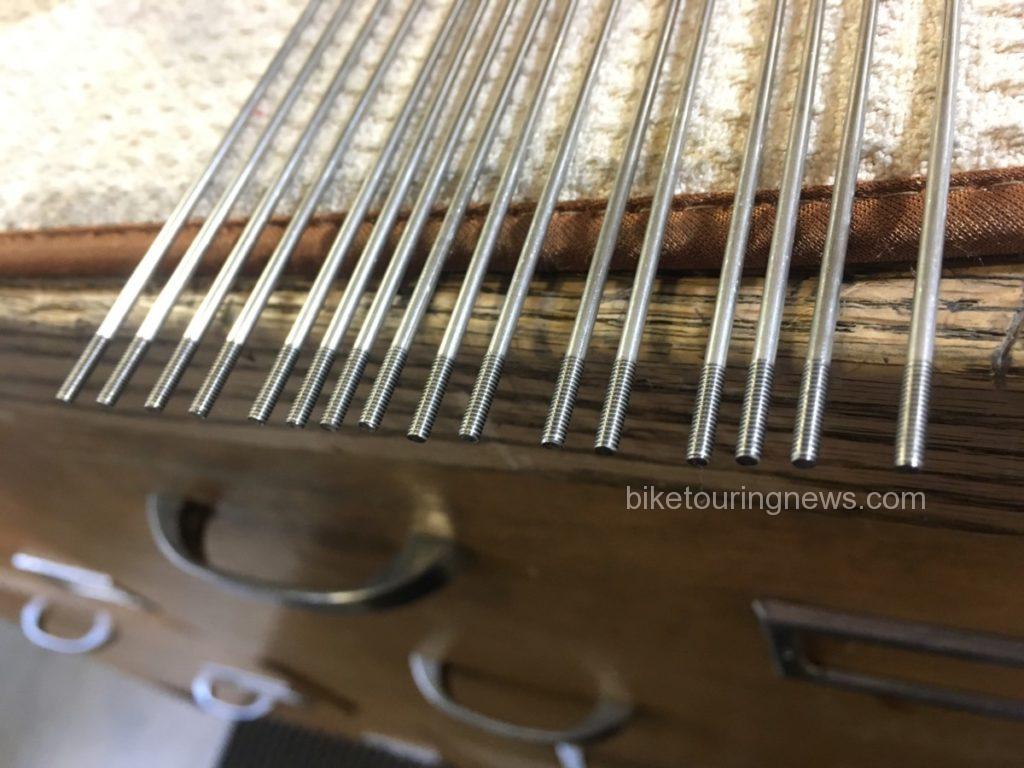
A spoke is a spoke is a spoke, right?  How big of a difference do spokes really make?  Well, imagine if the Golden Gate Bridge was built with suspension cables made from cheap steel to cut cost.  Bicycle wheels and suspension bridges have a lot in common.  Spokes made from poor-quality steel will have a much shorter lifespan and will be prone to breakage.  Quality brands like DT Swiss, Wheelsmith and Sapim mark their spokes, either on the head (DT, Wheelsmith) or just below the j-bend (Sapim).  Cheap spokes will have no mark at all or one of a handful of markings such as a star or uppercase “S” or “N”.  If you’re curious, you can investigate the mark on your spokes using this extra-nerdy Spoke Head Identification website.

Quality spokes from DT Swiss. Their butts are visible if you look closely.

A butted spoke is also a definite indicator of quality.  Butted spokes are tapered in the center and thicker at the ends.  Sometimes the butts will be clearly visible.  If not, you can feel for the taper by grasping the spoke near the nipple with your thumb and forefinger.  Slide your fingers up the spoke and you’ll feel the diameter decrease if your spoke is butted.  A butted spoke distributes stress along that slender center section rather than focusing it at the j-bend or threads, improving durability.  As a happy side effect, they are also lighter.

Regardless of quality, any bent or gouged spokes can cause problems or break prematurely.  Bends typically happen when an object lodges in the wheel as it turns or through impact.  Gouging most often occurs on the drive-side spokes due to the chain shifting over the largest cassette cog.  Cassette removal may be necessary for this inspection.

Inspect Your Rims

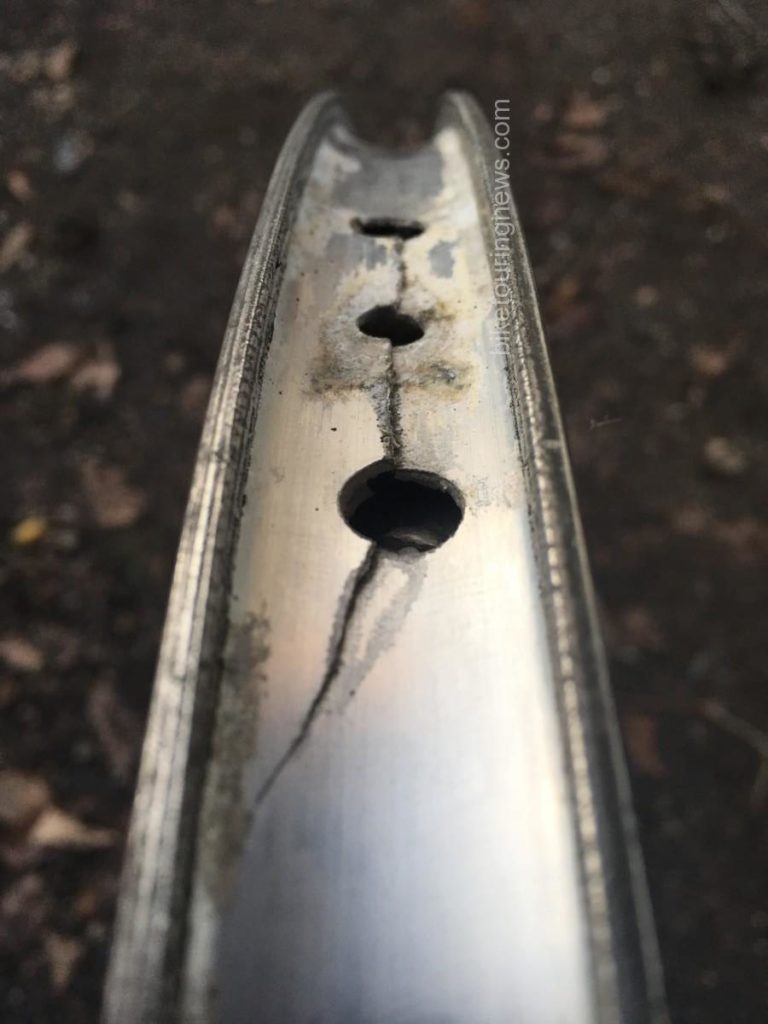
Rim failure can be sneaky!

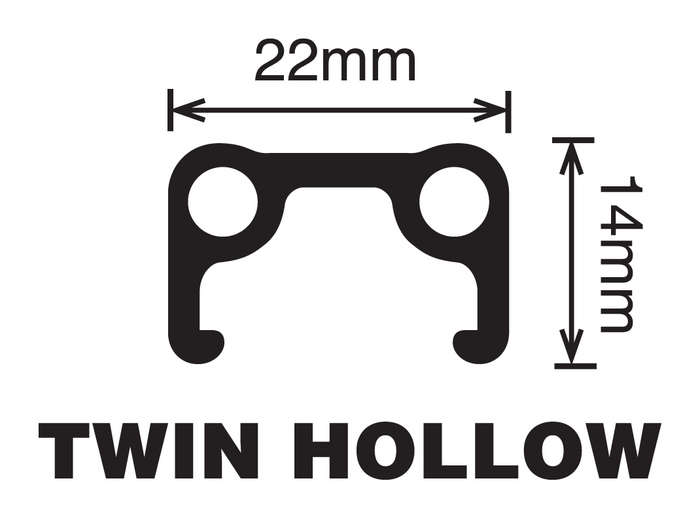
As we discussed in a previous post, single-wall rims are wholly inadequate for bikepacking.  Fortunately, even entry-level mountain bikes typically feature a double-wall rim.  Much like spokes, the quality of a rim can be difficult to assess.  Rim makers such as DT Swiss and Stan’s are at the top of the original equipment game.  WTB and AlexRims are common in the middle of the range.  Fortunately, even many inexpensive rims can hold up to hard riding if kept true and properly tensioned.

Of course, even the best rims will suffer the ill effects of high mileage, hard riding or abuse.  If your rims have any major dents or bends you’d be wise to replace them before a big trip.  Also, check the nipple seat for cracks.  This is a common failure mode on quality wheels that have reached the end of their life.  On a bike with rim brakes, you should also inspect the brake track for excess wear.

Evaluate Your Hubs

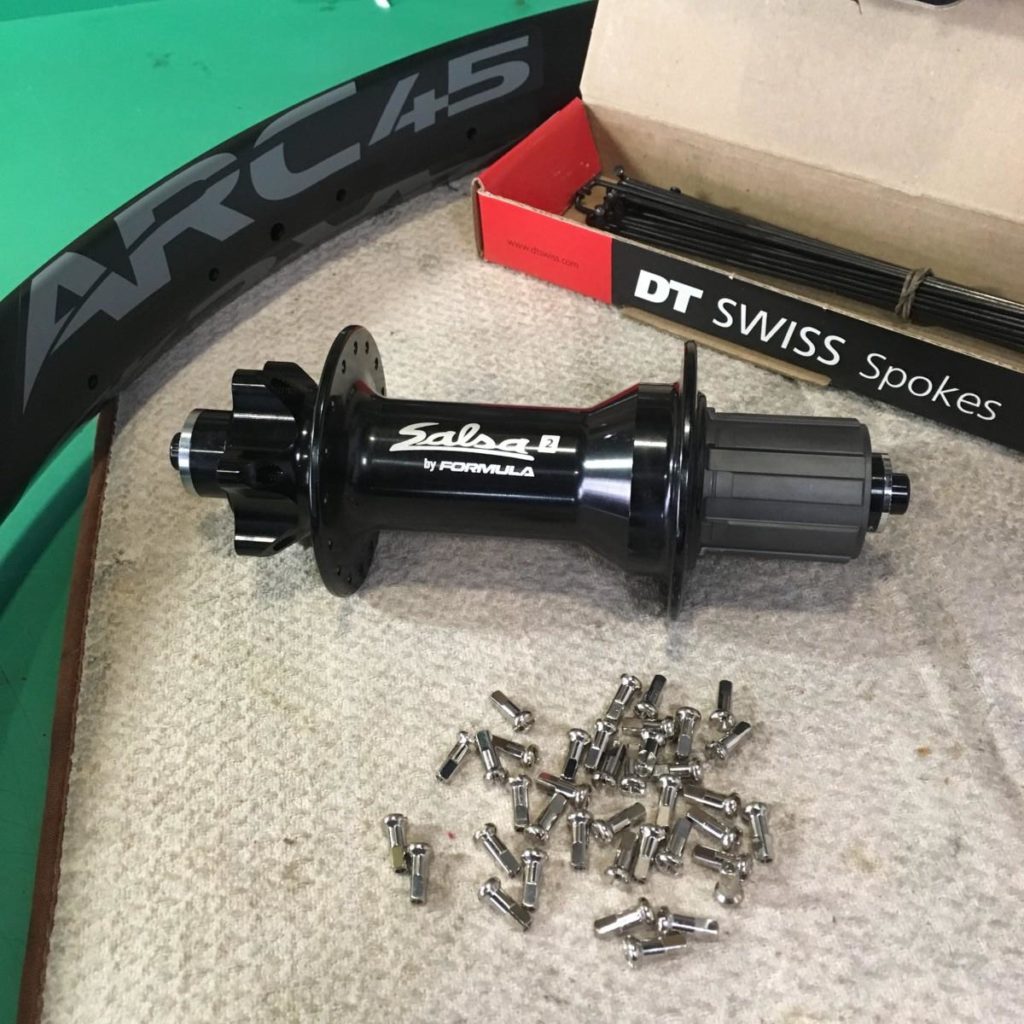
Formula hubs are typically affordable and reliable. They’re common on quality stock wheels and hand-built options.

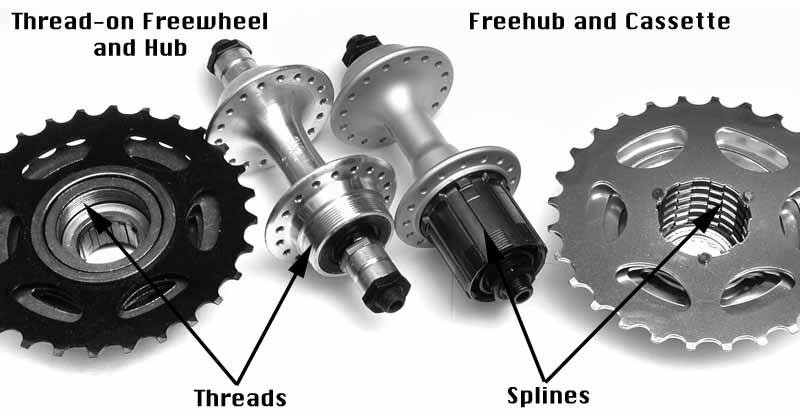
Even inexpensive hubs rarely fail but you’d still be wise to evaluate their condition before heading out.  Is there play in the bearings?  Try to push the wheel side-to-side while clamped in your frame or fork.  Do you feel any knocking or play?  Remove the wheel and turn the axle end by hand.  Do the bearings feel rough when you turn the axles?  Does your freehub make odd noises when coasting or fail to engage when you start pedaling?  If your hubs exhibit any of these signs you’d be wise to service them before hitting the trail.

Steer Clear of “Wheel Systems”

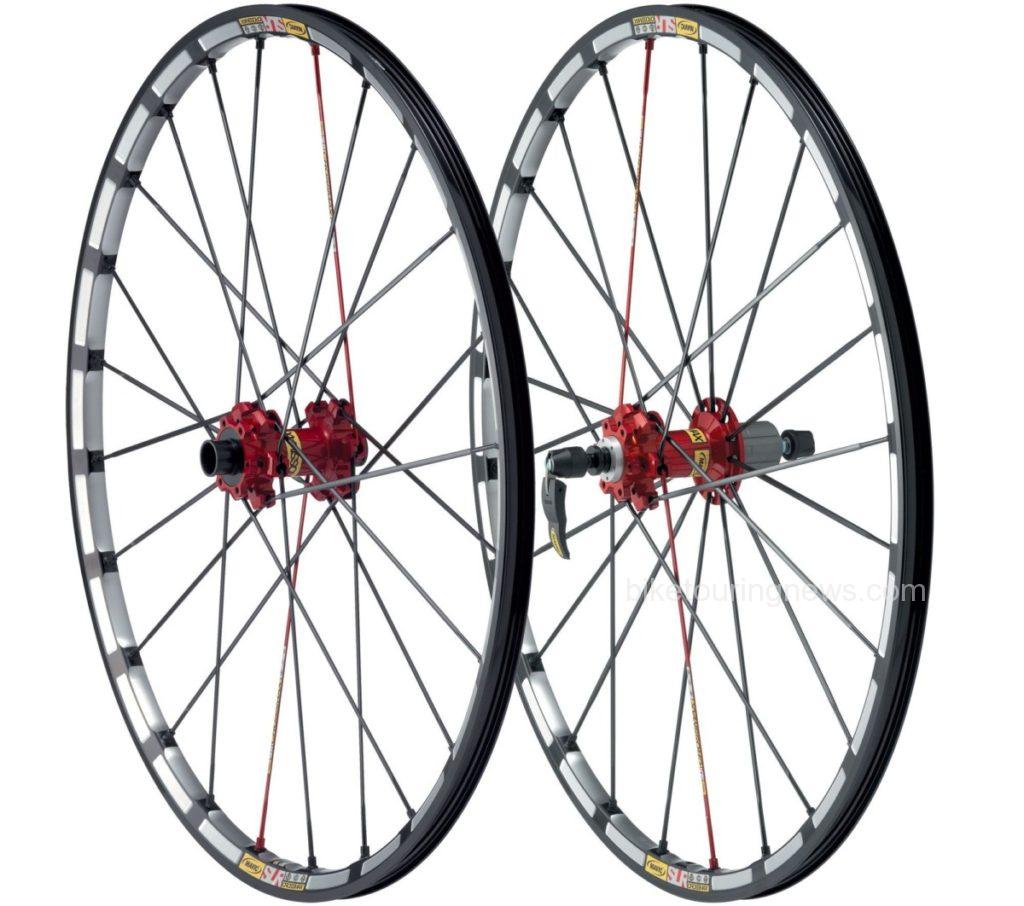
Wheel Systems may look fast and flashy but sacrifice reliability and serviceability.

We have seen a nearly infinite number of departures from the traditionally-spoked design as manufacturers continue to reinvent the bicycle wheel.  Some of these variations may offer a performance benefit for competitive cyclists.  Most simply want to stand out from the crowd and appear unique.  Regardless of the result, they accomplish this at the expense of durability and serviceability.  You may be wise to consider a replacement if your wheels have fewer than 28 spokes, nipples that aren’t square or spokes that aren’t made of stainless steel with a j-bend at the hub.  Fortunately, most bike makers are using more traditional wheels on their mountain bikes these days.

Preventative Maintenance is Key! 

Assuming your wheels pass the test above, you’ll want to make sure they’re in the best possible shape before you head out for your trip.  Wheels that are properly trued and tensioned will be much less likely to go out of true or break spokes.  Hubs that are properly adjusted and lubricated will very rarely fail, even under demanding conditions.  If you’re not a top-flight home mechanic you may want to leave this job to a professional.  A skilled mechanic will also be able to update you on the condition of your wheels and help you make preventative repairs to avoid untimely failures.

Need an Upgrade?  Go Hand Built!  

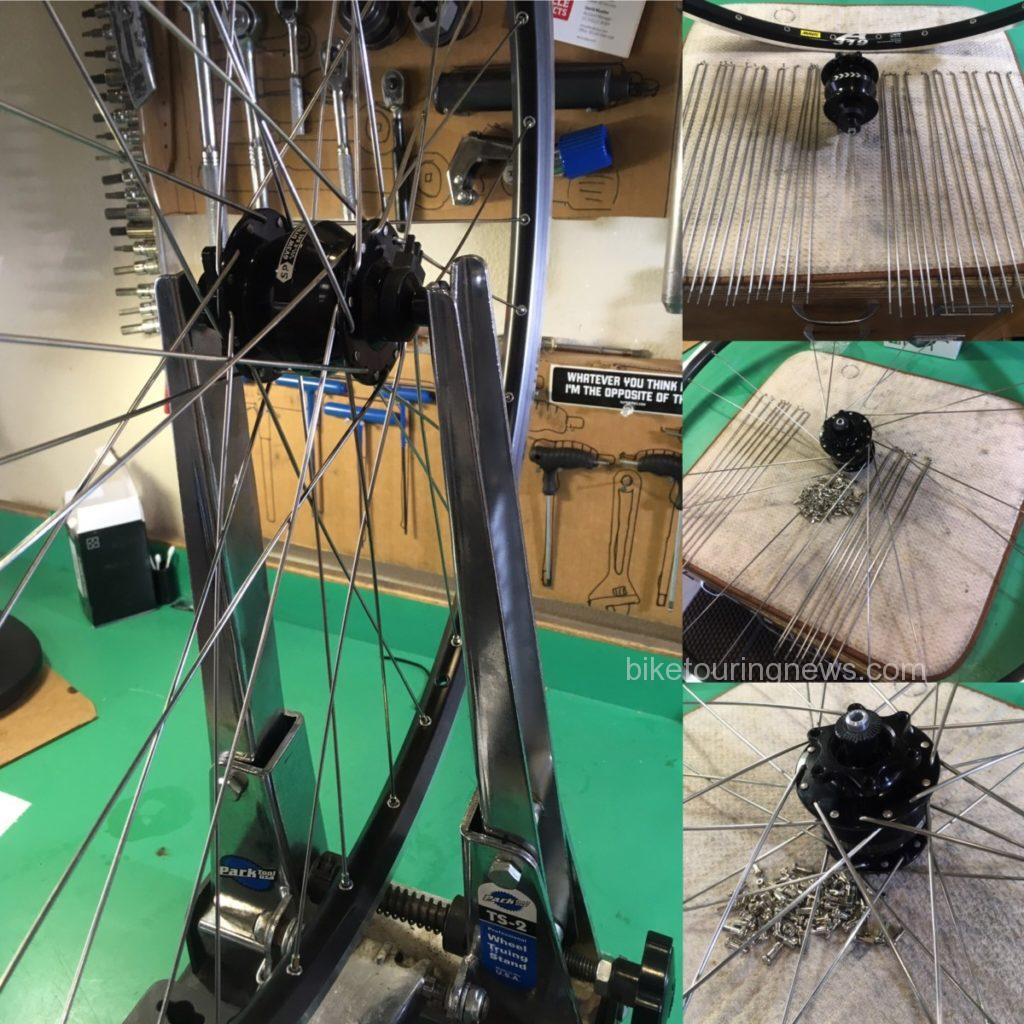
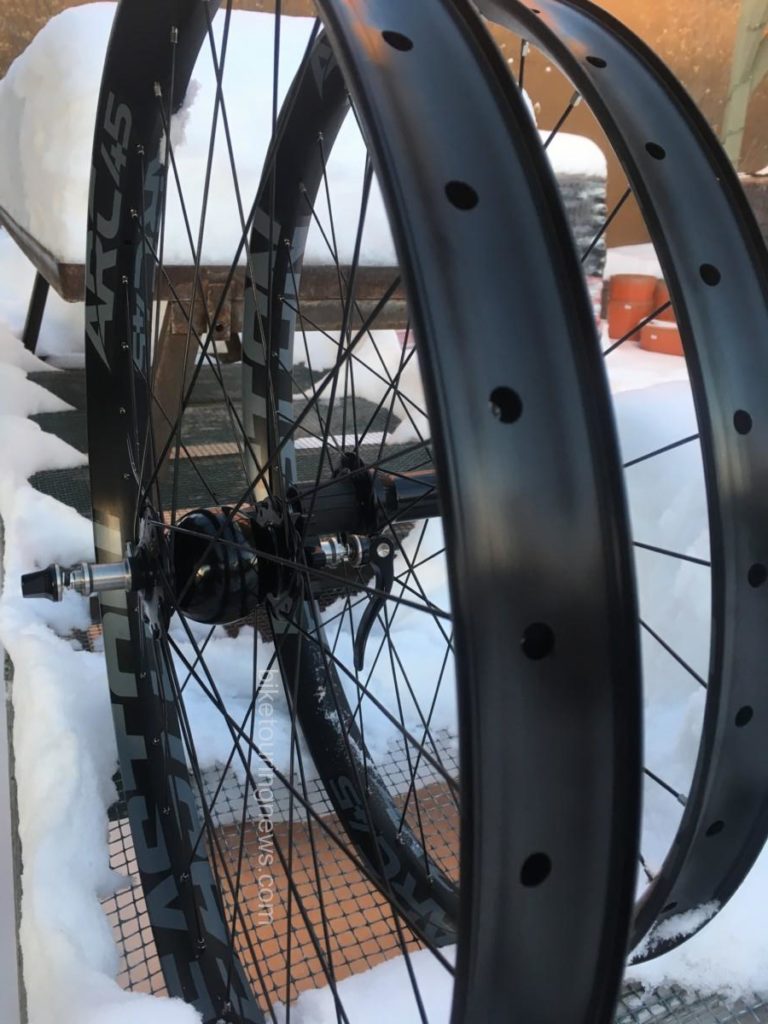
A front wheel comes together in the Bike Touring News workshop.

If your wheels aren’t up to the task or if you’re just looking for an upgrade you’d be well-advised to go hand built.  Unless finished by a skilled wheel builder, machine-built wheels are often undertensioned and tend to need repeated truing even if they are built with quality components.  A hand built wheel allows you the choice of components specific to your application and the ability to customize to your heart’s content.  A good wheel builder will also build to precise, even spoke tension and take steps to remove the stresses that cause wheels to go out of true, resulting in a very durable, reliable wheel built specifically for your riding style and intended use.  They don’t have to be expensive either.  Our prices for hand built wheelsets typically start around $300 and go up from there depending on options.  We build a large number of bikepacking wheels here at Bike Touring News and would love to talk with you about your dream hoops!

If you’re considering a new wheelset, think about incorporating a dynamo hub into the build.  The benefits of dynamo lighting and charging are massive, even if you don’t expect to do a great deal of riding after dark.  With a dynamo light you’ll never have to worry about charging or replacing batteries or leaving your light behind.  If you’re traveling off the grid and need to charge electronics, there are a also a variety of USB charging options powered by your dynamo.  That front wheel is already turning over; why not put it to work?  We offer a wide range of hubs, lights and chargers for every budget and application but that is a subject for another post!

Hand built and dynamo equipped! These 27.5+ wheels are ready for anything!

It is difficult to understate the value of solid, reliable wheels for bikepacking.  Good wheels are the best upgrade you can possibly make and are worth their weight in gold.  We hope you’re feeling better equipped to evaluate your current wheelset or consider what you may look for in an upgrade.  As always, feel free to drop us a comment to ask a question or share your experience.  Have you ever had a bike trip hijacked by wheel problems?  What qualities do you look for in a good wheel?

Thanks for reading and keep on pedaling!

Categories
Bags/Panniers/Racks Bike Touring Equipment Bikepacking Frame Bags Touring Bike Accessories

The Best Bikepacking Bike Part II: Luggage

Author’s Note:  This post has been revised and updated as of January 9, 2017.  It was published in its original format on March 20, 2015.

By now, hopefully you’ve had time to digest our introductory post and are ready to start equipping your mountain bike for bikepacking!  The best bike in the world won’t do you much good if you can’t carry the things you need to survive and thrive when you’re out on the trail for days at a time, so lets dig into the world of luggage for carrying those essentials.  In this post, we’ll go over the various brands and styles of bikepacking bags we carry at Bike Touring News and help you decide which will fit your bike and needs.

Photo by Howard Draper
A full complement of Revelate Designs bikepacking gear fitted to a Salsa 29er on the Idaho Hot Springs Mountain Bike Route.
Photo by Howard Draper/@Howrad

Our Brands

Bike Touring News carries bikepacking gear from Revelate Designs, Apidura and Ortlieb, along with a handful of others.  There are many other makers of quality gear out there but most are cottage industries making bags on a small scale for individual customers.  There is a time and place where custom or DIY bags make sense but all three of these brands offer top-quality gear at reasonable prices without a long waiting list.  They each have their own approach and offer products optimized for certain conditions.  We’ll cover the range and help you make sense of it all.

The author's rig near the finish of the Smoke 'n' Fire 400, sporting a rack mounted handlebar bag alongside Revelate's Viscacha seat bag and Mountain FeedBag. Photo by Ryan King
The author’s rig near the finish of the 2014 Smoke ‘n’ Fire 400.
Photo by Ryan King/@Bobby.Buttons

The Bikepacking Triad

The three cornerstones of any bikepacking setup are pretty clearly established.  They are the Frame Bag, Handlebar Pack and Seat Pack.  It is pretty easy to imagine where each one goes, right?  Good.  There are also various add-on or accessory bags to extend carrying capacity.  We’ll go over those as well.  Let’s get into it!

Frame Bags

Revelate Viscacha, Ranger Bag and Sweetroll on a Kona 29er. photo by Jason Britton/Velograph
Revelate Viscacha, Ranger Bag and Sweetroll on a Kona 29er.
photo by Jason Britton/@Velograph

The frame bag takes advantage of the space inside your frame’s front triangle.  Because of its central location, this is an ideal place to carry heavier items like your cookset, food, tools and spares, water transport and filtration supplies, first aid kit, etc.  Most frame bags feature a top zipper located just below the top tube of your frame, so they also are well-suited for carrying items you’ll need easy access to while in motion such as ride food, spare layers, camera, phone, maps, sunglasses, fermented/distilled beverages, etc.  All but the very smallest can accommodate a 2 or 3-liter hydration bladder and have a built-in port for the drinking hose to exit.  Strap one on and leave the hydration pack behind!

How do I know which bag fits my bike? 

The process is easy if you own a Surly!  We carry Revelate’s line of co-branded bags for Surly’s mountain and fat bikes!  Reference the chart on the product page to find your bike and the corresponding frame bag.  Easy enough.  But what about your Cross-Check or Straggler?  We’ve got you covered there also; just pick your frame size.  Even though they have a Surly logo on them, these co-branded bags will fit lots of other frames as well.  Check out the complete dimensional fit charts for the Straggle-Check bags and Mountain bags on Surly’s site.

In addition to the co-branded bags, we stock Revelate’s generic Ranger Bags that fit a wide variety of bikes.  They share features with the Surly-specific bags but come in four standard sizes and carry only Revelate logos.  Reference the fit chart on the product page to find the best fit for your frame.

PRO TIP:  If in doubt or in-between sizes, go for the smaller size!  Most frame bags feature fairly long straps to accommodate a range of frame shapes.  You’d rather have a tightly drawn bag than a saggy, floppy one.

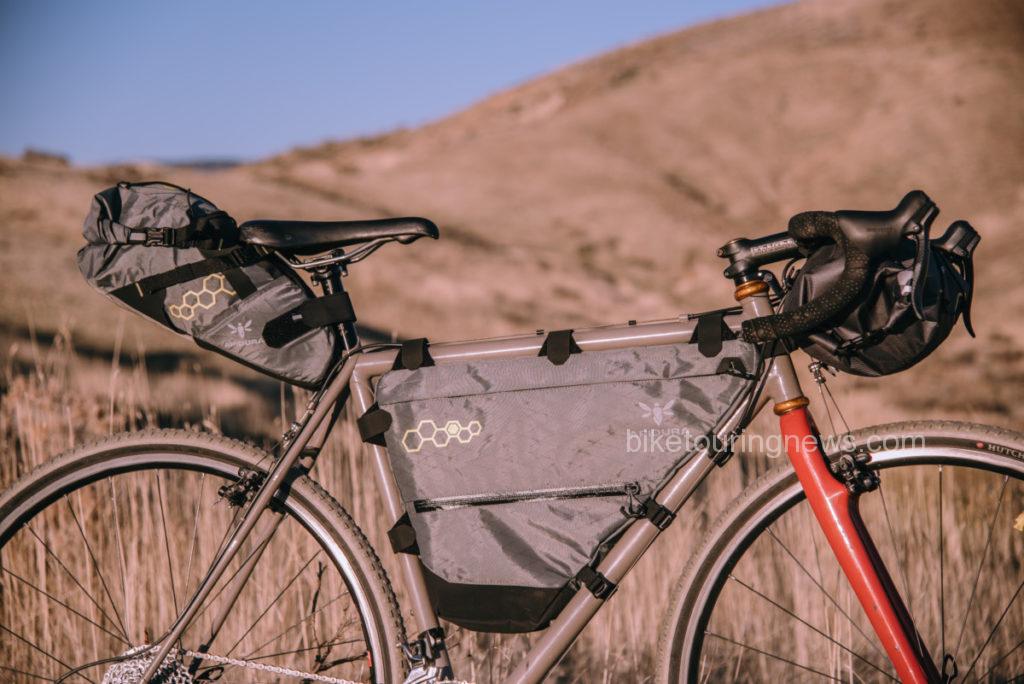
Apidura Bikepacking Kit
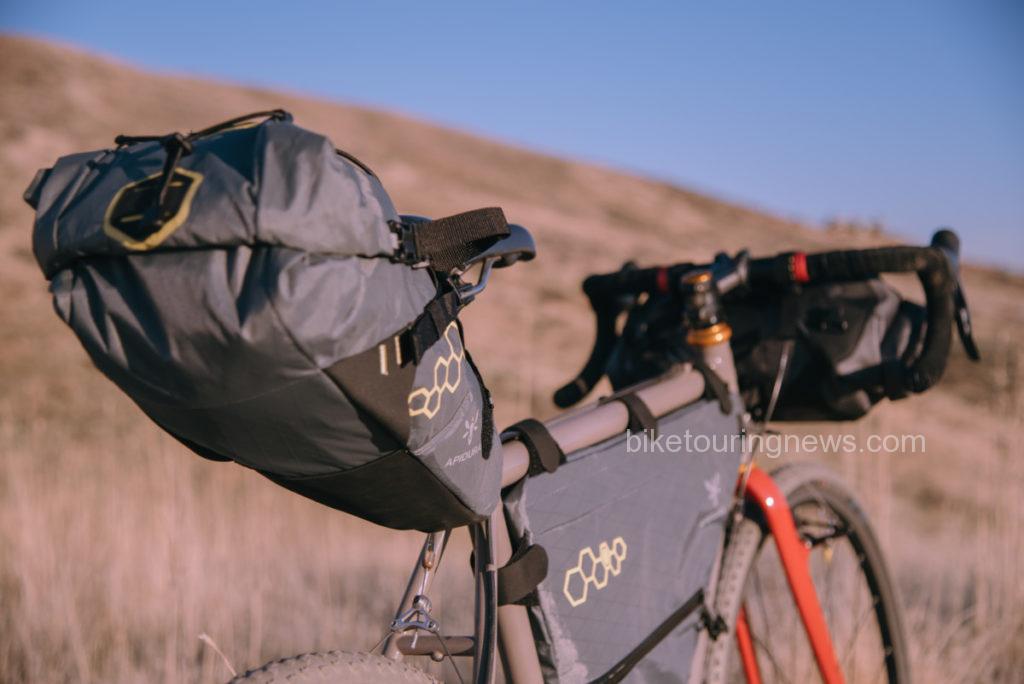
Apidura Bikepacking Kit on a Cyclocross bike.  Photo by @NiclasKrake

We also carry frame bags from Apidura.  Their offerings are best suited to road or cyclocross bikes with slightly sloping top tubes rather than the ultra-compact frames found on most mountain bikes.  Their frame bag comes in three sizes and features a more minimalist, low-profile design with some nice details and high-quality materials.  They are a great choice for those looking to travel light and fast.

Half-frame bags can be a good alternative for riders looking to retain the use of one or more water bottle cages on their frame.  These smaller bags will also fit a wider variety of frames, including many full-suspension models.  Revelate’s Tangle Bag is our pick in this category.  Three sizes, burly construction, cut and sewn in the USA.  What more do you want?
All of the frame bags we have discussed are considered water resistant.  They are all constructed with materials that will not absorb water but moisture can still enter through the sewn seams in seriously wet conditions.  These bags have been proven to shrug off anything short of a monsoon but we still recommend that you use waterproof dry bags inside your frame bag for anything that must be kept absolutely dry.  They are also useful for organization!

NOTE:  Ortlieb plans to release their fully waterproof frame bag line in February of 2017.  We’ll update this post when they arrive.  Keep an eye on our Facebook, Twitter and Instagram for the most current information.

Seat Packs

We carry a few different flavors of seat packs but they are all perfect for carrying compressible items like sleeping bags, shelters, spare layers, etc.  Most also have external shock cords or lash points for overflow storage.  They vary in size, construction and water resistance.

Revelate Viscacha on a #BikeFishing day ride. Photo by Ryan King/@Bobby.Buttons

How do I choose a Seat Pack?

I’m glad you asked!  Seat packs are great because the fit is nearly universal, making them easy to move from bike to bike.  There are a few limiting factors.  The big one is tire clearance.  If there isn’t enough space between your saddle rails and rear tire (a common problem on bikes with big wheels and small frames) the bag can bump and rub on the tire.  You’d be amazed how fast you’ll wear a hole right through your bag and its contents in this situation!  Give yourself some breathing room so that your bag will never contact the tire, even if overloaded or sagging.  Riding full-suspension?  Make sure you measure your clearance with the suspension fully compressed!

The second consideration is the length of exposed seatpost.  This is less critical and can be fudged a bit within reason.  For example, Revelate recommends at least 5″ of exposed seatpost for their Viscacha.  I only have about 4″ of exposed post on the bike pictured above and it still fits fine.  If in doubt, stick to the maker’s recommendations.  Fit considerations aside, let’s take a look at the various seat packs we carry.
Revelate’s Viscacha was the first widely-available bikepacking seat pack.  A few improvements have been made to the design over the years but the essentials remain.  This pack will always be hard to beat if you have the 9.5″ of clearance required.   It carries up to 14L but easily compresses down to less than half that volume for smaller loads.
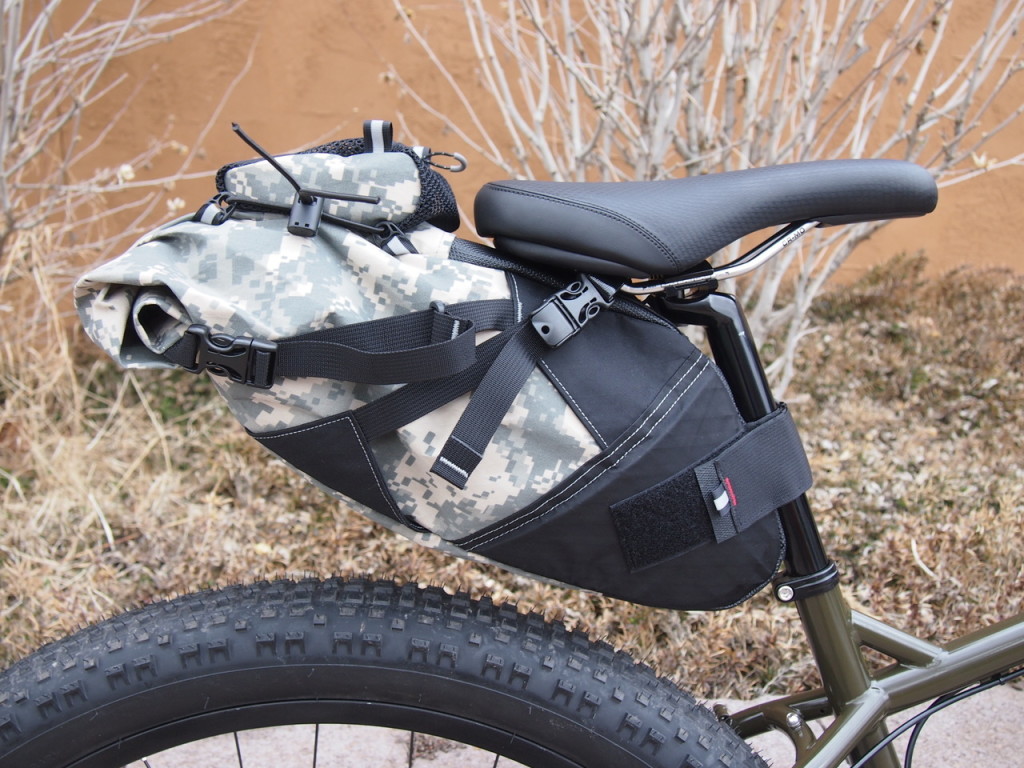
Revelate Viscacha in digital camo with matching Spocket. Photo by the Bike Hermit
Revelate Viscacha in digital camo with matching Spocket.
Photo by the Bike Hermit

The Pika is nearly identical to the Viscacha but is smaller in girth, requiring only 8″ of clearance.  However, it only sacrifices 2L of capacity.  This makes it ideal for minimalist packers or for smaller frames with slightly less tire clearance and exposed seatpost.

Apidura’s Seat Pack shares many features with the Viscacha and Pika but has a couple of features that set it apart.  One nice addition is the series of taillight loops on the rear of the pack.  A loop should be available at any point in the range of compression.  Apidura’s offering is also available in three sizes: 17L, 14L and 11L so riders can choose the bag appropriate for their bike and needs.  Minimum clearances are listed on the product page.
Apidura Saddle Pack
Apidura Saddle Pack.  Photo by @NiclasKrake.

So far all of the seatpacks we’ve covered fall into the “water-resistant” category.  We also carry a couple of designs that are fully waterproof.  A waterproof seat pack is great in wet climates or for extra insurance in changeable conditions.  Down jackets and sleeping bags especially benefit from this extra level of protection.

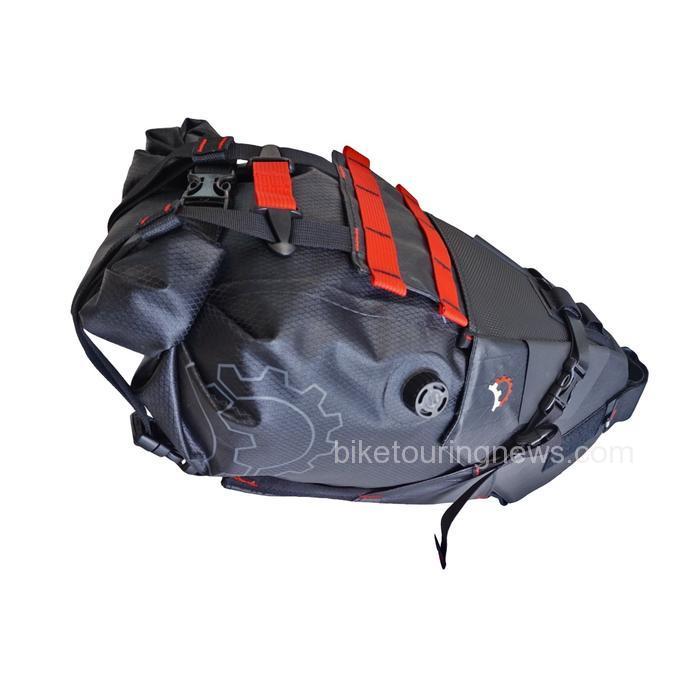
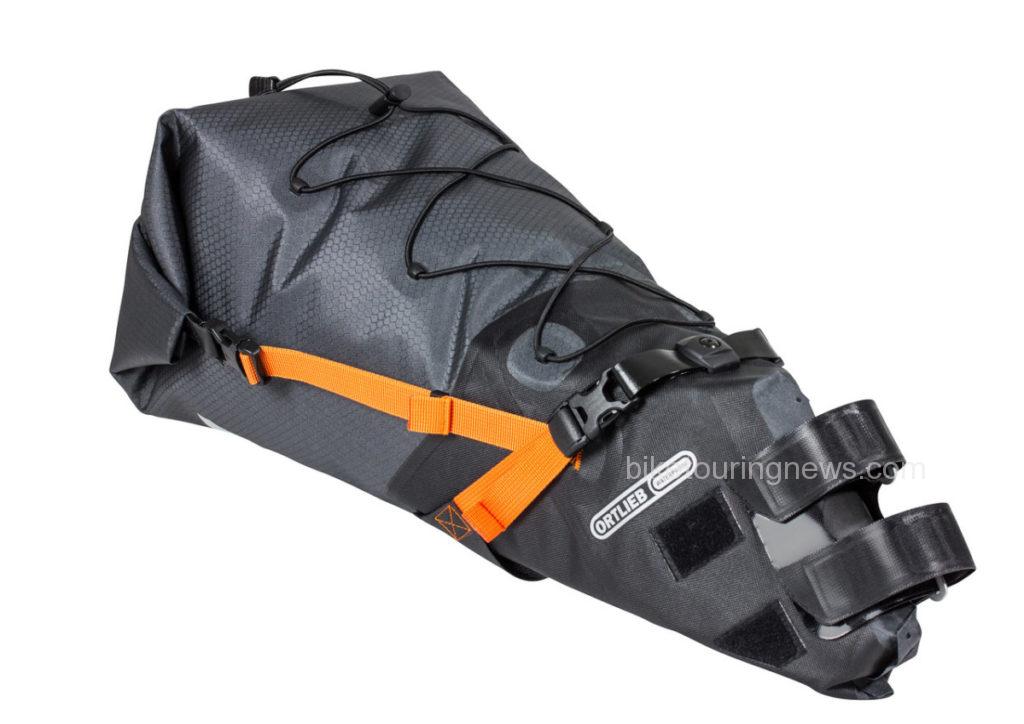
Revelate’s Terrapin is an evolution from the Viscacha that separates the bag from the strapping and compression system.  Basically, it is an underseat harness designed to hold a separate drybag.  This two-part system has a few advantages over the Viscacha or Pika.  First, the drybag is fully sealed and waterproof where the Viscacha/Pika is highly water-resistant but is not seam sealed.  Also, the Terrapin is easier to pack and unpack since the drybag can be removed without unstrapping the harness from your bike.  Daisy chain webbing on the harness provides a perfect place to attach a SPOT tracker or other accessories.  The bridge of webbing between the straps can be used for taillight mounting and the drybag incorporates a one-way valve to purge excess air.  The Terrapin harness and drybag are also available separately.  revelateterripinsystem__23529-1474062287-1280-1280Ortlieb is a relative newcomer to the bikepacking game but they certainly know a thing or two about waterproof gear.  They took their time designing their seat pack and it shows.  This bag is definitely on the large side with a 16.5L capacity.  It also incorporates an internal aluminum frame at the saddle rail and seatpost attachment points for added anti-sway stability.  This is a helpful feature as the bag has a pronounced cone shape, placing more weight farther behind the saddle.  Similar to the Apidura, Ortlieb incorporates a series of light attachment points on the rolling closure, along with reflective patches.  Add in the extra-long section of criss-crossing shock cord and air purge valve and you have the most fully-featured one-piece seat pack we carry.  Ortlieb doesn’t list a minimum tire clearance.  Instead, they ask for 14cm (5.5in) of exposed post.  Given the more rigid nature of this bag, any bike with that much post should have plenty of clearance but it is best to check the fit first.

ortliebseatpack

Handlebar Pack

To balance your load and maintain equilibrium, your handlebar roll is the last key component in your bikepacking setup.  The handlebars are a great place to carry your shelter, sleeping bag, sleep pad, tent poles and other rollable or compressible items.  Most of the handlebar setups that we sell also provide a large amount of flexible strapping space for things like fishing rod tubes, trekking poles, firewood, etc.

How do I choose a Handlebar Pack? 

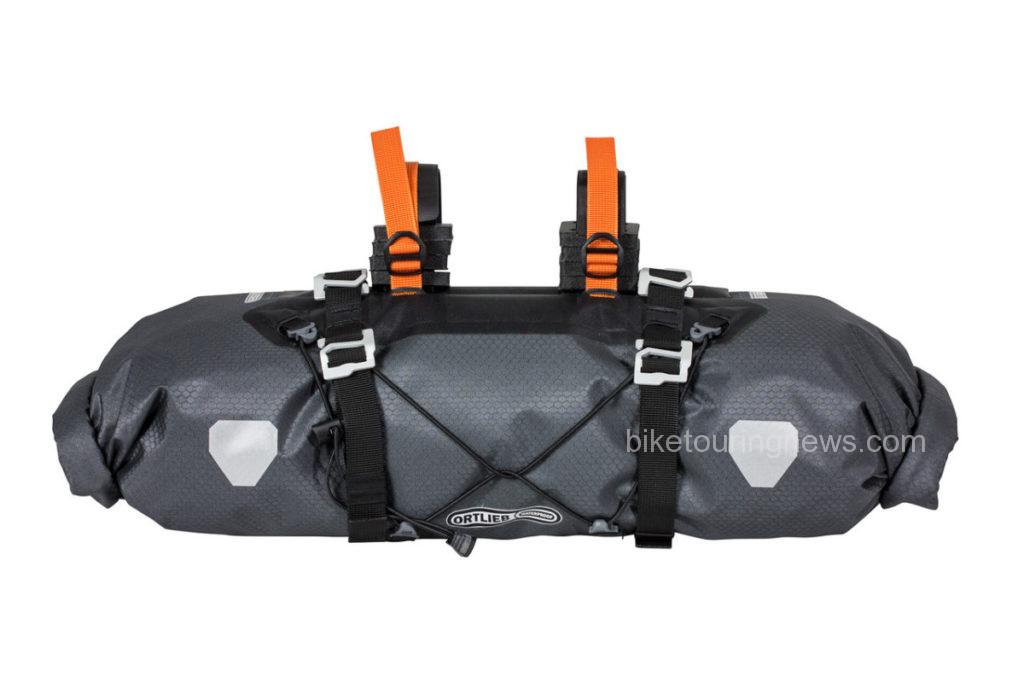
Similar to the seat packs, the big limiting factor here is tire clearance.  You want to be certain that your front tire will never come into contact with your handlebar pack, especially if you’re using a thin, lightweight dry bag.  Again, be sure to take suspension travel into account!  The best way to be sure you’re getting a proper fit is to test the bag on your bike.  If that isn’t possible, measure from the bottom of your handlebars to the closest point on your tire.  You’ll want a bag at least 2″ smaller in diameter than that measurement.  Don’t forget to account for the thickness of any spacer blocks or pads!  We typically recommend using the smallest handlebar pack you can get away with to reduce handling impact and clearance concerns.  Need more assistance?  Don’t hesitate to give us a call, email or drop a comment below.   Fit concerns aside, let’s look at some gear!

Revelate’s Handlebar Harness is a simple and versatile “soft rack” for carrying a dry bag on your handlebars.  It attaches to the bars using nylon webbing and heavy-duty rubber spacer blocks to space the bag away from the bars and prevent kinking of your brake and shift cables.  Dry bags up to 20 liters can be secured with the three compression straps but Revelate lists a 15-pound weight limit.  For the price, you’d be hard-pressed to find a more versatile handlebar system.

Revelate Handlebar Harness

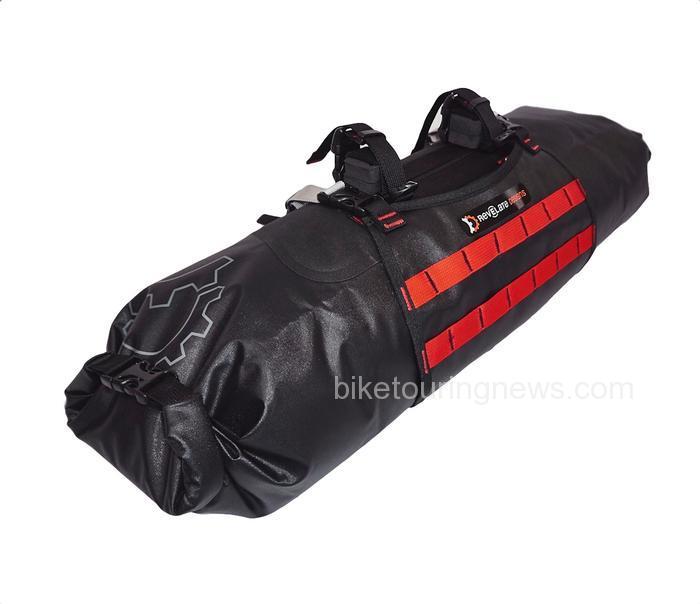
The new-and-improved Sweetroll is an evolved version of Revelate’s handlebar harness that integrates the dry bag into the handlebar attachment for added simplicity and reduced weight.   The latest version uses RF-welded seams for long-term waterproofness compared to sewn-and-sealed seams.  The dual-roll design allows easy packing and centering of the load while the compression flap provides additional security and a place to strap extra cargo.  Have a set of Jones Loop H-Bars on your bike?  We have a special Loop Bar buckle kit that creates two additional attachment points to the handlebar for added security and extra spacing away from your bike’s head tube.  The Sweetroll comes in three sizes: small, medium and large.  The length of the dry bag is the same; they only vary in diameter.  Click through to the product page for dimensions.
reelatedesignswaterproofsweetroll__83841-1482882258-1280-1280

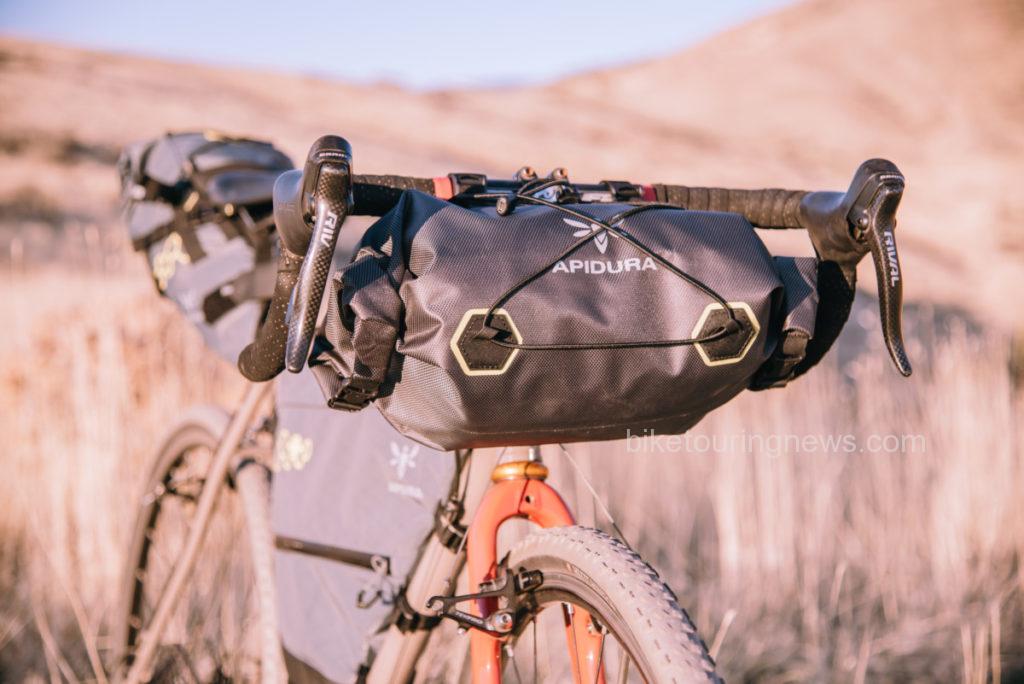
Apidura also has solid bar-mounted options.  Like their other products, their handlebar packs are simple, lightweight and thoughfully detailed.  They offer four different handlebar packs, differing on size and construction.  The water-resistant version comes in a Regular 20L size or a “Compact” 9L version.  The 20L size is especially useful on drop bar bikes.  The “Dry” option is available in a Regular 14L or Compact 9L.  The dry versions feature a cleverly hidden air purge valve for easy compression.  All four feature a criss-crossing shock cord for extra storage and reflective details for visibility.
Waterproof Handlebar Pack
14L Dry Handlebar Pack from Apidura

Like their seat pack, Ortlieb’s handlebar pack is thoroughly engineered and especially secure.  Dual straps and adjustable foam spacers secure the bag to your handlebars and a pair of compression straps lock down the load or secure overflow gear.  15L capacity is on the large side and the welded construction is rock solid.  This bag is especially appealing for shoulder season trips where additional gear and weather protection will come in handy.

ortlieb-handlebar-pack

Salsa’s EXP Anything Cradle is a new addition to our offerings and takes a very different approach.  This is a very “rack-like” handlebar packing system designed to carry a separate dry bag.  Two hinged aluminum clamps secure the cradle to your handlebars and provide plenty of standoff to prevent kinking hoses or cables.  The complete kit comes with 15L double-roll dry bag and two webbing straps.

anythingcradle

Conclusions

Hopefully you’re feeling a little more comfortable choosing bikepacking bags for your bike!  Overall, fit is the most important factor here.  If your bags don’t fit your bike well, they won’t perform well!  Feel free to give us a call, email or comment if you have questions about fitting bikepacking bags to your bike!

Stay tuned for the next installment of this series, coming soon!  Don’t forget to follow us on Facebook, Twitter and Instagram (@BikeTouringNews) for all the latest updates!  Thanks for reading!

Categories
Bike Touring Equipment Bike Touring Tips Bikepacking Touring Bicycles Touring Bike Components

The Best Bikepacking Bike is the One you Already Own: Part I

Author’s Note:  This post was updated on Dec. 29, 2016.  It was originally published on Feb. 20, 2015.

As interest in bikepacking and off-road bicycle travel continues to grow, many bike makers are offering machines that claim to be optimized for the task. We should know, as Surly’s line is full of bikes like the ECR, Ogre, Troll and Karate Monkey that are ideal vehicles for pedal-powered exploration. This level of specialization in bicycles can be a good thing but it also leaves many would-be bikepackers on the sidelines because they think they need a whole new bicycle to participate. While a shiny new bike can certainly make things easier and provide good motivation to get out and ride, you may discover that the best bikepacking bike is the one you already own.

With a few simple modifications or additions, any good-quality mountain bike can carry you and your gear into the backcountry. In this series of blog posts, we’ll guide you through the process and detail a few key points to consider when evaluating, upgrading and modifying your bike into a two-wheeled adventure steed that will take you places you never thought you could go.Especially since many key pieces of equipment  (bags, lights, etc.) won’t come with any new bike, modifying the bike you already own can be a much more cost-effective path of entry.

In this post, we’ll take a look at the key qualities that good bikepacking bikes share and see if your bike fits the bill. A comfortable, durable, mechanically-sound bicycle is critical. The consequences of an ill-timed breakdown or failure can be quite serious when venturing far from home, so these are very important considerations. Assuming you own a mountain bike of some kind, wheel that thing in here and let’s have a look.

Evaluating your Bike for Trail-Worthiness

Before heading into the backcountry or sinking lots of money into expensive upgrades, you would be well advised to be sure your bike is up for the task. There is a certain standard of trail-worthiness that not all mountain bikes meet. This is mainly a question of reliability. Off-road riding is hard on equipment and many inexpensive, “entry-level” mountain bikes are built with more casual riding in mind.

7598636072_d5d553779d_z
Two trail-worthy mountain bikes, ripe for a bikepacking conversion. Photo by the author.

So, how do you know if your bike is trail worthy? If you purchased your bike at a bike shop and are already riding it regularly on singletrack with few mechanical issues you’re probably in good shape. If you bought your bike somewhere other than a specialty bicycle retailer your chances aren’t so hot. Bikes sold in many sporting goods and department stores are cheap for a reason and don’t typically hold up well when ridden often, especially off-road.

magna
Department store mountain bikes are not a good option.

However, even many top-quality mountain bikes don’t make great bikepacking bikes. So, let’s dig into some of the nuances that set a potential bikepacking rig apart from the rest. Your bike doesn’t have to meet all of these criteria to work well but you’ll be more likely to enjoy the experience if you have most of these boxes checked.

What Makes a Good Bikepacking Bike?

Comfortable Riding Position

HowardandAlanIHSMTB
Two riders pedaling comfortably on the Idaho Hot Springs MTB Route. Photo by the author.

This is perhaps the most important consideration that we’ll discuss but also the most potentially challenging to get right. When you’re on the bike for hours at a time for days in a row, any potential source of discomfort can lead to frustrating pain or a debilitating injury. Other than employing the help of a skilled bicycle fit professional, the only way to know if you’ll encounter comfort issues is to put in the hours riding your bike. If you’re preparing for bikepacking you’ll want to do plenty of preparatory rides anyway, so listen carefully to your body for signs of problems as you ramp up the miles. A comfortable saddle and handlebar in the proper position are key elements in this equation. We’ll get deeper into fit issues in future posts. Assuming that you have a properly sized frame that you can ride comfortably, let’s take a look at some of the nuts and bolts of your bike.

Front Suspension or None at All

While full-suspension mountain bikes are becoming more common across all categories, they are often less than ideal for bikepacking on anything other than the roughest and most technical of routes. Suspension pivots and shock mounts take up valuable space in the front triangle, making frame bags difficult if not impossible to mount. All those moving parts also require regular maintenance and are often impossible to service in the field. You’d rather not be a hundred miles from the nearest bike shop when your rear shock blows a seal and stops holding air.

A suspension fork takes the edge off the rugged singletrack on the Idaho Hot Springs Mountain Bike Route.
A suspension fork takes the edge off the rugged singletrack on the Idaho Hot Springs Mountain Bike Route. Photo by the author.

A suspension fork can be valuable if your route includes a good deal of rough terrain but can be overkill for routes consisting mainly of dirt roads or smoother trails. Much like rear suspension, a suspension fork adds weight and complexity, requires regular maintenance and can be a major problem if it fails. While rigid mountain bikes have become a relative rarity the simplicity they offer is appealing. If your bike is already equipped with a rigid fork you may be in luck!

The choice to ride front and/or rear suspension will be dictated by your bike, route, personal preference and budget. If your bike does have suspension, be sure it is in top condition before heading out on a long trip.

Big Wheels, Wide Tires

There are many good reasons that 29ers have taken over the mountain bike market in recent years. The bigger footprint, increased air volume and shallower angle of attack offered by wide 29″ tires deliver excellent traction and improve the bike’s ability to roll easily over larger obstacles. These attributes are especially helpful when the bike is loaded down, less maneuverable and harder to unweight over bumps. However, don’t despair if your bike has 26″ wheels or is one of the newer crop sporting 650b/27.5″ hoops. Wheel size won’t make or break your experience out on the trail but larger wheels certainly offer appealing comfort and performance benefits.

Regardless of wheel size, you can do yourself a big favor by using the widest, highest volume tires your frame can safely accommodate. Wide tires will provide a smoother ride, cushion your bike, load and body from bumps and provide improved traction. We’ll talk more about tires in a future post, so stay tuned for that.

Quality Components

For better or worse, the price of an “entry level” mountain bike is incredibly low these days. This is certainly a good thing for many riders as the cost of getting into cycling is lower than perhaps ever before. However, those “entry level” bikes reach their low price points by cutting corners somewhere. One common place for this cost-trimming is in the bike’s wheels.

Bicycle wheels endure tremendous forces, especially when carrying heavy loads over rough terrain. Low-quality wheels that break spokes, bend axles, dent easily and won’t stay true are a serious liability. You’ll want to be certain that your wheels are built on sturdy, double-wall rims with quality hubs and spokes to avoid problems.  As shown in the cross-section diagrams below, double-wall rims feature a box section design that adds significant strength over the less-expensive single-wall design.

Blunt_35_No_Title_450_449
Double-wall rims – like Velocity’s Blunt 35 – provide much stronger wheels.
(Diagram from Velocity USA)
twin hollow
Single-wall rims are not typically strong and durable enough for trail riding or bikepacking.
(Diagram from Velocity USA)

On the subject of hubs, most newer bikes are equipped with a “freehub” drive system rather than the older “freewheel” style.  Bent or broken axles were common with “freewheel” rear hubs on mountain bikes because of the long section of axle protruding past the drive-side bearing.  If you have a rear wheel using a threaded-on freewheel you’d be wise to consider an upgraded wheelset before loading the bike down. We build a significant number of bikepacking-worthy wheelsets here at Bike Touring News, so we’ll talk more about wheels in an upcoming post.

freewheel-vs-k7
Hub comparison from the late, great Sheldon Brown. sheldonbrown.com

Other than wheels, you don’t really have too much to worry about. Even inexpensive brakes, shifters and drivetrain parts are surprisingly reliable and rarely fail when properly maintained. Higher-end parts will be lighter, more precise, offer performance benefits and are sometimes more durable but are not required. However, it is vital that all of your components are well maintained, not excessively worn and in good working order. It is wise to check and replace (if needed) your chain, cables/hydraulic fluid, brake pads, etc before heading for the hills to avoid problems on the trail.  We have a series of blog posts on roadside repair and maintenance, so brush up there if you need a primer.  Many trip-ending mechanicals are a result of poor maintenance and should be easily avoidable.

Metal Frame

Carbon fiber is everywhere in the bicycle industry. Carbon frames and components are showing up at surprisingly low price points and have (mostly) shaken off their reputation for fragility and premature failure. Modern carbon bikes and parts from reputable manufacturers are of very high quality and have proven reliable in demanding conditions. Many also offer extra protection in the form of tough, durable finishes, rock guards and the like. However, you’d still be wise to take extra care when bikepacking with a carbon frame. The combination of additional weight, frame bag straps, accumulated dirt, abrasion and vibration – in addition to normal hazards such as sharp rocks, severe crashes, etc – can cause serious damage to frame tubes of any kind but the problem can develop faster and have more severe consequences with carbon tubes. A good carbon bike can be a potent off-road weapon – especially for those looking to travel fast and light – but metal bikes will be more worry-free and probably longer-lived.

P1160822
Four riders – all on metal frames – head into the Owyhee Desert. Photo by the author.

On the other hand, steel or aluminum bikes may suffer damage to their finish from the conditions presented by bikepacking but will rarely sustain serious damage to the tubes themselves. Regular cleaning and inspection is still important but is not as serious a concern as with carbon tubes. Though expensive, titanium may be an ideal material for bikepacking bikes due to its exceptional hardness and resistance to scratching or abrasion.

Summary

So, is your bike up for the challenge? You may already have your new bikepacking bike hanging in your garage, waiting to hit the trail! If your ride doesn’t cut the mustard, Bike Touring News offers a range of models from Surly that will do the job admirably without breaking the bank, like the ECR, Troll, Ogre or Long Haul Trucker.  There comes a point where a new bike becomes a simpler, more cost-effective option.  Feel free to give us a call, shoot us an email or stop by the shop if you want to talk about the pros and cons of your current bike!

Throughout this series of posts, we’ll dig deeper into some of the considerations outlined above and a few more in order to help you build the best possible bikepacking setup for your application and budget.  In the next post we’ll explore various methods of carrying the supplies for your ride, so stay tuned for that!  Follow us on Facebook, Instagram and Twitter @BikeTouringNews for the most up-to-date news and information.

What questions do you have about setting up a bike you already own for bikepacking?  Sound off in the comments, give us a call or email and I’ll do my best to cover those topics of interest in a future post.  Hey, thanks for reading!

Categories
Bike Touring Equipment Bikepacking

Esbit Alcohol Stove and Trekking Cook Set- Product Review.

NOTE: The Bike Touring News store carries the Esbit Alcohol Stove and Trekking Cook Set. We don’t stock the other stoves mentioned in this post. If you have been thinking about buying a stove for bike touring, and one of the mentioned stoves appeals to you, clicking on one of the links will take you to the Campmor website to complete the purchase. We are an affiliate for Campmor and will earn a small percentage of your purchase. Campmor curates great products, have competitive pricing and their customer service is first rate: almost as good as Bike Touring News!

Several years ago, when I decided I wanted to go bike touring again, one of the things I needed was a new camp stove. I went to the long time local outdoor store, listened to the sales pitch, and selected this stove. It features a piezo-electric ignition and burns a blend of propane and butane- the fuel that comes in those little sealed canisters. The burner snaps onto a wide base piece which also acts as a wind screen and supports the sauce pan. The thing has worked flawlessly; it lights easily and the flame is like a torch that boils a pan full of water in a few minutes. By turning the knob on the valve connected to the canister the flame can be regulated down to a simmer. The fuel canisters are sealed and impossible to spill. I don’t think this model is made anymore, but there are similar stoves that use the propane-butane blended fuel canisters. The canisters are available in most outdoor stores as well as in Walmart.

On the downside, propane does not like cold temperatures. In below freezing temperatures the flow of the fuel mixture becomes weaker and weaker as the temperature drops. The canisters are a little bulky and might be hard to find in some locations and you never really know how much fuel is left in the canister. Disposing of the canisters can be problematic, but there is a tool made for punching holes in a completely empty canister allowing it to be recycled like any steel or aluminum can.

Lately I’ve been using the Esbit Alcohol Stove and Trekking Cookset on bike trips and it has become my go-to stove. It’s lighter and more compact and fuel is easier to find (denatured alcohol is the preferred fuel). In fact, at a convenience store one time I bought a small bottle of HEET gas treatment which burned suitably well in the stove but also left quite a bit of black residue on the pan. The stove itself is made of brass and has a simmer ring to adjust the flame or extinguish it completely. The included screw on lid can then be used to contain the remaining fuel in the stove until the next use. Since this is an Esbit stove there is a separate solid fuel platform which fits inside the base when the alcohol stove is not in use. This way extra solid fuel tablets can be carried along and used instead of alcohol or as a backup when the alcohol runs out.
alcohol stove

Small pot boiling with alcohol stove
The kit I use has a small pot which holds about 470 ml and also serves as a lid for the larger pot, which has a capacity of around 985 ml. Both pots have folding handles made of stainless steel with an insulating coating. Everything fits inside the large pot for transport. The whole thing weighs less than a pound and is 5″ in diameter and about 6″ tall. It fits perfectly in a Salsa Anything Cage.

front of bikepacking setup
The Esbit Stove and Cook Set straps to the Salsa Anything Cage on the front fork

This size is fine for the single Bike Hermit, or for two people when the cooking will consist of boil-in-the-pouch meals, instant oatmeal and quick cooking pasta. For those with more rigorous culinary demands the Esbit Alcohol Stove and Camp Set might be a better way to go. It is about twice the weight but only a couple of inches taller when packed. The pots are larger, with built in heat exchangers, and a frying pan and two plates are included.

Esbit Alcohol Stove and Camp Set

There are downsides to alcohol stoves too. The container the fuel is being carried in can be spilled and it can leak. The lighted stove can accidentally be knocked over with the result that flaming alcohol will then cover every nearby surface. A match or lighter or fire steel needs to be used to light the stove which is not as convenient as pushing a button for a piezo-electric starter. Cold temperatures make the alcohol more recalcitrant to light and wind plays a bigger factor in the efficiency of the flame; a separate, homemade tinfoil wind screen is an easy thing to take along though. It’s usually a good idea to place the stove in some sort of natural windbreak like between some rocks. Even though the design of this stove allows it to “bloom” quickly, it will never be as efficient at boiling water as quickly as a propane/butane stove will be.

A light, simple alcohol stove provides a certain amount of comfort in that, as long as there is fuel available, it will always work; there are no moving parts or valves or seals to fail. There are trade-offs however and there is no one perfect solution for each situation or person. On an extended expedition a multi fuel stove such as the MSR Dragonfly might be the best option.

MSR Dragonfly Stove

A multi-fuel expedition stove with a fully adjustable flame, from a slow simmer to a ro… [More]

Price: $109.96
Categories
Bags/Panniers/Racks Bike Touring Equipment Bikepacking Frame Bags Handlebar Bag Saddlebags

Product Gallery: Apidura Bikepacking Gear

All photos by @niclaskrake.

Cyclocross bike kitted up with Apidura bikepacking gear.
Cyclocross bike kitted up with Apidura bikepacking gear, perfect for light and fast rides.


Products pictured: Full Frame Pack (Med.), Handlebar Pack (Dry, 14L), Saddle Pack (Compact)


Apidura Bikepacking Kit
The full-frame bag is tailored to fit bikes with more traditional, level top tubes rather than the ultra-compact front triangles on most mountain bikes.  It is available in three sizes to fit a wide range of bikes.


dsc_9133
The Frame Pack has a much slimmer profile than similar bags, improving knee clearance and preventing the pack from bulging.  The internally-divided pockets are accessible via three zippers.


Sturdy Velcro and Shielded Zippers
The Frame Pack features sturdy velcro attachment points and shielded, non-waterproof zippers which tend to be more reliable than waterproof models.


Hidden Hydration Hose Exit Point
The Frame Bag also integrates a hidden hydration hose exit point.  The upper section of the bag (separated by an internal divider) accommodates an average 3L bladder easily.


Apidura Saddle Pack
Apidura’s Saddle Pack is a variation on a tried-and-true design with thoughtful details that set it apart.


Quality Hardware and Thoughtful Detailing
Quality hardware and reflective details on the Saddle Pack.


The Saddle Pack incorporates a series of taillight attachment loops. One should be accessible no matter how far the bag is rolled.


Rolling Closure and Shock Cord
Shock Cord is included on the top of the Saddle Pack to secure extra layers or other gear.


Waterproof Handlebar Pack
The Waterproof Handlebar Pack incorporates a cleverly-hidden valve for purging of excess air inside the bag.  Shock cord and attachment points for optional accessories add to its versatility.  It is offered in a range of sizes to fit any cockpit.


Sunset in the Boise Foothills
Apidura bikepacking gear is perfect for light and fast adventures on a wide variety of terrain and bicycles – especially those with more horizontal top tubes.  These products fill an important void and expand the utility of bikes that may not have been considered appropriate for touring in the past.  So, load up and hit the road!