Categories
Cockpit Handlebars and Stems Touring Bike Components

A Conversion: Drop Bar to Albatross Handlebar

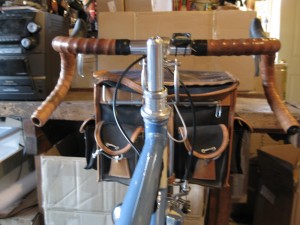
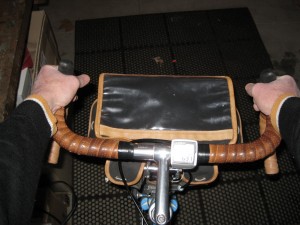
Switching from drop style handlebars to an upright, swept back handlebar can change the functionality and personality of a bicycle. And sometimes a change can be good, maybe turning an unused bike, or one that may duplicate another bike in one’s stable of bikes, into the go to, everyday machine.
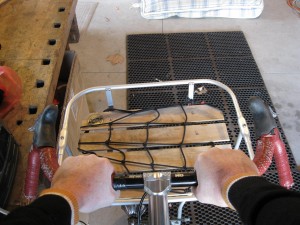
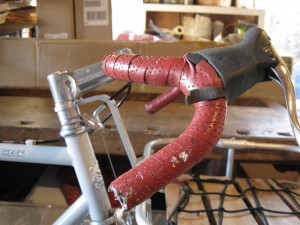
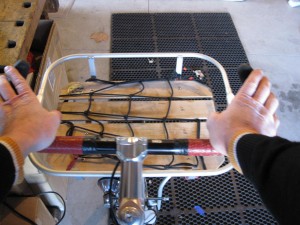
From This:
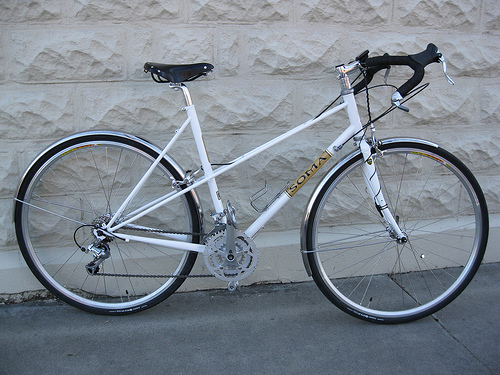
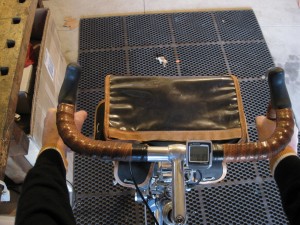
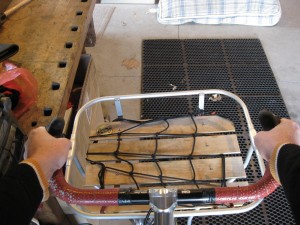
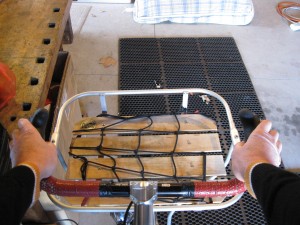
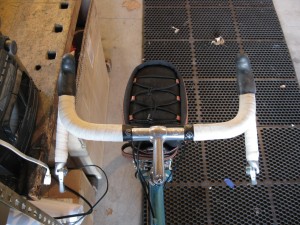
To This:

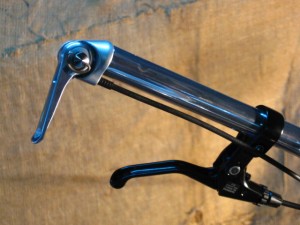
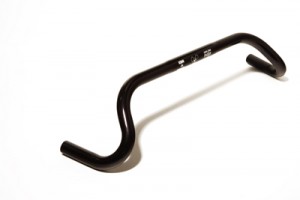
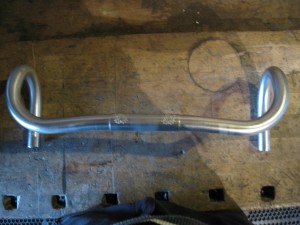
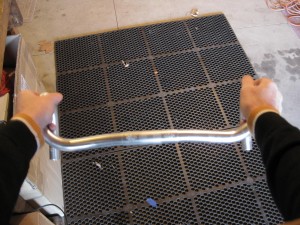
oxford handlebarsOne such handlebar, the Nitto Albatross is popular in both the alloy and chrome-moly versions. Soma Fabrications makes the Oxford bar which is almost identical in size and shape to the alloy Albatross Nitto makes. This 6061 polished aluminum handlebar will take bar end shifters, and has a 25.4mm clamp diameter making it versatile for use with most stems.Making the switch takes a little bit of planning and thought:
– First of all, the brake levers that fit on a drop bar will not fit on the new bar so new  “mountain bike” style brake levers with a 22.2mm clamp diameter, like the Shimano BL-R550 – are a requirement. The brake levers come with new cable and housing which will come in handy because the old cable and housing is probably too short.
– If the drop handlebar setup used bar end shifters these can be transferred to the Albatross or Oxford bar. If downtube shifters, then, no worries. If the drop bars had “brifters”, or those brake levers with the shifters built in, then new shift levers are in order. Either the bar end style or a top mount shifter or I suppose even the mountain bike standard trigger shifters could be used.
– The hand grip areas can be wrapped with regular bar tape or a slide on grip can be used with the caveat that the cable and housing for bar end shifters will not clear most standard grips, and the more or less conventional solution is to use cork grips with grooves filed into them for the cable.

Now it’s a simple matter of disconnecting all the brake and shift cables, un-wrapping the handlebars and taking off the brake and shift levers. The old handlebar comes off and the new one goes on. New shift levers (or the old bar end shifters), brake levers and grips go on, the new cable and housing is fit and tightened and adjusted and that’s it except for possibly adjusting the height or angle of the handlebars to the rider’s preference. A threadless stem with a removable face plate makes removing and installing handlebars pretty simple.
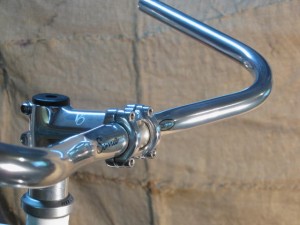
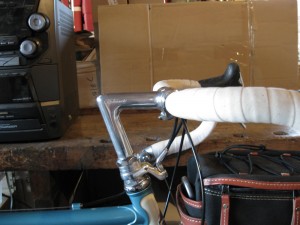
bare oxford handlebars installed
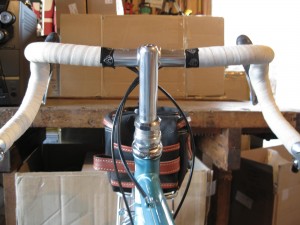
The new bars clamped into place
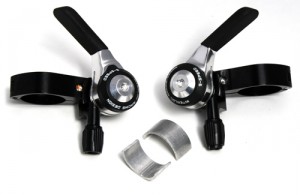
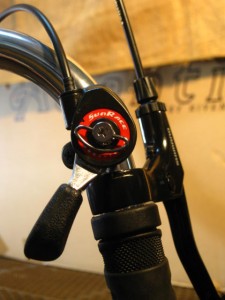
Sun Race shift lever
This top mount shifter is inexpensive but it works great. It is a single lever meant to be used with a rear derailleur, single chainring and no front derailleur. Who needs more than 5 or 8 gears anyway?
silver bar end shifter
Bar end shift levers work too. See how close to the bar the cable is? This calls for a grooved grip….or just a tape wrap.
IRD brand top mount shifters
Another option might be the IRD brand top mount shifters, indexed for use with a 9 speed rear cassette.
Categories
Cockpit Handlebars and Stems Touring Bike Components

Quill Stems

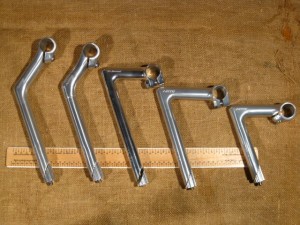
Quill stemsinsert into the threaded steer tube on a bicycle fork and are held in place by means of a bolt which tightens a wedge inside the tube. The other type of stem commonly used is a so-called threadless stem which clamps to a threadless steer tube. Quill stems and threaded steer tubes are less common nowadays, but the Nitto company in Japan still makes a wide range. Here is a side by side photo of most of the stems they make. Each stem in the photo is placed so that the minimum insertion mark on the stem aligns with the top of the ruler. This gives a basic visual cue as to how high the various stems can extend above the top of the tube. Notice that the stems are placed at an angle meant to replicate the 70 some degree angle of the head tube on most bikes.
NEWS FLASH! 09/26/2012
We now stock the 225 Technomic Deluxe stems. These have a long quill like the Technomic but are cold forged and have the same finish as the Deluxe. 25.4 or 26.0 clamp sizes.

Photo of 4 models of quill stem
From Left to right: Nitto Dirt Drop 100, Nitto Dirt Drop 80, Nitto Technomic, Nitto Technomic Deluxe and Nitto Dynamic

The Dynamic stems only come with a 26.0 mm clamp size, and the Dirt Drop,  Technomic and Deluxe stems come with either 25.4mm or 26.0 mm clamps. A 25.4 stem will not work with a handlebar that has a diameter at the center clamping point of 26.0. However a 26.0 stem will work with a 25.4 handlebar as long as a shim, specially made for this purpose is used between the stem and the bar. The Dirt Drop stems are only made in 80 mm and 100mm versions (the extension from the vertical-ish riser part or quill part of the stem). The other models come with extensions generally from 80 mm to 100mm in 10 mm increments. Got it?

Hopefully, this is a useful comparison for the bicycle traveler who might be thinking about changing the position of their handlebars or about getting different handlebars.

Categories
Best Touring Saddle Cockpit Touring Bike Components

Brooks Saddles

J.B. Brooks took out the first patent for leather saddles in 1882, and the company that bears his name has been making them ever since. Brooks saddles have become iconic, known for their good looks, comfort and durability.

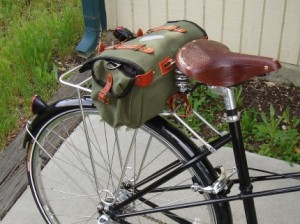
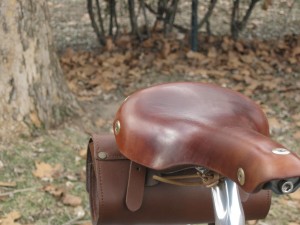
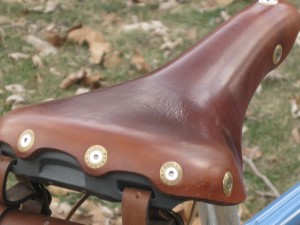
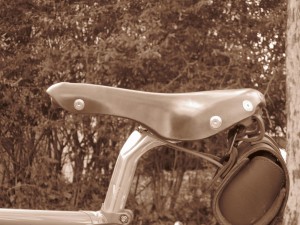
Brooks saddle
Sweet Brooks B67

This two part video relates a little more about the history of the company and shows the process of making each saddle by hand, as has been done for over one hundred years. The Bike Touring News store carries Brooks saddles and always strives to have most models in stock or readily available. ( Alan at EcoVelo just posted this photo essay on Brooks saddles)

Categories
Cockpit Touring Bike Components

Nitto Albatross Handlebar Brake Levers

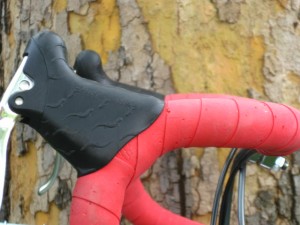
Let’s review. We know that v-brakes, also called linear pull brakes, require a brake lever configured to “pull” more cable than do side pull or cantilever brakes. We also know that so called aero style drop bar levers fit on drop bars and on moustache bars. (it’s a diameter thing) And those levers have rubberized hoods which are folded back out of the way when wrapping the bars with tape and pop back in place to cover the tape where it wraps around the lever clamp.

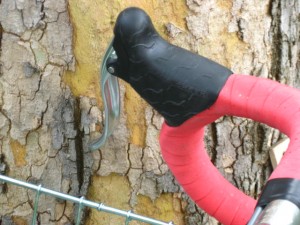
drop bar brake hood photo
The hoods on drop bar brake levers.

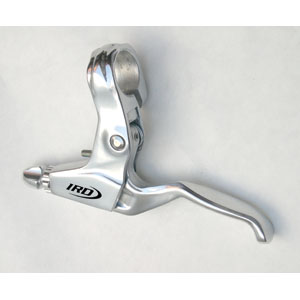
So what if you have flat or riser mountain bike style handlebars or a swept back bar like the Nitto Albatross? The diameter where the brakes clamp is a little smaller and there is no bend to accommodate the shape of the brake lever clamp. You need a mountain bike style lever, which looks like this.

photo of IRD Sylvan flat bar brake lever
Brake lever for flat bars or swept back bars.

Get some grips (or just get a grip) and clamp these near the end of the grip. And make sure you get a lever designed to work with your brake calipers. For shifters you can use trigger type shifters or a top mount shifter or bar end shifters. More on that in later installments.

Categories
Cockpit Touring Bike Components

Drop Handlebars/Brake Levers

So, the question came up about which brake lever to use on a Nitto Grand Randonneur handlebar. That’s sort of a two part question. In order to answer it we need to delve into brake calipers. Some common brake calipers are:
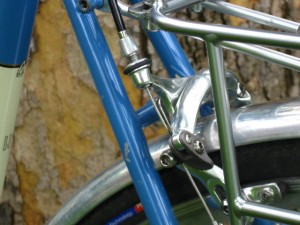
Cantilever

photo of a cantilever brake caliper
Cantilever Brake Caliper

Sidepull

photo of sidepull brake caliper
The sidepull brake caliper.

Center Pull
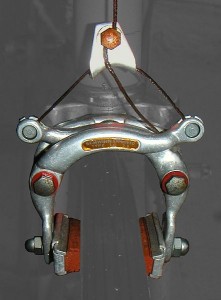
photo of center pull brake
The Center Pull Brake caliper

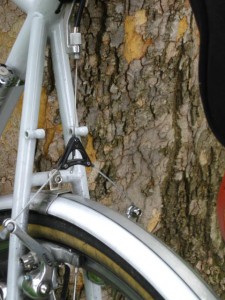
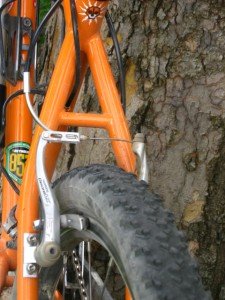
Linear Pull a.k.a V-Brake

photo of a v-brake caliper
The V-brake, sometimes called a linear pull brake.
Stupid v-brake. It throws a monkey wrench into the whole works. Even though they work great and have fantastic stopping power, they use a different leverage than the others to work properly. So whatever lever is used with these calipers, it needs to be v-brake compatible.
“Drop” or “road” style handlebars are of a standard diameter at the point the brakes are meant to clamp to the bar. So any lever that looks like this will work:

photo of Cane Creek brake lever
The Cane Creeek SCR-5 sports a wide, cushy grip- plus it has lizards!

These are also called “aero” brake levers because, rather than exiting the top of the lever and looping over the handlebars, the cable and housing exit under the hood and run along the handlebar, under the wrap, for a nice clean look.Photo of aero brake lever cable routing
aero brake levers on a drop bar
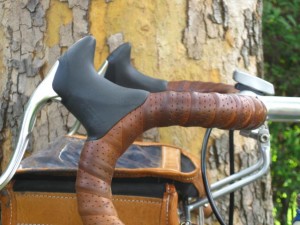
Shimano brake levers.... clean look! Make the tops of the bars level with a smooth transition to the brake hoods, dangit.

The Cane Creek and Tektro levers have a feature known as the Campy style quick release which is a button that releases the cable tension allowing the brake calipers to spread out to clear the tire when the wheel needs to be removed. It’s called Campy style because Campagnolo (Campy) brake calipers do not have quick releases.
Shimano aero brake levers don’t have quite as wide a hood which results in a more classic look. And they don’t have the quick release feature on the brake lever, again maybe not a problem since most brake calipers will have a quick release.
The drop bar brake levers we sell will fit on any of the drop bars we sell. and they will work on the not-so-ironic moustache bars too. Just be sure, if you have v-brakes to get the Tektro RL520 v-brake version. The other standard levers will work with cantilever, side pull or center pull brakes. And finally if you’re replacing a handlebar or just the brake levers you might want to get a cable and housing kit to replace the old set.

Categories
Cockpit Drivetrain Touring Bike Components

Bar End Shifters a.k.a. Sneaky Petes

I’ve talked about my preference for down tube shifters, now I thought I would give equal time to probably the most popular method of shifting gears on a modern touring bike. That would be bar end shifters. Being inserted into the ends of the handlebars and held secure by means of an expanding wedge these shifters make it possible to shift gears without taking the hands off the handlebars.

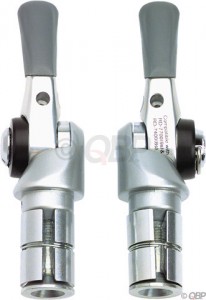
Shimano Bar End shift levers

Ergo (Campagnolo) or STI (Shimano) accomplish the same thing by incorporating the shifters with the brake levers, but these only work on drop style handlebars and they are significantly more complex and prone to failure and/or wearing out. Some really old guys remember the days before STI type shifters when bike racers with bar end shifters could shift into a higher gear in preparation for opening a can of whoop-ass on the group without being too obvious…hence the moniker “sneaky petes”.

Bar end shifters will fit in most drop or road style handlebars and the Nitto Moustache bar as well as some in upright bars such as the Nitto North Road aka the Albatross. The limiting factor being the inside diameter of the bar tube where the expanding wedge fits. The simple design and absence of numerous moving parts makes for reliable shifting even on the most demanding and lengthy tours. The Shimano version is made to work with either 9 or 8 rear cogs in index mode. The index mode can be disabled allowing the shifter to be used with any number of rear cogs and even when the derailleur or derailleur hanger gets bent. A nice feature for the bicycle traveler. There is a friction only (no index mode) bar end shifter designed by Rivendell too.

The shifters go on like this:

Oh yeah, and the Rivendell shifters, even though they come with their own pods (the part that goes inside the handlebar), will mount on the Shimano pods. To be safe, if using either one of these use a Shimano rear derailleur too.

Categories
Cockpit Drivetrain Touring Bike Components

What I Like About Down-Tube Shifters

Downtube shifters are shift levers mounted on the downtube of the bicycle.  Not everybody will feel comfortable taking their hand completely off the handlebar in order to shift but for those of us who don’t mind doing so, downtube shifters offer the most minimalistic of gear shifting solutions.

Shifters on the downtube means taking one hand off the handlebar in order to shift.
Shimano Dura-Ace Downtube Shifters

These Shimano shifters have an “index” option on the right lever which means there are eight detentes or pauses signaled by audible clicks for each gear as the lever is moved back or forth. The left lever works the front derailleur and doesn’t have an index option. Rivendell is producing downtube levers without the index option for the real caveman in us all. The right lever can be used to change one, two or more gears up through all nine at one stroke. Kind of a nice feature. And the transfer of movement to the derailleur is super positive, mostly because there is only one short piece of housing at the rear derailleur and no housing on the cable to the front derailleur. Housing compresses and adds friction to the system.

Shorter runs of cable and no housing make down tube shifters more positive.
Only one short piece of housing on the rear shift cable.

I didn’t even realize it until I started reading a thread in Bike Forums about using downtube shifters, but to use these I actually reach across the downtube through the frame with my right hand in order to shift the front changer, the lever for which is on the left side of the bicycle.

Reaching through the frame to shift

One bike tourist I know uses Campy ergo shifters which means the shifters are incorporated with the brake levers. He carries a downtube shift lever and a piece of cable with him in case the ergo shifters fail. Keep in mind that in order to use downtube shifters, the bike must have brazed on attachments on the downtube. Those look like this:

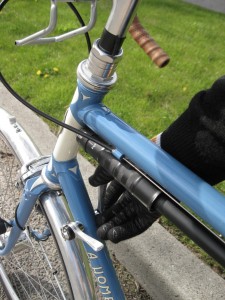
Brazed on fittings to accept downtube shifters.

For those who appreciate a stripped down approach to touring and the peace of mind in having bike parts which are not failure prone, downtube shifters might be a consideration.

Categories
Cockpit Handlebars and Stems Touring Bike Components

4 Handlebars

Wherein the  bike hermit compares and contrasts 4 different drop style handlebars for the touring bike. Finding the perfect handlebar for his touring bike has him in a bit of a bother.

Last season I installed the Nitto Dirt Drop bars on Chief. I like the way the drops flair out.

Nitto Dirt Drop

The bars actually have a very slight rise from the clamp area to the ramps. These are the medium width version. There is a version that is narrower and one that is wider. These feel a little too narrow for me when I’m riding on the hoods. Dang, should have got the wider ones.  But I like the angled-in aspect of the brakes on the flair of these bars. It feels natural.

On the hoods.

The other nice thing about the drops being wider than the tops ….my wrists don’t hit the tops of the bars when “in the drops”.

Nitto Dirt Drop touring handlebars,"in the drops"

On Norm, my everyday bike, I have the On One Midge handlebar. Perhaps my favorite bar of all time.

On One brand Midge handlebar

This handlebar might look a little crazy…. in fact I have been labeled “crazy bar guy” on group rides…but the ergonomics are fantastic. These have a super wide, flat top section so there are multiple positions available on the top of the bars alone. As the top of  the bar bends to begin the drop portion it also flairs out at a dramatic angle.

On One Midge.....Wide tops, crazy bends

The other thing that happens when the bend from the tops is so gradual is that the brake levers get mounted at an even more extreme angle. But if I raise my arms out in front of my body, in a relaxed way, my fingers do not naturally line up perpendicular to the ground. They are more like 30 to 40 degrees from vertical. An angle very similar to the angle of the the brake levers on the Midge bar:

Natural angle to the brake hoods

I like to install these handlebars with the ramps level. This provides a great platform and plenty of support for the hands.

Notice the ramps, the portion of the bar behind the levers, are basically level.
Another position I use a lot with the Midge bars.
Nice platform for the hands

Sky King has the Nitto Grand Randonneur on her Rivendell Bleriot.

Sky King's Nitto Grand Randonneur bars

The most notable thing in this view is the distance the ends of the bars extend toward the rider. This should allow for riding comfortably in the drops without reaching. The picture below shows the rise from the center up to the ramp portion.

The Grand Randonneur rises from the center to the ramp
A view of the upward rise from the center, the slight flair of the drops, and the angle of the brake levers.

The handlebar I am itching to try on my touring bike is the Nitto Noodle.

I guess I know why they are called "Noodle"

These bars intrigue me because of the slight rearward bend of the top portion. Again, if I examine the shape of my palm, curled into a gripping shape, I find that it is at a slight angle, from inside to outside. Corresponding to the shape of the Noodle bar.
They don’t have any flair to the drops though. The ramps are basically parallel to the drops. These would be really cool if they had the backward bend plus a flair like the Midge bars! Then they would be the Pretzel bar.

No flair to the drops and subsequently.... to the brake levers

So, there you have four options for drop style handlebars for touring. If you are thinking about changing handlebars keep in mind that there are three standard diameters for handlebars where they clamp to the stem: 25.4 mm, 26mm, and 31.8mm. Stems are made for all those diameters too. A stem with a clamp for 25.4 will not work with a 26 or 31.8 handlebar, but a smaller diameter handlebar can be made to work with a larger clamp diameter stem by means of handy dandy shims made for that purpose!
After looking at these pictures I think I need to write a post about handlebar tape and how to change it.

Categories
Best Touring Saddle Cockpit Touring Bike Components

Gilles Berthoud Saddles


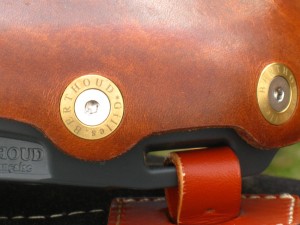
I now have over 3000 miles on my Gilles Berthoud Aspin touring saddle, so I guess I feel OK about sharing my impressions. (the pun will become apparent later) The Gilles Berthoud Company is located in Pont de Vaux, France. The products they produce are well thought out and elegant and, as far as I can tell, any compromise in materials or methods used in construction is never considered. The leather saddles are unique in several ways. The cantle plate and nose piece are made of a special, composite material. The rails, either steel or titanium, depending on the model, slide into holes molded into the composite pieces. The leather tops are bolted on with stainless steel bolts and specially designed brass washers which have the Gilles Berthoud name engraved on them except the nose rivet which has the individual saddle’s number on it. The idea being that individual pieces of the saddle can be easily replaced. The tension on the leather top can be adjusted with a 5 mm allen wrench so no special tool is required as on Brooks saddles. The leather is supposed to be waterproof and Gilles Berthoud does sell a proprietary leather treatment.

Being able to take the saddle apart may be a good idea, but I have noticed a couple of things one needs to pay attention to. If you pick up a 60 pound touring bike by grabbing the rear of the saddle, the rails may pop out of the cantle plate. It is possible to loosen the tensioning bolt enough to pop them back in place and the saddle is good as new, but US 77 outside of La Grange TX is not the best place to go through this exercise. The bolts holding the leather top on can come loose and need to be checked and tightened periodically. We also discovered that the dye used in the black saddles leaves an unsatisfactory stain on lighter colored pants. The natural saddles don’t appear to have that feature.

The bottom line is that this is the most supremely comfortable saddle I have ever used. The leather appears to be thicker than that on some other brands but it has been pre-softened, and rather than simply sagging or splaying out with use has conformed to my anatomy leaving the impressions of my sit bones. Yet it gives enough support that there is no pressure on the soft tissue parts of the perineum or the arteries and blood vessels. In short, no pain and no genital numbness! As with any saddle, especially leather ones, adjustment of the fore/aft tilt is critical to comfort.
The section of rail that can be clamped to the seatpost is short, like on Brooks saddles so the fore and aft positioning of the saddle is limited, but a set back seat post can help if a farther aft position is desired.

Experiment with the best tilt or angle for your Berthoud saddle.

My sit bones leave a deeper impression on the right side

These saddles are not inexpensive, over two times the price of a Brooks B17, but to my mind (not to mention other parts) they are well worth it. After 4 or 5 or 6 hours in the saddle when touring, it’s nice to not have a literal pain in the butt to worry about. The durability of my saddle so far has been terrific allowing for the mentioned caveats. Those are two things that figure into my calculations of value.