Categories
Bikepacking Cockpit Handlebars and Stems

Jones H-Bar® Setup Guide

For ages, they’ve been the standard.  They’re nearly as ubiquitous as racks and panniers on touring bikes around the world but can also be found on road racing steeds, track bikes, cyclocross machines, commuting rigs or even mountain bikes.  I’m talking about drop bars.  Ask just about anyone what a bicycle handlebar looks like and they’ll likely describe the ramhorn bends of a drop bar.  They come on many of our favorite new bikes, like Surly’s Long Haul Trucker, Disc Trucker, Cross-Check and Straggler.  It isn’t tradition alone that keeps these gracefully curved tubes on the front of so many different bikes.  Drop bars offer an effective and comfortable range of hand and body positions that are excellent for a great variety of riding styles and terrain.  There are hundreds of subtle variations in shape available, each with differing reach, drop, width and bend to provide a rider with the perfect fit.  In short, drop bars are awesome.

However, there are situations where a drop bar leaves much to be desired.  Take a look at mountain bikes or off-road motorcycles and you’ll see what I mean.  In order to maneuver his machine through difficult terrain, the off-road rider needs a neutral or slightly rear-biased body position and plenty of leverage.  A wide, flat, slightly backswept handlebar does just that.  What that flat handlebar doesn’t do is provide a multitude of hand and body positions.  For the singletrack rider who is constantly moving and shifting her weight over the bike this is not a big drawback.  Her riding position changes independent of her grip on the handlebars.  For the touring or bikepacking rider who may cover long stretches of flat and smooth terrain in between steep and rough sections, the limited hand positions offered by a flat bar can lead to soreness, stiffness and accelerated fatigue.  This is why we see so many bikepacking bikes with aerobars clamped onto flat bars.  The rider needs alternative hand and body positions to ride comfortably for hours at a time.

So – as in most things – a middle ground must be sought and the unconventional thinker often arrives at the ideal solution.  When it comes to handlebars for off-road touring and a variety of other applications, Jeff Jones’ Loop H-Bar may just be that solution.  A great deal has already been written about the H-Bar’s merits – much of it by Jeff Jones himself – so I won’t waste time adding to the mountain of praise already heaped on these bars.  In many ways, the H-bar neatly splits the difference between a drop bar and a flat bar, retaining the best characteristics of each.  It offers the width and leverage of the flat bar, the forward reach and hand positions of the drop bar and much more room to shift weight rearward.  In addition, the Loop-H bar’s forward extension offers a perfect location for strapping a handlebar roll.  Revelate even offers a special 4-point attachment kit to neatly secure their Sweetroll to the Loop-H bars.

The astute reader may recall that I have been considering a different handlebar for my dirt touring bike ever since my experience on the Smoke ‘n’ Fire 400.  Given the large number of other touring riders who may be pushing the limits of their drop bar setups and looking for alternatives, I thought I’d share some thoughts and experiences from the process and try to provide a setup guide for H-Bars on a touring or bikepacking bike.

Assuming you’ve settled on the H-Bar as the right handlebar for your application, there are a few other components you’ll need to effect the conversion.  Since my bike and most of the touring bikes we sell are spec’ed with drop bars and bar-end shifters, I’ll walk you through that process.  If your bike has integrated shifters or downtube levers, your process and the parts needed will be different.

So, let’s get down to the details.  What do you need to make the conversion from drop bars to H-Bars on your bike?  Every bike is different and there is no one perfect setup.   Many of these questions you’ll have to answer for yourself – especially when it comes to fit.  I do not claim to be a fit expert and have arrived at positions that work for me through a combination of self-education and trial-and-error.  If in doubt, consult a trained bicycle fitting professional in your area before making any dramatic changes to your riding position.

First: Pick Your Handlebars

Jeff Jones offers three different handlebars that provide the same basic positioning but in slightly different shapes and widths. They are the Loop-H, Cut-H and Bend-H.  They are all available in 660 or 710mm widths and a variety of materials.  If you’re planning on using a handlebar roll (especially the Revelate Sweetroll), you’ll be happiest with the Loop-H.  If you won’t be strapping much gear to the bars, don’t need as much forward extension but want the width and backsweep in an elegant shape, get the Bend-H.  Other than aesthetic preference, I don’t think there is much to recommend the Cut-H over the Loop.  Also, there isn’t really much reason to choose the 660mm width as the handlebars are clearly marked for cutting, if desired.  I would encourage anyone other than the smallest riders to try the wide bars first.  You just might like them and you can always trim them later.  For my purposes, I went with a silver, aluminum Loop-H Bar in a 710mm width.

Second: Pick Your Stem

Now things get complicated.  Bicycle fitting is a highly complex topic with very little good research to draw on outside the racing world.  The makeup of a comfortable and efficient riding position is different for everyone, so I’ll do my best to offer helpful guidelines you can use to find your own sweet spot.  Jeff Jones wrote a useful blog post on choosing a stem to pair with your H-Bar but it is geared toward riders moving from flat bars to H-bars.  Since we’re talking about drop bars here, I’ll take you through some of the questions you’ll be faced with.

There are two important variable to consider when choosing your stem: reach and stack.  Reach describes the horizontal position of the bars, or how far out they are.  Stack (or drop) describes the vertical position of the bars, or how far above or below the saddle they sit.  Reach and stack can be measured in a variety of ways but since we’re talking about converting an existing cockpit assumed to be comfortable, I’ll talk about them in more relative terms.

First, let’s talk reach.  Most people find that their favorite hand position on drop bars is on the brake hoods or the “ramps” of the bars just behind the hoods.  Assuming you are reasonably comfortable on your drop bars, I recommend setting up your H-Bars so that the forward extension gives the same reach as the farthest forward position you can reach on the brake hoods.  This will give you roughly the same amount of room to stretch out forward but with much more space to shift your weight back.  In this position I found that the junction of the grip section and crossbar landed right on the ramps, providing an ideal perch to simulate the sweet spot on my drop bars.  It is worth pointing out that the total front-to-back reach of the Loop H-Bar is significantly longer than a typical drop bar.  Compared to roughly 5.5 inches of reach on an average drop bar from the front of the brake hoods to handlebar center, the 710mm Loop H-Bars measure a full 9 inches from the center of the forward extension to the center of the rearmost portion of the grip area.  Most of this additional real estate comes in the widest, rearmost grip position.  Avoid the temptation to set your bars farther forward to favor this grip position as it will render the forward extensions unusable and prevent you from shifting your weight farther back for descents.

P1160232

With the H-Bars positioned in the manner pictured above, I estimated that I would need to shorten my stem by 1cm to secure them in place, so I settled on a 90mm long stem.

Now let’s talk stack, or drop.  For most riders, positioning the H-Bars so they are roughly level with the saddle yields a comfortable, neutral riding position with good weight distribution between handlebar, pedals and saddle.  Depending on your current setup, you’ll likely need a stem with more rise or up-angle to achieve this.  By changing my stem from a -10 degree to a 0 degree, I raised the handlebars by roughly 1.5cm, putting them just a hair lower than my saddle.

If you need to raise the bars more than a couple centimeters this stem extension is available which clamps onto the fork steerer tube in place of the stem. The stem in turn clamps onto the extension affording up to 8cm additional stem height.
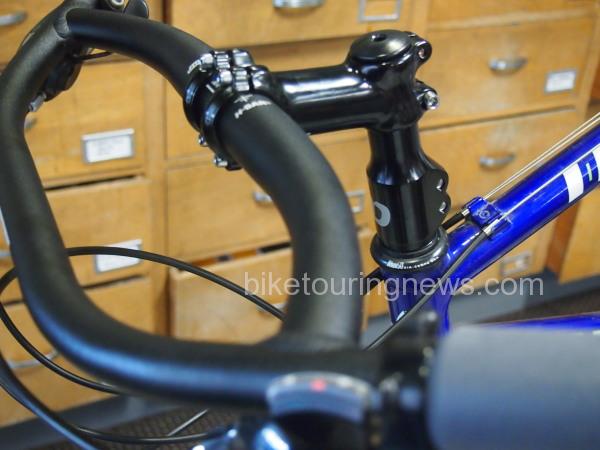
fork steerer tube extension
A handy extension for getting the bars up to the desired height.

All of the Jones bars have a 31.8mm clamping surface, so be sure that any stem you purchase will fit the handlebar and your bike’s steerer tube to avoid disappointment.  Thomson’s X4 mountain bike stem is an excellent choice but we offer several less expensive options as well.

Third: Choosing Brake Levers and Shifters

After the complexity of the stem question, the remaining decisions will be fairly straightforward.  When choosing brake levers, you’ll want a flat-bar, MTB-style lever that pulls the proper amount of cable for your brakes.  Cantilevers, centerpull, sidepull and road disc brakes use a short pull.  V-brakes and mountain disc brakes use a long pull.  Also, I highly recommend levers with a good reach-adjustment mechanism for the H-Bars. You will need to replace the brake cables and housing so if the new brake levers don’t include cables and housing you will need to purchase those separately.

If you have bar-end shifters, Paul Components’ Thumbies provide a clean and elegant way to mount your shifters on top the Jones Bars and use them as thumb shifters. The bar end shifters will work in the ends of the Jones bars but, given the width and the sweep of the bars, this might be a little  functionally awkward.

Hope this guide offers some help and direction to those considering a swap to the Jones Bars.

Categories
Bike Touring Equipment Cockpit Handlebars and Stems Touring Bicycles Touring Bike Components

Dropping Out and Looping In: Converting from Drop Bars to Jones Loop H-Bars

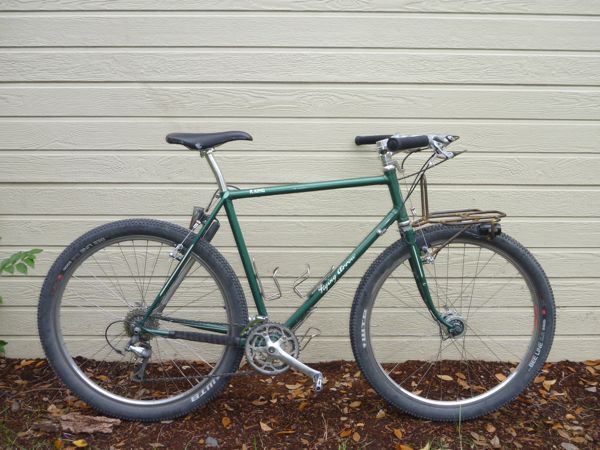
The wintertime (known to some among us as the “off-season”) is a great time to experiment with your bike setup and few components can transform the ride of a bike like handlebars. Unlike many so-called “performance” upgrades that claim to offer weight savings, greater precision or improved efficiency, different handlebars change the way your body relates to the bicycle in a fundamental and important way. The wrong handlebar can make the finest bicycle nearly unrideable. The right handlebar can enhance comfort, control and confidence. The Jones Loop H-Bar does just that. As many of the Surly bikes we sell (in addition to many other touring bikes) come with drop bars and bar-end shifters, I thought I’d share my experience converting my personal bike from drop bars to H-Bars. I’ll get more into the details and technicalities of the process – especially the fit aspect – in a future post, so stay tuned for that.
P1160221

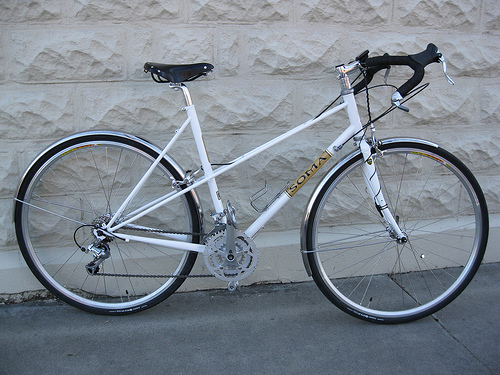
I built my dirt touring bike – the RandoGnar – around drop bars. I had the wide-open and reasonably smooth gravel roads of north-central Oregon in mind when drawing up the plans and laying out the cockpit.  The position is very similar to what I’ve used on my cyclocross bike to provide a good balance of comfort, aerodynamics and pedaling efficiency for long, mixed-terrain rides and ‘cross racing. This setup performed admirably on the Oregon Outback in May, 2014 and I wouldn’t have changed a thing.  However, on rough descents or technical singletracks, the hand and body positions offered by drop bars leave something to be desired. When riding in the drops – the preferred position for descending – my weight is shifted far forward over the front wheel which tends to generate a feeling of “oh-crap-I’m-about-to-get-pitched-over-the-bars”.  This leads to tension throughout the my body, causing fatigue and a diminished ability to ride lightly over rough surfaces.

OB
Open country and smooth gravel on the Oregon Outback

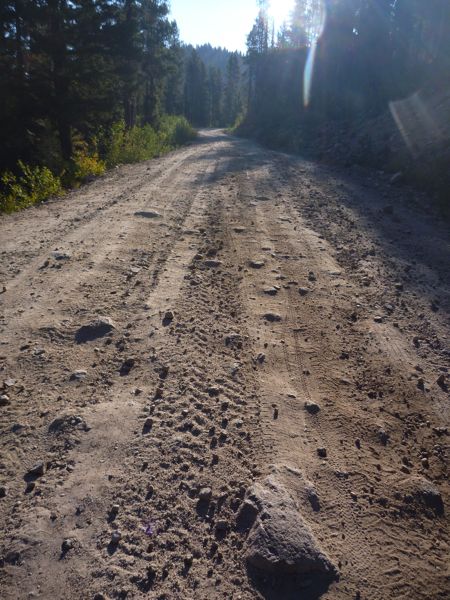
Upon moving to Idaho and sampling some of the unpaved roads and singletracks in the central part of the state, I found myself wishing for a different handlebar. Descending on a loaded bike through rough, rocky, loose terrain can be sketchy on any bike but I’ve had some harrowing moments on rutted, washed out mountain roads and trails down in the hooks of my deep drops.

snf
A section of steep, rocky road near Scott’s Mountain on the Smoke ‘n’ Fire 400

Anyone who has ridden a modern mountain bike can tell you that a short stem and wide, flat handlebars yield enhanced control in challenging terrain.  It is easy to keep the front wheel light and approach steep terrain with confidence.  So for mixed-terrain bikepacking and touring – where we ride long hours on loaded bikes in widely varying conditions – we need a middle ground.  We like the range of hand and body positions offered by drop bars but miss the confidence and control lent by a flat bar with things get rough. The Loop H-Bar treads this fine line better than perhaps any other handlebar available.

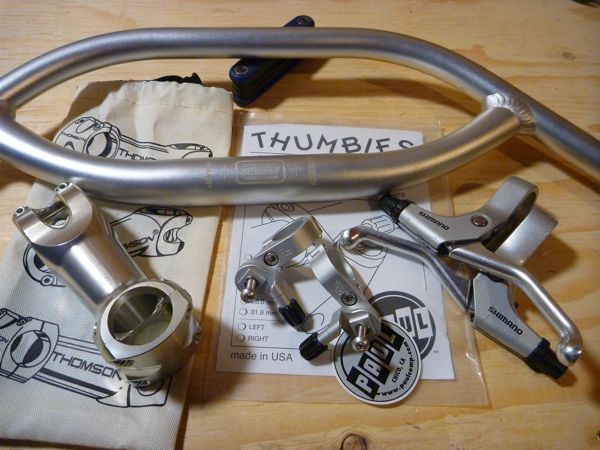
Your list of necessary parts will vary, but here are the parts I needed to effect the conversion.

Jones Loop H-Bar, 710mm

– Thomson X.4 Stem, 90mm x 0-deg

Paul Thumbies for Shimano shifters, 22.2 clamp

Shimano BL-R550 canti levers

P1160234
The bits: Jones 710mm Loop-H bars, Thomson X4 90mm 0-degree stem, Paul Thumbies, Shimano canti levers.
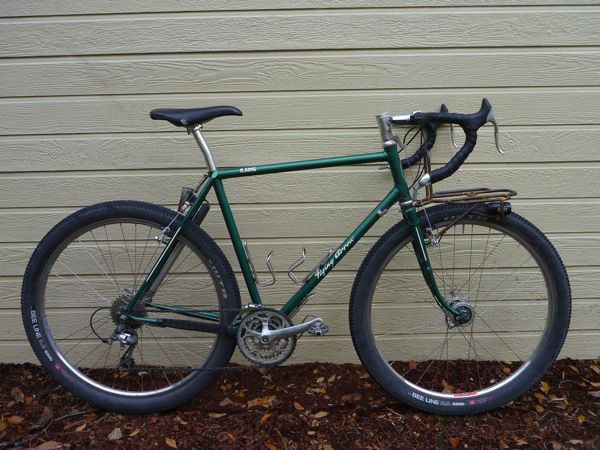
I replaced my 100mm, -10 degree stem with a 90mm, 0 degree version to bring the handlebar clamp up closer to level with the saddle height for a nice, balanced riding position. I am now able to rotate my hips back slightly and rest my weight lightly on the saddle with most of my body supported by the pedals. The stance is upright and controlled but with enough forward reach possible to tuck under the wind. On the road, the forward extension offers a very similar perch to riding on the “ramps” of my drop bars. On singletrack, the extra width and rearward extension provides a very strong and confident stance to attack steep terrain with one finger tucked in the crook of the brake levers.  The overall look is a little cruiser-y but the bike feels much more at home in singletrack.
P1160271
Rando-Gnar with Jones Loop-H Bars

These bars are now the widest I have on any bike.  The extra leverage and control is remarkable.

P1160274
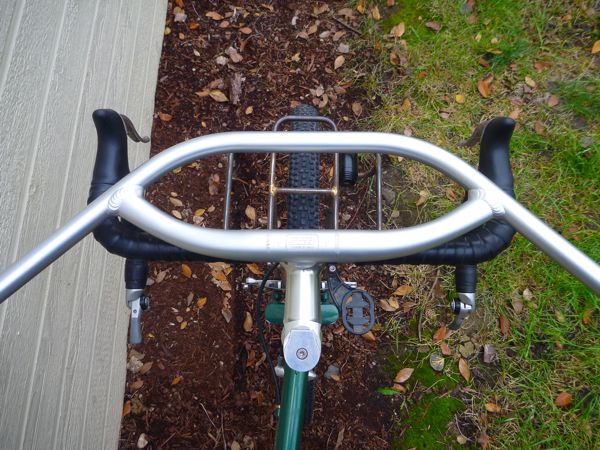
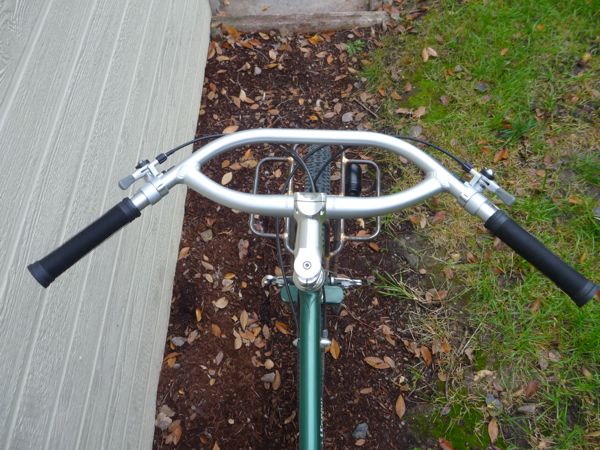
Cockpit from above

ODI’s classic Longneck BMX grips pair well with the Jones bars.  The extra length covers more of the handlebar section than a standard mountain bike grip.  I prefer to trim the flanges off for additional shifter clearance.  We also offer the ESI foam grips which are designed for the long grip section of the H-Bars.

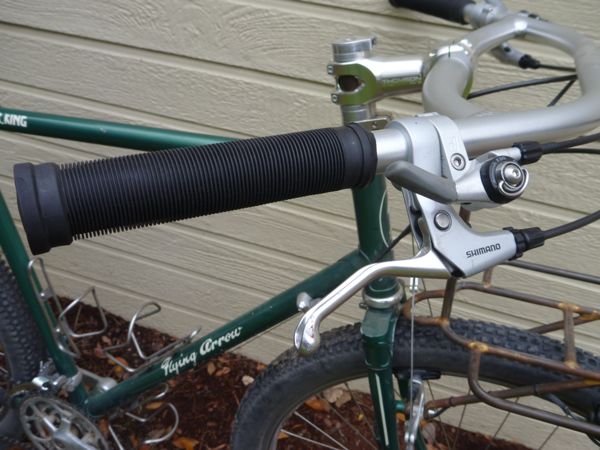
Also, I found (in corroboration with Jeff Jones’ guidelines) that the ergonomics of this setup are much improved by adjusting the brake levers’ reach screws in slightly to bring the lever blades closer to the bars.  Those with extra-long fingers may not need to make the adjustment but the levers are easy to reach with the first finger even when at the farthest rearward position on the bars.  The BL-R550 levers deliver a very strong pull to my cantilever brakes and a comfortable lever shape for one or two fingers.

P1160277
De-flanged BMX grips and brake levers with reach adjusted in slightly

The sweep and width of these bars has transformed the Rando-Gnar from a dirt road crusher into a singletrack slayer. I’m able to ride much faster and more confidently than I ever thought possible on a rigid bike.  In addition to the range of hand positions, the 45-degree sweep of the bars offers excellent leverage for lifting either end of the bike over obstacles in the trail.  This is especially helpful when the bike is loaded and requires more effort to maneuver.

P1160281
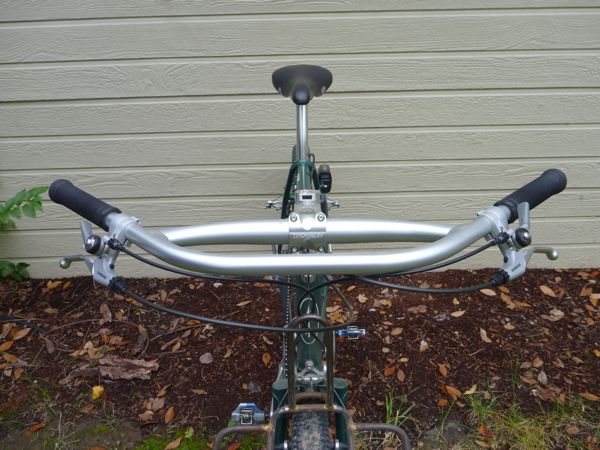
From the front

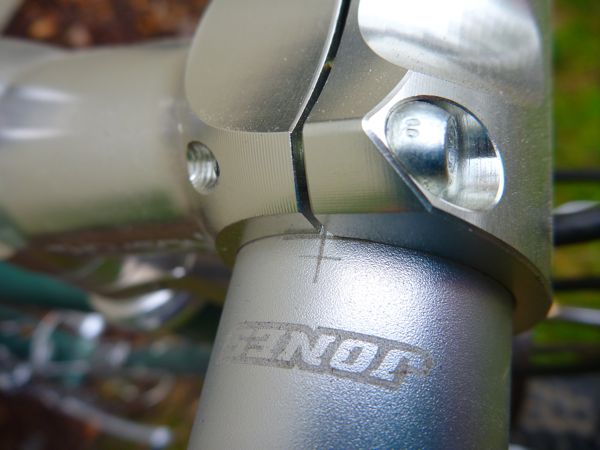
Thomson’s X4 stem pairs perfectly with the Jones bars.  Even the alignment marks align with the edges of the clamp jaws.

P1160283
Alignment hashmarks placed perfectly for Thomson clamp

On the first few shakedown rides in the Boise foothills, I had to consciously keep my speed in check any time the trail pointed downhill.  The riding position inspired so much confidence that I quickly outran the available traction from my close-knobbed tires in loose corners.  With my weight shifted over the rear wheel and my hands out wide, I was able to leverage the bike around downhill corners with ease and maintain a comfortable, relaxed posture.  When climbing, I could easily shift my hands forward to keep the front wheel down.

P1160319
At the top of Scott’s Trail in the Boise Foothills

Overall, I’m quite happy with the comfort, control and multiple riding positions the Jones bars offer.  On longer stretches of smoother terrain I find myself missing the aerodynamic position offered by the drop bars, but feel that the off-road confidence and control more than makes up for the slightly decreased efficiency on the pavement.

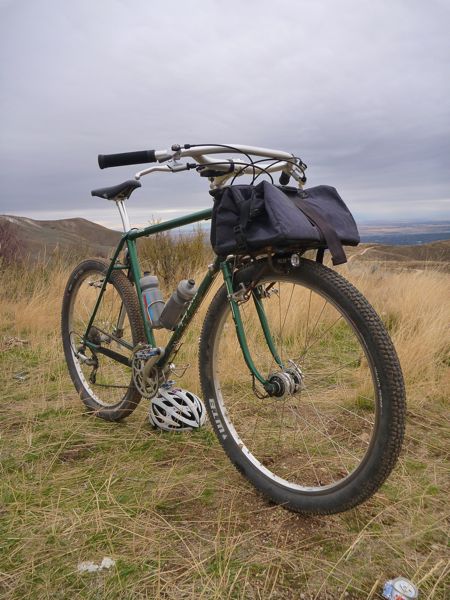
P1160321
Rando-Gnar with Jones Loop-H bars in the wild

Overall, the Jones H-Bars are an excellent alternative to a drop bar for touring bikes that are regularly ridden in more technical and demanding situations.  I’d recommend them to anyone who wants to blend the confidence and control of a flat bar with the comfort and hand positions of a drop bar.  I’ll be taking a closer look at the setup process in a future post, so feel free to chime in with any questions you’d like to have answered or ideas you’d like to see explored. Thanks for reading!

Categories
Cockpit Handlebars and Stems Touring Bike Components

Jones Bars

Journalism is a tough business. Those not involved don’t understand the sacrifices reporters make in order to enlighten and entertain them. As an example, I could not get the wi-fi connection to work at the Woodland Empire brewery and I had to walk almost 200 feet to Pre-Funk tap room in order to find a decent connection. Somebody’s got to do it though.

It’s always encouraging to me when I talk to an entrepreneur who has been involved in the bike business for a long time and is still so excited about what they do that they will talk my ear off about their product or service. Channing at Old Man Mountain is one example, as is Chris Kostman at Rough Riders- Any Bike Anywhere (Chris, why are there no new blog posts?)
Jeff Jones has to be included in this company.
introhome_text
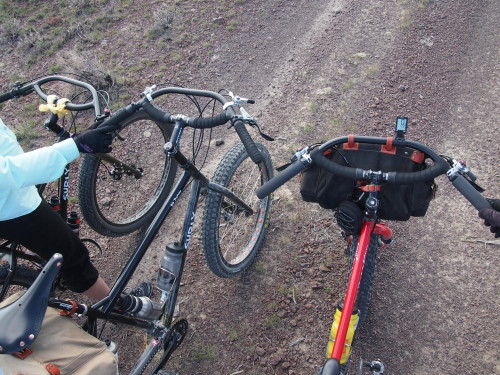
He is an iconoclast who developed his own line of bicycle frames and what may seem like a somewhat unconventional handlebar; The Jones Loop H-Bar®. Surly Bikes even commissioned an extra long version of the bars from Jones for their ECR, Troll and Ogre bikes. We have sold several sets of these bars and are currently experimenting with them- the Bike Hermit has them on the Big fat Dummy and Sky King has them on the ECR.

L.to R. ECR, Big Dummy, Pugsley

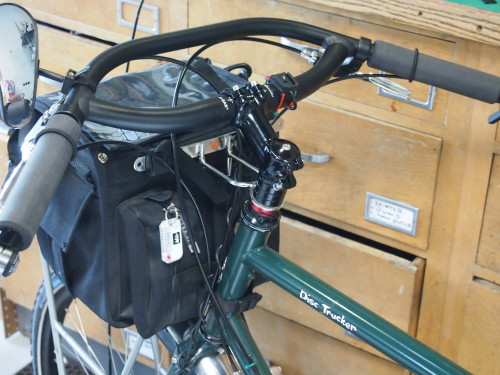
We even installed them on a Surly Disc Trucker, an experiment which revealed that bar end shifters fit.

Handlebars
Even good for touring!

The other interesting feature that has become apparent, thanks to friend Wendell, is the ability to annex bags ostensibly made for saddlebags, as seen in these photos:
handlebars
Jones Loop H-Bars and homemade bag

handlebars and bags
Jones Loop Bars, Revelate Designs Harness and a Salsa Minimalist rack.

The astute reader will notice that in most of the photos the ends of the bars have a thick foam grip. These are ESI grips for the Jones bars and they come in two lengths; 6.25 and 8.25 and two thicknesses; Chunky and Extra Chunky. Surly chose to not use the matching grips on their bikes…an oversight I hope is remedied in the next production run.
Some of the pictures also show padded tape wrapped around the welded junction of the loop part of the bar. This turns out to be a fine alternative hand position with these.

Two widths; the original 660mm and the Surly inspired 710mm. Two colors; black and silver. Aluminum or titanium. One clamp size; 31.8. Mr. Jones doesn’t allow us to sell them online but if you are in Boise, we have them in stock. Otherwise, order from jonesbikes.com

Categories
Cockpit Handlebars and Stems Touring Bike Components

New Cockpit- Shiny Bits, Plus Leather

I recently changed handlebars on my A. Homer Hilsen. Going from the 48cm Dirt Drop bars to the same model in the 52cm width will hopefully provide a more natural position for my arms and give better stability for the loaded bike. The clamp bolt on one of the brake levers was somehow stripped or cross-threaded and seized in the clamp, necessitating the use of the handy Dremel tool to cut off the clamp.

cut clamp on brake lever
Busted

old brake lever and new
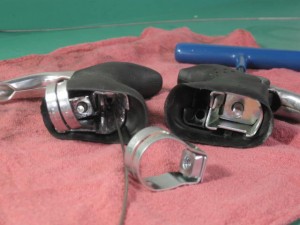
The old, broken lever is on the left. In the foreground is the clamp which slips over the handlebar and is held in place with the bolt through the lever shown on the right

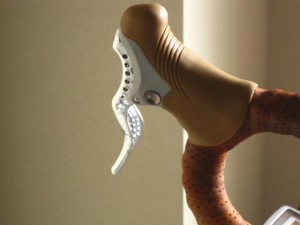
I decided to replace both brake levers with Tektro’s new TRP levers. Aesthetically, these might not be everybody’s cup of tea, especially this drilled out version. The levers themselves have a somewhat tortured looking shape and the hoods have the almost obscene protrusion of STI style brake hoods. But using these levers, it quickly becomes clear that this is a case of form following function. The long, flat hoods provide a comfortable platform for the hands and the shape of the levers fits the fingers naturally. Somehow the design even manages to provide more mechanical advantage – my side-pull brakes seem smoother, more responsive and more powerful. The flared out lower part of the levers are easy to grab either from the hoods or the drops.

The silver button is a cable quick release.

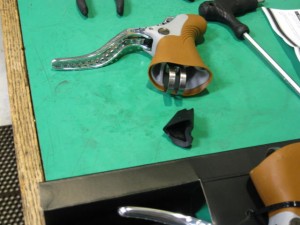
This optional plastic shim rotates the top of the lever for a flatter hood position. (I used it)

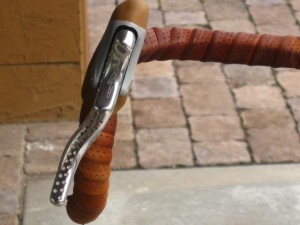
TRP lever, front view

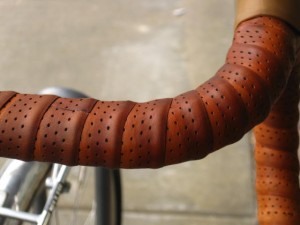
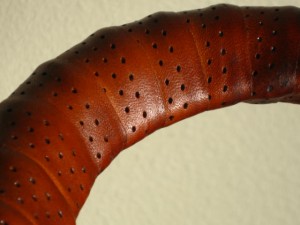
While I was at it, I decided to try to clean up the Brooks leather bar tape which had turned almost black from accrued hours of contact with my grubby mitts. I filled the sink with warm water and a little bit of dish detergent and lightly scrubbed the tape with a dish washing brush, rinsed it off and immediately installed it. Wrapping the bars with wet Brooks tape does a couple of things: it lets the tape stretch so that it wraps smoothly and when it dries out it conforms like a skin to the handlebars. A light coating of Brooks Proofide after the tape has dried completely adds back moisture and effulgence. This is the second or third time I have removed and re-applied this wrap, wetting it each time first, so, even though the Brooks leather tape is more expensive than other materials it is extremely durable.

This tape started life as "honey" colored. This is after washing the tape and re-applying it.

Washed and treated - Lustrous!

Categories
Cockpit Handlebars and Stems Touring Bike Components

Selle An-Atomica Saddle

“Saving Your Butt, One ride at a Time”  What a great tag line!

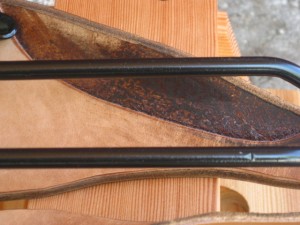
The saddle has a layer laminated to the underside for more support.

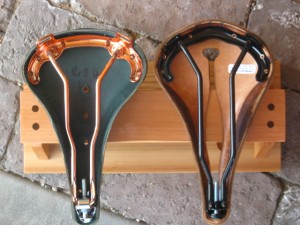
Customer feedback and diligent perusal of various on-line forums (somebody’s got to do it, the internet’s not going to read itself!) encouraged us to stock the Selle Anatomica saddles in the store. The saddles have a long cutout intended not only to relieve pressure but to allow the two sides of the saddle to move independently.

We have not had the chance to test these saddles but Selle An-Atomica claims there is no break in period.             Here we compare and contrast the Selle An-Atomica Titanico and the Brooks B-17 Imperial:

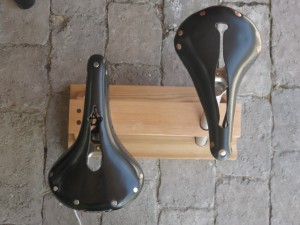
The Brooks B-17 Imperial on the left, Selle An-Atomica Titanico on the right


The Selle An-Atomica on the left, Brooks B-17 on the right.


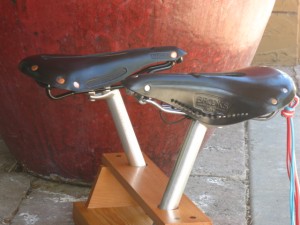
The Brooks B17 on the left, Selle An-Atomica on the right


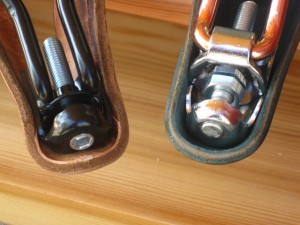
The Selle An-Atomica nose bolt can be used to adjust the tension of the saddle and takes a 5 mm hex wrench. The bolt on the Brooks requires a special wrench, which is provided with the purchase of a saddle.
Categories
Cockpit Handlebars and Stems Touring Bike Components

Nitto Dirt Drop Handlebars

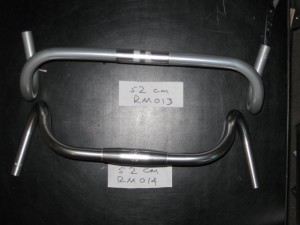
The Bike Touring News store stocks two different versions of the Nitto Dirt Drop handlebar. The main difference between the two, or so I thought, is the diameter of the bar at the stem clamp sleeve. The RM-013 is 26.0mm and the RM-014 is 31.8 mm. I recently did a side by side comparison and was surprised to see just how different these bars are, not only in the clamp diameter but in the overall shape.

Nitto RM-013 Dirt Drop compared to the RM-014 Dirt Drop
Nitto Rm-013 Dirt Drop bar (top) and the Nitto RM-014 Dirt Drop

The bars in the above photo are both 52’s. That means it is 52 cm from the center of the end of the tube on one side to the center of the end of the tube on the opposite side. Even though both bars are the same width at their widest, or the bottom of the flair, the top, flat part of the RM-014 begins curving to the drop much closer to the center of the handlebar, resulting in a narrower top section and a wider flare.

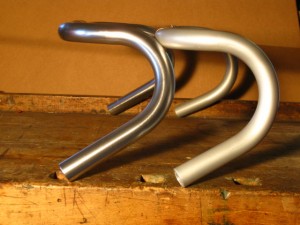
Rm-014 and Rm-013 from the side
The Nitto RM-014 on the left, the RM-013 on the right

From the side the differences are not as pronounced. The bottom flared portion of the RM-014 on the left may be a slight bit longer and the bend a little bit sharper.
side view, Nitto Dirt Drop bars
For a bike that will be ridden mainly off-road, the Rm-014 might be a good choice with the ramps at a little more of an angle (like in the last photo) and the brake levers mounted a little lower to make riding in the drops more comfortable.

But this picture I find to be the most interesting:
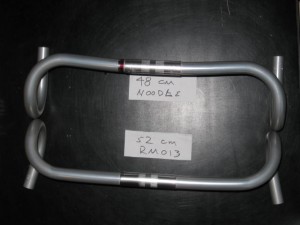
Nitto Dirt Drop and Nitto Noodle
The 52 cm RM-013 is very similar to the 48 cm Nitto Noodle bar, it just flares out a little more and doesn’t have the slight return bend on the tops. A Google search revealed why. Grant Petersen from Rivendell designed both bars. The Dirt Drop was original equipment on the 1987 Bridgestone MB-1 and the Noodle was a replacement, with a few tweaks, for the Dirt Drop when Nitto stopped making them due to lack of a market. Now they are making the Dirt Drop again, in two versions. I personally like the extra flare on the RM-013 and I use them on my touring bike.

Either bar will accept bar end shifters and road style brake levers. The RM-014 is a few grams heavier in any given size and it comes in 50 amd 52 cm widths. The RM-013 comes in 46, 48 and 52 cm widths.

Categories
Cockpit Handlebars and Stems Touring Bike Components

A Conversion: Drop Bar to Albatross Handlebar

Switching from drop style handlebars to an upright, swept back handlebar can change the functionality and personality of a bicycle. And sometimes a change can be good, maybe turning an unused bike, or one that may duplicate another bike in one’s stable of bikes, into the go to, everyday machine.
From This:

To This:

oxford handlebarsOne such handlebar, the Nitto Albatross is popular in both the alloy and chrome-moly versions. Soma Fabrications makes the Oxford bar which is almost identical in size and shape to the alloy Albatross Nitto makes. This 6061 polished aluminum handlebar will take bar end shifters, and has a 25.4mm clamp diameter making it versatile for use with most stems.Making the switch takes a little bit of planning and thought:
– First of all, the brake levers that fit on a drop bar will not fit on the new bar so new  “mountain bike” style brake levers with a 22.2mm clamp diameter, like the Shimano BL-R550 – are a requirement. The brake levers come with new cable and housing which will come in handy because the old cable and housing is probably too short.
– If the drop handlebar setup used bar end shifters these can be transferred to the Albatross or Oxford bar. If downtube shifters, then, no worries. If the drop bars had “brifters”, or those brake levers with the shifters built in, then new shift levers are in order. Either the bar end style or a top mount shifter or I suppose even the mountain bike standard trigger shifters could be used.
– The hand grip areas can be wrapped with regular bar tape or a slide on grip can be used with the caveat that the cable and housing for bar end shifters will not clear most standard grips, and the more or less conventional solution is to use cork grips with grooves filed into them for the cable.

Now it’s a simple matter of disconnecting all the brake and shift cables, un-wrapping the handlebars and taking off the brake and shift levers. The old handlebar comes off and the new one goes on. New shift levers (or the old bar end shifters), brake levers and grips go on, the new cable and housing is fit and tightened and adjusted and that’s it except for possibly adjusting the height or angle of the handlebars to the rider’s preference. A threadless stem with a removable face plate makes removing and installing handlebars pretty simple.

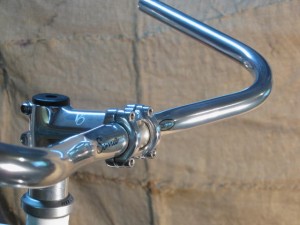
bare oxford handlebars installed
The new bars clamped into place
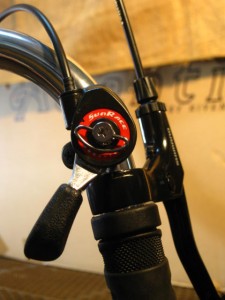
Sun Race shift lever
This top mount shifter is inexpensive but it works great. It is a single lever meant to be used with a rear derailleur, single chainring and no front derailleur. Who needs more than 5 or 8 gears anyway?
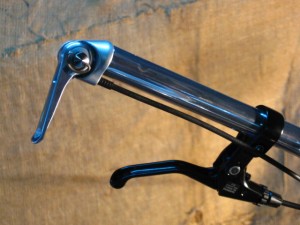
silver bar end shifter
Bar end shift levers work too. See how close to the bar the cable is? This calls for a grooved grip….or just a tape wrap.
IRD brand top mount shifters
Another option might be the IRD brand top mount shifters, indexed for use with a 9 speed rear cassette.
Categories
Cockpit Handlebars and Stems Touring Bike Components

Quill Stems

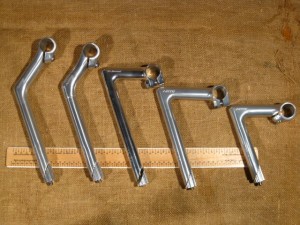
Quill stemsinsert into the threaded steer tube on a bicycle fork and are held in place by means of a bolt which tightens a wedge inside the tube. The other type of stem commonly used is a so-called threadless stem which clamps to a threadless steer tube. Quill stems and threaded steer tubes are less common nowadays, but the Nitto company in Japan still makes a wide range. Here is a side by side photo of most of the stems they make. Each stem in the photo is placed so that the minimum insertion mark on the stem aligns with the top of the ruler. This gives a basic visual cue as to how high the various stems can extend above the top of the tube. Notice that the stems are placed at an angle meant to replicate the 70 some degree angle of the head tube on most bikes.
NEWS FLASH! 09/26/2012
We now stock the 225 Technomic Deluxe stems. These have a long quill like the Technomic but are cold forged and have the same finish as the Deluxe. 25.4 or 26.0 clamp sizes.

Photo of 4 models of quill stem
From Left to right: Nitto Dirt Drop 100, Nitto Dirt Drop 80, Nitto Technomic, Nitto Technomic Deluxe and Nitto Dynamic

The Dynamic stems only come with a 26.0 mm clamp size, and the Dirt Drop,  Technomic and Deluxe stems come with either 25.4mm or 26.0 mm clamps. A 25.4 stem will not work with a handlebar that has a diameter at the center clamping point of 26.0. However a 26.0 stem will work with a 25.4 handlebar as long as a shim, specially made for this purpose is used between the stem and the bar. The Dirt Drop stems are only made in 80 mm and 100mm versions (the extension from the vertical-ish riser part or quill part of the stem). The other models come with extensions generally from 80 mm to 100mm in 10 mm increments. Got it?

Hopefully, this is a useful comparison for the bicycle traveler who might be thinking about changing the position of their handlebars or about getting different handlebars.

Categories
Cockpit Handlebars and Stems Touring Bike Components

4 Handlebars

Wherein the  bike hermit compares and contrasts 4 different drop style handlebars for the touring bike. Finding the perfect handlebar for his touring bike has him in a bit of a bother.

Last season I installed the Nitto Dirt Drop bars on Chief. I like the way the drops flair out.

Nitto Dirt Drop

The bars actually have a very slight rise from the clamp area to the ramps. These are the medium width version. There is a version that is narrower and one that is wider. These feel a little too narrow for me when I’m riding on the hoods. Dang, should have got the wider ones.  But I like the angled-in aspect of the brakes on the flair of these bars. It feels natural.

On the hoods.

The other nice thing about the drops being wider than the tops ….my wrists don’t hit the tops of the bars when “in the drops”.

Nitto Dirt Drop touring handlebars,"in the drops"

On Norm, my everyday bike, I have the On One Midge handlebar. Perhaps my favorite bar of all time.

On One brand Midge handlebar

This handlebar might look a little crazy…. in fact I have been labeled “crazy bar guy” on group rides…but the ergonomics are fantastic. These have a super wide, flat top section so there are multiple positions available on the top of the bars alone. As the top of  the bar bends to begin the drop portion it also flairs out at a dramatic angle.

On One Midge.....Wide tops, crazy bends

The other thing that happens when the bend from the tops is so gradual is that the brake levers get mounted at an even more extreme angle. But if I raise my arms out in front of my body, in a relaxed way, my fingers do not naturally line up perpendicular to the ground. They are more like 30 to 40 degrees from vertical. An angle very similar to the angle of the the brake levers on the Midge bar:

Natural angle to the brake hoods

I like to install these handlebars with the ramps level. This provides a great platform and plenty of support for the hands.

Notice the ramps, the portion of the bar behind the levers, are basically level.
Another position I use a lot with the Midge bars.
Nice platform for the hands

Sky King has the Nitto Grand Randonneur on her Rivendell Bleriot.

Sky King's Nitto Grand Randonneur bars

The most notable thing in this view is the distance the ends of the bars extend toward the rider. This should allow for riding comfortably in the drops without reaching. The picture below shows the rise from the center up to the ramp portion.

The Grand Randonneur rises from the center to the ramp
A view of the upward rise from the center, the slight flair of the drops, and the angle of the brake levers.

The handlebar I am itching to try on my touring bike is the Nitto Noodle.

I guess I know why they are called "Noodle"

These bars intrigue me because of the slight rearward bend of the top portion. Again, if I examine the shape of my palm, curled into a gripping shape, I find that it is at a slight angle, from inside to outside. Corresponding to the shape of the Noodle bar.
They don’t have any flair to the drops though. The ramps are basically parallel to the drops. These would be really cool if they had the backward bend plus a flair like the Midge bars! Then they would be the Pretzel bar.

No flair to the drops and subsequently.... to the brake levers

So, there you have four options for drop style handlebars for touring. If you are thinking about changing handlebars keep in mind that there are three standard diameters for handlebars where they clamp to the stem: 25.4 mm, 26mm, and 31.8mm. Stems are made for all those diameters too. A stem with a clamp for 25.4 will not work with a 26 or 31.8 handlebar, but a smaller diameter handlebar can be made to work with a larger clamp diameter stem by means of handy dandy shims made for that purpose!
After looking at these pictures I think I need to write a post about handlebar tape and how to change it.