Categories
Bottom Brackets and Crank Sets Drivetrain

From Three by Nine to Two by Ten on a Touring Bicycle

A Tale of Chain Suck
bicycle drivetrain
The new drivetrain

By replacing my chain and the middle ring on my triple Sugino touring crankset I thought my problems would be solved. The chain would now drop smoothly from the middle ring to the small ring without hanging up on the bottom of the middle ring, getting dragged around and over the top and getting jammed or “sucked” into the front derailleur. For the technical minded, this article about chain suck is informative. Basically, worn chain rings and/or a worn, dirty chain will contribute to chain suck. But, even with the new chain and middle ring the chain still was reluctant to disengage from the bottom of the middle ring when I wanted to shift to the smaller ring.
triple touring crankset
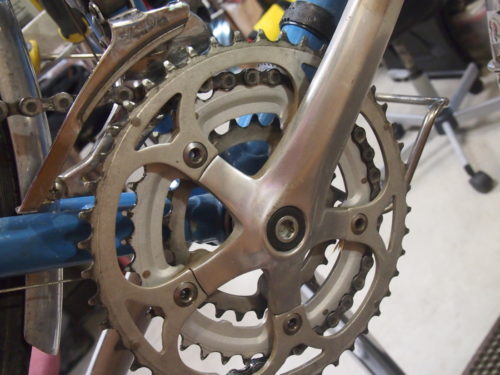
The old, triple Sugino crankset. 46-36-26

I have never been entirely happy with this crankset for a couple of other reasons:
1.) the arms are 175 millimeters long when I would have preferred 172.5
2.) the Q-Factor has always felt too wide to me.
3.) there are several combinations of chainring/rear cog that are either unusable or redundant.

The mountain biking world has been addressing the inefficiencies of triple cranksets and now so-called 2x and 1x systems using either two chainrings or just one with 10 or 11 speed, wide-range rear cassettes proliferate. When I saw the new “wide compact road double” crankset from Interloc Racing Design (IRD) I decided to take off the curmudgeon hat and put on the practical hat.
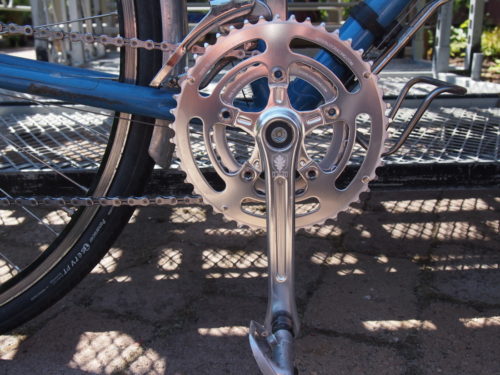
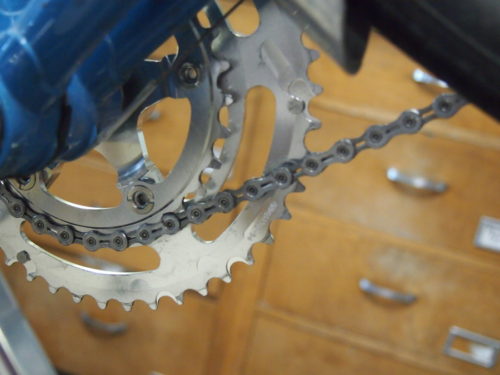
IRD crankset
The IRD wide compact double touring crankset. 46-30 172.5mm arms
IRD double
The new double crankset. 46-30

I had to consider a number of things in making the swap;
-First, I obviously want a decent range of gears suitable for a loaded touring bike. I used the Sheldon Gear Calculator as I describe in this blog post and see that a 10 speed cassette with a small cog of 11 teeth and a big cog with 34 teeth will give me the same high end as I have with the triple and a slightly easier low gear, which is a bit of a bonus, and will give me a few more usable gears (less cross-chaining) and fewer redundant gears.

-Second, my front and rear derailleurs need to be able to deal with new rings and cogs and with a ten speed chain. The front triple derailleur, while it does not have the ideal shape for the compact rings moves the chain back and forth quite smoothly. I use a friction downtube shift lever so the 9 speed derailleur works with the narrower 10 speed chain but a 9 speed front derailleur will generally not work with an indexed shifting system made for ten speed. The rear derailleur can handle the chain wrap because there will actually be less chain to tension than with the triple setup. The medium cage Ultegra derailleur has a nominal large cog maximum of 30 teeth though, four teeth smaller than the 34 I am using. When in the big cog I am unable to adjust the derailleur to keep the upper pulley far enough away from the bottom of the cog but if that proves to be a problem, I can get a different derailleur.
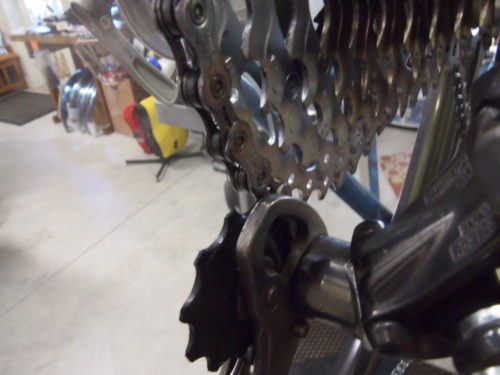
rear derailleur pulley
For smooth running, there should be more space between the top of the derailleur pulley and the bottom of the largest cog.

-Third, since I still like an indexed rear shifter I need 10 speed downtube levers. And of course I will need a new, 10 speed cassette and chain.
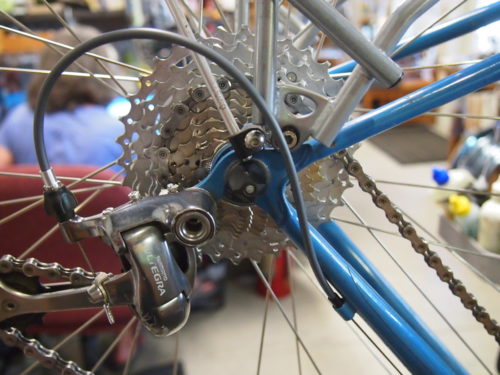
ten speed cassette
The new rear cassette. 11-34

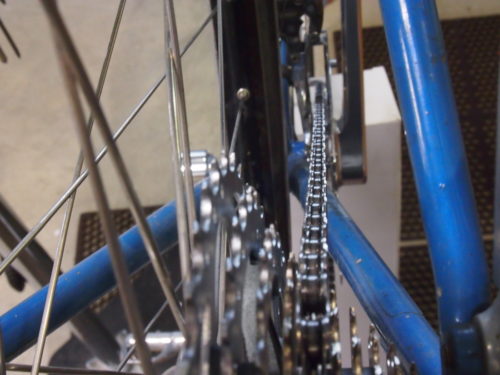
– My fourth consideration was Q-Factor. IRD recommend a JIS square taper bottom bracket with a 118mm spindle length to achieve the best chainline and, using that suggestion I ended up with an almost perfect chainline. The Q-Factor is now 1 centimeter narrower which I’m hoping will be more comfortable and efficient.
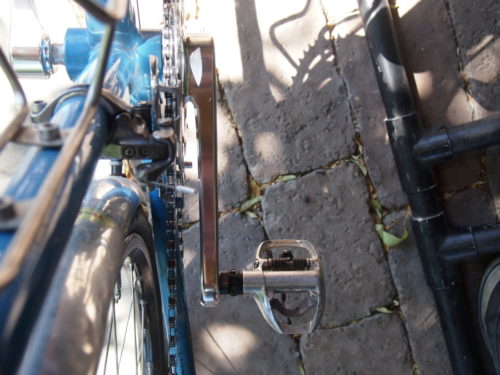
crank arms
Straight arms, Low Q-Factor

chainline
The chainline in the small ring and just left of center on the cog is pretty straight

I feel like simpler is almost always better and I like the simple, clean look of this setup. The IRD crankset has a jewellry-like finish and a muscular appearance, which might be even a little more traditional looking than the Sugino. The real test of the success of the conversion will be taking longer rides and going touring with it.

Categories
Bottom Brackets and Crank Sets Drivetrain

Phil Wood Co.

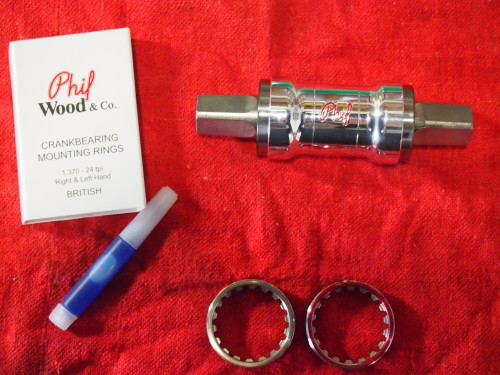
The Bike Touring News store now has Phil Wood bottom brackets for your Long Haul Trucker (or even brand x touring bikes!) builds. Phil Wood has gained a reputation over the last 40 years or so for being the standard in durable, strong and serviceable bottom brackets. Here’s a short pictorial guide:

picture of bottom bracket and cups
The Phil wood bottom bracket and retaining rings. The rings come with thread lock and they are required for installation.

bottom bracket shell
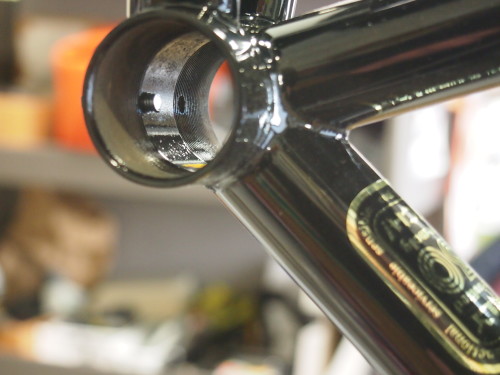
On a new frame the bottom bracket shell threads should be chased before installing the bottom bracket. Phil Wood retaining rings have no outer flange to rest against the the outer surface of the shell, so the paint does not need to be cleaned off nor does the shell need to be faced.
bottom bracket thread chasing tool
This is a thread chasing tool for bottom brackets. A person could probably get away without this step on a new frame.
Phil Wood bottom bracket ring
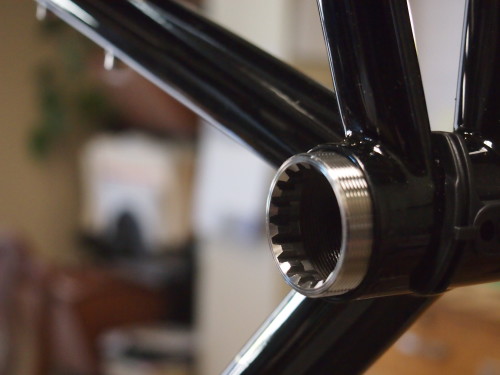
The drive side retaining ring threads in to the shell, just partway to start.
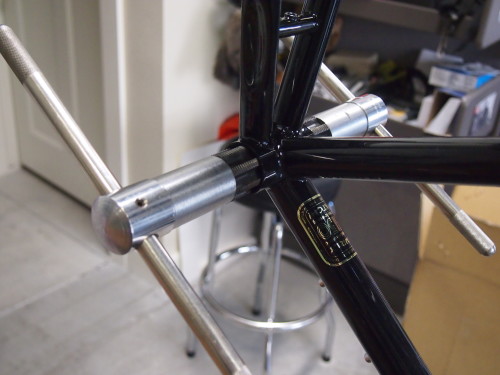
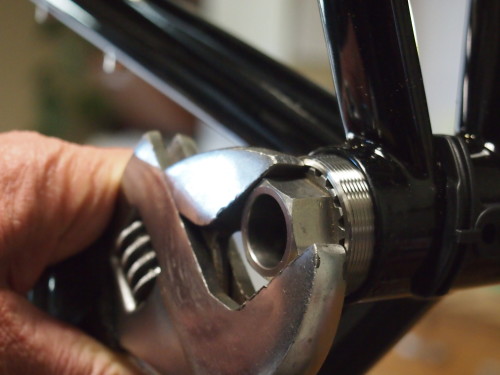
Phil Wood bottom bracket tool
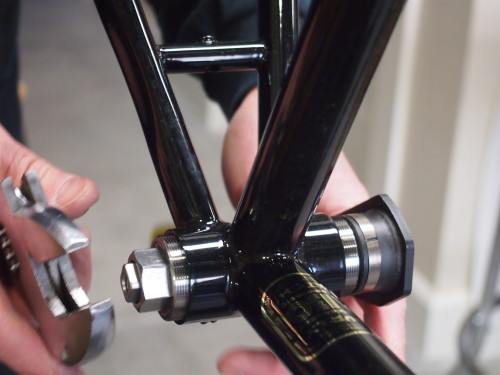
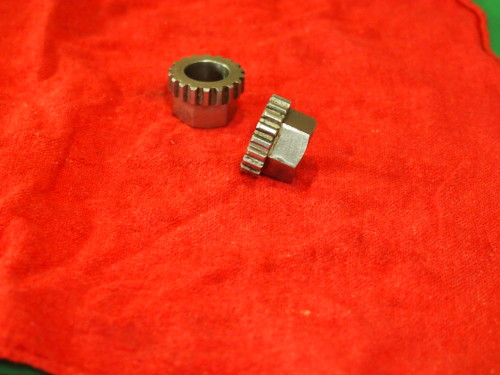
The Phil Wood bottom bracket tool is specifically designed for the retaining rings and is required for installation.
Two Phil Wood bottom bracket tools in use
Two bottom bracket tools, one on each side makes the job much easier. The bottom bracket is slipped in from the non-drive side before the non-drive retaining cup is threaded in.
two phil wood bottom bracket tools
Here is a pair of Phil bottom bracket tools. Using two makes final adjustment much, much easier.
centered bottom bracket installed
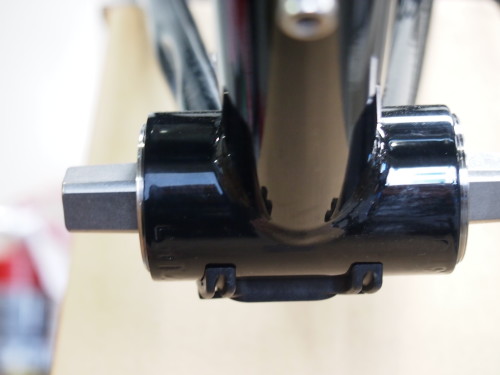
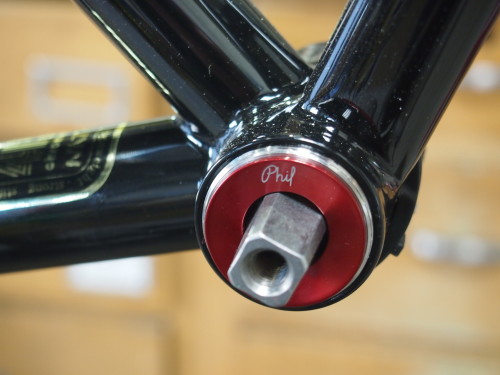
On of the unique and clever benefits of the Phil Wood bottom bracket design is the ability to move the cartridge left or right up to 5mm in order to get the chain line perfectly dialed. Here the bottom bracket is more or less centered since there is about the same amount of thread left exposed on the cups on both sides of the shell.
proper crank set clearance
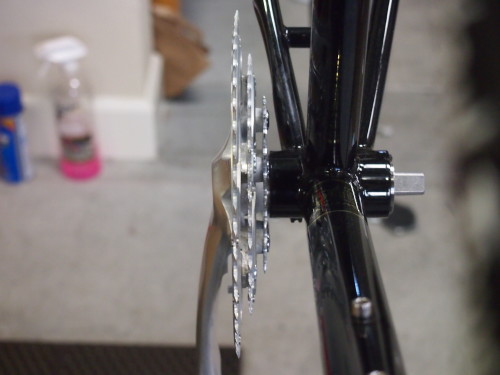
The proper length of bottom bracket spindle will be a function of the shape of the crank, mostly. Too short a spindle and the chainrings can hit the frame, too long and the chainline could be awkward and the Q-factor will be increased. This is a 68×108 bottom bracket with a Sugino XD2-500T triple crank set.
phil mud guards
New (2013 or so) to the Phil Wood product lineup is the BB Cup Mudguards designed to friction fit into the retaining cups and to keep the splines free from muck buildup. On this 108mm bottom bracket the bottom of the spindle taper doesn’t clear the mud guard and when the crank is tightened onto the spindle it binds. Clearly this idea needs some work. Phil Wood & Co. has been selling bottom brackets without mudguards for 4 decades though so they are not a requirement.
Categories
Bottom Brackets and Crank Sets Drivetrain

Some Square Taper Bottom Brackets

Second in a series on bottom brackets. Numero uno is here.

The newest (2012) Long Haul Trucker complete bikes come with the Shimano UN55 square taper bottom bracket which is an improvement over the UN-P.O.S. used in earlier years, but when asked what I might upgrade on a stock Long Haul Trucker I am likely to recommend a new bottom bracket. Don’t get me wrong, the bottom bracket that comes standard on the stock LHT is perfectly adequate. But there are bottom brackets that will last longer.

With bottom brackets, one gets what one pays for. In this case more money buys better bearing seals, higher quality bearings made to stricter tolerances, and better materials throughout.

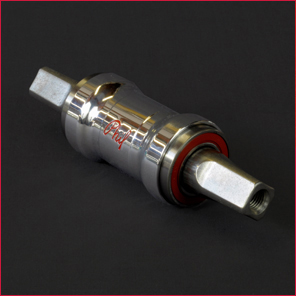
Phil Wood Company designs, manufactures and assembles precision bike parts in San Jose, CA. USA. Their bottom bracket uses two adjustable cups to hold the bearings and spindle in place which makes it possible to achieve the perfect chain line, since the bottom bracket can be positioned within a 5 mm band of “normal” centered position. The cartridge bearings are plainly visible when the unit is installed, which might make one wonder about the durability when used in extreme conditions, but Phil Wood Co. uses “seals which are as good or better than those found in the highest quality submersible motor and pump bearings”. I have only seen one Phil Wood bottom bracket that needed servicing though, and even that was straightforward….the unit can be sent back to the company for new bearings at a reasonable cost.

phil wood bottom bracket
Phil Wood cartridge bottom bracket
bottom bracket cups for phil wood
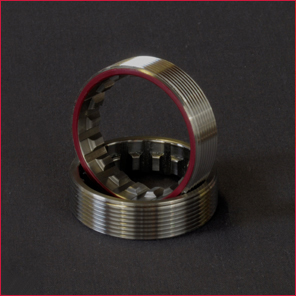
The left and right cups use an interference fit with the bottom bracket and require the use of the Phil Wood bottom bracket tool

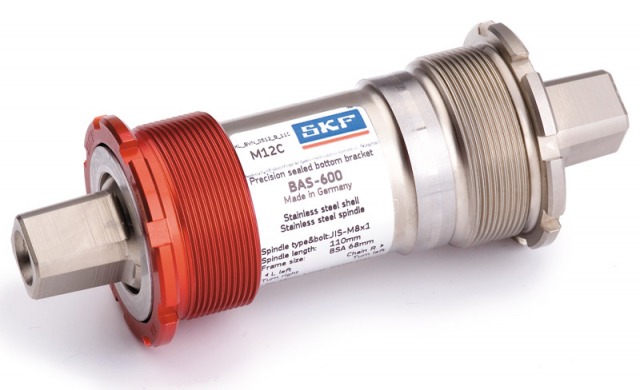
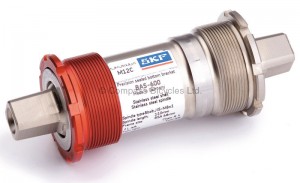
SKF is a German company (Correction: Thomas K. correctly points out that SKF headquarters are in Gothenburg, Sweden) which has been a leader in bearing technology since 1907 and today is the largest bearing company in the world. Their approach to bottom bracket design strives to incorporate the best of old and modern technology. Rather than using cartridge bearings pressed onto the spindle and into the bottom bracket cartridge they use bearings which are received by races which are part of the spindle and the shell. Custom seals are used to keep contaminants away from the assembly. This way they can use roller bearings on the drive side and over-sized bearings on the non-drive side increasing durability and strength. This design has some appeal to the retro-grouchy Bike Hermit, and SKF is proud of it too….they offer a 10 year or 65,000 mile warranty (just be sure to keep track of your miles) 😉

SKF bottom bracket. The little bit of bling afforded by the red cup is not undesirable.


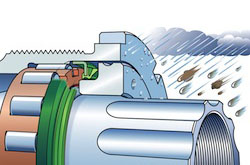
The mechanical seal designed to keep the bearings cozy and happy in the most inclement weather
Categories
Bottom Brackets and Crank Sets Drivetrain Touring Bicycles

Bottom Brackets

At the risk of talking down to some readers and over the head of others I feel the need to explain the term “bottom bracket”. According to Sheldon Brown’s Bicycle Glossary a bottom bracket is:
The part of the frame around which the pedal cranks revolve, also the bearings and axle assembly that runs through the bottom bracket shell of the frame.

SKF Bottom Bracket
This is an SKF brand bottom bracket. The red cup slips off to allow the unit to be threaded into the bottom bracket shell.

Looking at the late Mr. Brown’s page I realized I am opening a bona fide can of worms. There are several bottom bracket “standards”, and bottom bracket/crankset interfaces. We won’t even get into “outboard bearing” and “BB30” and other new standards which are mostly calculated to keep the buying public buying, while claiming to add some performance advantage…not performance related to the durability or function of the piece… but of the rider/bike.

“Square taper” bottom brackets are made to work with “square taper” cranksets and cranksets with suitable chain ring sizes for touring generally are of the square taper variety. Clink this link for a discussion of gears and gearing. So this series of pieces will be about square taper bottom brackets.There are still compatibility issues to think about though. The taper on Italian (Campagnolo) cranks and bottom brackets are different from the taper on cranks and bottom brackets made anyplace else in the known Universe, which actually is typical of Campy parts. And bottom brackets come with different spindle lengths. The correct spindle length for a given bicycle will be a function of the width of the bottom bracket shell, the shape of the chain stays and of the shape of the crank. For example: with a Sugino XD500 (XD2) triple crank set on a Surly Long Haul Trucker, a 107mm to 110mm spindle length works well.

Before the widespread use of cartridge bearings, bottom brackets were designed with loose balls or caged balls running on races inside the cups and races shaped into the spindle. Mechanical seals or o-rings were used to keep out water and dirt. Nowadays the spindle is held inside a case by means of sealed cartridge bearings pressed onto the spindle. The only seals being those on the bearings themselves. A less than ideal state of affairs for the part of the bicycle in a location that will be sprayed from time to time with a slurry of water, grease, oil, de-icer, sand and grit.

So, what’s the dyed-in-the-wool bike tourist to do? In the following posts we will explore some of the available options for touring bike bottom brackets. If the idea of reading about that titillates you, you should think about getting a life.