Categories
Bike Touring Equipment Shifters and Derailleurs Surly Bikes Touring Bike Components

In Defense of Bar-End Shifters

We are often asked why Surly specs bar-end shifters rather than integrated brake/shift levers on the Long Haul Trucker, Disc Trucker and Cross-Check.  This is a good question and one we thought warranted some explanation.
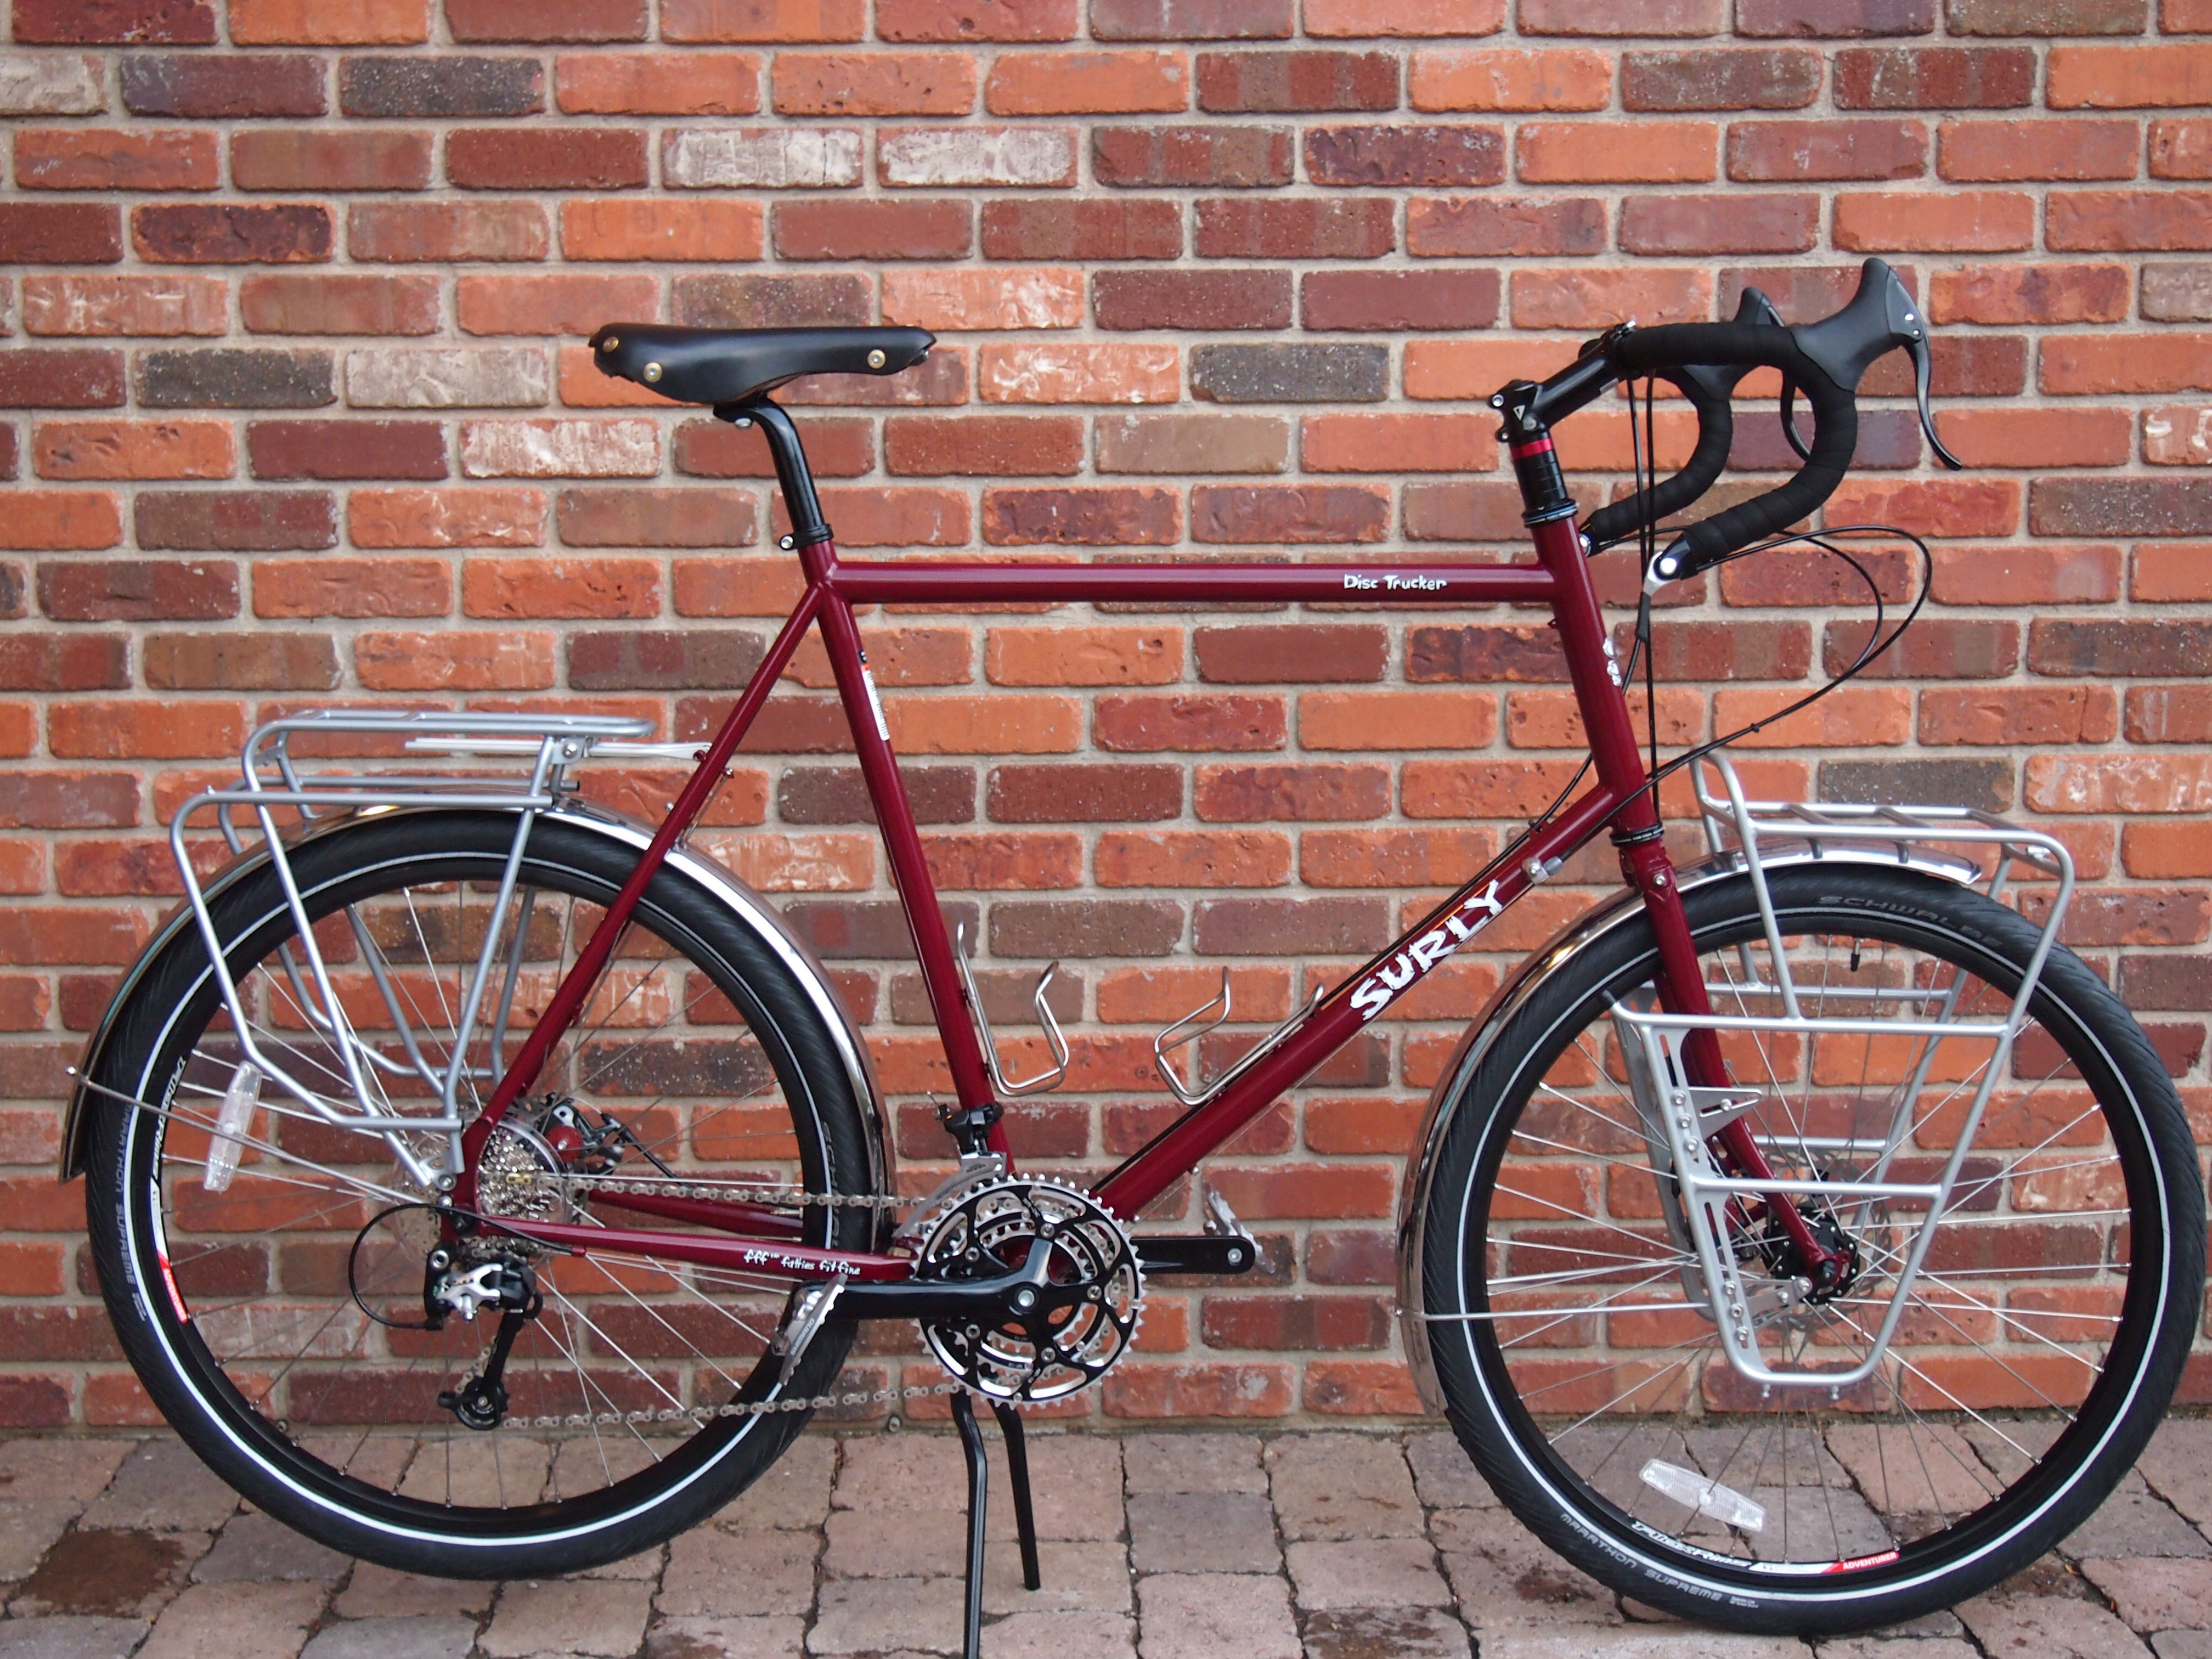
side view of bike
Disc Trucker with bar-end shifters.

When you walk into most bike shops, you’ll most likely find that every single new bike with drop bars is fitted with combination brake/shift levers from Shimano, Sram or perhaps Campagnolo.  They have become ubiquitous for a myriad of reasons, most of them good.  With an integrated shifter, the rider has complete control over braking and shifting from a single hand position without having to let go of the bars.  Now, the rider can shift while bouncing over rough terrain, from the hoods or the drops, even out of the saddle or in a full sprint!  Try that with your old downtube shifters and you may be picking your teeth out of the dirt.  This was quite an advancement and has changed the way riders interact with their bikes in a profound way.  Many cyclists could never imagine going “back” to bar-end or down tube shifters.  Why should they?
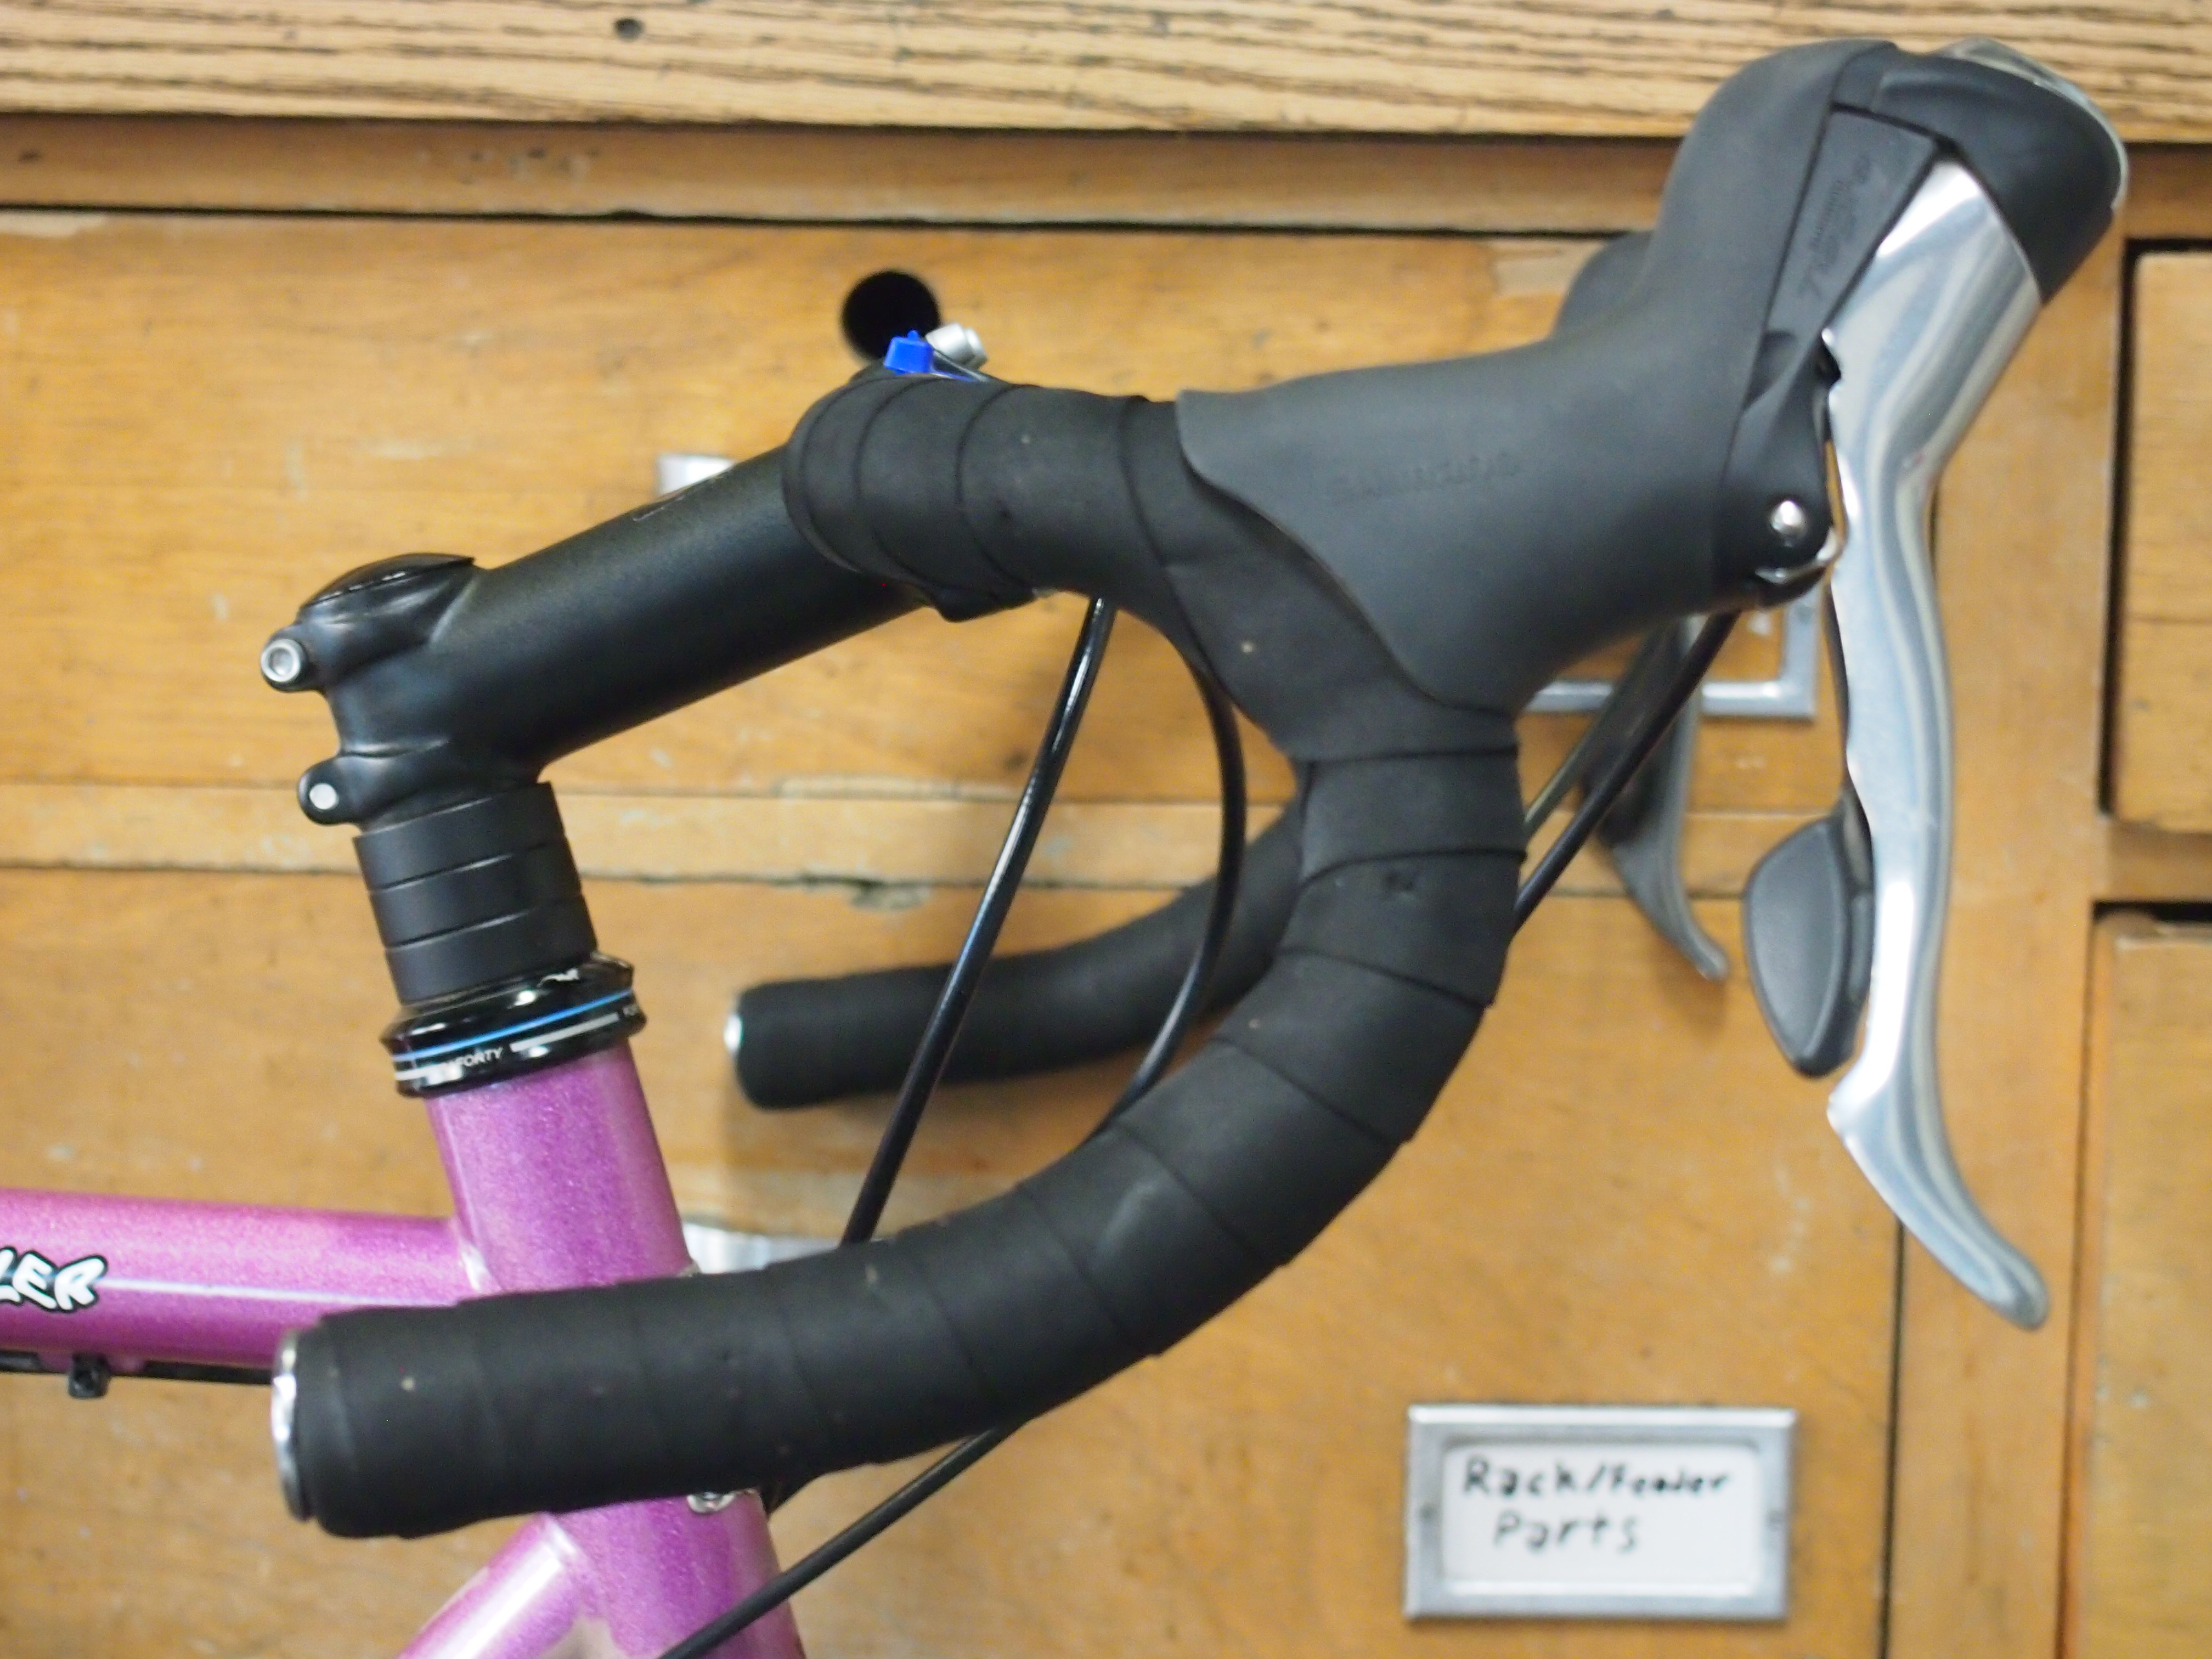
handlebar and brake hoods
Straggler with Shimano STI brake/shift levers

If integrated shifting is so great that it has become the standard for drop-bar bikes of all styles and price points, why would a bike company include anything else on their complete bikes?  Are Surly’s bikes spec’ed by crotchety retrogrouches who are scared of progress?  Maybe.  Are they trying to rip us off by sticking us with obsolete, outdated parts for an exorbitant price?  Doubtful.  Did they accidentally order ten million sets of bar-end shifters that they had to put somewhere?  Possible, but unlikely.  Surly does use integrated shift levers on a handful of bikes like the Pacer and Straggler, so we know they’re not afraid to spec them when it makes sense.  Perhaps it comes down to having the right tool for the job.

For all their wonders and benefits, the level of convenience offered by integrated shifters comes at a price, both literal and figurative.  These things are not cheap!  Next to the frame and wheels, those little clicky bits are usually the most expensive component on your bike.  For example, Shimano’s latest Ultegra STI (Shimano Total Integration) levers carry an MSRP of $400.  If you want the top-of-the-line Dura-Ace units you’re looking at at whopping $700!  You could buy a nice new frame with money to spare or even a complete entry-level bike for that price!

In contrast, a pair of Dura-Ace bar-end shifters (probably the finest indexing bar-end shifters on the market) will set you back about $120.  Depending on your drivetrain requirements, many shifter sets (like these little dandies from SunRace) cost much less.  This saves you money on the complete bike and makes replacement in case of a crash or damage much less painful for the pocketbook.

Also, the operation of integrated shifters can be very confusing for new users.  Learning which of the four shift paddles (two of which are also brake levers) does what, when and how to use them adds to the intimidation and nervousness many new riders feel.  So much focus is required to learn how to shift that it is easy to forget how to brake, especially when your brake lever is also your shifter!  Conversely, bar-end shifters use only two levers – one for each derailleur – that are completely separate from the brake levers.  Pull it towards you to shift one way, push away from you for the other.  The lever even stays in place to remind you what gear you’re in.  Easy for new riders to learn, refreshingly simple for the experienced.

The other main drawback of integrated shifters is their complexity and lack of serviceability.  There is a whole heck of a lot going on under those hoods that allows you to pull and release cable, shifting willy-nilly up and down across your cassette to your heart’s content.  When something goes wrong in there, there is often nothing to be done.  Here’s a photo from the Black Mountain Cycles blog that illustrates the point:
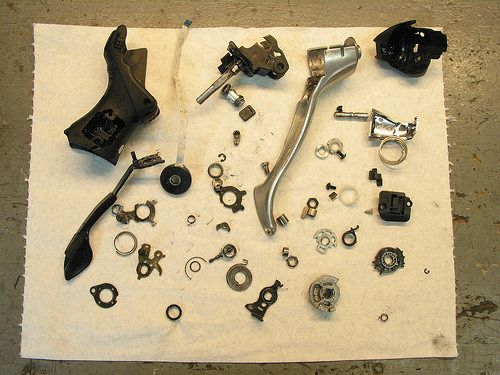
14721625829_1b4f289ffa
Photo by Mike Varley, Black Mountain Cycles. Used with permission.

Holy smokes, look at all those tiny springs!  We must note that Shimano does not intend for their shifters to be disassembled in this way.  None of the pictured parts are available as replacements and getting this whole mess back together would be quite a chore.  The problem with this particular shifter (as per Mike’s story on the blog) was that the teeny little spring in the lower-right corner broke, preventing one pawl from doing its job holding the cable reel in place and rendering the shifter useless.  When something like this happens there is no recourse other than to replace the entire unit.  In favorable conditions Shimano’s integrated shifters have a surprisingly good track record but they will all wear out eventually.  When they do fail you will quickly find yourself up shi(f)t creek without a functioning paddle.  This could be only a minor inconvenience if you’re close to home and have deep pockets but is not a situation you want to be in when out on the road for an extended tour.

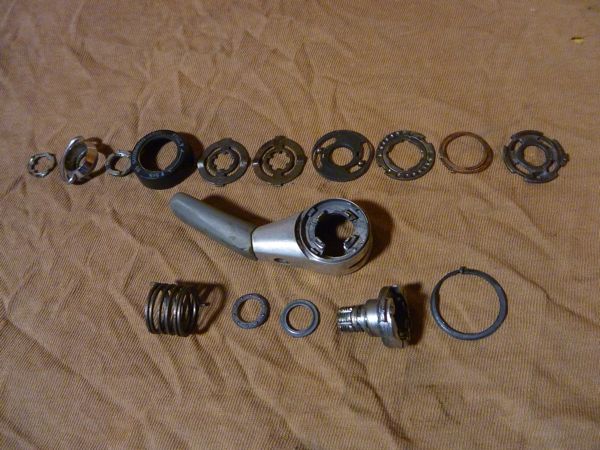
For the sake of comparison, I pulled the Shimano 9-speed bar end shifter off the RandoGnar to see what goes on inside this little guy.  Much like the integrated shifters, the guts of the bar end shifters are installed at the factory and aren’t meant to be taken apart for service.  Unlike the STI units though, bar end shifters rarely fail or wear out.  Here we can see why.  This shifter has been in constant service since 2008; first on my Long Haul Trucker, then on the RandoGnar.  It has seen many thousands of miles and an uncountable number of shifts in sometimes horrible conditions.  It has never been cleaned, serviced or lubricated in any way.  It still works well and I expect to get many more years of service from it.  Given the same treatment, I would be lucky if an integrated shifter lasted half that time.

P1160219

That’s all, folks.  Not much going on in there, huh?  No tiny springs, no diminutive pawls, just a shift lever, couple of ball bearings, detent ring, big burly spring and some washers, bushings, post and nut to hold it all together.  Simple and robust.  I gave everything a clean, oiled up the moving parts, reassembled the shifter and bolted it back onto the bike.  It now works as well or better than when it was new.

To be clear, I’m not claiming that bar-end shifters are more serviceable than integrated levers.  While they may be easier to take apart (I would never dare disassemble a fully-functional STI lever) and have fewer parts, Shimano does not offer replacements for the internal components.  If something breaks inside your bar-end shifter, you’ll have to replace the whole unit, same as the STI.  What I am saying is that there is much less to break inside a bar-end shifter, so the probability of a failure is minimal.  And, if you do manage to break one you won’t have to sell a kidney to fund its replacement.

This is why they’re spec’ed on Surly’s touring bikes and many others.  When compared with integrated brake/shift levers they are inexpensive, simple and reliable; all prized traits in touring gear.  For my money, they’re the flat-out best shifter for a drop-bar touring bike.  Surly gets that.  You’ll get it too once you try them.

What has been your experience with integrated or bar-end shifters on your touring bike?  Tell us about it in the comments below.  Thanks for reading.


Categories
Touring Bike Components Touring Bike Tires

Touring and Trekking Tire Trends

At the 2014 Interbike trade show, it seemed to us that 27.5″ (a 650b by any other name would ride as sweet), so called “29+” and fatbike tires are gaining traction with manufacturers and with consumers. As fans of the 29+ wheel/tire combo as on the Surly ECR we were excited about the number of upcoming offerings for tires and rims.
29+
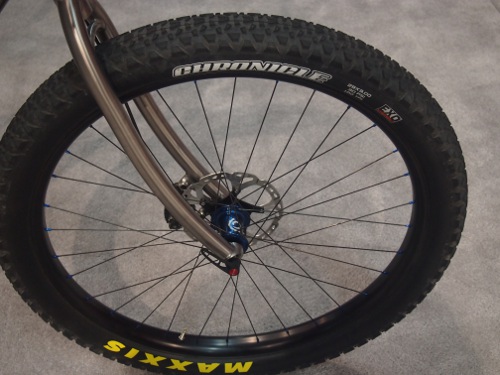
Maxxis have 29 x 3″ tires coming out.

big bicycle tire
The Maxxis Chronicle 29 x 3″ tire

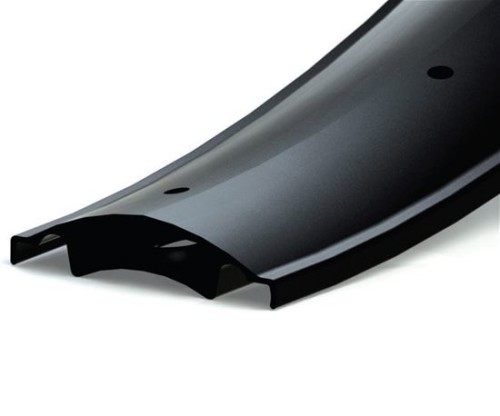
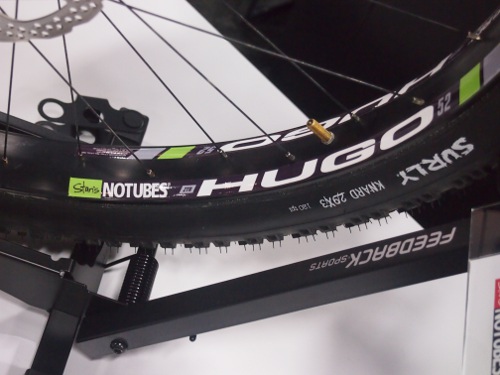
Stans NoTubes showed the Hugo 52 rim which is designed to work with tires such as the Surly Knard 29 x 3. (There will be 26″ and 27.5″ versions too) Generally, a non-tubeless-ready tire will not work well in a tubeless application even if the rim is made for tubeless. That is because the bead of a non-tubeless tire will not mate properly with the bead seat on a tubeless rim. But Stans designed the bead seat on this rim to work with non tubeless tires. They developed a sort of reverse box rim design so the profile from the outside is almost impossibly slim since the box section intrudes to the interior of the rim. In order to mount the tire, the rim needs to be basically inserted inside the tire cavity so that each tire bead is on the outside of the rim. Then each bead is worked over the rim from outside to inside.
rim cut
The Stans NoTubes Hugo 52 rim looks impossibly thin when a tire is mounted, but has the strength of a double wall section.

bicycle tire and wheel
Very thin looking section!

bicycle rims
29″ (700c), 27.5″ (650b) and 26″ (26″) Hugo 52 rims.
bicycle rim profile
Profile of the Hugo 52 rim with rim tape installed.

The Bike Hermit™ has been a curmudgeon when it comes to tubeless tires but with the lower pressures we have been running in the 29 x 3″ tires for desert touring he is pretty stoked about these tubeless rims because one of the main advantages of tubeless is the reduced chance of pinch flats when running low pressure tires (around 12 psi or so in the Knards).
FATBIKE TIRES
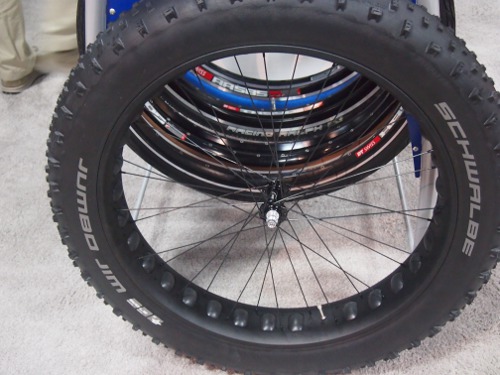
A couple monthe ago I asked my Schwalbe salesperson when he thought Schwalbe might make a fatbike tire. He said, basically- when they thought fatbikes had legs. Well, fatbikes got legs! Apparently:

big fat tire
A fatbike tire with the Schwalbe name! Behold- Jumbo Jim

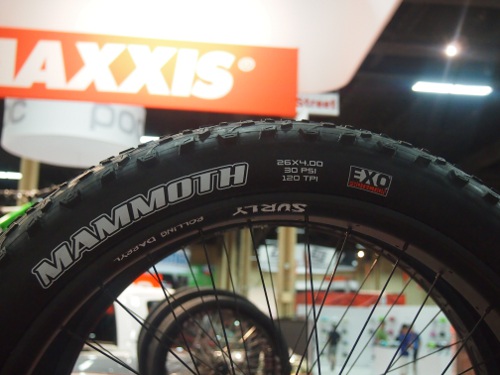
Maxxis too.

fatbike tire
Maxxis Mammoth

Categories
Cockpit Handlebars and Stems Touring Bike Components

Jones Bars

Journalism is a tough business. Those not involved don’t understand the sacrifices reporters make in order to enlighten and entertain them. As an example, I could not get the wi-fi connection to work at the Woodland Empire brewery and I had to walk almost 200 feet to Pre-Funk tap room in order to find a decent connection. Somebody’s got to do it though.

It’s always encouraging to me when I talk to an entrepreneur who has been involved in the bike business for a long time and is still so excited about what they do that they will talk my ear off about their product or service. Channing at Old Man Mountain is one example, as is Chris Kostman at Rough Riders- Any Bike Anywhere (Chris, why are there no new blog posts?)
Jeff Jones has to be included in this company.
introhome_text
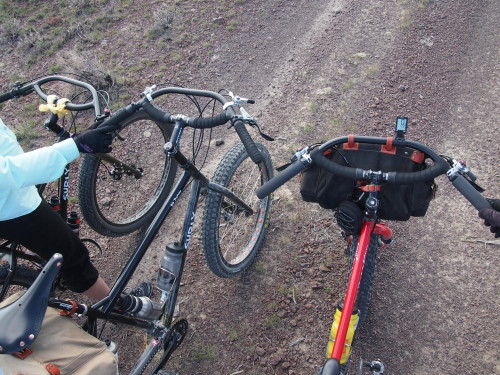
He is an iconoclast who developed his own line of bicycle frames and what may seem like a somewhat unconventional handlebar; The Jones Loop H-Bar®. Surly Bikes even commissioned an extra long version of the bars from Jones for their ECR, Troll and Ogre bikes. We have sold several sets of these bars and are currently experimenting with them- the Bike Hermit has them on the Big fat Dummy and Sky King has them on the ECR.

L.to R. ECR, Big Dummy, Pugsley

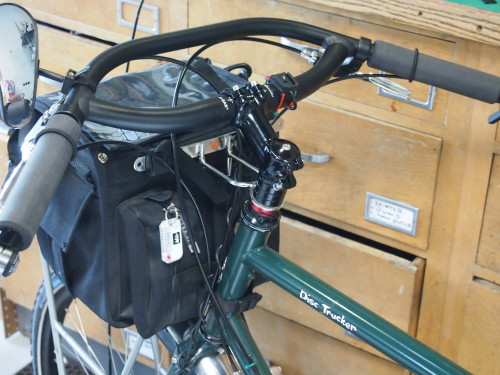
We even installed them on a Surly Disc Trucker, an experiment which revealed that bar end shifters fit.

Handlebars
Even good for touring!

The other interesting feature that has become apparent, thanks to friend Wendell, is the ability to annex bags ostensibly made for saddlebags, as seen in these photos:
handlebars
Jones Loop H-Bars and homemade bag

handlebars and bags
Jones Loop Bars, Revelate Designs Harness and a Salsa Minimalist rack.

The astute reader will notice that in most of the photos the ends of the bars have a thick foam grip. These are ESI grips for the Jones bars and they come in two lengths; 6.25 and 8.25 and two thicknesses; Chunky and Extra Chunky. Surly chose to not use the matching grips on their bikes…an oversight I hope is remedied in the next production run.
Some of the pictures also show padded tape wrapped around the welded junction of the loop part of the bar. This turns out to be a fine alternative hand position with these.

Two widths; the original 660mm and the Surly inspired 710mm. Two colors; black and silver. Aluminum or titanium. One clamp size; 31.8. Mr. Jones doesn’t allow us to sell them online but if you are in Boise, we have them in stock. Otherwise, order from jonesbikes.com

Categories
Bottom Brackets and Crank Sets Drivetrain

Phil Wood Co.

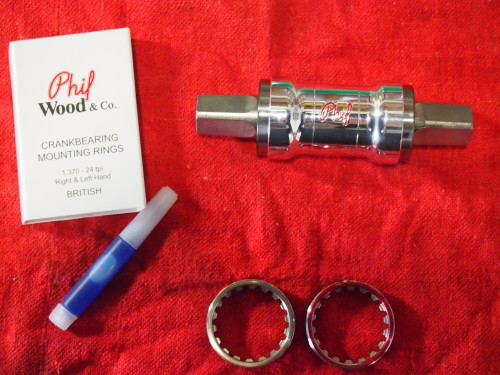
The Bike Touring News store now has Phil Wood bottom brackets for your Long Haul Trucker (or even brand x touring bikes!) builds. Phil Wood has gained a reputation over the last 40 years or so for being the standard in durable, strong and serviceable bottom brackets. Here’s a short pictorial guide:

picture of bottom bracket and cups
The Phil wood bottom bracket and retaining rings. The rings come with thread lock and they are required for installation.

bottom bracket shell
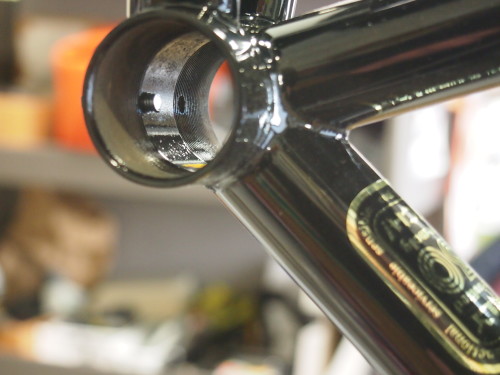
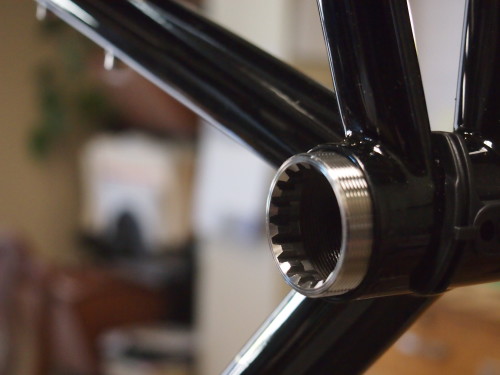
On a new frame the bottom bracket shell threads should be chased before installing the bottom bracket. Phil Wood retaining rings have no outer flange to rest against the the outer surface of the shell, so the paint does not need to be cleaned off nor does the shell need to be faced.
bottom bracket thread chasing tool
This is a thread chasing tool for bottom brackets. A person could probably get away without this step on a new frame.
Phil Wood bottom bracket ring
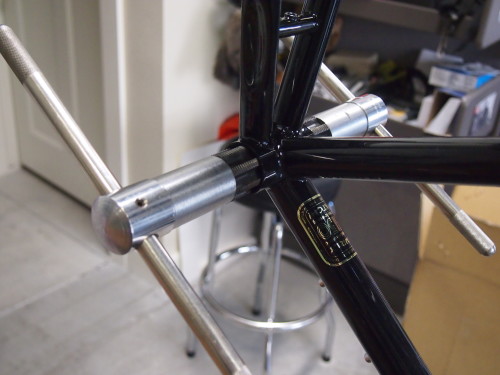
The drive side retaining ring threads in to the shell, just partway to start.
Phil Wood bottom bracket tool
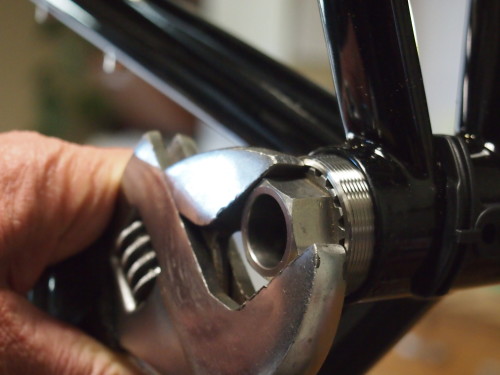
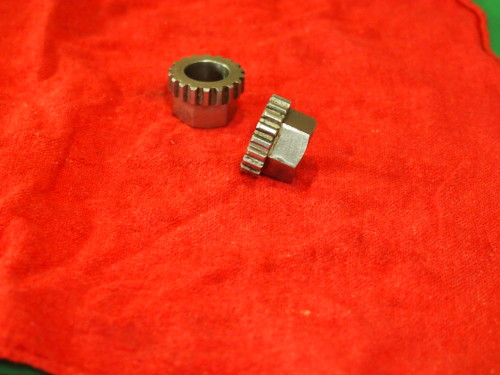
The Phil Wood bottom bracket tool is specifically designed for the retaining rings and is required for installation.
Two Phil Wood bottom bracket tools in use
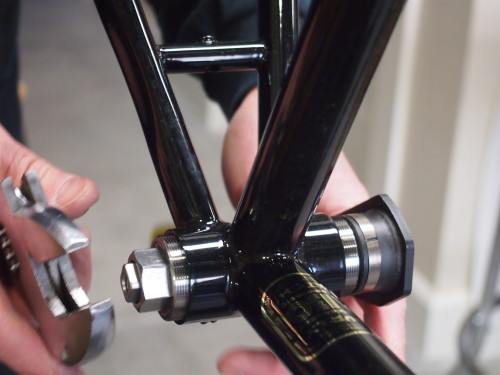
Two bottom bracket tools, one on each side makes the job much easier. The bottom bracket is slipped in from the non-drive side before the non-drive retaining cup is threaded in.
two phil wood bottom bracket tools
Here is a pair of Phil bottom bracket tools. Using two makes final adjustment much, much easier.
centered bottom bracket installed
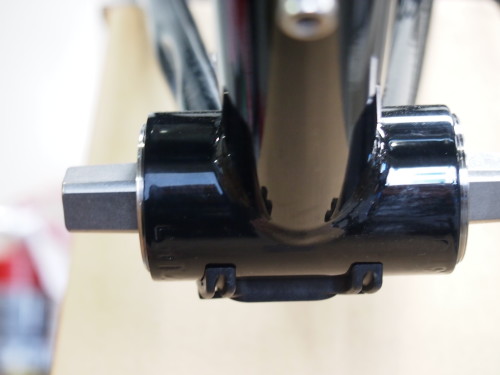
On of the unique and clever benefits of the Phil Wood bottom bracket design is the ability to move the cartridge left or right up to 5mm in order to get the chain line perfectly dialed. Here the bottom bracket is more or less centered since there is about the same amount of thread left exposed on the cups on both sides of the shell.
proper crank set clearance
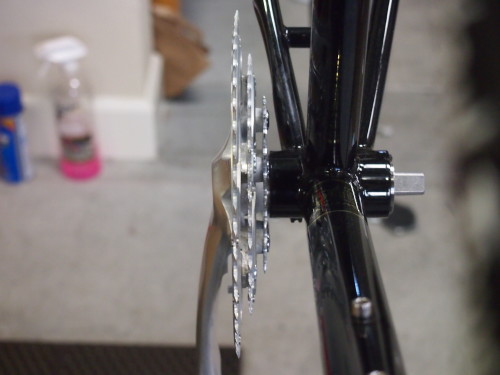
The proper length of bottom bracket spindle will be a function of the shape of the crank, mostly. Too short a spindle and the chainrings can hit the frame, too long and the chainline could be awkward and the Q-factor will be increased. This is a 68×108 bottom bracket with a Sugino XD2-500T triple crank set.
phil mud guards
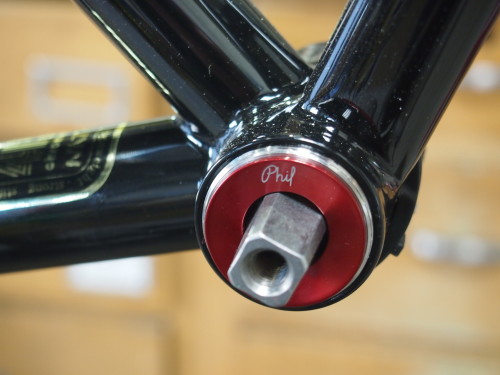
New (2013 or so) to the Phil Wood product lineup is the BB Cup Mudguards designed to friction fit into the retaining cups and to keep the splines free from muck buildup. On this 108mm bottom bracket the bottom of the spindle taper doesn’t clear the mud guard and when the crank is tightened onto the spindle it binds. Clearly this idea needs some work. Phil Wood & Co. has been selling bottom brackets without mudguards for 4 decades though so they are not a requirement.
Categories
The Touring Bicycle Wheel Touring Bicycles

Wheel Size- Myth and Theory

Every size of the Long Haul Trucker bicycle, from the tiny 46cm bike to the gargantuan 64cm bike is available with 26″ wheels. 56cm and larger frames also come in 700c wheel versions while 54cm and smaller bikes only come with 26″ wheels. Why do they do that? Why can’t you buy a smaller bike with 700c wheels? And how do I choose between 26″ and 700c wheels on my 62cm Long Haul Trucker?

A Surly LHT in black with 700c wheels
700c wheel on a 56cm Long Haul Trucker. Nice proportions.


Big bike..little wheels
62cm Surly Deluxe Trucker with 26″ wheels
58cm Surly Disc Trucker w/26″ wheels

First, some bike design theory:
As a bike frame shrinks in size 700c wheels become problematic in a couple of ways. Georgina Terry from Terry Bicycles does a fantastic job of qualifying those problems in her videos about Bicycle Design
With a given wheel size- in this case 700c- there is a limit to how low the top tube can be before you run out of head tube and how short it can be before the rider’s foot starts hitting the front wheel.
Some bike manufacturers call some of their smaller bikes “women’s specific” and paint them in girly colors, which is nothing less than a marketing gimmick. Mainstream bike companies assume that the market will demand 700c wheels on their “road bikes” and so they compromise the design of the smaller bikes by changing the angle of the seat tube to make the top tube shorter and they change the angle of the headtube to mitigate toe overlap with the front wheel, which also helps make the top tube shorter.

A better way, and the way good bike designers like Terry, Rivendell and Surly do it is to change to a smaller size wheel as the frame size shrinks. Rivendell and Surly change both front and rear wheel sizes while Terry uses a smaller front wheel with a 700c rear wheel.
Terry Precision -- SOLD

A truism I hear all the time is that 700c wheels are faster than 650b or 26″ wheels. But I don’t buy it. That’s what they make gears for. A 26″ wheel will be spinning faster than a 700c wheel would be at the same velocity so the rider might be in a higher gear.  Surly makes the analogy of a tractor compared to a Formula One car….the controlling factors being gearing, suppleness and quality/type of tire and the motor.

What about handling of a bike with the smaller tires? Georgina Terry simply says that the front end is designed for the a smaller tires and so the handling isn’t twitchy. One of those design features taken from the Surly geometry charts is a slightly more slack head tube on the 26″ bikes which results in a similar trail when compared to the 700c bikes. I do think that a bike with 26″ wheels rides differently than one with larger wheels, simply because of that gyroscopic thing.
The reason Surly decided a couple years ago to offer every size LHT and Disc Trucker in 26″ wheel versions is that the 26″ wheel size is more ubiquitous around the world and replacement wheels and tires should be easier to find. So if you plan on touring in countries outside the US, 26″ wheels might be a good way to go. Come to think of it, there may more 26″ wheels and tires available here too in out of the way places. I’m reminded of the story of the couple traveling between Portland and Boise when they accepted a ride in a pickup truck and her bike fell out at 60 MPH. The rear wheel was ruined but their hosts had an old mountain bike in a shed from which she was able to salvage a serviceable wheel.

So, to summarize:
-Small bike…small wheels
-Larger bike and desire to find replacement wheels/tires wherever one may tour (or desire to run really fat tires) …26″ wheels.
-If you think 26″ wheels on bigger bikes look funny….700c wheels
-If you are convinced that 700c wheels are somehow faster…get those (assuming, of course, you think going faster is a good thing)

Categories
Fenders Touring Bike Tires

Tire and Fender Considerations for Snow and Mud

The temperature is going to be well below freezing this New Year’s Eve day and several inches of snow have fallen in the last 48 hours. A combination of de-icer, sand spread by the highway district and traffic has left the busiest roads mostly bare and dry. But driveways and side streets are covered with (one after another, or all at the same time) patches of snow, ice, slush and gravel. I’m not riding the bike today.

Ice on the street
Would even studded tires help here?

This morning I looked in a supplier’s catalog at tires with 400 or so carbide steel studs in the tread. I’m tempted to buy a pair but I’m not sure if even that would keep me upright on the ice. And the use for such tires is limited…I don’t really want to be taking them off and putting them back on every time it snows. If I had a bike with disc brakes I could try the old zip-tie snow chain trick.

Photo: Dutch Bike Co.

Earlier this month, before the snow was sticking, we went on a day trip from Three Horse Winery north of Eagle, ID to Montour, ID where we ate lunch before riding back. Scott and Aileen scouted this route prior and they were going to show us the fabled passage between Eagle and Montour which we had been unable to discover on our overnight trip last year. This turned into sort of an epic slog through mud and water and emphasized the importance of the right bike for the job… those of us with fenders spent quite a bit of time digging packed mud from between the tires and fenders. We even ended up taking Sky King’s front fender off when her front wheel completely bound up and stopped turning. For those on bikes without fenders and using disc brakes the going was relatively easier.
Here is a map of the route for those who might want to repeat it.

Even with the mud everybody had a great time and there was more smiling taking place than cursing although there was some of both. That is partly a testament to the cohesiveness and the great attitude of our fledgling bike touring group wherein everybody is quick to help others and nobody complains. Plus, every rider is competent and able to take care of themselves on and off the bike.

A touring bike continues to open my eyes to the scenic and solitary places within an hour or two of where we live. Places I never visited in the previous two decades of living here and probably would not have experienced in another 20 years, but which are suddenly accessible on my country bike. Not to mention a new group of friends….a group of thinking, entertaining and interesting people who make this hermit happy to be a part of it.

Categories
Drivetrain The Touring Bicycle Wheel Touring Bike Components

A Bike Touring Wheelset

A hub is laced to a rim with spokes and nipples in order to create a wheel. Elementary I know but semantics are important if the aspiring bike tourist is to make him/her self understood.

I don’t want to go into how to build a bicycle wheel because there are hundreds of YouTube videos and several good books available on how to do it. (Jobst Brandt’s The Bicycle Wheel being the paradigm for books)

I will say there are a couple of elements that make a good, strong touring wheel, and these things may not be intuitive. Here is a good touring wheelset:

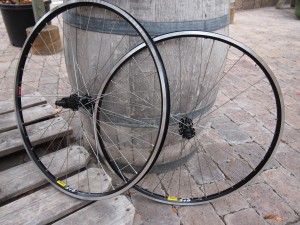
A durable inexpensive wheelset for loaded touring.
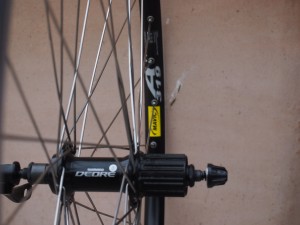
Shimano Deore hubs laced to Mavic A319 rims with 36 DT Swiss double butted spokes.
Notice there are a lot of spokes…36 per wheel to be exact. Each spoke crosses 3 other spokes on the way from the hub to the rim, creating a structure of amazing grace, elegance and stability. Some recently popular wheel designs with as few as 18 spokes per wheel rely on the strength of the rim for stability of the wheels which results in a heavier rim. (unless the rim is carbon fiber) Spokes actually are made in various gauges or thicknesses and a visceral reaction might be to assume that thicker spokes will result in a stronger wheel….but not so fast. The spokes flex with every revolution of the wheel, no way around it. So making the middle sections of the spokes thinner than the ends (called “double butting”) allows the spokes to flex and adds strength where they are most likely to fail; at the ends. Get Mr. Brandt’s book if you want to know the excruciating details.

In my experience, based on building dozens of wheelsets, there are only two companies that consistently make high quality rims: Mavic and Velocity. The Mavic A319 rims are a super solid choice for a touring wheelset. For hubs it would be hard to beat the Shimano Deore hubs for value. Steel axles and loose ball bearings make a durable, user friendly combination.

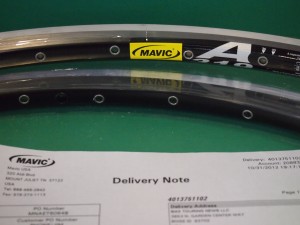
Mavic A319 36 hole.

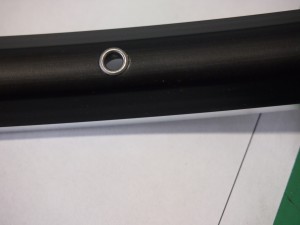
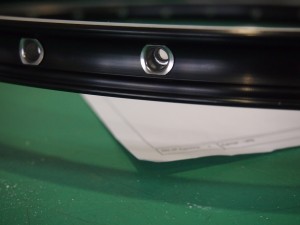
Eyelets provide a wider and smoother bearing surface for the spoke nipple, distributing the load and mitigating galling or cold welding of the rim by the spoke nipple.

A good box section rim will have an outer wall and an inner wall creating the “box section”. The eyelets on the Mavic A319 distribute spoke loads to both the inner and outer walls of the rim.

FULL DISCLOSURE:
I built these wheels for a customer who reminded me he has disc brakes. Disc brakes require a disc specific hub onto which the brake rotor is bolted. These wheels don’t have a disc specific hub. That’s right, I’m a professional and an expert. I’ll be selling this wheelset and the customers new wheels are on the way.

Categories
Touring Bike Tires

More About the Best Touring Tire

Schwalbe Marathon Dureme
The Schwalbe Marathon Dureme

I enjoy reading the posts and looking at the pictures on the Pondero blog. The latest post happens to be a review of the Schwalbe Marathon Dureme tire. Check it out and look at some of his other articles while you’re at it. Good stuff.

I copied the following from the Road Bike Rider website. While not normally a great source of information for the touring bicycler I think the question and the reply at least provide a starting point for a reasoned decision about tire selection.

Are 25mm Tires Better than 23mm Tires?
Question:

I found out yesterday from my LBS owner that I’m apparently late to the party moving up to 25mm tire width. I’m told all the pros have switched. Is this why I’ve been able to buy 700X23 tires on-line so reasonably? – Seth S.

Coach Fred Matheny Replies:

Yes, there has definitely been a move toward wider road tires, and I suspect that’s why shops and websites are putting 23s on sale.

A number of studies, most notably by Jan Heine in Bicycle Quarterly (www.bicyclequarterly.com), have shown that wider tires roll faster on all but the smoothest pavement if the tires have supple casings.

Wider tires also tend to be more comfortable because of the increased air volume and because they don’t have to be inflated as much to avoid pinch flats. They corner on bumpy pavement better because they don’t bounce around on the rough asphalt like narrow tires tend to do if they are inflated hard.

The weight difference between the same tire in a 23 and a 25 — or even 28 — is minimal. The extra few grams are more than compensated for by increased comfort and performance.

The only drawback is that many race-oriented frames won’t accept anything larger than a 25, or in some cases a 23. Manufacturers are remedying this, in large part because pro racers in events like Paris-Roubaix that features rough pavement and cobblestones are going to wider rubber. A good example of a carbon race-oriented bike that can handle a 28 is the Specialized Roubaix.

I’m a convert. I’m running Michelin Pro Race 25s (which are more like 28s) and Conti 4Season Grand Prix 28s on all my bikes except my old Litespeed Vortex, which will only handle 25s. I made the switch some years ago due to the extremely rough pavement here in western Colorado. We have a variety of chip seal, potholes, convex patches and grass-filled cracks, but while narrow tires beat me up, 28s smooth things out considerably.

I haven’t noticed any difference in speed — maybe a slight increase — but the added comfort is what sold me. I used the Conti 28s on the Pacific Crest Tour this summer and even on the relatively smooth pavement of Washington and Oregon, they made a significant difference in efficiency over the two-week event.

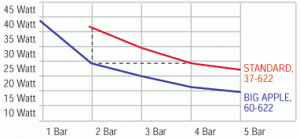
And while we’re at it the Schwalbe tire company has a page about tire size and rolling resistance. It’s interesting to note that, at a given pressure, a wider tire has less rolling resistance than a skinny tire. Obviously a skinny tire can be inflated to a higher pressure but the trade off is a less comfortable ride.
a rolling resistanc graph

So don’t just assume that replacing the tires on your mountain bike or touring bike with some skinny, punishing race tires will make your commute better. Might want to consider the construction and tread pattern too. Maybe a little wider tire will still allow you to punk the other commuters on your route and yet not beat you up before you even get to work!

Categories
Cockpit Shifters and Derailleurs

Top mount thumb shifters

So I had a Bridgestone MB-1 circa 1992, I think….might have been ’93. A poor fellow, down on his luck, or perhaps his brain addled from meth or crack cocaine, determined that he was deserving of such a bike. And so he took it. The Bike Hermit is always happy to help those less fortunate than himself. I hope the buzz that person received via my bike made his efforts worthwhile. That bike had Shimano XT top mount thumb shifters which remain my favorite gear shifting solution for straight or swept back handlebars. The shape was perfect. They could as well be called knuckle shifters because the cable tension releasing motion was just a twist of the hand with the index finger knuckle against the lever. Simple, intuitive and unobtrusive.

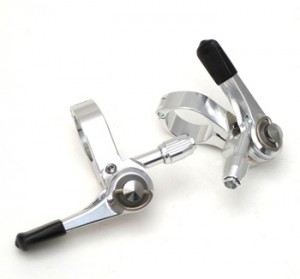
Even though the great and powerful Shimano decided to make those shifters obsolete others have stepped in to fill the void. Paul Component Engineering makes the Thumbies which are made to be used with the levers cannibalized from Shimano or Sram bar-end shifters.
These are great as long as you have some bar-end shifters. Otherwise it’s sort of an expensive option.

IRD or Interloc Racing Design (Racing. I know, right? But they make a lot of cool stuff) makes two versions of top-mount shifters- one version is friction only and will work with almost any rear cluster. The other version uses indexing for the rear derailleur shifter and only works with 9 speed cassettes.

The IRD Power Ratchet thumb shifters are friction only…no indexing. So they are compatible with almost any rear cog setup.

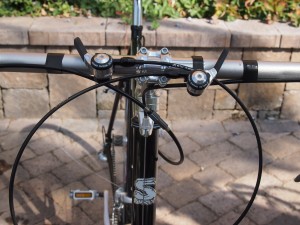
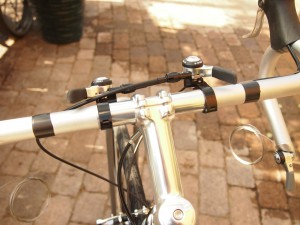
I’ve also been fascinated with the idea of mounting these on drop bars. On the tops and near the stem where they will be out of the way but easy to use. I had a Long Haul Trucker to put together last week and decided to try the IRD XC-Pro 9 speed shifters. The fixtures clamped to the 26.0 mm section of the handlebar without using the included shims (made for clamping to a thinner, mountain bike style bar). Offsetting the two levers slightly kept the cable housings from interfering with each other. Even so, the cable routing was a little wonky but I don’t think it looked too bad. With a little judicious trimming the cable housing could be made to fit close enough to the head tube of the bike that even a front rando bag such as a Gilles Berthoud would fit.

A slight offset allows for unusual but effective cable housing routing.

Another view of the IRD XC-Pro top mount shifter set up on drop bars.

I took the bike out for a ride and I have to say I was excited by how well the setup worked. The downtube shifters on my touring bike are the ultimate in simplicity but there have been times when taking one hand off the bars to shift did not seem like the most prudent thing to do. Top mount shifters on drop bars instead of bar end shifters would even preclude the need to move one’s hand to the end of the drops to shift. The more I think about it the more sense it makes. One downside could be the room these take up on the bars. Especially if a person wants to mount a computer and/or a headlight there. But the great thing about being in the bike industry is that this means there is a market thus created for handlebar extensions on which to mount those things. Actually, maybe one of those bar extensions would work for mounting top mount shifters. Hmmmmm…more experimenting and blog posting forthcoming.
Something along these lines perhaps:
Cockpit

Categories
Best Touring Saddle

Rivet Saddles

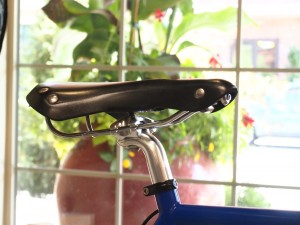
Rivet Pearl saddle in black

My personal quest for a comfortable bicycle saddle which I can sit on for consecutive hours in relative comfort came to an end (uh,huh,huh) when I tried the Gilles Berthoud Aspin saddle. But that solution didn’t work out for my wife and riding/touring partner. The shape wasn’t quite right. For her the Rivet Pearl saddle provides the best platform.

Rivet Cycle Works is a relatively new player…the saddles were introduced at the North American Handmade Bicycle Show in Sacramento this year (2012). The founder, Deb Banks is an ultra long distance rider. Like Paris-Brest-Paris long distance. She wanted to take the good things from all the currently available leather saddles and incorporate them into a dependable, comfortable product.

Rivet offers two models- the Pearl and the Diablo. The Diablo at 155mm wide and 280mm long is narrower than the Pearl, which measures 170mm wide and 280mm long. The Diablo is a little bit lighter as well. Both models feature a longitudinal cut-out in the top. Leather tabs on either side of the skirt extend underneath where they meet and are held together with a riveted metal plate. The attention to detail is apparent when one notices the Rivet logo on the metal plate visible through the cut-out. Rivet calls these “suspension” saddles. The extra thick, laminated leather tops are “firm but forgiving”. And the skirt tabs do not allow the saddle to flare out when the leather starts to soften with use. After several hundred miles the leather on Sky King’s saddle is noticeably softer and has some spring or give but the saddle is not developing a “hammock” shape.

Rivet Pearl saddles in natural and burgundy. Black and white also available.

The straight portion of the rails, the part that clamps to the seat tube, is about a two centimeters longer than the rails on a Brooks B17 so the fore and aft position is more adjustable. Both models come in steel rail and ti rail versions.

Rivet claims that the leather they use is waterproofed during the tanning process so that no further leather treatment is required. And the leather is thick….thicker than any other saddle we have seen. There is actually a second layer of leather laminated (finished side out) to the underside of each saddle, apparently to add structure to the leather and mitigate stretching but I would assume it helps with the weatherproofing too.

A layer of leather is laminated to the bottom. The rails are relatively long for a leather saddle….so you can dial in the position.

Some might hesitate to buy the first generation of a new product, but from what we’ve seen and used, I say go ahead…take a chance.. be a pioneer. Your friends and neighbors will be impressed. $150.00 for the steel rail versions and $250.00 for titanium rails.