Categories
Cockpit Handlebars and Stems Touring Bike Components

A Conversion: Drop Bar to Albatross Handlebar

Switching from drop style handlebars to an upright, swept back handlebar can change the functionality and personality of a bicycle. And sometimes a change can be good, maybe turning an unused bike, or one that may duplicate another bike in one’s stable of bikes, into the go to, everyday machine.
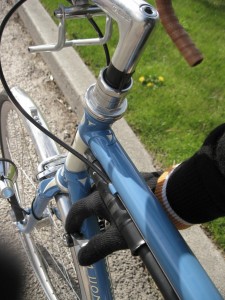
From This:
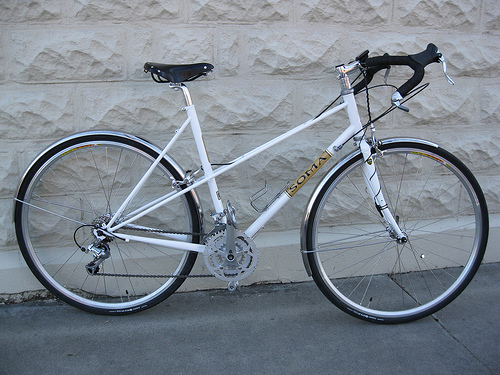
To This:

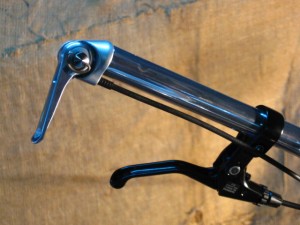
oxford handlebarsOne such handlebar, the Nitto Albatross is popular in both the alloy and chrome-moly versions. Soma Fabrications makes the Oxford bar which is almost identical in size and shape to the alloy Albatross Nitto makes. This 6061 polished aluminum handlebar will take bar end shifters, and has a 25.4mm clamp diameter making it versatile for use with most stems.Making the switch takes a little bit of planning and thought:
– First of all, the brake levers that fit on a drop bar will not fit on the new bar so new  “mountain bike” style brake levers with a 22.2mm clamp diameter, like the Shimano BL-R550 – are a requirement. The brake levers come with new cable and housing which will come in handy because the old cable and housing is probably too short.
– If the drop handlebar setup used bar end shifters these can be transferred to the Albatross or Oxford bar. If downtube shifters, then, no worries. If the drop bars had “brifters”, or those brake levers with the shifters built in, then new shift levers are in order. Either the bar end style or a top mount shifter or I suppose even the mountain bike standard trigger shifters could be used.
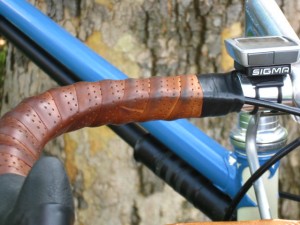
– The hand grip areas can be wrapped with regular bar tape or a slide on grip can be used with the caveat that the cable and housing for bar end shifters will not clear most standard grips, and the more or less conventional solution is to use cork grips with grooves filed into them for the cable.

Now it’s a simple matter of disconnecting all the brake and shift cables, un-wrapping the handlebars and taking off the brake and shift levers. The old handlebar comes off and the new one goes on. New shift levers (or the old bar end shifters), brake levers and grips go on, the new cable and housing is fit and tightened and adjusted and that’s it except for possibly adjusting the height or angle of the handlebars to the rider’s preference. A threadless stem with a removable face plate makes removing and installing handlebars pretty simple.
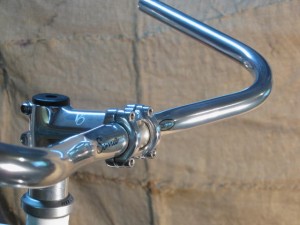
bare oxford handlebars installed
The new bars clamped into place
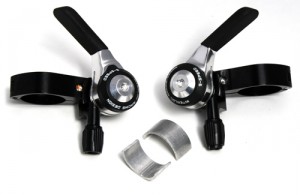
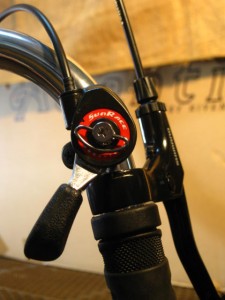
Sun Race shift lever
This top mount shifter is inexpensive but it works great. It is a single lever meant to be used with a rear derailleur, single chainring and no front derailleur. Who needs more than 5 or 8 gears anyway?
silver bar end shifter
Bar end shift levers work too. See how close to the bar the cable is? This calls for a grooved grip….or just a tape wrap.
IRD brand top mount shifters
Another option might be the IRD brand top mount shifters, indexed for use with a 9 speed rear cassette.
Categories
Cockpit Handlebars and Stems Touring Bike Components

Quill Stems

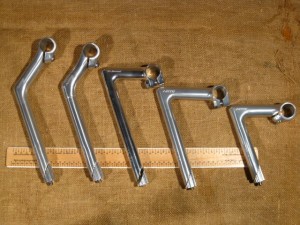
Quill stemsinsert into the threaded steer tube on a bicycle fork and are held in place by means of a bolt which tightens a wedge inside the tube. The other type of stem commonly used is a so-called threadless stem which clamps to a threadless steer tube. Quill stems and threaded steer tubes are less common nowadays, but the Nitto company in Japan still makes a wide range. Here is a side by side photo of most of the stems they make. Each stem in the photo is placed so that the minimum insertion mark on the stem aligns with the top of the ruler. This gives a basic visual cue as to how high the various stems can extend above the top of the tube. Notice that the stems are placed at an angle meant to replicate the 70 some degree angle of the head tube on most bikes.
NEWS FLASH! 09/26/2012
We now stock the 225 Technomic Deluxe stems. These have a long quill like the Technomic but are cold forged and have the same finish as the Deluxe. 25.4 or 26.0 clamp sizes.

Photo of 4 models of quill stem
From Left to right: Nitto Dirt Drop 100, Nitto Dirt Drop 80, Nitto Technomic, Nitto Technomic Deluxe and Nitto Dynamic

The Dynamic stems only come with a 26.0 mm clamp size, and the Dirt Drop,  Technomic and Deluxe stems come with either 25.4mm or 26.0 mm clamps. A 25.4 stem will not work with a handlebar that has a diameter at the center clamping point of 26.0. However a 26.0 stem will work with a 25.4 handlebar as long as a shim, specially made for this purpose is used between the stem and the bar. The Dirt Drop stems are only made in 80 mm and 100mm versions (the extension from the vertical-ish riser part or quill part of the stem). The other models come with extensions generally from 80 mm to 100mm in 10 mm increments. Got it?

Hopefully, this is a useful comparison for the bicycle traveler who might be thinking about changing the position of their handlebars or about getting different handlebars.

Categories
Best Touring Saddle Cockpit Touring Bike Components

Brooks Saddles

J.B. Brooks took out the first patent for leather saddles in 1882, and the company that bears his name has been making them ever since. Brooks saddles have become iconic, known for their good looks, comfort and durability.

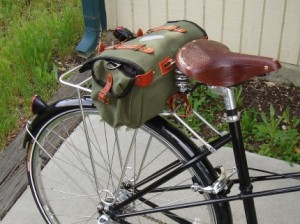
Brooks saddle
Sweet Brooks B67

This two part video relates a little more about the history of the company and shows the process of making each saddle by hand, as has been done for over one hundred years. The Bike Touring News store carries Brooks saddles and always strives to have most models in stock or readily available. ( Alan at EcoVelo just posted this photo essay on Brooks saddles)


Categories
Cockpit Touring Bike Components

Nitto Albatross Handlebar Brake Levers

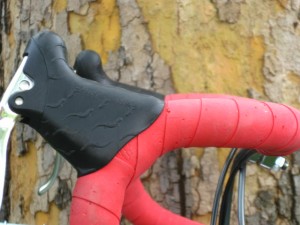
Let’s review. We know that v-brakes, also called linear pull brakes, require a brake lever configured to “pull” more cable than do side pull or cantilever brakes. We also know that so called aero style drop bar levers fit on drop bars and on moustache bars. (it’s a diameter thing) And those levers have rubberized hoods which are folded back out of the way when wrapping the bars with tape and pop back in place to cover the tape where it wraps around the lever clamp.

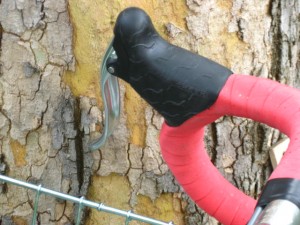
drop bar brake hood photo
The hoods on drop bar brake levers.

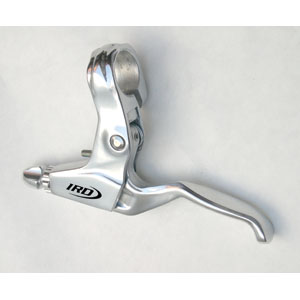
So what if you have flat or riser mountain bike style handlebars or a swept back bar like the Nitto Albatross? The diameter where the brakes clamp is a little smaller and there is no bend to accommodate the shape of the brake lever clamp. You need a mountain bike style lever, which looks like this.

photo of IRD Sylvan flat bar brake lever
Brake lever for flat bars or swept back bars.

Get some grips (or just get a grip) and clamp these near the end of the grip. And make sure you get a lever designed to work with your brake calipers. For shifters you can use trigger type shifters or a top mount shifter or bar end shifters. More on that in later installments.

Categories
Cockpit Touring Bike Components

Drop Handlebars/Brake Levers

So, the question came up about which brake lever to use on a Nitto Grand Randonneur handlebar. That’s sort of a two part question. In order to answer it we need to delve into brake calipers. Some common brake calipers are:
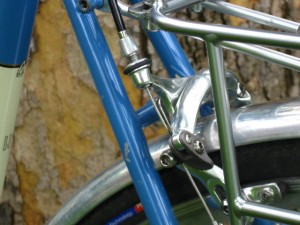
Cantilever

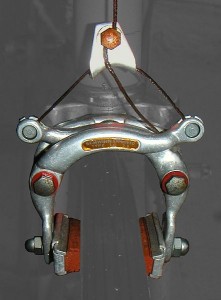
photo of a cantilever brake caliper
Cantilever Brake Caliper

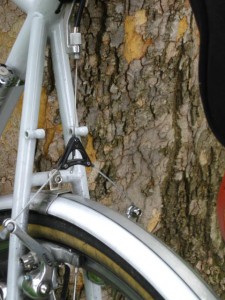
Sidepull

photo of sidepull brake caliper
The sidepull brake caliper.

Center Pull
photo of center pull brake
The Center Pull Brake caliper

Linear Pull a.k.a V-Brake

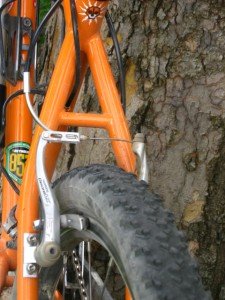
photo of a v-brake caliper
The V-brake, sometimes called a linear pull brake.

Stupid v-brake. It throws a monkey wrench into the whole works. Even though they work great and have fantastic stopping power, they use a different leverage than the others to work properly. So whatever lever is used with these calipers, it needs to be v-brake compatible.

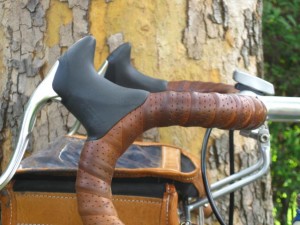
“Drop” or “road” style handlebars are of a standard diameter at the point the brakes are meant to clamp to the bar. So any lever that looks like this will work:

photo of Cane Creek brake lever
The Cane Creeek SCR-5 sports a wide, cushy grip- plus it has lizards!

These are also called “aero” brake levers because, rather than exiting the top of the lever and looping over the handlebars, the cable and housing exit under the hood and run along the handlebar, under the wrap, for a nice clean look.Photo of aero brake lever cable routing
aero brake levers on a drop bar
Shimano brake levers.... clean look! Make the tops of the bars level with a smooth transition to the brake hoods, dangit.

The Cane Creek and Tektro levers have a feature known as the Campy style quick release which is a button that releases the cable tension allowing the brake calipers to spread out to clear the tire when the wheel needs to be removed. It’s called Campy style because Campagnolo (Campy) brake calipers do not have quick releases.
Shimano aero brake levers don’t have quite as wide a hood which results in a more classic look. And they don’t have the quick release feature on the brake lever, again maybe not a problem since most brake calipers will have a quick release.
The drop bar brake levers we sell will fit on any of the drop bars we sell. and they will work on the not-so-ironic moustache bars too. Just be sure, if you have v-brakes to get the Tektro RL520 v-brake version. The other standard levers will work with cantilever, side pull or center pull brakes. And finally if you’re replacing a handlebar or just the brake levers you might want to get a cable and housing kit to replace the old set.

Categories
Drivetrain Touring Bike Components

Fears of Gears,Gear Inches, Gear Development

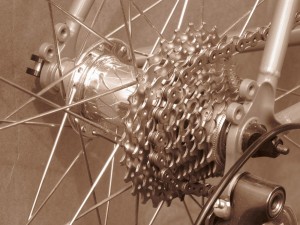
Photo of Shimano 10 speed cassette
This is a "10 speed" cassette

Hey baby, what kind of gearing you got on that thing?

What kind indeed.  I guess I got gears in the front and gears in the back. But how do I know what my “gearing” is?  One way to measure mechanical advantage on a bicycle is to use a concept called “gear inches”. Gear Inches? Huh? Gears have inches? What about gear development? What? Are gears reaching puberty? What’s a gear? On a bicycle we use toothed wheels (the front chainring and the rear cogs) to give us mechanical advantage. That means we can make our legs go around really fast compared to how fast the rear wheel is going around…..like when we are climbing a hill. Or we can make the wheel go around really fast with relatively little motion from our legs…..like when we’re going downhill with a tailwind, just by changing the combination of front and rear chainrings/cogs.

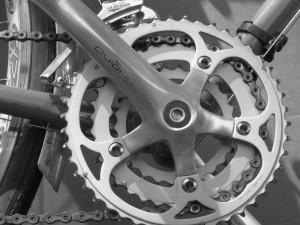
Photo of a double crankset ie,one with two chainrings
A double crankset.
Photo of a triple crankset, one with 3 chainrings
The triple crankset

Really, “gear inches” are just a way to quantify the mechanical advantage offered when the chain is engaged on a particular size of front chainring and a particular size of rear cog. A gear inch is not a real unit of measure –                   “Why are women bad at estimating lengths? Because they have always been told “this is 8 gear inches.””

But it is a useful way to compare different combinations of gears to achieve the riders goal. If I know how many teeth are on each of my front chainrings and on each of my rear cogs I can figure out the gear inches for every combination and plot them on a chart.

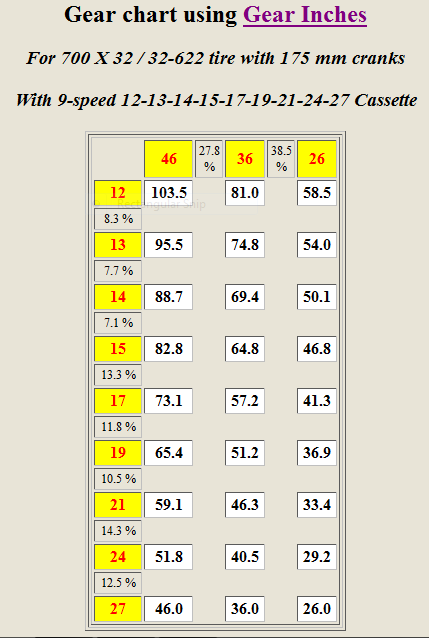
Snapshot of a chart showing gear inches for 46,36,26 crankset and 12-27 rear cassette
Chief's current gear range in "gear inches"

The late Sheldon Brown has an online gear calculator that makes figuring gear inches snap like. This chart shows the gearing setup on Chief, my touring bike. I’m using a crankset with chainrings of 46, 36 and 26 teeth and a rear cassette which ranges from a small cog of 12 teeth to a large cog of 27 teeth. Giving me a top gear of 103.5 gear inches when the chain is on the big ring in the front and the small cog in the back…. for those high speed descents, and a climbing gear of 26. If I had a larger big cog in the back and/or a smaller small chainring I would have a lower number for my climbing gear and hence a little more mechanical advantage. Some touring bikes, for example, the Surly Long Haul Trucker come stock with a low gear of 21 -22. The 103.5 top gear has been adequate for my purposes.

Comparing the values on the chart, it becomes apparent that their is some overlap, some redundant gears. Noticeably, the 46/27 (46 tooth cog in the front and 27 tooth cog in the back) and the 36/21. It’s entertaining to play with different gear combinations to try to get the best range with little redundancy. The most important thing though for the touring cyclist is to have a low gear that provides enough mechanical advantage to get them over the hills on their planned route. Knowing that  number will only come from experience but  21 to 22 gear inches should work for most people on most routes. For mountainous, off road touring a low gear of 18 to 19 might be more suitable.

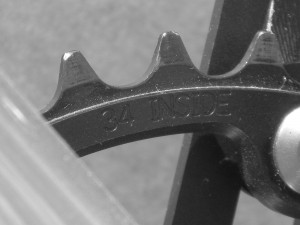
The number of teeth on a chainring are marked.
Most chainrings will have the number of teeth marked on either the front or back of the ring.
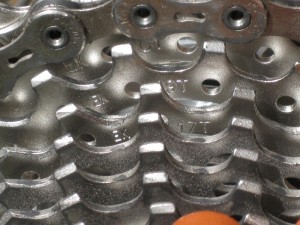
The number of teeth on each cog in the cassette is marked on the back
The number of teeth on each cog of the cassette is usually marked on the front. Not always easy to see, especially on dirty cogs.
Categories
Cockpit Drivetrain Touring Bike Components

Bar End Shifters a.k.a. Sneaky Petes

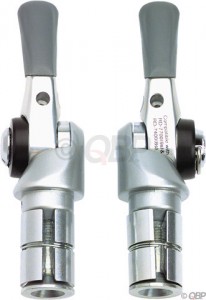
I’ve talked about my preference for down tube shifters, now I thought I would give equal time to probably the most popular method of shifting gears on a modern touring bike. That would be bar end shifters. Being inserted into the ends of the handlebars and held secure by means of an expanding wedge these shifters make it possible to shift gears without taking the hands off the handlebars.

Shimano Bar End shift levers

Ergo (Campagnolo) or STI (Shimano) accomplish the same thing by incorporating the shifters with the brake levers, but these only work on drop style handlebars and they are significantly more complex and prone to failure and/or wearing out. Some really old guys remember the days before STI type shifters when bike racers with bar end shifters could shift into a higher gear in preparation for opening a can of whoop-ass on the group without being too obvious…hence the moniker “sneaky petes”.

Bar end shifters will fit in most drop or road style handlebars and the Nitto Moustache bar as well as some in upright bars such as the Nitto North Road aka the Albatross. The limiting factor being the inside diameter of the bar tube where the expanding wedge fits. The simple design and absence of numerous moving parts makes for reliable shifting even on the most demanding and lengthy tours. The Shimano version is made to work with either 9 or 8 rear cogs in index mode. The index mode can be disabled allowing the shifter to be used with any number of rear cogs and even when the derailleur or derailleur hanger gets bent. A nice feature for the bicycle traveler. There is a friction only (no index mode) bar end shifter designed by Rivendell too.

The shifters go on like this:

Oh yeah, and the Rivendell shifters, even though they come with their own pods (the part that goes inside the handlebar), will mount on the Shimano pods. To be safe, if using either one of these use a Shimano rear derailleur too.

Categories
Cockpit Drivetrain Touring Bike Components

What I Like About Down-Tube Shifters

Downtube shifters are shift levers mounted on the downtube of the bicycle.  Not everybody will feel comfortable taking their hand completely off the handlebar in order to shift but for those of us who don’t mind doing so, downtube shifters offer the most minimalistic of gear shifting solutions.

Shifters on the downtube means taking one hand off the handlebar in order to shift.
Shimano Dura-Ace Downtube Shifters

These Shimano shifters have an “index” option on the right lever which means there are eight detentes or pauses signaled by audible clicks for each gear as the lever is moved back or forth. The left lever works the front derailleur and doesn’t have an index option. Rivendell is producing downtube levers without the index option for the real caveman in us all. The right lever can be used to change one, two or more gears up through all nine at one stroke. Kind of a nice feature. And the transfer of movement to the derailleur is super positive, mostly because there is only one short piece of housing at the rear derailleur and no housing on the cable to the front derailleur. Housing compresses and adds friction to the system.

Shorter runs of cable and no housing make down tube shifters more positive.
Only one short piece of housing on the rear shift cable.

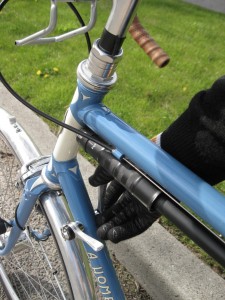
I didn’t even realize it until I started reading a thread in Bike Forums about using downtube shifters, but to use these I actually reach across the downtube through the frame with my right hand in order to shift the front changer, the lever for which is on the left side of the bicycle.

Reaching through the frame to shift

One bike tourist I know uses Campy ergo shifters which means the shifters are incorporated with the brake levers. He carries a downtube shift lever and a piece of cable with him in case the ergo shifters fail. Keep in mind that in order to use downtube shifters, the bike must have brazed on attachments on the downtube. Those look like this:

Brazed on fittings to accept downtube shifters.

For those who appreciate a stripped down approach to touring and the peace of mind in having bike parts which are not failure prone, downtube shifters might be a consideration.

Categories
Drivetrain Hermit's Workshop Touring Bike Components

FiberFix Emergency Spoke Replacement Kit

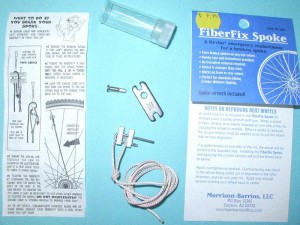
The FiberFix Emergency Spoke Repair Kit

We just got these in at the Bike Touring News Store.
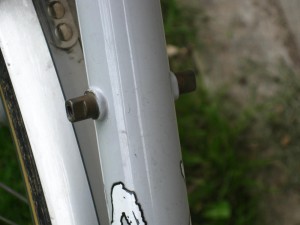
The FiberFix replacement spoke is an aramid cord with a metal “cam” attached. When a spoke breaks the wheel will have a wobble which will probably rub on the bike frame and or the brake pads. If not repaired right away, other spokes may start to go as well. For the mechanically challenged, when a spoke breaks the FIberFix spoke replacement is a good alternative to removing wheels, tires and possibly cassettes. Just thread the included attachment piece into the remaining spoke nipple on the rim, thread the cord down to the hub and back up to the piece threaded into the nipple and tighten.

Here are some reviews at crazyguyonabike.
Might want to bring two!

Categories
Drivetrain Touring Bike Components

One Bike, One Pedal, Many Shoes and Shimano’s A530

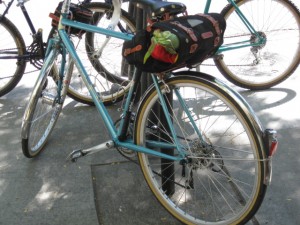
I am quite content riding “Sky”, my Rivendell Bleriot .

Sky, after a successful trip to the Saturday Market

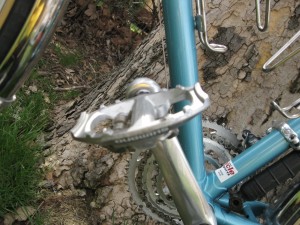
In fact my Voodoo, set up with a front shock for more aggressive trail riding is gathering dust in the garage because I have so much fun tooling around on Sky.  I also have my  fair share of shoes and love nothing more than being fashionable while pedaling  efficiently when running errands or meeting friends for dinner and drinks.  On the other hand, I like to wear my Shimano bike shoes with clipless pedals for longer rides, weekend rides and touring.  What I hate is changing pedals.  After breaking my finger, a helmet and giving myself a black eye riding my son’s bike (so I could wear shoes that matched my outfit) the Bike Hermit gave me a set of Shimano A530 Clipless SPD/Platform Road Pedals. One side is platform, the other works with my SPD clipless cleat on my bike shoe.

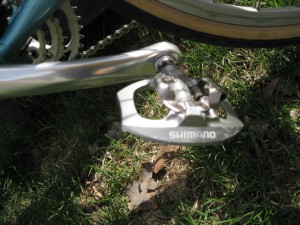
Shimano A530 dual bike pedal
Problem solved with a SPD/platform pedal

Now it doesn’t matter what shoe I am wearing, I can ride Sky pretty much anywhere at anytime.  The other nice feature on longer rides has been the ability to opt out of my clipless, flip the pedal over and still get a nice grip on my biking shoe.  As I have been battling a tendon issue having the interchangeable option has been terrific.  If we are bike camping or bike touring, at the end of the day, I can easily slip off my bike shoes and  wear my sandals if we chose to go exploring once we have set up camp.

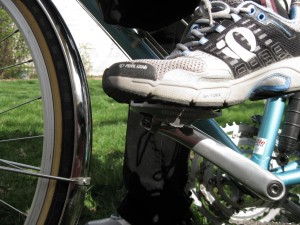
Shimano a530 with a street shoe
Great grip with my tennis shoe on the platform side
SPD side Shimana A530
flip it over and my SPD cleat clips right in.
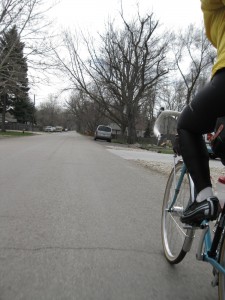
Clipped in for A Sunday Afternoon Bike ride