Categories
Fenders

Installing Berthoud Fenders on the Surly Disc Trucker

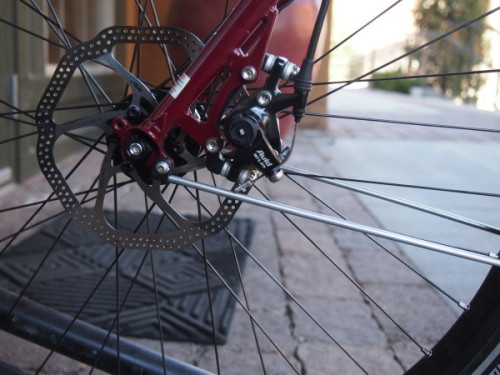
A bicycle with disc brakes can present some challenges when it comes to attaching fenders and, sometimes, racks. Especially tricky is the front wheel where the brake caliper is bolted onto the adapter on the back side of the left fork blade. In my experience the Gilles Berthoud stainless steel fenders are the perfect fender for the Surly Disc Trucker or the Long Haul Trucker for that matter. The single stay for both front and rear fenders is easier to deal with than the twin stay design of most composite fenders. The stays attach low on the backside of the front fender which not only looks elegant but cleanly routes the stay below the front brake caliper.

Having installed dozens of these fender sets, it occurred to me that some people might be interested in a short tutorial on how to go about it. So hopefully this will be useful.

Installation tools needed:

A person could get by with a Dremel cutoff tool or a hacksaw instead of the bolt cutters. Everything else is pretty essential. Only one hole needs to be drilled and that in the rear fender at the brake bridge.

– Drill with a sharp 5mm or 13/64″ bit.
– Cloth tape measure or a piece of string to find the center of the fender.
– 10mm and 7mm socket or box wrenches
– 3mm and 2.5mm hex wrenches
– Bolt cutters or Dremel tool with a cutoff blade. (A hacksaw will work in a pinch).
– Metal file
– Metal punch to start drill bit
– Permanent marker (Sharpie)

Parts Included:

fender parts
4 p-clamps with bolts and washers. Daruma bolt. L-bracket. 4 bolts, washers and nuts to attach stays to fenders

Front Fender:

The Gilles Berthoud fenders are packaged with an eyebolt or “daruma” bolt for the front fender. Berthoud assumes the bike will have either sidepull or centerpull brakes and the eye of the daruma bolt slips over the brake bolt and dangles down out of the bottom of the fork steer tube. If your bike has cantilever or disc brakes you will need a 5mm or 6mm bolt long enough to go completely through the fork crown (Hopefully your bike has a hole drilled through) with enough thread left over to screw on a nut with a lock washer. A 35mm bolt usually is long enough for this.

The front fender receives the dangling daruma bolt through the pre-drilled hole and is spaced away from the fork crown with the included metal fender washer and rubber washer. Berthoud also assumes the bike will have a 1″ steer tube so for a 1 1/8″ steer tube I use a larger fender washer than the one supplied.

P21432211
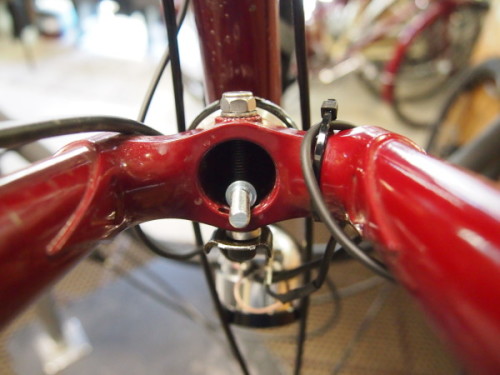
Dangling daruma.
P21432221
Here the front fender is attached with the large metal fender washer and rubber washer. The daruma bolt hangs inside the steer tube from the bolt through the fork crown. A 10mm nut on the bottom side of the fender threads onto the daruma and holds everything in place.
Fender stay attachment for Berthoud stainless steel front fender
Here is the attachment of the fender stay to the front fender. I like to put the pan head bolt on the inside and the nuts on the outside to mitigate debris collection between the tire and the fender.

I usually bolt on the front stays before I make the fork crown attachment and I loosely screw the fender stay p-clamps to the holes in the fork dropout. Once the fender is in place at the fork crown I put the tire back on the bike and hold the back end of the fender in place while I line up the ends of the stays with the p-clamps and mark them with a sharpie where they will need to be cut. I snip off the ends with a pair of bolt cutters (the Dremel tool or a hack saw could be used here) and file the sharp edges before slipping them into the p-clamps for final tightening.

P21432291
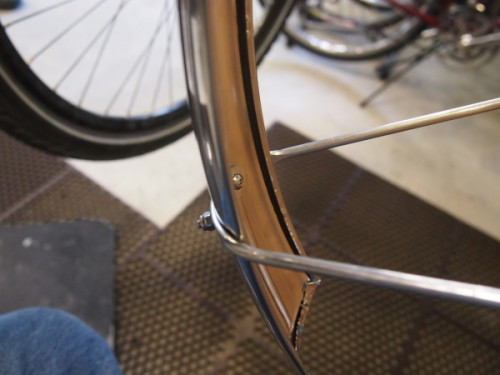
This is obviously the rear wheel but I mark the stays for the front in the same way. The black p-clamp is lightly bolted onto the bike and with the fender held in place the stay (blurry in this picture, I know) is marked where it will end up flush with the end of the clamp.
P21432381
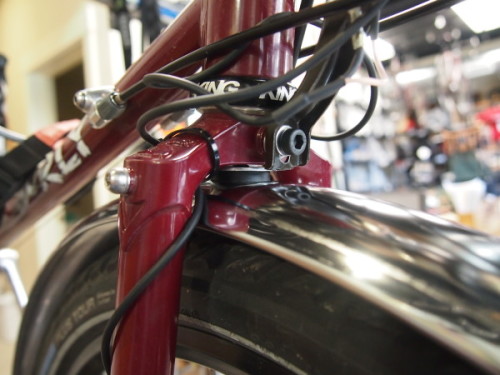
With the installation finished, the stay sweeps neatly under the front disc brake caliper.


Rear Fender:

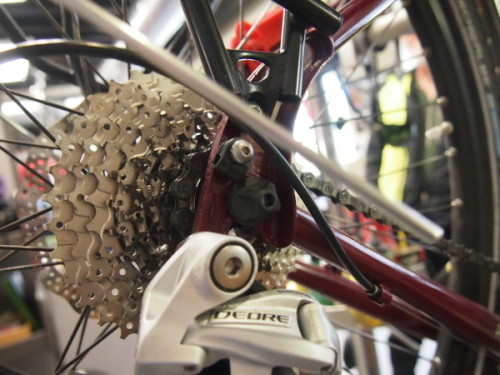
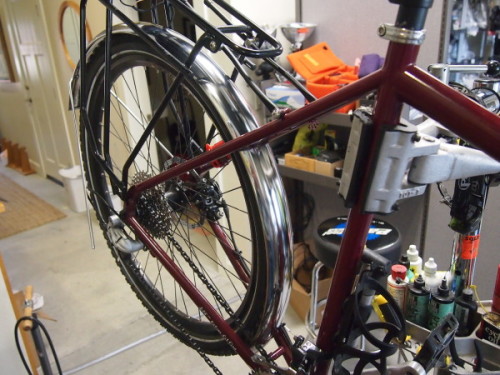
A bicycle with a well thought out design for the rear wheel disc brake adapter places the caliper inside the triangle created by the seatstay and chainstay, where it is out of the way of the fender stay attachments. As such, the rear fender is usually less of a challenge; at least relative to the disc brake. But the installation usually involves removing and replacing the wheel several times in order to make adjustments to the fender line.

P21432261
Dry fit of the rear fender.

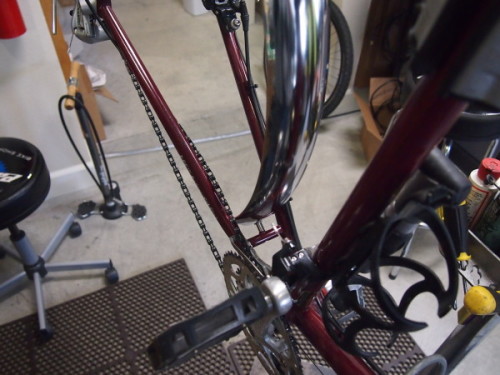
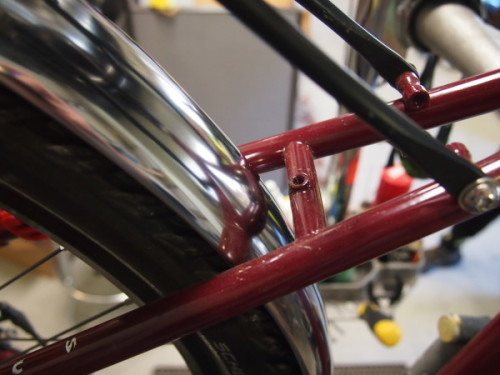
I start by holding the rear fender in place to see how much clearance there is at the front, between the chainstays and between the fender and the bridge between the chainstays. Usually, a spacer, which can be anything from a sawed off wine cork to a piece of aluminum tubing to 3 or 4 of those little washers that screw onto tube valve stems, is required between the bridge and the fender.

P21432281
Here is the first attachment. I used a piece of aluminum tubing from the hardware store for a spacer. Sawed off wine bottle corks work too. Oh, you might need a longer bolt here.


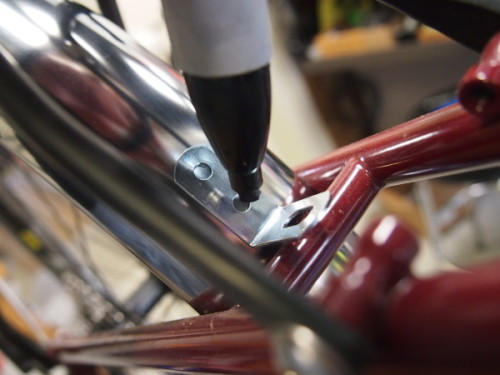
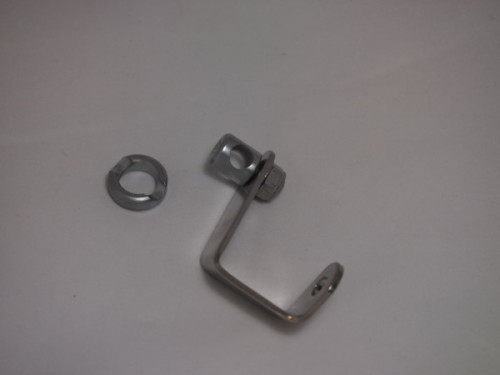
This is the first solid attachment I make. Again, the stays are bolted onto the fender before I start, so once I make the first attachment I can put the wheel back on and hold the rear end of the fender in place to mark where I want to cut the stays. Once those are cut to length and the sharp edges filed off they can be clamped into the p-clamps. There is one final, crucial step to installing the rear fenders. After the fender line has been established, and everything is held in place on the bike with the connections I have already made, it is time to drill a hole in the fender where it will be bolted onto the brake bridge. Here is the third assumption that Berthoud makes; that the bike in question has a threaded hole on the bottom of the brake bridge into which a bolt holding the fender can be screwed.  If the bike does have the threaded hole then it is relatively simple to mark the spot on the fender and drill the hole. To find the spot to drill the hole for an L-bracket, bolt the bracket onto the brake bridge and, holding the fender at the desired clearance from the tire, mark the hole locations with the Sharpie.


P21432311


P21432341
It’s easier to make this mark if the L-bracket is bolted onto the brake bridge.

Mark the hole and find the center of the fender crown using the cloth tape measure or the string. The metal punch is sort of critical because stainless steel is hard and the drill bit will wander around before starting to cut if there is not some sort of indentation for a guide. A one-hand-held spring punch is ideal for this.

I just read through this instructional and it seems sort of complicated for the average person who doesn’t do this sort of thing everyday. I can say that installing fenders takes way more time than I can reasonably charge for. However, if one has some patience and a modicum of skill, or desire to learn, along with a few tools, it can be sort of rewarding. Then there is the opinion (mine) that a touring bike only looks complete after fenders have been installed. Hope this helps somebody. Please comment if I have left anything out or left you more confused than when you started reading.


Categories
Lights and Electronics

More on Dynamo Lights

Lately we have been selling and installing more dynamo powered headlights and tail lights from Busch & Muller and Schmidt as well as a few from Supernova. This post will cover some mounting options and some tail light wiring details.

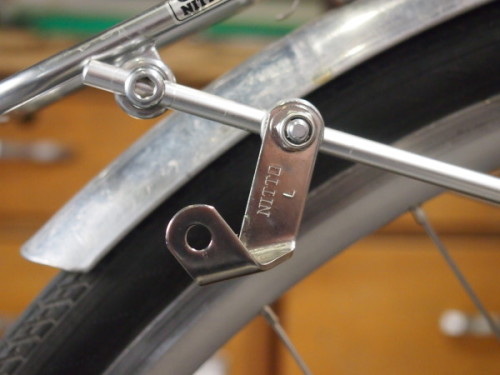
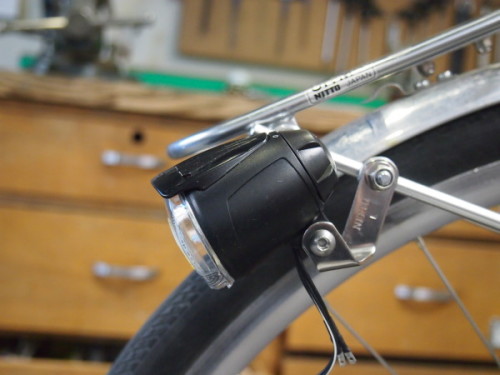
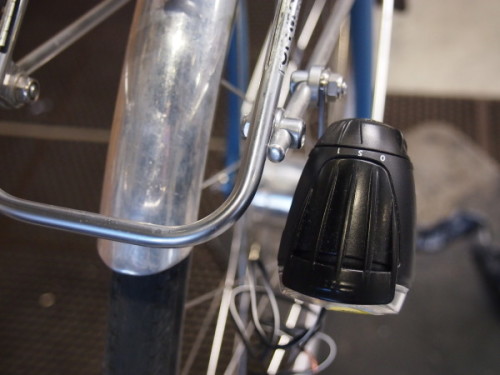
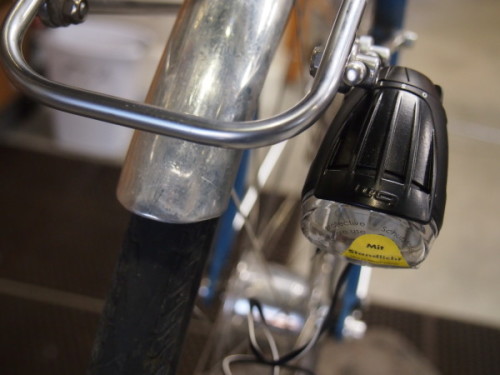
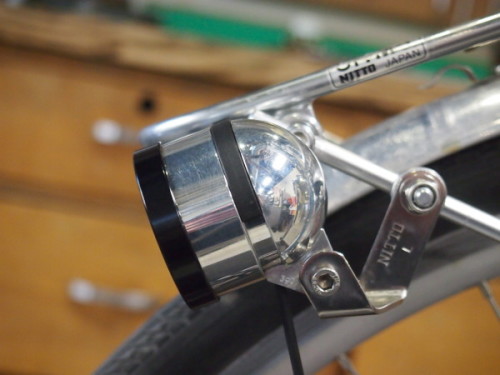
We have the Nitto Lamp Holder for Nitto M-18 and M-1 racks. There is a left and a right side version depending, obviously, on which side you want to mount the light. I set up the left side mount on my bike and bolted on a couple of lights to see how it works. The mount can be bolted on anywhere along the stay but I think I would put it at the highest point that will still keep the top of the light below the rack platform. The bracket can also be clamped either on the outside of the stay or on the inside depending on the light being used.

nitto lamp holder
This is the left side Nitto Lamp Holder. The right bracket is a mirror of this. The eye bolt with grooved washer slips over the end of the rack stay.
lamp holder
Nitto Lamp Holder for left side. Right side is a mirror.
lamp
This is the B&M Lumotec IQ mounted on the left Nitto Lamp Holder.
light on bracket
Here the bracket is mounted outside the stay.
light on bracket
This is with the bracket mounted inside the stay.
lamp holder and rack
Schmidt Edelux on the Nitto Lamp Holder and M-18 Rack
Supernova dynamo light
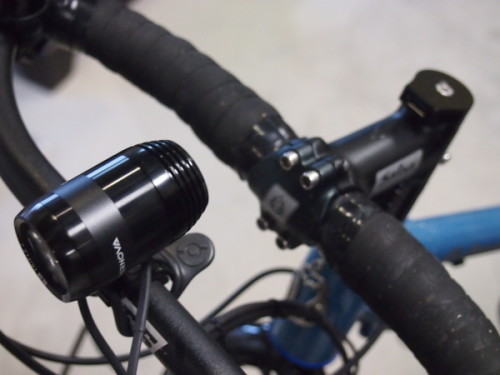
This is the Supernova E3 Triple with handlebar mount.
light on fork mount
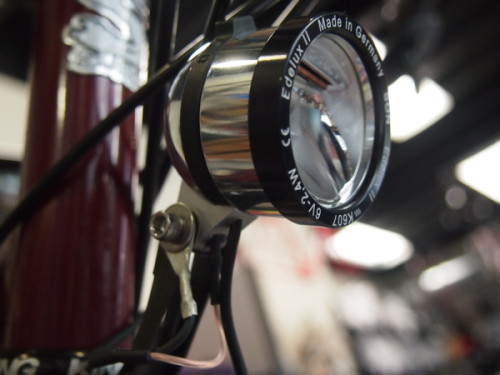
The Schmidt Edelux ll on a fork crown mount.
red light
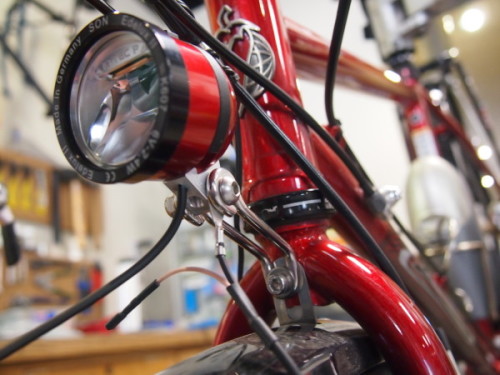
This is another Edelux light mounted on a different type of fork crown mount

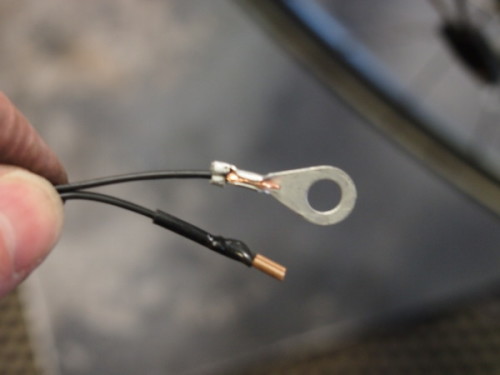
In the two above photos above can be seen the tail light wire, the ground leg terminated with a Schmidt ground connector which is sandwiched between the light body and the mounting bracket when the mounting bolt is run through. The other end is terminated with a 2.8mm connector and plugged into the mating connector in the base of the light. The Schmidt headlights use this configuration but the Busch & Muller lights have connections for two 2.8 mm fittings so one doesn’t have to mess with a separate ground connection when using a wired tail light. The hard-wired wire in the base of the light goes to the dynamo hub. All wired tail lights are wired into and operated by the headlight, not the hub.
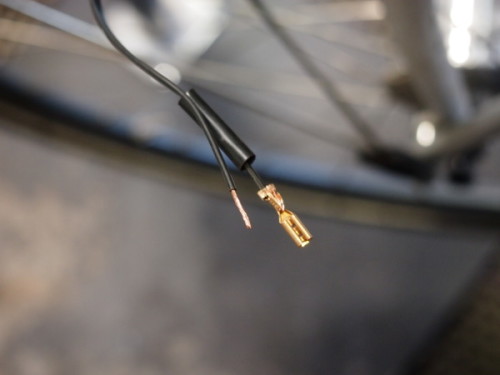
Here I am making up the connectors for the tail light wire;

P21532421
The 2.8 connector crimped on. Ready to crimp on the ground connector; don’t forget to put another piece of shrink tubing above the ground connector before crimping.
wire connections
Oops, forgot the heat shrink tubing

ch

back of bicycle light
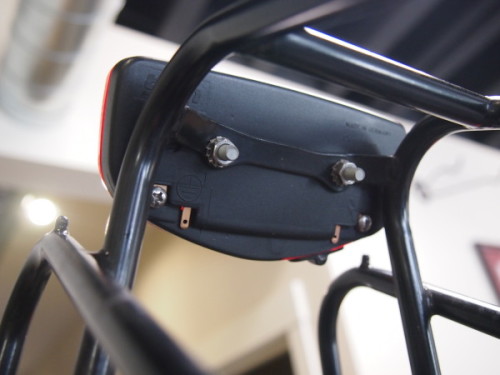
The wired tail lights have two 2.8mm spade connectors. There is a positive and a negative.

I finally got tired of having a battery tail light because it was just too undependable, partly because I often forgot to switch it off and the batteries died. I mounted the Busch & Muller Secula Plus fender mount light and it has been fantastic. There is no switch, the light is on whenever the headlight is on. And there is a built in capacitor so when I stop at an intersection the light stays lit for a few minutes. Simple, idiotproof, reliable and super bright!

fender light
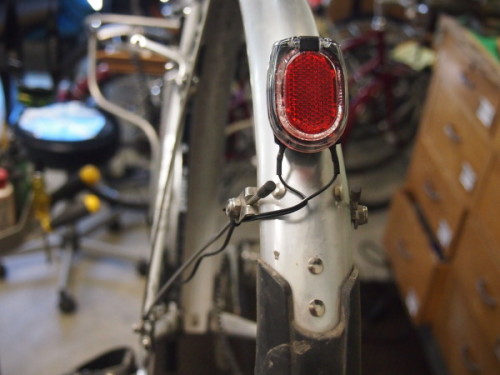
Secula Plus fender mount light. Note the messy wiring!
light
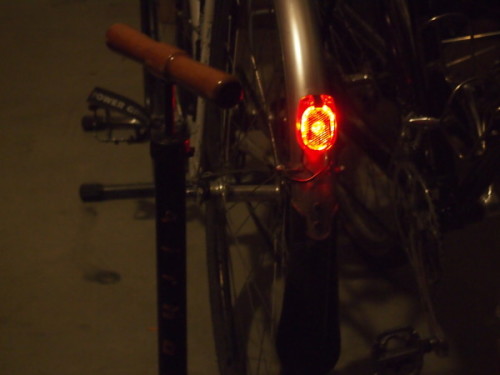
In standlight mode; the light stays on with power from the built in capacitor. Neat!


Categories
Bags/Panniers/Racks Handlebar Bag Panniers Touring Bike Accessories

New Products From Lone Peak Packs

made in USA

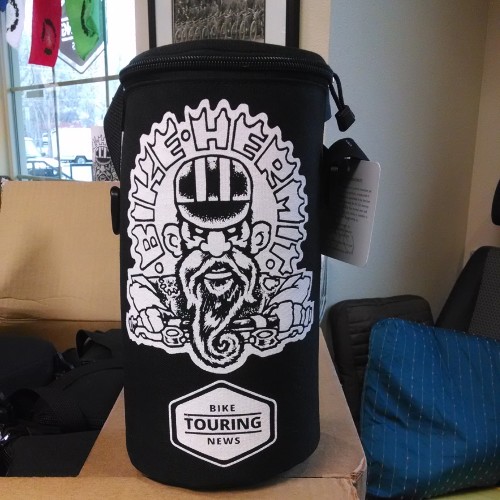
Lone Peak, in Salt Lake City, Utah, has long been a maker of high quality bike touring bags. Gary Hubbert bought the company a few years ago and moved operations to Marysville, WA. We like the fact that Lone Peak is fairly small and so Gary is able and willing to consider our input into products and design. Last year he took his growler pack and added pannier clips to it. Then he made us a run of the packs with our logo silkscreened on the front. As far as we know, this growler pack with pannier clips is a Bike Touring News exclusive! We have a few left and they are now on sale….even better!growler pannier

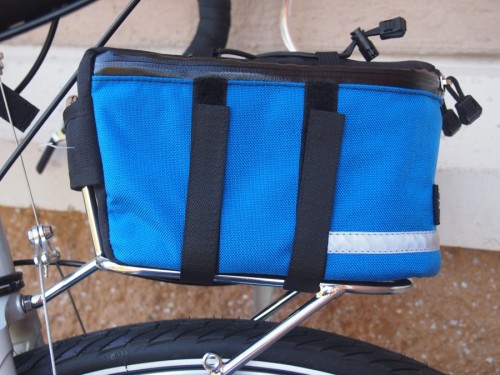
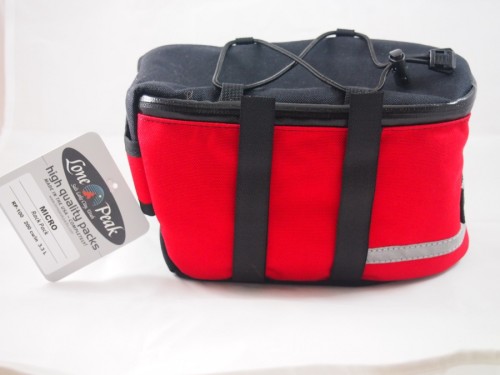
Micro Rack Pack. We have been looking for someone to make a small bag to fit on the Nitto M-12, M-18 and Mark’s Rack for a while, and Gary exceeded our expectations with the Micro Rack Pack. The bottoms are fairly rigid and the sides are reinforced too, so the bag maintains its shape. Four long hook and loop straps secure the bag to the rack rails. Also new are the welded zippers which makes the bag more weather resistant.

rack top bag
Lone Peak Micro Rack Pack
small rack top bag
Lone Peak Micro Rack Pack

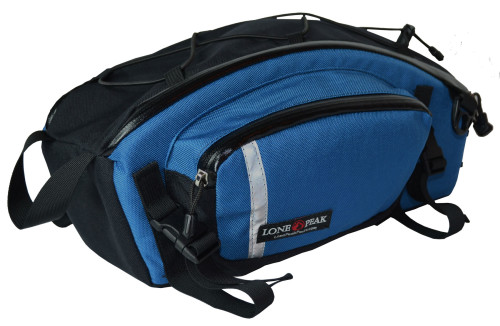
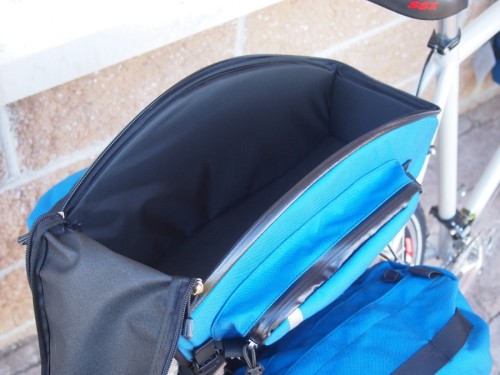
Also new for 2014 is the Swayback Rack Pack. This is a sleek, versatile rack top bag for a rear rack. It has a total capacity of 725 cubic inches/ 11.9 liters. The top opens fully for easy access and there are two large side pockets. The sides and bottom are reinforced with a dense foam for rigidity, and all the zippers are welded.

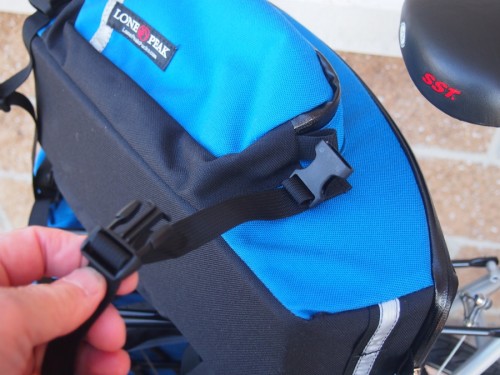
buckles
Fastex buckles for a secure attachment on the Lone Peak Swayback
rack top bag
The Swayback Rack Pack
rack pack opening
Fully opening top with welded zippers.

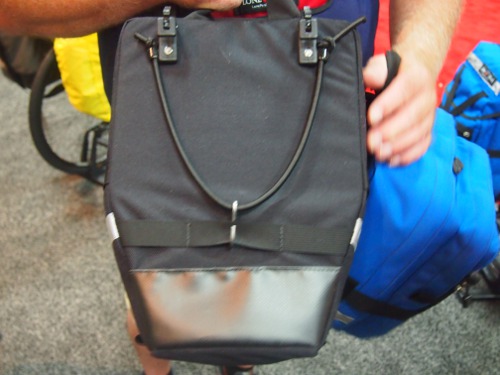
New pannier shock cords. Gary has also modified the lower shock cord attachment on all the panniers. Previously the shock cords were anchored near the lower part of the bag and there was no way to adjust the tension on the s-hook if the lower rack rail was not in quite the right position. The result would be a floppy, rattling attachment. Now, each end of the shock cord passes through a barrel clip anchored directly underneath the upper pannier clips. The longer cord loop with s-hook attached goes underneath a web strap near the bottom of the pannier. The tension on the cord and s-hook is adjustable because the cord is simply knotted above the barrel clips. Older bags can be retrofitted with the new hardware since the retrofitting kit includes a web strap which bolts into the same holes used by old style shock cords.

rear of Lone Peak pannier
The new shock cord attachment. This can be retrofitted to older bags too.

We have used Lone Peak products extensively over the last few years and have found them to be extremely durable and functional. The panniers secure to most racks with less sway and bounce than panniers from better known and much larger manufacturers. Gary is not resting on the company’s laurels either. He even has a fully waterproof pannier which he showed us at Interbike 2014 and as soon as those become available we will stock them.

Categories
Touring Bike Accessories Water Bottle Cages

A Visit To King Cage

outside view
King Cage World Headquarters in Durango, CO.

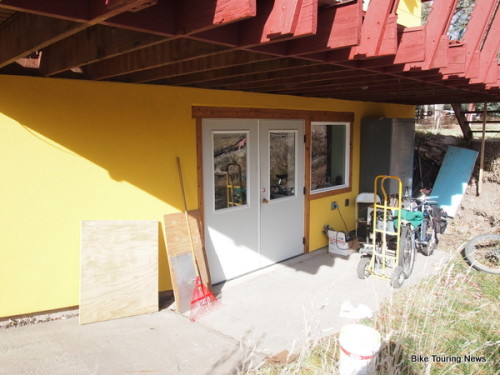
We have used and sold King Cages for years. Ron Andrews started the company in Durango, Colorado and recently moved into  new, larger accommodations. We stopped in on our way to West Texas and Ron gave us the tour. The price of admission was four Sew Your Oats oatmeal cookies from Bread bakery in Durango for Ron and the crew.
This post includes a cool video of the making of a cage. Ron designed and built all the jigs he uses and it’s pretty cool to see another small company making thing and employing people in the USA.

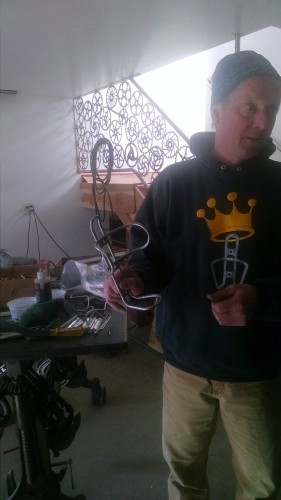
Ron with a bottle cage
Ron with the Many things Cage. It can’t hold “anything” but it can hold many things.

Ron has a list of people waiting to get their hands on the new Manythings Cage and now, we are on the list too. The Kargo Cage is a must IMHO for any serious bike tourist and the Barbell is a clever design and a nice complement for the Mud Flask!

welding a cage
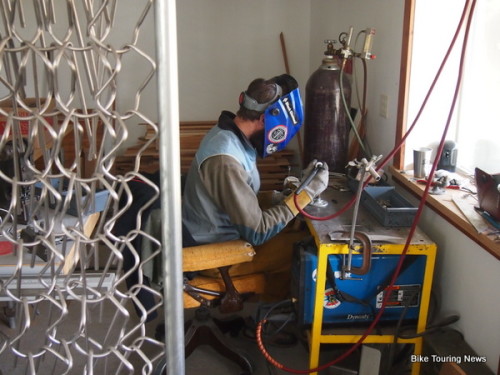
One welding station

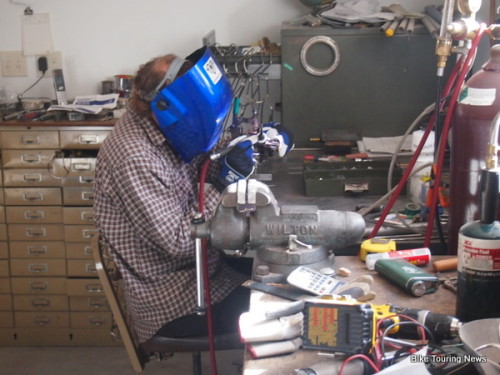
welding a bottle cageThe other welding station.

mud flask on Brooks saddle
King Cage Mud Flask with Brooks mount.
Categories
Bike Touring Equipment Lights and Electronics

Shutter Precision Dynamo Hubs – New Product Spotlight

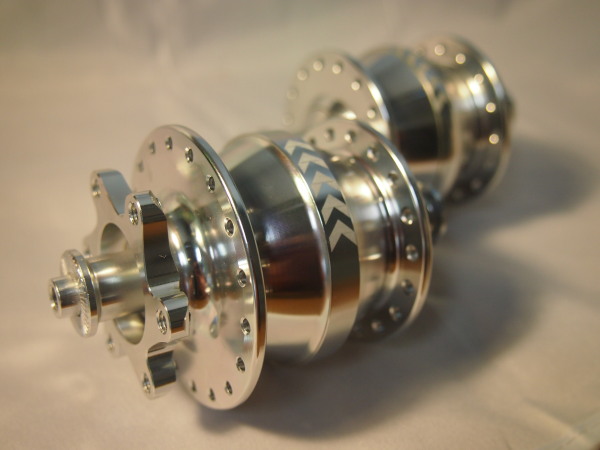
Even if you’re a close follower of developments in bicycle lighting technology, you may not be familiar with the new generator hub systems from Shutter Precision, or SP. However, we suspect that you’ll be hearing a good deal more about their hubs in the near future. With a background in the production of advanced photographic shutters for digital cameras and mobile devices, SP used their expertise in miniature electronics to develop a new dynamo hub system. The Taiwanese company began production in 2009 and now markets a line of hubs that rival the quality, performance and weight of the industry leaders at a surprisingly low price. We are currently stocking the PD-8 (6-bolt disc) and PV-8 (rim brake) hubs in 32 and 36-hole drillings with a bright silver finish.

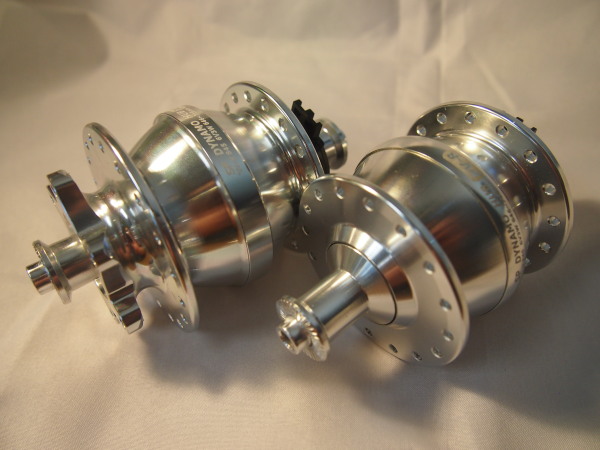
PB0727961
Excellent finish quality and clean lines on the SP PD-8 and PV-8 dynamo hubs.

Given that my understanding of what actually happens inside a dynamo hub is limited, I won’t attempt to describe what goes on internally to set these hubs apart from the others on the market. It’s all magic and wizardry as far as I know. Despite my ignorance, I will risk some comparisons here.

SP claims that their 8-Series hubs (like the ones we have) deliver 72% efficiency at 15km/h (9.3mph), meaning that you as a rider are required to supply an additional 3.3 watts to generate power. If accurate, this puts the 8-Series in a dead heat with the highly-regarded Schmidt SONdelux, perhaps the industry’s benchmark for efficiency. In experiential terms, this level of drag is practically unnoticeable while riding. The Shimano DH-3N80 hub on my RandoGnar is supposedly only 53% efficient – requiring something like 4.5 watts at 15km/h – and I often find myself riding around with my light on in the daytime after neglecting to switch it off the night before.  

In terms of weight, the 8-Series hubs are also right on par with the Schmidt. SP claims 390g for the rim-brake version and 410g for the 6-bolt unit. Schmidt gives an identical weight of 390g for the SONdelux and 395g for the Shimano-compatible CenterLock disc option. Shimano claims a weight of 490g for their lightest offering.  These numbers also put SP at the top of the class, regardless of price.

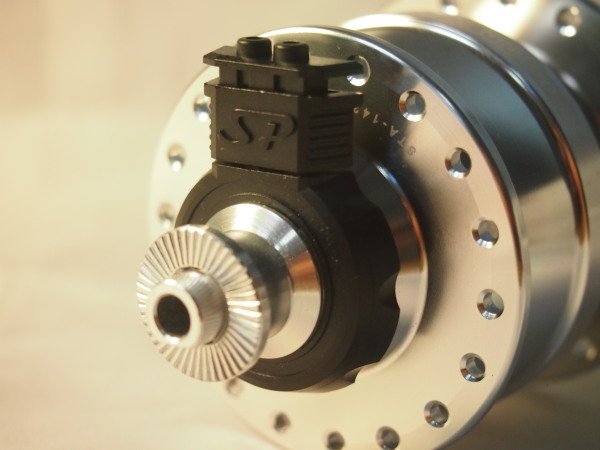
Okay, so they’re efficient and lightweight. That’s a good start, but all the high-tech internals in the world don’t matter if the thing isn’t reliable. SP backs all of their hubs with a two-year warranty against defects. They have survived the rigors of the Tour Divide and numerous other long, arduous races and tours without issue. In the hand, they feel just as sturdy and well-made as the Schmidt units. They spin on high-quality cartridge bearings rather than the cup-and-cone systems that Shimano uses in their hubs. Unfortunately (as with all dynamo hubs, to my knowledge) the bearings are not replaceable or serviceable by the user. However, the hub can be returned directly to the factory for bearing replacement if they ever wear out. If within the warranty period, this service will be performed for roughly $30 US including shipping.  The SP hubs also use a connector very similar to Shimano’s which makes installing wires, removing and installing the wheel a simple matter.

PB0728051
SP’s wiring connector, shown here still partially disassembled.

Okay, so let’s get down to dollars and sense here. A dynamo lighting system is no small investment and we all want to be sure we get the best our budget will deliver. For the price-concious consumer who still prizes performance, the PD-8 or PV-8 will be difficult to top. This may be the new standard for bang-for-your-buck in a dynamo hub, bar none. We’re selling them for the very reasonable price of $123.97. Compared to the $300 price tag for the SONDelux, this an amazing value. Shimano’s Alfine or DH-3N80 hubs cost almost exactly the same as the SP but are less efficient and likely to be less durable.  These were formerly the best alternative for anyone who didn’t want to spring for the SON but are clearly outclassed by SP.

So why should you buy anything else for your dynamo build if these hubs are so great? I’ll have to leave that to you to decide for yourself but I’ll offer some food for thought. Perhaps the single biggest factor setting the Schmidt offerings apart is the five-year warranty compared to two years from Shutter Precision.  Schmidt uses a “smart pressure compensation system” to prevent the buildup of condensation inside the hub shell which can lead to corrosion or freezing of the generator parts over the long haul, allowing them to offer such a generous guarantee. It is unclear wether SP uses any similar technology in their hubs. Aside from this discrepancy, the other differences are fairly subjective.

SP is a relative newcomer to the business, so despite their excellent track record so far they are relatively untested over the long haul. Some brand-oriented customers will prefer the prestigious Schmidt name or the tried-and-true Shimano.  Also, there’s no avoiding the fact that these hubs are made in Taiwan. We all know that lots of really nice things are made in Taiwan, so quality isn’t the issue. I can’t speak to the ethics or sustainability of Shutter Precision’s business practices, so I’ll leave that judgement to others. Regardless, many consumers would rather put their trust in a German-made product. Prefer Shimano’s CenterLock disc rotors?  You’re out of luck with SP unless they decide to license that technology in the future. Also, our stock is currently limited to the aforementioned PD-8 and PV-8 in silver with 32 and 36-hole drillings. SP offers a wide range of other models, colors and drillings but availability is currently scanty in the US.

PB0728031

Overall, Shutter Precision is an exciting new player in the dynamo hub market and we’re happy to be able to offer these hubs to our customers. No product is perfect, but we think the ratio of price to performance they offer is exceptional and are looking forward to getting them laced, wired and between the dropouts of some bikes in the very near future. Shoot us an email or give us a call in the shop if you’d like to talk about wheel build options or a lighting setup for your bike.

Categories
Lights and Electronics

busch+müller Battery Powered Bicycle Lights Review

DISCLAIMERS

-The Bike Hermit started this post and turned it over to Ryan to do the un-boxing and comparisons of the lights reviewed here. During the final edit it became apparent that the Bike Hermit’s contribution was somewhat incoherent and truculent. That part was removed in favor of Ryan’s more measured and lucid approach. The Bike Hermit did complete the last part- “Road Test”

-We are not giving advice here on how to light your bike and/or yourself. Each rider should take the responsibility of knowing local laws pertaining to bicycle safety and for using common sense.

In Germany, bicycles are legally considered to be part of traffic, and so the laws (Straßenverkehrszulassungsordnung, abbreviated StVZO) are very specific. In fact all bikes over 11 KG are required to be fitted with dynamo powered lights. Even lighter, “racing” bikes are required to have lights but these can be battery powered. And every bike light sold in Germany must have an approval from the department of transportation. Blinking headlights or taillights are not legal. (need to get me a lobbyist)

-Boise City Code Section 10-14-03 says:
When in use at nighttime, a red reflector on the rear visible from a distance of three hundred feet (300′) when directly in front of lawful upper beams of a motor vehicle, and a forward-facing white light attached either to the bicycle or the bicyclist which is visible from a distance of at least five hundred feet (500′) in front of the bicycle. A bicycle shall be equipped with a frontfacing
white or yellow reflector when the bicyclist uses a generator powered light which is unlit when the bicycle is stopped.

######
———

B&M Battery-Powered Headlight Comparision

We talk a lot about dynamo-powered headlights around here, and for good reason because there is a lot to like about them.  However, dynamo-powered systems have their drawbacks.  First, the light is wedded to the bike it is installed on and doesn’t easily switch over to another bike.  Also, while some dynamo-powered headlights are quite inexpensive the entire kit can cost a good deal when the hub, wheel build, installation, etc are factored in.  Depending on the hub and light used, the resistance can be noticeable.  Exposed wiring often lends an untidy appearance on an otherwise sleek and elegant machine.  Dynamo hubs can also add a significant chunk of weight.

Even with the excellent dynamo-powered lights available today, there is still need for a well designed battery-powered light that solves all of the above problems associated with dynamo lighting while still providing useful lighting.  However, most of the lights widely available in bike shops across the US fall into one of two categories: “to-be-seen lights” with limited ability to illuminate the terrain and high-output, flood-style lights designed to turn a pitch-black singletrack into broad daylight.  For most on-road riding, neither is ideal.  A middle ground must be sought.

The main problem with either style of garden-variety LED lights commonly used by US riders is that the beam is typically round and uncontrolled, spilling out wildly in all directions.  With a light of the dim, “to-be-seen” style the rider is the only one at a disadvantage.  Even fairly low-powered LEDs are bright enough to be seen at a great distance by other road users.  What these lights don’t do is illuminate the road ahead of their rider.  On back roads, streets or paths without lighting, this can produce anxious moments.  Potholes, cracks, road debris and other obstacles are invisible until it is too late.

On the flipside, with some of the more powerful lights designed for off-road riding the beam can be absolutely blinding for anyone facing the rider.  This is not only a problem for oncoming traffic but also dangerous for the rider who is rendered nearly invisible by their blinding light!  On a more technical note, we must also ask what good is all that power when half of the light’s beam aims above the horizon line?  Many consumers equate a large light output number with a quality light but all the photons in the world are useless if they are not aimed purposefully.

Enter busch+müller with their battery-powered LED lights modeled after their excellent dynamo systems.  These are actual bicycle headlights, not merely “flashlights with a handlebar mount” as Peter White calls the inferior LED lights described above.  We are currently stocking several of these lights that are ideal for any bicycle where a dynamo system is impractical.   Let’s take a closer look at two of them: the Ixon IQ and Ixon Core.

They look very different on the surface but are remarkably similar in function.  They are priced within a few dollars of one another.  The light output of each lamp is nearly identical, with a claimed maximum output of 50 Lux for the Core and 40 Lux for the IQ.  Both lights also have a lower-output, battery-conserving “efficiency” mode where they emit a 10 Lux beam, which is the minimum standard brightness for bicycle headlights under German law.  The key shared feature that distinguishes these headlights from the lights that most American riders are accustomed to is the top-weighted, manicured beam pattern manifested through B&M’s magnificent mirrors.  We’ll look more closely at the beam patterns shortly.

When compared to wimpy “to-be-seen” lights or the overpowered, uncontrolled glare of the MTB-style floods, either of these German-made lights from Busch & Muller will do an excellent job of not only making a rider visible to other traffic but also allowing them to see the road they’re riding without blinding other users.

Un-Boxing

However, there are some key differences that set them apart that we should explore to help those looking for a high-quality battery-powered headlight decide between these two excellent options.
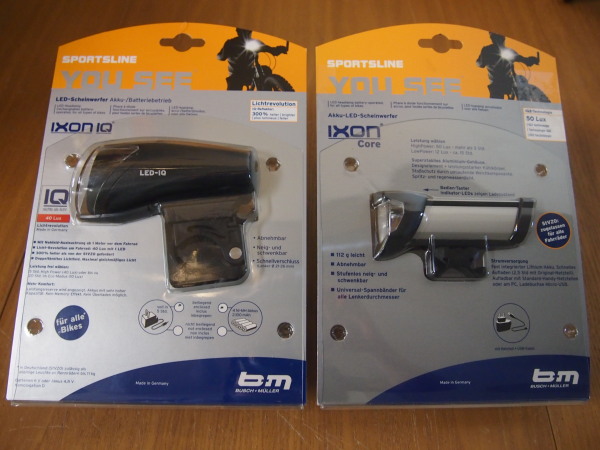
OLYMPUS DIGITAL CAMERA

First, let’s dig into the Ixon IQ.

OLYMPUS DIGITAL CAMERA

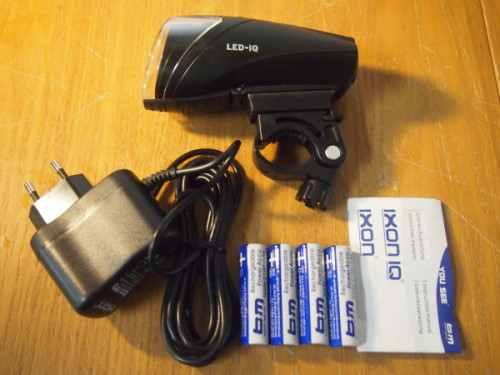
Here’s what comes in the package: headlight with handlebar mount, wall charger, rechargeable AA batteries, instructions.  A two-prong adaptor for US wall outlets (not pictured) is also included at no additional charge when purchasing from Bike Touring News.  The Ixon IQ is also available without charger or batteries for use with your own AA cells.  B&M’s IQ mirror (used in the Schmidt Edelux, B+M’s own Lumotec IQ Cyo and others) is the key technology in this lamp.  The power system also makes this light unique.  The ability to use standard AA batteries lends a level of versatility if the charger is lost or for riders who are heading off the grid.
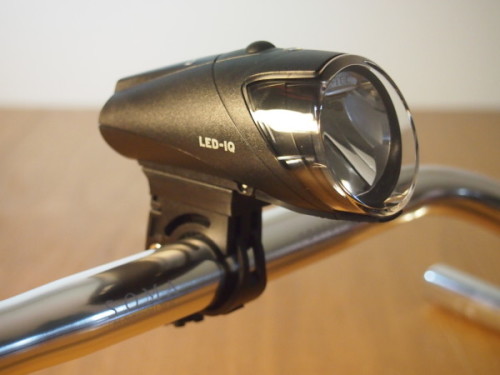
PA2126811

The use of AA cells rather than a built-in battery adds a bit of heft and bulk to the light but it doesn’t look too ungainly when mounted.  The handlebar bracket has three adjustable positions to fit 22.2, 25.4/26.0 or 31.8mm handlebar sections and is locked down with a quick-release thumbscrew.  The mount also allows a few degrees of horizontal adjustment for precise centering of the beam.
PA2126891

The batteries are very easy to install.  You simply open the hinged case by pressing a small button on the rear of the light…
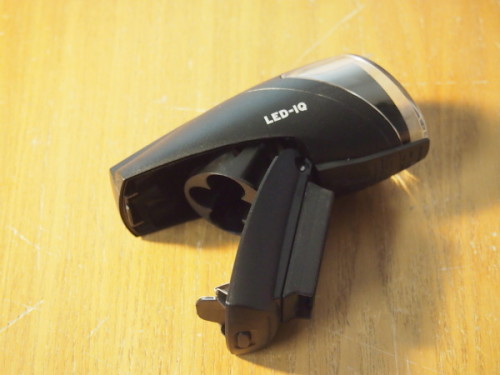
PA2126931

…then slide the batteries into their clearly-marked receptacles before swinging the case closed again.  The second set of contacts is built into the lower portion of the hinged housing.  The door closes firmly and securely to complete the circuit and prevent any unwanted movement of the batteries.
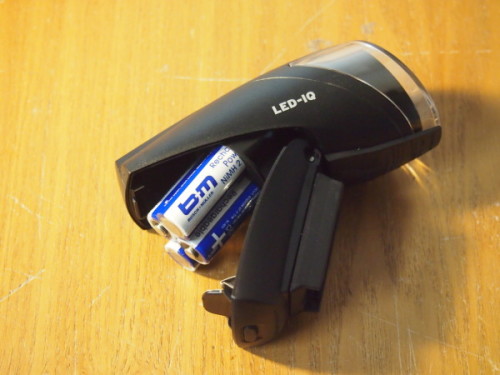
PA2126941

With the batteries installed, the Ixon IQ charges through a port in the underside of the light body, circumventing the need to remove the batteries to charge externally.
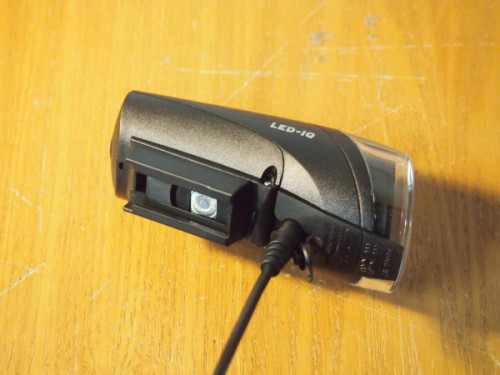
PA2126991

Okay, now let’s have a look at the Ixon Core.  Though similar in function to the Ixon IQ, the Ixon Core is immediately distinguished by its silver finish, slimmer profile and the use of an integral lithium-ion battery rather than replaceable AA cells.  This is both a blessing and a curse.  The Li-Ion battery is lightweight and cleanly integrated but will operate over a finite number of charge cycles and could be outlived by the rest of the light.  However, I suspect that many users will appreciate the sleeker look of the Core and the ease of USB charging without concern for battery lifespan.
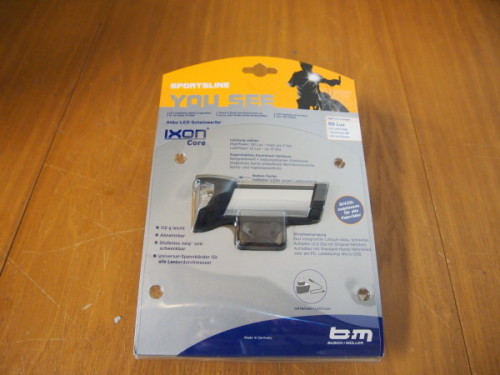
PA212656

In the package you’ll find the Ixon Core light, adhesive rubber stickers, heavy-duty rubber attachment straps, instructions, USB charging cable with wall adaptor, and two-prong adaptor for US outlets (included at no extra charge when purchasing through Bike Touring News).
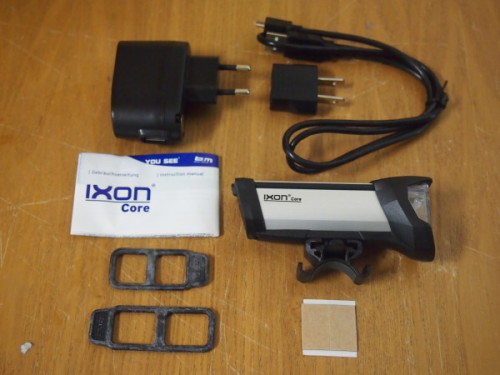
PA2126591

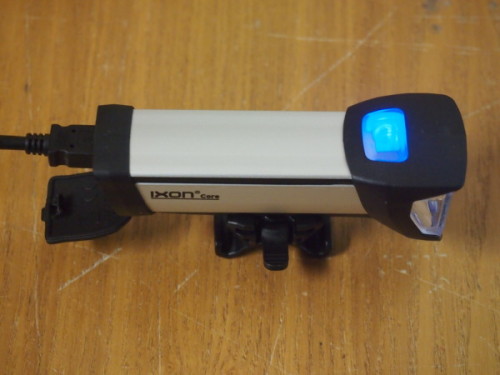
The Ixon Core charges via a USB port in the rear of the light, drawing power from a computer, wall adaptor or any other device with USB output.  The light under the button glows blue while charging and switches off once a full charge is attained.
PA2126601

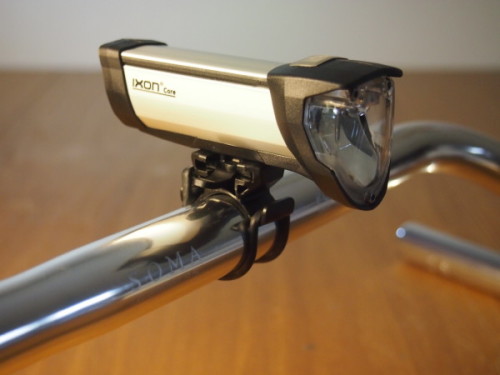
The rubber fixing straps are very tough and can be difficult to stretch around your handlebars but provide a very secure mount when in place.  Like the Ixon IQ, the Core’s mount allows the light to pivot horizontally to allow centering of the beam when the light is mounted off-center from the bicycle’s centerline.
PA2126791

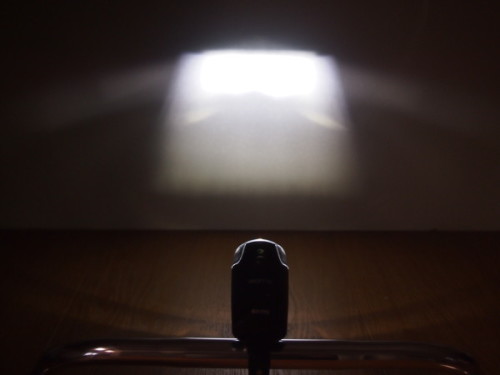
So, now that we’ve taken a good look at the lights themselves lets compare the two beams and their relative merits.  First, here’s the Ixon IQ with its “high and tight” beam pattern.  Note that the beam’s intensity is focused high to illuminate the road far ahead but with a sharp cutoff to avoid blinding oncoming users.  When aimed from handlebar height, this beam provides very even illumination of the road surface.  Very little light spills off the sides or bottom of the illuminated area.
PA2127061

Here’s the Ixon Core for comparison.  The beams are very similar in that they have a brighter top section for far-off illumination and a sharp cut-off at the top of the beam.  However, the Core spills a bit more light around the sides of the main lighting area and especially at the bottom of the beam.  To me, it appears that the extra 10 Lux of claimed output spills out in these areas rather than extending visibility in the center of the beam but we’ll look to the results of some road testing to confirm this.
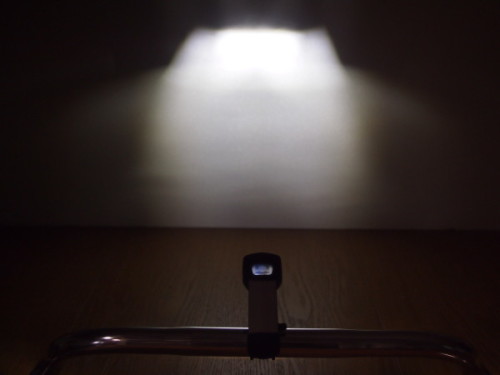
PA2127131

Here are the two lights presented side-by-side.  The tight, focused beam of the IQ is easily distinguished from the broader, more diffuse output of the Core.  In addition to their different charging and power characteristics, the differing beam patterns will make one light or the other a better fit for different riders.

In my estimation, the IQ’s beam will be better suited to faster riding on terrain without tight corners while the Core will perform best at slower speeds and in tighter terrain.
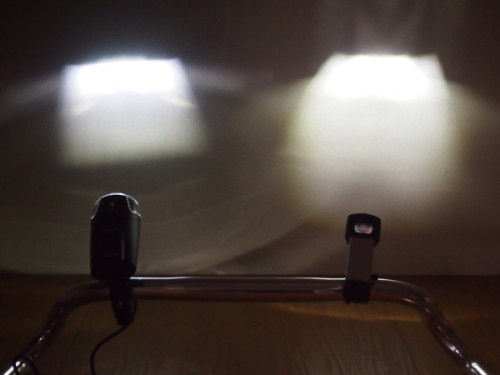
PA2127251

Road Test

I headed out last night after dark with both lights mounted side by side on the handlebars to compare the beams. After a few minutes, the IQ light turned off and I realized the batteries were dead. This illustrates one of the downsides of battery powered lights; maybe you forget to charge it at work and you don’t have spare batteries so you end up riding the last half of the commute in the dark. There is a low battery indicator LED on the top of the light and, if in high powers mode when the battery starts getting low, the beam automatically switches to low power.

The on/off  buttons have a positive action and require being held down with some force for a second before the light turns off or on. So if the light is stuffed into a bag or a jersey pocket there is little chance of either of these lights being turned on or off accidentally.

Lucky for all, I rolled out of bed before daylight and accomplished the road test in the morning.  Both lights have a similar beam pattern and I was hard pressed to tell if the Ixon Core, which is rated at 50 lux output was any brighter than the 40 lux Ixon IQ.  Both lights create a well defined trapezoidal pattern on the road surface. The narrow end of the trapezoid appears a few feet in front of the tire (when mounted on the handlebars) and the two sides of the trapezoid diverge until the entire beam is the width of a two lane road at perhaps 150-180 feet from the bike. I describe the beam as though it was painted on the road, and that that is the impression I am distinctly left with. Almost no light spills outside of the trapezoidal beam lighting the road, except very close to the bike. The IQ light casts a dim crescent shaped light pattern if front of the front wheel. (which can be seen in the side by side comparison of the beams in the last photo above) The Core light projects a relatively focused beam out each side of the lens 90 degrees to the direction of travel, which makes the rider extremely visible from the sides. My observation is that the Core lights the road in a little more even and uniform way. The IQ light has a little triangular shadow in the near part of the beam and the upper edge of the beam (the wide part of the trapezoid farthest from the bike) is a little fuzzy compared to the Core.

Either one of these lights would meet the needs of most commuting and touring cyclists who don’t use dynamo powered lights. They do a fantastic job of lighting the road surface. They don’t do a good job of lighting the sides of the road next to the rider nor do they illuminate things like overhead tree branches.
Categories
Frame Bags Touring Bike Accessories

Revelate Designs at Interbike 2014

On Monday September 8 between 4 and 5 inches of rain fell in southern Nevada and wiped out portions of I-15, the main highway between Salt Lake City and Las Vegas, and resulted in the worst flooding in over 30 years in the area. We heard about it first from Eric Parsons who was having his booth for Interbike shipped to him from Salt Lake. He finally got it set up around six PM…after the first day of the show.

When we stopped by again on Thursday we had a chance to talk and to get updates on new stuff from Revelate Designs;

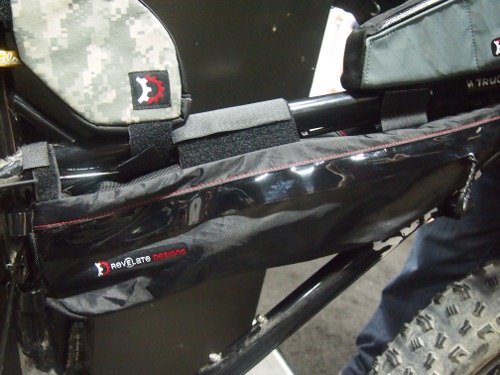
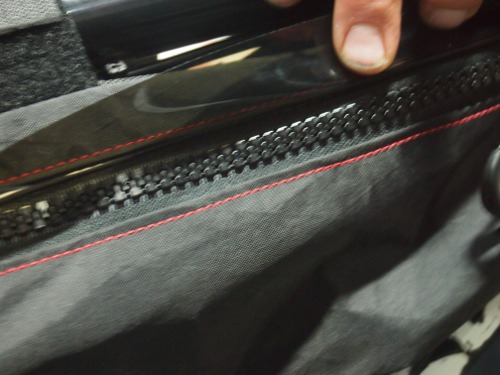
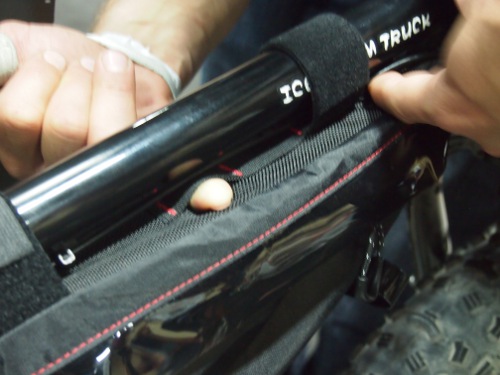
They have a prototype for a new Tangle Bag (the original will still be made) which addresses the stress on the zipper to the main compartment. Apparently that side is the one that is most abused with a loaded bag. The prototype (which is close to production) uses a flexible cover shield to keep out the elements and a non-waterproof zipper for durability. The final bag may incorporate a more flexible material on the top of the bag where it attaches to the top tube to further reduce stress on the zipper area.

Revelate Tangle
New zipper cover.
zipper
The new zipper is not waterproof but is more durable.
daisy chain revelate designs
This daisy chain webbing allows for a custom fit when using other top tube bags.

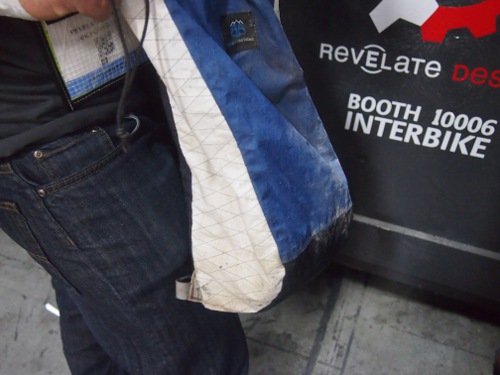
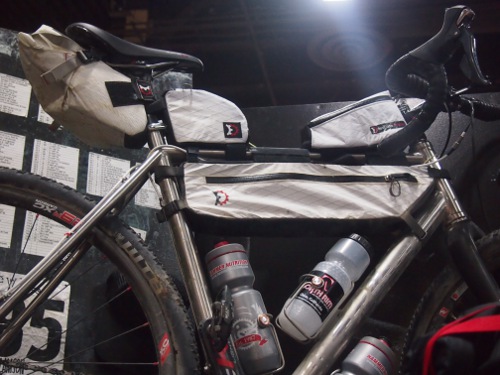
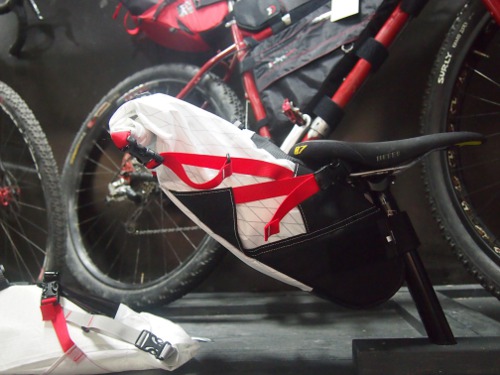
They still make some bags out of the super light Cuben Fibre material but it is so labor intensive that they don’t wholesale the bags yet. There is a mid weight material though that is very tough and durable and is a similar swanky looking white.

backpack
This climbing backpack (not for sale)has seen years of abuse.

bags on a bike

Pika seat bag
The areas subject to stress and abrasion still use the heavier material.

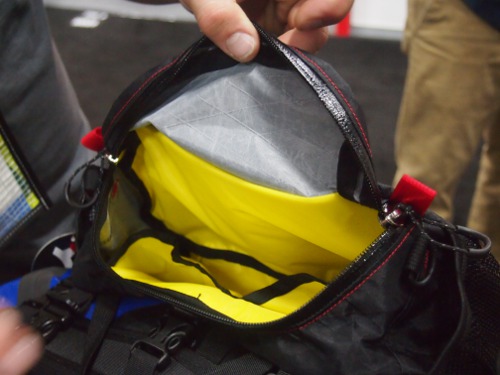
There is a newly designed Pocket as well. This one features a curved zipper which creates sort of a lid, the idea being that it will be easier to access while on the bike. The bag is also reinforced in a way that it retains its shape and there are attachments that will make the bag more stable when used as a standalone piece, without a Harness or Sweet Roll.

inside of bag
The new front Pocket has a redesigned interior too.

top of bag
New smiley face zipper on Revelate Designs Pocket

I’m glad we went back and had a chance to talk with the guys from Revelate Designs because, at first glance, there didn’t appear to be a lot that was new. But they are always thinking and tinkering and improving. We are looking forward to the next generations of bikepacking gear!

Categories
Bags/Panniers/Racks Handlebar Bag Saddlebags

Ostrich S-2 Saddlebag

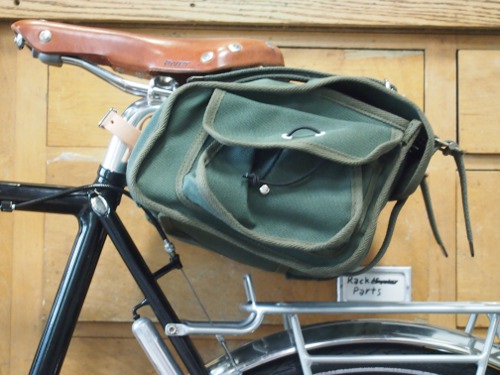
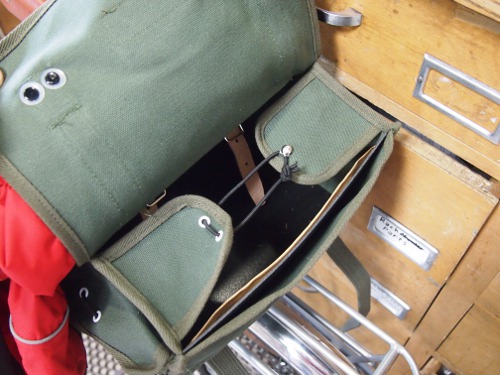
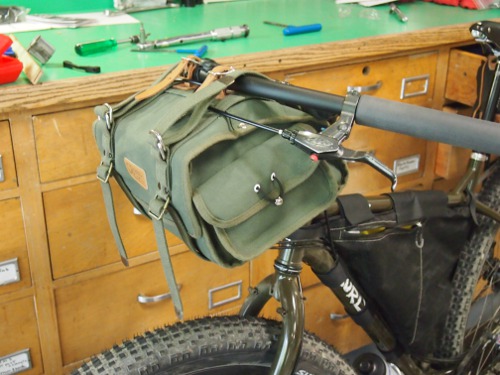
The Ostrich S-2 saddlebag is a traditional canvas saddlebag meant to be attached to the loops built into the rear of most leather saddles. These are made in Japan;  “Excellent Equipment of Pack and Carrying Gear for All Cyclists at Heart”  Nice!  It has been discovered, although not by me, that this bag also fits on Jones Loop Bars as if it were made for them.
saddlebag on bike
The Ostrich bag is self supporting.
saddlebag
The lid of the S-2 only accesses about half the bag, so pack accordingly.
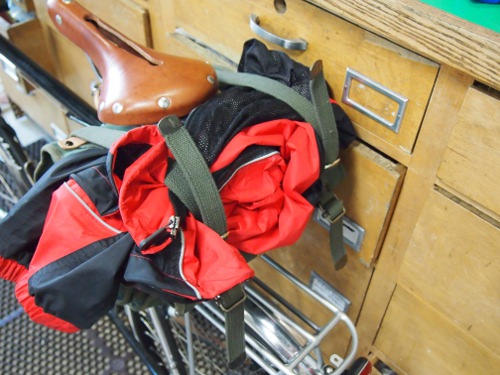
These Top Straps are Handy for the Odd Jacket
handlebar bag
The Ostrich S-2 works brilliantly with Jones Loop Bars
handlebar bag
Perfect Fit!

Handlebar Bag

Categories
Frame Bags Saddlebags Touring Bike Accessories

Revelate Designs Frame Bags for Bikepacking and Bike Camping

Bike Touring News carries the full line of Revelate Designs products (when we can get them; these things are popular and, since they are all made in the US on a relatively small scale, sometimes they are out of stock). We are also one of four Authorized On-Line Dealers in the U.S.
Revelate Designs “are innovators and builders of the highest quality bikepacking and adventure cycling gear available anywhere. Alaska born and 100% Made in USA“. This is bike gear that is designed for rackless lightweight touring, bikepacking, bike camping and expedition touring. Many customers use individual bags, such as the Mountain Feedbag or the Gas Tank, to complement their traditional pannier setup for touring.
A couple of years ago I wrote this blog post featuring Eric Parson’s trip on the Lost Coast of Alaska in 2008. Eric is the founder of Revelate Designs (which was originally called Epic Designs).
Last year at Interbike in Las Vegas we spoke to Eric and recorded this interview:

In this video I describe some of the features of the bags and talk about how they are designed to fit on the bike. The benefits of the modular concept of this system become apparent when one starts combining bags to create a bikepacking setup; the various bags fit without interfering with one another, plus bags can be removed or added depending in the length and/or duration of the current trip under consideration. And- this is where Eric’s structural engineering background becomes evident- the incorporated stiffeners and straps create a very solid and sway free coupling to the bike.

For people with bikes which are not designed to be fitted with racks, Revelate Designs frame bags can be a good way to increase the bike’s usefulness. Even those with a traditional touring bike and pannier arrangement can always use another place to store food, electronics, jackets, sunglasses, etc.
Categories
Lights and Electronics

Tigra Sport Power Converter and Power Pack Review

Recently we received the BikeCharge Power Pack by Tigra Sport and the BikeCharge Power Converter by Tigra Sport for review. The Power Pack is a storage battery with USB output for charging electronic devices, and a micro USB input. The Power Converter converts the A.C. power from a 6 volt dynamo hub to D.C. so that the hub can be used to charge electronic devices or the Power Pack.

UNBOXING

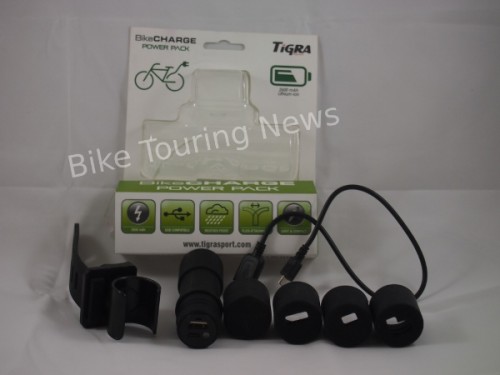
My first impression of the Power Pack is that it is a nice, compact size, relatively light, and appears to be robustly made. There is a rubber cap to seal the ports on the business end of the battery which is held on by means of o-rings. I like that…simple and durable. There are three other caps included in the package, each of which has a different configuration of openings providing access to the USB out or the micro USB in, or both. I can see the advantages of being able to keep dust and moisture out of the unused ports, I just wish there was a more elegant way to do it, especially since I will lose most of the caps the first day on tour.
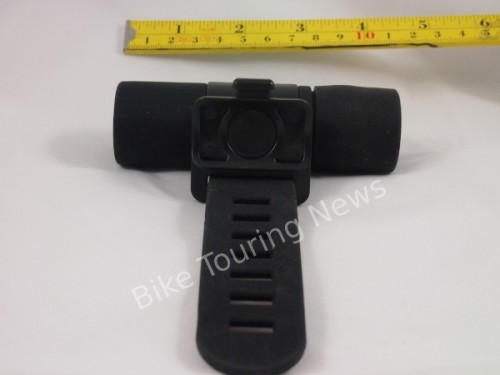
The battery snaps into a hard plastic cradle which rotates an a base which in turn mounts to a tube on the bicycle (frame, handlebar or stem) and is held in place by a heavy, rubberized band. The attachment system is very solid and I can’t imagine that it will rattle or that there is any chance of it falling off. It might be nice if the part of the base which is held against the bike tube was padded rather than simply hard plastic.
There is a charge indicator light adjacent to the ports on the end of the battery. A short USB cable is included.
The battery has a capacity of 2600 mAh and will charge a device at 500 mAh at 5 volts.

rechargeable battery
The battery is solid and compact. Shown with bracket for attachment to the bike.

picture of battery and accessories
Bracket, battery, cover caps and USB cable are included.

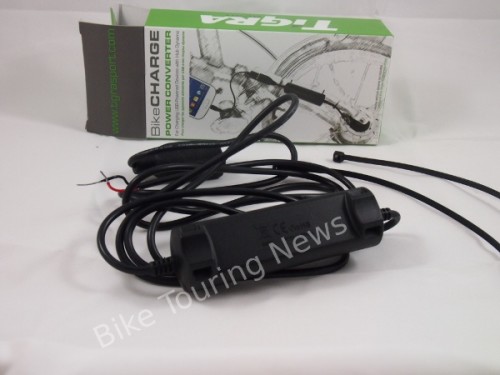
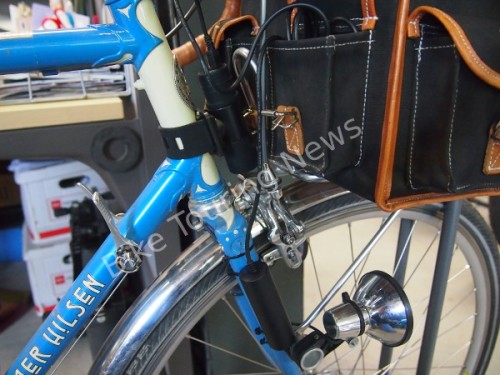
One end of the BikeCharge Power Converter sprouts a short cable which plugs into the dynamo hub, and the converter itself is attached to the bicycle fork with zip ties. Out of the other end of the converter a second cable emerges and is terminated with a USB port. The converter is light but it is large, much larger than the other converter I am using. The two bare wires at the end of the cable which attaches to the hub are meant to be inserted into the plastic plug on Shimano or Sanyo hubs but for my Schmidt hub it was necessary to crimp two piggyback fittings on the end. Over voltage protection is built into the unit for when the wheel is spinning fast.
power converter

converter and battery on bike
The converter is on the fork leg and the power pack is on the head tube..
converter/hub connectors
Piggyback connectors on the Schmidt hub.

IN USE

I have only had the chance to use the Power Converter one time but it appears to work well. With any converter I think it is best to use them to charge a battery which can simultaneously be charging a different device or which can be used to charge the device later. This way, when the bike stops, the charge to the device won’t be interrupted. At USD $29.95 this converter is an inexpensive way to get into charging electronics with a dynamo hub. I wish the output cable with the USB port attached was shorter. At almost five feet, there is a lot of extra cable that needs to be tucked in or zip tied on.

I really like the BikeCharge Power Pack. Like I said, it is small and robust and it charges my Droid phone quickly. The rubber end caps are a little cumbersome and might be rethought in order to use just one cap with some sort of system to keep it tethered to the battery. I will probably eventually lose all the caps. I also like the little bracket to keep the battery attached to the bike so I don’t need to find a pocket on a bag to hold it while charging, and I won’t need to fish around looking for the battery when I need it. At USD $69.95 the price is competitive.

The distributor also has a product called LightCharge Hub which is intriguing to me. This is a smaller converter/charger which features dual modes; in addition to the USB port, a separate leg goes to the bike lights , so with the flip of a switch a person can power their lights or charge a device, eliminating the need for piggyback connectors on the hub and the resulting mess of wires. I may need to get one of those for my own use!

We will be listing these products in the Bike Touring News store even though we may not stock all of them. The distributor has a drop ship program which we will be taking advantage of. I can remember back to just a few years ago when the means for recharging electronics with a dynamo hub were limited, and the ones that were out there were complicated and expensive. The story of everything related to electronics, I suppose. Now, if you have a dynamo hub, there are a number of inexpensive ways to keep the phone and tablet charged even when in the middle of nowhere.