Categories
Touring Bike Accessories

Surly Bill Trailer

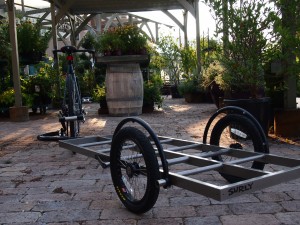
We recently ordered and built a Surly Bikes cargo trailer for a customer. This one is the so called Bill trailer. The shorter Surly trailer is the Ted. In typical Surly fashion these trailers are way better than they need to be. The beds and the hitch are made mainly of TIG welded 4130 ChroMoly steel. 304 stainless steel hardware is used where appropriate.
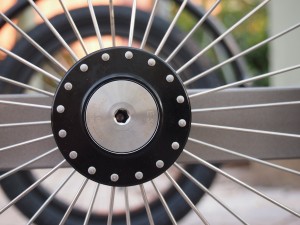
There are two sealed cartridge bearings on each wheel.

The trailers and the hitch are sold separately. The hitch will work with almost any bike by simply replacing the stock quick release skewer or thread on nuts with Surly’s proprietary parts. Surly’s own Ogre and Troll bike frames have a threaded hole in the rear dropout made to accept a 10×1 threaded bolt and the Surly hitch mount nuts.  The hitch and yoke assembly retails for $299.00. The Bill trailer retails for $750.00 and the Ted goes for $650.00

The Surly crew cultivates an impression of being a bunch of beer swilling louts and rad bro’s, but their engineers are top notch and these guys obviously ride bikes…a lot. And they actually use what they sell. It’s surprising to me and it bugs me when some manufacturers bring bikes or parts to market and the bike or part does not work as expected or advertised because of a minor, or not so minor, design flaw which could have been flagged and worked out if the the item had been ridden and used before being marketed. Here’s what makes me think these trailers were used in the real world before being sold:

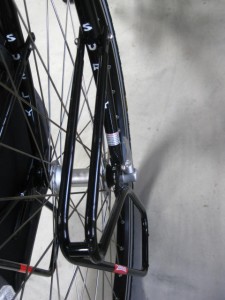
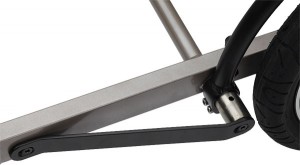
You see the bent piece of flat steel bolted to the frame and to the end of the wheel guard mount? I couldn’t figure out what that was for. It obviously is not structural. Then I took the trailer for a spin and when I was rolling it back in through the front door the piece of flat steel hit the door jamb and neatly kept the wheel from smacking into it which would have resulted in a jolt. I’m guessing that actually happened the first time someone took one of these out.
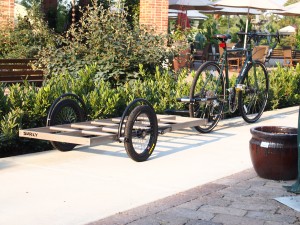
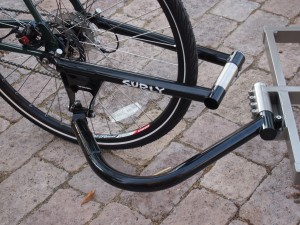
The articulating arm and adjustable sleeve at the trailer attachment make it possible to get the trailer level on any bike.

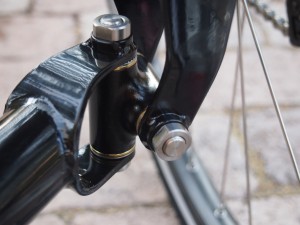
A compound knuckle joint connects the hitch to the yoke.

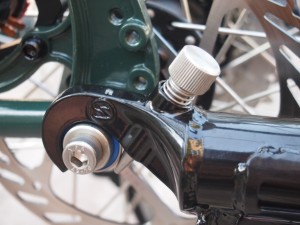
The fingers on the ends of the hitch are troughed to cradle the sealed bearing which is part of the attachment nut secured to the bike. The needle thumb screw holds it in place.

These trailers obviously are not suitable for bike touring and that is not the intention. But on the days when we miss the UPS driver and my Bob Yak is overloaded with boxes to ship I think one of these would be nice. The customer who bought this trailer is a carpenter. It would be fantastic to see him going down the road with an air compressor and a dozen two-by-fours strapped onto the the deck. Made for people who are serious about Using (with a capital U) their bicycles, these trailers are designed and made to last for a very long time.

Categories
Front Racks Touring Bike Accessories

Salsa and Axiom Low Rider Racks

So called “low rider” racks are popular for carrying panniers on the front of the bike. We have already gone over the Nitto Campee rack and the Nitto M-12-2 rack.
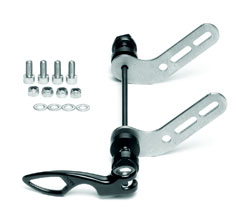
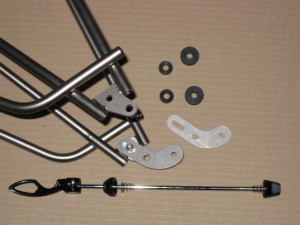
Axiom makes the Journey DLX Lowrider and Salsa sells the Down Under rack. Both are made of tubular aluminum.

The Salsa rack is similar to the Tubus Duo in that the top rails sandwich the fork blade and bolt on both sides of it. The only down side is that not all fork blades have a threaded boss on both sides. (The Surly Long Haul Trucker does)

The Down Under rack attaches to the fork dropout eyelets with a welded tab. There are no moving parts and the rack is all one piece which should make it fairly reliable. My only gripe is that there are no “pannier stops” on the top rail and so the panniers have a tendency to slide back and forth but I think some simple after market mods would solve that.

There is a barrel boss welded to the leading edge of both top rails though, ostensibly for the attachment of Salsa’s Minimalist front top rack, but I think they would make ideal light mounts.

The Salsa Down Under low rider rack
Long top rails with a forward bias and barrel bosses for a Salsa Minimalist rack or for lights

The Axiom Journey DLX Lowrider rack employs a two piece design and comes with a large u-bolt to attach to the fork leg. The two pieces are designed to pivot in order to achieve a fairly level attachment rail for the panniers when used on forks with varying rakes. The good thing about this rack is that mid fork eyelets are not required, in fact it appears that the u-bolt attachment actually is designed to stabilize the rack from twisting. When I bolted the rack to one mid fork eyelet on the Long Haul Trucker I was able to twist the rack with my hands- less than ideal for carrying bags next to the wheels! And even with the pivoting design I was unable to get the top rails completely level with the floor when mounted. On a bike with 26″ wheels and wide profile cantilever brakes, such as the Tektro CR-720, the top rail interferes with the brake caliper….not an issue obviously on a 700c wheel bike or even a 26″ one with disc brakes or narrow profile cantilevers.
Another good feature is the stops on top of the rails to keep the panniers from sliding. This is a serviceable entry level touring rack that will not break the bank.

The Axiom Journey DLX Lowrider. A decent entry level low rider rack.


Tabs on the top to keep the panniers from sliding. The wide profile brakes on this 26" wheel bike hit the top rail of the rack.


Categories
Touring Bike Accessories

Touring Bike Propping and Sun Screening

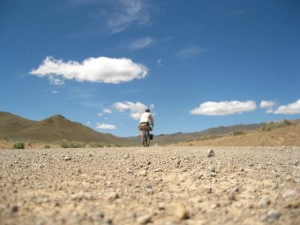
riding in the high desert
Hermitat

One would think a lonesome bike hermit would have desert travel down to a science.
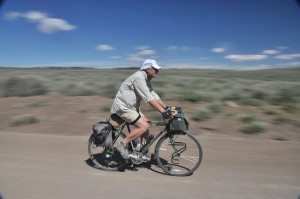
One would be wrong. Sunburned skin on my forehead and nose is flaking off a week after the Owyhee Uplands tour. There were blisters on the backs of my hands after the first day. SPF 33 sunscreen is no match for the desert sun at a mile above sea level. Hands, arms, legs, the back of the neck, ears and noses need to be physically shaded via long sleeve shirts, pants and hats. Desert dwellers in Mexico, North Africa and the Middle East know this, and they know that loose fitting full coverage clothing actually keeps them cooler than say, cutoffs and t-shirts. The air circulates next to the skin under the garment and evaporates the sweat- that’s a pretty neat physiological design.

riding in the desert
Ron models good desert cyclo-touring apparel. I gotta get me one of those Adventure Cycling caps


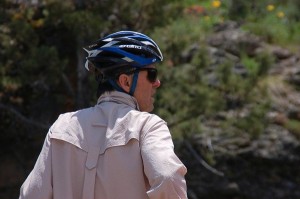
bike hermit with sun shirt
This shirt- my "safari" shirt- is made of synthetic material and has a vented yoke. The collar folds up too.


I invented this. I am going to call it the Ultra-Light Power-Screen. I'm going to write a business plan and put it on KickStarter to raise money and go into production. Soon.


bandanas used for sun mitts
I fashioned these mitts out of a bandana to screen the backs of my hands and my wrists from the sun.


Lisa, who has extensive adventure travel experience, came up with a solution to keep the sun off her thighs. I tried it and it actually works better than you might think- when riding, the wind presses the bandana down and keeps it in place.

For my birthday Sky King bought me a Click-Stand.
I had a good opportunity to test it with a loaded bike, and I have to say it solves the problem of what to do with the bike when taking a break. The Click-Stand is a portable, folding bicycle stand which, when folded, is between seven and ten inches in length. Mine weighs about 110 grams. For ultra-light touring the Click-Stand could double as a support for a rain fly or shelter. When used as a bike stand, the maker recommends using the supplied, small bungie straps to hold the brake levers closed so the bike won’t roll off the stand. I will not contradict that, but I can say that simply strapping a toe clip strap around the down tube and front tire to keep the wheel from turning works too.

Click_Stand supporting loaded touring bike
Click-Stand in use

Using a traditional kickstand is possible with a loaded touring bike but one needs to be careful. The type of kickstand that is held in place by sandwiching the chainstays between two plates with a bolt through the middle can actually crush the chain stays, especially the more ubiquitous, one legged kickstand. A two-legged kickstand is better. Such a design helps reduce the potential for chainstay flex compared to that which a loaded bike leaning on a kickstand single leg can impose. Even so, care needs to be taken not to tighten the sandwich bolt too tight. And the bolt needs to be checked regularly to make sure it is not coming loose. One bonus of the two-legged design is that the rear wheel is held a little ways off the ground, making maintenance and repairs much easier.

Loaded LHT with two-legged kickstand
Olive likes her two-legged Pletscher kickstand.
Categories
Bags/Panniers/Racks Front Racks Touring Bike Accessories

Nitto M-12-2 Front Rack

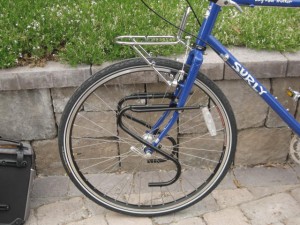
The Bike Hermit likes his front bag because it is easy to reach even when riding and because it has a map case on the top for… maps. A “handlebar” bag, one that attaches only to the handlebar, is not ideal because it affects the steering of the bike too much. One that is supported on a low front rack is better. The Nitto M-12-2 rack is a tubular steel rack made in Tokyo, Japan by the Nitto company. It works on bikes with cantilever brakes and will support a front “rando bag” such as those made by Gilles Berthoud, Acorn or Swift. A person could just strap a dry sack or a tent or zip tie a basket on it too. Since the mounting points are up out of the way, “low-rider” racks and panniers can be used at the same time! The “-2” after M-12 references the two light mount braze-ons- one on either side of the rack.

Nitto M12 on Surly Long Haul Trucker
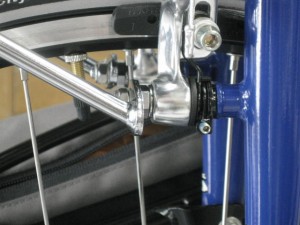
The Nitto M-12 front rack attaches to the cantilever brake bosses and the brake hole in the fork crown.

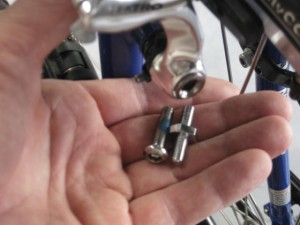
replacement brake stud for NItto M-12
Replace the button head brake bolt on the left with the double ended stud on the right.

Nitto M-12
The rack bolted to the replacement brake stud.

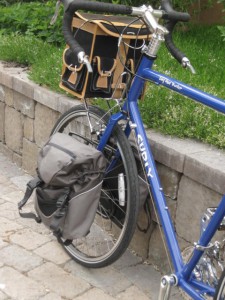
Berthoud GB28 on Nitto M-12
And now, Mr. Berthoud can come along!

Some minor tweaks may need to be made to get the rack arms or struts to line up with the respective holes and bolts, but these are made of tubular chrome-moly steel which can stand up to a small amount of judicial bending. Just be careful about bending the piece too far….make small incremental adjustments so that you won’t need to bend it back.

Categories
Front Racks Handlebar Bag Touring Bike Accessories

Gille Berthoud Decaleur Brackets, Custom Replacements

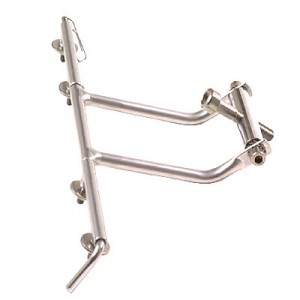
Gilles Berthoud makes bicycle products with apparent disregard for costs. The materials and methods and designs are always uncompromising. That is why it is surprising to me that the Gilles Berthoud decaleurs (a bracket made to attach to the bicycle stem and secure a front bag) don’t really work with the Gilles Berthoud rando bags.
Gille Berthoud H-121 decaleur
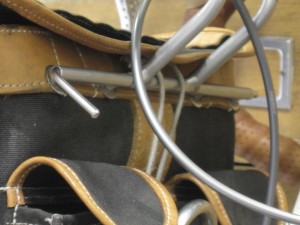
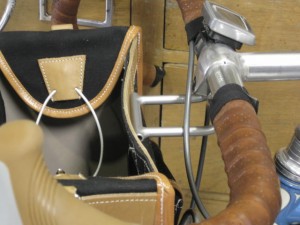
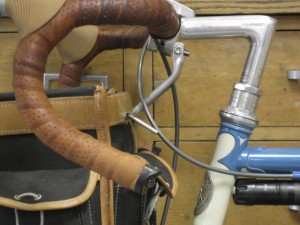
The large bolt replaces the stem bolt and threads into the hole in the short piece of tubing which replaces the stem nut. The arms are bolted on to the short piece of tubing which is threaded at both ends. Then the arms can be rotated to the desired position to line up with the pieces attached to the leather trim piece along the top of the bag so all the pieces can be skewered together. The only problem is, the shape and the length of the arms allow for only a very narrow range of positions; if the arms are parallel to the ground, the bag is pushed too far forward….if the arms are rotated down so the bag can sit closer to the bars the connection point is low, potentially below the point where the pieces need to be attached to the bag. Another problem is that the arms of the decaleur interfere with closing the top flap.

The GB Decaleur arms keep the flap from completely closing, resulting in a permanent curl in the top flap.
This is the shorter version of the decaleur. For a bag topping out at close to handlebar height it pushes the bag too far away from the bar.
For a bag topping out below the handlebars this decaleur, the GB H-91, works fine. The back side of the bag is still close to the handlebar.

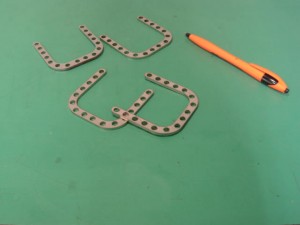
I know someone with access to a machine shop who likes to tinker with bike parts so we imagined a part that would work to replace the stock arms. He did a rough sketch and gave it to his c.a.d. guy who put it into language a machine could understand and out came these:

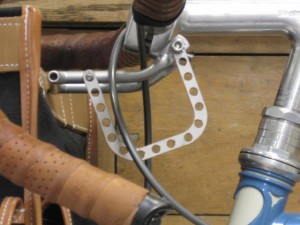
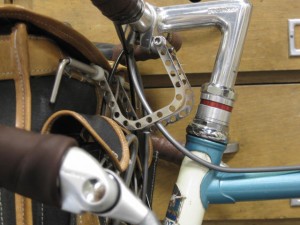
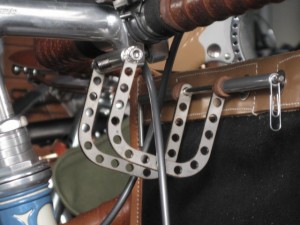
One of these pieces will bolt to either side of the short piece of tubing bolted to the stem and replace the bent arms of the original decaleur. The holes allow for adjustability plus they make it look rad. The U-shape will bring the outer arm up in under the top flap of the bag without interference.


Here’s a comparison of the original bracket arms bolted side by side with the new ones
:

New U-shaped brackets provide more adjustability and clearance for the bag lid.

Here are the new brackets in use with a GB25 bag on Sky King’s Bleriot:

And here are the new brackets on Chief with a GB28 bag:

The original arms are a little bit wider than the new brackets at the bag attachment point, so some spacers take up the slack. Here, we see the upgraded leather spacers in use.


Here are the two bags with the new brackets. The bags top out at roughly handlebar height and they sit close to the bar, minimizing any adverse influence on the steering.


Notice how neatly the brackets tuck under the top cover flap of the bag.
Categories
Pumps

Zefal HPX Frame Pump

Set up in 1880, Les Etablissements AFA are specialized in the design of toe-clips, toe-straps, bicycle bells and racks. Later called POUTRAIT, the company works closely with famous riders to develop products. In partnership with Mr Lapize and Mr Christophe, both French famous cyclists, POUTRAIT created, at the beginning of the twentieth century, products under two new brands: LAPIZE and CHRISTOPHE.

A few years after the creation of AFA / POUTRAIT, another French industrialist, Mr. Sclaverand, invented and manufactured the first bicycle valve which took his name for decades before being called the French valve or Presta valve.

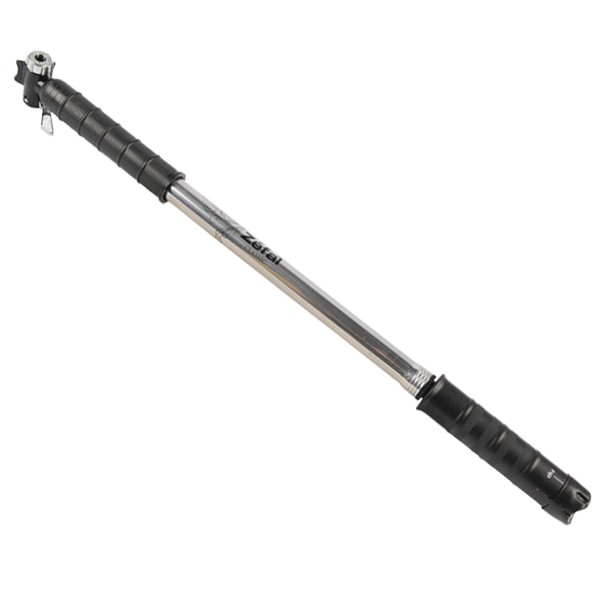
Photo of Zefal frame pump

Fast forward 100 years and the company is named Zefal, after their best selling product line. The Bike Hermit loves Zefal pumps. The Zefal Husky floor pump was the only one robust enough to hold up to the everyday requirements of a bike shop that fixed A LOT of flat tires. The Zefal HPX line is just as well built, and when you are in the middle of freakin’ Bolivia with a flat tire, you just want a pump that works.

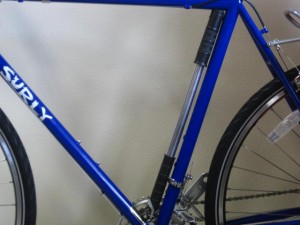
Zefal says the pump is designed to fit vertically along the seat tube inside the frame and it is held in place by spring tension. One end of the pump is shaped to fit against the top tube snugly, without twisting, and the other end incorporates replaceable “wings” which get bracketed by the down tube and seat tube. That works fine except it eliminates the possibility of using a seat tube water bottle cage, which doesn’t make much sense, especially when many vintage bikes and many current touring bikes have a pump peg brazed onto the trailing side of the head tube. Zefal “declines all responsibility” whatever that means, for mounting the pump along the top tube.

However you want to mount it, here’s what you need to know:

There are four sizes; 1,2,3 and 4

-The number 4 pump measures roughly 58 cm (22 3/4″) in length when compressed to the point where the handle just contacts the barrel. Applying more force compresses the spring inside the handle which bottoms out when the overall length of the pump reaches about 52 cm. (20 1/2″). The relative numbers for the number 3 pump are 52cm to 46cm, and for the number 2, 47cm to 41cm. and for the number 1, 42cm to 37cm

You will need to determine the correct size pump based on the inside dimensions of your bike frame parallel to the tube where the pump will mount.
PLEASE WATCH THIS TOO:


frame pump installed along seat tube
This is the way Zefal recommends using the HPX Classic frame pump. Measure the inside dimension of your frame to get the right pump.

Horizontal mount of Zefal frame pump
Zefal does not recommend this mounting (lawyers) but the end of the handle accepts the frame pump peg provided on many touring bikes. Again, when selecting a frame pump size it is crucial to know the inside dimension of the tube where the pump will be mounted.

pump peg on frame
This is a pump peg

The long, slim barrel of these pumps puts a lot of air to the tires quickly and up to a claimed 160 PSI of pressure. The barrel, handle and the pump head are made of aluminum and the piston shaft is steel. The “wings” are made of hard plastic and one of those on my pump has broken, but I was pleased to discover that there are replacement parts for those. Replacements are also available for the metal cap and inner pieces of the head and for the rubber washer on the business end of the piston.

In addition, not that we recommend or endorse it, the Bike Hermit has found his pump to be an effective deterrent to persistent, chasing dogs. One well placed blow between the eyes usually makes them rethink their choices.

BACK TO THE STORE

Categories
Lights and Electronics

Tail Lights

Not all jurisdictions will require tail lights on a bicycle after dark but a desire for self preservation should overrule and dictate that the bicycle traveler have decent lights on the bike to make them visible to motorists approaching from the rear.

We like the Spanninga fender mounted lights and the XLR Road Handlebar Plug Lights. For those who don’t have fenders (hard to imagine) or who don’t want to mount lights there, here’s a link to some proven tail lights.

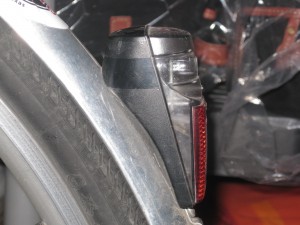
side view, mounted
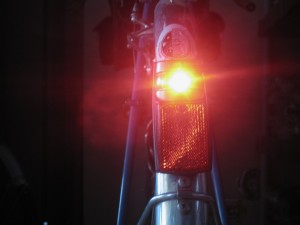
This Spanninga light attaches directly to the rear fender.
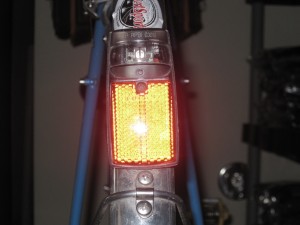
reflector on Spanninga taillight
The Spanninga light has a large reflector surface and….
is visible over 180 degrees horizontal, and is very bright directly on axis, due to focusing prisms in front of the super bright LED

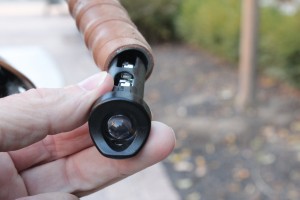
The bar end plug light is a pretty clever idea that seems to work well.
I first saw these on a bike we were following on a rainy night in a suburb of Seattle and I was impressed with the extra visibilty they provided. They are friction fit inside the handlebar and run on two camera type batteries, which are included.

Categories
Bags/Panniers/Racks Rear Racks

Tubus Quick Release Adapter

Tubus quick release mounting kit
The Tubus quick release mounting kit

Made for use with Tubus racks, the Tubus Quick Release Adaptermakes it possible to mount a rack securely on a bike without threaded braze on tabs at the dropouts. The package comes with two brackets meant to be attached to the lower two bolt holes on Tubus racks. The supplied skewer is then threaded through the bracket on one side, a shim, (also supplied) the hub axle, and the shim and bracket on the other side and tightened down with the standard cam lever. There are shims provided of two different thicknesses, and the adapter will work on any rear dropout spacing.

Keep in mind that, if your bike doesn’t have eyelets at the dropouts, chances are it wont have eyelets on the seatstays and some sort of clamping arrangement will need to be made there. Tubus makes a stainless steel clamp with a thick and firm cushioning liner, in various sizes, just for this purpose.

Quick release mounting adapter
The two brackets are made to attach to the two holes in the bottom of Tubus racks.


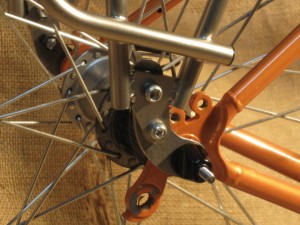
adapter mounted to bike
The replacement skewer runs through the hub axle and the brackets. Shims are supplied to go over the skewer for different widths of rear frame spacing.

As can be seen in this last photo, the brackets cause the rack to be mounted a little bit farther back than if it were attached to the braze on eyelets. This might also be a good solution for bikes with shorter chainstays when the pannier placement results in heel strike.

Categories
Panniers

Ortlieb Panniers – Back Roller Classic

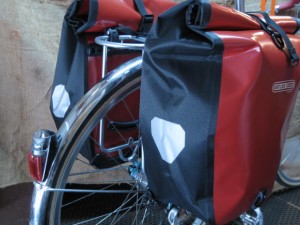
Ortlieb Back Roller panniers mounted on rack
The Ortlieb Back Roller Classic in red.

The German maker of Ortlieb Panniers is a well known and highly regarded bicycle pannier maker. The company also makes motorcycle dry bags and panniers, horse panniers, drybags, messenger bags and rucksacks, water containers, protection bags for electronics and documents, coffee filter holders and , my personal favorite accessory, a waterproof, toilet paper holder/dispenser.

The Ortlieb catalog points out that sustainability of their production is due in part to how long the products are expected to last and the fact that they are easily repairable if damage occurs. To that end they offer replacement parts and patch kits and back up durability claims with a 5 year warranty.

The Back Roller and Front Roller panniers are no frills bags made from pvc coated polyester fabric with welded seams rendering them waterproof. The roll top closure system keeps out dust and water. There are no external pockets on these panniers and only one side pocket inside.

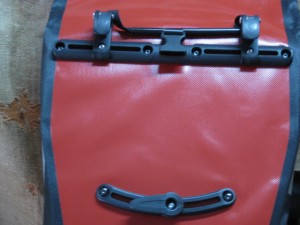
Rear view of Ortlieb bag showing mounting system
Ortlieb's QL1 mounting system. The hooks on the top rail adjust side to side and the lower arm pivots as well as slides.
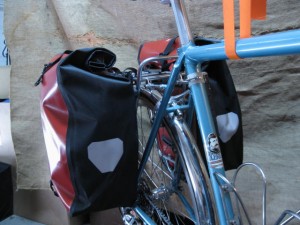
rear view of mounted Ortlieb back rollers
From the top rail of the rack to the bottom of the bag measures 34 cm.

These panniers fit fine on the MT-Campee rack with the bottom edge trailing only slightly below the rack, but not so low as to interfere with the rear derailleur cable. Made to fit on almost any rack such as, besides this one, the Tubus Cosmo, Tubus Logo, both sizes of the Tubus Cargo and the Racktime TourIt.
In the next post I want to try the Racktime TravelIt pannier and then I should be ready to announce the winner of this little comparison and the lucky bag which will be traveling with us on the Olympic Peninsula the first week of August.

Categories
Bags/Panniers/Racks Panniers

Lone Peak Mt. Superior Panniers

Preparing for our upcoming 3 day tour on Washington’s Olympic Peninsula, I did a dry fitting of a few different panniers on Sky King’s bike.
First, a word about the bike and the rack. The bike is a Rivendell Bleriot with 650b wheels and I selected the Nitto MT-Campee rear rack which is made for 26″ wheels but which also fits nicely over the fendered 650b tires. I wanted a rack that mounted with the top platform close to the top of the wheel, for a low center of gravity, and that had side rails for pannier support.

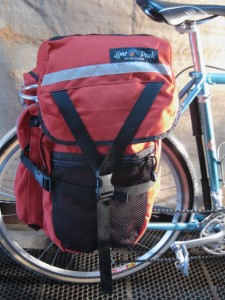
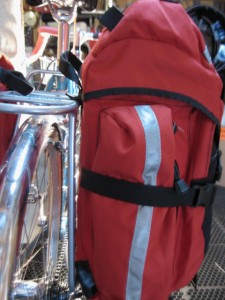
side view of Lone Peak panniers
The Lone Peak P-500 Mt Superior pannier

First up is the Lone Peak Mount Superior pannier. Lone Peak is based in Salt Lake City, Utah and their products are made in the USA. The company has been around since 1979. The website is very minimalistic and it’s short on specific information about the bags they make….information like mounting systems and materials.
With a nominal capacity of 3200 cubic inches or 52 liters per pair the P-500 Mount Superior panniers are the most capacious panniers in our store. With zippered pockets on the face, trailing edge and top, there should be plenty of room for items which need to be readily accessible. The zippered mesh pocket on the face of each pannier is perfect for carrying damp clothes while they dry out. There is no claim to waterproofness of the cordura fabric which forms the body of these bags but rain covers are sold separately.

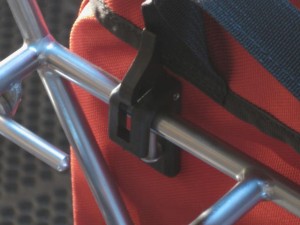
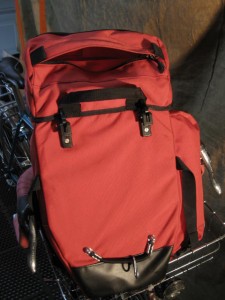
Two composite hooks are bolted onto the back outside of the bag through the plastic stiffener inside the bag. The hooks go over the rack rail and are held in place with a pivoting thumb lock.

top hook on the lone peak pannier
Two of these composite hooks hold the bag on the top rack rail. They are held in place with the little pivoting thumb lock.

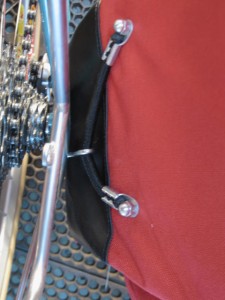
The horizontal compression strap can be adjusted to keep the load from shifting and can even be wrapped around the rack frame to keep the panniers hard against the rack. On the bottom portion of the back is bolted an elastic cord, strung through a metal s-hook which is meant to hook to a bottom rail or clip on the rack, keeping the bottom of the bag secure.

a rear view showong attachment points on a Lone Peak rear pannier
The Lone Peak attachment system. The compression straps can be routed around a rack rail for a super solid system.

With the upper hooks hanging on the Nitto MT-Campee I discover that there is no place to hook the lower s-bolt and pull the elastic cord taught. From the top, inside, of the composite hooks, where they rest on the rack rail, to to the s-hook, the part that will hook on a bottom rail, with the elastic cord being flaccid, measures 295 mm. and to the very bottom of the bag measures about 320 mm.

bottom hook and elastic cord
The elastic cord needs to be tighter than this!

I hooked the bags on some other racks to see how they fit:
-The 26″ Tubus Cargo rack is a perfect fit and I’m sure the 28″ cargo would work as well.
-The Tubus Logo and Cosmo racks work as long as the bags are attached to the upper rail, which sort of defeats the purpose of the lower rail on these racks.

rear view Lone Peak pannier
When full the panniers extend well above the carrying rail. A rack with a secondary, lower rail might be preferable.

In the next installment: Ortlieb Back Roller Classics.