Categories
Bike Touring Equipment Cockpit Handlebars and Stems Touring Bicycles Touring Bike Components

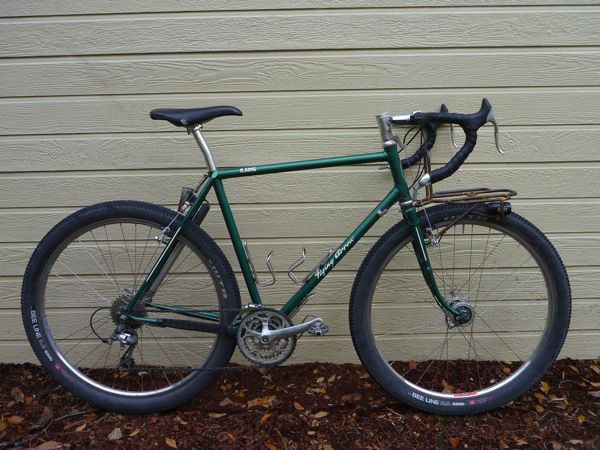
Dropping Out and Looping In: Converting from Drop Bars to Jones Loop H-Bars

The wintertime (known to some among us as the “off-season”) is a great time to experiment with your bike setup and few components can transform the ride of a bike like handlebars. Unlike many so-called “performance” upgrades that claim to offer weight savings, greater precision or improved efficiency, different handlebars change the way your body relates to the bicycle in a fundamental and important way. The wrong handlebar can make the finest bicycle nearly unrideable. The right handlebar can enhance comfort, control and confidence. The Jones Loop H-Bar does just that. As many of the Surly bikes we sell (in addition to many other touring bikes) come with drop bars and bar-end shifters, I thought I’d share my experience converting my personal bike from drop bars to H-Bars. I’ll get more into the details and technicalities of the process – especially the fit aspect – in a future post, so stay tuned for that.

P1160221

I built my dirt touring bike – the RandoGnar – around drop bars. I had the wide-open and reasonably smooth gravel roads of north-central Oregon in mind when drawing up the plans and laying out the cockpit.  The position is very similar to what I’ve used on my cyclocross bike to provide a good balance of comfort, aerodynamics and pedaling efficiency for long, mixed-terrain rides and ‘cross racing. This setup performed admirably on the Oregon Outback in May, 2014 and I wouldn’t have changed a thing.  However, on rough descents or technical singletracks, the hand and body positions offered by drop bars leave something to be desired. When riding in the drops – the preferred position for descending – my weight is shifted far forward over the front wheel which tends to generate a feeling of “oh-crap-I’m-about-to-get-pitched-over-the-bars”.  This leads to tension throughout the my body, causing fatigue and a diminished ability to ride lightly over rough surfaces.

OB
Open country and smooth gravel on the Oregon Outback

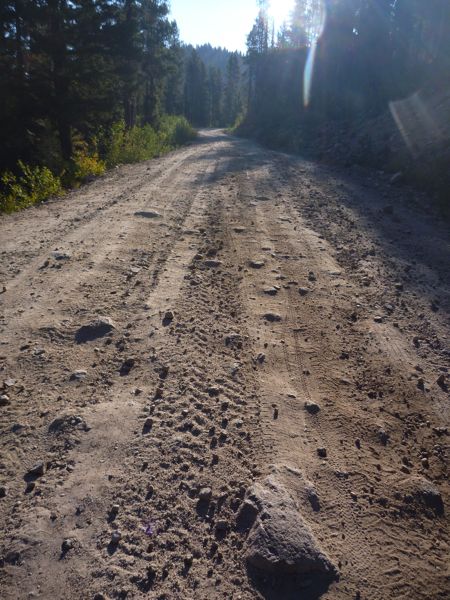
Upon moving to Idaho and sampling some of the unpaved roads and singletracks in the central part of the state, I found myself wishing for a different handlebar. Descending on a loaded bike through rough, rocky, loose terrain can be sketchy on any bike but I’ve had some harrowing moments on rutted, washed out mountain roads and trails down in the hooks of my deep drops.
snf
A section of steep, rocky road near Scott’s Mountain on the Smoke ‘n’ Fire 400

Anyone who has ridden a modern mountain bike can tell you that a short stem and wide, flat handlebars yield enhanced control in challenging terrain.  It is easy to keep the front wheel light and approach steep terrain with confidence.  So for mixed-terrain bikepacking and touring – where we ride long hours on loaded bikes in widely varying conditions – we need a middle ground.  We like the range of hand and body positions offered by drop bars but miss the confidence and control lent by a flat bar with things get rough. The Loop H-Bar treads this fine line better than perhaps any other handlebar available.

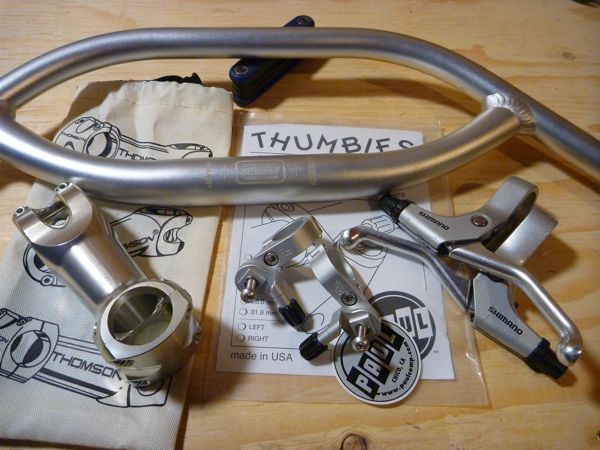
Your list of necessary parts will vary, but here are the parts I needed to effect the conversion.

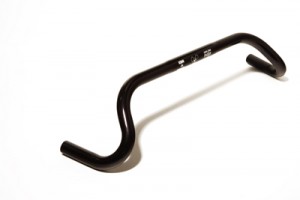
Jones Loop H-Bar, 710mm

– Thomson X.4 Stem, 90mm x 0-deg

Paul Thumbies for Shimano shifters, 22.2 clamp

Shimano BL-R550 canti levers

P1160234
The bits: Jones 710mm Loop-H bars, Thomson X4 90mm 0-degree stem, Paul Thumbies, Shimano canti levers.

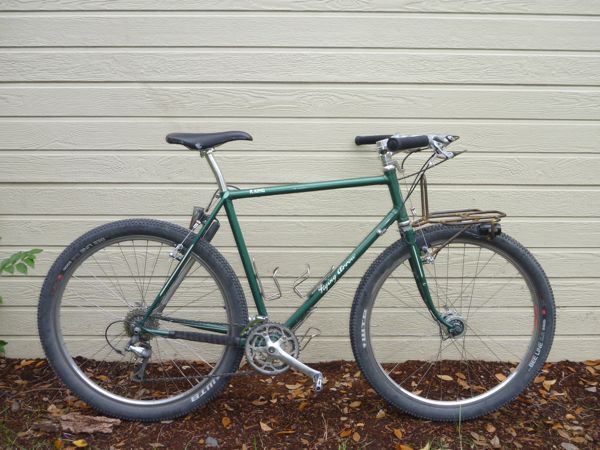
I replaced my 100mm, -10 degree stem with a 90mm, 0 degree version to bring the handlebar clamp up closer to level with the saddle height for a nice, balanced riding position. I am now able to rotate my hips back slightly and rest my weight lightly on the saddle with most of my body supported by the pedals. The stance is upright and controlled but with enough forward reach possible to tuck under the wind. On the road, the forward extension offers a very similar perch to riding on the “ramps” of my drop bars. On singletrack, the extra width and rearward extension provides a very strong and confident stance to attack steep terrain with one finger tucked in the crook of the brake levers.  The overall look is a little cruiser-y but the bike feels much more at home in singletrack.
P1160271
Rando-Gnar with Jones Loop-H Bars

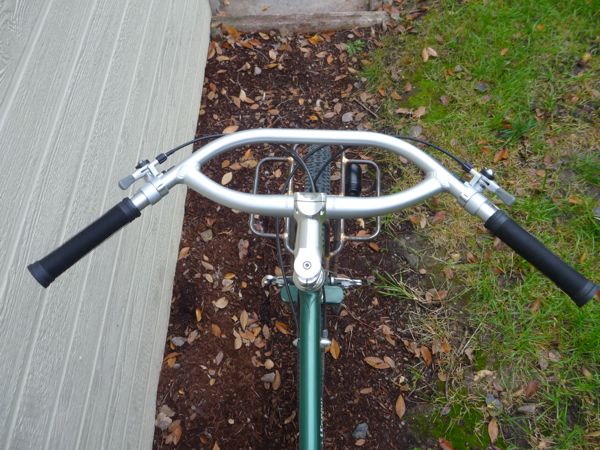
These bars are now the widest I have on any bike.  The extra leverage and control is remarkable.
P1160274
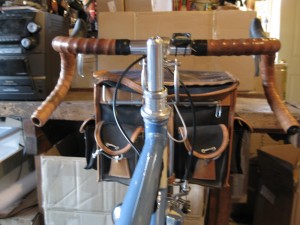
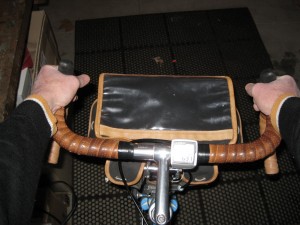
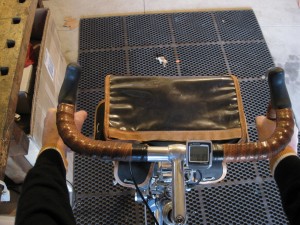
Cockpit from above

ODI’s classic Longneck BMX grips pair well with the Jones bars.  The extra length covers more of the handlebar section than a standard mountain bike grip.  I prefer to trim the flanges off for additional shifter clearance.  We also offer the ESI foam grips which are designed for the long grip section of the H-Bars.

Also, I found (in corroboration with Jeff Jones’ guidelines) that the ergonomics of this setup are much improved by adjusting the brake levers’ reach screws in slightly to bring the lever blades closer to the bars.  Those with extra-long fingers may not need to make the adjustment but the levers are easy to reach with the first finger even when at the farthest rearward position on the bars.  The BL-R550 levers deliver a very strong pull to my cantilever brakes and a comfortable lever shape for one or two fingers.
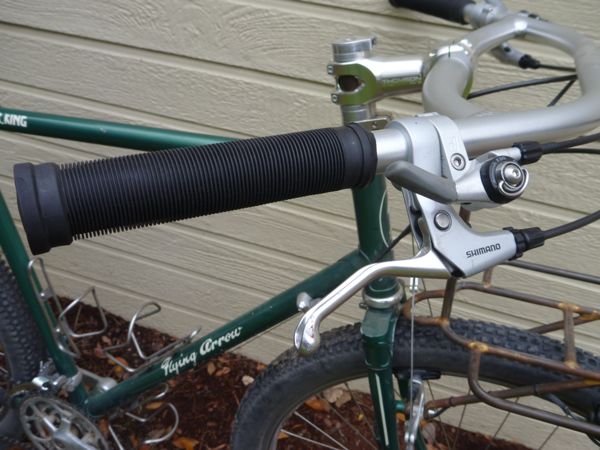
P1160277
De-flanged BMX grips and brake levers with reach adjusted in slightly

The sweep and width of these bars has transformed the Rando-Gnar from a dirt road crusher into a singletrack slayer. I’m able to ride much faster and more confidently than I ever thought possible on a rigid bike.  In addition to the range of hand positions, the 45-degree sweep of the bars offers excellent leverage for lifting either end of the bike over obstacles in the trail.  This is especially helpful when the bike is loaded and requires more effort to maneuver.
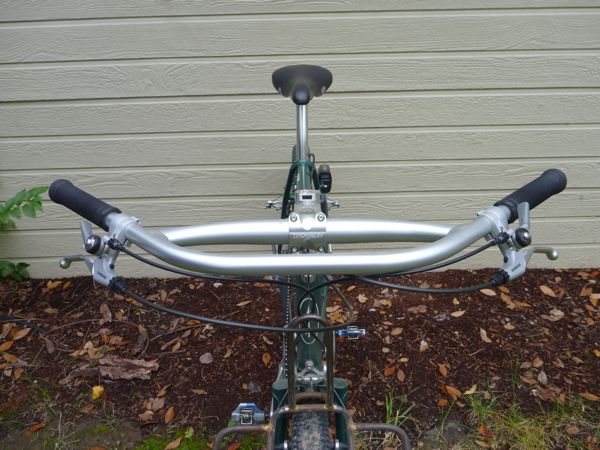
P1160281
From the front

Thomson’s X4 stem pairs perfectly with the Jones bars.  Even the alignment marks align with the edges of the clamp jaws.
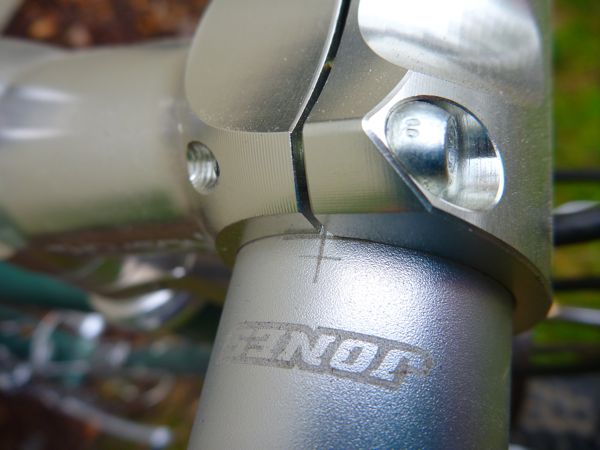
P1160283
Alignment hashmarks placed perfectly for Thomson clamp

On the first few shakedown rides in the Boise foothills, I had to consciously keep my speed in check any time the trail pointed downhill.  The riding position inspired so much confidence that I quickly outran the available traction from my close-knobbed tires in loose corners.  With my weight shifted over the rear wheel and my hands out wide, I was able to leverage the bike around downhill corners with ease and maintain a comfortable, relaxed posture.  When climbing, I could easily shift my hands forward to keep the front wheel down.

P1160319
At the top of Scott’s Trail in the Boise Foothills

Overall, I’m quite happy with the comfort, control and multiple riding positions the Jones bars offer.  On longer stretches of smoother terrain I find myself missing the aerodynamic position offered by the drop bars, but feel that the off-road confidence and control more than makes up for the slightly decreased efficiency on the pavement.
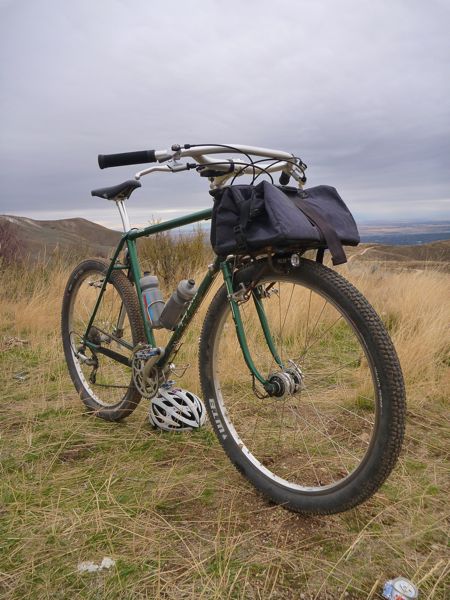
P1160321
Rando-Gnar with Jones Loop-H bars in the wild

Overall, the Jones H-Bars are an excellent alternative to a drop bar for touring bikes that are regularly ridden in more technical and demanding situations.  I’d recommend them to anyone who wants to blend the confidence and control of a flat bar with the comfort and hand positions of a drop bar.  I’ll be taking a closer look at the setup process in a future post, so feel free to chime in with any questions you’d like to have answered or ideas you’d like to see explored. Thanks for reading!

Categories
Touring Bicycles

Bike Fit

On The Bike is a bike fit service  collaborating with Boise State University’s Center for Orthopaedic and Biomechanics Research. We met Benjamin Stein, the man behind On The Bike when he stopped into Bike Touring News World Headquarters (BTNWH) a few months ago.  We asked if we could come see his operation and write a blog post about it and he graciously offered a complimentary fit session to me.

http://youtu.be/MLqZR0XvoUA

Even though I have read almost everything I can find on the subject and I am trained in a prominent “laser precision bike fitting” system, I am not a bike fitting professional. That does not prevent me from holding forth on the subject  in my series of articles on bike fit. What I do know is that riding a bike efficiently is neither simple nor intuitive… there are a lot of moving parts and we simply can’t tell what our own bodies are doing. But the cyclo-tourist needs to be able to ride efficiently and in comfort for long periods, and while I’m not saying that a professional bike fit is required for bike touring, a set of trained and critical eyes can help identify changes that might need to be made to improve enjoyment and to prevent injury.

On The Bike’s approach to fitting a rider on the bike seems to be holistic. Beginning with an interview, Ben gets a feeling for the person’s history and their goals. Then he observes as they perform a range of prescribed activities including knee bends, squats and simply walking. Then, with the rider flat on his/her back Ben assesses flexibility and looks for asymmetries or discrepancies in leg length and so on. Then reflective dots are affixed to strategic locations on the riders body. These dots will be picked up by the 8 motion capture video cameras arrayed around the bike, which is on a stationary trainer. As the rider rides, a computer compiles all the motion capture information and displays a 3-D video representation of the rider-  a representation of the skeleton of the rider actually. Using this video Ben can confirm how any asymmetries affect the rider’s pedaling motion and he can see other issues which might be important but cannot be seen in a static view.

As I was pressing Ben for formulas or rules of thumb he might use for things such as saddle height or crank length it became apparent that he didn’t have any dogmatic rules or guidelines… which I can appreciate, since no two people are exactly the same. With his background in physiology (Ben holds an M. S. degree in Exercise Physiology with a bio-mechanics emphasis) he can see how a rider’s body interfaces with the bike and make recommendations on how to achieve a better range of motion or better use of a muscle group.

I came away with a better understanding of just how complicated achieving a comfortable, efficient position on the bike can be. All those moving parts need to work together and changing one component, simply moving the saddle forward for example, changes the relationships of all the other parts. That recognition and appreciation may be one of the values of what  Ben Stein is trying to do with On The Bike. When he then makes suggestions or observations based on his background and experience it can help the rider understand the reasoning and be more aware of what their body is doing.

To the person considering getting fit on a touring bike I would say;  Beware of formulaic, rigid bike fitting “systems” and quickly move away from anybody who claims they can provide the “perfect” fit for you on the first try. Most of these people focus on performance or racing. Racers and tourist have different needs. The tourist will not be sprinting or trying to cheat the wind to go faster and their touring bike has a different geometry than a racing bike- plus it will be loaded, and so it will handle differently. Somebody like Ben who knows enough about physiology to be flexible in their approach will be best for the touring cyclist.


Categories
Best Touring Saddle Cockpit Touring Bike Components

Saddle Comfort and Bike Touring

Just what is the best saddle for touring???  Drum Roll, please.  The best saddle for touring is the saddle that fits your behind and allows you to ride in comfort!!

Chief out touring

Okay maybe that wasn’t the answer you were looking for, but it is the best we have to offer.  No two people are shaped the same therefore no one saddle is going to be the end all saddle for every person.

The Bike Hermit used to tour on a Brooks B17, as to be expected, over time the saddle relaxed and had a bit of “splay” He punched holes in the sides (like the Brooks Imperial) and threaded the saddle with leather (from the Tandy leather store) and that solved the problem.  About two years ago he switched to a Gilles Berthoud Aspin.  This saddle was stiffer in the beginning and now has molded to his shape just perfectly.  He easily has 3,000 miles on that saddle with no issues.  Aha, you say, I will go research and purchase a Gilles Berthoud.  Well, Sky King did her best to love the Gilles Berthoud Aspin spending hours adjusting height, position, angle etc but was never comfortable.  Finally she measured her sit bones and realized between the shape and width of the Gilles Berthoud Aspin, it was never going to work for her.  She went back to her older Fizik’s vitesse tri and problem solved.  She is back to all day, day after day saddle comfort.  She does plan to try the Brooks B17 Narrow as she misses not being able to carry her Zimbale 7 liter saddlebag but for now the Fizik’s Vitesse Tri is just fine.

Here are some very important things to consider when selecting a Saddle.

Shape:

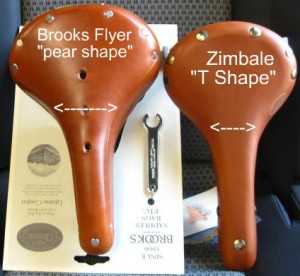
Your shape and the saddle shape need to be happy.  Most Saddles tend to be either a pear shape or a t-shape.  The Gilles Berthoud Aspin & the Brooks B17, The Brooks Flyer fall into the pear shape category, the Brooks Swallow, the Zimbale leather saddlethe Brooks B17 Narrow, the Fizik’s Vitesse are considered a T shape.

bike saddle shape
The Flyer does not narrow as quickly as the Zimbale

The width of the saddle across the widest area and how quickly it widens from the nose to the back will affect saddle comfort.  Add to that the saddle position or the saddle tilt  (nose down, nose up, nose level).  Of course don’t forget to factor in the entire bike fit (see earlier posts)

Too Much Pear-Shape for your shape typically causes chafing in the inner neighborhood of the lower fold of the buttock, top-of-the-leg, panty line, hamstring attachment (however you want to describe it) because the saddle is too pear-shaped for the motion of your hip joints.  If these are issues you have with your saddle, perhaps a T-Shaped style would work better.  If you feel like you are sitting on a narrow, painful 2 X 4 a pear shaped saddle could be what you need.

Let’s get back to saddle width and length.  The size of your hips or the size of your behind has very little to do with the size of your saddle, wide hips do not mean you need a wider saddle.  The width between your “Ischial Tuberosities”  ie) sit bones is what matters. Where those sit bones connect with your saddle makes the biggest impact in saddle comfort.  Too wide or too narrow for your sit bones and the end result is pain and chafing.  Sky King has a wider hip measurement than the Bike Hermit but he has a wider sit bone measurement.

Each saddle has “cheeks” on the wide back part. Sometimes the cheeks are even domed up a bit. Your sit bones are meant to land in the high part of that dome to take advantage of the padding and the overall architecture of the saddle.  Saddle without domes still have a cheek area, the widest part of the saddle is where your sit bones should be resting.  Measure the saddle from center of cheek to center of cheek. The saddle’s center-to-center should match the center to center measurement of your sit bones.

Next measure the saddle’s overall width. Generally the saddle’s overall width should be, at minimum, the same as the outside measurement of your sit bones OR slightly wider but NO more than 2 centimeters wider than the outside sit bone measurement. You want to be able to shift around to power up hills or use body-english around corners or just to give your butt a break, and STILL have the bones land on the saddle.

In the case of a many leather saddles your saddle must be about 2 cm wider than your outside sit bone measurement so you do not have bones contacting the metal cantle* plate.

(*rough description –  the horseshoe shaped metal plate under the back of the saddle that holds the rails in place)

Measure your sit bones:

We could get all fancy and purchase memory foam or drop some dollars on a fancy gel seat specifically designed to measure sit bones and assist in determining the proper saddle width but we hate to spend money when things at hand will work just as well.

Three inexpensive options for measuring Sit Bones:

The Flour method

Take a gallon size zip lock bag, fill with enough flour for about a two inch flour cushion when the bag is lying on a flat surface.  Place this bag on a hard flat surface – table or chair (we use a piano bench)  Sit on the bag (preferably bare skin), mimic your bike position.  Now stand up without disturbing the bag.  Those two dimples/impressions in the flour are from your sit bones.

The Play Dough method

To make your dough:

One part salt, two parts flour, mix with water until it’s right for modeling.

Roll about an inch thick, cover with aluminum foil to keep it from being sticky, place dough w/ foil on a low bench, once again sit on dough (bare skin is best) and lean forward to approximate riding position since the sitbones become more narrow as you lean forward.  Remove foil and allow to dry a little. The bones impression will become white first.

The Measurement

Take a millimeter tape measure and measure the impressions, recording your findings.

1. The inside edge to inside edge

2. Center of depression to center of depression, if easier, place a marble in each depression and measure the marbles.

3. Outside edge to outside edge

  • Center-to-center measurement correlates with the spot on a saddle that bears the weight of the sit bones. The saddle “cheeks”.
  • Outside to outside measurement is a consideration for some types of saddles, such as the Brooks that have metal rails, you do not want to have your sit bones resting on the metal rails.  General rule of thumb – your saddle width should be about 2 centimeters wider than outside sit bone measurement.  Again, you want your sit bones resting on the “checks” of the saddle and you want some wiggle room for movement as you are touring.
  • Inside to inside may be necessary if you plan to use a saddle with a cut out, to ensure the sit bones clear any large center cutout in the saddle. The inside bones falling into the ‘moat’ so to speak, causes a lot of pain in the bones surrounding the “soft tissue” area. To clear the cutout, you need about 20 mm extra space in between the inside distance of the sit bones. So, if the cutout is 60 mm, your inside distance is 80, then you have just enough clearance.

The Hand Method(s) of measuring

Sit on your hands, and feel for the two bones of your butt. They feel like elbows poking down into your hands.

Put the tip of your index fingers right under the part of the bones that is pushing hardest into the chair. (squish the very tip of your fingers between the chair and your sit bones)

Lift your butt from the chair leaving your hands on the chair, and have your assistant measure the distance between your fingertips. This is pretty much your center-to-center.

Then put your fingertips against the outsides of the bones. Push them right into the bones so they are on the outside of the bones. Lift your butt from the chair and have an assistant measure the distance between your fingertips. This is pretty much your outside.

Some people have sit bones that angle a lot from front to back. The “sits” are heavy thickened portions of the rami area of the pelvis and can have unique personalities of their own. You can measure again on the forward part of the heavy “elbow” bit if you can feel that yours have a definite angle. The forward portion of the heavy thick part of the bone is what your weight rests on more when you are in a more aero position. DON’T measure the thin blade like portion that is in your crotch, that is the rami and you do not want a saddle there. Measure from your backside.

Repeat your measurements a few times, average them out if you want.

You can also get these measurements by lying on your back with your knees to your chest holding a measuring tape and poking around for landmarks.

The Cutout

Cut Out on a Brooks B17 Imperial

Purchasing a saddle with a cut out can be beneficial if you have soft tissue pressure.  An easy way to help determine if you might be a good candidate is to sit (commando or in thin underwear)on a very hard surface, feet flat on the floor, pedaling distance apart.  Lean forward from the hips, keeping your back straight and place your elbows on your knees.  If you soft tissue is feeling overly squished you may want to try a saddle with a cut out.  Do some forum research, some people love them, other’s find the edges of the cut out equally irritating.  Assuming you have a good bike fit and proper saddle height, consider adjusting the angle of your current saddle as well to see if that relieves soft tissue pressure.

Length

Years ago some saddle manufacturers started adding a short version to their line. Historically the short version came about for women riding in skirts and dresses, the longer nose would catch on the dress, making mounting and dismounting more challenging.  Now a short version is more about personal comfort.  Reading Forums and blog post about saddle fit there are numerous opinions about both. Sky King’s Fizik Vitesse Tri is a “woman’s” saddle but it isn’t any shorter in the nose than a Brooks Swallow.

Conclusion

We agree that finding the right saddle can be tough.  Sometimes despite the best research, trial and error ends up being the answer.  Taking your measurements and understanding your riding style are the beginning of your quest.

For more great info on choosing a Saddle read other blogs and forums.  Sky King took the measuring suggestions from posts on the Team Estrogen Forum.  Great resources can be found on sheldonbrown.com, team estrogen forums, bike forums (touring).  Most of all don’t be afraid to ask questions. We both ride day in day out without saddle pain on two entirely different saddles.

Categories
Cockpit Handlebars and Stems Touring Bike Components

4 Handlebars

Wherein the  bike hermit compares and contrasts 4 different drop style handlebars for the touring bike. Finding the perfect handlebar for his touring bike has him in a bit of a bother.

Last season I installed the Nitto Dirt Drop bars on Chief. I like the way the drops flair out.

Nitto Dirt Drop

The bars actually have a very slight rise from the clamp area to the ramps. These are the medium width version. There is a version that is narrower and one that is wider. These feel a little too narrow for me when I’m riding on the hoods. Dang, should have got the wider ones.  But I like the angled-in aspect of the brakes on the flair of these bars. It feels natural.

On the hoods.

The other nice thing about the drops being wider than the tops ….my wrists don’t hit the tops of the bars when “in the drops”.

Nitto Dirt Drop touring handlebars,"in the drops"

On Norm, my everyday bike, I have the On One Midge handlebar. Perhaps my favorite bar of all time.

On One brand Midge handlebar

This handlebar might look a little crazy…. in fact I have been labeled “crazy bar guy” on group rides…but the ergonomics are fantastic. These have a super wide, flat top section so there are multiple positions available on the top of the bars alone. As the top of  the bar bends to begin the drop portion it also flairs out at a dramatic angle.

On One Midge.....Wide tops, crazy bends

The other thing that happens when the bend from the tops is so gradual is that the brake levers get mounted at an even more extreme angle. But if I raise my arms out in front of my body, in a relaxed way, my fingers do not naturally line up perpendicular to the ground. They are more like 30 to 40 degrees from vertical. An angle very similar to the angle of the the brake levers on the Midge bar:

Natural angle to the brake hoods

I like to install these handlebars with the ramps level. This provides a great platform and plenty of support for the hands.

Notice the ramps, the portion of the bar behind the levers, are basically level.
Another position I use a lot with the Midge bars.
Nice platform for the hands

Sky King has the Nitto Grand Randonneur on her Rivendell Bleriot.

Sky King's Nitto Grand Randonneur bars

The most notable thing in this view is the distance the ends of the bars extend toward the rider. This should allow for riding comfortably in the drops without reaching. The picture below shows the rise from the center up to the ramp portion.

The Grand Randonneur rises from the center to the ramp
A view of the upward rise from the center, the slight flair of the drops, and the angle of the brake levers.

The handlebar I am itching to try on my touring bike is the Nitto Noodle.

I guess I know why they are called "Noodle"

These bars intrigue me because of the slight rearward bend of the top portion. Again, if I examine the shape of my palm, curled into a gripping shape, I find that it is at a slight angle, from inside to outside. Corresponding to the shape of the Noodle bar.
They don’t have any flair to the drops though. The ramps are basically parallel to the drops. These would be really cool if they had the backward bend plus a flair like the Midge bars! Then they would be the Pretzel bar.

No flair to the drops and subsequently.... to the brake levers

So, there you have four options for drop style handlebars for touring. If you are thinking about changing handlebars keep in mind that there are three standard diameters for handlebars where they clamp to the stem: 25.4 mm, 26mm, and 31.8mm. Stems are made for all those diameters too. A stem with a clamp for 25.4 will not work with a 26 or 31.8 handlebar, but a smaller diameter handlebar can be made to work with a larger clamp diameter stem by means of handy dandy shims made for that purpose!
After looking at these pictures I think I need to write a post about handlebar tape and how to change it.

Categories
Touring Bicycles

How to Size a Touring Bike

I have finally completed the series of pages about sizing for a touring bike. The first one is here.   This is always a controversial topic and usually engenders the longest threads on most forum sites, and so it’s sure to ruffle some feathers but that should be entertaining. If you have comments or specific questions please reply to this post or leave a response on any of the specific pages or email me.

Categories
Touring Bicycles

Steel Bikes And Comfort

Even though I’m a fan of steel bikes, it’s mostly because of the durability of the material. I certainly like the ride quality too, but I think the idea that steel is a more plush or forgiving ride because it flexes or dampens is hogwash. The idea has almost become gospel now just because it’s been repeated so many times.  Don’t get me wrong, I know my steel bike frames flex…. I can hear my fender and/or brake and/or front derailleur rub from time to time if they are a little out of whack and I am pressing hard on the pedals. But that is torsional flex.

It’s the idea of vertical flex of a bicycle frame I have a hard time envisioning.

Scientific diagram

Imagine the arrows to be balancing the downward force of the rider and the bike.

Categories
Living Vicariously

Welcome!

Relaxin' in the Valley of Death

A site about all things bike touring, a term that can mean a number of different things. Is  overnight bicycle camping touring? Does riding out to the state park for a picnic qualify as a tour? We think the answer is yes. Stay and look around – Shop, get inspired and maybe learn something new too!

Categories
Touring Bicycles

The Touring Bicycle – Update

I’ve decided to insert a post to update my previous posts about touring bicycles. From the previous posts in might appear that the choices for bikes with which one can travel is limited to pretty traditional designs. This is far from the case as evidenced by this journal at crazyguyonabike. A mountain bike with an Xtracycle attachment obviously is a viable way to carry gear for self supported touring.

So, even though I have my opinions and preferences, it is not to say that there are no other good options for touring bikes.

Now back to our regularly scheduled program!

Categories
Touring Bicycles

The Touring Bicycle – Part 2

In part 1 of this series I hinted at some of the differences between a touring bicycle and a bicycle for racing or performance. Now I will get more specific about what to look for in a touring bicycle.
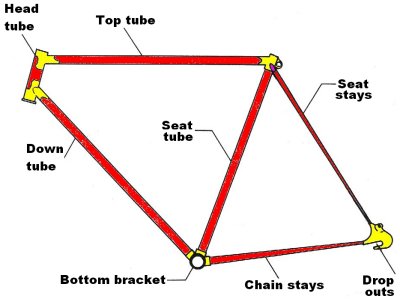
Let’s use our bicycle frame picture for a reference again.

A touring bicycle will have relatively long chain stays…… for a couple of reasons. First, if the bicycle will be loaded with panniers or saddlebags on either side of a rear rack ,longer chain stays will allow the bags to be placed farther aft, reducing the chance that the riders feet will hit the bags when pedaling.

Longer chain stays will move the rear wheel farther back too. This will allow for more clearance between the tire and the frame. (Good for fat tires and fenders!)

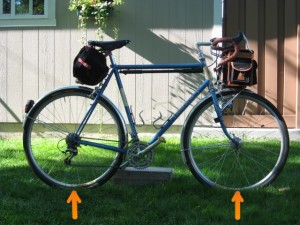
Don’t worry too much about a number for the chainstay length. Just look at the bike with wheels and tires mounted and visually determine if there is room between the tires and the frame for fenders. If you just have a frame with no wheels/tires then measure the chainstay length from the center of the bottom bracket to center of the rear dropout. 17 3/4 to 18 inches ( 45 to 46 centimeters) is what you are looking for.No BuenoMui bien

Look at the fork too. Make sure there is enough clearance for fenders.

A touring bicycle will be ridden steadily for hours at a time. There will be no sprinting or  hard echelons. On a comfortable touring bike the top of the handlebars will be within a couple of centimeters, or level with, the top of the saddle. Forget all the mumbo jumbo the bike fitters, who will charge upwards of $200.00 to adjust your saddle and handlebars, spout about performance  and “your game”. Your game is all day comfort.  To achieve this, many of the best touring bike makers will slope the top tube up a few degrees from the junction with the seat tube. Then they will extend the top of the head tube a few centimeters. Voila, the handlebars are up where they belong for comfort, without resorting to some crazy looking extensions.

Of course, in order to carry things on the bike, you will need some sort of rack system. A good touring bike will have tabs brazed onto the frame near the rear dropouts and on the fork dropouts. These tabs have threaded holes for rack and fender attachment. Look for two “braze ons” on the rear dropout (for fenders as well as racks) and one or two on the fork. Look for bolt holes in the mid section of the front fork as well. These are useful for attaching front or “low rider” racks.

Most bike frames have bolts in the down and seat tubes for water bottle cages. Some will have a place for another cage on the bottom of the down tube near the bottom bracket. On a self supported tour, the more ways to carry water the better.

These are just some of the things to consider in a touring bicycle. In future articles we will get into the details about goodies like racks, fenders, tires, etc.

Categories
Touring Bicycles

The Touring Bicycle

This is a topic that will always create controversy. There are as many ideas about what a touring bicycle should be as there are touring bicyclists. Especially when it comes to frame materials. There are many , many articles and opinions about frame materials, and that’s a tar baby with which I’m not willing to wrestle.

Some features, however, undeniably contribute to a bicycle which is suitable for carrying a load and for spending long days in the saddle. For clarity and as a reference, here is a drawing of a bicycle frame with the various parts named.


You will have to imagine the fork, which inserts into the head tube to hold the front wheel.

Where to begin?  Hmmmmm. How about size? OK.
Walk into any bike shop to get sized for a bike and you will hear about stand over height. Stand over height is simply a measurement from the floor to the top of the top tube at a point roughly midway between the seat tube and the head tube of a bicycle with wheels and tires mounted. Obviously, being able to “stand over” the bike is a benefit. That is where the usefulness of this rule of thumb ends. The bike shop sales person will undoubtedly tell you that on a “road bike” you want 2 inches (or something) between your crotch and the top tube.  What if the top tube slopes a little, or a lot? How long is the top tube in relation to the seat tube and resultant stand over height?  It’s more complicated than stand over height.

Most frames will have a designated size. This is usually a measurement from the center of the bottom bracket to the top of the top tube measured parallel to the seat tube. Again, this is sort of a meaningless measurement unless the other  tube dimensions are known.

What’s a person to do? Find a bike shop or bike company which specializes in touring bikes. Talk to them and get a feeling for how much traveling they have done by bicycle. See what kind of bikes they stock or sell. Most bike shops do not stock or know touring bicycles and this can be a frustrating search, but don’t give up. Be wary of buying a bike that is too small. In general, a race bike will be smaller than a touring bike for a given person. Be careful not to get  trapped into the truisms about smaller frames being lighter or more responsive or stiffer. What you are worried about is being comfortable! A too small frame can make it difficult to carry panniers without  interfering with the rider’s feet, and may make the loaded bike less stable.

What about weight?
If you watch people in bike shops, you will see most of them pick up the bicycles to see how much they weigh. It’s actually quite entertaining. As a touring cyclist you should be more worried about durability… of the frame, of the components, and of the wheels especially. Not to say  heavier is automatically more durable, but light weight bikes and wheels have no place on a  self supported tour.

In Touring Bicycle (Part 2) I will go into more detail about specific features which should be considered when shopping for a good bicycle for self supported touring .