Categories
Bike Touring Equipment Touring Bike Accessories

Holiday Gift Giving – Here’s some ideas

Looking for Gift Ideas - We've got some suggestions

We’ve added a Gift Category to the website, allowing you to shop by price point for great biking gear.  Here are some items that should bring a smile to many a bike traveler.
Custom BTN waterbottleBike Touring News Custom Water Bottle

Who doesn’t need a fresh water bottle?  These are Specialized’s Purist bottles, BPA free. Dishwasher safe – in fact Specialized instructs you to never scrub the inside of your bottle, just rinse with soapy water. The tops clean up the best in a hot dishwasher. Our BTN logo on one side and the classic Bike Hermit character on the other.

$8


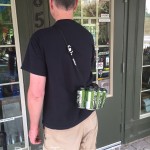
beer sling

Surly Junk Straps

Yes, we love Surly Junk Straps.  In case you missed it here’s our “Eight Ways to Use your Junk Strap” post.

We always have Junk Straps with us and they’ve come in handy more than once.

$5.99


cranesuzubar

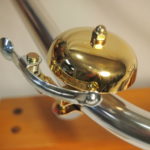
Crane Suzu Brass Bell

Nothing like the clear, crisp ring tones of a brass bell. Perfect for greeting the neighbors, calling attention to your presence on both the MUP or when climbing that steep hill and using your words just ain’t an option.

$12.99


20161202_144644_resizedHats, T’s & Socks

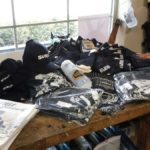
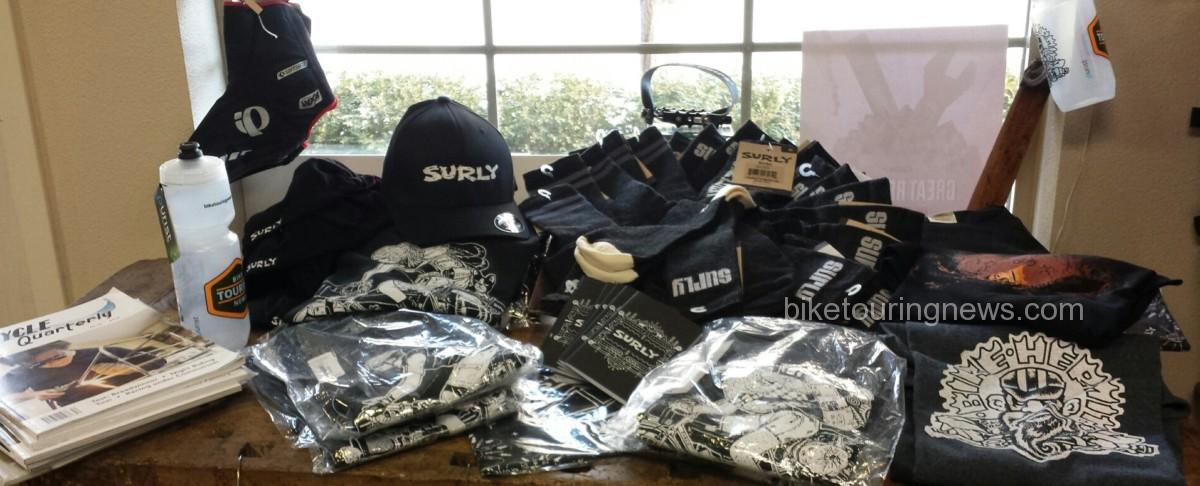
Surly Hats, Surly Socks, Great t-shirts, both long sleeve and short sleeve.  A fun “Racing Sucks” hat or just announce your surliness with anything Surly.  Check out our selection and we can always order more.

$10 – $30


bm_ixon_coreBusch & Muller Ixon Core

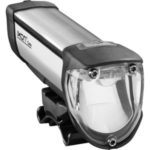
Bike Touring News sell lights that help not only with being seen but ones that help you see – what a concept. This is a terrific, USB-rechargeable headlight that easily attaches to the handlebar.  The beam projects onto the road (hey another great idea) and not into the eyes of oncoming traffic.  With 50 LUX it is a great option for those who don’t use a dynamo hub.

$88


many-things

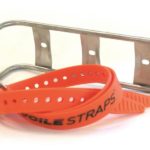
The Many Thing Cage

Have a weight conscious rider in the group? King Cage’s Many Thing Cage is a great option. Extremely light weight and durable cage that will bolt to any braze on. Stainless Steel to boot.  Need attachment options? We have those too.

$55.00


gillesberthoudgb25

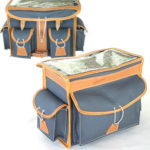
Gilles Berthoud GB25

Now here’s a gift for life, in fact a gift that can be passed down for generations.  A front bag from Gilles Berthoud is not just a pretty face, it is a work horse that will earn its keep every ride.  Beautiful canvas and leather construction.  Our personal bags have 1,000’s of miles on them and stand up to rain, snow, dirt and heat.

$259


tenkararodcosawtoothflyfishingpackage

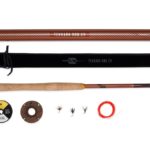
The Sawtooth – Tenkara Fly Rod

We bike tour, we bike pack and we like to fly fish.  Bet there is someone in your life that has the same passion.  Tenkara Rod Co. fly rod packages go hand in hand with bike touring and bike packing – kinda like peanut butter and jelly.  This kit is complete with rod, line, flies and a solid case that straps to your bike or slides into your frame bag.

$159


esbit

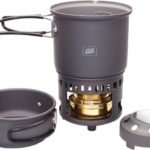
Esbit Alcohol Burner w/ Cookset

This compact alcohol burner proves to be a great kit when cooking for 1 to 2 bike travelers. Burns denatured alcohol or cubed fuel. Packs up nice and tight and fits on the Salsa Anything Cage quite well. We’ve been using for about 8 months now and are sold!

$49.99


Obviously we could go on and on with ideas.  Bike Touring News is more that just a store.  While selling bike gear keeps the lights on we also are happy to guide you on finding the best products and gear to keep the bike travelers in your world pedaling.  Call, email or come see us and we’ll lend a hand.

Categories
Bike Touring Equipment Bikepacking Touring Bike Tires

Summer Love – Maxxis Chronicle 29+

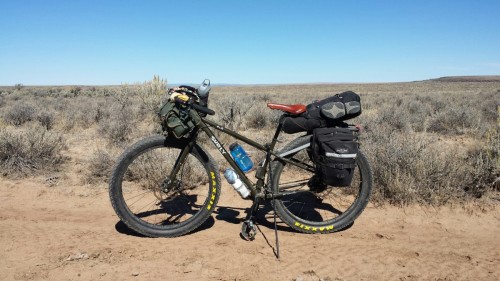
Indeed, Sky King has a new love. I happen to be quite spoiled and spend many happy hours on my ” Excellent Creative Riding” machine also known as the “Extremely Cool Ride” and for those of you who don’t know me, just call it my Surly ECR.

SUrly ECR "Extremely Cool Ride" now with Maxxis 29+
Surly ECR “Extremely Cool Ride” now with Maxxis 29+

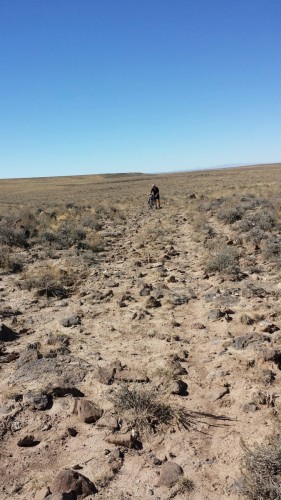
We ventured out in August for a S24O to Crutcher Crossing. The road/trail/path is two track, dirt and rock. The first 7 miles pass through a Juniper forest. Juniper’s are invasive species in the Owyhee Mountains and this section is currently being logged. Given that, the road had impressive ruts, especially on hilly corners. We hadn’t traveled far and as I negotiated a rutted corner my tires slipped out and boom, on the ground I go. While I don’t consider myself the most technical descender – especially on a loaded bike – I should have negotiated the corner just fine. Back on the bike, half mile down the road and boom, slipped out again. After a few choice words I take a serious look at my tires – the original Surly Knard 29+3 27tpi. Yep, the side edge tread is pretty much worn to zilch – oops.

I’ve never had a big complaint with the Surly Knard tires. Some of my riding buddies have commented on the lack of a grippy edge but I never mind hopping off and walking some of the steep. The rest of the trip I certainly paid attention and took a less aggressive approach to the rest of the rutted corners.

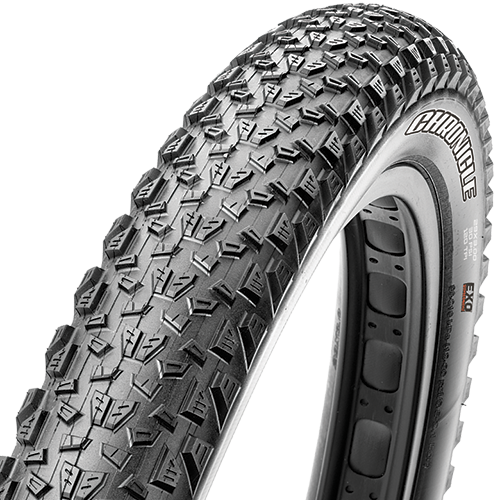
Did I mention I was spoiled, oh yeah, I did. A few days after the trip the Bike Hermit surprised me with a set of Maxxis Chronicles.Maxxis29+ This is a relatively new 29+3 so I had some trepidation. Ha, silly girl. The tread is perfect for a wide variety of terrain. I have the 120 TPI casing and the tire is lighter than my Surly Knards. The roll on pavement is excellent. On our very technical ride to Pipeline crossing, in the Owyhee desert the tires, hands down, out performed the Knards. The side grip is great. I didn’t have any slips, any spin outs or questionable traction issues. The Excellent Cool Ride bounced and jostled along happily – almost as if the person riding had advance to “pro” status. Look out Bike Hermit!

Technically a road...
Technically a road…

(Logan, over at bikepacking.com has a detailed review of the Maxxis Chronicle)

Categories
Lights and Electronics

Charging Electronics on Bike Tours

I was sitting on the top of the counter in the bathroom at Seminole Canyon State Park in Texas writing a blog post using my Droid phone. I was in the bathroom mostly to get out of the maddening wind I had been battling all day but also so I could use the electrical outlet to charge the Droid. My phone just doesn’t hold a charge very long especially when using the internet or GPS functions. Since then I’ve been on the lookout for a way to keep my phone charged while I’m on the bike. “When it rains it pours” and “if you try sometime, you just might find, you get what you need” etc.

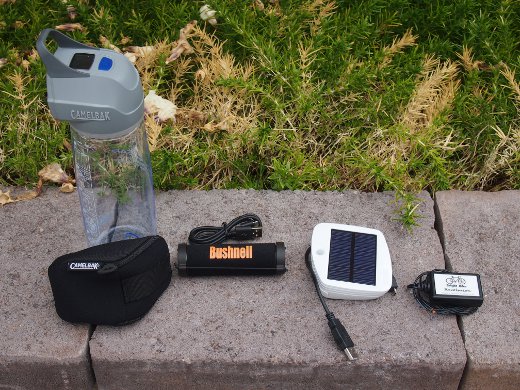
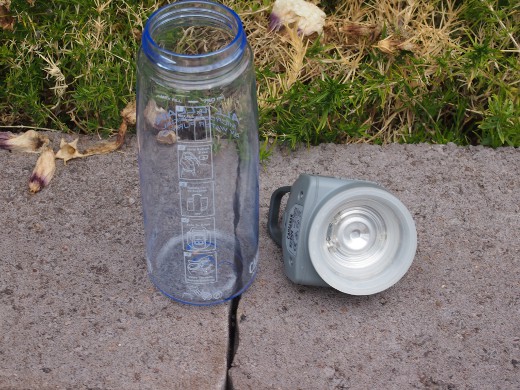
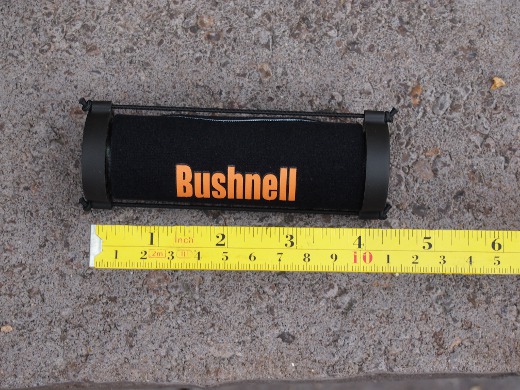
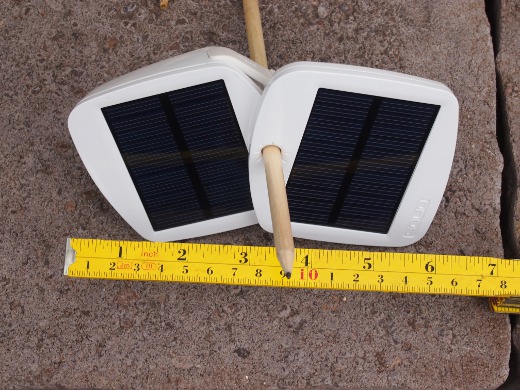
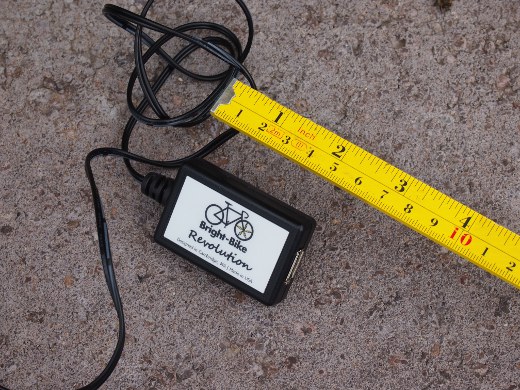
From the left: Camelbak All Clear, Bushnell SolarWrap Mini, Solio Bolt, Bright Bike Revolution

The Camelbak All Clear

picture of camelbak bottle
The Camelbak All Clear

Obviously not actually a charging device, this is a 750 ml bottle with a cap which incorporates a USB rechargeable ultra-violet light bulb to purify water. I “discovered” this product at summer Outdoor Retailer in Salt Lake City earlier this year. It takes about 60 seconds to purify a bottle of water and one charge of the light is good for about 80 cycles. There is an LCD display screen on top of the cap which counts down the 60 seconds once the light is turned on so you know the cycle is finished and the water is potable. And it displays the remaining battery charge. 80 cycles will purify about 60 liters of water so this bottle will last the duration of most trips with one charge. But if you are in the middle of say, the Chihuahuan Desert and out of charge then one of the other pictured devices will come in handy.

The Bushnell Solar Wrap Mini

solar charge
The Bushnell Solar Wrap, unrolled

Bushnell Solar Wrap
Basically a lithium-ion battery wrapped in a flexible solar panel. Unwrapping the panel and hanging it facing the sun charges the battery. The battery can also be charged using the included USB cable. This little unit is light and simple with an output port on one end of the battery and an input port at the other. An indicator light on one end glows red when charging and green when fully charged.

The Solio Bolt.

picture of charger
Solio Bolt solar charger and battery

I actually first saw the Camelbak All Clear at the Solio booth at OR. Solio devices use lithium ion polymer batteries charged from rigid solar panels which fold together when stored and can be fanned out and arranged as a sundial. The on off switch indicates the amount of remaining charge by blinking when turned on….one blink indicates 20% charge so 5 blinks means the battery is fully charged. The discharge has two modes, one for Apple devices and one for others. These can be charged via via USB cable as well.

The Bright-Bike  Sinewave Cycles Revolution

picture of converter
Sinewave Cycles Revolution converter.


picture of converter
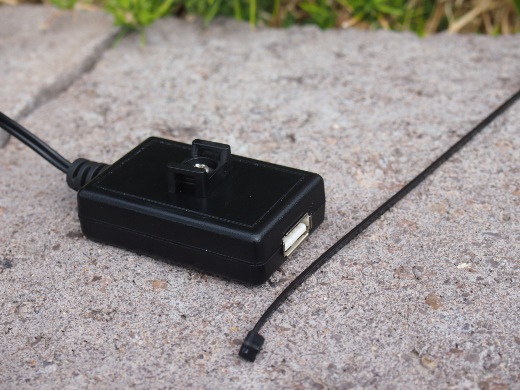
Rear of the Bright-Bike revolution. Zip Tie Included!

For bikes equipped with hub or bottle dynamos this little gem will convert the current from the dynamo to USB output. Any device can be plugged in to recharge while riding, including your Solio Bolt or Bushnell Solar Wrap batteries. This converter plugs directly into the output from the generator and can be installed with piggyback plugs onto which the leads from the headlights can be attached in parallel, so theoretically a device can be charged while riding with the generator powered headlight on. Simply zip-tie the unit onto the bike and plug in your phone, camera, GPS, head light, Camelbak bottle cap etc. How neat is that?

Some Neo-Luddites will cry “I go on a bike tour to get away from technology
But thus sayeth the Bike Hermit; “If it makes life on the road easier or more comfortable and even safer, then why not use it”?
Some might even say “Why do you need the dynamo hub charger AND the solar batteries?” Well, even on cloudy days I may need to top off the Droid or tablet using the Bright-Bike Sinewave Cycles Revolution and on other, sunny days I may not be riding and I can charge the batteries in the sun or using a wall outlet.

Personally I think this stuff is pretty neat and I can’t wait for my ride across Nevada on Highway 50 next month and the challenges that will present with lack of services or water for stretches of 80 miles and more on successive days. There probably won’t be any surface water to purify and cell phone coverage is going to be questionable too but lack of charge to my electronic devices will not be a limiting factor! I will do a report after the ride and will also be posting a video showing the final setup and use.

Categories
Bike Touring Tips Hermit's Workshop

Bike Hermit on YouTube

I watch YouTube videos sometimes. I admit it. Actually, I watch them more than sometimes…it’s sort of like crack cocaine to me. And I watch everything. From comedians whose entire body of work seems to exist only on YouTube, to old episodes of Iron Chef (the original, Japanese version of course) to videos about gangsters and prison, to entire Yes concerts. My current favorite however is Jeff Bradshaw’s “Redneck Restoration“. This guy can literally find an old motor that has been sitting in a field (without the vehicle) for the last 15 years and make it run. His videos are rough and primitive. He puts the camera on a tripod and films himself as he cracks the cover off the differential of a 1958 1 ton truck. Then he carries the camera into the auto parts store and records his banter with the employees. Looks simple.

I’m more interested in search engines than auto engines though and all the gurus say that YouTube videos (YouTube is owned by Google) can help a website rank highly in searches. No problem thinks I; “If Jeff Bradshaw can do it, then I can too” So I figure I would record myself putting together the Surly Ogre/Rohloff build then under way. After an hour or so of setting up the camera and lights I’m ready to boggle the minds of the brethren with my mad video skills. I would time lapse the repetitive, dull operations and then slow the video back down to normal speed to highlight some particularly difficult step and to impart my sardonic and incredibly useful revelations.

Guess what? It’s way more difficult than it looks. My video was pretty much unusable. The lighting was bad and the bike blocked the view of whatever I happened to be working on. I even attempted to use two cameras, but that didn’t simply double the exposure of my ineptitude …it became more of an exponential display of incompetence. In fact, after “recording” for some time, I discovered the battery in one of the cameras was dead. And I didn’t even get far enough along to worry about the editing.

Since then we have been lucky to find a young fellow (the Bike Hermit has several pairs of shoes older than he is) to film, edit and post videos for us. Our YouTube channel is called “Bike Touring with Bike Hermit” and we have instructional videos along with product overviews and product un-boxing videos. So please check it out. Leave comments and let us know what sort of things you would like to see covered. Here’s a sample:

Categories
Advocacy/Awareness

This is your brain…

We do our best to be educational and to not rant about bike issues.  We wear helmets, always.  When our kids lived at home not wearing a helmet was a capital offense that resulted in loss of bike privileges and being grounded.  I still tell them “I already did diaper duty with you and don’t desire to do it again”

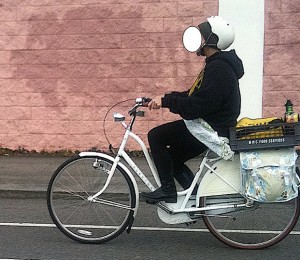
This past Sunday a section of our ride took us on the local MUP, referred to as the Greenbelt.  Being a Sunday we saw several bike riders, adults, kids, families with bike trailers and tag-a-longs.  For the most part they all had helmets HOWEVER,  the way the helmets were attached to the noggin was downright scary.

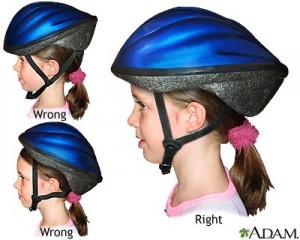
A helmet set way back on the head isn’t going to provide much protection if you pitch forward in a crash.  A helmet that is so low on the forehead that the rider can barely see isn’t safe either.

A helmet so far back like this could actually break your neck in a crash

Then there are the chin straps – they do need to be strapped and the do need to be in the vicinity of the area underneath the chin, not on your chin, not dangling 4 inches below the chin, securely under the chin, no they don’t have to strangle but the idea is to have the strap help keep the helmet on if you crash.

Like Goldilocks, adjust your helmet to fit just right

There are some great step by step informational websites about proper helmet fit.  Helmets do not have to be expensive, granted a nice feature is the adjustable locking system that allows for a snug fit but even simple helmets using padding to adjust the fit provide great coverage.  This simple guide on NHTSA is a good one.

Here are two photos, one of me after a crash, going very slow (maybe 5 mph) in town wearing my helmet, the other I found on Flickr.  Finally here is a link you may chose to look at fair warning it is a nasty looking photo so I opted to do the link instead of posting.

Yes, this crash broke my helmet but not my head
riding a "cruiser" or upright bike does not mean you shouldn't wear a helmet


Categories
Hermit's Workshop Touring Bike Accessories

King Cage Tool Pouch

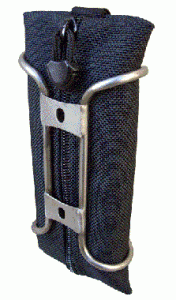
*Note updated Cage is now know as the King Cage Kargo Cage and includes the bottle cage and the pouch!  Finding a place for all the small things that need to be readily accessible when I’m touring…. like tools….is a constant challenge. Ron Andrews at King Cage seems to always be tinkering and coming up with new ideas. I think this is a particularly good one. We have them in the store so get your orders in now! Comes with the ballistic nylon pouch and retails for $45.00.

King Cage Behold tool pouch
The carrier bolts to the bike frame.
King Cage tool pouch and frame
The water bottle cage bolts to the pouch carrier.
Categories
Cockpit Touring Bike Components

Nitto Albatross Handlebar Brake Levers

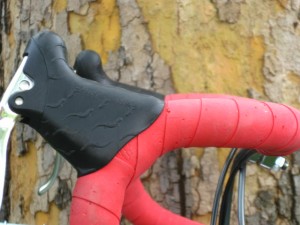
Let’s review. We know that v-brakes, also called linear pull brakes, require a brake lever configured to “pull” more cable than do side pull or cantilever brakes. We also know that so called aero style drop bar levers fit on drop bars and on moustache bars. (it’s a diameter thing) And those levers have rubberized hoods which are folded back out of the way when wrapping the bars with tape and pop back in place to cover the tape where it wraps around the lever clamp.

drop bar brake hood photo
The hoods on drop bar brake levers.

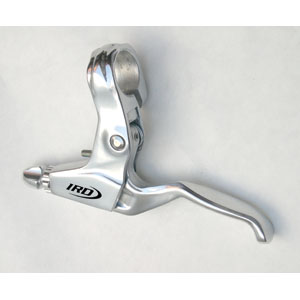
So what if you have flat or riser mountain bike style handlebars or a swept back bar like the Nitto Albatross? The diameter where the brakes clamp is a little smaller and there is no bend to accommodate the shape of the brake lever clamp. You need a mountain bike style lever, which looks like this.

photo of IRD Sylvan flat bar brake lever
Brake lever for flat bars or swept back bars.

Get some grips (or just get a grip) and clamp these near the end of the grip. And make sure you get a lever designed to work with your brake calipers. For shifters you can use trigger type shifters or a top mount shifter or bar end shifters. More on that in later installments.

Categories
Cockpit Touring Bike Components

Drop Handlebars/Brake Levers

So, the question came up about which brake lever to use on a Nitto Grand Randonneur handlebar. That’s sort of a two part question. In order to answer it we need to delve into brake calipers. Some common brake calipers are:
Cantilever

photo of a cantilever brake caliper
Cantilever Brake Caliper

Sidepull

photo of sidepull brake caliper
The sidepull brake caliper.

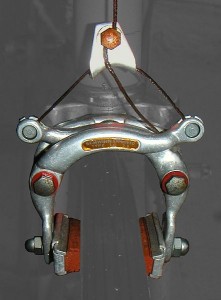
Center Pull
photo of center pull brake
The Center Pull Brake caliper

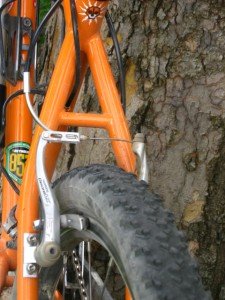
Linear Pull a.k.a V-Brake

photo of a v-brake caliper
The V-brake, sometimes called a linear pull brake.

Stupid v-brake. It throws a monkey wrench into the whole works. Even though they work great and have fantastic stopping power, they use a different leverage than the others to work properly. So whatever lever is used with these calipers, it needs to be v-brake compatible.

“Drop” or “road” style handlebars are of a standard diameter at the point the brakes are meant to clamp to the bar. So any lever that looks like this will work:

photo of Cane Creek brake lever
The Cane Creeek SCR-5 sports a wide, cushy grip- plus it has lizards!

These are also called “aero” brake levers because, rather than exiting the top of the lever and looping over the handlebars, the cable and housing exit under the hood and run along the handlebar, under the wrap, for a nice clean look.Photo of aero brake lever cable routing
aero brake levers on a drop bar
Shimano brake levers.... clean look! Make the tops of the bars level with a smooth transition to the brake hoods, dangit.

The Cane Creek and Tektro levers have a feature known as the Campy style quick release which is a button that releases the cable tension allowing the brake calipers to spread out to clear the tire when the wheel needs to be removed. It’s called Campy style because Campagnolo (Campy) brake calipers do not have quick releases.
Shimano aero brake levers don’t have quite as wide a hood which results in a more classic look. And they don’t have the quick release feature on the brake lever, again maybe not a problem since most brake calipers will have a quick release.
The drop bar brake levers we sell will fit on any of the drop bars we sell. and they will work on the not-so-ironic moustache bars too. Just be sure, if you have v-brakes to get the Tektro RL520 v-brake version. The other standard levers will work with cantilever, side pull or center pull brakes. And finally if you’re replacing a handlebar or just the brake levers you might want to get a cable and housing kit to replace the old set.

Categories
Rivendell Bicycles Touring Bicycles

A Bike For A Bike Overnight

The weather looks a little sketchy for our planned Memorial Day overnight bike trip so it may be postponed one week. Not that it’s going to be horrible weather, but it will be more fun when a little warmer. Maybe I should call this Fair Weather Bike Touring News?

Sky King’s bike is ready to go.

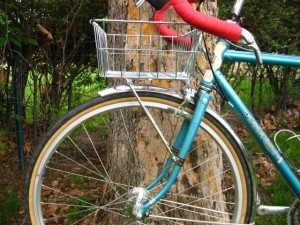
Wald Basket on a Nitto M-18 front rack

Grant Petersen at Rivendell pioneered the use of an inexpensive wire basket zip tied to a Nitto rack for overnight bike tripping. Sort of primitive but it looks like it should work. (Notice I’m letting Sky King do the experiment)

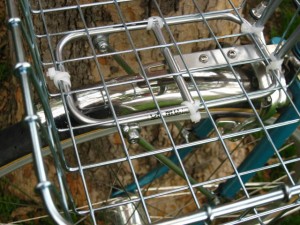
Zip tied Wald basket
Zip Ties are the preferred method for attaching the basket to the rack.
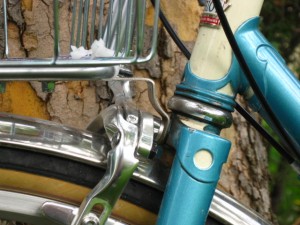
Nitto M18 rack fork brake bolt attachment
The Nitto M18 attaches with a metal tang which shares the front brake bolt.
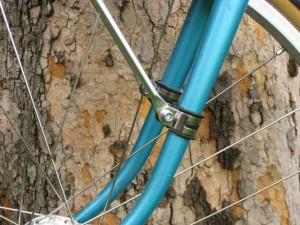
Nitto M18 stays mounted to metal clamps on the fork
For a bike without mid-fork eyelets Nitto provides these stainless steel clamps.
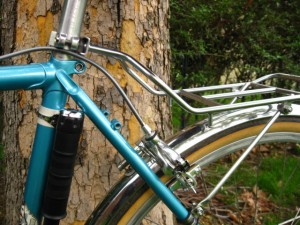
Nitto R10 Bag Supporter mounted to seatpost and seat stays
The Nitto R10 Bag Supporter

The Nitto R10 Bag Supporter is a real minimalist rack but she is just going to use it to support a large rear saddlebag and a sleeping bag.

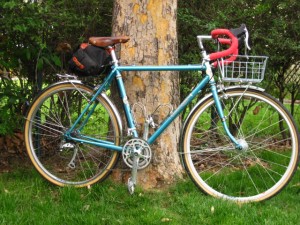
Photo of Rivendell Bleriot ready for overnight bike trip
Sky

While almost any bike can be used for an overnight trip,Sky King’s bike, Sky, sports road style drop handlebars, bar end shifters, a triple crankset with an 8 speed cassette and relatively voluminous tires about 34 to 35 millimeters wide. The wider tires will offer some cushion on the gravel roads we will be traversing. The small front chainring with 26 teeth combined with a large rear cog of 32 teeth provides a low gear of 21 which should get her up any of the hills we will encounter. (see my post about gear inches to see what that means)

More about the actual packing, the Bike Hermits setup and the route will be the subject of future posts.

Categories
Tours and Rides

Alaska’s Lost Coast

Lost Coast Trailer from Eric Parsons on Vimeo.

In 2008 Dylan Kentch and Eric Parsons rode and carried and rafted with their singlespeed bicycles across 300 miles of wild Alaska coastline from Yakutat to Cordova. If one were to look at this on a map and/or Google Earth they might not think it possible. But these guys did it and lived to tell the story. What’s most impressive to me is that they never complain about the difficult conditions, they had fun, and they were sad when it was over. Epic.
Their blog is called Bike The Lost Coast
In 2010 some homies from Bozeman, Mt. did it too. Their blog is Biking the Lost Coast
Eric’s company is Revelate Designs LLC
He makes frame bags for expedition touring and for bikes which are rack challenged.

Image of bike camping with Revelate Designs bags
Bike Camping or Bikepacking


Revelate Designs LLC frame fit bags
Revelate Designs LLC frame bags

Looking at these photos and reading the ride reports gets me to thinking about different ways to set up the bike, and it gets me thinking about an off road adventure touring bike. Of course, being a Surly groupie, the Troll or Karate Monkey come to mind. I’m sure Sky King will be happy to know I have a new obsession! Anybody else use these bags and have stories to tell of their expeditions?