Categories
Hermit's Workshop

Tool Kits For Bike Touring

Dear Bike Hermit,
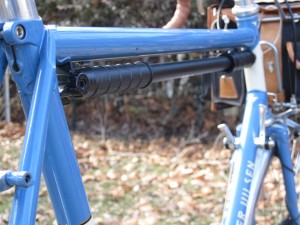
You’re the coolest and this blog is the best. I want to be just like you so I want to get a super-cool King Cage Behold Tool Pouch. But I want to know what you carry in yours.
Thanks, and keep up the good work

Les in Tuscaloosa

Les in Tuscaloosa,
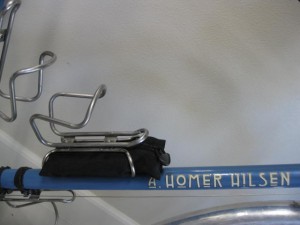
There are many people cooler than I am, and there are probably better blogs but thanks for your comments. I agree that the King Cage Behold Tool Pouch is super-cool, in fact I think it is one of the best ideas I have seen in a long time. In case you missed it I did this blog post about it a while back. But now that you mention it I realize I never talked about what can be carried in it. So here’s a list of what I carry in mine:
-A chain tool
-A cassette lock ring tool
-A spoke wrench
-A few links of chain and a quick connect coupler
-Spare bolts for seat post, racks and shoe cleats
-Spare bulbs and parts for my bike headlamps

Nothing I carry in the tool pouch will ever need to be accessed in a hurry, in fact those parts and tools may never need to be used at all, but if I ever need them they could be life savers. I did a blog post about the cassette lock ring tool that you might want to look at. If you don’t know what the other tools are for or how to use them… Google it, that’s what YouTube’s for brah. I read about a lot of people who go for extended tours and write proudly of barely knowing how to fix a flat tire. Don’t be that guy. Take your bike apart and put it back together. At least loosen the brake cables and the brake shoes and try to get them adjusted again. Do the same thing with the shift cables. Take a class at REI. Take the tires off the rims and put them back on. You can thank me later.

Oh, and carry the things you most likely will need at some point, such as spare tubes, tire levers, a multi-tool that has 4, 5 and 6mm hex wrenches and both kinds of screwdrivers, and a y-shaped socket wrench with 8, 9 and 10 mm sockets on it in an outer pocket of one of your bags where you can get to them quickly.

To make it easier for you there are now a couple of new package options on the Bike Touring News store. One option (Tool Kit #1) is for the tool pouch with all the tools I carry in mine…. minus the spare bolts and light bits and chain pieces. You’re on your own for those. The other option (Tool Kit #2) is to buy the whole caboodle which includes Tool Kit #1 plus the y-shaped socket tool, a multi tool with hex wrenches and screwdrivers, and a set of tire levers.

Hope this answers your question Les and remember the 7 P’s; Proper Prior Planning Prevents Piss Poor Performance.

Best Regards,
Bike Hermit

Categories
Hermit's Workshop

Carrying Spare Spokes

In bike touring, as in life, one needs to plan for the worst and hope for the best. The middle of nowhere is nowhere to be with a broken spoke without a little bit of know how and prior planning. Breaking a spoke is one of those rare occurrences but it does happen and the bicycle tourist needs to carry extra spokes in the proper lengths, a spoke wrench, and a tool to remove the rear cassette. A search on the internet brings up many instructional videos on how do do the deed, so I’m not going to duplicate those here.
It might be a good idea to carry a FiberFix spoke replacement as a stop gap until the next bike shop too.

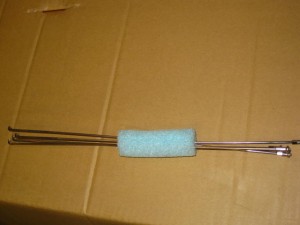
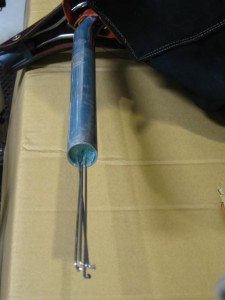
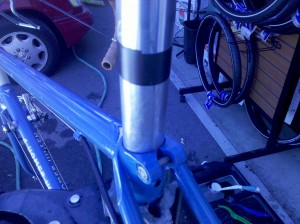
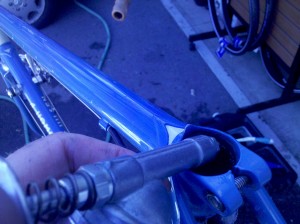
What I do want to share is this idea for carrying spare spokes. I don’t claim to be the first one to think of this, in fact I normally tape some spokes to my left chainstay, but I decided that looks too ghetto. A two or three inch long piece of foam whittled into a cylindrical shape a little larger than the inside diameter of the seatpost can be pierced lengthwise with three or four spokes and then stuffed inside the seatpost.

spokes piercing a piece of foam
Penetrate the foam. Then thread a nipple on the end.

Foam inserted into seat post, with spokes
The foam should fit tightly enough that it won't bounce out

The spokes are relatively easy to access (just remember to mark the seatpost before removing it so the saddle height will be the same when reinstalled.) Some tourists stuff spokes into the ends of the handlebars but I don’t like the idea of the spokes being bent like that, and it wouldn’t be that handy on a bike with bar end shifters.
So there you have it. One step closer to being self-sufficient on the road.

Categories
Pumps

Zefal HPX Frame Pump

Set up in 1880, Les Etablissements AFA are specialized in the design of toe-clips, toe-straps, bicycle bells and racks. Later called POUTRAIT, the company works closely with famous riders to develop products. In partnership with Mr Lapize and Mr Christophe, both French famous cyclists, POUTRAIT created, at the beginning of the twentieth century, products under two new brands: LAPIZE and CHRISTOPHE.

A few years after the creation of AFA / POUTRAIT, another French industrialist, Mr. Sclaverand, invented and manufactured the first bicycle valve which took his name for decades before being called the French valve or Presta valve.

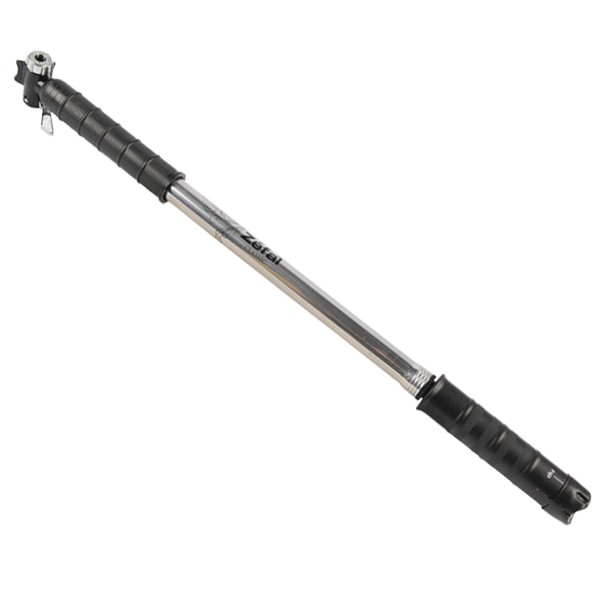
Photo of Zefal frame pump

Fast forward 100 years and the company is named Zefal, after their best selling product line. The Bike Hermit loves Zefal pumps. The Zefal Husky floor pump was the only one robust enough to hold up to the everyday requirements of a bike shop that fixed A LOT of flat tires. The Zefal HPX line is just as well built, and when you are in the middle of freakin’ Bolivia with a flat tire, you just want a pump that works.

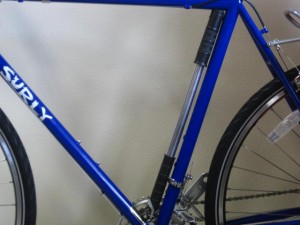
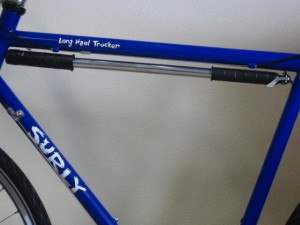
Zefal says the pump is designed to fit vertically along the seat tube inside the frame and it is held in place by spring tension. One end of the pump is shaped to fit against the top tube snugly, without twisting, and the other end incorporates replaceable “wings” which get bracketed by the down tube and seat tube. That works fine except it eliminates the possibility of using a seat tube water bottle cage, which doesn’t make much sense, especially when many vintage bikes and many current touring bikes have a pump peg brazed onto the trailing side of the head tube. Zefal “declines all responsibility” whatever that means, for mounting the pump along the top tube.

However you want to mount it, here’s what you need to know:

There are four sizes; 1,2,3 and 4

-The number 4 pump measures roughly 58 cm (22 3/4″) in length when compressed to the point where the handle just contacts the barrel. Applying more force compresses the spring inside the handle which bottoms out when the overall length of the pump reaches about 52 cm. (20 1/2″). The relative numbers for the number 3 pump are 52cm to 46cm, and for the number 2, 47cm to 41cm. and for the number 1, 42cm to 37cm

You will need to determine the correct size pump based on the inside dimensions of your bike frame parallel to the tube where the pump will mount.
PLEASE WATCH THIS TOO:


frame pump installed along seat tube
This is the way Zefal recommends using the HPX Classic frame pump. Measure the inside dimension of your frame to get the right pump.

Horizontal mount of Zefal frame pump
Zefal does not recommend this mounting (lawyers) but the end of the handle accepts the frame pump peg provided on many touring bikes. Again, when selecting a frame pump size it is crucial to know the inside dimension of the tube where the pump will be mounted.

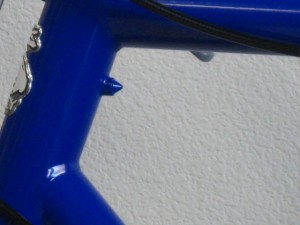
pump peg on frame
This is a pump peg

The long, slim barrel of these pumps puts a lot of air to the tires quickly and up to a claimed 160 PSI of pressure. The barrel, handle and the pump head are made of aluminum and the piston shaft is steel. The “wings” are made of hard plastic and one of those on my pump has broken, but I was pleased to discover that there are replacement parts for those. Replacements are also available for the metal cap and inner pieces of the head and for the rubber washer on the business end of the piston.

In addition, not that we recommend or endorse it, the Bike Hermit has found his pump to be an effective deterrent to persistent, chasing dogs. One well placed blow between the eyes usually makes them rethink their choices.

BACK TO THE STORE

Categories
Drivetrain Hermit's Workshop Touring Bike Components

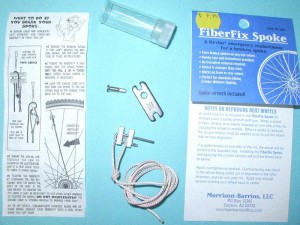
FiberFix Emergency Spoke Replacement Kit

The FiberFix Emergency Spoke Repair Kit

We just got these in at the Bike Touring News Store.
The FiberFix replacement spoke is an aramid cord with a metal “cam” attached. When a spoke breaks the wheel will have a wobble which will probably rub on the bike frame and or the brake pads. If not repaired right away, other spokes may start to go as well. For the mechanically challenged, when a spoke breaks the FIberFix spoke replacement is a good alternative to removing wheels, tires and possibly cassettes. Just thread the included attachment piece into the remaining spoke nipple on the rim, thread the cord down to the hub and back up to the piece threaded into the nipple and tighten.

Here are some reviews at crazyguyonabike.
Might want to bring two!

Categories
Hermit's Workshop

Maintenance Tips/ Post Tour

If you ship your bike home from the end point of your tour, you will probably have removed you seat post and saddle in order to fit the bike into whatever case you used. When you get home and are putting the bike back together you will want to end up with the saddle at the same height relative to the pedals as it was when you took it off. A simple way to ensure that is, before you remove it, to wrap a piece of tape (electrical tape works best) around the seat post where it enters the frame. Then, when you put it back, just insert the post to the same spot.

Mark the seat post before removing it.

An aluminum seat post inserted into a steel frame will result in galvanic corrosion between the two metals. If not removed and cleaned and re-lubed periodically the seat post will become well and truly stuck and may need to be cut out. Removing it for a period of time will also allow any moisture which might be in the frame tubes to evaporate. Applying grease to the inside of the seat tube rather than to the seat post results in less of the goop squished out onto exposed bits and ending up on your clothes.
Applying grease inside the seat tube before inserting seat post.

Don’t use grease on a carbon post or with a carbon frame. Use a special paste made for this purpose. The paste won’t damage the carbon and it has a little bit of grit to it that will help hold the post in place without over tightening.

Categories
Hermit's Workshop

Bike Preventive Maintenance

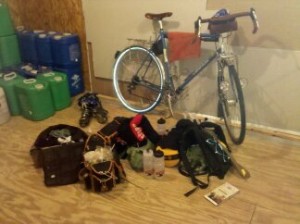
I was pinned down in Orberlin, LA by thunderstorms on my recent Austin to New Orleans Tour. Luckily I had a nice dry and warm storage shed at the fire station in which to store my gear. (I ended up sleeping there too, but that’s for another story) So I took the opportunity to do a little preventive maintenance. It’s much easier to fix a loose bolt or other potential problem when you have the time and the the place than it is to repair a failed part along the road when it’s getting dark.

Take any opportunity for preventive maintenance

Removing all the luggage makes it easier to inspect bike and accessories. After checking the tightness of all the rack attachment bolts and fender mounts, I also go through the bike and tighten the stem bolts, seatpost bolt, brake lever and brake caliper bolts, derailleur attachment bolts and chainring bolts. Then I lube the chain. I turn the bike upside down and place it on the floor resting on the handlebars and saddle. Then I can visually inspect the tires for cuts or abrasions, and spin the wheels to check alignment. Like the man said,”an ounce of prevention is worth a pound of cure“.

Categories
Bike Touring Tips Hermit's Workshop Saddlebags

@#!% Flat Tire

There are dozens of videos out there about changing a flat tire. None with background music by Sonny Stitt.  Here’s one!

A couple of things. Notice that I just lay the bike on it’s side with the derailleur up. That’s an easy way to do it when you’re on the side of the road. Also, I shift the chain into the smallest cog. When I put the tire back on it’s easy to remember what cog to put the chain over so that the wheel will be centered.

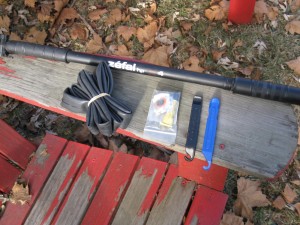
This is what I carry on the bike to change a flat:

Pump. I use a Zefal HPX frame fit pump. This pump is all aluminum and the barrel is long enough to push a decent amount of air, so the tire is up to pressure relatively quickly. Plus, unlike CO2 pumps,  it has never failed or frozen. It mounts to the underside of the top tube

on  bikes that have a pump peg.

Or it can be mounted in front of the seat tube, but this precludes the use of a water bottle there.

Spare tube, tire levers and patch kit. The simplest and quickest way to fix a flat is to change the tube. But I only want to carry one spare and if I get another flat I need to be able to patch one of the flat tubes.

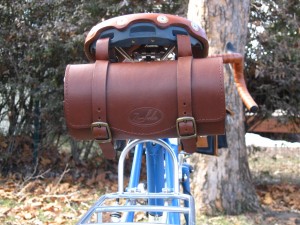
Seat bag. For shorter day rides I use a Zimbale leather saddle bag to carry these items plus a multi tool.