Categories
Bike Touring Equipment Bikepacking Planning Resources

The Best Shelter for Bikepacking: Three Opinions

We get lots of questions about shelter from folks getting started in bikepacking.  What shelter is best?  Can I use the ____ that I already own?  How do I know which shelter to bring on a given trip?  In this post, we’ll offer three perspectives on the best bikepacking shelter and try to answer some of those questions!

While many people already do some kind of camping, many shelters that would be appropriate for car camping or even backpacking are not well-suited for bike travel.  Space and weight are at a premium when traveling by bike, so heavy and bulky shelters are a liability.  In selecting a shelter for bikepacking, there are a few key factors to consider:

  • Sleeping Comfort
  • Protection from the Elements
  • Interior Space & Gear Storage
  • Ease of Site Selection & Setup
  • Packed Size/Weight

Obviously, many of the above factors can change dramatically depending on weather, environment or season.  Plan Ahead and Prepare for the conditions you expect to experience.  Any shelter will offer some level of versatility but some excel only in certain conditions.  Also, every person has their own preferences, likes and dislikes when it comes to shelter.  In this post, we’ll offer perspectives from the Bike Touring News crew on the different shelters we use.  What shelter do you prefer for bikepacking?  What did we miss?  Read through and add to the discussion with a comment below!

The Bike Hermit’s Preference:  The Hammock

Several years ago, I came across some articles about stealth camping – or “hiding in the woods” as some people call iton an obscure site called crazyguyonabike.com. The author’s choice of shelter was a Hennessy Hammock and – for some reason I can no longer remember – the idea of bike touring with a hammock appealed to me.
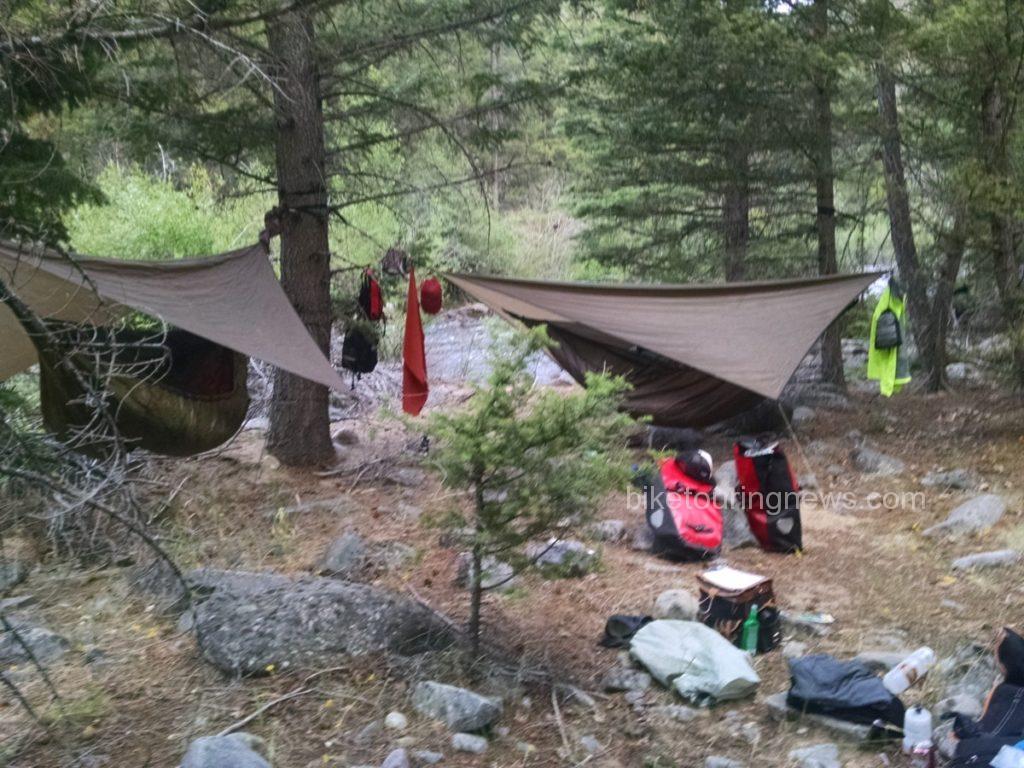
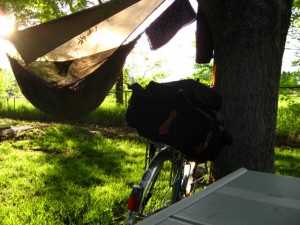
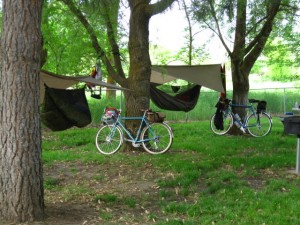
image of camp hammocks
Not many spots for a tent

The design of my Hennessy Hammock impresses me every time I use it. The hammock is attached to and suspended from a ridge line which also supports the enclosing insect netting. A separate rain fly keeps the sleeper dry and/or out of the wind. Upgrading from the stock rain fly to the Monsoon rain fly creates a space around and under the hammock big enough to park the bicycle out of the rain. Hennessy sells a 4-season SuperShelter system consisting of a second layer of nylon on the bottom of the hammock which creates a sleeve where an insulating pad can be inserted. My experience is that the hammock is very cold to sleep in without the 4 season system.

Worries about sleeping in a “hammock” position and only being able to sleep on ones back are mitigated by the asymmetrical design of the Hennessy; once in the hammock the sleeper can put his feet to one side and his head to the other and the hammock offers a flatter, even if still not completely flat, support. I am not able to sleep face down but I can sleep comfortably on either side.  This is obviously a big plus for side sleepers who struggle for comfort when sleeping on the ground.

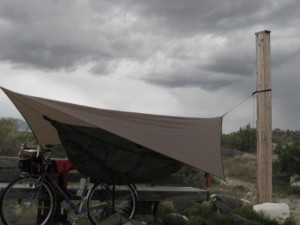
People always ask what I do when there are no trees. The rain fly, when staked at one end or tied to a sagebrush, and supported at a higher point by the bike or a tree or a fence post at the other end makes a dandy shelter. If the night is cold the hammock can be used laying on the ground under the rain fly as a sort of cocoon.  In this configuration, the hammock becomes a sort of tent/bivy/hammock hybrid shelter.  The benefit of sleeping suspended is lost and setup can be tricky but this capability extends the range of conditions where a hammock is functional.
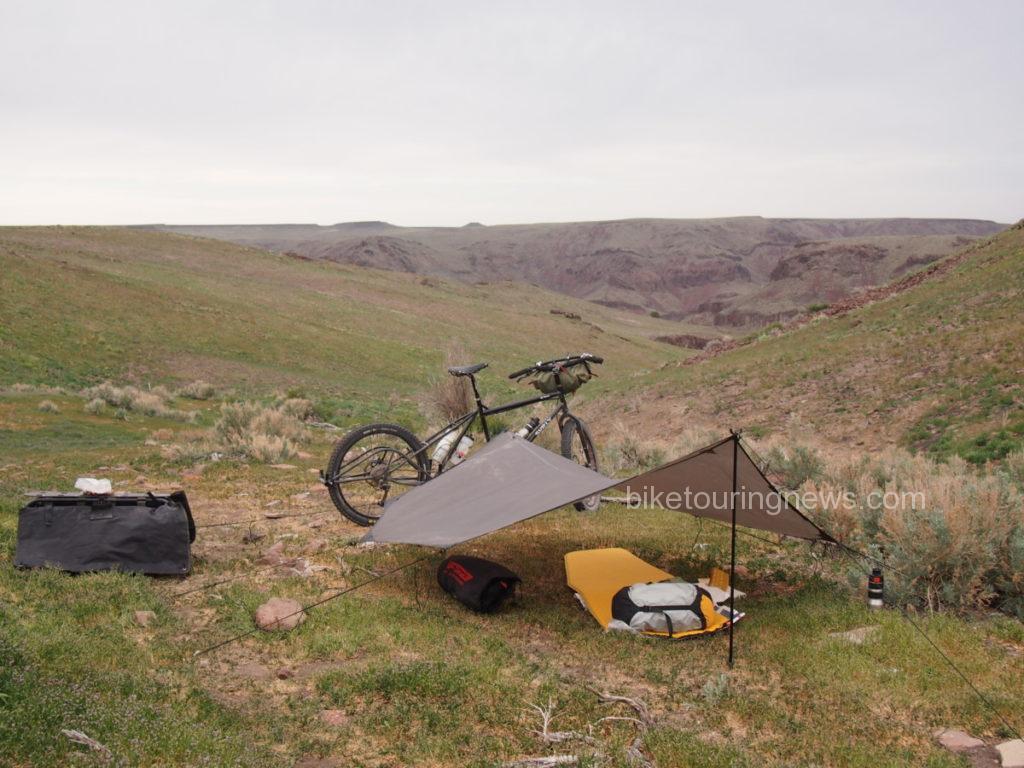
image of bike and tarp
The Clickstand bike support as a tent pole!

On the last couple of trips I have been using Hennessy’s SnakeSkins which stay attached to the ridge line and simple slip over the entire hammock and pad and swallow the whole thing up leaving a long, fat, nylon snake that can be stuffed into one half of a pannier. This is a much faster way to set up and take down the hammock.

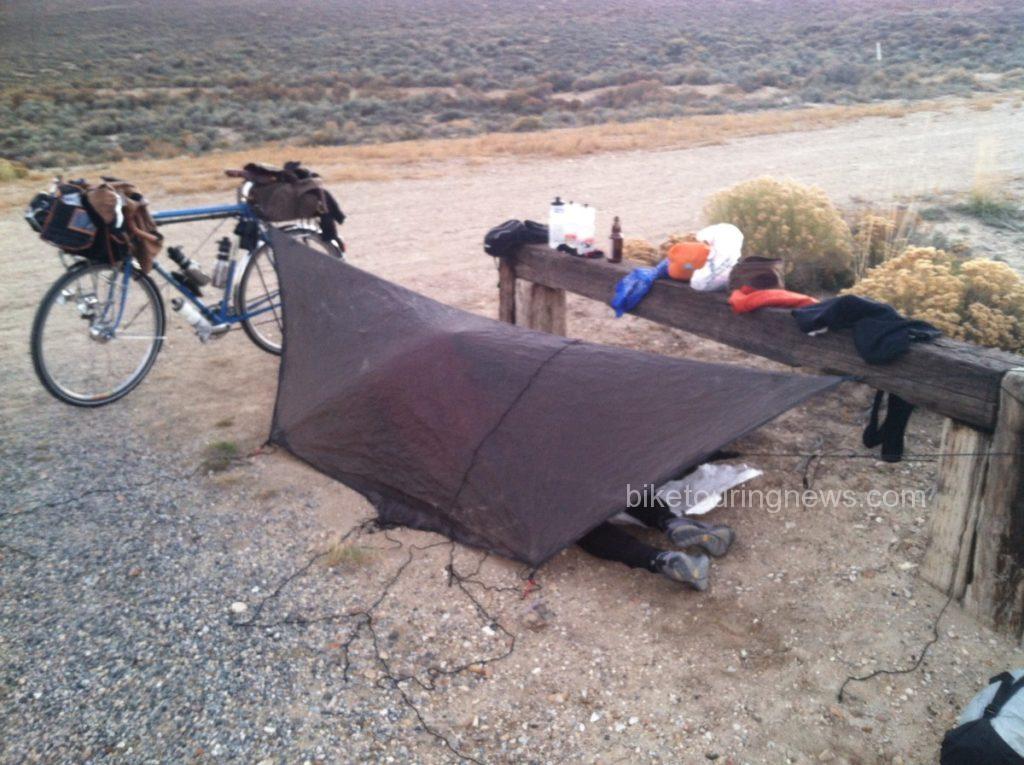
image of end of hammock
The SnakeSkins fold out of the way on the ridge line when the hammock is in use and just slide down from either end to make a quick stuff sack.


image of tarp tent
This was to be a very cold night. The fly was on top of me by morning with the weight of a heavy layer of frost. This is the Monsoon Fly.

Pros:

  • Very comfortable – none of the pressure points associated with sleeping on the ground
  • Warm enough for most conditions when used with the two layer insulation system
  • Can be used on uneven, sloping, rocky or wet terrain
  • Completely weatherproof
  • No condensation
  • Packs relatively small – no tent poles.

Cons:

  • Can’t always be suspended
  • Not necessarily lighter than a good tent
  • Not ideal for relaxing – minimal interior space
  • Not as private as a tent – hard to dress or undress in a hammock
  • Makes some people feel claustrophobic

Sky King’s Preference:  The Tent

While the Bike Hermit and Sky King are both huge fans of the Hennessy Hammock there are situations where a tent is a more practical shelter, especially in desert environs where trees are scarce.  Sleeping on the ground in a hammock is an option, though one without most of the hammock’s benefits.  Comparatively, a good tent offers increased comfort and space at roughly the same weight and pack size as the hammock, when divided among a team of two.
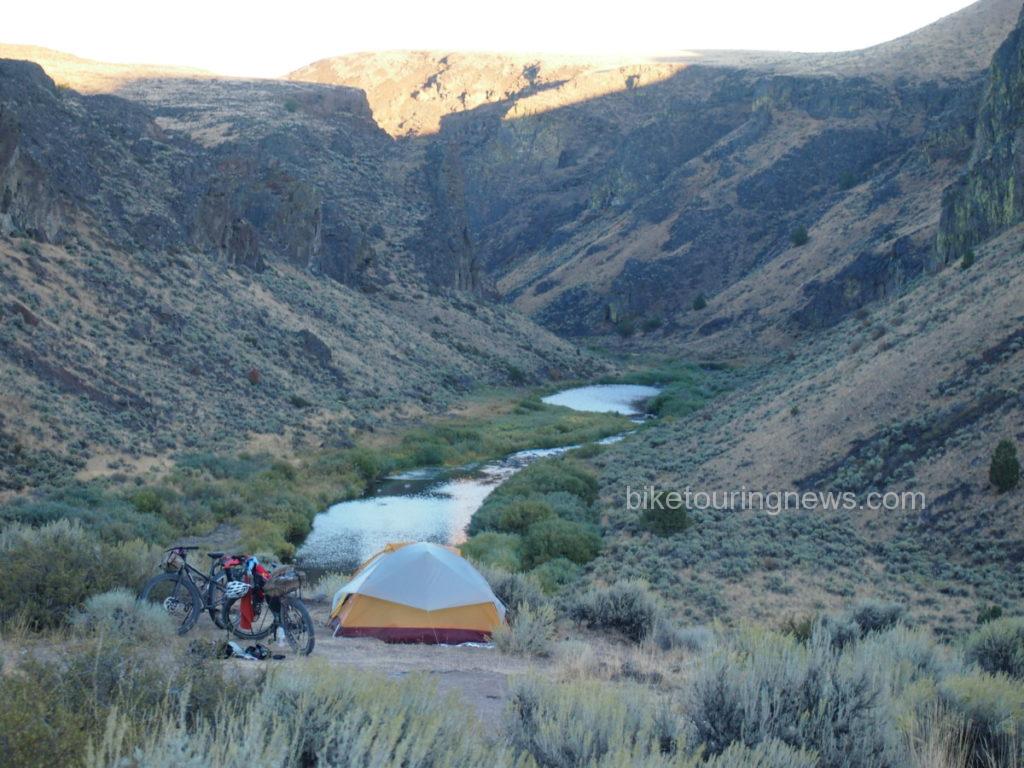
perfect for Desert Bike Packing
Big Agnes Angel Springs UL2 in the Owyhee Canyonlands

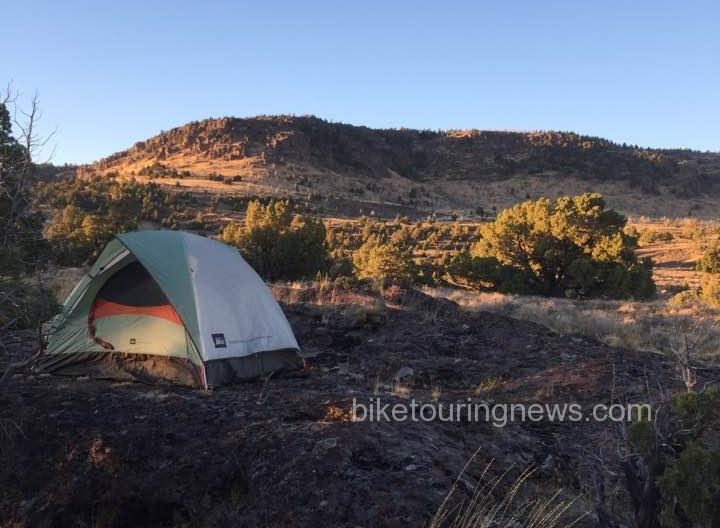
For our first couple of “let’s take the tent trips” we used our 3-person Kelty – a great tent. We bought it for backpacking primarily because it was roomy – with two vestibules and two doors – making for easy entry/exit and gear storage. However, it is a bit bulkier than we’d like for bike trips. We bit the bullet and now own a Big Agnes Angel Springs UL2. We gave up the double entrance, meaning someone is getting crawled over for the middle of night nature call. Like most tents, it incorporates a rain fly vestibule, allowing for a place to tuck gear out of the weather.
14495463_265649453829296_3002774429655013193_n

We carry the tent for most of our desert riding, especially in new terrain where we aren’t certain of the tree situation.  Site selection – especially in areas where large trees are few and far between – is relatively easy with a 2-person tent.  The tent’s footprint is relatively small, but very hard or soft ground can present guyline challenges.  On surfaces where stakes won’t hold or can’t penetrate, you’ll have to get creative as most tents must be staked out for a proper pitch.

Weight wise, the combination of tent and sleeping pads is roughly equal to that of two hammocks without pads. We can divide the load between bikes and packed volume equates to about the same as the hammock.  For teams of two who don’t mind sharing space and gear, a tent makes an appealing option.  Solo adventurers may find the packed weight and size burdensome unless they are willing to spend big bucks for high-end, ultra-light models.
Pros:

  • Easy entry and exit.
  • Relatively easy site selection.
  • Vestibule space to keep gear dry.
  • Space to sit up and move around inside, especially nice if bad weather hits.
  • Tent components can be divided between bikes, decreasing each rider’s load.

Cons:

  • Heavier and bulkier on average.
  • Higher cost for lightweight options.
  • Tent poles can be difficult to pack on a bike.
  • Potentially tedious and time-consuming setup and takedown.
  • Condensation can be an issue in certain conditions.


Ryan’s Preference:  The Bivy Sack

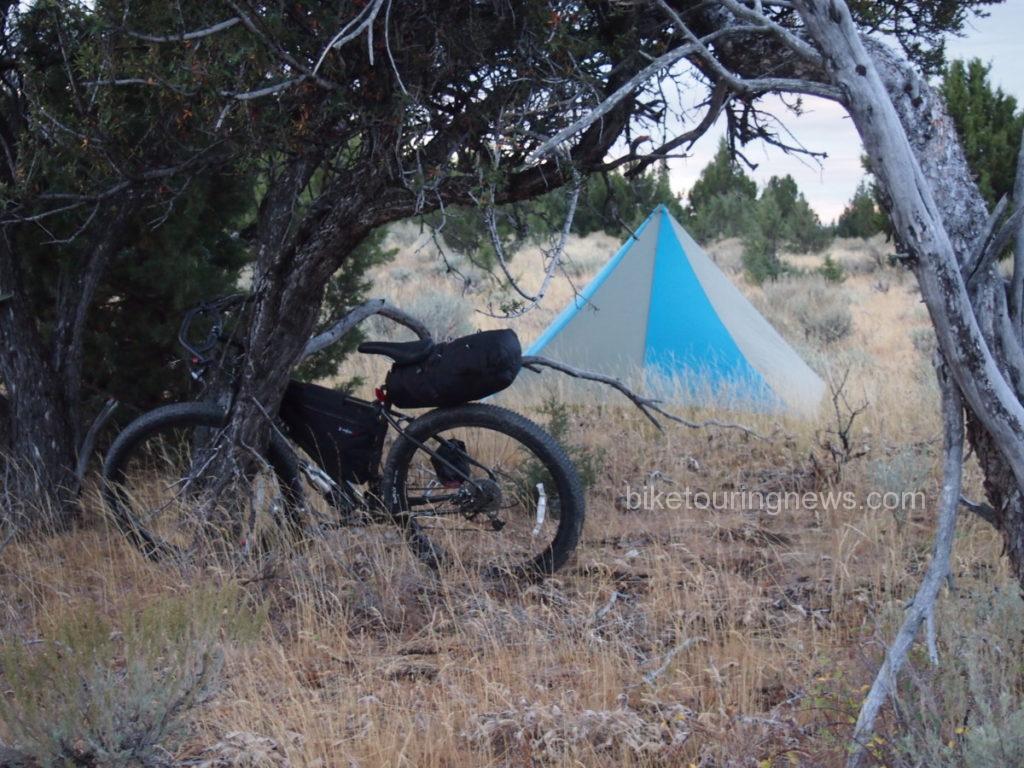
Bivy is short for “bivouac,” which is a fancy word for making camp.  “Bivouac Bags” or “Bivy Sacks” are essentially waterproof sleeping bag covers and have been used since time immemorial by soldiers, alpinists or anyone else who needs a simple shelter that can be quickly deployed in nearly any site.
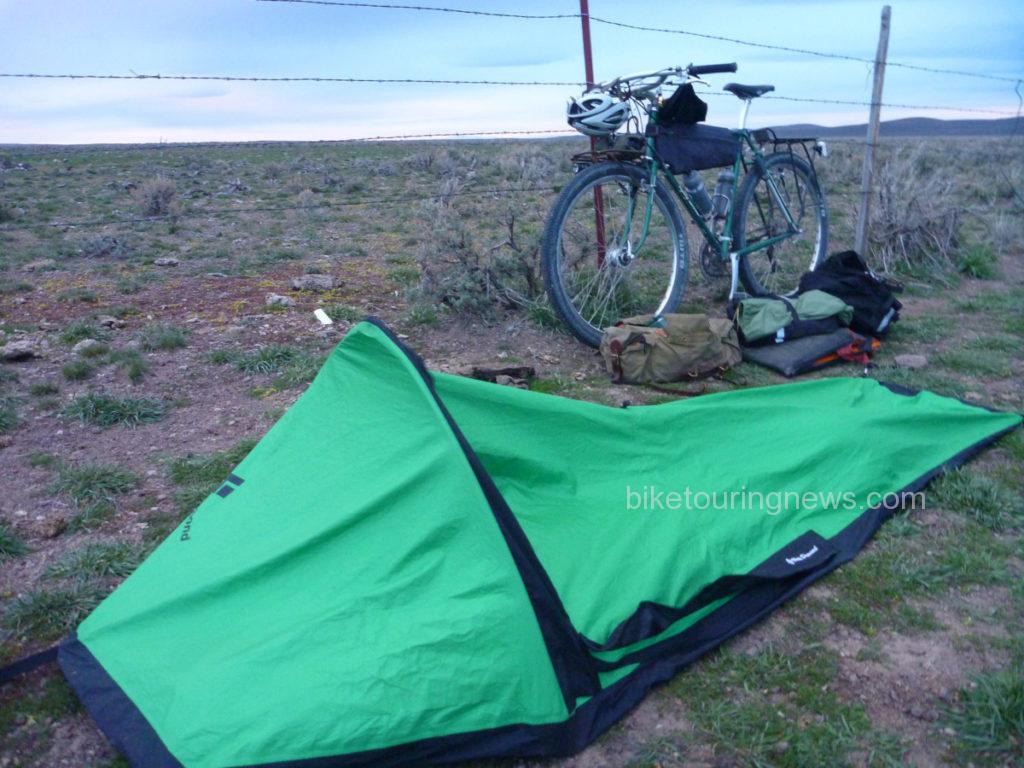
Twilight falls on the author’s campsite in the Owyhee desert.

There are a wide variety of bivy sacks on the market intended for a range of purposes.  Ultralight emergency bivvies are intended to help you survive an unplanned night out.  They are generally inexpensive, pack small, weigh next to nothing and offer little in terms of comfort.  Some ultra-minimalist bikepackers use shelters of this type for racing but they’re planning on sleeping 2-4 hours per night, if at all.

The more fully-featured bivvies are designed for alpine climbing or similar pursuits. They typically employ sturdier construction, waterproof/breathable fabrics and may even incorporate some kind of additional structure to increase space and ventilation.  If you’re looking for a full night’s sleep or expect anything other than perfect weather, this is the way to go.
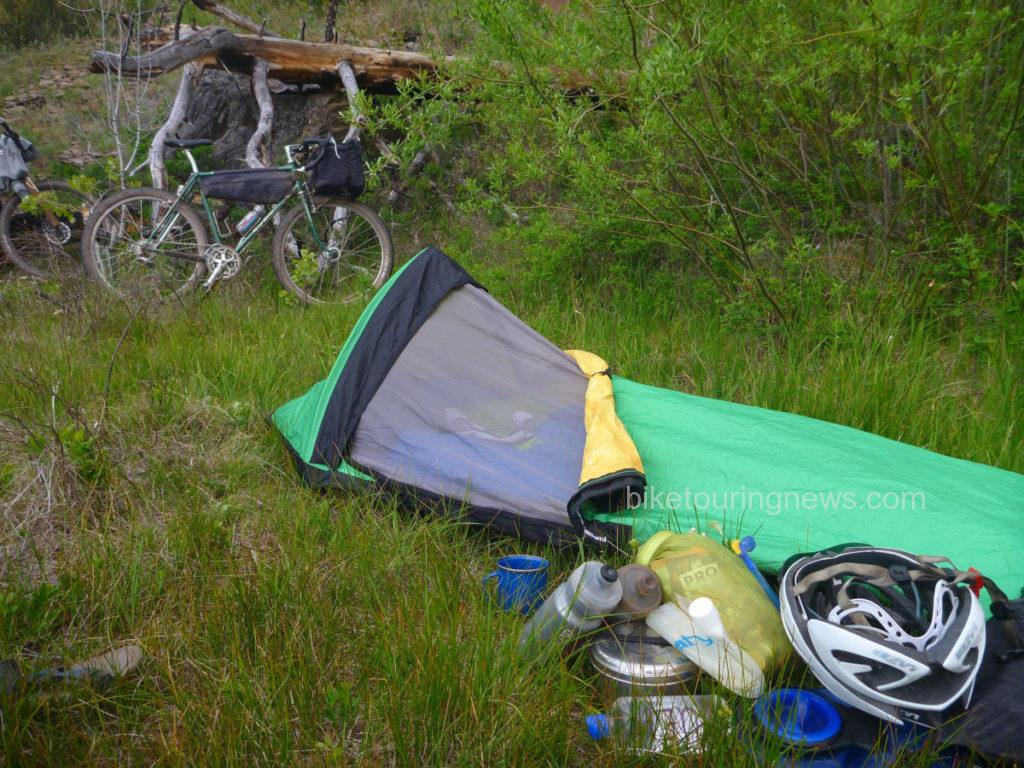
The insect mesh on some full-featured bivvies can be a major plus in buggy locations, such as this creekside camp on the 2014 Oregon Outback.

Even though a full-featured bivy can weigh as much or more than an ultra-light tent, it is significantly less expensive, more durable, simpler to pack and ultimately easy to deploy.  For me, this is the bivy’s main advantage.  Any piece of level ground large enough to lay on can be your campsite and the shelter is ready to use within seconds.  This allows you to spend more time riding and exploring rather than searching for an appropriate site to pitch your tent, hang your hammock or fly your tarp.  No stakes, guylines or trees required!  There is also nothing quite like laying on the earth with no roof over your head and watching for shooting stars on a clear night while you drift off to sleep!
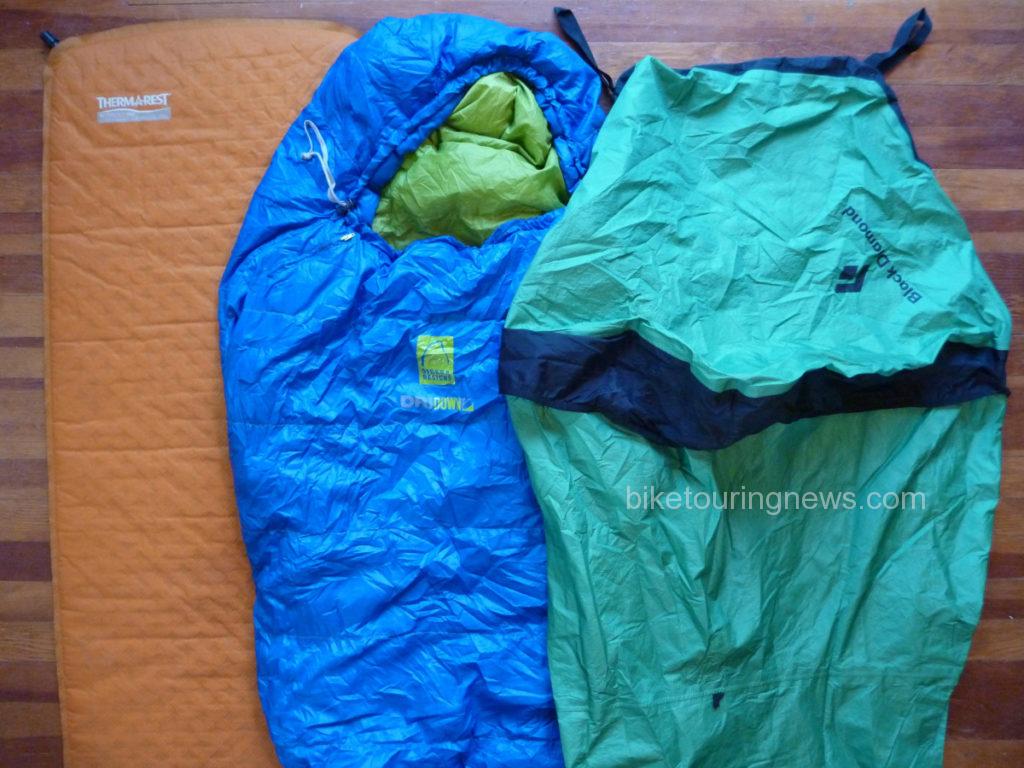
Sleep kit for the 2014 Smoke ‘n’ Fire 400. Simple and reliable.

A good waterproof/breathable fabric is the key to the bivy’s success.  The fabric used in my Black Diamond Bipod Bivy features a fuzzy, nappy surface on the inside, allowing it to absorb moisture and disperse it across a wider area of fabric.  This prevents droplets from forming and speeds moisture transport through the fabric.  I have had some condensation form on the floor panels (made from a different, less breathable material) but never on the upper portion of the bag.  I highly recommend that any bivy you purchase feature similar technology.

Also, consider the volume of your sleeping bag and pad.  You’ll lose the loft and warmth of your sleeping bag by cramming it into an undersized bivy, especially around the foot.  If in doubt, go for a larger size.  This is especially true if you plan to use a thicker, inflatable pad or a winter-weight bag.
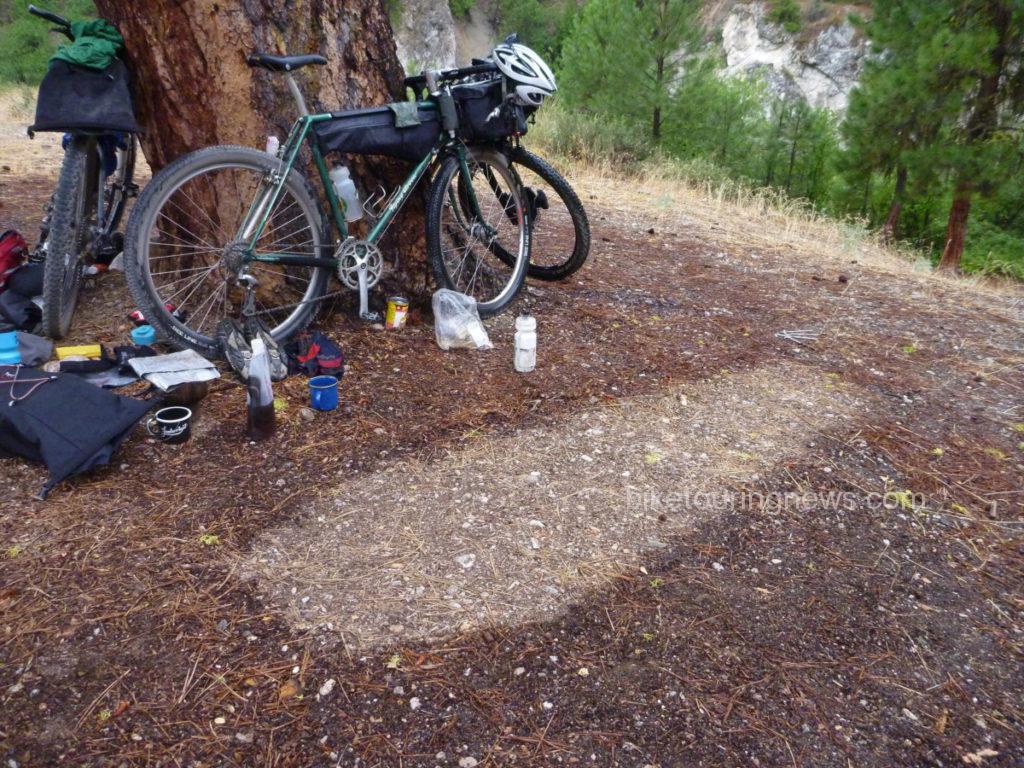
A coffin-shaped rain shadow after a wet night on the Idaho Hot Springs Mountain Bike Route. Should have packed the tarp!

Even with the best breathable fabrics, it is always best to keep any bivy at least partially unzipped to allow moisture to vent out, especially if you’re going to bed wet or attempting to dry wet gear in the bag overnight.  Therefore, it is wise to bring along a tarp to create additional shelter if you expect wet conditions.  A tarp flown over the bivy allows you to leave the head open to vent moisture and prevent claustrophobia.  Nobody likes sleeping in a waterproof coffin (see photo above).  The tarp will also provide shelter for cooking, changing clothes, packing or other camp chores.  I use a simple 8×10′ silnylon tarp that packs to the size of a softball and weighs around 200g.

Pro:

  • Easy Site Selection
  • Ultra-Fast Setup & Takedown
  • Simple Packing
  • Inexpensive
  • View of the Sky!

Con:

  • Claustrophobic When Zipped
  • Minimal Interior Space
  • Condensation Issues
  • Loss of Loft in Sleeping Bag
  • Not Particularly Light

Conclusions

As we’ve learned, every different shelter has its merits and a set of ideal conditions for use.  You should select your bikepacking shelter taking those merits and conditions into account, along with your personal preferences and budget.  Every bike traveler is different, and so is every journey!  We hope this post has provided some guidance and that you’ll have many comfortable, peaceful nights out on your bikepacking trips!

What did we miss?  What shelter(s) do you use and why?  Let’s keep the discussion going in the comments below!  Thanks for reading!

Categories
Bike Touring Equipment Hermit's Workshop Idaho Planning Resources

Packing for the Smoke ‘n’ Fire 400

Greetings!  I’m a new voice here so I’ll briefly introduce myself.  My name is Ryan King and I’ll be riding the inaugural Smoke ‘n’ Fire 400 bikepacking race with the support of the good folks at Bike Touring News.  I’ve done a small handful of rides like this, including the Oregon Outback in May of this year and a four-day trip on the Idaho Hot Springs Mountain Bike Route in July but this will be my first solo, race-type bikepacking trip.  I’ve always sought out new ways to push my limits as a rider and am excited (and a little nervous) about seeing what I’m capable of through this test.  As a first-time “racer” I’m no expert at any of this so I hope that I can offer some insight into my approach to this event and help others learn from my successes and mistakes while encouraging them to undertake similar challenges of their own.

Bicycle travel can be as simple or complex as you want to make it.  I think this is part of why I enjoy a bikepacking-style approach and make every effort to streamline and simplify my trip rather than finding ways to bring more and more gear.  This takes a good deal of planning and head-scratching sometimes but the joyful freedom of pedaling a bike packed with everything you need and nothing you don’t is well worth the extra work ahead of time.

So, let’s get down to the nitty-gritty.  What do you bring on such a journey and how do you carry it?  Let’s start with the “how” and then get into the “what” after that.


Luggage

For me, the first decision isn’t so much what to pack as how to carry it.  The carrying capacity offered by traditional rack-and-pannier setups is appealing (and ideal for longer trips) but their bulk makes them impractical when one intends to travel light and fast over more rugged terrain.  The benefits of bikepacking-style luggage have been extolled elsewhere but the main advantages for my purposes are lighter overall weight, improved aerodynamics and more clearance on narrow trails or when pushing the bike.

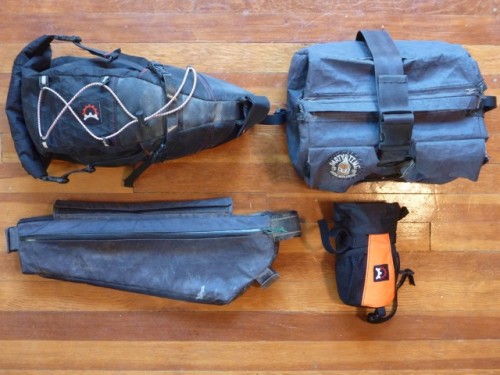
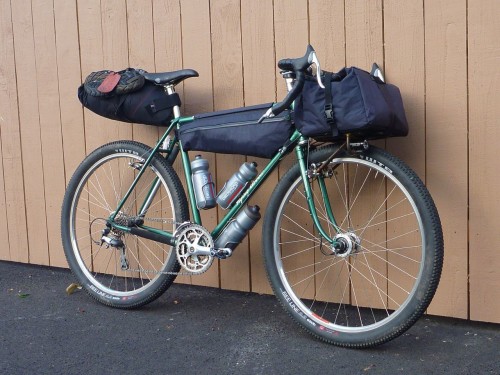
My setup differs slightly from the “standard” bikepacking kit in a couple of ways.  First, I prefer not to carry a backpack or hydration pack so I use a half-frame bag that fits under the top tube with room for water bottles in their cages.  The frame bag does fit a 100 oz. hydration bladder to stretch my water-carrying ability when needed.  Also, my bike is built around drop bars and a medium-size front rack, so I use a rack mounted handlebar bag rather than a handlebar harness.  This allows me to carry odd shaped, non-compressible items and offers fairly easy access to all of the bag’s contents without having to unpack.  For routes consisting of roads and easy singletrack, I find this setup to be ideal.

Although it can create something of a packing nightmare when trying to find space for everything, I find it important to place constraints on the amount of gear I’m able to carry by not allowing myself a place to put it.  This forces a higher level of planning and prioritization that pays off if done right.  Of course, there are potentially serious consequences to leaving a key piece of gear at home but experience and research will be your guide when it comes to what really matters.  Overall, a lighter bike is more fun to ride, you’ll get up the climbs with greater ease, cover rough terrain more easily and be able to enjoy your time in the saddle much more.  If your trip involves more time spent in camp than on the bike, you’ll want to pack very differently.

Here’s my luggage for the Smoke ‘n’ Fire:

P1150752


Sleep Kit

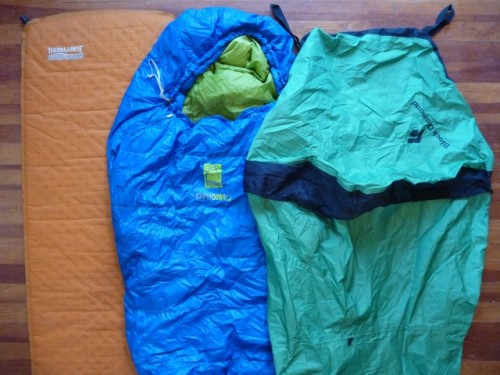
This is one department where opinions are as varied as the riders espousing them.  Some will sleep very little or plan to use lodging along the route, carrying only the bare minimum for survival if forced to camp.  Others will carry a full-size tent, air mattress and perhaps even a camp chair.  Others prefer a hammock rather than sleeping on the ground.  In wet climates a synthetic-fill bag may outperform down which loses its loft when wet.  As outdoor gear gets lighter and more packable, there are lots of good options for bikepacking-friendly gear in this department if you have the coin to spend.  My low-budget approach forces some compromise and I carry more weight and bulk in sleep kit than I would prefer but I know I’ll stay dry and warm in anything but full-on winter conditions.

P1150755

  • Therma-Rest Prolite 3 Sleeping Pad, Small
  • Sierra Designs Zissou 23° Sleeping Bag, 700-fill “Dri-Down”
  • Black Diamond (Bibler) Bipod Bivy w/single pole and 4 stakes


Tools, Spares, First Aid 

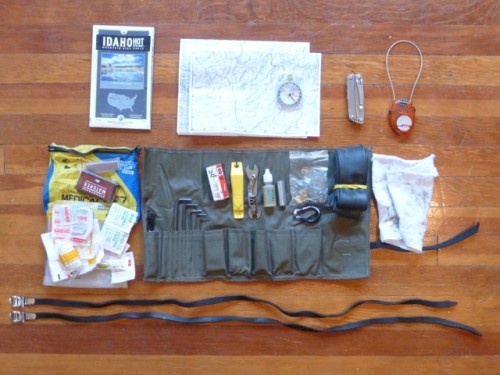
One of the great joys of traveling by bike is its efficiency.  On a bicycle you have ability to cover an immense amount of distance each day, even over terrain that would stop a four-wheel-drive truck in its tracks.  However, one mechanical issue at the wrong time will turn your amazing machine into a glorified luggage cart.  If you don’t like the idea of pushing or dragging your bike for miles on end it is critical to carry the tools needed to fix common mechanicals and know how to use them.  Most modern bikes require only a handful of hex wrenches to perform the majority of adjustments or repairs you’d need to make on the road.  Don’t go off the deep end preparing for every potential catastrophe and weigh yourself down with several pounds of hardened steel that you’ll never use.  If you maintain and service your bike before your trip, you shouldn’t have to perform major repairs in the field.  There also comes a point where you have to place your trust in your equipment and hope for the best.  Your tool needs will vary depending on your bike and route but my tool roll holds pretty much the same kit I would take on a long day ride with the addition of a few “just in case” items.

My first-aid kit looks small by comparison but I tend to ride very carefully on trips like this and rarely suffer much more than the odd abrasion.  The Smoke ‘n’ Fire route is never too far from major roads or outposts of civilization, so I’ll rely on outside medical aid in case of anything more severe.

I plan to use my GPS unit and cue sheet for primary navigation but always like to have good old paper maps as a backup.  I don’t like to place too much trust in electronics.

P1150759

  • Idaho Hot Springs MTB Route Map (shows 90% of Smoke ‘n’ Fire route)
  • Relevant photocopied map pages from Benchmark’s Idaho Road and Recreation Atlas
  • Compass
  • Leatherman Wingman multi-plier
  • Bakoda Cable Lock (for a little peace of mind when making resupply stops)
  • First Aid Kit w/ alcohol swabs, misc. bandages, anti-chafe cream, moleskin patches, waterproof matches.
  • DIY Tool Roll with 6, 5, 4, 3, 2mm hex wrenches, vulcanizing patches and glue, 9 and 10-spd quick-links, tire lever, DIY multitool with chain tool, 8, 9, 10mm open wrenches and bottle opener, chain lube, duct tape, spare Crank Bros cleat, misc. spare hardware, spoke wrench, tube, rag.
  • DIY leather “Junk Straps”
  • Not Pictured: Topeak Road Master Blaster frame pump (on bike)


Electronics

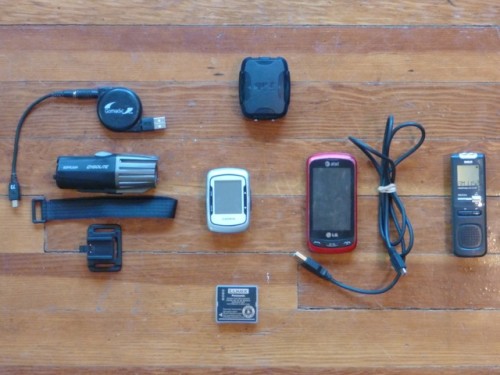
The escape from our screen-filled, flickering electronic world of ones and zeros is an appealing feature of these kinds of rides.  They allow you an opportunity to get back to a more immediate, unplugged, unfiltered, simplified existence.  This is why I carry a minimum of electronic distractions.  I brought an iPod on the Oregon Outback thinking I might need the music for extra motivation but never used it.  I’m constantly shocked and amazed by the desire people have to carry all the mess and noise of the modern world with them into the backcountry.  However, I do appreciate GPS technology for simple route-following and ride tracking, love my digital camera and struggle to imagine a world before high-powered LED lighting.  The lynchpin of this setup is the dynamo hub on my bike which powers my main headlight and a USB charger that allows me to recharge most of my devices on the go.

P1150765

  • Cygolite Expilion 700 USB-rechargable headlamp w/helmet mount
  • Garmin Edge 500
  • Gomadic Charging Cable (specific to Edge 500, also charges the Cygolite)
  • SPOT Tracker
  • Cell Phone & Charging Cable
  • Digital Voice Recorder (easier than a paper journal for ride notes)
  • Spare Battery for Panasonic Lumix DMC-TS2 (Camera not pictured. Guess why.)
  • On Bike, Not Pictured: Supernova E3 Pro Headlamp and Sinewave Cycles Reactor USB Charger, powered by Shimano DH-3N80 generator hub. Portland Design Works Radbot Taillight


Clothing

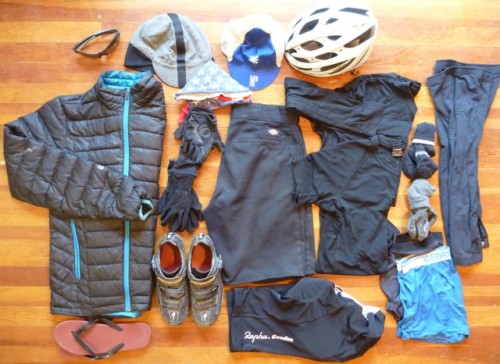
Similar to tools and spares, this is another department where it is easy to overpack in a vain attempt to be prepared for anything.  In my estimation, if there isn’t a time where I’m wearing nearly every article of clothing I packed, I brought too much.  I’ve fallen in love with wool shirts as opposed to the wicking synthetics typically used in technical clothing.  They seem to hold just enough sweat or water next to my skin to allow it to cool me off when hot and never feel chilly or clammy when cold.  For a trip like this where I don’t plan to spend much time in towns or in camp I don’t bring changes of clothes.  I’ll be stinking to high heaven after a few days but bringing extra clothes just for the luxury of feeling a little more “civilized” isn’t worth it to me.  However, with early morning temperatures expected to be below freezing in the high places I want to give myself the best chance of staying warm.

P1150768

  • Smith Pivlock v90 sunglasses, platinum lens
  • Wool cycling cap w/earflaps
  • Generic cotton cycling cap
  • Lazer Genesis helmet
  • Sierra Designs Gnar Lite down jacket
  • Pearl Izumi cut-off half-finger gloves
  • Seirus softshell long-finger gloves
  • Dickies cut-off shorts
  • Icebreaker wool long-sleeve
  • Icebreaker wool short-sleeve
  • Wool socks, thin
  • Wool socks, thick
  • Leg Warmers
  • Synthetic (quick drying) underwear for hot spring or river dips
  • Icebreaker wool underwear
  • Rapha bibshorts
  • Specialized Pro MTB shoes
  • Cheap flip-flops
  • Not Pictured: Giro Insulated Vest


Hygiene and Hydration

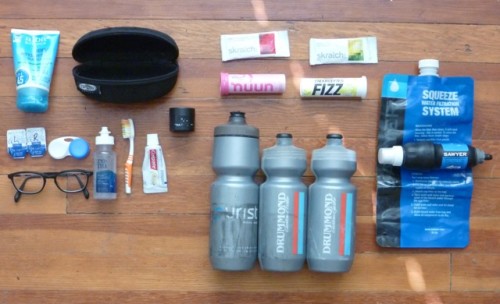
I tend to keep things pretty simple here as well, especially for short trips like this.  I find some kind of electrolyte supplement to be a big help for warding off cramps.  I also get tired of plain water and like having one bottle of water and one of some kind of drink mix on the bike at all times, mixing up the flavors for some variety.  It’s easy to get sick of a particular taste when you’re sucking it down hour after hour, day after day.

For a trip this short, I’ll make do with quick stream baths to get the worst of dust and dirt off but would never go without my toothbrush!  However, I will use alcohol wipes in my first-aid kit to keep my backside clean.  The last thing I want to deal with is an infected saddle sore.

P1150769

  • Sunscreen
  • Hardshell sunglass case for glasses and toiletries
  • Spare contact lenses
  • Lens Case
  • Contact Solution
  • Glasses
  • Toothbrush
  • Toothpaste
  • Chamois cream
  • Skratch Labs drink mixes
  • Nuun electrolyte tablets
  • Hammer Fizz electrolyte tablets
  • Sawyer Squeeze water filter and bag
  • Water Bottles, two 22 oz., one 26 oz.


Cooking and Nutrition

This is one area that I tend to overprepare in.  In an ideal world, I would carry just enough food to get me to my next resupply location without going hungry.  In the real world, I’d always rather have a little extra.  I also never know what I might find at unfamiliar stores so I prefer to carry a larger supply of food that I know packs well and keeps my fire fueled rather than making do with whatever I can get my hands on.   Also, this prevents me from being at the mercy of small country markets that often have irregular and unpredictable business hours.  There is comfort in the knowledge that if shit hits the fan I won’t be going hungry.

For rides like the Smoke ‘n’ Fire, some light-and-fast purists will leave the cookset at home.  For me, the comforting, morale-boosting ritual of preparing and enjoying a warm meal or hot beverage is well worth the extra gear and preparation time.  I prefer to cook simple dehydrated meals where I can just boil a small pot of water and add food.  This allows me to carry my simple, compact and lightweight alcohol stove.  There are lots of dehydrated food options at grocery stores with well-stocked bulk departments in addition to the freeze-dried meals available at outdoor stores.  Typically, I’ll carry oatmeal with dried fruit, granola or trail mix for breakfast and some kind of soup or bean mix for dinner.  I’ll supplement these bases with whatever I pick up along the way.  Jerky, smoked fish, tuna packets, summer sausage and cheese are favorites for quick protein and require no additional cooking.  I’ll also try to pick up fresh fruit where possible and eat it immediately since it doesn’t pack well.  When time and funding allows, a break for a hot meal in town is always a morale booster and gives me a chance to take on extra calories that I don’t have to carry.

On the bike, I’ll eat just about anything.  I like prepackaged food bars for ease of carrying/consumption, calorie density and variety of flavors/nutrients.  ProBars are among my favorites and I rarely get tired of them.  I’m excited to try out Revelate’s handlebar-mounted feedbag on this trip as it will allow me to have a bag of trail mix or other snacks easily accessible for one-hand munching.  In the past, I’ve finished trips with huge quantities of trail mix left over because it is so difficult to eat while riding and I’m typically eating my breakfast or dinner if I’m in camp.

For many of us, a hot cup of coffee in the morning is not a luxury but a necessity.  However, coffee beans and the apparatus needed to prepare them can be difficult to justify carrying and create additional waste that must be dealt with in a responsible way.  Fortunately, Starbuck’s VIA or Mount Hagen instant coffee packets are a workable substitute.  I’d much rather drink VIA than actual Starbuck’s coffee; at least it isn’t burned yet.  I also enjoy a warm cup of caffeine-free tea in the evenings while taking in the stars.  Lemon ginger tea with a splash of whiskey is a pretty delightful nightcap!

P1150777


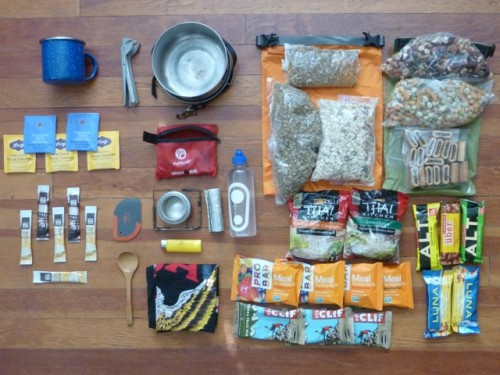
  • Enameled Cup
  • Pot Gripper
  • MSR 1-liter stainless steel pot w/lid
  • 1 cup Refried Bean mix
  • 3 cups Lentil Soup mix
  • 4 cups Oatmeal w/dried mixed fruit
  • 2 Thai Noodle Soup packets
  • Trail Mix
  • Sesame Cheddar Sticks and Wasabi Peas
  • Fig Bars
  • 12 assorted Energy Bars
  • Handkerchief
  • Bamboo Spoon
  • Pot Scraper
  • DIY Beer Can Alcohol Stove
  • DIY Bicycle Spoke Pot Stand
  • DIY Aluminum Foil Windscreen
  • Denatured Alcohol
  • Lighter
  • Starbuck’s VIA Instant Coffee
  • Assorted caffeine-free Tea Bags

I think that’s everything!  Did I forget anything?  Now for the task of packing it all into my bags and onto the bike!  Packing strategies also vary widely but that’s a topic for another post.  Until then, here’s a photo of the Rando-Gnar all packed up at the start of the Oregon Outback.

P1140035

In my next pre-ride post I’ll get into some of the planning, strategizing and goal-setting I like to do when assessing a route.  Follow the link to read on!

Thanks for reading; I look forward to your comments and feedback!

[Looking for more Smoke ‘n’ Fire content?  Check out Ryan’s post-ride recap here.]


Categories
Bike Touring Equipment

Tactical Flashlights and Survival Kits

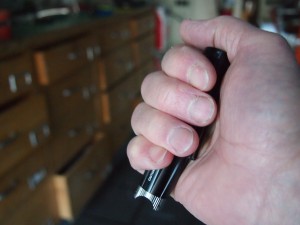
Ever since I read “How To Use A Flashlight Tactically” on the Art of Manliness (yes, that’s for real) blog I have wanted a tactical flashlight. A tactical flashlight is not much bigger than the palm of the hand, has a bright LED beam, is made of impact resistant material, is waterproof and has a robust, shielded on/off switch. Technically a tactical flashlight would have “striking” bezel, a hardened aluminum piece which is scalloped or shaped in such a way that the flashlight can be used as a tool or for self defense. OK, I admit that if faced with the situation, I’m not sure I would have the wits or the skill to use the flashlight to temporarily blind and disorient an assailant long enough for me to get away or to punch him out. But the thought that I could is somehow comforting.

tactical flashlight fits in the palm of the hand
Maybe I can punch my way out of a wet paper bag with this!

My new flashlight is small enough to conceal in my fist with only the bezel sticking out and the on/off switch cradled against my thumb. And it has a metal clip to secure it to the pocket of a bike bag for quick access, or to attach it to the brim of a baseball cap so I can use it as a headlamp.

This flashlight weighs about 2.4 ounces or 70 grams. I don’t think I would want one much heavier.

On a related note:
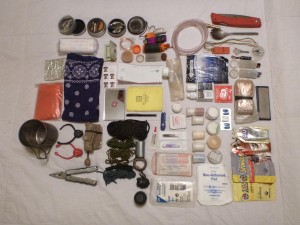
Brother David Sunshine (pretty sure that’s his given name) posted on the Surly Bikes blog an article about his survival kit. While we’re not necessarily preparing for the apocalypse….we’re just going bike touring…..there are some good ideas for what to take with. And the specifics will change for each person depending on where they are going; a trip around the San Juan Islands in Puget Sound is different than riding the length of the Baja.

Items included in survival kit
From surlybikes.com

I can see that my own survival kit needs some work. For backcountry touring I want to get a signal mirror and a compass. And my fire starting skills could be improved. I should carry a fire steel and learn how to use it. When I was in Boy Scouts we spent a lot of time building fires. If you couldn’t start a fire with only one match and without paper, it could be embarrassing. So much of the fire building process was in the prep…plenty of dry tinder, several stacks of dry twigs in graduated sizes, then larger sticks and logs…and in the structure….making a teepee shape over the tinder out of the smallest dry twigs and slowly adding bigger twigs as the flame grew. What I did not know until I read this is that inner tubes will light on fire pretty easily. So having several strips cut out of old inner tubes means I will always have fire starter. Not sure that would have qualified in the Boy Scouts but, oh well.

Categories
Idaho

Celebration Park and Swan Falls Dam- Ride Report

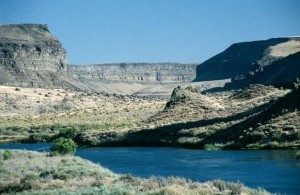
Photo from the BLM website

Day One Tuesday, April 17
Boise to Celebration Park – Total distance; 43 miles

I stare at the 22 oz. Rogue Dead Guy Ale for about five minutes before deciding not to buy it because I don’t want to carry it the rest of the way to Celebration Park, and surely there will be be at least a convenience store in Melba where I can get a decent beer to drink as I set up camp. There is indeed a market in Melba but it looks pretty homemade and, no you can’t buy singles but there are tallboy cans so I buy one of the least offensive…24 ounces of PBR. I often wonder why out of the way places don’t stock flavorful beer, since the distributors are the same ones that deliver the Bud Lite. And, is it just me or do real men not drink micro-brews? Bike touring forces one to face the weighty, existential questions.

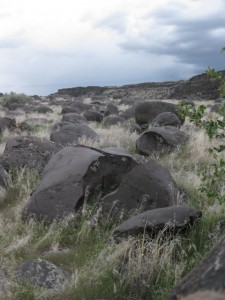
Boulder field
Boulders deposited by the Bonneville Flood

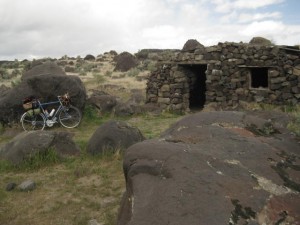
When the Bonneville Flood slammed through here a few years back, it tore chunks of volcanic rock the size of school buses off the walls of the Snake River Canyon. Bouncing along under water the chunks were rounded and smoothed and then deposited downstream…a jumble of huge boulders in the narrowest part of the canyon and a more even distribution of smaller boulders where the canyon widens out and the water slowed down.

I scout out what appears to be the best place to hang the hammock and get after it because the clouds are turning blacker and more menacing and I can see lightning to the north. I am ecstatic that the parking lot is empty and I will have the whole place to myself. Then a car comes fishtailing down the gravel road from the “east campground” and out the entrance road and after the dust settles I hear sounds of a beer blast coming from the same direction. Oh well, that’s what they make I-pods for.

Various Boy Scouts have made Eagle projects out of building structures at Celebration Park and so there is a network of boardwalks and decks and even an atlatl range. There are bathrooms and a visitor center and the place starts humming in the morning with park staff getting ready for the busloads of fifth and sixth graders coming that day. That entertains me for a while but, with peace and quite my main objectives for the trip, I decide to push off (quite literally as will soon become apparent)

The rain is coming, but I think we are ready.

Day Two Wednesday, April 18
Celebration Park to Swan Falls Dam – Total Distance; 16 miles
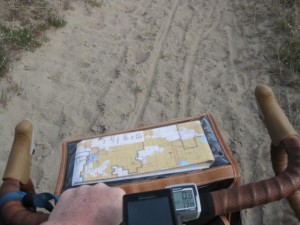
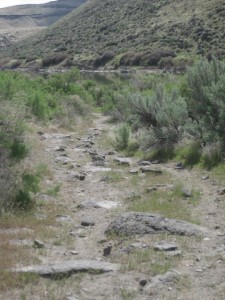
Google Maps shows what looks like a road along the Snake River between Celebration Park and Swan Falls Dam. After maybe a mile or maybe two, motor vehicles are restricted and the road becomes double track and then single track and in places almost non-existent. I spend some time pushing the bike through loose sand encouraged by Wendell’s report after riding here last week that the loose sandy section is not too extensive. But with a loaded bike weighing probably close to 70 pounds and relatively skinny 700cx32 tires I end up pushing quite a bit. But there is no rush and the scenery is on par with that of southern Utah, so I push along and ride when the ground is firm enough.
Other sections of the path are interspersed with melon sized rocks which means I ride (scoot) with one foot clipped in and the other pushing. Even further on, where the trail occupies a narrow shelf between the river and the canyon walls, and is hemmed in by willow bushes, tumbleweeds have collected in the path. They are impossible to miss and every time I ride over one it attaches to fenders/chainrings/derailer/chain/wheels….so I am stopping every twenty or thirty feet to pull them out.
Motor vehicles are restricted over about eight of the twelve miles between Celebration Park and Swan Falls Dam. The last four miles to the dam are on gravel road. Swan Falls Dam is owned by Idaho Power and there is a day use area with boat ramps and picnic tables and bathrooms, but no camping. There is too much activity and noise around here anyway so I cook some lunch, refill the water bottles and head back down the gravel road and about half a mile down the car-less path and find a spot to pitch shelter just before the rain comes again.


Day Three, Thursday, April 19
Total Distance; 47 miles

I am in the heart of Morley Nelson Snake River Birds Of Prey National Conservation Area. Laying under my improvised shelter this morning, waiting for the rain to stop, I can hear many species. Crows (mostly), mourning doves, geese, ducks and loons? Sometimes I am sure I hear people but it is just the birds laughing at the old guy hiding under a tarp. Climbing up the switchbacks out of the canyon this morning I stop to watch a golden eagle floating overhead and he is soon joined by three others. The steepness of the terrain means that they are very close when they pass over and I watch them for several minutes. The whole time I spend watching, none of them flap their wings. Must be nice. Last night I startled a pair of pheasants before they startled me with their drum beat winged escape. I didn’t encounter any vampires but I did observe a couple of George Romero-esque zombies disguised as sight-seeing tourists.

The eight miles of trail along the river was definitely the highlight of the trip and made the jaunt more than worthwhile. When I do it again I will have a bike with fatter tires. A fat bike like the Surly Pugsley would be perfect and I think the whole trail would be rideable even with a loaded bike. 700×40 or 26″x2″ tires would be the minimum cross sections for tires through here I would think. Any bike capable of the whole trip without driving would necessarily be a compromise; one that can handle the off road sections while still being able to cruise on the pavement.

Categories
Tours and Rides

Overnight To Montour Report

photo of camping bike and hammock
Montour Bureau of Reclamation campground

Well, the weather finally cooperated this weekend and we were able to complete our Boise-Montour-Boise overnight bike trip. We were attempting to find a passage over the foothills without traveling on the main highways. That didn’t exactly work out, but the adventure and the exploration were really the main point.

And the timing couldn’t have been better. It had been a difficult week and the combination of work-a-day events and everyday average life events were beginning to feel oppressive. Funny how halfway through the first day the thought patterns in the brain were beginning to be a little bit more objective and coherent. Such is the power of getting out on the bike!

Just after the road turns to dirt and just before it becomes Pearl Road

photo of camping bike along road
Where's Sky King?

Eagle Road becomes Willow Creek road as one travels north from Eagle and about 17 miles from our front door it turns into dirt. A fairly well maintained dirt road which goes basically straight up for the next 8 miles, and becomes Pearl Road along the way. We were watching for a road which, according to Google Maps, veered off to the left shortly after the abandoned mining town of Pearl and wound back down towards Montour. We never saw this alleged road and finally ended up on Highway 55 just outside of Horseshoe Bend. Dropping down into Horseshoe Bend on the old highway and then about 11 miles on scenic highway 52 along the Payette River brought us to Montour. About 10 miles more than we had planned on, and the 47 total miles for the day took us almost 5 hours to ride. Luckily, we were able to replenish our carbohydrates and spirits at the general store!

photo of front basket loaded for camping
Can you spot the bike touring dietary supplement?

Being so replenished, and having set up the hammocks, we proceeded to cook our pasta primavera and to enjoy the sunny windless evening, with mosquitoes. Sitting in the sun and reading, we could have been anywhere….Texas, California or Croatia, and yet we were only a few hours from home.

image of Hennessy Hammocks
Dual Hennessy Hammocks

The next morning we decided to take the dirt road on the north side of the river into Emmett instead of taking the main highway. According to the campground host, the road was well maintained with little loose gravel and only one climb. Never listen to a cigarette smoking diesel pickup driving campground host. I’m sure the road is a piece of cake driving the pickup home from the bar in Emmett. It’s just that the climbs were numerous and sharp, and the washboard effect was in place on most of them….. heck of a way to start the day.

After a big breakfast in Emmett, the ride up Old Freezeout hill and then on highway 16 back into town was relatively uneventful. And so, with just a little bit of planning and just a little over 24 hours, we were able to get away for a little adventure, recharge and come back raring to go and ready for the next kick in the teeth.

Another successful adventure

Categories
Bike Touring Tips

Tent Camping App

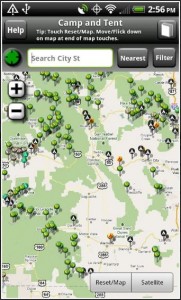
Today I found a link on the Bike Forums Touring site for an app for finding camping spots using the IPhone or Android.  It’s called AllStays Camp and Tent. With it the bike tourist can find campgrounds near their current location and over 13,000 campgrounds in the US and Canada.

Screen shot for camping app
Camp and Tent app screenshot


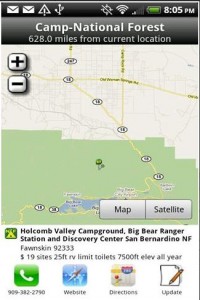
screen shot detail camp and tent
Details Camp and Tent screenshot

It shows maps, directions and details about the campground like number and types of sites, amenities and phone numbers. This particular version only shows campgrounds with tent sites but there is an app for camping with RVs as well. It has a manual search feature with states and towns listed alphabetically with the number of listed campgrounds, and the searches can be filtered by Forest Service, KOA, National Park, etc.
The Bike Hermit is pretty excited to find this, but then he doesn’t get out much either.

Categories
Bike Touring Equipment Nutrition for the Bike Tourist

Cook Stoves for Bike Touring

Back in the day there were not a lot of choices in lightweight backpacking or bike touring stoves. The bike hermit used (and still has) a Svea brand stove. Aside from being dangerous, unreliable, inconsistent, inefficient, heavy and difficult to use, that stove is great. Nowadays there is a better selection of stoves from which to choose, with various models burning everything from white gas to isobutane/propane to denatured alcohol to sticks. The different fuel sources all have pluses and minuses and most people will have a preference for one or the other based on their own demands.

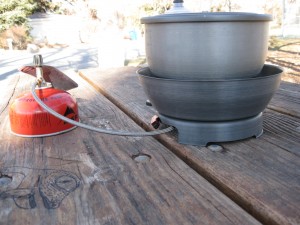
My most recent experience has been with the Primus EtaPowerTrail EF Stove

Primus EtaPower stove in use. The black knob on the line attached to the top of the fuel canister allows for flame adjustment.

This is an isobutane/propane stove so the fuel source is a sealed canister with a screw fitting for a fuel line which connects to the burner. The fuel is pretty easy to find at most outdoor stores and even Walmart, so even though you can’t fly with it or ship it, you can get it on route.

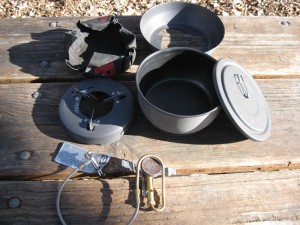
The kit I purchased includes the burner unit with fuel line , a base, a windscreen, a 1.7 liter aluminum pot with a lid and a pot handle.

All the parts

This is not the most compact stove available but it has some features I like.
Namely;
-Relatively large and very stable base.
-Windscreen
-Easy to light
-Great heat output Boils about 3 cups of water at 32 degree F. ambient temp. in about 4 minutes.
-1.7 liter pot is good for cooking pasta dishes or for making freeze dried food with water left over for coffee or cleaning.
-Separate, light, easy to use pot handle
-Piezoelectric start precludes need for matches

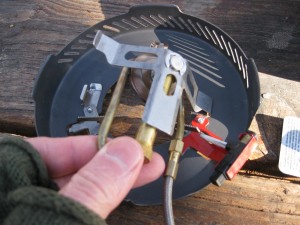
The burner unit snaps into the base.

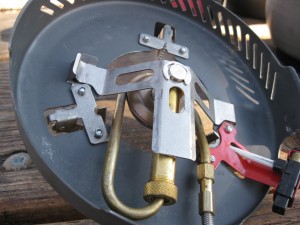
The burner in place. The piezoelectric starter button is the black button in the lower right of the photo above

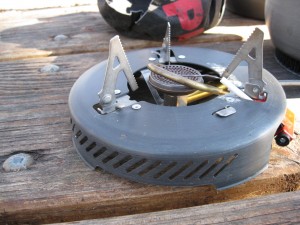
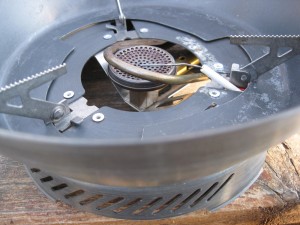
Base unit with burner attached, ready for windscreen

The windscreen sits on the base and is secured by rotating counterclockwise to engage the helical cut outs with the bases of the pot support wings. The wings are then folded down to provide a level pot surface.

Pressing the piezoelectric ignition button creates a current in the wire which is suspended over the burner plate and a spark generates between the end of the wire and the plate, igniting the fuel coming through the line from the canister. If the wire gets bent and is too close to the plate, no spark will generate and the wire needs to be re-positioned away from the plate surface until the spark is visible when the ignition button is pressed.

The space between the end of the wire and the plate may need to be adjusted to achieve a spark when the ignition button is pressed.

Even though this might appear to be a complicated kit, it is well made and durable. I need to be more diligent in making sure all the connections are tight between uses. The entire kit (minus fuel canister) weighs about 27 ounces or 765 grams. Now I see on the Primus website they have a stove that is slightly lighter but much more compact, the Primus Eta Lite

Primus ETA Lite Stove

The Primus ETA Lite Stove sets a new standard for compact, all in one backpacking stove… [More]

Price: $99.95

I think when it is time to get a new stove for Sky King we may be looking at that one.

Categories
Tours and Rides

Sub 24 Hour Overnight – S24O

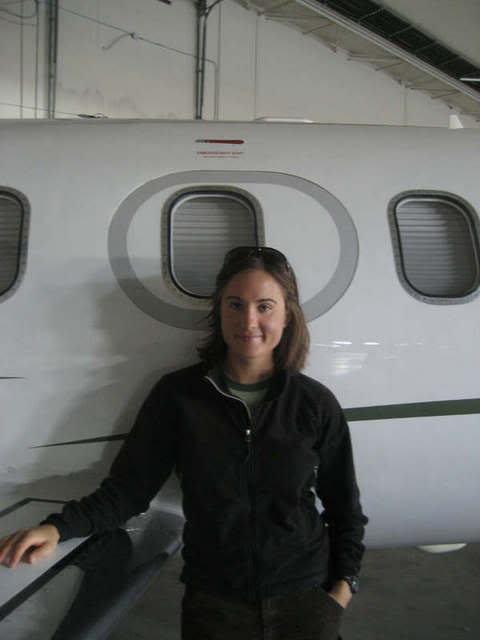
Sarah is a friend of mine who flies Lear jets for a living. She also races bicycles on the road, but I won’t hold that against her 🙂  She borrowed my BOB Yak Plus Trailer (with Dry Sak) (yes, this link takes you to Amazon.com but if you follow it and buy a trailer I make a little money, so if you’re going to buy one anyway………..)
and some of my camping gear last summer for a decidedly slower paced trip and her first ever bike tour. She went solo to Tenmile Campground northeast of Idaho City. She tells the tale here.

It was fun to help her plan her trip and it was interesting  listening to the questions of a noob to bike touring.  This is a great way to get a shakedown tour, figure out if you like it and the things to take and those to leave behind. So, it doesn’t need to be a grand, complicated, time consuming venture. Anybody can do it!