Categories
Hermit's Workshop

An Important Tool When You Need It

Somewhere I’ve heard the sentiment that youth might be wasted on the young. Sometimes I wonder if that doesn’t apply to pure dumb luck as well. When I was a good deal younger than I am now I was touring in New England. Just outside of a small Vermont town, as I started up a longish grade, and as the sun was starting its descent, I heard the telltale snap of a spoke in the rear wheel breaking. Then a moment later, because of the added stress on the remaining spokes, a second one snapped. My wheel was distorted but not too much to prevent me from wobbling back into town.

Here’s where the luck came in. There was actually a bike shop in this little town and they had a couple spokes in the right length. For whatever reason (I seem to remember it was closing time) I didn’t have them replace the spokes for me. Instead I walked across the street to a service station (told you it was a long time ago) borrowed a hammer and a screwdriver and sat on the concrete floor in an empty bay.

This was before the days of cassettes and I had a 5 speed freewheel on my Peugeot PA10, but I had no way to unscrew it from the hub. So I used the hammer and screwdriver to take off the top race in order to take the freewheel apart to access the spoke heads in the hub. I still can’t believe I was able to do it and get the spokes replaced and the freewheel reassembled without losing any of the 36 little ball bearings or the springs or pawls inside the freewheel.

Nowadays on most bikes the freewheeling part, or cassette body will be part of the wheel’s hub and the cassette, or group of cogs, will slide over the cassette body and be held in place with a lock ring.
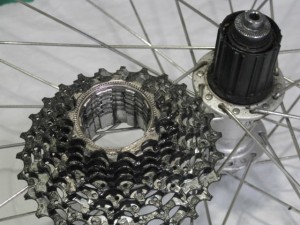
cassette next to cassette body
The cassette body is attached to the hub. The cassette cogs are slotted on their inner suface and these slots mate with the ridges on the cassette body
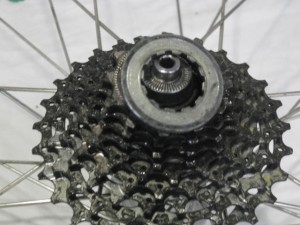
shows cassette lock ring on top of cassette
The cassette cogs are held down with this lock ring which screws into the cassette body.

You can see that if a spoke breaks on the cassette side of the wheel, the cassette needs to come off in order to get the broken end out and the new spoke in (did I mention I now carry spare spokes when touring? Here’s a way to do it).
Normally this requires a special tool with splines to match the lock ring, a big honkin’ wrench to turn the tool and another big wrench called a chain whip to keep the cassette cogs/body from turning. The Unior 1669 cassette lock ring tool weighs just a few ounces and can loosen the lockring and tighten it again with minimum fuss and save your bacon.
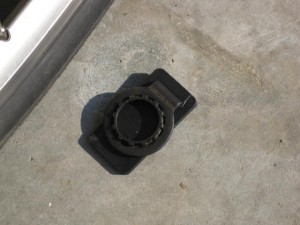
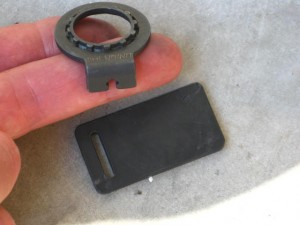
Unior 1669 cassettte lock ring tool
The Unior 1669 cassette lockring tool, all folded up.
Unior 1669 cassette lockring tool
The tool incorporates a spoke wrench. The little plastic plate is held between the tool and the bike frame to protect the paint.

Using this little beauty to loosen a cassette lockring is not exactly intuitive. The first step is to remove the wheel and the nut on the quick release skewer. Then the tool can be slipped into place with the teeth of the tool meshing with the lockring teeth. Now the outside of the tool is flush with the end of the hub axle cones or adapters and the wheel can be put back on the bike and the skewer tightened to hold it in place. The tangs on the tool need to be pointing down in order to slip in between the derailleur hanger and the chain stay.
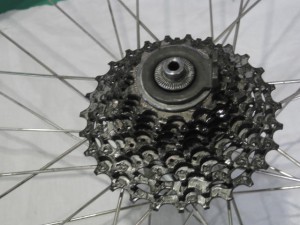
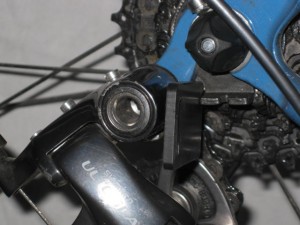
The cassette lockring tool in place
The cassette lockring tool in place. Note how it is flush with the hub axle adapters. Now the quick release skewer can be put back in and the wheel re-mounted on the bike.
cassette lock ring tool in place
The tool is in place, the wheel is secured and the plastic, paint protector plate is ready.

Now, giving a mighty effort with both hands on the crankset, the lockring can be loosened. When re-installing, the rear wheel is manually turned backwards while holding the plastic plate on the opposite side to protect the paint on the chainstay. Brilliant, really.

Categories
Drivetrain Touring Bike Components

Fears of Gears,Gear Inches, Gear Development

Photo of Shimano 10 speed cassette
This is a "10 speed" cassette

Hey baby, what kind of gearing you got on that thing?

What kind indeed.  I guess I got gears in the front and gears in the back. But how do I know what my “gearing” is?  One way to measure mechanical advantage on a bicycle is to use a concept called “gear inches”. Gear Inches? Huh? Gears have inches? What about gear development? What? Are gears reaching puberty? What’s a gear? On a bicycle we use toothed wheels (the front chainring and the rear cogs) to give us mechanical advantage. That means we can make our legs go around really fast compared to how fast the rear wheel is going around…..like when we are climbing a hill. Or we can make the wheel go around really fast with relatively little motion from our legs…..like when we’re going downhill with a tailwind, just by changing the combination of front and rear chainrings/cogs.

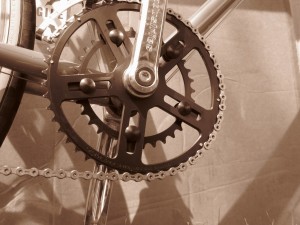
Photo of a double crankset ie,one with two chainrings
A double crankset.
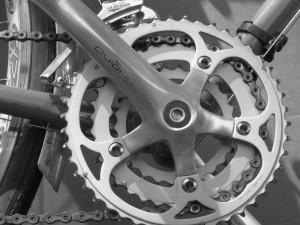
Photo of a triple crankset, one with 3 chainrings
The triple crankset

Really, “gear inches” are just a way to quantify the mechanical advantage offered when the chain is engaged on a particular size of front chainring and a particular size of rear cog. A gear inch is not a real unit of measure –                   “Why are women bad at estimating lengths? Because they have always been told “this is 8 gear inches.””

But it is a useful way to compare different combinations of gears to achieve the riders goal. If I know how many teeth are on each of my front chainrings and on each of my rear cogs I can figure out the gear inches for every combination and plot them on a chart.

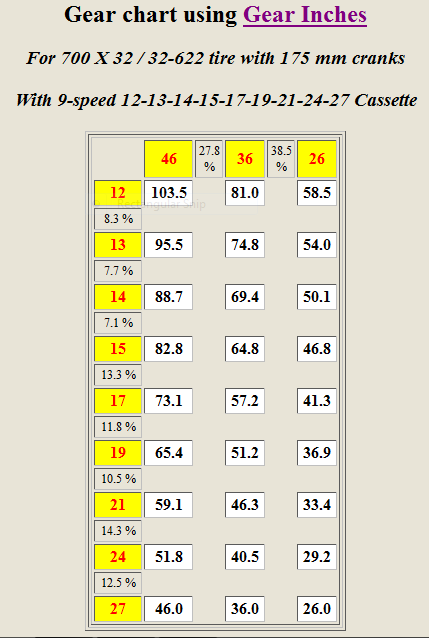
Snapshot of a chart showing gear inches for 46,36,26 crankset and 12-27 rear cassette
Chief's current gear range in "gear inches"

The late Sheldon Brown has an online gear calculator that makes figuring gear inches snap like. This chart shows the gearing setup on Chief, my touring bike. I’m using a crankset with chainrings of 46, 36 and 26 teeth and a rear cassette which ranges from a small cog of 12 teeth to a large cog of 27 teeth. Giving me a top gear of 103.5 gear inches when the chain is on the big ring in the front and the small cog in the back…. for those high speed descents, and a climbing gear of 26. If I had a larger big cog in the back and/or a smaller small chainring I would have a lower number for my climbing gear and hence a little more mechanical advantage. Some touring bikes, for example, the Surly Long Haul Trucker come stock with a low gear of 21 -22. The 103.5 top gear has been adequate for my purposes.

Comparing the values on the chart, it becomes apparent that their is some overlap, some redundant gears. Noticeably, the 46/27 (46 tooth cog in the front and 27 tooth cog in the back) and the 36/21. It’s entertaining to play with different gear combinations to try to get the best range with little redundancy. The most important thing though for the touring cyclist is to have a low gear that provides enough mechanical advantage to get them over the hills on their planned route. Knowing that  number will only come from experience but  21 to 22 gear inches should work for most people on most routes. For mountainous, off road touring a low gear of 18 to 19 might be more suitable.

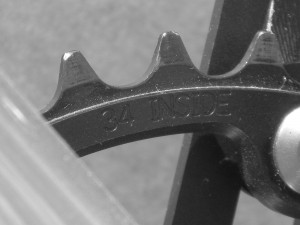
The number of teeth on a chainring are marked.
Most chainrings will have the number of teeth marked on either the front or back of the ring.
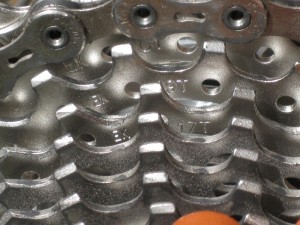
The number of teeth on each cog in the cassette is marked on the back
The number of teeth on each cog of the cassette is usually marked on the front. Not always easy to see, especially on dirty cogs.