Categories
Bottom Brackets and Crank Sets Drivetrain Touring Bicycles

Bottom Brackets

At the risk of talking down to some readers and over the head of others I feel the need to explain the term “bottom bracket”. According to Sheldon Brown’s Bicycle Glossary a bottom bracket is:
The part of the frame around which the pedal cranks revolve, also the bearings and axle assembly that runs through the bottom bracket shell of the frame.
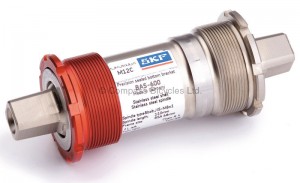
SKF Bottom Bracket
This is an SKF brand bottom bracket. The red cup slips off to allow the unit to be threaded into the bottom bracket shell.

Looking at the late Mr. Brown’s page I realized I am opening a bona fide can of worms. There are several bottom bracket “standards”, and bottom bracket/crankset interfaces. We won’t even get into “outboard bearing” and “BB30” and other new standards which are mostly calculated to keep the buying public buying, while claiming to add some performance advantage…not performance related to the durability or function of the piece… but of the rider/bike.

“Square taper” bottom brackets are made to work with “square taper” cranksets and cranksets with suitable chain ring sizes for touring generally are of the square taper variety. Clink this link for a discussion of gears and gearing. So this series of pieces will be about square taper bottom brackets.There are still compatibility issues to think about though. The taper on Italian (Campagnolo) cranks and bottom brackets are different from the taper on cranks and bottom brackets made anyplace else in the known Universe, which actually is typical of Campy parts. And bottom brackets come with different spindle lengths. The correct spindle length for a given bicycle will be a function of the width of the bottom bracket shell, the shape of the chain stays and of the shape of the crank. For example: with a Sugino XD500 (XD2) triple crank set on a Surly Long Haul Trucker, a 107mm to 110mm spindle length works well.

Before the widespread use of cartridge bearings, bottom brackets were designed with loose balls or caged balls running on races inside the cups and races shaped into the spindle. Mechanical seals or o-rings were used to keep out water and dirt. Nowadays the spindle is held inside a case by means of sealed cartridge bearings pressed onto the spindle. The only seals being those on the bearings themselves. A less than ideal state of affairs for the part of the bicycle in a location that will be sprayed from time to time with a slurry of water, grease, oil, de-icer, sand and grit.

So, what’s the dyed-in-the-wool bike tourist to do? In the following posts we will explore some of the available options for touring bike bottom brackets. If the idea of reading about that titillates you, you should think about getting a life.


Categories
Drivetrain Touring Bike Components

Fears of Gears,Gear Inches, Gear Development

Photo of Shimano 10 speed cassette
This is a "10 speed" cassette

Hey baby, what kind of gearing you got on that thing?

What kind indeed.  I guess I got gears in the front and gears in the back. But how do I know what my “gearing” is?  One way to measure mechanical advantage on a bicycle is to use a concept called “gear inches”. Gear Inches? Huh? Gears have inches? What about gear development? What? Are gears reaching puberty? What’s a gear? On a bicycle we use toothed wheels (the front chainring and the rear cogs) to give us mechanical advantage. That means we can make our legs go around really fast compared to how fast the rear wheel is going around…..like when we are climbing a hill. Or we can make the wheel go around really fast with relatively little motion from our legs…..like when we’re going downhill with a tailwind, just by changing the combination of front and rear chainrings/cogs.

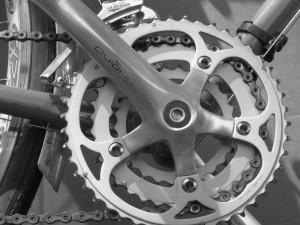
Photo of a double crankset ie,one with two chainrings
A double crankset.
Photo of a triple crankset, one with 3 chainrings
The triple crankset

Really, “gear inches” are just a way to quantify the mechanical advantage offered when the chain is engaged on a particular size of front chainring and a particular size of rear cog. A gear inch is not a real unit of measure –                   “Why are women bad at estimating lengths? Because they have always been told “this is 8 gear inches.””

But it is a useful way to compare different combinations of gears to achieve the riders goal. If I know how many teeth are on each of my front chainrings and on each of my rear cogs I can figure out the gear inches for every combination and plot them on a chart.

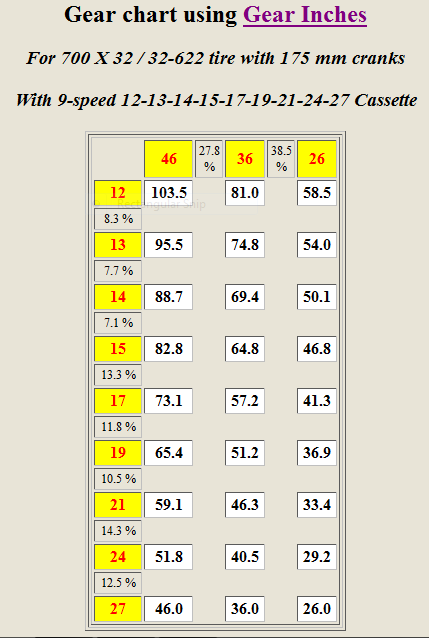
Snapshot of a chart showing gear inches for 46,36,26 crankset and 12-27 rear cassette
Chief's current gear range in "gear inches"

The late Sheldon Brown has an online gear calculator that makes figuring gear inches snap like. This chart shows the gearing setup on Chief, my touring bike. I’m using a crankset with chainrings of 46, 36 and 26 teeth and a rear cassette which ranges from a small cog of 12 teeth to a large cog of 27 teeth. Giving me a top gear of 103.5 gear inches when the chain is on the big ring in the front and the small cog in the back…. for those high speed descents, and a climbing gear of 26. If I had a larger big cog in the back and/or a smaller small chainring I would have a lower number for my climbing gear and hence a little more mechanical advantage. Some touring bikes, for example, the Surly Long Haul Trucker come stock with a low gear of 21 -22. The 103.5 top gear has been adequate for my purposes.

Comparing the values on the chart, it becomes apparent that their is some overlap, some redundant gears. Noticeably, the 46/27 (46 tooth cog in the front and 27 tooth cog in the back) and the 36/21. It’s entertaining to play with different gear combinations to try to get the best range with little redundancy. The most important thing though for the touring cyclist is to have a low gear that provides enough mechanical advantage to get them over the hills on their planned route. Knowing that  number will only come from experience but  21 to 22 gear inches should work for most people on most routes. For mountainous, off road touring a low gear of 18 to 19 might be more suitable.

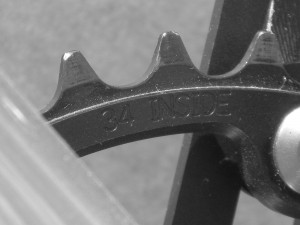
The number of teeth on a chainring are marked.
Most chainrings will have the number of teeth marked on either the front or back of the ring.
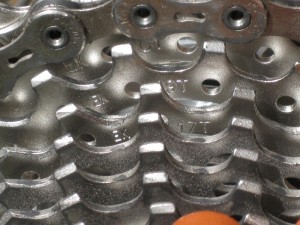
The number of teeth on each cog in the cassette is marked on the back
The number of teeth on each cog of the cassette is usually marked on the front. Not always easy to see, especially on dirty cogs.