Categories
Bikefishing Bikepacking Idaho Idaho Hot Springs Mountain Bike Route Other Our Trips Surly Bikes

Middle Fork Sub24O


A few months back, I came across a small article about a Sub24O ride from Crouch, ID to Boiling Hot Springs. After posting said article to Facebook, I find that I have 3 general types of friends, the kind that will click that little ‘heart button’ and then comment something like “you are so badass, I wish I could do something like this”, well dude you could, and you should. Then there are the people, who you probably haven’t spoken to in years, that will like and share the post and then go do it on their own, with their own bike touring squad. The best kind, however, are the ones that text you later, with genuine interest, and over tacos you start to develop a plan. Many beers and several puns later, a weekend was chosen and the gears were put in motion (pun intended).

The thing is about drinking beer while planning a bike trip, some of the fine details get lost in translation… A bit of advice I’ll share with you, something I’ve learned in my bike touring endeavors, always have a plan B, in fact always have at least a plan B, probably a plan C, and just for good measure, keep plan D tucked away in your back pocket. The weekend I picked for this adventure just so happened to be the first weekend after the start of Boise State’s Fall Semester, and with my touring partner in the middle of earning his MBA, he had to back out at the last minute. I’ve toured alone before, see ‘Crazy girl rides across Oregon’, so I had no qualms about setting out on my own, but when the Bike Hermit and Sky King caught wind of the trip, they felt it necessary to join in on the fun. And so, after a few beers, I left the two of them to pour over maps of the route that I had planned for months, double checking all the details and making sure I hadn’t just made the whole thing up.

The next morning I pulled up to Bike Touring News at 0900, gear spread across the entirety of the garage, Revelate frame bags, Surly junk straps, Hennessy Hammocks, BTN water bottles and various bits of clothing needing to be packed and loaded into the truck. I tried to keep my cool as I stuffed my sleeping gear into my handlebar bag, a Revelate SweetRoll that was fighting back. An hour later, we were heading out, driving in circles so the Bike Hermit could find an ethanol free gas station (Horseshoe Bend does have ethanol free for future reference). As the temps rose into the high 80’s we pulled into Crouch, finding a spot suitable for overnight parking, next to the log cabin that doubles as the town hall. Thankfully the City of Crouch offers free WIFI, thus I was able to get a shot of the fully loaded Karate Monkey off to my many instagram followers (all 50 of them). At noon, I headed up Middle Fork Rd, a few minutes ahead of the Bike Hermit and Sky King.
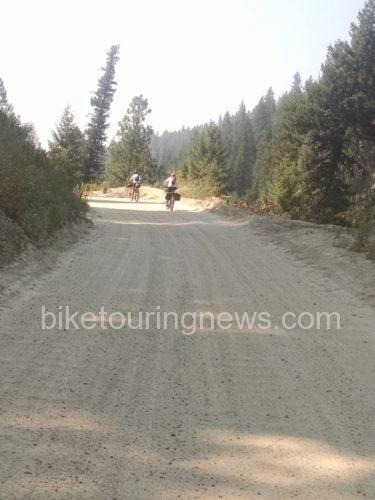
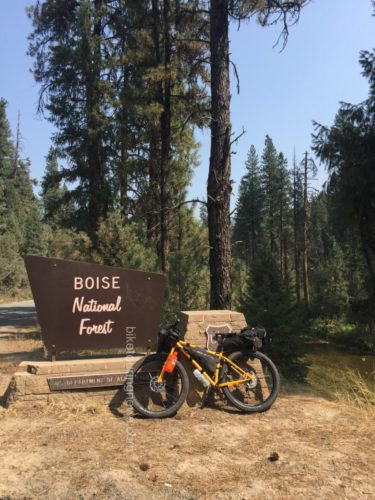
The first 8 or so miles are rolling pavement flowing past a mixture of old barns, open fields and modern homes perched along the Middle Fork of the Payette River. Once the road hits the boundary of the Boise National Forest, it turns to gravel with both designated and primitive camp spots every few miles. The steady climb takes you past several fishing and/or swimming opportunities, which despite their remote location seem to surge with popularity on weekends. Most of the motorists and ATV users were respectful to the ‘Share The Road’ signage, but without doubt, we did encounter the occasional driver who seemed to give zero shits about the lives of cyclists. I would highly recommend bringing an extra handkerchief to tie up bandit style for this exact reason, protecting yourself from the intermittent dust bowls. The 16 miles of gravel transitions from washboard, to packed dirt, to deep layers, making us thankful for the 3” tires in place on the Surly ECR, Troll and Karate Monkey.
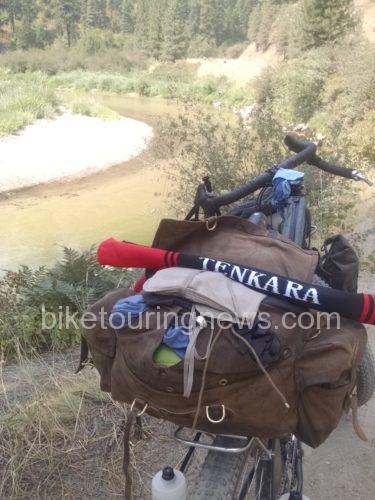
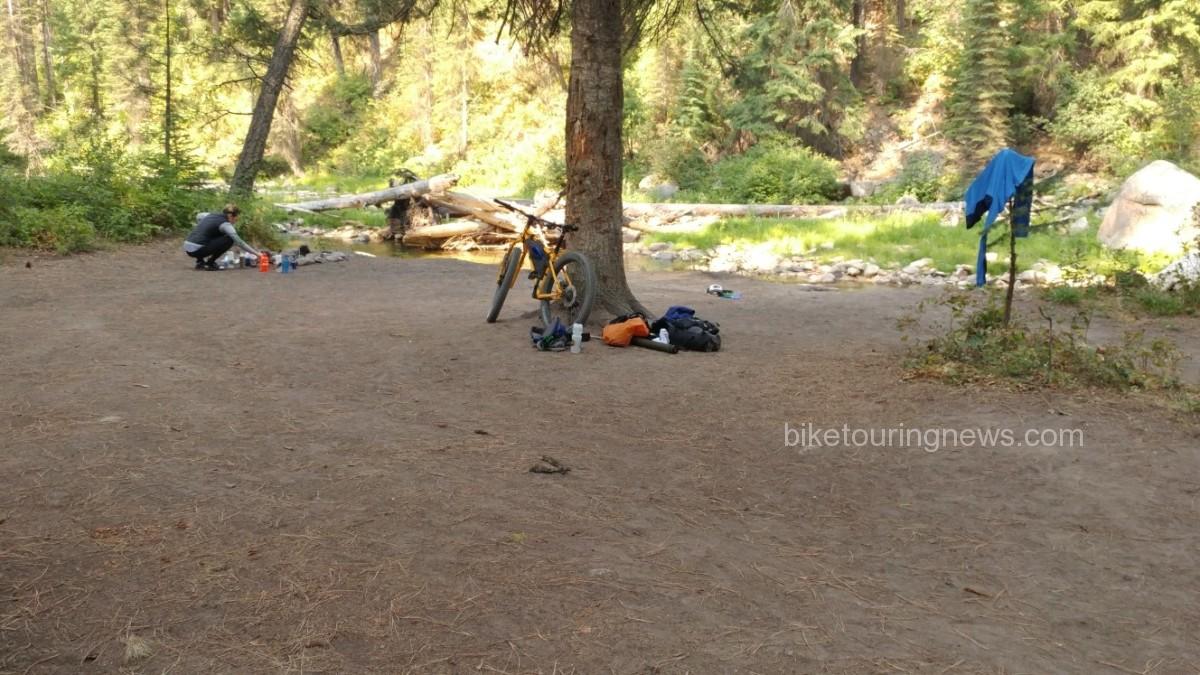
In late August, the Middle Fork runs at just above 100 CFS, making it the perfect time to access the natural hot springs requiring river crossings to access. The low flow also leaves small pockets above sections of rapids where brook trout made futile attempts to hide from the Bike Hermit’s Tenkara Rod. The short distance from Crouch to our destination allowed us for plenty of time to stop and fish with daylight left to set up camp. At mile 16, the road forks, the east taking you along the traditional main route of the Idaho Hot Springs trail, the north taking you up to Boiling Hot Springs, our intended destination. Sky King’s research showed that the designated camp spot at Boiling Springs would cost $16.00, more than the cost of gas to get from Boise to Crouch, leading us to look for a primitive spot along the river. Just below Silver Creek, along a stretch of river where several trout could be seen with the naked eye jumping in the afternoon sunlight, we set up camp for the night. IPA’s supplied by Mother Earth Brewing were cooled in the sub 60 degree water and fly rods were rigged for slaying. As the sun set below the canyon, the fishing slowed and Sky King whipped up a delicious riverside happy hour consisting of crackers, cheese and red peppers. After refueling, the Bike Hermit and I headed north in search of undiscovered trout waters, scurrying down steep embankments to the deep pockets protected by downed trees and large boulders. We fished until dark before drifting off in Hennessy Hammocks to the sound of the river bubbling close by. 
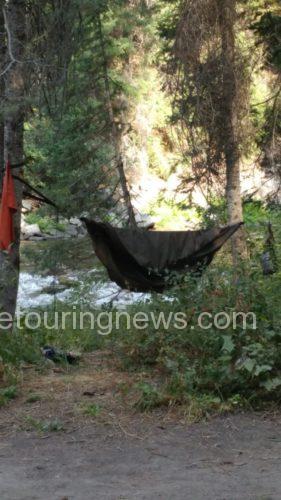
The quiet of the remote location and the lack of sun in the canyon allowed us to sleep in well past 0900 and we took our time packing up in the cool morning air. The Bike Hermit revealed his ninja fast packing skills, training from coffee drinking, jogger pants wearing, sunday breakfast type guy into the Bike Hermit in less than 10 minutes, a real Clark Kent to Superman type moment.
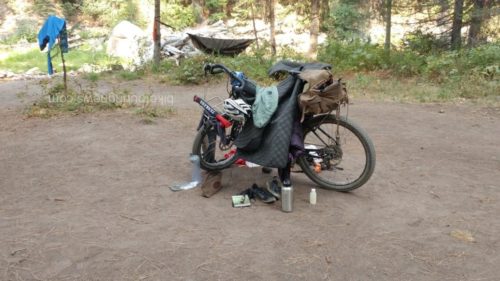
It wasn’t until we had gone a few miles before we realized how much of a steady climb we had undertaken the day before, making it a true Sunday Funday. The extra time allowed us to stopped at Fire Crew Hot Springs, the Bike Hermit fished while Sky King and I explored the warm pools on the west side of the river. We came out of the canyon in the late Sunday afternoon heat, making the last few miles a bit harsh. Thankfully The Dirty Shame serves up a good burger and the squad was once again smiling while reliving tales from the past 24 hours.

Bike Touring News endorses this ride for numerous reasons

  • quick overnighter not far from home with options to go further.
  • road surface is doable – could ride w/ 32 mm tires (mildly rough – washboards, sand and gravel)
  • gradual climbing
  • great shake down trip for new gear, new bike packers, new bikes etc.
  • plenty of water at various campgrounds along the way (or take a filter)
  • hot springs (is on the Adventure Cycling Idaho Hot Springs Route)
  • successful fishing


Categories
Bike Touring Equipment Bike Touring Tips Bikepacking Touring Bicycles Touring Bike Components

The Best Bikepacking Bike is the One you Already Own: Part I

Author’s Note:  This post was updated on Dec. 29, 2016.  It was originally published on Feb. 20, 2015.

As interest in bikepacking and off-road bicycle travel continues to grow, many bike makers are offering machines that claim to be optimized for the task. We should know, as Surly’s line is full of bikes like the ECR, Ogre, Troll and Karate Monkey that are ideal vehicles for pedal-powered exploration. This level of specialization in bicycles can be a good thing but it also leaves many would-be bikepackers on the sidelines because they think they need a whole new bicycle to participate. While a shiny new bike can certainly make things easier and provide good motivation to get out and ride, you may discover that the best bikepacking bike is the one you already own.

With a few simple modifications or additions, any good-quality mountain bike can carry you and your gear into the backcountry. In this series of blog posts, we’ll guide you through the process and detail a few key points to consider when evaluating, upgrading and modifying your bike into a two-wheeled adventure steed that will take you places you never thought you could go.Especially since many key pieces of equipment  (bags, lights, etc.) won’t come with any new bike, modifying the bike you already own can be a much more cost-effective path of entry.

In this post, we’ll take a look at the key qualities that good bikepacking bikes share and see if your bike fits the bill. A comfortable, durable, mechanically-sound bicycle is critical. The consequences of an ill-timed breakdown or failure can be quite serious when venturing far from home, so these are very important considerations. Assuming you own a mountain bike of some kind, wheel that thing in here and let’s have a look.

Evaluating your Bike for Trail-Worthiness

Before heading into the backcountry or sinking lots of money into expensive upgrades, you would be well advised to be sure your bike is up for the task. There is a certain standard of trail-worthiness that not all mountain bikes meet. This is mainly a question of reliability. Off-road riding is hard on equipment and many inexpensive, “entry-level” mountain bikes are built with more casual riding in mind.

7598636072_d5d553779d_z
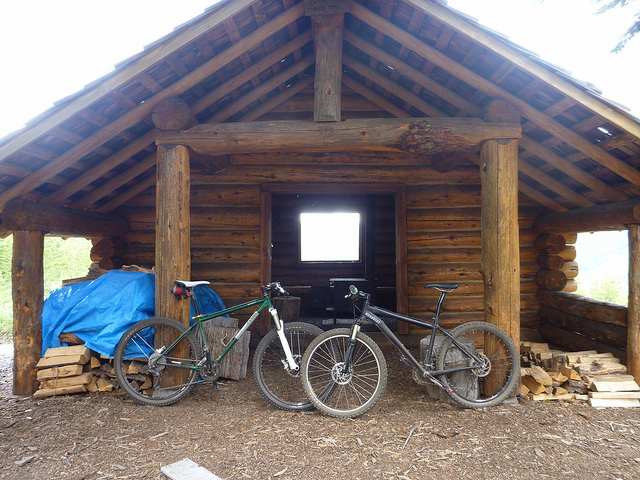
Two trail-worthy mountain bikes, ripe for a bikepacking conversion. Photo by the author.

So, how do you know if your bike is trail worthy? If you purchased your bike at a bike shop and are already riding it regularly on singletrack with few mechanical issues you’re probably in good shape. If you bought your bike somewhere other than a specialty bicycle retailer your chances aren’t so hot. Bikes sold in many sporting goods and department stores are cheap for a reason and don’t typically hold up well when ridden often, especially off-road.

magna
Department store mountain bikes are not a good option.

However, even many top-quality mountain bikes don’t make great bikepacking bikes. So, let’s dig into some of the nuances that set a potential bikepacking rig apart from the rest. Your bike doesn’t have to meet all of these criteria to work well but you’ll be more likely to enjoy the experience if you have most of these boxes checked.

What Makes a Good Bikepacking Bike?

Comfortable Riding Position

HowardandAlanIHSMTB
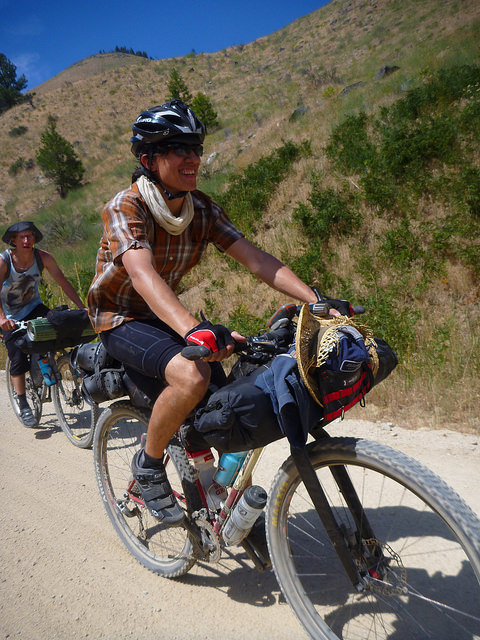
Two riders pedaling comfortably on the Idaho Hot Springs MTB Route. Photo by the author.

This is perhaps the most important consideration that we’ll discuss but also the most potentially challenging to get right. When you’re on the bike for hours at a time for days in a row, any potential source of discomfort can lead to frustrating pain or a debilitating injury. Other than employing the help of a skilled bicycle fit professional, the only way to know if you’ll encounter comfort issues is to put in the hours riding your bike. If you’re preparing for bikepacking you’ll want to do plenty of preparatory rides anyway, so listen carefully to your body for signs of problems as you ramp up the miles. A comfortable saddle and handlebar in the proper position are key elements in this equation. We’ll get deeper into fit issues in future posts. Assuming that you have a properly sized frame that you can ride comfortably, let’s take a look at some of the nuts and bolts of your bike.

Front Suspension or None at All

While full-suspension mountain bikes are becoming more common across all categories, they are often less than ideal for bikepacking on anything other than the roughest and most technical of routes. Suspension pivots and shock mounts take up valuable space in the front triangle, making frame bags difficult if not impossible to mount. All those moving parts also require regular maintenance and are often impossible to service in the field. You’d rather not be a hundred miles from the nearest bike shop when your rear shock blows a seal and stops holding air.

A suspension fork takes the edge off the rugged singletrack on the Idaho Hot Springs Mountain Bike Route.
A suspension fork takes the edge off the rugged singletrack on the Idaho Hot Springs Mountain Bike Route. Photo by the author.

A suspension fork can be valuable if your route includes a good deal of rough terrain but can be overkill for routes consisting mainly of dirt roads or smoother trails. Much like rear suspension, a suspension fork adds weight and complexity, requires regular maintenance and can be a major problem if it fails. While rigid mountain bikes have become a relative rarity the simplicity they offer is appealing. If your bike is already equipped with a rigid fork you may be in luck!

The choice to ride front and/or rear suspension will be dictated by your bike, route, personal preference and budget. If your bike does have suspension, be sure it is in top condition before heading out on a long trip.

Big Wheels, Wide Tires

There are many good reasons that 29ers have taken over the mountain bike market in recent years. The bigger footprint, increased air volume and shallower angle of attack offered by wide 29″ tires deliver excellent traction and improve the bike’s ability to roll easily over larger obstacles. These attributes are especially helpful when the bike is loaded down, less maneuverable and harder to unweight over bumps. However, don’t despair if your bike has 26″ wheels or is one of the newer crop sporting 650b/27.5″ hoops. Wheel size won’t make or break your experience out on the trail but larger wheels certainly offer appealing comfort and performance benefits.

Regardless of wheel size, you can do yourself a big favor by using the widest, highest volume tires your frame can safely accommodate. Wide tires will provide a smoother ride, cushion your bike, load and body from bumps and provide improved traction. We’ll talk more about tires in a future post, so stay tuned for that.

Quality Components

For better or worse, the price of an “entry level” mountain bike is incredibly low these days. This is certainly a good thing for many riders as the cost of getting into cycling is lower than perhaps ever before. However, those “entry level” bikes reach their low price points by cutting corners somewhere. One common place for this cost-trimming is in the bike’s wheels.

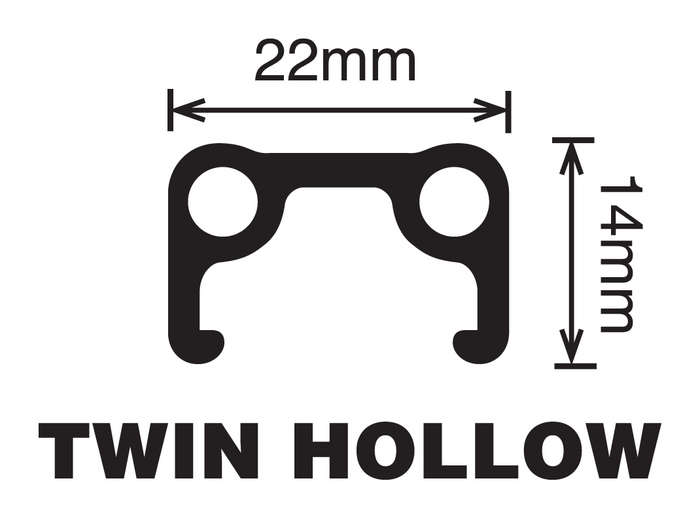
Bicycle wheels endure tremendous forces, especially when carrying heavy loads over rough terrain. Low-quality wheels that break spokes, bend axles, dent easily and won’t stay true are a serious liability. You’ll want to be certain that your wheels are built on sturdy, double-wall rims with quality hubs and spokes to avoid problems.  As shown in the cross-section diagrams below, double-wall rims feature a box section design that adds significant strength over the less-expensive single-wall design.

Blunt_35_No_Title_450_449
Double-wall rims – like Velocity’s Blunt 35 – provide much stronger wheels.
(Diagram from Velocity USA)
twin hollow
Single-wall rims are not typically strong and durable enough for trail riding or bikepacking.
(Diagram from Velocity USA)

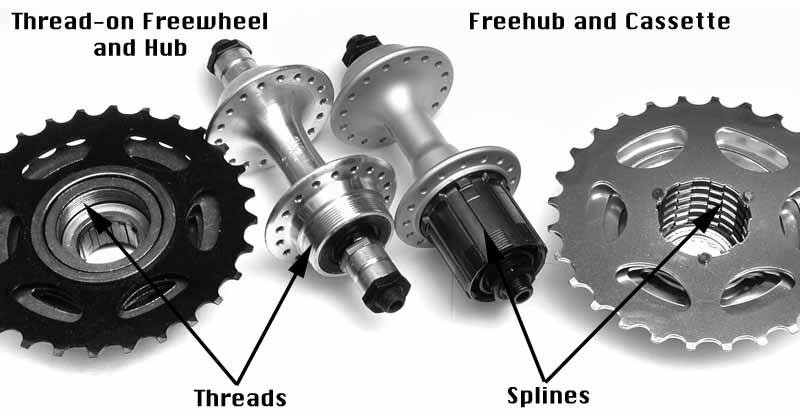
On the subject of hubs, most newer bikes are equipped with a “freehub” drive system rather than the older “freewheel” style.  Bent or broken axles were common with “freewheel” rear hubs on mountain bikes because of the long section of axle protruding past the drive-side bearing.  If you have a rear wheel using a threaded-on freewheel you’d be wise to consider an upgraded wheelset before loading the bike down. We build a significant number of bikepacking-worthy wheelsets here at Bike Touring News, so we’ll talk more about wheels in an upcoming post.

freewheel-vs-k7
Hub comparison from the late, great Sheldon Brown. sheldonbrown.com

Other than wheels, you don’t really have too much to worry about. Even inexpensive brakes, shifters and drivetrain parts are surprisingly reliable and rarely fail when properly maintained. Higher-end parts will be lighter, more precise, offer performance benefits and are sometimes more durable but are not required. However, it is vital that all of your components are well maintained, not excessively worn and in good working order. It is wise to check and replace (if needed) your chain, cables/hydraulic fluid, brake pads, etc before heading for the hills to avoid problems on the trail.  We have a series of blog posts on roadside repair and maintenance, so brush up there if you need a primer.  Many trip-ending mechanicals are a result of poor maintenance and should be easily avoidable.

Metal Frame

Carbon fiber is everywhere in the bicycle industry. Carbon frames and components are showing up at surprisingly low price points and have (mostly) shaken off their reputation for fragility and premature failure. Modern carbon bikes and parts from reputable manufacturers are of very high quality and have proven reliable in demanding conditions. Many also offer extra protection in the form of tough, durable finishes, rock guards and the like. However, you’d still be wise to take extra care when bikepacking with a carbon frame. The combination of additional weight, frame bag straps, accumulated dirt, abrasion and vibration – in addition to normal hazards such as sharp rocks, severe crashes, etc – can cause serious damage to frame tubes of any kind but the problem can develop faster and have more severe consequences with carbon tubes. A good carbon bike can be a potent off-road weapon – especially for those looking to travel fast and light – but metal bikes will be more worry-free and probably longer-lived.

P1160822
Four riders – all on metal frames – head into the Owyhee Desert. Photo by the author.

On the other hand, steel or aluminum bikes may suffer damage to their finish from the conditions presented by bikepacking but will rarely sustain serious damage to the tubes themselves. Regular cleaning and inspection is still important but is not as serious a concern as with carbon tubes. Though expensive, titanium may be an ideal material for bikepacking bikes due to its exceptional hardness and resistance to scratching or abrasion.

Summary

So, is your bike up for the challenge? You may already have your new bikepacking bike hanging in your garage, waiting to hit the trail! If your ride doesn’t cut the mustard, Bike Touring News offers a range of models from Surly that will do the job admirably without breaking the bank, like the ECR, Troll, Ogre or Long Haul Trucker.  There comes a point where a new bike becomes a simpler, more cost-effective option.  Feel free to give us a call, shoot us an email or stop by the shop if you want to talk about the pros and cons of your current bike!

Throughout this series of posts, we’ll dig deeper into some of the considerations outlined above and a few more in order to help you build the best possible bikepacking setup for your application and budget.  In the next post we’ll explore various methods of carrying the supplies for your ride, so stay tuned for that!  Follow us on Facebook, Instagram and Twitter @BikeTouringNews for the most up-to-date news and information.

What questions do you have about setting up a bike you already own for bikepacking?  Sound off in the comments, give us a call or email and I’ll do my best to cover those topics of interest in a future post.  Hey, thanks for reading!