Categories
Bags/Panniers/Racks Handlebar Bag Saddlebags

Frost River Gunflint Trail and Caribou Trail Saddlebags

The new shipment of Frost River bike bags arrived at the Bike Touring News Store last week. Frost River may be better known for their canoe packs than for bicycle touring bags but both should be held to the same standard –
Canoe packs are built for a very specific task (hauling the stuff that will sustain you) in a very specific environment (the Northern Wilderness). In this setting, things like a seam ripping or a sidewall tearing or a strap breaking—little failures that would be an annoyance in everyday life—come with huge consequences.”
-And so it goes for bike touring.

Frost River makes their bags in Duluth Minnesota from materials sourced in the USA.
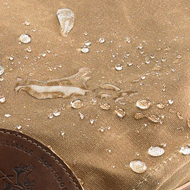
water beads up on canvas
Photo from www.frostriver.com

The waxed cotton canvas comes from Fairfield Textiles and is called Martexin Original Wax. The fabric is claimed to have a lifelong resistance to inclement weather as well as being naturally breathable. The hand is not course or stiff even though the canvas is stout. It is evident that the material is impregnated with wax rather than simply coated.
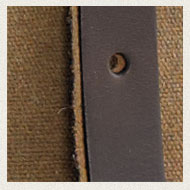
leather strap
Photo from www.frostriver.com

The leather in the straps and reinforcements comes from S.B. Foot Tanning Co. in Red Wing MN. Yes, that Red Wing. I currently have two pairs of Red Wing shoes and it’s sort of neat to know the leather in my bike bag comes from the same source!
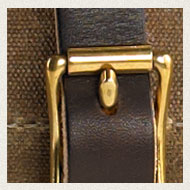
photo from www.frostriver.com

All the buckles, snaps, slides and d-rings are solid brass, not simply plated. And they are big. They might almost appear clunky to some but when fumbling with cold fingers and/or in the dark I think I will appreciate the large size.

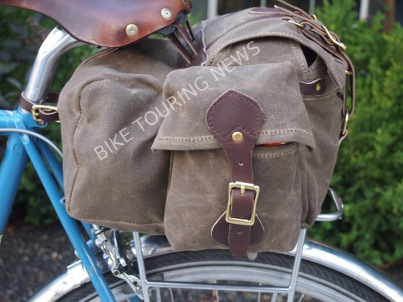
The Gunflint Trail is the larger of the two traditional style “transverse” saddlebags from Frost River and it is big. The stated capacity is 20.6 liters but it seems larger…..maybe that doesn’t include the side pockets. And, while this bag could be used without a rack support, it sits very nicely on the Nitto R15 or R14 Top Rack.
side view of saddlebag
The Gunflint Trail bag on the Nitto R15 rear rack. Note the riveted and sewn leather attachments.


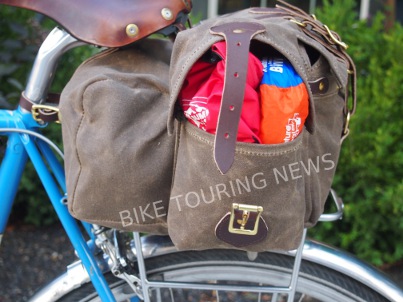
side view w/ open pocket
The side pockets have a clam shell lid which increases the capacity while keeping the contents accessible.


interior shot
The drawstring in not included…..not sure why…..


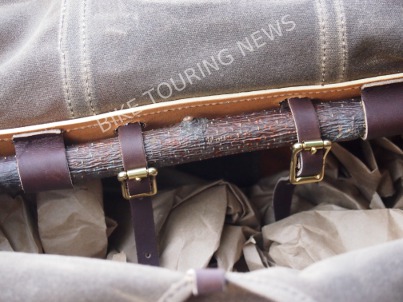
interior support
Leather straps looped through the saddle and around the willow (?) stick (which should never break) support the bags. The interior leather reinforcement is hella thick.


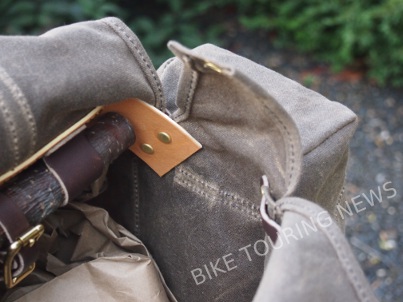
interior reinforcement
The corners of the interior leather reinforcement are square and sharp leading me to wonder if they might eventually wear through the canvas.


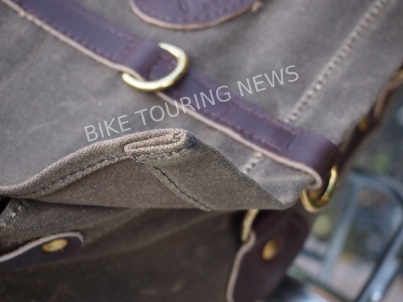
Hemmed edges won’t unravel.


bottom view
A broad piece of tanned leather is sewn lengthwise on the bottom of the bag for reinforcement and wear protection. Small slots in the leather accommodate straps for secure lashing to the rack.

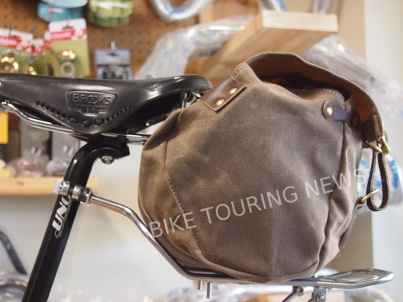
The Caribou Trail bag is an 8.8 liter capacity bag without side pockets. It works as a saddlebag but can also be strapped to the handlebars. A support such as the Nitto R10 rear bag supporter will keep the bag a little proud of the saddle and might prevent any unwanted side to side swaying.
side view on carrier
The Caribou Trail bag on the Nitto R10 bag supporter.


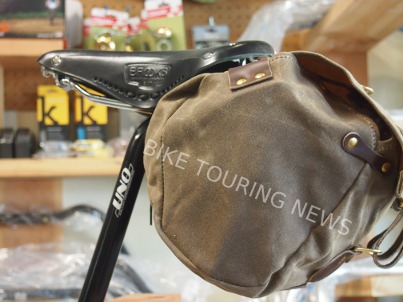
side view without support
If used without a support the bag requires about 9″ (23cm) from the saddle loops to the tire or fender.


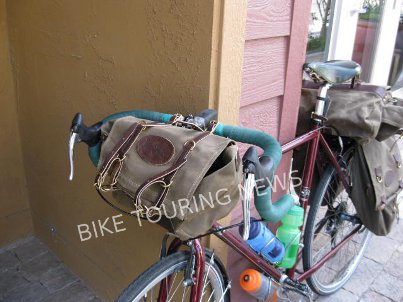
handlebar mount
Right then, it’s also possible to use the Caribou trail as a handlebar bag.
Categories
2011 Oregon Manifest Event Coverage

Oregon Manifest 2011 – Three Bikes

I judged the entries by how they incorporated the mandatory design features outlined on the Oregon Manifest site:
-Anti-Theft System
-Fender System
-Lighting System
-Load System
-Free-Standing Under Load (While Parked) System
With a heavy bias toward integration, quality of execution and aesthetics.
In no particular order, I thought these bikes were outstanding.
YiPsan Bicycles
This bike has a two legged kick stand and, depending on how the load is distributed, is balanced in such a way that either the front or rear wheels are off the ground, facilitating flat tire repairs.

Rear wheel removal mode


Front wheel removal mode


To help stabilize the bike when parked, this pin runs through the fork brake bolt hole and into a custom hole in the frame’s downtube


When riding, the pin is retracted and held against the fork magnetically.

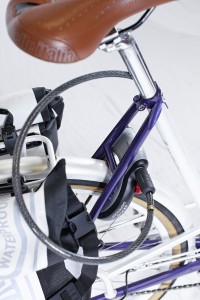
There is a Dutch bike style lock which is attached to the frame and locks the rear wheel so that it can’t be turned, and Renold inserted a braided steel cable into the seat post of the bike which can be pulled out and locked into the wheel lock mechanism.

Yep, that cable disappears into the seat post.(Photo from YiPsan Bicycles website)

With fenders, internally geared rear hub, belt drive, generator lights and great load carrying capacity, this bike’s got it covered. And it fits Leah like a glove.

Bauhinia – YiPsan Bicycles from YiPsan on Vimeo.

The more I looked at this bike, by Geekhouse, the more I liked it. I talked to the builder at the lunch stop and took these pics.

Geekhouse touring bike

I thought this was a really creative frame design. Not a traditional double diamond frame, rather an inverted curve or an arch, the other strongest shape, basically forming the seat stays and rack. The double top tubes curve down and sweep back to form the rear rack, also establishing a low stand over height.
The rear skirt guard and front fender design could be improved to provide better spray coverage. And again the ubiquitous Shimano Alfine internal gear rear hub and front dynamo hub. The front light was actually integrated into the stem.

Geekhouse touring bike
The front light is part of the stem, but I think the bag is in the way. Should be an easy fix though.

The shaft of the u-bolt lock is built into a short piece of tubing welded to the two pivot points on the top tube. The shackle portion of the lock is strapped down when riding and pivoted up and removed to lock the bike to a post or bike rack.

Nice work integrating the Brooks bag carrier into the handlebars.

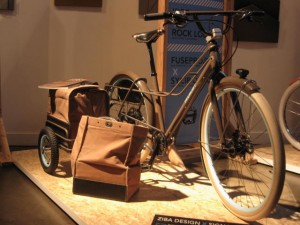
Another bike I was drawn to is the Fremont a collaboration between Ziba and Signal Cycles.

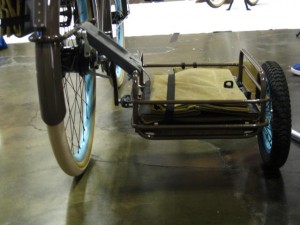
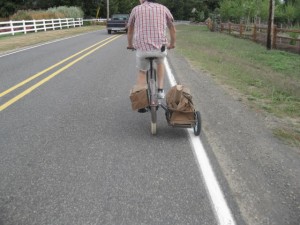
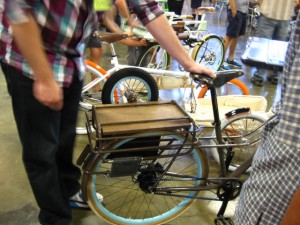
This is one of several side-car designs at the event, but it seemed like the most practical of the bunch to me because the side car folds up over the rear fender to become a rack. And the side car met the additional requirement of providing a support for the parked, loaded bike. The canvas bags were made for the team by a local Portland seamstress.

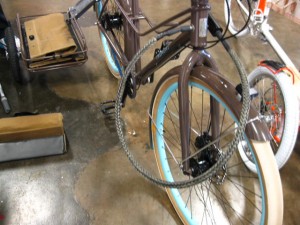
The locking system is a little clunky since one needs to remove the cable and stash it when riding, but then again it’s not that much of a hassle and there is plenty of room to carry it.
Side Car flipped up and now is a rear rack

I thought these bikes met the challenge requirements in elegant ways and I can see how they would be practical and functional in the real world.

Categories
Triple Brew Pub Tour

Java Man Triple Brew Pub Bike Tour- Day Four

August 3, 2011

Crack….Thump….Whoomp
I’m flat on my back on the ground.
“Are you OK?”
“Yeah, I’m OK…….are you OK?”
“Yeah”
For all of the trees around here, most of them are massive cedars and they are too big to tie the hammock straps. Earlier, I had tied one end of each hammock to what turned out to be a rotten stump of a tree, with the other ends going to separate trees. The weight of both of us in our hammocks was too much for the remaining roots and the whole thing pulled out at ground level and fell neatly in between us. Sky King had retired before I did and I tried not to think about what might have happened if her weight alone had been enough to pull the tree over, because I imagine it would have fallen on top of her. A rude awakening to say the least.

We scuttled around with the headlamps on to retrieve our sleeping bags from the wreckage and we spent the rest of the night under the stars. I felt dumb, but I don’t think that will happen again!

It’s less than 20 miles to the Clinton ferry from South Whidbey Island state Park, and US 525 has a nice shoulder. A short diversion on Newman Road from Freeland provided a quite ride until the junction with 525.
A few miles outside of Clinton a parking lane appears which is meant for vehicles waiting for the ferry and we coast past a long line of cars which, according to the signs, will still not be on the ferry for another hour. And when we get in line to buy our passes the woman in the car behind us tells us it is free for bicycles going back to the mainland. So we roll right to the front, rejoicing in one of the very few moments when a bicycle has more rights than a car.

texas size shoulder
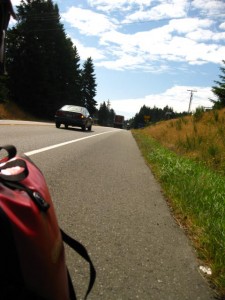
In Texas they call them courtesy lanes. I don't think they had cyclists in mind but they are nice riding.
I would give directions to the multi use path, or MUP, system from Mukilteo, but I’m still not sure how we found it. I had directions printed off of Google Maps but after talking to a driver at the fruit stand where we stopped who said, “I’ve been delivering here for 15 years and I’ve never heard of Natures Path Road” we abandoned those and used the Droid to find another route. But after getting well and truly lost again we stopped at a fishing tackle store where we were told how to get to the Burke-Gilman trail. We got a few miles closer using his directions but still had to rely on the Droid for the last few miles.
We finally crossed Bothell Drive and were on the trail. A chatty Seattle cyclist lady gave us directions to the Sammamish Trail, but by thus time I was having none of it and decided to trust the Droid from here to Bellevue.

Seattle's Burke-Gilman
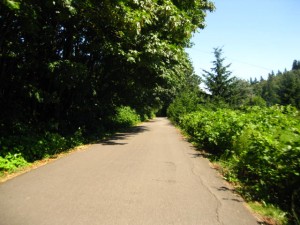
Finally, we are on the Burke-Gilman Trail
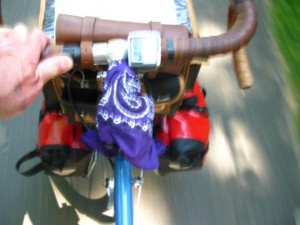
handlebar shot while riding
making up some time......
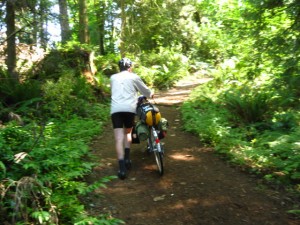
walking up a dirt trail pushing the bike
Please, Seattle, if it's not asking too much, more signs!
The shiny, happy town of Bellevue

I have to give kudos to Seattle for their MUP system but I wonder if they could scrounge a few dollars more for some signage. Once we got on the Burke-Gilman we still were confused and took a number of wrong turns before we got to the Sammamish Trail and ultimately to the 520 Trail. But not before a detour over the Bridal Crest Trail, which is dirt and very steep. And then we literally were ejected onto a suburban neighborhood street with no idea where the trail went until we saw a bike rider appear from a barricaded abandoned road which was the access to the 520 Trail continuing toward Bellevue.
Once back to our starting point in Bellevue we both had to agree that this tour was a success. No mechanical failures and no major physical problems presented themselves. This is a spectacular part of the country. I really didn’t realize the extent of the rugged mountains and wilderness which exist so close to Seattle and which we could see in the distance every day of our ride. We plan to do some more bike touring here in the near future.

Categories
Triple Brew Pub Tour

Java Man Triple Brew Pub Bike Tour- Day One

On the I90 trail Seattle

On the 28th of July we drove to Bellevue, WA to attend a relative’s wedding. On the 4th we are going to Sky King’s family reunion on Snoqualmie Pass. In the intervening days we are bike touring. Originally I was going to post a journal on crazyguyonabike, but that site has been down today while I’m updating so I decided to post the tour journal here too.
Once we are in the bike touring mode and all our gear is readily accessible and we’re mentally and physically ready, it is easy to sandwich in a 3 or 4 day tour. It doesn’t take a huge amount of planning and we were going to be in Seattle anyway. It’s not as if a person has to quit their job or even take major time off in order to go touring.

On the 31st we rode to the Seattle ferry terminal and took the Bainbridge ferry. From there we started riding towards Port Townsend via Fay Bainbridge State Park where we spent the night. Getting to the ferry terminal from Bellevue was a piece of cake on the I90 Trail and the Mountains to Sound Trail. The 305 out of the town of Bainbridge Island has a beautiful, wide shoulder with a nice surface but the amount of automobile traffic is astounding. It was only about 4 miles to the turn off on Day Road but the relative silence was  immediately apparent as soon as we got off 305. Then it was a couple more bucolic miles to the state park.

Fay Bainbridge State Park is a wedge of land opening to Puget Sound and holding back housing developments on both sides. Weathered, beam straight cedar logs are spread out on the black volcanic sand, but not in a jumble, rather aligned with the shoreline up to the high tide water’s edge. The view of the sound and Mt Rainier and the Seattle Skyline and the North/Canadian Cascades is nothing short of breathtaking.

While in Bainbridge Island we hit the Safeway and bought beer and vegetables so we were able to make past primavera for dinner. This park only charges $5.00 per bicycle because they want to encourage that type of behavior and the showers are 25 cents for a minute and a half. Good place to stay!

Preparing to leave Bellevue.
waiting for the Bainbridge ferry
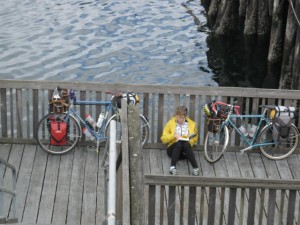
One of the best things about bike touring is these short breaks with nothing to do but relax.
Sky King riding
Almost to the end of the first 18 mile day!
Categories
Panniers

Ortlieb Panniers – Back Roller Classic

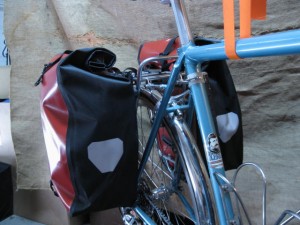
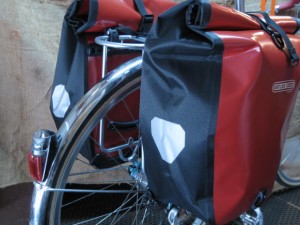
Ortlieb Back Roller panniers mounted on rack
The Ortlieb Back Roller Classic in red.

The German maker of Ortlieb Panniers is a well known and highly regarded bicycle pannier maker. The company also makes motorcycle dry bags and panniers, horse panniers, drybags, messenger bags and rucksacks, water containers, protection bags for electronics and documents, coffee filter holders and , my personal favorite accessory, a waterproof, toilet paper holder/dispenser.

The Ortlieb catalog points out that sustainability of their production is due in part to how long the products are expected to last and the fact that they are easily repairable if damage occurs. To that end they offer replacement parts and patch kits and back up durability claims with a 5 year warranty.

The Back Roller and Front Roller panniers are no frills bags made from pvc coated polyester fabric with welded seams rendering them waterproof. The roll top closure system keeps out dust and water. There are no external pockets on these panniers and only one side pocket inside.

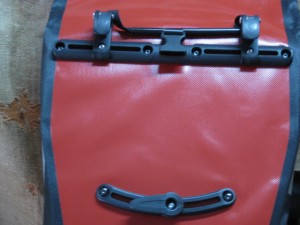
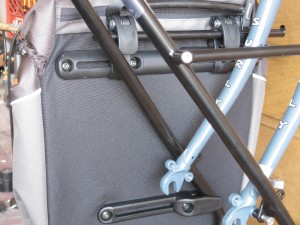
Rear view of Ortlieb bag showing mounting system
Ortlieb's QL1 mounting system. The hooks on the top rail adjust side to side and the lower arm pivots as well as slides.
rear view of mounted Ortlieb back rollers
From the top rail of the rack to the bottom of the bag measures 34 cm.

These panniers fit fine on the MT-Campee rack with the bottom edge trailing only slightly below the rack, but not so low as to interfere with the rear derailleur cable. Made to fit on almost any rack such as, besides this one, the Tubus Cosmo, Tubus Logo, both sizes of the Tubus Cargo and the Racktime TourIt.
In the next post I want to try the Racktime TravelIt pannier and then I should be ready to announce the winner of this little comparison and the lucky bag which will be traveling with us on the Olympic Peninsula the first week of August.

Categories
Bags/Panniers/Racks Panniers

Lone Peak Mt. Superior Panniers

Preparing for our upcoming 3 day tour on Washington’s Olympic Peninsula, I did a dry fitting of a few different panniers on Sky King’s bike.
First, a word about the bike and the rack. The bike is a Rivendell Bleriot with 650b wheels and I selected the Nitto MT-Campee rear rack which is made for 26″ wheels but which also fits nicely over the fendered 650b tires. I wanted a rack that mounted with the top platform close to the top of the wheel, for a low center of gravity, and that had side rails for pannier support.

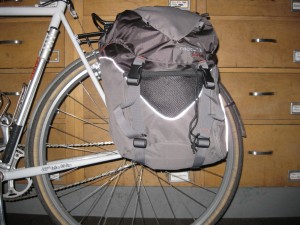
side view of Lone Peak panniers
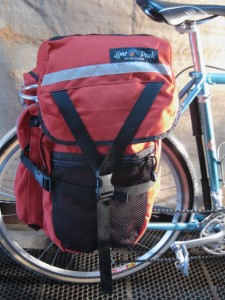
The Lone Peak P-500 Mt Superior pannier

First up is the Lone Peak Mount Superior pannier. Lone Peak is based in Salt Lake City, Utah and their products are made in the USA. The company has been around since 1979. The website is very minimalistic and it’s short on specific information about the bags they make….information like mounting systems and materials.
With a nominal capacity of 3200 cubic inches or 52 liters per pair the P-500 Mount Superior panniers are the most capacious panniers in our store. With zippered pockets on the face, trailing edge and top, there should be plenty of room for items which need to be readily accessible. The zippered mesh pocket on the face of each pannier is perfect for carrying damp clothes while they dry out. There is no claim to waterproofness of the cordura fabric which forms the body of these bags but rain covers are sold separately.

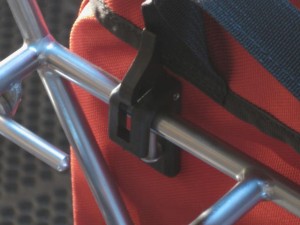
Two composite hooks are bolted onto the back outside of the bag through the plastic stiffener inside the bag. The hooks go over the rack rail and are held in place with a pivoting thumb lock.

top hook on the lone peak pannier
Two of these composite hooks hold the bag on the top rack rail. They are held in place with the little pivoting thumb lock.

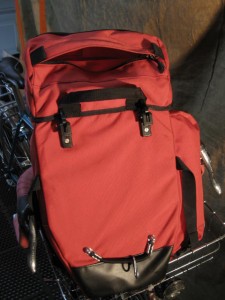
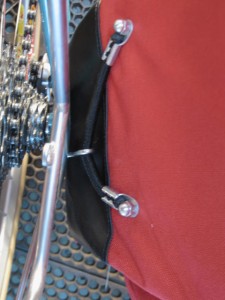
The horizontal compression strap can be adjusted to keep the load from shifting and can even be wrapped around the rack frame to keep the panniers hard against the rack. On the bottom portion of the back is bolted an elastic cord, strung through a metal s-hook which is meant to hook to a bottom rail or clip on the rack, keeping the bottom of the bag secure.

a rear view showong attachment points on a Lone Peak rear pannier
The Lone Peak attachment system. The compression straps can be routed around a rack rail for a super solid system.

With the upper hooks hanging on the Nitto MT-Campee I discover that there is no place to hook the lower s-bolt and pull the elastic cord taught. From the top, inside, of the composite hooks, where they rest on the rack rail, to to the s-hook, the part that will hook on a bottom rail, with the elastic cord being flaccid, measures 295 mm. and to the very bottom of the bag measures about 320 mm.

bottom hook and elastic cord
The elastic cord needs to be tighter than this!

I hooked the bags on some other racks to see how they fit:
-The 26″ Tubus Cargo rack is a perfect fit and I’m sure the 28″ cargo would work as well.
-The Tubus Logo and Cosmo racks work as long as the bags are attached to the upper rail, which sort of defeats the purpose of the lower rail on these racks.

rear view Lone Peak pannier
When full the panniers extend well above the carrying rail. A rack with a secondary, lower rail might be preferable.

In the next installment: Ortlieb Back Roller Classics.

Categories
Bags/Panniers/Racks Panniers

Racktime Travel-It

Racktime Travel-It rear pannier
Racktime Travel-It front pannier

(NOTE 10/31/2016: Racktime no longer has a distributor in the USA)

(NOTE 11/12/14:  Since this review, Sky King has used these panniers a several trips and the performance was most excellent.)

This is not really a review- I have not had a chance to actually use the Racktime Travel-It panniers yet- more like my impressions.

Racktime is an offshoot of Ortlieb/Tubus, the go to brands for many bike tourists. The products are distributed in the USA by Ortlieb-USA so my confidence in the products and service is high.

The first thing that attracts me to these bags is the external pockets. The rear pannier boasts two pockets on the top cover, one large mesh pocket on the side and a zippered, bellows type pocket on the trailing edge. In my experience, external pockets make it easier to find whatever one might be looking for…easier than with panniers which only have one large compartment.

The aggressive elastic binding the top cover should make sure the contents are secure, especially since there is a nylon shroud with a drawstring inside the main compartment. but it also interferes with the lid opening completely, making accessing the main compartment a tad fussy.

Racktime Travel-It rear pannier main compartment. Notice the nylon shroud with drawstring.
Front mesh pocket on Racktime Travel-It
Front pannier top pocket
The attached rain cover goes in this pocket with room left over for gloves and a cap
The large rear bellows type pocket on the Travel-It rear pannier
QL1 mounting system on front Travel-It. Rack is the Tara from Tubus

The mounting system is the tried and true QL1 system from Ortlieb. This is one of the most secure and simple to use designs I have seen. When the pannier is lifted by the handle, the two hooks on the reverse side are opened. Then the pannier can be hooked into the rack. Once you let go of the handle, the two hooks close around the rack tube.

The Ortlieb QL1 mounting system

Fixation of the lower section of the pannier is just as important as mounting in the top section in order to prevent the pannier from sliding and pivoting. The lower fixing hook serves for this purpose; it fixes the pannier to a vertical tube of the rack and secures it in the lower pannier area. The hooks may be adjusted easily to the distance required and tightened in position with allen key size 3
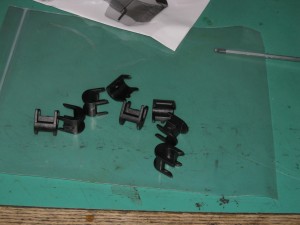
The QL1 hook system is adjustable using various inserts allowing compatible mounting on standard racks with an outside diameter of 8 -16 mm. The upper QL1 hooks can be reduced in size by inserting reduction parts into the hooks for 8mm or 11mm. The hook then closes perfectly around the rack tube and securely holds the pannier in its position.

Reduction spacers can be clipped into the top hooks of the Ortlieb QL1 mounting system to adapt to different rack tube diameters.

My Surly Cross Check doesn’t have chainstays as long as those on most touring bikes, but even so when mounted on the Racktime Tour-It rack these panniers had adequate heel clearance.

Surly Cross Check, Racktime Tour-It rack and Racktime Travel-It rear panniers

Overall I’m quite impressed with the design and construction of these bags and they look like a great value. The rear panniers should fit on almost any rear rack including Racktime’s. Racktime doesn’t have a low rider rack currently for the front panniers but they fit nicely as shown on the Tubus low rider racks.

Categories
Bags/Panniers/Racks Rear Racks

Racktime Tour-It

We just received the  Tour-It rack and the Travel-It front and Travel-It rear panniers from Racktime for the Bike Touring News Store. Ortlieb, Tubus and Racktime  all come from the same company with the Racktime products intended for those who don’t want to pay Ortlieb and Tubus prices.

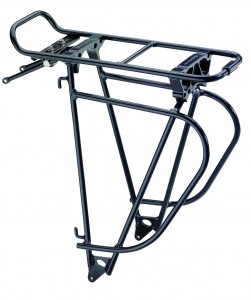
Racktime Tour-It rear rack

Naturally, as with any new gear, I had to fiddle around with it and I mounted the rack on Norm, my Surly Cross Check bike and installed one of  the rear panniers. I wanted to see what the hardware was like and how well the bags mounted and also I was eager to see how the bags differ from the Ortieb back and front rollers.

The Racktime racks are made of aluminum as opposed to the tubular chrome moly or stainless steel of the Tubus offerings. This rack actually weighed a few ounces more than the Tubus Cosmo stainless steel rack even though the two have nearly identical configurations.  Overall the mounting of the rack was simple and straight forward. Screws attach through a hole in the welded plate on the bottom of either side of the rack and into the dropout eyelets on the bike. The spacing was perfect for the 135mm rear blades on the Surly and I didn’t need any shims and there was no prying or spreading of the rack legs either.

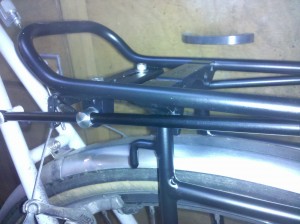
The braces which secure the upper platform to the bike are meant to be attached to eyelets on the seat stays, but could be attached to clamps if no eyelets are provided. The other end of the braces then thread through an eyebolt which in turn is bolted to the rack platform. Even though this is a versatile setup, if I was going to make this a permanent attachment I would bend the struts in order to achieve a better alignment. Or else I would cut them shorter. As it was, the vertical sides of the rack interfered and I was unable to tighten things down completely.

All the hardware needed for the Racktime Tour-It rear rack. Standard bolts, eyebolts, and two stays.
The stays or braces bolt to the seat stays and thread through the eyebolts. For a permanent installation, I would either cut them shorter of bend them so they didn't hit the vertical leg of the rack.

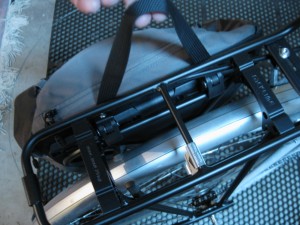
I like theminimal hardware on this rack since the fewer pieces and bolts to come loose the better when on the road. The top platform is wide enough to actually be used to carry a sleeping bag or tent and the lower set of rails allow for the attachment of panniers in such a way that they won’t interfere with a load on the top platform. The little pump pegs on the left leg of the rack are a cool idea, but I am unaware of any pumps that will fit on them. I was told that this rack is made as original equipment on some bikes for the European market, and they have their own proprietary pumps. The rack also will work with the Racktime SNAPit components. The rack is rated to carry up to 30 kilograms and the suggested retail is about $65.00.

Categories
Austin to New Orleans Tour Planning Resources

Tour Preparation, Day Three- Daruma’s, Decaleurs and Mid-Fork Eyelets

I remember riding through downtown Montreal, Quebec, Canada on my first self supported bike tour with homemade rear panniers which, when the bike hit a rough patch,  bounced around and came un-hooked from the rack. Luckily they didn’t fall completely off because the gang of homeless men accosting me from a vacant lot as I rode past would have been happy to relieve me from my load and probably my bike if I had stopped. Needless to say, since that tour I am a little more finicky about my equipment.

On my up-coming  tour I am using front and rear racks made by Nitto in Tokyo, Japan. These are made of nickel plated, tubular Chrome-moly steel with simple and solid attachment hardware.

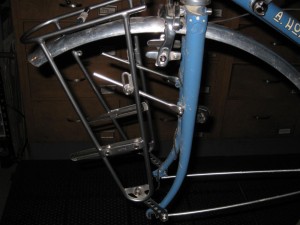
The Nitto Campee front rack sans the low rider attachments.
Highly adjustable aluminum struts allow for a custom fit.
The lower leg of the Campee rack has an integral spacer to clear the fork blade.
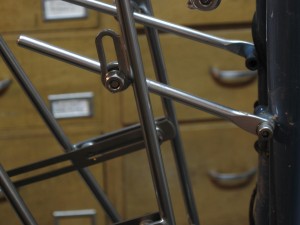
Daruma bolt
Daruma bolt attached to rack and strut.

The Nitto Campee front rack comes with detachable low-rider panels for attaching panniers. I have removed those, because I don’t have low rider panniers. The panniers and bags I will be using are the subject of another post. The aluminum struts attaching the rack  to the fork eyelets in these photos are sold as separate accessories. The struts which come with the rack are made to attach to cantilever brake posts.

This seems like as good a time as any to look at a couple different fork blade/eyelet/brake combinations. Eyelets are the small, threaded holes drilled into the sides of the fork or into tabs which are then welded onto the dropout (the piece on the end of the fork blade…where the wheel axle attaches). Some bikes have one eyelet on the fork dropout and some have two. There is only one on each dropout on my bike, so the rack and the fender strut clamps will share the same hole. A bike with two dropout eyelets allows a little more flexibility in attaching racks and fenders.

A fork blade dropout(from a Surly Long Haul Trucker) with two eyelets

Not all bikes have eyelets on the forks. What? How can that be? Well, some people don’t want to carry stuff on their bikes, believe it or not. For the person who actually uses their bike, however, the more eyelets the better. OK so how about the mid-fork eyelets? On most touring bikes these are located to facilitate “low rider” racks such as the Tubus Tara or the Tubus Duo. And on really well designed touring bikes, like Surly’s Long Haul Trucker, there are two mid-fork eyelets on each fork blade…one on the outside and one on the inside. The Tubus Duo was actually made with that bike in mind. On some bikes, like my Rivendell, the eyelets are located higher on the fork, and these will not work with low-rider only racks. Bikes such as Rivendell, with higher fork mount braze-on eyelets seem to work best with the Nitto type hardware and designs.

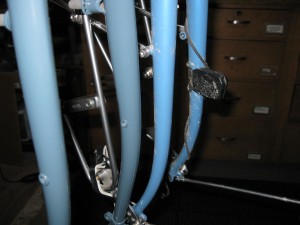
The fork on the left has inner and outer eyelets in the fork blade. The other fork blade has braze-on eyelets mounted higher.

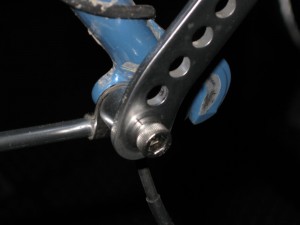
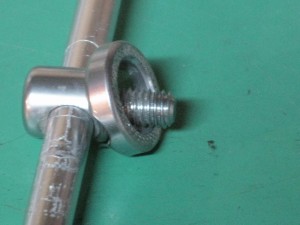
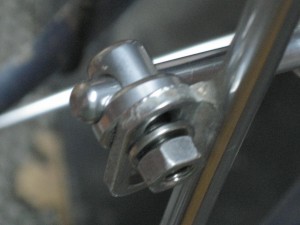
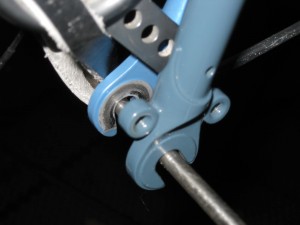
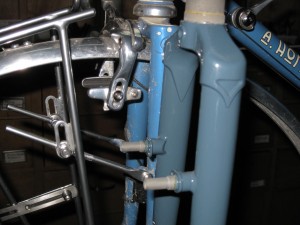
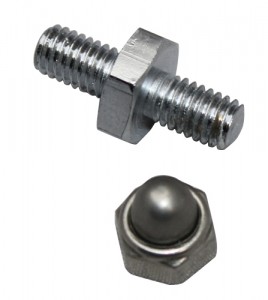
Many touring bikes will also be designed for cantilever style brakes. These brakes are mounted on special posts which are welded on to the fork blades. Some racks like Old Man Mountain brand Cold Springs and Ultimate Low Rider models attach directly to these posts with provided replacement bolts. Others, like some Nitto models attach to these posts with a special, double ended brake bolt or stud.

The fork in the foreground has posts for cantilever style brakes. The brakes on the other fork are center mount, sidepulls.
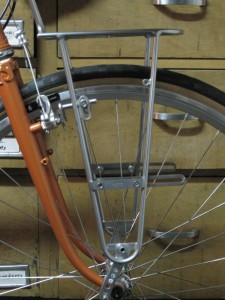
The Nitto Campee rack on a bike with cantilever brakes. The struts would bolt on to a stud (pictured below) which replaces the brake bolt.
This is the stud which replaces the cantilever brake bolt.
The struts are adjusted to line up with the brake bolt, which would be replaced with the double ended stud.

I got a little carried away and off topic with this post, but it felt like a good time to get into some rack details. Hopefully it might give you, good readers, some things on which to cogitate. In the next post I talk about my dual Schmidt E6 headlight setup, about which I am unnaturally excited.