Categories
Rear Racks

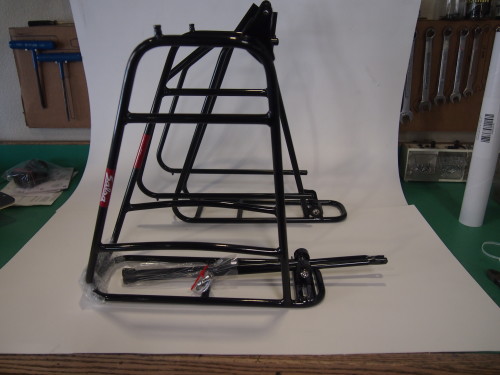
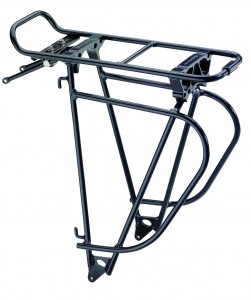
Salsa Wanderlust Rear Bicycle Rack

Recently I experienced some discomfiture when I realized the Salsa Wanderlust rear rack would not fit on a Surly Long Haul Trucker. Because the top platform was so long and extended so far forward it actually came into contact with the seat stays, making it impossible to mount the rack so that the top platform was level. Apparently the rack was designed to fit certain Salsa bicycles; those with pronounced top tube slope, short seat stays and lots of seat post showing. This implied a positive short sightedness on the part of Salsa. The expression of my discombobulation to the good folks at Salsa seemed to go unheeded.

More recently we restocked our Salsa Wanderlust racks and brought in one of the new Heavy Duty versions of the rack. Turns out somebody was listening! Both versions of the rack have been redesigned and now fit beautifully on the LHT and Disc Truckers as well as the Cross Check and, I imagine, most other bikes. (as of 12/9/2013 the Salsa site still says-“NOTE: Designed as a rear rack solution for Salsa Fargo and Vaya frames. This rack may not work well with traditional touring frames that feature level toptubes.”)
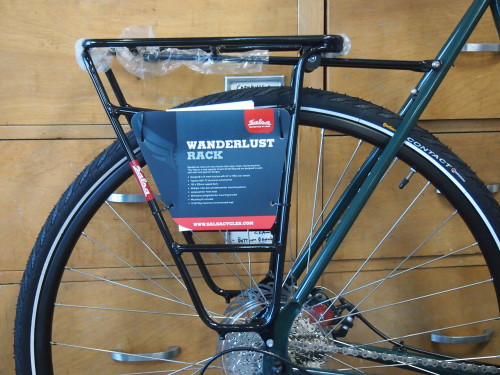
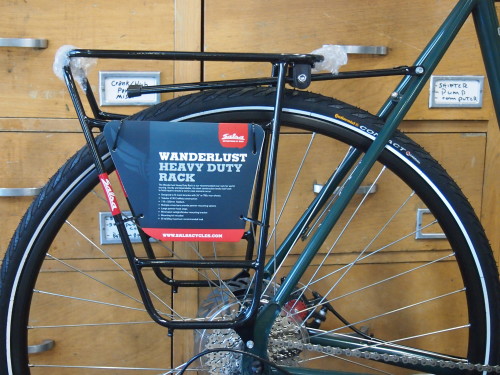
rear rack on surly bike
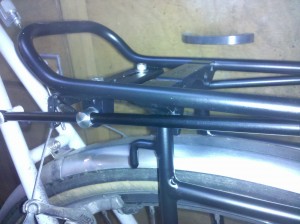
When mounted on the 700c Disc Trucker there is plenty of clearance to the seat stays. Notice how far rearward the top platform sits.

rear rack on bike
The H.D. version of the Wanderlust sits a little lower than the standard version, but still clears a 700c wheel

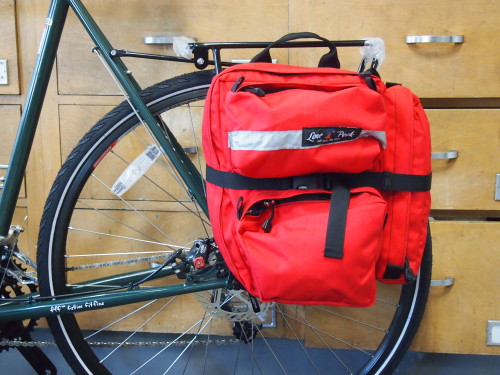
pannier bags on rear rack
Panniers are back and down on the Wanderlust racks; good for bikes with shorter chain stays, such as cross bikes. (Your heels won’t hit the bags)

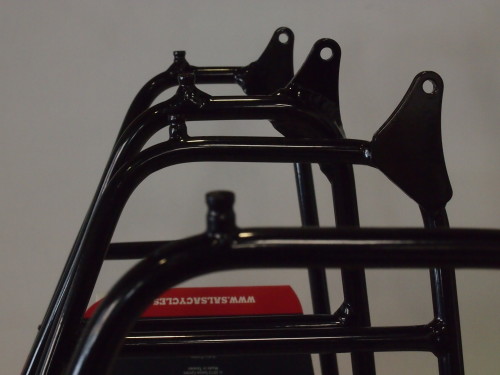
The new Wanderlust racks place the top platform well behind the seat stays, lower than most other racks. The middle pannier carrying rail is lower too. This means you can get your panniers low and out of the way of your heels if you have relatively short chain stays. (touring bikes will have chain stays in the 44 to 46 cm range, measured from the center of the crank to the center of the rear dropouts). The other thought that occurred to me is that there might even still be space for a capacious saddlebag; say the Frost River Caribou Trail for example, in addition to a bag on top of the rack.
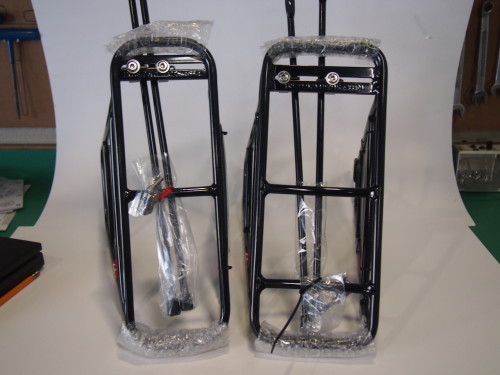
two racks
The wanderlust H.D. on the left has a slightly narrower top.

racks side by side
The H.D. version in the foreground is wider at the bottom.

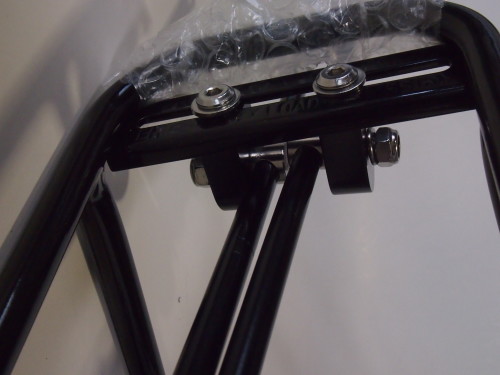
Salsa rack hardware
Simple, robust hardware.

wanderlust and logo
With the lower attachment points more or less aligned it is apparent the top platform of the Salsa Wanderlust (in front) will be well aft of that on the Tubus Logo. (rear)

This didn’t start out as comparison between these racks and the Tubus Logo but one is inevitable since the new heavy duty Wanderlust is in the same price range; $140 for the Salsa Wanderlust H.D. and $150 for the Tubus Logo. Both racks are made of steel but the Logo is lighter by almost half a pound or 195 grams. I weighed the Logo at 1 lb. 13 oz. (840 grams). The Logo also has a greater rated load capacity at 40 kilograms or 88 pounds, whereas the H.D Wanderlust has a rated capacity of 25 kilograms or 55 pounds. The standard Wanderlust is made of aluminum and weighs in at 800 grams or 1 lb. 12 oz.; close to the weight of the Tubus Logo, but it has less rated capacity at 15 kilograms or 33 pounds. In fairness it also costs $55 less than the Logo.

These new Salsa racks get the Bike Hermit™ Seal of Approval. For those who have bikes with shorter chain stays but still want to carry a pretty significant load, the Wanderlust H.D. is a good alternative. And the standard Wanderlust is a sturdy, well designed rack that should handle most bicycle touring duties with equanimity.

Categories
Surly Bikes Touring Bicycles

Surly Disc Trucker -Redux

In an earlier post I talked about cable actuated disc brakes on the Long Haul Trucker.

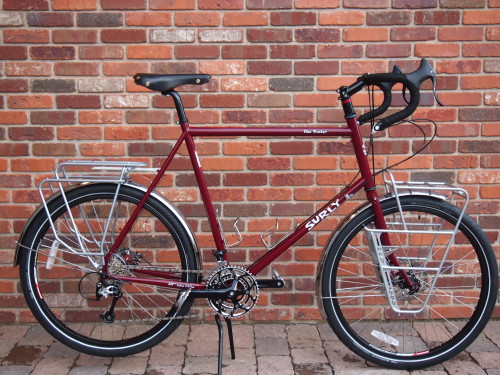
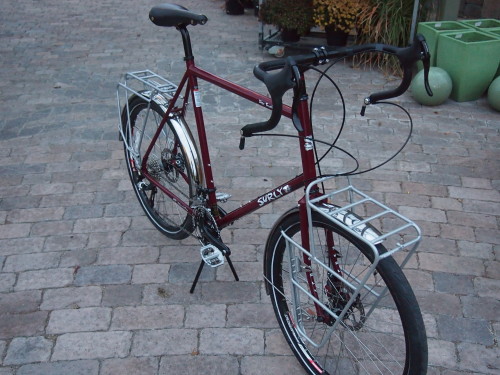
Surly rolls out bikes in new colors each year (or so). They continue to sell bikes in the previous year’s colors until they are gone. For 2014 the new Disc Trucker color is burgundy. We just finished this bike for a customer:
1/4 view of bike
A 62 cm Surly Disc Trucker with 26″ wheels

side view of bike
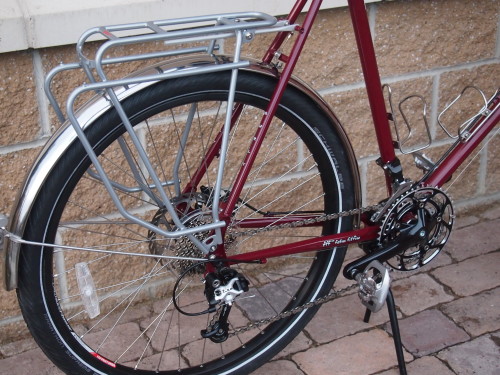
Tubus Logo rear rack and Surly front rack

tubus logo
The Tubus Logo rear rack; simple, strong and practical.
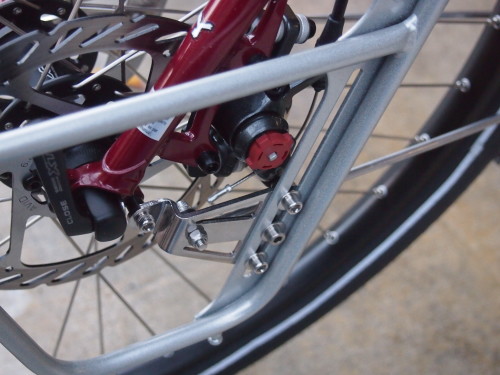
rack attachment
The Surly front rack can be fined tune to clear the disc brake caliper and there is a special hole for the fender stays.

Additions and Substitutions:
Gilles Berthoud stainless steel fenders- 26×60
Gilles Berthoud Aspin saddle– black
King Cage Andrews stainless steel bottle cages
Shimano PD-A530 double sided pedals
Schwalbe Marathon Supreme 26×2 tires replace the stock Continentals
Surly front rack– silver
Tubus Logo rear rack– silver

Categories
Bags/Panniers/Racks Front Racks Rear Racks

Old Man Mountain

The Bike Touring News Store has Old Man Mountain racks! Designed and made in Santa Barbara, CA. Old Man Mountain has a rack for almost any bike including full suspension mountain bikes and fat bikes.

Here’s an Adventure Cyclist Story from 2004. It describes the genesis of the company, the owner’s background and some of the philosophy behind the designs.

Please check the offerings in our store and feel free to contact us if you have questions or need a rack you don’t see.

Categories
Front Racks Touring Bike Accessories

Salsa and Axiom Low Rider Racks

So called “low rider” racks are popular for carrying panniers on the front of the bike. We have already gone over the Nitto Campee rack and the Nitto M-12-2 rack.
Axiom makes the Journey DLX Lowrider and Salsa sells the Down Under rack. Both are made of tubular aluminum.

The Salsa rack is similar to the Tubus Duo in that the top rails sandwich the fork blade and bolt on both sides of it. The only down side is that not all fork blades have a threaded boss on both sides. (The Surly Long Haul Trucker does)

The Down Under rack attaches to the fork dropout eyelets with a welded tab. There are no moving parts and the rack is all one piece which should make it fairly reliable. My only gripe is that there are no “pannier stops” on the top rail and so the panniers have a tendency to slide back and forth but I think some simple after market mods would solve that.

There is a barrel boss welded to the leading edge of both top rails though, ostensibly for the attachment of Salsa’s Minimalist front top rack, but I think they would make ideal light mounts.

The Salsa Down Under low rider rack
Long top rails with a forward bias and barrel bosses for a Salsa Minimalist rack or for lights

The Axiom Journey DLX Lowrider rack employs a two piece design and comes with a large u-bolt to attach to the fork leg. The two pieces are designed to pivot in order to achieve a fairly level attachment rail for the panniers when used on forks with varying rakes. The good thing about this rack is that mid fork eyelets are not required, in fact it appears that the u-bolt attachment actually is designed to stabilize the rack from twisting. When I bolted the rack to one mid fork eyelet on the Long Haul Trucker I was able to twist the rack with my hands- less than ideal for carrying bags next to the wheels! And even with the pivoting design I was unable to get the top rails completely level with the floor when mounted. On a bike with 26″ wheels and wide profile cantilever brakes, such as the Tektro CR-720, the top rail interferes with the brake caliper….not an issue obviously on a 700c wheel bike or even a 26″ one with disc brakes or narrow profile cantilevers.
Another good feature is the stops on top of the rails to keep the panniers from sliding. This is a serviceable entry level touring rack that will not break the bank.

The Axiom Journey DLX Lowrider. A decent entry level low rider rack.


Tabs on the top to keep the panniers from sliding. The wide profile brakes on this 26" wheel bike hit the top rail of the rack.


Categories
Bags/Panniers/Racks Front Racks Touring Bike Accessories

Nitto M-12-2 Front Rack

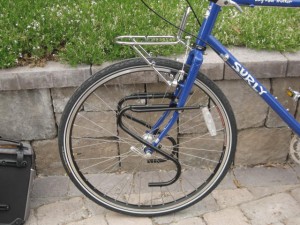
The Bike Hermit likes his front bag because it is easy to reach even when riding and because it has a map case on the top for… maps. A “handlebar” bag, one that attaches only to the handlebar, is not ideal because it affects the steering of the bike too much. One that is supported on a low front rack is better. The Nitto M-12-2 rack is a tubular steel rack made in Tokyo, Japan by the Nitto company. It works on bikes with cantilever brakes and will support a front “rando bag” such as those made by Gilles Berthoud, Acorn or Swift. A person could just strap a dry sack or a tent or zip tie a basket on it too. Since the mounting points are up out of the way, “low-rider” racks and panniers can be used at the same time! The “-2” after M-12 references the two light mount braze-ons- one on either side of the rack.

Nitto M12 on Surly Long Haul Trucker
The Nitto M-12 front rack attaches to the cantilever brake bosses and the brake hole in the fork crown.

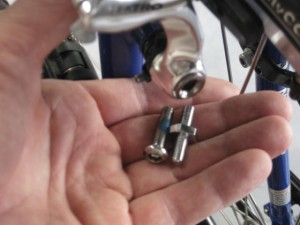
replacement brake stud for NItto M-12
Replace the button head brake bolt on the left with the double ended stud on the right.

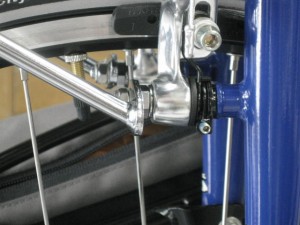
Nitto M-12
The rack bolted to the replacement brake stud.

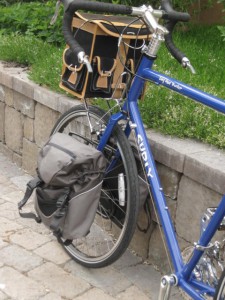
Berthoud GB28 on Nitto M-12
And now, Mr. Berthoud can come along!

Some minor tweaks may need to be made to get the rack arms or struts to line up with the respective holes and bolts, but these are made of tubular chrome-moly steel which can stand up to a small amount of judicial bending. Just be careful about bending the piece too far….make small incremental adjustments so that you won’t need to bend it back.

Categories
2011 Oregon Manifest Event Coverage

Oregon Manifest 2011 – Three Bikes

I judged the entries by how they incorporated the mandatory design features outlined on the Oregon Manifest site:
-Anti-Theft System
-Fender System
-Lighting System
-Load System
-Free-Standing Under Load (While Parked) System
With a heavy bias toward integration, quality of execution and aesthetics.
In no particular order, I thought these bikes were outstanding.
YiPsan Bicycles
This bike has a two legged kick stand and, depending on how the load is distributed, is balanced in such a way that either the front or rear wheels are off the ground, facilitating flat tire repairs.

Rear wheel removal mode


Front wheel removal mode


To help stabilize the bike when parked, this pin runs through the fork brake bolt hole and into a custom hole in the frame’s downtube


When riding, the pin is retracted and held against the fork magnetically.

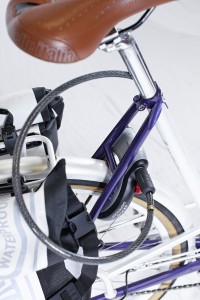
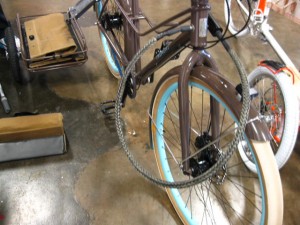
There is a Dutch bike style lock which is attached to the frame and locks the rear wheel so that it can’t be turned, and Renold inserted a braided steel cable into the seat post of the bike which can be pulled out and locked into the wheel lock mechanism.

Yep, that cable disappears into the seat post.(Photo from YiPsan Bicycles website)

With fenders, internally geared rear hub, belt drive, generator lights and great load carrying capacity, this bike’s got it covered. And it fits Leah like a glove.

Bauhinia – YiPsan Bicycles from YiPsan on Vimeo.

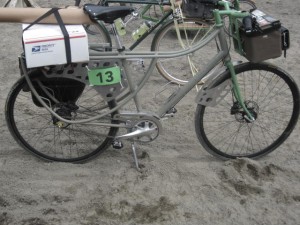
The more I looked at this bike, by Geekhouse, the more I liked it. I talked to the builder at the lunch stop and took these pics.

Geekhouse touring bike

I thought this was a really creative frame design. Not a traditional double diamond frame, rather an inverted curve or an arch, the other strongest shape, basically forming the seat stays and rack. The double top tubes curve down and sweep back to form the rear rack, also establishing a low stand over height.
The rear skirt guard and front fender design could be improved to provide better spray coverage. And again the ubiquitous Shimano Alfine internal gear rear hub and front dynamo hub. The front light was actually integrated into the stem.

Geekhouse touring bike
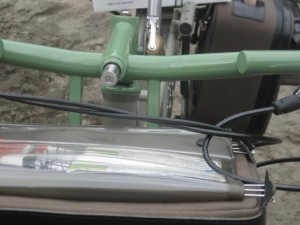
The front light is part of the stem, but I think the bag is in the way. Should be an easy fix though.

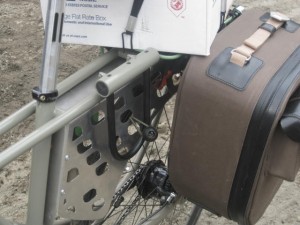
The shaft of the u-bolt lock is built into a short piece of tubing welded to the two pivot points on the top tube. The shackle portion of the lock is strapped down when riding and pivoted up and removed to lock the bike to a post or bike rack.

Nice work integrating the Brooks bag carrier into the handlebars.

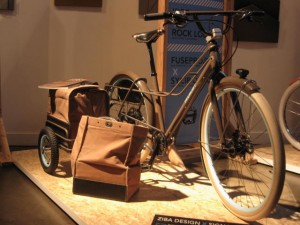
Another bike I was drawn to is the Fremont a collaboration between Ziba and Signal Cycles.

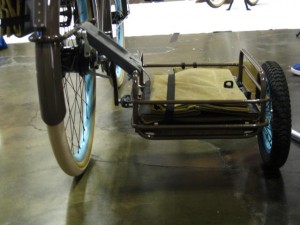
This is one of several side-car designs at the event, but it seemed like the most practical of the bunch to me because the side car folds up over the rear fender to become a rack. And the side car met the additional requirement of providing a support for the parked, loaded bike. The canvas bags were made for the team by a local Portland seamstress.

The locking system is a little clunky since one needs to remove the cable and stash it when riding, but then again it’s not that much of a hassle and there is plenty of room to carry it.
Side Car flipped up and now is a rear rack

I thought these bikes met the challenge requirements in elegant ways and I can see how they would be practical and functional in the real world.

Categories
Bags/Panniers/Racks Rear Racks

Tubus Quick Release Adapter

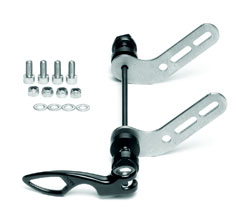
Tubus quick release mounting kit
The Tubus quick release mounting kit

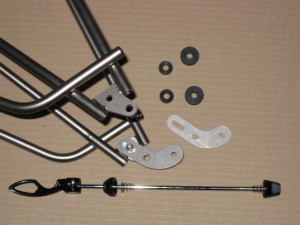
Made for use with Tubus racks, the Tubus Quick Release Adaptermakes it possible to mount a rack securely on a bike without threaded braze on tabs at the dropouts. The package comes with two brackets meant to be attached to the lower two bolt holes on Tubus racks. The supplied skewer is then threaded through the bracket on one side, a shim, (also supplied) the hub axle, and the shim and bracket on the other side and tightened down with the standard cam lever. There are shims provided of two different thicknesses, and the adapter will work on any rear dropout spacing.

Keep in mind that, if your bike doesn’t have eyelets at the dropouts, chances are it wont have eyelets on the seatstays and some sort of clamping arrangement will need to be made there. Tubus makes a stainless steel clamp with a thick and firm cushioning liner, in various sizes, just for this purpose.

Quick release mounting adapter
The two brackets are made to attach to the two holes in the bottom of Tubus racks.


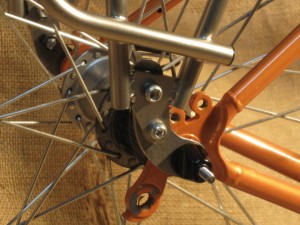
adapter mounted to bike
The replacement skewer runs through the hub axle and the brackets. Shims are supplied to go over the skewer for different widths of rear frame spacing.

As can be seen in this last photo, the brackets cause the rack to be mounted a little bit farther back than if it were attached to the braze on eyelets. This might also be a good solution for bikes with shorter chainstays when the pannier placement results in heel strike.

Categories
Bags/Panniers/Racks Panniers

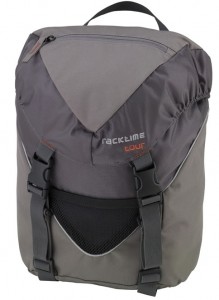
Racktime Travel-It

Racktime Travel-It rear pannier
Racktime Travel-It front pannier

(NOTE 10/31/2016: Racktime no longer has a distributor in the USA)

(NOTE 11/12/14:  Since this review, Sky King has used these panniers a several trips and the performance was most excellent.)

This is not really a review- I have not had a chance to actually use the Racktime Travel-It panniers yet- more like my impressions.

Racktime is an offshoot of Ortlieb/Tubus, the go to brands for many bike tourists. The products are distributed in the USA by Ortlieb-USA so my confidence in the products and service is high.

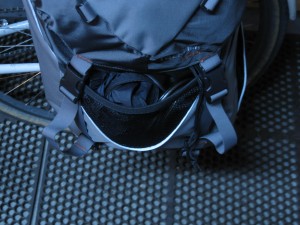
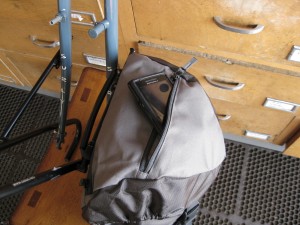
The first thing that attracts me to these bags is the external pockets. The rear pannier boasts two pockets on the top cover, one large mesh pocket on the side and a zippered, bellows type pocket on the trailing edge. In my experience, external pockets make it easier to find whatever one might be looking for…easier than with panniers which only have one large compartment.

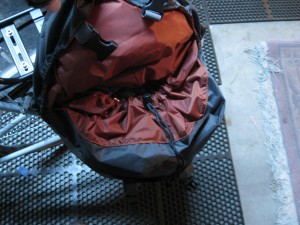
The aggressive elastic binding the top cover should make sure the contents are secure, especially since there is a nylon shroud with a drawstring inside the main compartment. but it also interferes with the lid opening completely, making accessing the main compartment a tad fussy.

Racktime Travel-It rear pannier main compartment. Notice the nylon shroud with drawstring.
Front mesh pocket on Racktime Travel-It
Front pannier top pocket
The attached rain cover goes in this pocket with room left over for gloves and a cap
The large rear bellows type pocket on the Travel-It rear pannier
QL1 mounting system on front Travel-It. Rack is the Tara from Tubus

The mounting system is the tried and true QL1 system from Ortlieb. This is one of the most secure and simple to use designs I have seen. When the pannier is lifted by the handle, the two hooks on the reverse side are opened. Then the pannier can be hooked into the rack. Once you let go of the handle, the two hooks close around the rack tube.

The Ortlieb QL1 mounting system

Fixation of the lower section of the pannier is just as important as mounting in the top section in order to prevent the pannier from sliding and pivoting. The lower fixing hook serves for this purpose; it fixes the pannier to a vertical tube of the rack and secures it in the lower pannier area. The hooks may be adjusted easily to the distance required and tightened in position with allen key size 3
The QL1 hook system is adjustable using various inserts allowing compatible mounting on standard racks with an outside diameter of 8 -16 mm. The upper QL1 hooks can be reduced in size by inserting reduction parts into the hooks for 8mm or 11mm. The hook then closes perfectly around the rack tube and securely holds the pannier in its position.

Reduction spacers can be clipped into the top hooks of the Ortlieb QL1 mounting system to adapt to different rack tube diameters.

My Surly Cross Check doesn’t have chainstays as long as those on most touring bikes, but even so when mounted on the Racktime Tour-It rack these panniers had adequate heel clearance.

Surly Cross Check, Racktime Tour-It rack and Racktime Travel-It rear panniers

Overall I’m quite impressed with the design and construction of these bags and they look like a great value. The rear panniers should fit on almost any rear rack including Racktime’s. Racktime doesn’t have a low rider rack currently for the front panniers but they fit nicely as shown on the Tubus low rider racks.

Categories
Bags/Panniers/Racks Rear Racks

Racktime Tour-It

We just received the  Tour-It rack and the Travel-It front and Travel-It rear panniers from Racktime for the Bike Touring News Store. Ortlieb, Tubus and Racktime  all come from the same company with the Racktime products intended for those who don’t want to pay Ortlieb and Tubus prices.

Racktime Tour-It rear rack

Naturally, as with any new gear, I had to fiddle around with it and I mounted the rack on Norm, my Surly Cross Check bike and installed one of  the rear panniers. I wanted to see what the hardware was like and how well the bags mounted and also I was eager to see how the bags differ from the Ortieb back and front rollers.

The Racktime racks are made of aluminum as opposed to the tubular chrome moly or stainless steel of the Tubus offerings. This rack actually weighed a few ounces more than the Tubus Cosmo stainless steel rack even though the two have nearly identical configurations.  Overall the mounting of the rack was simple and straight forward. Screws attach through a hole in the welded plate on the bottom of either side of the rack and into the dropout eyelets on the bike. The spacing was perfect for the 135mm rear blades on the Surly and I didn’t need any shims and there was no prying or spreading of the rack legs either.

The braces which secure the upper platform to the bike are meant to be attached to eyelets on the seat stays, but could be attached to clamps if no eyelets are provided. The other end of the braces then thread through an eyebolt which in turn is bolted to the rack platform. Even though this is a versatile setup, if I was going to make this a permanent attachment I would bend the struts in order to achieve a better alignment. Or else I would cut them shorter. As it was, the vertical sides of the rack interfered and I was unable to tighten things down completely.

All the hardware needed for the Racktime Tour-It rear rack. Standard bolts, eyebolts, and two stays.
The stays or braces bolt to the seat stays and thread through the eyebolts. For a permanent installation, I would either cut them shorter of bend them so they didn't hit the vertical leg of the rack.

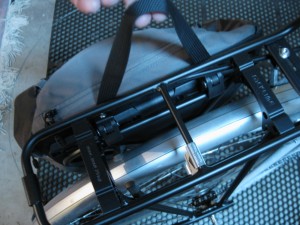
I like theminimal hardware on this rack since the fewer pieces and bolts to come loose the better when on the road. The top platform is wide enough to actually be used to carry a sleeping bag or tent and the lower set of rails allow for the attachment of panniers in such a way that they won’t interfere with a load on the top platform. The little pump pegs on the left leg of the rack are a cool idea, but I am unaware of any pumps that will fit on them. I was told that this rack is made as original equipment on some bikes for the European market, and they have their own proprietary pumps. The rack also will work with the Racktime SNAPit components. The rack is rated to carry up to 30 kilograms and the suggested retail is about $65.00.

Categories
Touring Bicycles

NAHBS, Day One, cont.

Jon Littleford makes custom touring bikes in Portland, OR with an emphasis on durability and usefulness. Where have I heard that before?

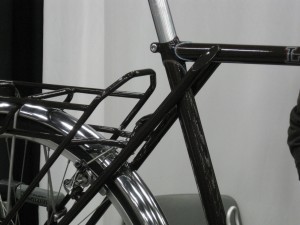
Holder for u-lock on rear rack.
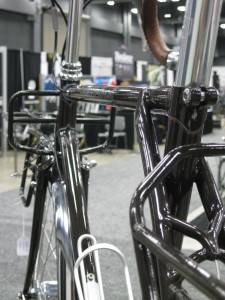
Meticulous
Integration
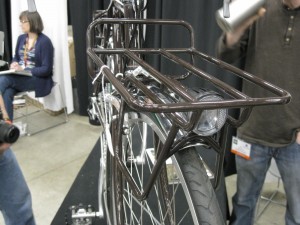
Integrated front rack.

Now I realize, after looking at these photos that I may have missed some details on this bike like the routing of the rear brake housing..is it actually inside the rack tube? Have to go back tomorrow and see.

The brake housing enters the top tube and exits through the rack braces in lower right.

Indeed after closer inspection the brake cable/housing enters the top tube and exits from the rack support behind the seat tube. Very clever and clean. I wonder how hard it is to change the cables!