DISCLAIMERS
-The Bike Hermit started this post and turned it over to Ryan to do the un-boxing and comparisons of the lights reviewed here. During the final edit it became apparent that the Bike Hermit’s contribution was somewhat incoherent and truculent. That part was removed in favor of Ryan’s more measured and lucid approach. The Bike Hermit did complete the last part- “Road Test”
-We are not giving advice here on how to light your bike and/or yourself. Each rider should take the responsibility of knowing local laws pertaining to bicycle safety and for using common sense.
–In Germany, bicycles are legally considered to be part of traffic, and so the laws (Straßenverkehrszulassungsordnung, abbreviated StVZO) are very specific. In fact all bikes over 11 KG are required to be fitted with dynamo powered lights. Even lighter, “racing” bikes are required to have lights but these can be battery powered. And every bike light sold in Germany must have an approval from the department of transportation. Blinking headlights or taillights are not legal. (need to get me a lobbyist)
-Boise City Code Section 10-14-03 says:
When in use at nighttime, a red reflector on the rear visible from a distance of three hundred feet (300′) when directly in front of lawful upper beams of a motor vehicle, and a forward-facing white light attached either to the bicycle or the bicyclist which is visible from a distance of at least five hundred feet (500′) in front of the bicycle. A bicycle shall be equipped with a frontfacing
white or yellow reflector when the bicyclist uses a generator powered light which is unlit when the bicycle is stopped.
######
———
B&M Battery-Powered Headlight Comparision
We talk a lot about dynamo-powered headlights around here, and for good reason because there is a lot to like about them. However, dynamo-powered systems have their drawbacks. First, the light is wedded to the bike it is installed on and doesn’t easily switch over to another bike. Also, while some dynamo-powered headlights are quite inexpensive the entire kit can cost a good deal when the hub, wheel build, installation, etc are factored in. Depending on the hub and light used, the resistance can be noticeable. Exposed wiring often lends an untidy appearance on an otherwise sleek and elegant machine. Dynamo hubs can also add a significant chunk of weight.
Even with the excellent dynamo-powered lights available today, there is still need for a well designed battery-powered light that solves all of the above problems associated with dynamo lighting while still providing useful lighting. However, most of the lights widely available in bike shops across the US fall into one of two categories: “to-be-seen lights” with limited ability to illuminate the terrain and high-output, flood-style lights designed to turn a pitch-black singletrack into broad daylight. For most on-road riding, neither is ideal. A middle ground must be sought.
The main problem with either style of garden-variety LED lights commonly used by US riders is that the beam is typically round and uncontrolled, spilling out wildly in all directions. With a light of the dim, “to-be-seen” style the rider is the only one at a disadvantage. Even fairly low-powered LEDs are bright enough to be seen at a great distance by other road users. What these lights don’t do is illuminate the road ahead of their rider. On back roads, streets or paths without lighting, this can produce anxious moments. Potholes, cracks, road debris and other obstacles are invisible until it is too late.
On the flipside, with some of the more powerful lights designed for off-road riding the beam can be absolutely blinding for anyone facing the rider. This is not only a problem for oncoming traffic but also dangerous for the rider who is rendered nearly invisible by their blinding light! On a more technical note, we must also ask what good is all that power when half of the light’s beam aims above the horizon line? Many consumers equate a large light output number with a quality light but all the photons in the world are useless if they are not aimed purposefully.
Enter busch+müller with their battery-powered LED lights modeled after their excellent dynamo systems. These are actual bicycle headlights, not merely “flashlights with a handlebar mount” as Peter White calls the inferior LED lights described above. We are currently stocking several of these lights that are ideal for any bicycle where a dynamo system is impractical. Let’s take a closer look at two of them: the Ixon IQ and Ixon Core.
They look very different on the surface but are remarkably similar in function. They are priced within a few dollars of one another. The light output of each lamp is nearly identical, with a claimed maximum output of 50 Lux for the Core and 40 Lux for the IQ. Both lights also have a lower-output, battery-conserving “efficiency” mode where they emit a 10 Lux beam, which is the minimum standard brightness for bicycle headlights under German law. The key shared feature that distinguishes these headlights from the lights that most American riders are accustomed to is the top-weighted, manicured beam pattern manifested through B&M’s magnificent mirrors. We’ll look more closely at the beam patterns shortly.
When compared to wimpy “to-be-seen” lights or the overpowered, uncontrolled glare of the MTB-style floods, either of these German-made lights from Busch & Muller will do an excellent job of not only making a rider visible to other traffic but also allowing them to see the road they’re riding without blinding other users.
Un-Boxing
However, there are some key differences that set them apart that we should explore to help those looking for a high-quality battery-powered headlight decide between these two excellent options.
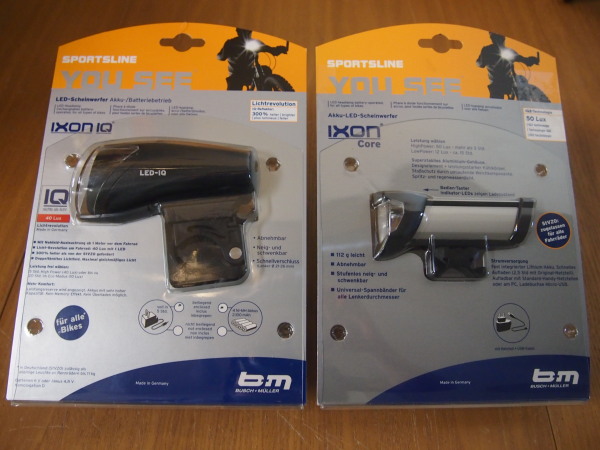
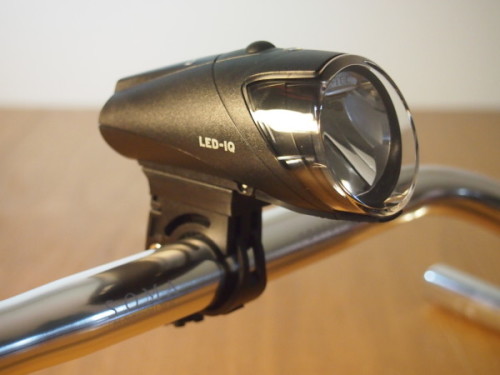
First, let’s dig into the Ixon IQ.

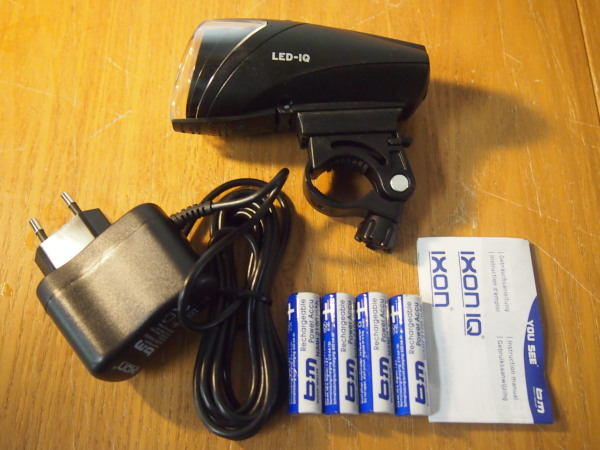
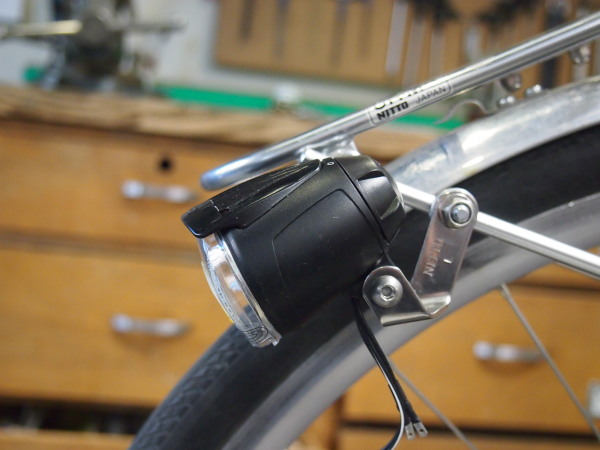
Here’s what comes in the package: headlight with handlebar mount, wall charger, rechargeable AA batteries, instructions. A two-prong adaptor for US wall outlets (not pictured) is also included at no additional charge when purchasing from Bike Touring News. The Ixon IQ is also available without charger or batteries for use with your own AA cells. B&M’s IQ mirror (used in the Schmidt Edelux, B+M’s own Lumotec IQ Cyo and others) is the key technology in this lamp. The power system also makes this light unique. The ability to use standard AA batteries lends a level of versatility if the charger is lost or for riders who are heading off the grid.

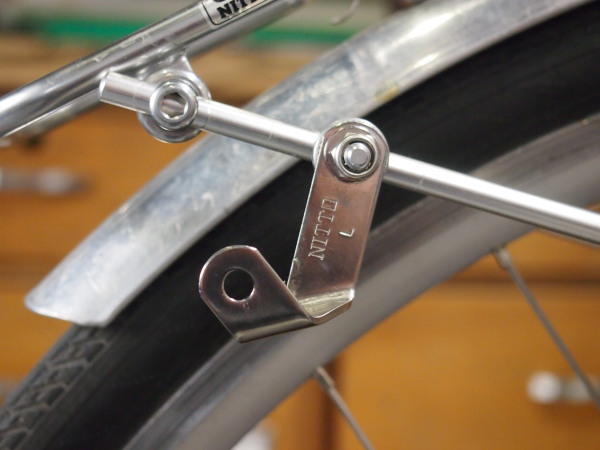
The use of AA cells rather than a built-in battery adds a bit of heft and bulk to the light but it doesn’t look too ungainly when mounted. The handlebar bracket has three adjustable positions to fit 22.2, 25.4/26.0 or 31.8mm handlebar sections and is locked down with a quick-release thumbscrew. The mount also allows a few degrees of horizontal adjustment for precise centering of the beam.
The batteries are very easy to install. You simply open the hinged case by pressing a small button on the rear of the light…
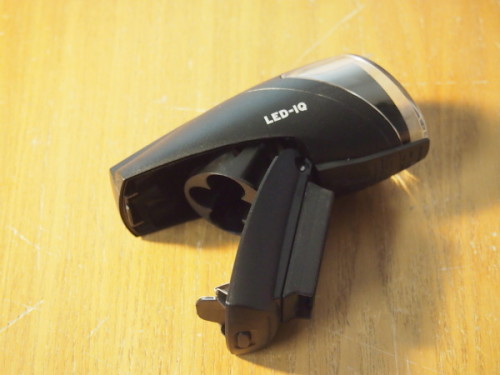
…then slide the batteries into their clearly-marked receptacles before swinging the case closed again. The second set of contacts is built into the lower portion of the hinged housing. The door closes firmly and securely to complete the circuit and prevent any unwanted movement of the batteries.
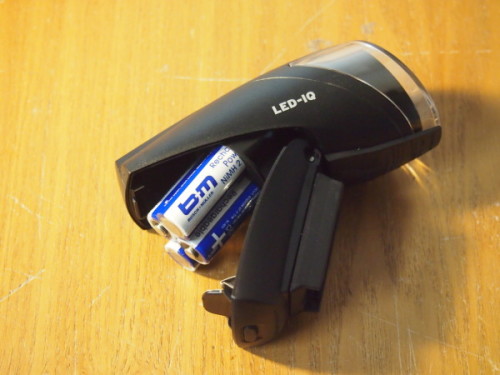
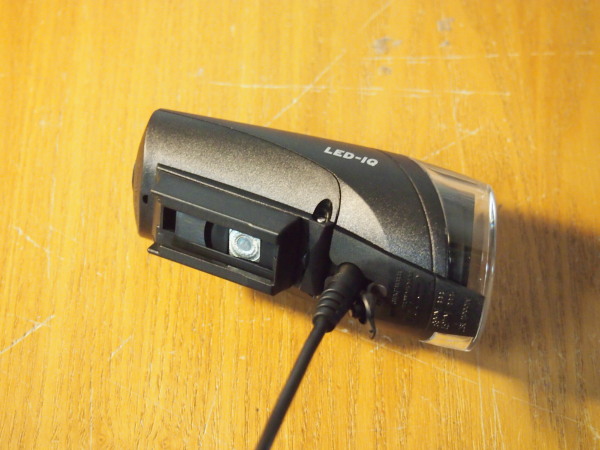
With the batteries installed, the Ixon IQ charges through a port in the underside of the light body, circumventing the need to remove the batteries to charge externally.

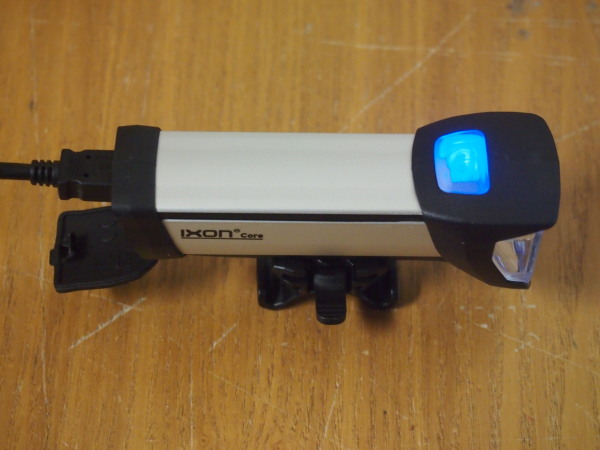
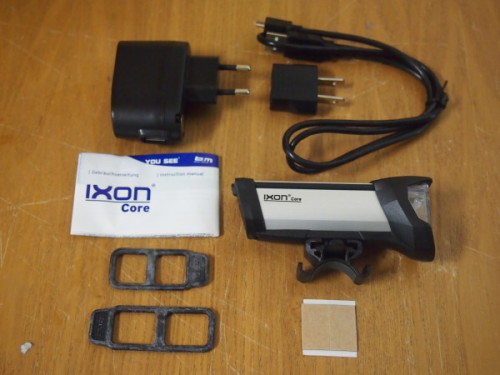
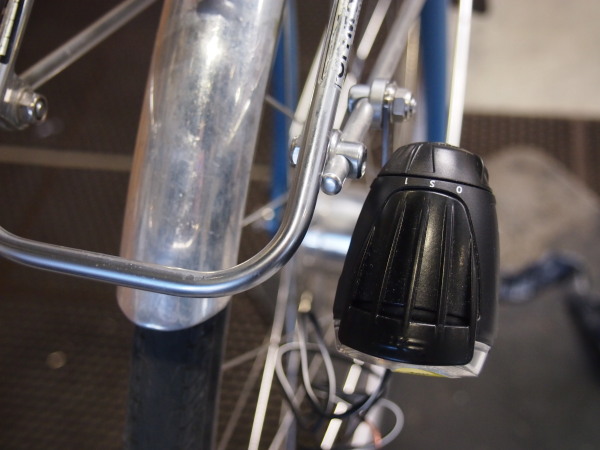
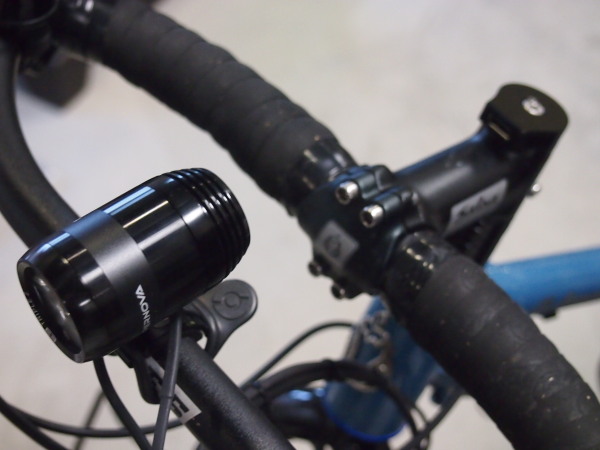
Okay, now let’s have a look at the Ixon Core. Though similar in function to the Ixon IQ, the Ixon Core is immediately distinguished by its silver finish, slimmer profile and the use of an integral lithium-ion battery rather than replaceable AA cells. This is both a blessing and a curse. The Li-Ion battery is lightweight and cleanly integrated but will operate over a finite number of charge cycles and could be outlived by the rest of the light. However, I suspect that many users will appreciate the sleeker look of the Core and the ease of USB charging without concern for battery lifespan.
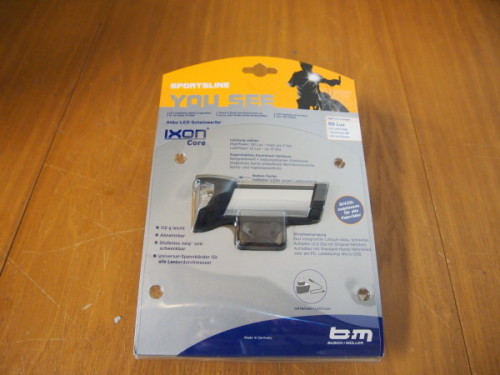
In the package you’ll find the Ixon Core light, adhesive rubber stickers, heavy-duty rubber attachment straps, instructions, USB charging cable with wall adaptor, and two-prong adaptor for US outlets (included at no extra charge when purchasing through Bike Touring News).
The Ixon Core charges via a USB port in the rear of the light, drawing power from a computer, wall adaptor or any other device with USB output. The light under the button glows blue while charging and switches off once a full charge is attained.

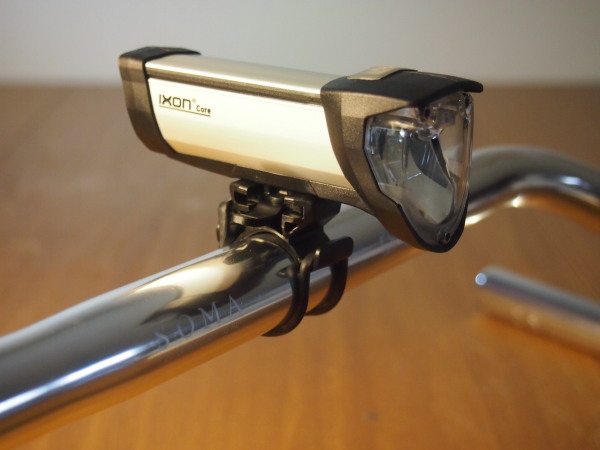
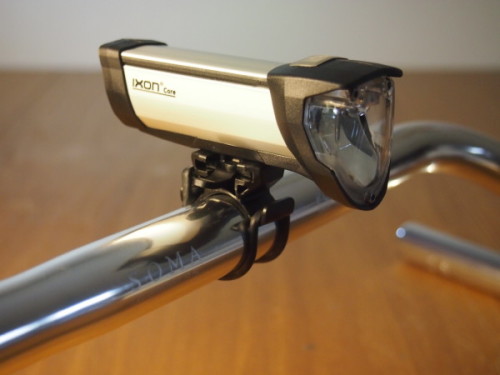
The rubber fixing straps are very tough and can be difficult to stretch around your handlebars but provide a very secure mount when in place. Like the Ixon IQ, the Core’s mount allows the light to pivot horizontally to allow centering of the beam when the light is mounted off-center from the bicycle’s centerline.
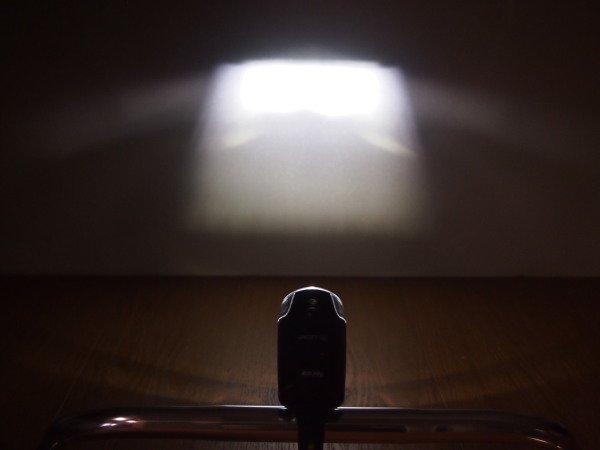
So, now that we’ve taken a good look at the lights themselves lets compare the two beams and their relative merits. First, here’s the Ixon IQ with its “high and tight” beam pattern. Note that the beam’s intensity is focused high to illuminate the road far ahead but with a sharp cutoff to avoid blinding oncoming users. When aimed from handlebar height, this beam provides very even illumination of the road surface. Very little light spills off the sides or bottom of the illuminated area.
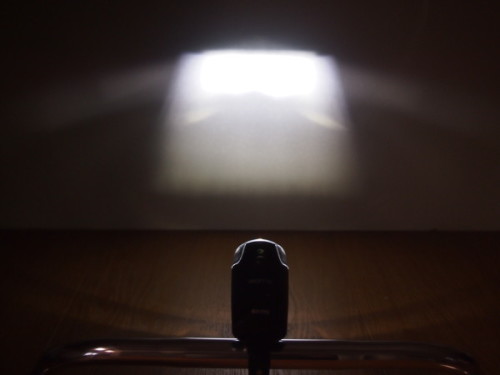
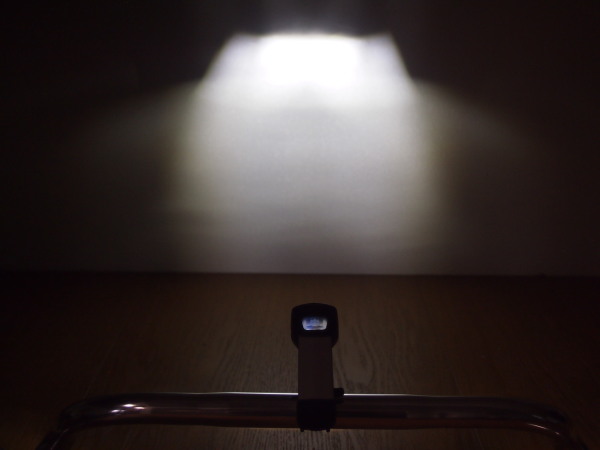
Here’s the Ixon Core for comparison. The beams are very similar in that they have a brighter top section for far-off illumination and a sharp cut-off at the top of the beam. However, the Core spills a bit more light around the sides of the main lighting area and especially at the bottom of the beam. To me, it appears that the extra 10 Lux of claimed output spills out in these areas rather than extending visibility in the center of the beam but we’ll look to the results of some road testing to confirm this.

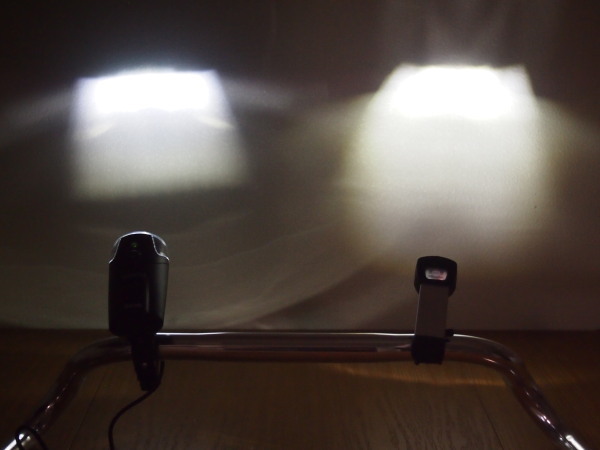
Here are the two lights presented side-by-side. The tight, focused beam of the IQ is easily distinguished from the broader, more diffuse output of the Core. In addition to their different charging and power characteristics, the differing beam patterns will make one light or the other a better fit for different riders.
In my estimation, the IQ’s beam will be better suited to faster riding on terrain without tight corners while the Core will perform best at slower speeds and in tighter terrain.

Road Test
I headed out last night after dark with both lights mounted side by side on the handlebars to compare the beams. After a few minutes, the IQ light turned off and I realized the batteries were dead. This illustrates one of the downsides of battery powered lights; maybe you forget to charge it at work and you don’t have spare batteries so you end up riding the last half of the commute in the dark. There is a low battery indicator LED on the top of the light and, if in high powers mode when the battery starts getting low, the beam automatically switches to low power.
The on/off buttons have a positive action and require being held down with some force for a second before the light turns off or on. So if the light is stuffed into a bag or a jersey pocket there is little chance of either of these lights being turned on or off accidentally.
Lucky for all, I rolled out of bed before daylight and accomplished the road test in the morning. Both lights have a similar beam pattern and I was hard pressed to tell if the Ixon Core, which is rated at 50 lux output was any brighter than the 40 lux Ixon IQ. Both lights create a well defined trapezoidal pattern on the road surface. The narrow end of the trapezoid appears a few feet in front of the tire (when mounted on the handlebars) and the two sides of the trapezoid diverge until the entire beam is the width of a two lane road at perhaps 150-180 feet from the bike. I describe the beam as though it was painted on the road, and that that is the impression I am distinctly left with. Almost no light spills outside of the trapezoidal beam lighting the road, except very close to the bike. The IQ light casts a dim crescent shaped light pattern if front of the front wheel. (which can be seen in the side by side comparison of the beams in the last photo above) The Core light projects a relatively focused beam out each side of the lens 90 degrees to the direction of travel, which makes the rider extremely visible from the sides. My observation is that the Core lights the road in a little more even and uniform way. The IQ light has a little triangular shadow in the near part of the beam and the upper edge of the beam (the wide part of the trapezoid farthest from the bike) is a little fuzzy compared to the Core.
Either one of these lights would meet the needs of most commuting and touring cyclists who don’t use dynamo powered lights. They do a fantastic job of lighting the road surface. They don’t do a good job of lighting the sides of the road next to the rider nor do they illuminate things like overhead tree branches.


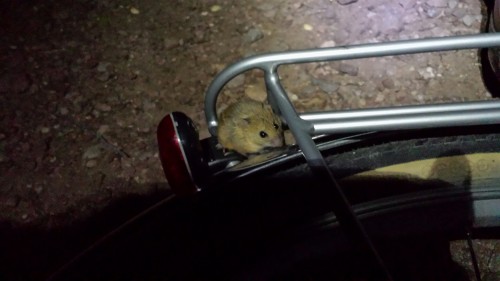
 But as always when riding, it got better.
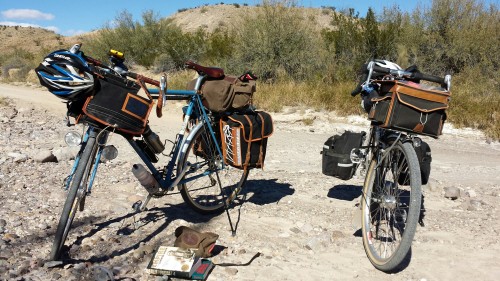
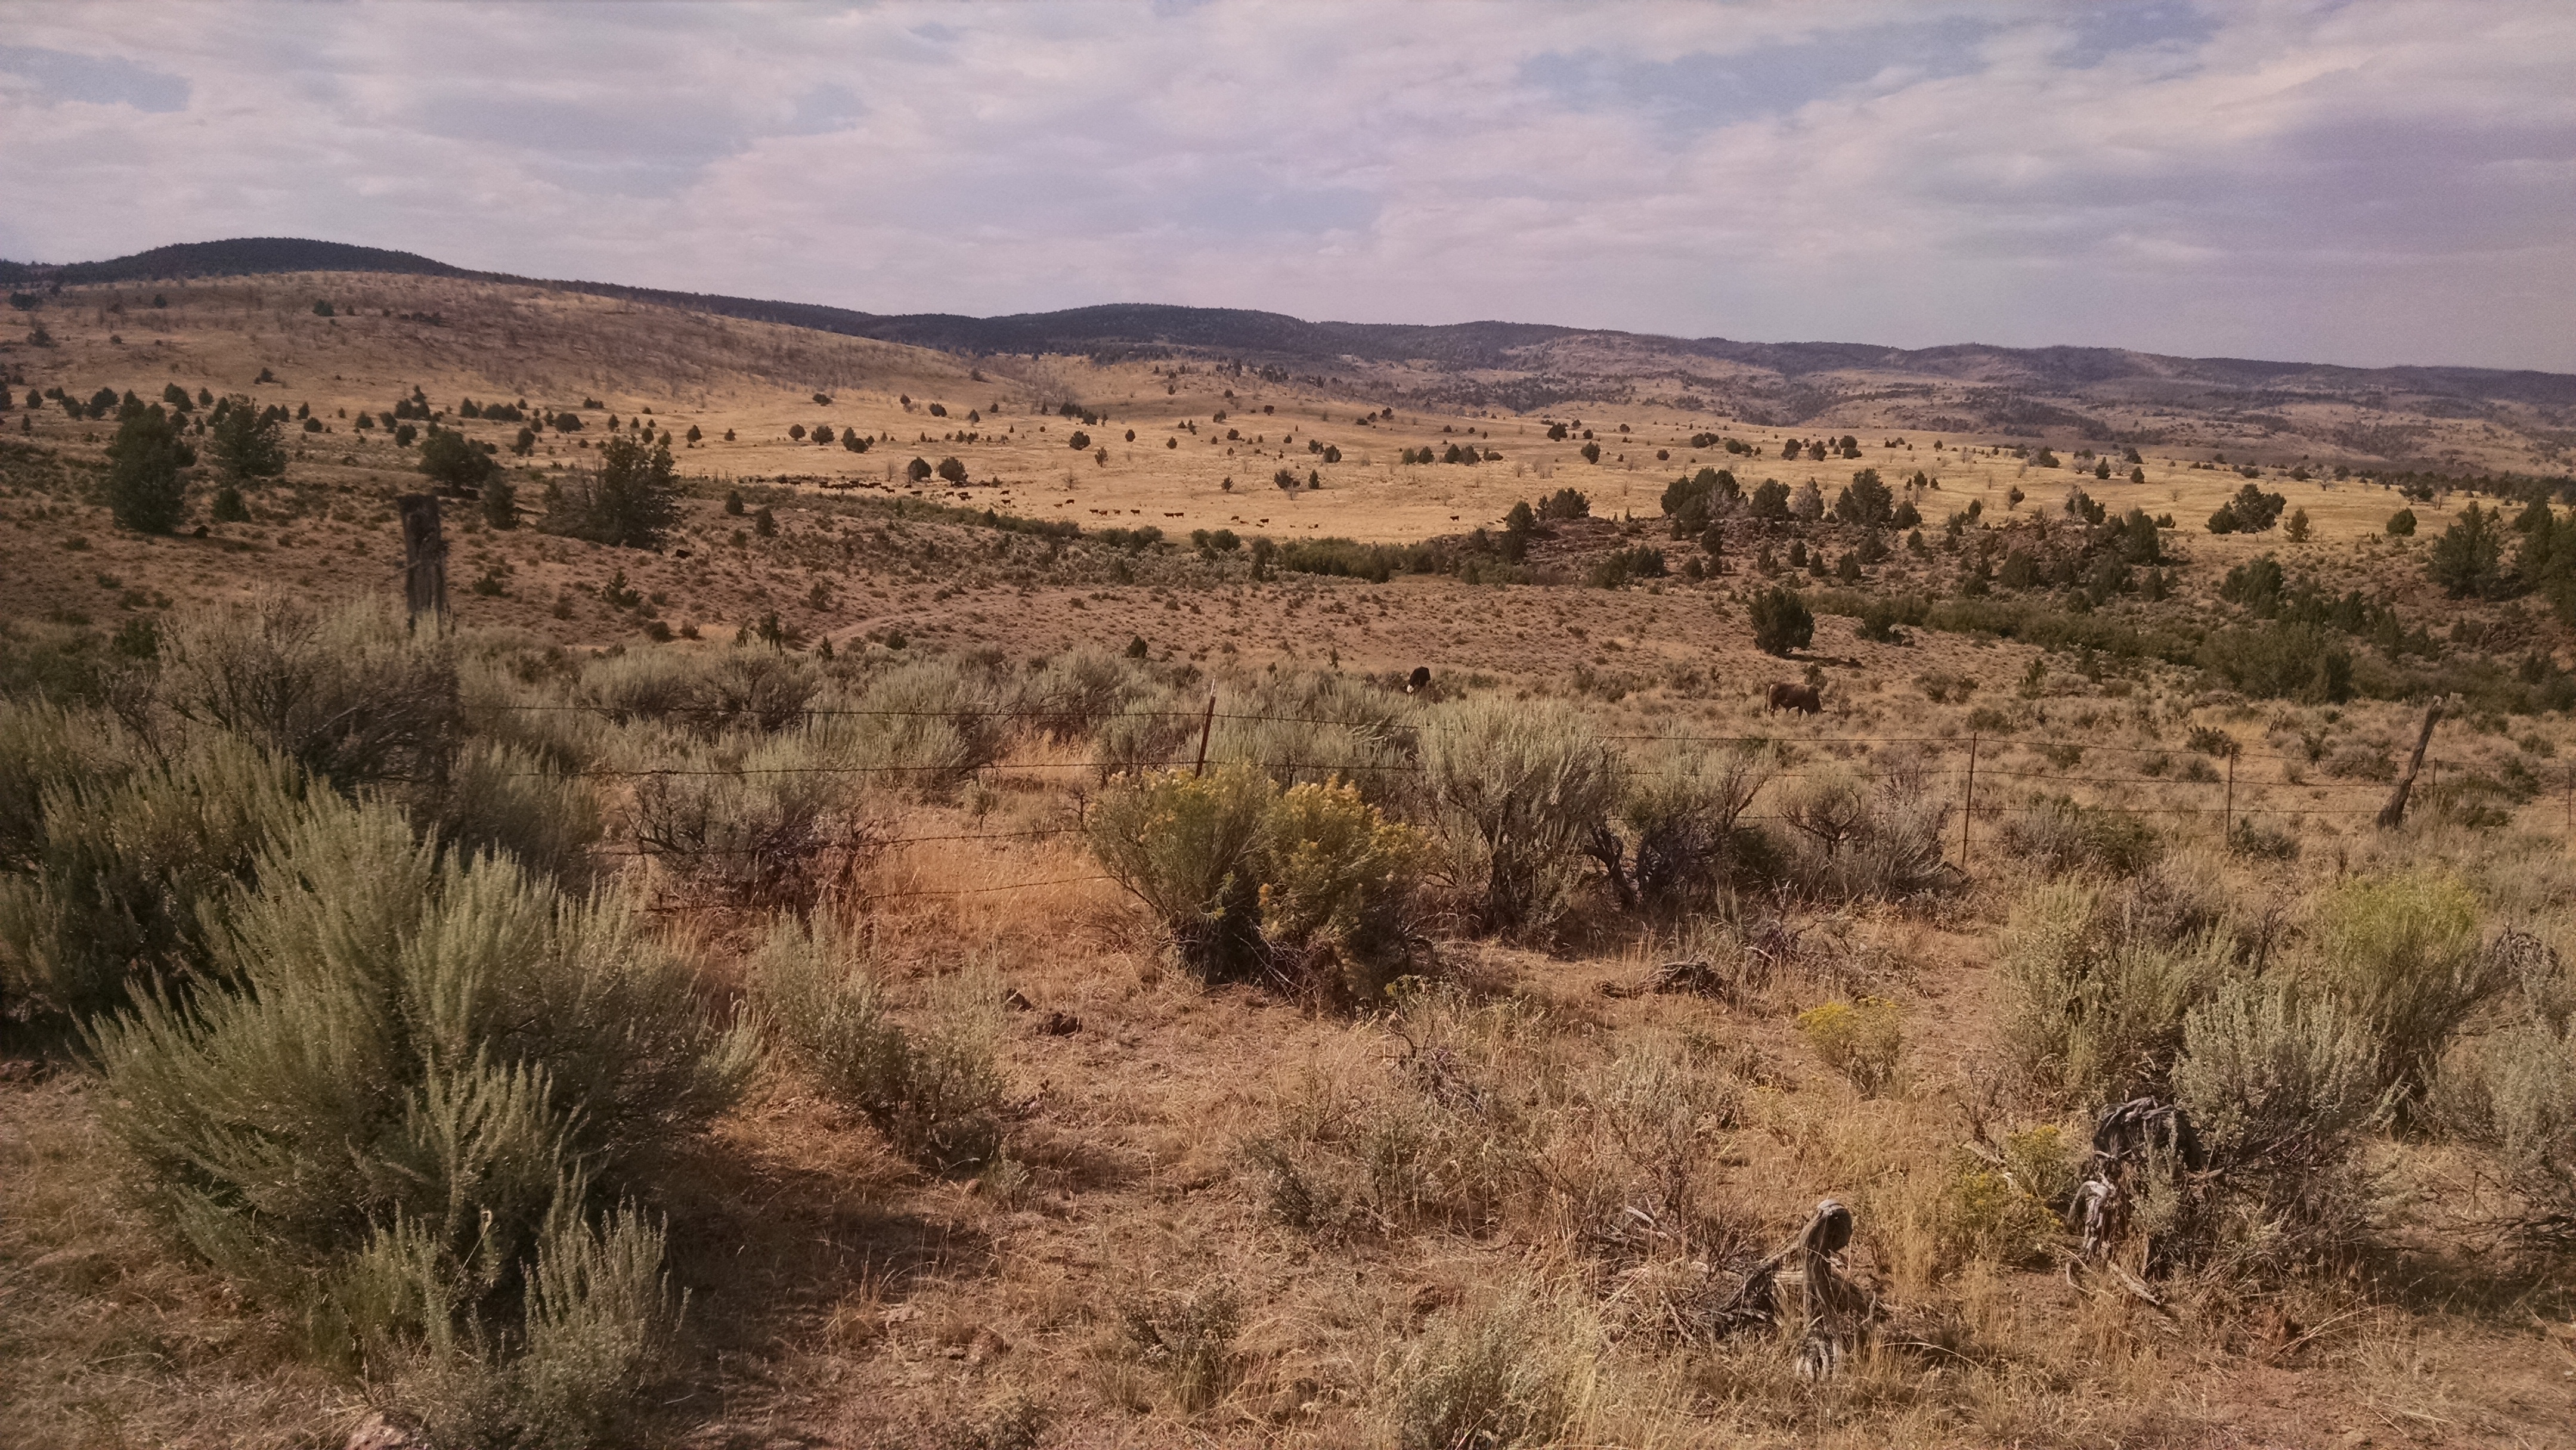
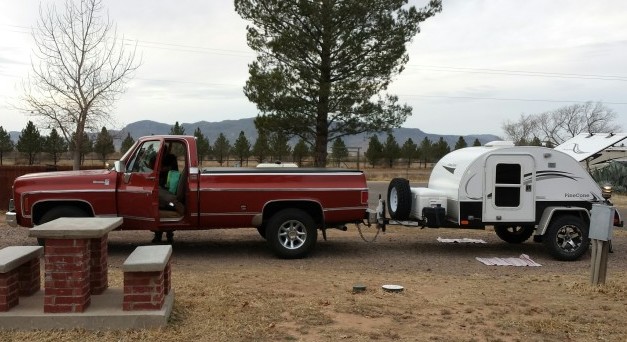
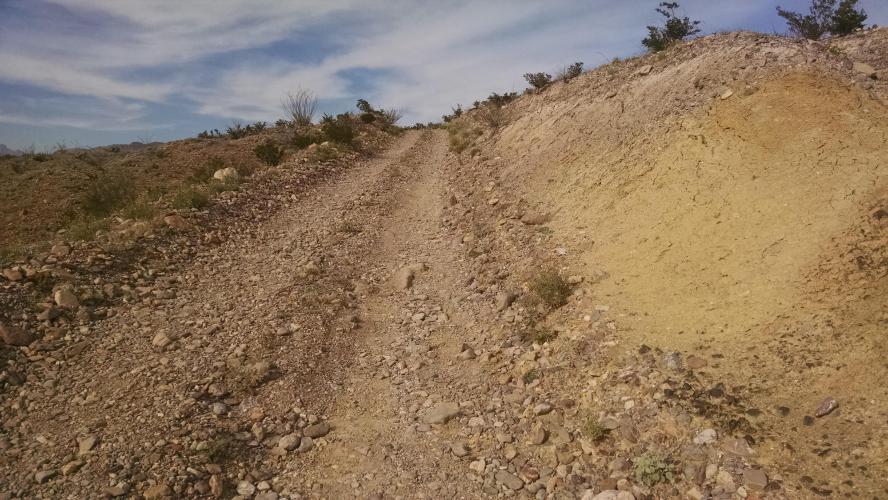
 West Texas is a country unto itself. I am a lover of wide open spaces and certainly got my fill of beautiful, quiet, rugged country.