Categories
Hermit's Workshop

Rust Prevention For The Steel Bicycle Frame

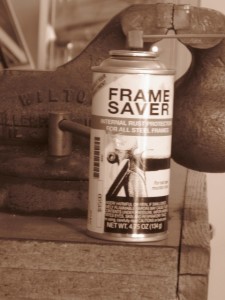
can of frame saver

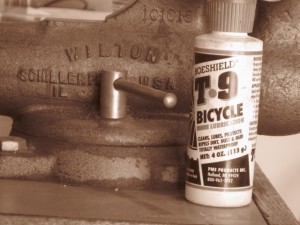
bottle of Boeshield lube
Get the aerosal can instead if you want to spray it in the frame. Makes a good chain lube too!

Steel can rust. More in some climates than in others. And rust will form when water, or water vapor, and air are both present and available. What does that mean for a steel bicycle frame? I have two steel frames, one is 40 years old and the other is 18 years old. Both have been ridden hard and put away wet, although for the last several years neither one has been assembled with parts and so there is no chance for moisture to mix with air and rust them out. (Not here in the high desert of Idaho anyway) Neither frame shows signs of rust on the inside of the tubes. Well, maybe a little bit on the older frame, but nothing worrisome.

There are a couple of precautions that can be taken to protect a steel bicycle from rust:
TAKE THE BIKE APART ONCE IN A WHILE! At least take the seatpost out and preferably the bottom bracket too. Let the bike sit inside long enough for any residual moisture to evaporate. Lube everything and put it back together. This is especially important for aluminum seatposts since the aluminum in contact with the steel WILL corrode, potentially requiring that the post be cut out of the frame seat tube. Don’t ask how I know this.

Use JP Weigle Frame Saver or Boeshield T-9 inside the tubes. Both products are delivered via solvents which evaporate and leave a sticky, protective film on exposed steel. Best to apply either one to a completely bare disassembled frame, since they are messy and you want the coating to be thorough, which means it will be dripping out of every orifice. Follow the instructions and precautions and make sure to use enough to completely coat the inner surfaces, but not too much. Be sure to allow enough time for the drying/evaporating process. The Boeshield T-9 makes a good chain lubricant as well.

Don’t let the fear of rust scare you away from a steel frame. In most cases, and with a little care, it will not be an issue.

Categories
Bike Touring Tips

Bike Touring – How Much Does It Cost?

campsite on bike tour
Cheap camping

How much does it cost to go bike touring?  Well, I guess it depends on the person(s). Some people can travel for next to nothing by eating store bought food rather than at restaurants and by stealth or wild camping wherever they happen to end up at the end of the day. Websites like CouchSurfing and Warm Showers connect travelers with people who are willing to provide a couch or a yard or even a bed.

Russ over at the Path Less Pedaled recently did this interview with Heidi Beierle who rode her bike across the country and wrote her master’s thesis on looking at bicycle tourism as an economic  development tool for rural communities. While not specifically about how much it costs to do a bike tour she does delve into that aspect.

httpv://youtu.be/X-XwCoOKHoQ

My recent 6 day and 5 night ride from Portland to Idaho broke down this way:

Food – $116.00

Mostly from grocery stores, with the occasional restaurant stop thrown in. Works out to about $19.30 per day.

Camping – $34.00

The most expensive night was $24.00 for a KOA. Two nights of wild camping for nothing and two nights in state parks at $5.00 per night. Average = $8.50 per night.

I also bought some fuel for the stove and some batteries and a memory card for the camera, but if I amortize those expenses over the life of those items it works out to pennies a day. For this trip I FedEx’d the bike to Portland and that cost $67.83. Shipping the empty box back home cost $30.35.  The cheap airline ticket to Portland, bought far in advance, was about $60.00.

So the total cost for the six day vacation with all the expenses thrown in was about $300.00. If I just look at the time when I was  on the bike, and don’t count the flight and shipping expenses, the six days cost me about $150.00 or $27.80 per day. Pretty cheap therapy methinks.

Categories
Hermit's Workshop

An Important Tool When You Need It

Somewhere I’ve heard the sentiment that youth might be wasted on the young. Sometimes I wonder if that doesn’t apply to pure dumb luck as well. When I was a good deal younger than I am now I was touring in New England. Just outside of a small Vermont town, as I started up a longish grade, and as the sun was starting its descent, I heard the telltale snap of a spoke in the rear wheel breaking. Then a moment later, because of the added stress on the remaining spokes, a second one snapped. My wheel was distorted but not too much to prevent me from wobbling back into town.

Here’s where the luck came in. There was actually a bike shop in this little town and they had a couple spokes in the right length. For whatever reason (I seem to remember it was closing time) I didn’t have them replace the spokes for me. Instead I walked across the street to a service station (told you it was a long time ago) borrowed a hammer and a screwdriver and sat on the concrete floor in an empty bay.

This was before the days of cassettes and I had a 5 speed freewheel on my Peugeot PA10, but I had no way to unscrew it from the hub. So I used the hammer and screwdriver to take off the top race in order to take the freewheel apart to access the spoke heads in the hub. I still can’t believe I was able to do it and get the spokes replaced and the freewheel reassembled without losing any of the 36 little ball bearings or the springs or pawls inside the freewheel.

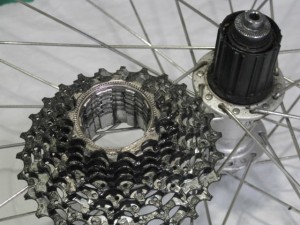
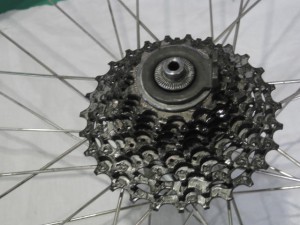
Nowadays on most bikes the freewheeling part, or cassette body will be part of the wheel’s hub and the cassette, or group of cogs, will slide over the cassette body and be held in place with a lock ring.

cassette next to cassette body
The cassette body is attached to the hub. The cassette cogs are slotted on their inner suface and these slots mate with the ridges on the cassette body
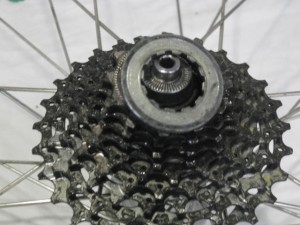
shows cassette lock ring on top of cassette
The cassette cogs are held down with this lock ring which screws into the cassette body.

You can see that if a spoke breaks on the cassette side of the wheel, the cassette needs to come off in order to get the broken end out and the new spoke in (did I mention I now carry spare spokes when touring? Here’s a way to do it).
Normally this requires a special tool with splines to match the lock ring, a big honkin’ wrench to turn the tool and another big wrench called a chain whip to keep the cassette cogs/body from turning. The Unior 1669 cassette lock ring tool weighs just a few ounces and can loosen the lockring and tighten it again with minimum fuss and save your bacon.

Unior 1669 cassettte lock ring tool
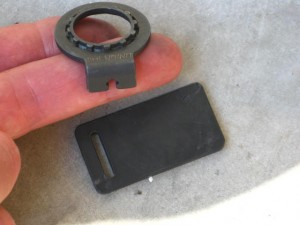
The Unior 1669 cassette lockring tool, all folded up.
Unior 1669 cassette lockring tool
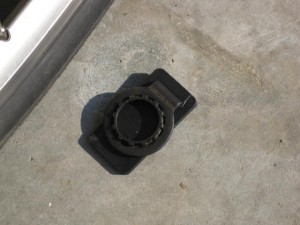
The tool incorporates a spoke wrench. The little plastic plate is held between the tool and the bike frame to protect the paint.

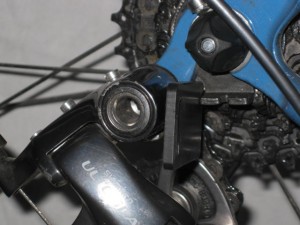
Using this little beauty to loosen a cassette lockring is not exactly intuitive. The first step is to remove the wheel and the nut on the quick release skewer. Then the tool can be slipped into place with the teeth of the tool meshing with the lockring teeth. Now the outside of the tool is flush with the end of the hub axle cones or adapters and the wheel can be put back on the bike and the skewer tightened to hold it in place. The tangs on the tool need to be pointing down in order to slip in between the derailleur hanger and the chain stay.

The cassette lockring tool in place
The cassette lockring tool in place. Note how it is flush with the hub axle adapters. Now the quick release skewer can be put back in and the wheel re-mounted on the bike.
cassette lock ring tool in place
The tool is in place, the wheel is secured and the plastic, paint protector plate is ready.

Now, giving a mighty effort with both hands on the crankset, the lockring can be loosened. When re-installing, the rear wheel is manually turned backwards while holding the plastic plate on the opposite side to protect the paint on the chainstay. Brilliant, really.

Categories
Bike Touring Tips

No Sweat, have water bottle will shower

A bit of sweat after a great bike ride

Guaranteed on any bike tour, you are going to sweat.  Ending the day with a shower is one of the ultimate rewards on a bike trip (ranks right up there with a cold beer).  On our recent tour on the Olympic Peninsula we spent each night at a campground but still ran into unexpected issues with using the showers.  Many campgrounds have “pay as you play” showers so be sure to tuck quarters into your pannier.  We arrived at one site “afterhours” and discovered they didn’t take quarters but used tokens that needed to be purchased from the camp host…  Well hell, what to do.  From previous trips we have devised a great technique for impromptu showers, we call it the two water bottles and a camp towel trick.  Simply heat water, pour into two water bottles.  At the campsite that had the shower but needed tokens, I took my water bottles, Dr Bonner’s liquid soap, my camp towel and my bike shorts into the shower stall.  I wet my hands, applied a small amount of soap and lathered all the priority body parts that need attention.  Then I used my two water bottles of warm water for rinsing.  While not as deluxe as a 3 minute shower, it takes the sweat layer off and I can sleep comfortably.

Why the bike shorts in the shower?  We travel with two pairs of shorts and every night  apply a small amount of diluted Dr Bonners to the chamois of the shorts worn that day and rinse well.  The shorts hang off the hammock for the night and if still damp in the am are securely draped over my sleeping bag for the days ride.

As noted we travel with hennesey hammocks so no tent for a private spit bath,  No worries, the rain fly makes a nice shower curtain for the two bottle shower.

A rainfly can double as a shower curtain

In addition to the camp towel and Dr Bonner’s, two other must have items I tuck into my pannier – Nutrogena Face Towelettes and baby wipes.  Both have travel packs.  It is nice to grab a face towelette and get the grime off and baby wipes … well let’s just say what did we do without them.

Categories
Bike Touring Tips

How to Ride a Bridge with no Shoulder.

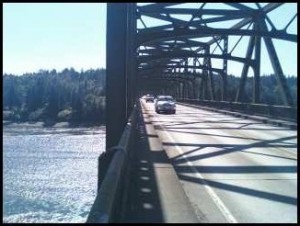
photo of Agate Pass Bridge
Sky King snapped this after crossing the Agate Pass Bridge. The bifurcated "shoulder" doesn't leave room for a cyclist. One option would be to walk across on the elevated portion, but there is not much room even for that. The other option is to "take the lane" as though you have the right...which you do.

Riding across the Agate Pass Bridge between Bainbridge Island and the Olympic Peninsula in Washington State on a fully loaded touring bike is one of the most frightening experiences I have had on a bike. The “shoulder” of the road way is divided by elevation, half is at road level and half is raised about 8 inches. So what is left is two unusable strips about 18 inches wide.

As I watch my wife ride over I choke down my fear of the unimaginable. She actually timed it perfectly by starting off just in front of a big box van which would have difficulty passing her with the heavy traffic in the opposite direction and “took the lane”, in other words, she rode in the depression the right tires of innumerable cars have left in the pavement. So  every vehicle behind the box van just had to take a deep breath and use the big pedal beside the gas pedal.

Expert that the bike hermit is, he decided he could ride on the elevated part. Which was no problem until a gust of wind almost blew him off the curb and into oncoming traffic. When his heart rate slowed sufficiently and there was a break in traffic he continued across….. taking the traffic lane.

Sometimes you have to hold up traffic to avoid dying. Just remember, you have as much right to use that section of the road as an automobile does. And remember that most people are not psychopaths and they will not run over you. If you act predictably and make sure that motorists see you, without being obnoxious, then you can co-exist. Just assume that the motorist doesn’t see you and ride very defensively. Every state has different laws governing bicyclists and a tourist can’t be expected to know all of them, but I think common sense and riding with confidence, as if you belong, can go a long way.

Of course, this was a relatively short bridge and I don’t recommend this for every situation. You should check local conditions and if a road or bridge appears to be too dangerous then find another route or another way across.

Categories
Hermit's Workshop Touring Bike Accessories

King Cage Tool Pouch

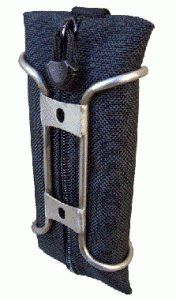
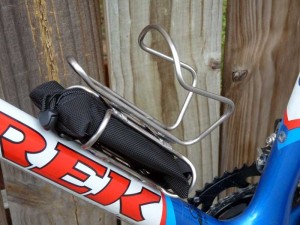
*Note updated Cage is now know as the King Cage Kargo Cage and includes the bottle cage and the pouch!  Finding a place for all the small things that need to be readily accessible when I’m touring…. like tools….is a constant challenge. Ron Andrews at King Cage seems to always be tinkering and coming up with new ideas. I think this is a particularly good one. We have them in the store so get your orders in now! Comes with the ballistic nylon pouch and retails for $45.00.

King Cage Behold tool pouch
The carrier bolts to the bike frame.
King Cage tool pouch and frame
The water bottle cage bolts to the pouch carrier.
Categories
Bike Touring Tips

Tent Camping App

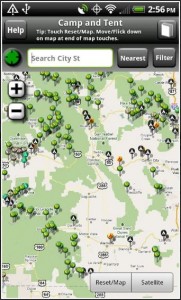
Today I found a link on the Bike Forums Touring site for an app for finding camping spots using the IPhone or Android.  It’s called AllStays Camp and Tent. With it the bike tourist can find campgrounds near their current location and over 13,000 campgrounds in the US and Canada.

Screen shot for camping app
Camp and Tent app screenshot


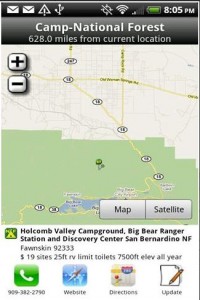
screen shot detail camp and tent
Details Camp and Tent screenshot

It shows maps, directions and details about the campground like number and types of sites, amenities and phone numbers. This particular version only shows campgrounds with tent sites but there is an app for camping with RVs as well. It has a manual search feature with states and towns listed alphabetically with the number of listed campgrounds, and the searches can be filtered by Forest Service, KOA, National Park, etc.
The Bike Hermit is pretty excited to find this, but then he doesn’t get out much either.

Categories
Planning Resources

Bike Overnight Reconnaisance

Exploring off the beaten path, the stream uses the road.
I thought this was a desert.

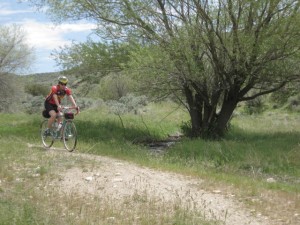
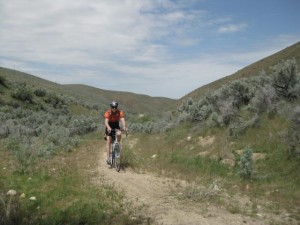
Saturday we decided to reconnoiter a potential overnight bike trip. East of town is a reservoir surrounded by a patchwork of state, federal and private land blanketing the foothills. Riding for about 15 miles from our front door on the highway and green belt put us at the top of the dam at the lower end of the reservoir. Traveling past a gate and a sign prohibiting aggressive behavior (dang) we started up the dirt road leading up the draw hoping it eventually connected to the network of roads on the other side. I think at this point we were on private land, but it was hard to tell because there was really no signage. No matter because the road continued to deteriorate  and actually became the stream bed for large sections. The grapefruit size rocks and loose sand would have been easier to navigate with some wider tires at a lower inflation. And Sky King’s rear tire picked up a goathead thorn and flatted. I wasn’t going to admit this but we violated the 7 P’s ie; proper prior planning prevents piss poor performance, in that we only had one spare tube for Sky King’s bike.

Trail side flat repair
Bike Down!

But it wasn’t all a bust. We had fun and we found out what we wanted to, namely that this course would be less than enjoyable on these bikes when the bikes are loaded with gear for overnight camping. And it also nourished the seed of an idea for adventure or expedition touring. A seed which will be further nurtured until it sprouts into some sort of as yet unknown mis-adventures!

Riding past a nice little spot by the stream.
Sky King navigates past a lovely site.
Offroad touring
The Bike Hermit approacheth.
Categories
Drivetrain Hermit's Workshop Touring Bike Components

FiberFix Emergency Spoke Replacement Kit

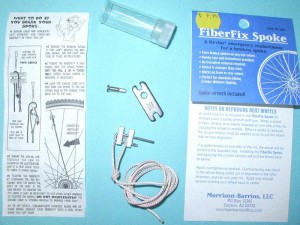
The FiberFix Emergency Spoke Repair Kit

We just got these in at the Bike Touring News Store.
The FiberFix replacement spoke is an aramid cord with a metal “cam” attached. When a spoke breaks the wheel will have a wobble which will probably rub on the bike frame and or the brake pads. If not repaired right away, other spokes may start to go as well. For the mechanically challenged, when a spoke breaks the FIberFix spoke replacement is a good alternative to removing wheels, tires and possibly cassettes. Just thread the included attachment piece into the remaining spoke nipple on the rim, thread the cord down to the hub and back up to the piece threaded into the nipple and tighten.

Here are some reviews at crazyguyonabike.
Might want to bring two!

Categories
Planning Resources

Bike Touring, Keeping It Simple

Carry what you need and no more.

Like any good hermit, the Bike Hermit is constantly attempting to simplify.  And why go on a bike tour if not, at least in part, to enjoy being unencumbered by unnecessary external superficialities, and by too much gear?
The Italian impressionist Carlotti said“Beauty is a summation of the parts working together in such a way that nothing is needed to be added, taken away or altered”.
Architect Ludwig Mies van der Rohe adopted the motto “Less is more” to describe his aesthetic tactic of arranging the numerous necessary components of a building to create an impression of extreme simplicity.

When traveling on the bike the kit can be pared down to the basics required for survival and comfort. And if it is possible to travel for two weeks with a certain amount of bike touring gear then, unless traveling in a more remote region, the cyclo tourist should be able to exist in relative comfort for longer periods carrying the same provisions.

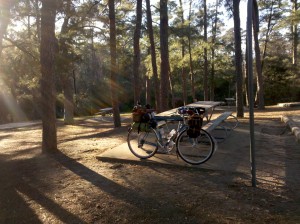
The bike hermit offers this outline of what can be taken on a two week or longer self-supported bike tour. While not an exhaustive, or even a very detailed list, it includes the core considerations for the bicycle traveler and can be modified by the individual according to their desire. Overall weight should not be a driving force behind the decision making process in what to take, but at the same time carrying more than is needed is senseless. The given weights include the weight of the luggage/bags/panniers if indicated.

Hennessy Hammock Super Shelter and rain pants in dry-bag                                  1lb   10.4 oz

Hennessy Hammock Ultralight Backpacker                                                                    2lb     6.8 oz

Front left pannier: Stove/ cook kit                                                                                      3lb       .8 oz

Front right pannier: toiletries, camp towels, sun screen, etc.                                    3 lb       .4 oz

Front handlebar bag: food, fuel canister, spare tube, patch kit, cell phone            7lb  11.8  oz

Spare tire                                                                                                                            12.4 oz

Small leather handlebar bag: pepper spray, knife, multi-tool, headlamp               1lb    5.6 oz

18 Liter Saddlebag: Clothes, chain lube, spare parts.                                                     9lb    5.8 oz

Sleeping bag                                                                                                                            3lb    2.8 oz

3, 24 oz water bottles- full                                                                                                      4lb     12 oz

Total weight comes to a little over 37 pounds. No need to go crazy about this stuff. Relax, be happy.