Categories
Bike Touring Tips Hermit's Workshop

Bike Hermit on YouTube

I watch YouTube videos sometimes. I admit it. Actually, I watch them more than sometimes…it’s sort of like crack cocaine to me. And I watch everything. From comedians whose entire body of work seems to exist only on YouTube, to old episodes of Iron Chef (the original, Japanese version of course) to videos about gangsters and prison, to entire Yes concerts. My current favorite however is Jeff Bradshaw’s “Redneck Restoration“. This guy can literally find an old motor that has been sitting in a field (without the vehicle) for the last 15 years and make it run. His videos are rough and primitive. He puts the camera on a tripod and films himself as he cracks the cover off the differential of a 1958 1 ton truck. Then he carries the camera into the auto parts store and records his banter with the employees. Looks simple.

I’m more interested in search engines than auto engines though and all the gurus say that YouTube videos (YouTube is owned by Google) can help a website rank highly in searches. No problem thinks I; “If Jeff Bradshaw can do it, then I can too” So I figure I would record myself putting together the Surly Ogre/Rohloff build then under way. After an hour or so of setting up the camera and lights I’m ready to boggle the minds of the brethren with my mad video skills. I would time lapse the repetitive, dull operations and then slow the video back down to normal speed to highlight some particularly difficult step and to impart my sardonic and incredibly useful revelations.

Guess what? It’s way more difficult than it looks. My video was pretty much unusable. The lighting was bad and the bike blocked the view of whatever I happened to be working on. I even attempted to use two cameras, but that didn’t simply double the exposure of my ineptitude …it became more of an exponential display of incompetence. In fact, after “recording” for some time, I discovered the battery in one of the cameras was dead. And I didn’t even get far enough along to worry about the editing.

Since then we have been lucky to find a young fellow (the Bike Hermit has several pairs of shoes older than he is) to film, edit and post videos for us. Our YouTube channel is called “Bike Touring with Bike Hermit” and we have instructional videos along with product overviews and product un-boxing videos. So please check it out. Leave comments and let us know what sort of things you would like to see covered. Here’s a sample:

Categories
Bags/Panniers/Racks Handlebar Bag Saddlebags

Frost River Gunflint Trail and Caribou Trail Saddlebags

The new shipment of Frost River bike bags arrived at the Bike Touring News Store last week. Frost River may be better known for their canoe packs than for bicycle touring bags but both should be held to the same standard –
Canoe packs are built for a very specific task (hauling the stuff that will sustain you) in a very specific environment (the Northern Wilderness). In this setting, things like a seam ripping or a sidewall tearing or a strap breaking—little failures that would be an annoyance in everyday life—come with huge consequences.”
-And so it goes for bike touring.

Frost River makes their bags in Duluth Minnesota from materials sourced in the USA.

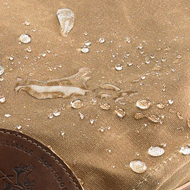
water beads up on canvas
Photo from www.frostriver.com

The waxed cotton canvas comes from Fairfield Textiles and is called Martexin Original Wax. The fabric is claimed to have a lifelong resistance to inclement weather as well as being naturally breathable. The hand is not course or stiff even though the canvas is stout. It is evident that the material is impregnated with wax rather than simply coated.

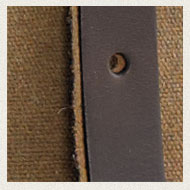
leather strap
Photo from www.frostriver.com

The leather in the straps and reinforcements comes from S.B. Foot Tanning Co. in Red Wing MN. Yes, that Red Wing. I currently have two pairs of Red Wing shoes and it’s sort of neat to know the leather in my bike bag comes from the same source!

photo from www.frostriver.com

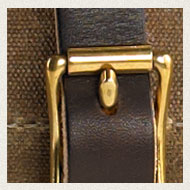
All the buckles, snaps, slides and d-rings are solid brass, not simply plated. And they are big. They might almost appear clunky to some but when fumbling with cold fingers and/or in the dark I think I will appreciate the large size.

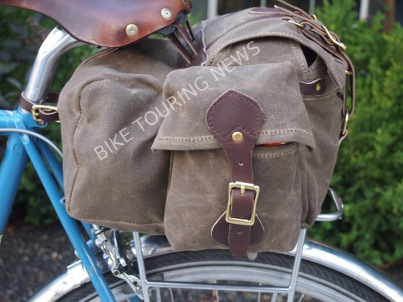
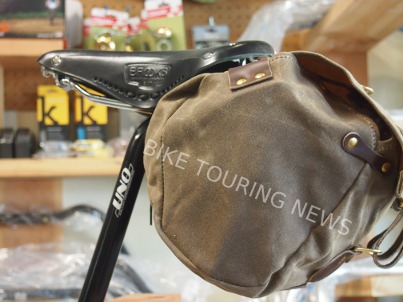
The Gunflint Trail is the larger of the two traditional style “transverse” saddlebags from Frost River and it is big. The stated capacity is 20.6 liters but it seems larger…..maybe that doesn’t include the side pockets. And, while this bag could be used without a rack support, it sits very nicely on the Nitto R15 or R14 Top Rack.

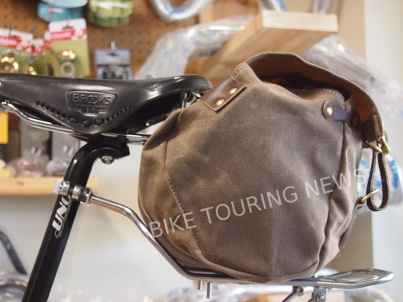
side view of saddlebag
The Gunflint Trail bag on the Nitto R15 rear rack. Note the riveted and sewn leather attachments.


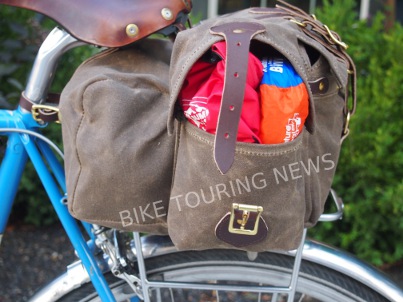
side view w/ open pocket
The side pockets have a clam shell lid which increases the capacity while keeping the contents accessible.


interior shot
The drawstring in not included…..not sure why…..


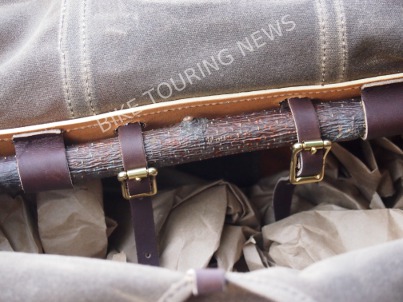
interior support
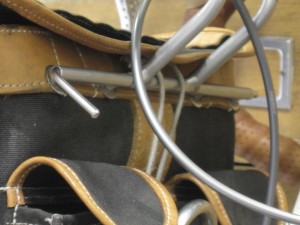
Leather straps looped through the saddle and around the willow (?) stick (which should never break) support the bags. The interior leather reinforcement is hella thick.


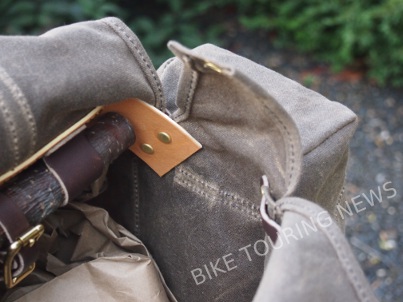
interior reinforcement
The corners of the interior leather reinforcement are square and sharp leading me to wonder if they might eventually wear through the canvas.


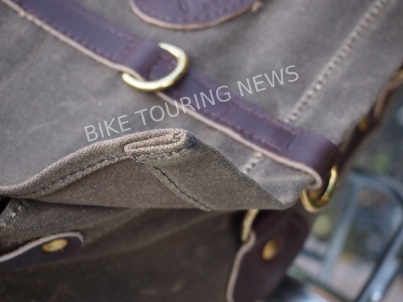
Hemmed edges won’t unravel.


bottom view
A broad piece of tanned leather is sewn lengthwise on the bottom of the bag for reinforcement and wear protection. Small slots in the leather accommodate straps for secure lashing to the rack.

The Caribou Trail bag is an 8.8 liter capacity bag without side pockets. It works as a saddlebag but can also be strapped to the handlebars. A support such as the Nitto R10 rear bag supporter will keep the bag a little proud of the saddle and might prevent any unwanted side to side swaying.

side view on carrier
The Caribou Trail bag on the Nitto R10 bag supporter.


side view without support
If used without a support the bag requires about 9″ (23cm) from the saddle loops to the tire or fender.


handlebar mount
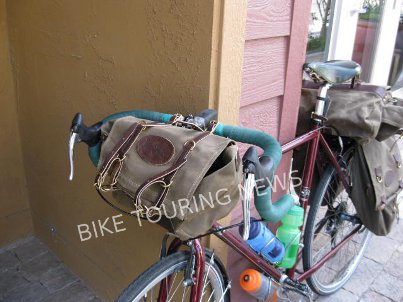
Right then, it’s also possible to use the Caribou trail as a handlebar bag.
Categories
Bags/Panniers/Racks Handlebar Bag

Ostrich Handlebar Bag

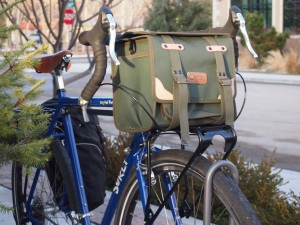
Ostrich F-106 bag on Racktime Topit
Not precisely “handlebar” bags these Ostrich bags are supported on the platform of a front rack and secured at the top either to the handlebars or by a bracket known as a decaleur. In my opinion the advantages of this style of bag are several:
The center of gravity is lower than a bag attached to and supported by the handlebars
-The bag is more accessible from the cockpit than panniers.
-An assortment of small pockets make it easy to find the small things you need
-A plastic covered map case is indispensable to the touring cyclist.
-Relatively easy to remove and carry when off the bike. Some come with shoulder straps.

Ostrich bag label

As of this writing their are two sizes of front Ostrich bags (Ostrich also makes a traditional style saddle bag and, I believe, rear panniers); the F-104 and the new, slightly larger F-106.

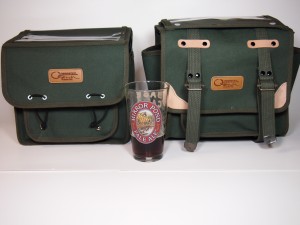
front view
The Ostrich F-104 (left) and the F-106


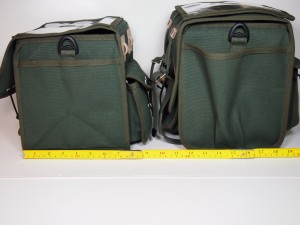
side view
The F-104 is slightly shorter than the F-106. Both are roughly the same depth.


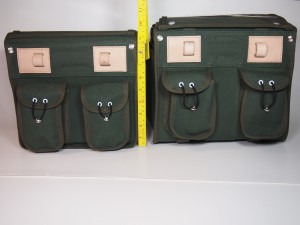
rear view
The overall height of the bag and the position of the leather patches will help determine which size will fit best on you bike.

Determining which size bag will work best on a particular machine starts with knowing the distance from the top platform of the rack to the handlebars. The type of stem on the bike -threadless (Aheadset) or threaded (quill)- and, in some cases, the steer tube diameter – 1″ or 1 1/8″- will tell what type of decaleur to use. Gilles Berthoud decaleurs are available in six different configurations, and Velo Orange decaleurs in two. We carry all of them in the Bike Touring News Store and,as always, are here to help demystify.

The map case on the F-106 snaps on and off. On the F-104 it is affixed.


side stiffener pocket
A stiffener is inserted into pockets on either side so the bag maintains its shape. Another stiffener lays in the bottom.


decaleur side view
This shows the Velo Orange decaleur for 1 1/8″ threadless stems.


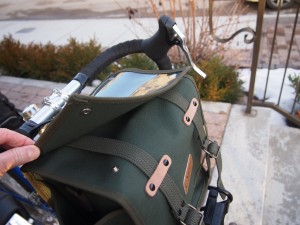
from the driver's seat
View from the driver’s seat. The metal bar of the decaleur can be strapped, as shown, or bolted to the bag through the holes on the end and through holes drilled through the bag at the leather patches.

I’ve always liked these bags. I’m a sucker for canvas duck and for the army green color. I like the robust, utilitarian feel and look of these and I think the details are well thought out. The relative voluminous capacities are nice too. When touring it seems as though I’m always looking for the extra pocket or for someplace to lash the rain jacket. These have been unavailable in the US for some time but I’m excited about being able to get them again.

UPDATE 2/19/2013
We will also be carrying the Ostrich Panniers
…..

BIke Panniers from Ostrich- Made in Japan!

….and the traditional style Ostrich S-2 Saddlebag...

ostrich saddle bags
Ostrich Saddlebag

MORE UPDATES! 3/15/2013
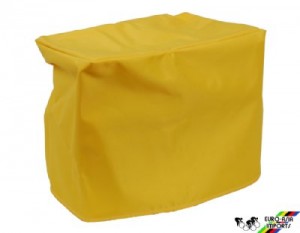
We now have the Gilles Berthoud rain covers which work nicely with the Ostrich F-106 and F-104 bags.

berthoud rain cover
The Gilles Berthoud rain cover for the *25* rando bags. Also fits for the Ostrich F-104 and F-106.
Categories
Front Racks Handlebar Bag Touring Bike Accessories

Gille Berthoud Decaleur Brackets, Custom Replacements

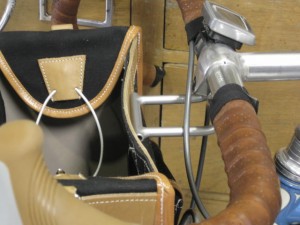
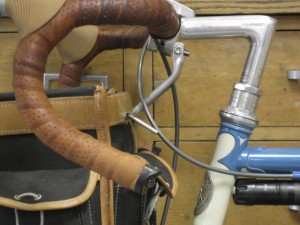
Gilles Berthoud makes bicycle products with apparent disregard for costs. The materials and methods and designs are always uncompromising. That is why it is surprising to me that the Gilles Berthoud decaleurs (a bracket made to attach to the bicycle stem and secure a front bag) don’t really work with the Gilles Berthoud rando bags.
Gille Berthoud H-121 decaleur
The large bolt replaces the stem bolt and threads into the hole in the short piece of tubing which replaces the stem nut. The arms are bolted on to the short piece of tubing which is threaded at both ends. Then the arms can be rotated to the desired position to line up with the pieces attached to the leather trim piece along the top of the bag so all the pieces can be skewered together. The only problem is, the shape and the length of the arms allow for only a very narrow range of positions; if the arms are parallel to the ground, the bag is pushed too far forward….if the arms are rotated down so the bag can sit closer to the bars the connection point is low, potentially below the point where the pieces need to be attached to the bag. Another problem is that the arms of the decaleur interfere with closing the top flap.

The GB Decaleur arms keep the flap from completely closing, resulting in a permanent curl in the top flap.
This is the shorter version of the decaleur. For a bag topping out at close to handlebar height it pushes the bag too far away from the bar.
For a bag topping out below the handlebars this decaleur, the GB H-91, works fine. The back side of the bag is still close to the handlebar.

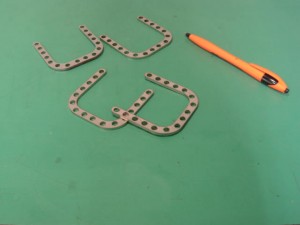
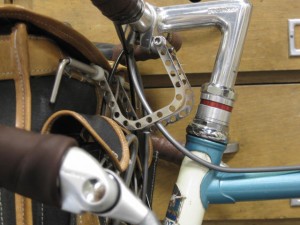
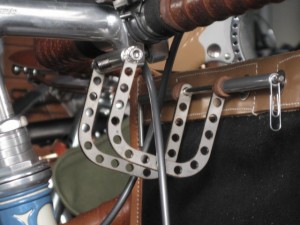
I know someone with access to a machine shop who likes to tinker with bike parts so we imagined a part that would work to replace the stock arms. He did a rough sketch and gave it to his c.a.d. guy who put it into language a machine could understand and out came these:
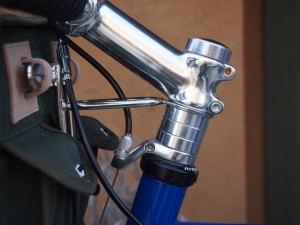
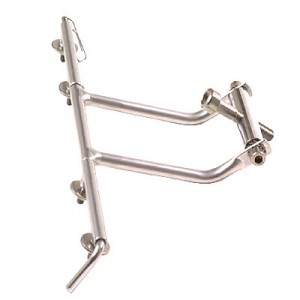
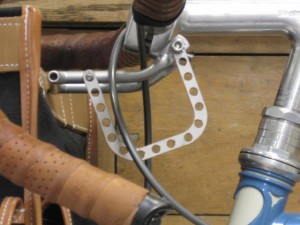
One of these pieces will bolt to either side of the short piece of tubing bolted to the stem and replace the bent arms of the original decaleur. The holes allow for adjustability plus they make it look rad. The U-shape will bring the outer arm up in under the top flap of the bag without interference.


Here’s a comparison of the original bracket arms bolted side by side with the new ones
:
New U-shaped brackets provide more adjustability and clearance for the bag lid.

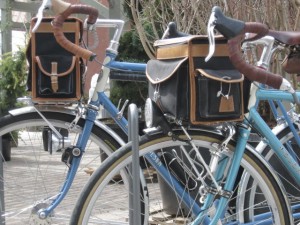
Here are the new brackets in use with a GB25 bag on Sky King’s Bleriot:

And here are the new brackets on Chief with a GB28 bag:

The original arms are a little bit wider than the new brackets at the bag attachment point, so some spacers take up the slack. Here, we see the upgraded leather spacers in use.


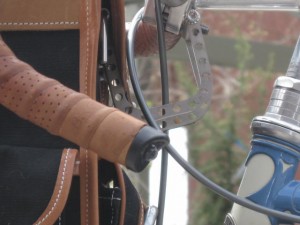
Here are the two bags with the new brackets. The bags top out at roughly handlebar height and they sit close to the bar, minimizing any adverse influence on the steering.


Notice how neatly the brackets tuck under the top cover flap of the bag.
Categories
2011 Oregon Manifest Event Coverage

Oregon Manifest 2011 – Three Bikes

I judged the entries by how they incorporated the mandatory design features outlined on the Oregon Manifest site:
-Anti-Theft System
-Fender System
-Lighting System
-Load System
-Free-Standing Under Load (While Parked) System
With a heavy bias toward integration, quality of execution and aesthetics.
In no particular order, I thought these bikes were outstanding.
YiPsan Bicycles
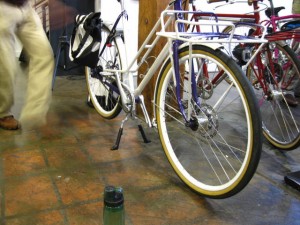
This bike has a two legged kick stand and, depending on how the load is distributed, is balanced in such a way that either the front or rear wheels are off the ground, facilitating flat tire repairs.

Rear wheel removal mode


Front wheel removal mode


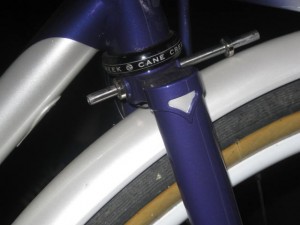
To help stabilize the bike when parked, this pin runs through the fork brake bolt hole and into a custom hole in the frame’s downtube


When riding, the pin is retracted and held against the fork magnetically.

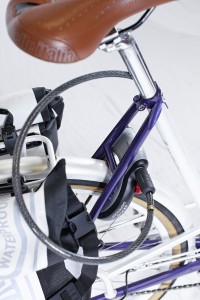
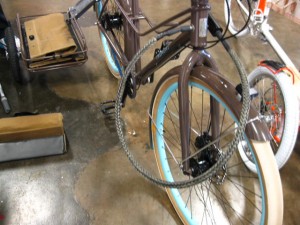
There is a Dutch bike style lock which is attached to the frame and locks the rear wheel so that it can’t be turned, and Renold inserted a braided steel cable into the seat post of the bike which can be pulled out and locked into the wheel lock mechanism.

Yep, that cable disappears into the seat post.(Photo from YiPsan Bicycles website)

With fenders, internally geared rear hub, belt drive, generator lights and great load carrying capacity, this bike’s got it covered. And it fits Leah like a glove.

Bauhinia – YiPsan Bicycles from YiPsan on Vimeo.

The more I looked at this bike, by Geekhouse, the more I liked it. I talked to the builder at the lunch stop and took these pics.

Geekhouse touring bike

I thought this was a really creative frame design. Not a traditional double diamond frame, rather an inverted curve or an arch, the other strongest shape, basically forming the seat stays and rack. The double top tubes curve down and sweep back to form the rear rack, also establishing a low stand over height.
The rear skirt guard and front fender design could be improved to provide better spray coverage. And again the ubiquitous Shimano Alfine internal gear rear hub and front dynamo hub. The front light was actually integrated into the stem.

Geekhouse touring bike
The front light is part of the stem, but I think the bag is in the way. Should be an easy fix though.

The shaft of the u-bolt lock is built into a short piece of tubing welded to the two pivot points on the top tube. The shackle portion of the lock is strapped down when riding and pivoted up and removed to lock the bike to a post or bike rack.

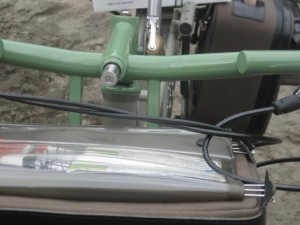
Nice work integrating the Brooks bag carrier into the handlebars.

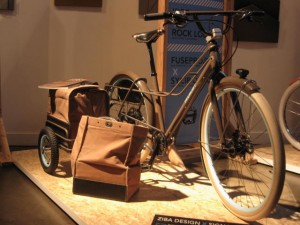
Another bike I was drawn to is the Fremont a collaboration between Ziba and Signal Cycles.

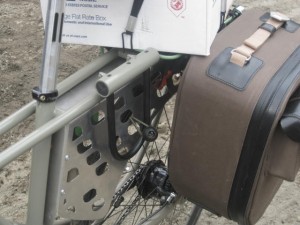
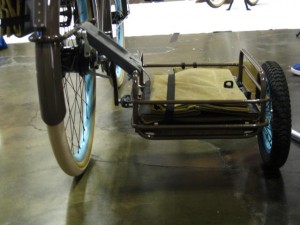
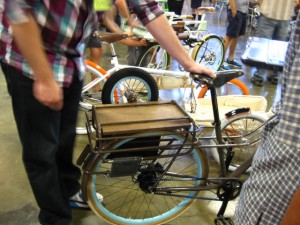
This is one of several side-car designs at the event, but it seemed like the most practical of the bunch to me because the side car folds up over the rear fender to become a rack. And the side car met the additional requirement of providing a support for the parked, loaded bike. The canvas bags were made for the team by a local Portland seamstress.

The locking system is a little clunky since one needs to remove the cable and stash it when riding, but then again it’s not that much of a hassle and there is plenty of room to carry it.
Side Car flipped up and now is a rear rack

I thought these bikes met the challenge requirements in elegant ways and I can see how they would be practical and functional in the real world.

Categories
Tours and Rides

Alaska’s Lost Coast

Lost Coast Trailer from Eric Parsons on Vimeo.

In 2008 Dylan Kentch and Eric Parsons rode and carried and rafted with their singlespeed bicycles across 300 miles of wild Alaska coastline from Yakutat to Cordova. If one were to look at this on a map and/or Google Earth they might not think it possible. But these guys did it and lived to tell the story. What’s most impressive to me is that they never complain about the difficult conditions, they had fun, and they were sad when it was over. Epic.
Their blog is called Bike The Lost Coast
In 2010 some homies from Bozeman, Mt. did it too. Their blog is Biking the Lost Coast
Eric’s company is Revelate Designs LLC
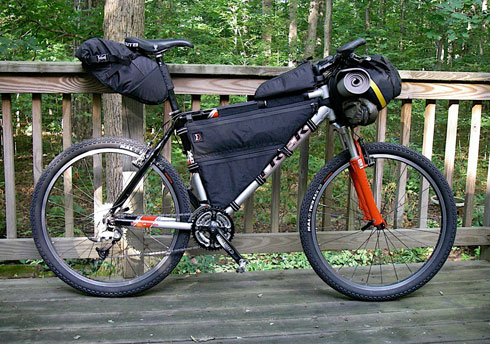
He makes frame bags for expedition touring and for bikes which are rack challenged.

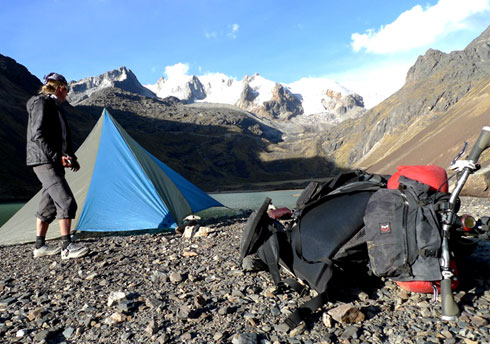
Image of bike camping with Revelate Designs bags
Bike Camping or Bikepacking


Revelate Designs LLC frame fit bags
Revelate Designs LLC frame bags

Looking at these photos and reading the ride reports gets me to thinking about different ways to set up the bike, and it gets me thinking about an off road adventure touring bike. Of course, being a Surly groupie, the Troll or Karate Monkey come to mind. I’m sure Sky King will be happy to know I have a new obsession! Anybody else use these bags and have stories to tell of their expeditions?

Categories
Austin to New Orleans Tour Living Vicariously

Austin to New Orleans-Goin’ Down Groovin’

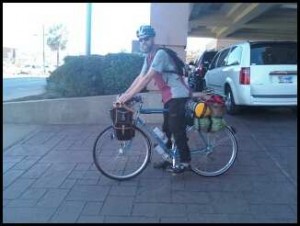
While the Bike Hermit is exploring Texas and Louisiana, he is journaling on Crazy Guy on A Bike.  Here are a few photos and the link to his Journal

Chief - aka A. Homer Hilson loaded and ready to roll
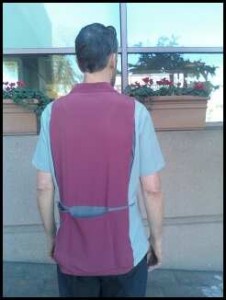
the Bike Hermit, happy to be wearing his new jersey by Club Ride
Three nice pockets and comfortable pleating on this Club Ride Jersey
The Bike Hermit rolling out of the Sheraton Hotel, Downtown Austin
The first of many routes to New Orleans
Categories
Touring Bicycles

NAHBS , Day One

Tim had this bike painted twice and still was not completely happy. Looked pretty good to me!

As promised, here is a pic of  Tim O’Donell’s fillet brazed road bike. We are right next to YiPsan Bicycles‘ booth. Renold has some good ideas. Especially the porteur/low rider front rack. The two side platforms on the front rack come off and attach to the lower stays to support panniers. A really clever solution and one that I’m sure will be reproduced in a production way by somebody judging from the number of photos taken during the day. When you see it, know where it came from.

The YiPsan transformer rack. The right side of the platform has been removed and attached to the right stays to support a low rider pannier.
The YiPsan transformer front rack.
YiPsan transformer rack. This is the right side platform attached to the side for a front low rider pannier
Categories
Event Coverage

North American Handmade Bicycle Show 2011

As the Bike Hermit I give myself permission to indulge my reclusive nature. As the North American distributor for Zimbale, a line of traditional style saddlebags crafted in Korea, I sometimes need to bear the discomfort of being in large groups of people. Such as the circus that is Interbike. This year I am looking forward to exhibiting at the 2011 North American Handmade Bicycle Show in Austin, TX. The show takes place February 25-27, 2011

For it’s seventh edition, the NAHBS is in Austin, TX . The first show in 2005 in Houston featured 23 exhibitors and 700 people attended. Last year in Richmond, VA there were 126 exhibitors and 6000 attendees.

Zimbale 11 liter saddlebag

Zimbale bags have been featured in posts on EcoVelo, Lovely Bicycle and others. Great products for commuting, touring, randonneuring and everything in between.

We will be posting updates and photos from the show here.

Categories
Living Vicariously

Welcome!

Relaxin' in the Valley of Death

A site about all things bike touring, a term that can mean a number of different things. Is  overnight bicycle camping touring? Does riding out to the state park for a picnic qualify as a tour? We think the answer is yes. Stay and look around – Shop, get inspired and maybe learn something new too!