Categories
Cockpit Handlebars and Stems Touring Bike Components

4 Handlebars

Wherein the  bike hermit compares and contrasts 4 different drop style handlebars for the touring bike. Finding the perfect handlebar for his touring bike has him in a bit of a bother.

Last season I installed the Nitto Dirt Drop bars on Chief. I like the way the drops flair out.
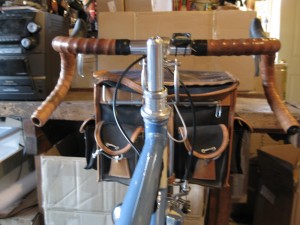
Nitto Dirt Drop

The bars actually have a very slight rise from the clamp area to the ramps. These are the medium width version. There is a version that is narrower and one that is wider. These feel a little too narrow for me when I’m riding on the hoods. Dang, should have got the wider ones.  But I like the angled-in aspect of the brakes on the flair of these bars. It feels natural.
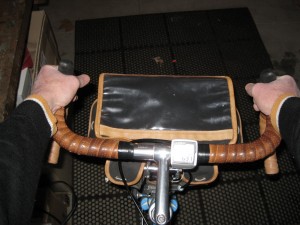
On the hoods.

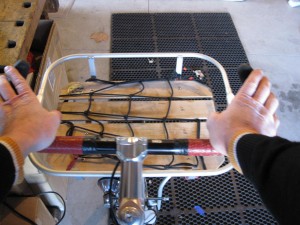
The other nice thing about the drops being wider than the tops ….my wrists don’t hit the tops of the bars when “in the drops”.
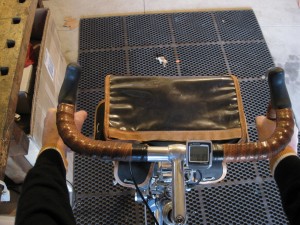
Nitto Dirt Drop touring handlebars,"in the drops"

On Norm, my everyday bike, I have the On One Midge handlebar. Perhaps my favorite bar of all time.
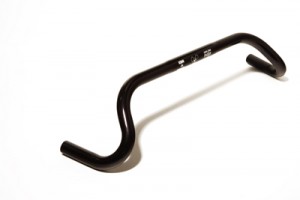
On One brand Midge handlebar

This handlebar might look a little crazy…. in fact I have been labeled “crazy bar guy” on group rides…but the ergonomics are fantastic. These have a super wide, flat top section so there are multiple positions available on the top of the bars alone. As the top of  the bar bends to begin the drop portion it also flairs out at a dramatic angle.
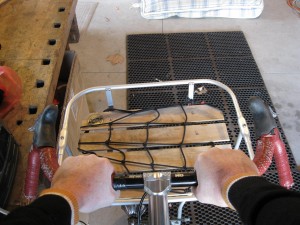
On One Midge.....Wide tops, crazy bends

The other thing that happens when the bend from the tops is so gradual is that the brake levers get mounted at an even more extreme angle. But if I raise my arms out in front of my body, in a relaxed way, my fingers do not naturally line up perpendicular to the ground. They are more like 30 to 40 degrees from vertical. An angle very similar to the angle of the the brake levers on the Midge bar:
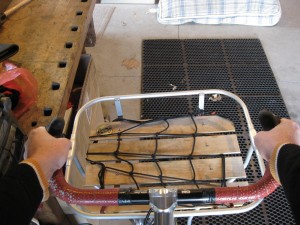
Natural angle to the brake hoods

I like to install these handlebars with the ramps level. This provides a great platform and plenty of support for the hands.
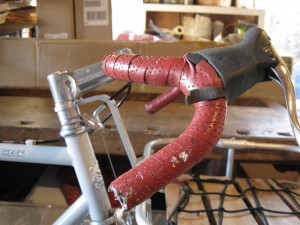
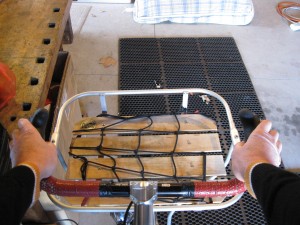
Notice the ramps, the portion of the bar behind the levers, are basically level.
Another position I use a lot with the Midge bars.
Nice platform for the hands

Sky King has the Nitto Grand Randonneur on her Rivendell Bleriot.
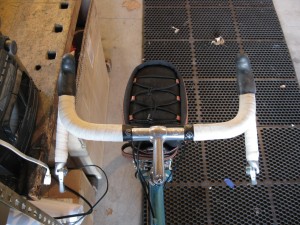
Sky King's Nitto Grand Randonneur bars

The most notable thing in this view is the distance the ends of the bars extend toward the rider. This should allow for riding comfortably in the drops without reaching. The picture below shows the rise from the center up to the ramp portion.
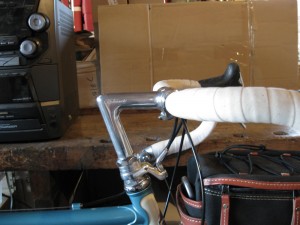
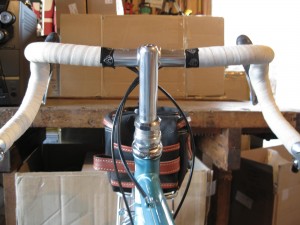
The Grand Randonneur rises from the center to the ramp
A view of the upward rise from the center, the slight flair of the drops, and the angle of the brake levers.

The handlebar I am itching to try on my touring bike is the Nitto Noodle.
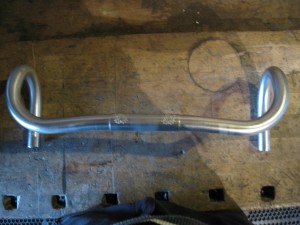
I guess I know why they are called "Noodle"

These bars intrigue me because of the slight rearward bend of the top portion. Again, if I examine the shape of my palm, curled into a gripping shape, I find that it is at a slight angle, from inside to outside. Corresponding to the shape of the Noodle bar.
They don’t have any flair to the drops though. The ramps are basically parallel to the drops. These would be really cool if they had the backward bend plus a flair like the Midge bars! Then they would be the Pretzel bar.
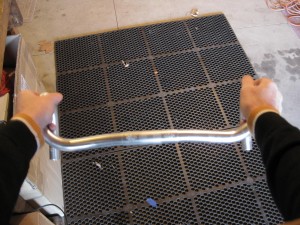
No flair to the drops and subsequently.... to the brake levers

So, there you have four options for drop style handlebars for touring. If you are thinking about changing handlebars keep in mind that there are three standard diameters for handlebars where they clamp to the stem: 25.4 mm, 26mm, and 31.8mm. Stems are made for all those diameters too. A stem with a clamp for 25.4 will not work with a 26 or 31.8 handlebar, but a smaller diameter handlebar can be made to work with a larger clamp diameter stem by means of handy dandy shims made for that purpose!
After looking at these pictures I think I need to write a post about handlebar tape and how to change it.

Categories
Advocacy/Awareness

“Sudden” Insights

I wonder if my experience is that much different from other bicyclers’.  Some of the time, or most of the time, after I have been out on my bicycle for a while, and usually when I am by myself, I will have an insight or a solution to a particular problem or situation which I am not even specifically thinking about at the time, but which I have been working on in everyday life. I recently came across a description of how this “eureka” moment comes about.

The Most Powerful Idea In The World is a book written by William Rosen and ostensibly about the Industrial Revolution, and the steam engine, but it’s just as much about invention and creativity and how insights to a problem can suddenly occur when the creator is not even “working” on the problem.

According to Rosen, people who study this sort of thing sometimes use “chaos theory to describe how neurons fire together. When a single neuron chemically fires it’s electrical charge, and causes it’s neighbors to do the same, the random electrical activity that is always present in the human brain can result in a “neuronal avalanche” within the brain”.

Most of this activity takes place in a part of the brain to which the blood flow is inhibited by most “normal” brain activity, i.e. the type of activity associated with everyday tasks such as (at least in modern day life) paying the power bill, going to the grocery store, and holding down a job. In short, survival. Likewise, early Homo Sapiens would not have had the luxury of being able to spend a lot of time daydreaming about new ways to start a fire.

Therefore, the human brain still does it’s best creative thinking when there is a sense of security or safety and relaxation. That might be why the  Greek dude who ran down the street naked shouting “eureka” was relaxing in the bathtub when he had his insight.

I thought this was an interesting description of a phenomenon I have always noticed to some degree when I’m riding my bike. And now, if you’ll excuse me, I think I will go do just that! (ride my bike that is..not run down the street naked)

Categories
Bike Touring Equipment Nutrition for the Bike Tourist

Cook Stoves for Bike Touring

Back in the day there were not a lot of choices in lightweight backpacking or bike touring stoves. The bike hermit used (and still has) a Svea brand stove. Aside from being dangerous, unreliable, inconsistent, inefficient, heavy and difficult to use, that stove is great. Nowadays there is a better selection of stoves from which to choose, with various models burning everything from white gas to isobutane/propane to denatured alcohol to sticks. The different fuel sources all have pluses and minuses and most people will have a preference for one or the other based on their own demands.

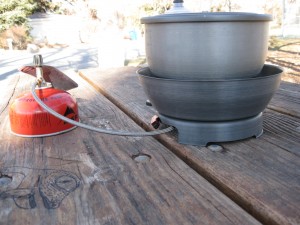
My most recent experience has been with the Primus EtaPowerTrail EF Stove

Primus EtaPower stove in use. The black knob on the line attached to the top of the fuel canister allows for flame adjustment.

This is an isobutane/propane stove so the fuel source is a sealed canister with a screw fitting for a fuel line which connects to the burner. The fuel is pretty easy to find at most outdoor stores and even Walmart, so even though you can’t fly with it or ship it, you can get it on route.

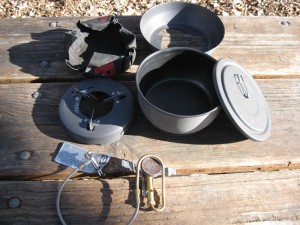
The kit I purchased includes the burner unit with fuel line , a base, a windscreen, a 1.7 liter aluminum pot with a lid and a pot handle.

All the parts

This is not the most compact stove available but it has some features I like.
Namely;
-Relatively large and very stable base.
-Windscreen
-Easy to light
-Great heat output Boils about 3 cups of water at 32 degree F. ambient temp. in about 4 minutes.
-1.7 liter pot is good for cooking pasta dishes or for making freeze dried food with water left over for coffee or cleaning.
-Separate, light, easy to use pot handle
-Piezoelectric start precludes need for matches

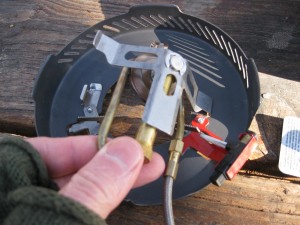
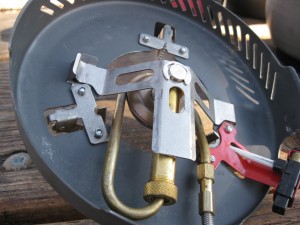
The burner unit snaps into the base.
The burner in place. The piezoelectric starter button is the black button in the lower right of the photo above
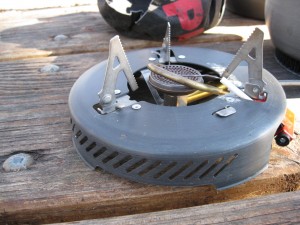
Base unit with burner attached, ready for windscreen
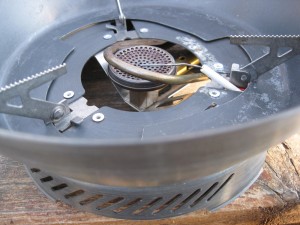
The windscreen sits on the base and is secured by rotating counterclockwise to engage the helical cut outs with the bases of the pot support wings. The wings are then folded down to provide a level pot surface.

Pressing the piezoelectric ignition button creates a current in the wire which is suspended over the burner plate and a spark generates between the end of the wire and the plate, igniting the fuel coming through the line from the canister. If the wire gets bent and is too close to the plate, no spark will generate and the wire needs to be re-positioned away from the plate surface until the spark is visible when the ignition button is pressed.

The space between the end of the wire and the plate may need to be adjusted to achieve a spark when the ignition button is pressed.

Even though this might appear to be a complicated kit, it is well made and durable. I need to be more diligent in making sure all the connections are tight between uses. The entire kit (minus fuel canister) weighs about 27 ounces or 765 grams. Now I see on the Primus website they have a stove that is slightly lighter but much more compact, the Primus Eta Lite

Primus ETA Lite Stove

The Primus ETA Lite Stove sets a new standard for compact, all in one backpacking stove… [More]

Price: $99.95

I think when it is time to get a new stove for Sky King we may be looking at that one.

Categories
Crossroads

A Beginners Guide To Bike Touring

The Bike Hermit didn’t write this but he thinks it’s funny. Actually, this was posted on the Touring pages of bikeforums dot net

Easy to get lost for hours on those pages. Don’t forget to come back!

A Beginners Guide to Cycle Touring: How to prepare

Step 1: Get a spagetti-strainer and several small sponges. Soak the sponges in salt-water and paste them to the inside of the spagetti-strainer. Place the
strainer on your head. Find a busy road. Stand by the side of the road and do
deep knee-bends for 8 hours. This will acclimatize you to a day’s ride.

Step 2: Take some 200-grit sandpaper and rub your rear-end and the insides of your legs for about 20 minutes. Rinse with salt-water. Repeat. Then, sit on a softball for 8 hours. Do this daily for at least 8 days.

Step 3: Each day, take two twenty-dollar bills and tear them into small pieces. Place the pieces on a dinner-plate, douse them with lighter fluid and burn them. Inhale the smoke (simulating car-fumes). Rub the ashes on your face. Then go to the local motel and ask them for a room.

Step 4: Take a 1-quart plastic bottle. Fill it from the utility sink of a local
gas-station (where the mechanics wash their hands). Let the bottle sit in the
sun for 2 or 3 hours until it’s good and tepid. Seal the bottle up (kinda,
sorta) and drag it through a ditch or swamp. Walk to a busy road. Place your
spagetti-strainer on your head and drink the swill-water from the bottle while
doing deep knee-bends along the side of the road.

Step 5: Get some of those Dutch wooden-shoes. Coat the bottoms with 90-W
gear-oil. Go to the local supermarket (preferably one with tile floors). Put
the oil-coated, wooden shoes on your feet and go shopping.

Step 6: Think of a song from the 1980’s that you really hated. Buy the CD and play 20 seconds of that song over and over and over for about 6 hours. Do more deep knee-bends

Step 7:
Hill training: Do your deep knee-bends for about 4 hours with the
salt-soaked spagetti-strainer on your head, while you drink the warm
swill-water and listen to the 80’s song over and over (I would recommend “I’m a cowboy/On a STEEL horse I ride!” by Bon Jovi). At the end of 4 hours, climb onto the hood of a friend’s car and have him drive like a lunatic down the twistiest road in the area while you hang on for dear life.

Step 8:
Humiliation training: Wash your car and wipe it down with a
chamois-cloth. Make sure you get a healthy amount of residual soap and
road-grit embedded in the chamois. Put the chamois on your body like a
loin-cloth, then wrap your thighs and middle-section with cellophane. Make sure it’s really snug. Paint yourself from the waist down with black latex paint.  Cut an onion in half and rub it into your arm-pits. Put on a brightly colored shirt and your Dutch oil-coated wooden shoes and go shopping at a crowded local mall.

Step 9:
Foul weather training: Take everything that’s important to you, pack it in a Nylon corodura bag and place it in the shower. Get in the shower with it. Run the water from hot to cold. Get out and without drying off, go to the local convienience store. Leave the wet, important stuff on the sidewalk. Go inside and buy $10 worth of Gatorade and Fig Newtons.

Step 10:
As Archimedes hypothesized: “Use a simple lever to move the Earth from one place to another”. After doing that, go around your house and lift heavy things that you never imagined a person could lift. Surprise yourself. Do 1,000 sit-ups. Then 10,000. Eat lunch. Repeat. Argue with every girlfriend/boyfriend you’ve ever known and be RIGHT. Solve all the problems of politics, faith and economics. At the end of the day, get into a huge tub filled with hot soapy water and relax, because tomorrow is another BIG DAY ON THE BIKE!

Step 11: Headwinds training: Buy a huge map of the entire country. Spread it in front  of you. Have a friend hold a hair-dryer in your face. Stick your feet in
taffy and try to pull your knees to your chest while your friend tries to
shove you into a ditch or into traffic with his free hand. Every 20 minutes
or so, look at the huge map and marvel at the fact that you have gone nowhere  after so much hard work and suffering. Fold the map in front of a window-fan set to “High”.

Useful tips for anyone planning a bicycle tour, trip, journey, expedition, whatever
you label it. Hope you have enjoyed this page.

Categories
Fenders

More On Honjo Fenders

I have been researching other resources for Honjo fenders in preparation for adding them to the store and to supplement my post on touring bicycle fenders.

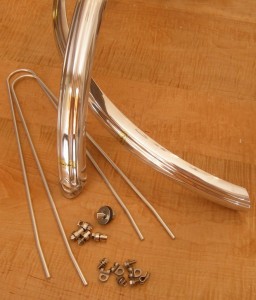
photo of honjo alloy fenders
Honjo Koken alloy fenders

I came across this article on Raymond Parker’s VeloWeb. The web address is http://veloweb.ca (he’s Canadian eh.) Very detailed and well photographed instructions there. While he is installing Honjo fenders, the guide will work as well for other metal fenders such as Gilles Berthoud and Tanaka.

Also, lo and behold, there is a Honjo Fenders group on flickr.com. Lots of good photos and ideas for  mounting fenders there.

Categories
Living Vicariously

Deserts

“One of the qualities that draws me to deserts is their sparseness. I go to be scoured by their winds, purged by their silence, humbled by their searing sunsets. The desert dirt, which accumulates in the chapped cracks of my fingers and the pores of my face, brings me solace. It somehow stills the subtle anxieties produced by living in a culture in which what you do is so often mistaken for who you are, where artificialities obscure essences. Immersing in the desert’s simplicity is akin to a ritual purification. As the earth stands naked, so I am stripped to my unadorned self, with little to distract me from the truths of my life.” So writes Michael Benanav in his excellent account of traveling through the Sahara with a  camel caravan to the salt quarries of Taoudenni and back to Timbuktu, Men Of Salt.

Apparently I find something about deserts intriguing as well. I live in Boise, Idaho which with 11 inches of rainfall annually is a high desert environment. Early in 2010 I traveled to west Texas to ride my bike through the Chihuahuan Desert and in early 2009 I rode through Death Valley, smack dab in the middle of the Mojave Desert. Granted, these trips were designed to escape the doldrums of February in Boise, and I’m not sure I would be as fascinated by these deserts in the summer with temp’s in the low triple digits.

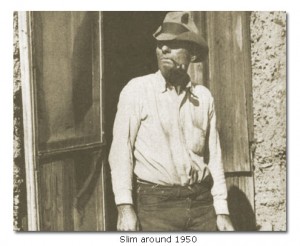
I came across this article about Ballarat Ghost Town in Death Valley and a hermit known as Seldom Seen Slim on the Rough Riders website.

Seldom Seen Slim aka Charles Ferge

Chris Kostman is behind the Rough Riders website as well as AdventureCORPS Chris organizes several rides in Death Valley and southern California. I intend to take part in one of his Rough Rider Rally rides soon.

The Adventure Cycling Association’s Utah Cliffs route is another desert trip I want to take. Sky King and I did an overnight bike trip in Zion National Park a couple years ago and that country is really beautiful with red rock cliffs and sub alpine forests.

Admittedly, the bike hermit is a little different. My brother doesn’t understand why I would go off and submit myself to the deprivations of bike touring and he doesn’t understand why I go to remote and barren locations to do it. Let me do some ‘splainin; The severe climate of the desert breaks my life down to the most basic elements like it breaks the rocks into sand. The detrition of the wind loosens the sediment in my brain and the subsequent silence when the wind dies makes it possible to listen to the voices in my head.  The scenery takes some effort to appreciate sometimes but like anything that requires effort, the rewards are more satisfying. Unlike Montana where around every bend is another postcard view, and you become numb to it after a while. The trips through the desert that I have taken, by myself, have been among the most memorable and rewarding experiences of my life.

Categories
Bike Touring Tips Hermit's Workshop Saddlebags

@#!% Flat Tire

There are dozens of videos out there about changing a flat tire. None with background music by Sonny Stitt.  Here’s one!

A couple of things. Notice that I just lay the bike on it’s side with the derailleur up. That’s an easy way to do it when you’re on the side of the road. Also, I shift the chain into the smallest cog. When I put the tire back on it’s easy to remember what cog to put the chain over so that the wheel will be centered.

This is what I carry on the bike to change a flat:

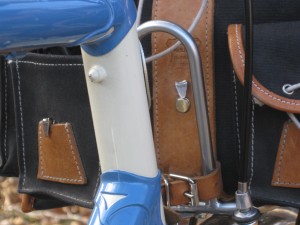
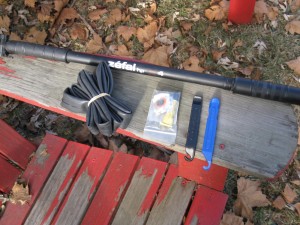
Pump. I use a Zefal HPX frame fit pump. This pump is all aluminum and the barrel is long enough to push a decent amount of air, so the tire is up to pressure relatively quickly. Plus, unlike CO2 pumps,  it has never failed or frozen. It mounts to the underside of the top tube

on  bikes that have a pump peg.

Or it can be mounted in front of the seat tube, but this precludes the use of a water bottle there.

Spare tube, tire levers and patch kit. The simplest and quickest way to fix a flat is to change the tube. But I only want to carry one spare and if I get another flat I need to be able to patch one of the flat tubes.

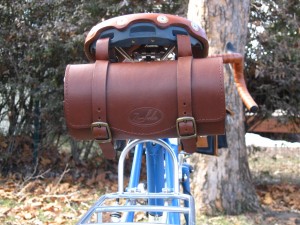
Seat bag. For shorter day rides I use a Zimbale leather saddle bag to carry these items plus a multi tool.

Categories
Living Vicariously

Fomenting Fermenting – Bike Touring So We Can Drink.

Those who know me know the bike hermit is a beer drinker with a cycling problem. But I think that is a common thread. It appears that many fellow riders appreciate a barley sandwich or two at the end of a riding day. Or any day. So I thought I would post these videos of me making a batch of homebrew.

http://www.youtube.com/watch?v=PJlm7oFQf18

http://www.youtube.com/watch?v=qZwVCM1OCJw

Categories
Tours and Rides

Sub 24 Hour Overnight – S24O

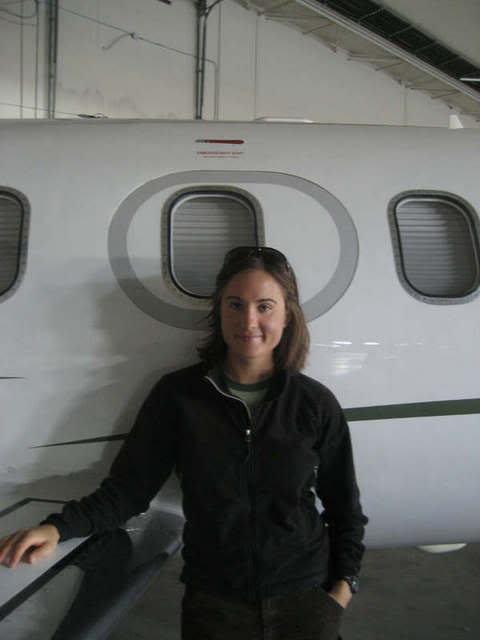
Sarah is a friend of mine who flies Lear jets for a living. She also races bicycles on the road, but I won’t hold that against her 🙂  She borrowed my BOB Yak Plus Trailer (with Dry Sak) (yes, this link takes you to Amazon.com but if you follow it and buy a trailer I make a little money, so if you’re going to buy one anyway………..)
and some of my camping gear last summer for a decidedly slower paced trip and her first ever bike tour. She went solo to Tenmile Campground northeast of Idaho City. She tells the tale here.

It was fun to help her plan her trip and it was interesting  listening to the questions of a noob to bike touring.  This is a great way to get a shakedown tour, figure out if you like it and the things to take and those to leave behind. So, it doesn’t need to be a grand, complicated, time consuming venture. Anybody can do it!

Categories
Touring Bicycles

How to Size a Touring Bike

I have finally completed the series of pages about sizing for a touring bike. The first one is here.   This is always a controversial topic and usually engenders the longest threads on most forum sites, and so it’s sure to ruffle some feathers but that should be entertaining. If you have comments or specific questions please reply to this post or leave a response on any of the specific pages or email me.