Categories
Best Touring Saddle Cockpit Touring Bike Components

Saddle Comfort and Bike Touring

Just what is the best saddle for touring???  Drum Roll, please.  The best saddle for touring is the saddle that fits your behind and allows you to ride in comfort!!
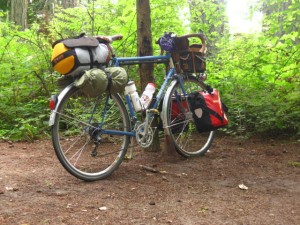
Chief out touring

Okay maybe that wasn’t the answer you were looking for, but it is the best we have to offer.  No two people are shaped the same therefore no one saddle is going to be the end all saddle for every person.

The Bike Hermit used to tour on a Brooks B17, as to be expected, over time the saddle relaxed and had a bit of “splay” He punched holes in the sides (like the Brooks Imperial) and threaded the saddle with leather (from the Tandy leather store) and that solved the problem.  About two years ago he switched to a Gilles Berthoud Aspin.  This saddle was stiffer in the beginning and now has molded to his shape just perfectly.  He easily has 3,000 miles on that saddle with no issues.  Aha, you say, I will go research and purchase a Gilles Berthoud.  Well, Sky King did her best to love the Gilles Berthoud Aspin spending hours adjusting height, position, angle etc but was never comfortable.  Finally she measured her sit bones and realized between the shape and width of the Gilles Berthoud Aspin, it was never going to work for her.  She went back to her older Fizik’s vitesse tri and problem solved.  She is back to all day, day after day saddle comfort.  She does plan to try the Brooks B17 Narrow as she misses not being able to carry her Zimbale 7 liter saddlebag but for now the Fizik’s Vitesse Tri is just fine.

Here are some very important things to consider when selecting a Saddle.

Shape:

Your shape and the saddle shape need to be happy.  Most Saddles tend to be either a pear shape or a t-shape.  The Gilles Berthoud Aspin & the Brooks B17, The Brooks Flyer fall into the pear shape category, the Brooks Swallow, the Zimbale leather saddlethe Brooks B17 Narrow, the Fizik’s Vitesse are considered a T shape.
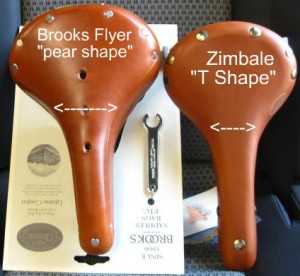
bike saddle shape
The Flyer does not narrow as quickly as the Zimbale

The width of the saddle across the widest area and how quickly it widens from the nose to the back will affect saddle comfort.  Add to that the saddle position or the saddle tilt  (nose down, nose up, nose level).  Of course don’t forget to factor in the entire bike fit (see earlier posts)

Too Much Pear-Shape for your shape typically causes chafing in the inner neighborhood of the lower fold of the buttock, top-of-the-leg, panty line, hamstring attachment (however you want to describe it) because the saddle is too pear-shaped for the motion of your hip joints.  If these are issues you have with your saddle, perhaps a T-Shaped style would work better.  If you feel like you are sitting on a narrow, painful 2 X 4 a pear shaped saddle could be what you need.

Let’s get back to saddle width and length.  The size of your hips or the size of your behind has very little to do with the size of your saddle, wide hips do not mean you need a wider saddle.  The width between your “Ischial Tuberosities”  ie) sit bones is what matters. Where those sit bones connect with your saddle makes the biggest impact in saddle comfort.  Too wide or too narrow for your sit bones and the end result is pain and chafing.  Sky King has a wider hip measurement than the Bike Hermit but he has a wider sit bone measurement.

Each saddle has “cheeks” on the wide back part. Sometimes the cheeks are even domed up a bit. Your sit bones are meant to land in the high part of that dome to take advantage of the padding and the overall architecture of the saddle.  Saddle without domes still have a cheek area, the widest part of the saddle is where your sit bones should be resting.  Measure the saddle from center of cheek to center of cheek. The saddle’s center-to-center should match the center to center measurement of your sit bones.

Next measure the saddle’s overall width. Generally the saddle’s overall width should be, at minimum, the same as the outside measurement of your sit bones OR slightly wider but NO more than 2 centimeters wider than the outside sit bone measurement. You want to be able to shift around to power up hills or use body-english around corners or just to give your butt a break, and STILL have the bones land on the saddle.

In the case of a many leather saddles your saddle must be about 2 cm wider than your outside sit bone measurement so you do not have bones contacting the metal cantle* plate.

(*rough description –  the horseshoe shaped metal plate under the back of the saddle that holds the rails in place)

Measure your sit bones:

We could get all fancy and purchase memory foam or drop some dollars on a fancy gel seat specifically designed to measure sit bones and assist in determining the proper saddle width but we hate to spend money when things at hand will work just as well.

Three inexpensive options for measuring Sit Bones:

The Flour method

Take a gallon size zip lock bag, fill with enough flour for about a two inch flour cushion when the bag is lying on a flat surface.  Place this bag on a hard flat surface – table or chair (we use a piano bench)  Sit on the bag (preferably bare skin), mimic your bike position.  Now stand up without disturbing the bag.  Those two dimples/impressions in the flour are from your sit bones.

The Play Dough method

To make your dough:

One part salt, two parts flour, mix with water until it’s right for modeling.

Roll about an inch thick, cover with aluminum foil to keep it from being sticky, place dough w/ foil on a low bench, once again sit on dough (bare skin is best) and lean forward to approximate riding position since the sitbones become more narrow as you lean forward.  Remove foil and allow to dry a little. The bones impression will become white first.

The Measurement

Take a millimeter tape measure and measure the impressions, recording your findings.

1. The inside edge to inside edge

2. Center of depression to center of depression, if easier, place a marble in each depression and measure the marbles.

3. Outside edge to outside edge

  • Center-to-center measurement correlates with the spot on a saddle that bears the weight of the sit bones. The saddle “cheeks”.
  • Outside to outside measurement is a consideration for some types of saddles, such as the Brooks that have metal rails, you do not want to have your sit bones resting on the metal rails.  General rule of thumb – your saddle width should be about 2 centimeters wider than outside sit bone measurement.  Again, you want your sit bones resting on the “checks” of the saddle and you want some wiggle room for movement as you are touring.
  • Inside to inside may be necessary if you plan to use a saddle with a cut out, to ensure the sit bones clear any large center cutout in the saddle. The inside bones falling into the ‘moat’ so to speak, causes a lot of pain in the bones surrounding the “soft tissue” area. To clear the cutout, you need about 20 mm extra space in between the inside distance of the sit bones. So, if the cutout is 60 mm, your inside distance is 80, then you have just enough clearance.

The Hand Method(s) of measuring

Sit on your hands, and feel for the two bones of your butt. They feel like elbows poking down into your hands.

Put the tip of your index fingers right under the part of the bones that is pushing hardest into the chair. (squish the very tip of your fingers between the chair and your sit bones)

Lift your butt from the chair leaving your hands on the chair, and have your assistant measure the distance between your fingertips. This is pretty much your center-to-center.

Then put your fingertips against the outsides of the bones. Push them right into the bones so they are on the outside of the bones. Lift your butt from the chair and have an assistant measure the distance between your fingertips. This is pretty much your outside.

Some people have sit bones that angle a lot from front to back. The “sits” are heavy thickened portions of the rami area of the pelvis and can have unique personalities of their own. You can measure again on the forward part of the heavy “elbow” bit if you can feel that yours have a definite angle. The forward portion of the heavy thick part of the bone is what your weight rests on more when you are in a more aero position. DON’T measure the thin blade like portion that is in your crotch, that is the rami and you do not want a saddle there. Measure from your backside.

Repeat your measurements a few times, average them out if you want.

You can also get these measurements by lying on your back with your knees to your chest holding a measuring tape and poking around for landmarks.

The Cutout
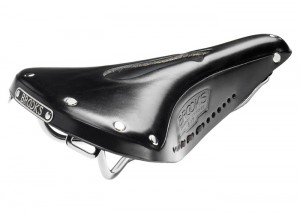
Cut Out on a Brooks B17 Imperial

Purchasing a saddle with a cut out can be beneficial if you have soft tissue pressure.  An easy way to help determine if you might be a good candidate is to sit (commando or in thin underwear)on a very hard surface, feet flat on the floor, pedaling distance apart.  Lean forward from the hips, keeping your back straight and place your elbows on your knees.  If you soft tissue is feeling overly squished you may want to try a saddle with a cut out.  Do some forum research, some people love them, other’s find the edges of the cut out equally irritating.  Assuming you have a good bike fit and proper saddle height, consider adjusting the angle of your current saddle as well to see if that relieves soft tissue pressure.

Length

Years ago some saddle manufacturers started adding a short version to their line. Historically the short version came about for women riding in skirts and dresses, the longer nose would catch on the dress, making mounting and dismounting more challenging.  Now a short version is more about personal comfort.  Reading Forums and blog post about saddle fit there are numerous opinions about both. Sky King’s Fizik Vitesse Tri is a “woman’s” saddle but it isn’t any shorter in the nose than a Brooks Swallow.

Conclusion

We agree that finding the right saddle can be tough.  Sometimes despite the best research, trial and error ends up being the answer.  Taking your measurements and understanding your riding style are the beginning of your quest.

For more great info on choosing a Saddle read other blogs and forums.  Sky King took the measuring suggestions from posts on the Team Estrogen Forum.  Great resources can be found on sheldonbrown.com, team estrogen forums, bike forums (touring).  Most of all don’t be afraid to ask questions. We both ride day in day out without saddle pain on two entirely different saddles.

Categories
Advocacy/Awareness Living Vicariously

Small Bike Tour

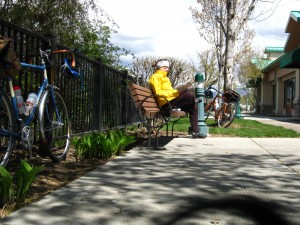
Chris Johnson already coined the word “micro-tour”.  “Small tour” might describe our Saturday ride. Eleven miles to a little restaurant in a neighboring town, a cup of coffee, some fish tacos and some time to sit in the sun and read. Doesn’t even really qualify as “cycling”. It’s just something we did and we happened to do it with bicycles.

Warm sun, no hurry!

Enjoying the good things about bike touring, like relaxing in a nice spot and not being in a big hurry. And not really having any other urgent commitments at the moment. We took our books and  we took jackets and long pants, because even though the sun felt great the wind had a bite to it. And the Zimbale canvas saddlebags came in handy!

The Not Even A Bike Ride
Categories
Bike Touring Tips

Bike Touring and Clothing

What are the basic essential articles of clothing needed for a successful bike tour? Obviously it depends on the season and local climate. My last three trips have been in late winter in the southern and southwestern US. Still, it can get cold…down to 25 degrees in Marathon Texas last year. And rain and even snow are always possibilities. So I carry what I consider to be the bare necessities for comfort without going overboard and bringing too much.

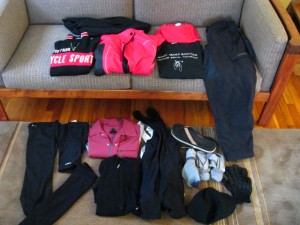
Clothing for a Bike Tour

At the top I have long johns and a long sleeve polypropylene t-shirt. The long johns and sometimes the long sleeve t for sleeping on the cold night. I have a Woolistic brand wool trainer, a rain jacket, this happens to be a Bellwether, a long sleeve cotton t-shirt and some Endura Humvee pants made out of nylon.

On the floor, wool leg and arm warmers and a pair of knee warmers, a Club Ride jersey and a Surly wool jersey, riding shorts (yes, I prefer bibs), flip flops, for the inevitable gross showers and for hanging out, socks, (I carry 2 or 3 pairs of undershorts too), a wool cap and gloves. When I’m riding I, of course, wear my helmet and bike shoes.

Every two or three days I can hit a laundromat and wash everything. In a pinch I can wash the basics in the shower at night and hang them to dry. Even though my trips of late have been shorter than 3 weeks, I don’t think I would need to carry much more even if I were going for 3 months.

Categories
Austin to New Orleans Tour Planning Resources

Tour Preparation, Day Three- Daruma’s, Decaleurs and Mid-Fork Eyelets

I remember riding through downtown Montreal, Quebec, Canada on my first self supported bike tour with homemade rear panniers which, when the bike hit a rough patch,  bounced around and came un-hooked from the rack. Luckily they didn’t fall completely off because the gang of homeless men accosting me from a vacant lot as I rode past would have been happy to relieve me from my load and probably my bike if I had stopped. Needless to say, since that tour I am a little more finicky about my equipment.

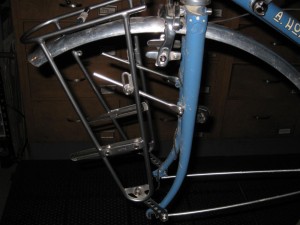
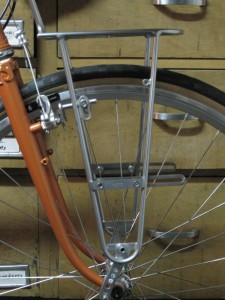
On my up-coming  tour I am using front and rear racks made by Nitto in Tokyo, Japan. These are made of nickel plated, tubular Chrome-moly steel with simple and solid attachment hardware.

The Nitto Campee front rack sans the low rider attachments.
Highly adjustable aluminum struts allow for a custom fit.
The lower leg of the Campee rack has an integral spacer to clear the fork blade.
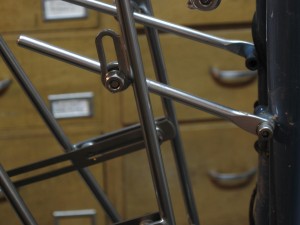
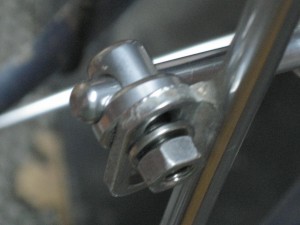
Daruma bolt
Daruma bolt attached to rack and strut.

The Nitto Campee front rack comes with detachable low-rider panels for attaching panniers. I have removed those, because I don’t have low rider panniers. The panniers and bags I will be using are the subject of another post. The aluminum struts attaching the rack  to the fork eyelets in these photos are sold as separate accessories. The struts which come with the rack are made to attach to cantilever brake posts.

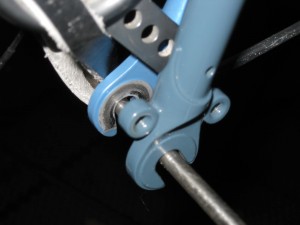
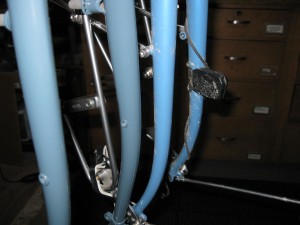
This seems like as good a time as any to look at a couple different fork blade/eyelet/brake combinations. Eyelets are the small, threaded holes drilled into the sides of the fork or into tabs which are then welded onto the dropout (the piece on the end of the fork blade…where the wheel axle attaches). Some bikes have one eyelet on the fork dropout and some have two. There is only one on each dropout on my bike, so the rack and the fender strut clamps will share the same hole. A bike with two dropout eyelets allows a little more flexibility in attaching racks and fenders.

A fork blade dropout(from a Surly Long Haul Trucker) with two eyelets

Not all bikes have eyelets on the forks. What? How can that be? Well, some people don’t want to carry stuff on their bikes, believe it or not. For the person who actually uses their bike, however, the more eyelets the better. OK so how about the mid-fork eyelets? On most touring bikes these are located to facilitate “low rider” racks such as the Tubus Tara or the Tubus Duo. And on really well designed touring bikes, like Surly’s Long Haul Trucker, there are two mid-fork eyelets on each fork blade…one on the outside and one on the inside. The Tubus Duo was actually made with that bike in mind. On some bikes, like my Rivendell, the eyelets are located higher on the fork, and these will not work with low-rider only racks. Bikes such as Rivendell, with higher fork mount braze-on eyelets seem to work best with the Nitto type hardware and designs.

The fork on the left has inner and outer eyelets in the fork blade. The other fork blade has braze-on eyelets mounted higher.

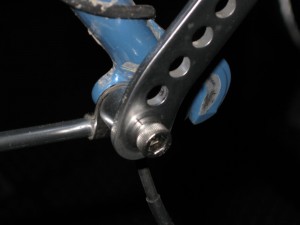
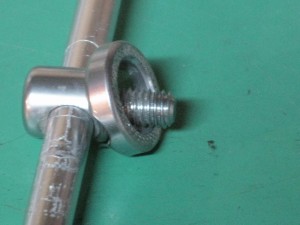
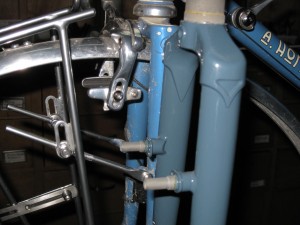
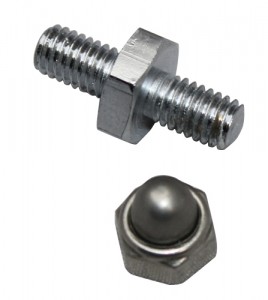
Many touring bikes will also be designed for cantilever style brakes. These brakes are mounted on special posts which are welded on to the fork blades. Some racks like Old Man Mountain brand Cold Springs and Ultimate Low Rider models attach directly to these posts with provided replacement bolts. Others, like some Nitto models attach to these posts with a special, double ended brake bolt or stud.

The fork in the foreground has posts for cantilever style brakes. The brakes on the other fork are center mount, sidepulls.
The Nitto Campee rack on a bike with cantilever brakes. The struts would bolt on to a stud (pictured below) which replaces the brake bolt.
This is the stud which replaces the cantilever brake bolt.
The struts are adjusted to line up with the brake bolt, which would be replaced with the double ended stud.

I got a little carried away and off topic with this post, but it felt like a good time to get into some rack details. Hopefully it might give you, good readers, some things on which to cogitate. In the next post I talk about my dual Schmidt E6 headlight setup, about which I am unnaturally excited.

Categories
Best Touring Saddle Cockpit Touring Bike Components

Gilles Berthoud Saddles


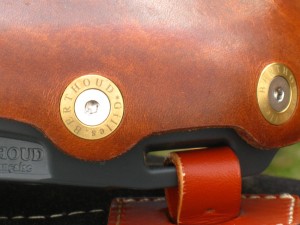
I now have over 3000 miles on my Gilles Berthoud Aspin touring saddle, so I guess I feel OK about sharing my impressions. (the pun will become apparent later) The Gilles Berthoud Company is located in Pont de Vaux, France. The products they produce are well thought out and elegant and, as far as I can tell, any compromise in materials or methods used in construction is never considered. The leather saddles are unique in several ways. The cantle plate and nose piece are made of a special, composite material. The rails, either steel or titanium, depending on the model, slide into holes molded into the composite pieces. The leather tops are bolted on with stainless steel bolts and specially designed brass washers which have the Gilles Berthoud name engraved on them except the nose rivet which has the individual saddle’s number on it. The idea being that individual pieces of the saddle can be easily replaced. The tension on the leather top can be adjusted with a 5 mm allen wrench so no special tool is required as on Brooks saddles. The leather is supposed to be waterproof and Gilles Berthoud does sell a proprietary leather treatment.

Being able to take the saddle apart may be a good idea, but I have noticed a couple of things one needs to pay attention to. If you pick up a 60 pound touring bike by grabbing the rear of the saddle, the rails may pop out of the cantle plate. It is possible to loosen the tensioning bolt enough to pop them back in place and the saddle is good as new, but US 77 outside of La Grange TX is not the best place to go through this exercise. The bolts holding the leather top on can come loose and need to be checked and tightened periodically. We also discovered that the dye used in the black saddles leaves an unsatisfactory stain on lighter colored pants. The natural saddles don’t appear to have that feature.

The bottom line is that this is the most supremely comfortable saddle I have ever used. The leather appears to be thicker than that on some other brands but it has been pre-softened, and rather than simply sagging or splaying out with use has conformed to my anatomy leaving the impressions of my sit bones. Yet it gives enough support that there is no pressure on the soft tissue parts of the perineum or the arteries and blood vessels. In short, no pain and no genital numbness! As with any saddle, especially leather ones, adjustment of the fore/aft tilt is critical to comfort.
The section of rail that can be clamped to the seatpost is short, like on Brooks saddles so the fore and aft positioning of the saddle is limited, but a set back seat post can help if a farther aft position is desired.

Experiment with the best tilt or angle for your Berthoud saddle.

My sit bones leave a deeper impression on the right side

These saddles are not inexpensive, over two times the price of a Brooks B17, but to my mind (not to mention other parts) they are well worth it. After 4 or 5 or 6 hours in the saddle when touring, it’s nice to not have a literal pain in the butt to worry about. The durability of my saddle so far has been terrific allowing for the mentioned caveats. Those are two things that figure into my calculations of value.

Categories
Living Vicariously

Fomenting Fermenting – Bike Touring So We Can Drink.

Those who know me know the bike hermit is a beer drinker with a cycling problem. But I think that is a common thread. It appears that many fellow riders appreciate a barley sandwich or two at the end of a riding day. Or any day. So I thought I would post these videos of me making a batch of homebrew.

http://www.youtube.com/watch?v=PJlm7oFQf18

http://www.youtube.com/watch?v=qZwVCM1OCJw

Categories
Touring Bicycles

Steel Bikes And Comfort

Even though I’m a fan of steel bikes, it’s mostly because of the durability of the material. I certainly like the ride quality too, but I think the idea that steel is a more plush or forgiving ride because it flexes or dampens is hogwash. The idea has almost become gospel now just because it’s been repeated so many times.  Don’t get me wrong, I know my steel bike frames flex…. I can hear my fender and/or brake and/or front derailleur rub from time to time if they are a little out of whack and I am pressing hard on the pedals. But that is torsional flex.

It’s the idea of vertical flex of a bicycle frame I have a hard time envisioning.

Scientific diagram

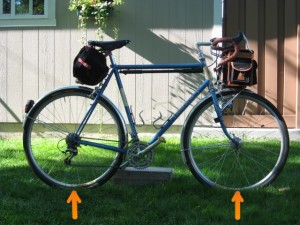
Imagine the arrows to be balancing the downward force of the rider and the bike.