Categories
Living Vicariously

Two Cycling Bloggists and Tourists

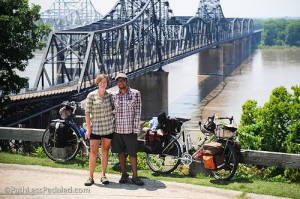
At NAHBS in Austin we met Russ Roca and Laura Crawford, the couple behind The Path Less Pedaled and The Epicurean Cyclist

Russ Roca and Laura Crawford

They are in the middle of an “open ended journey” and they are doing it on bicycles. When we saw them they had their Brompton folding bikes with them preparing to ride the Adventure Cycling Northern Tier route. I wish them luck and will be following their adventures.

Categories
Austin to New Orleans Tour Planning Resources

Tour Preparation, Day Five- Packing and Shipping

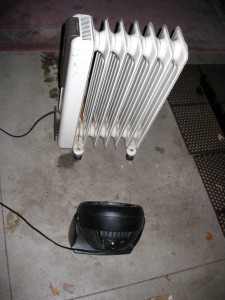
Most of the day yesterday was spent taking apart Chief and putting him in his box for the trip via FedEx to Austin. Even though the thermometer outside struggled to reach 40 degrees, the garage eventually was comfortable thanks to my upgraded heat system.

Upgrade of the Binford 4000 Series Electric Oil Radiator with the addition of the Binford 3100 Fan.

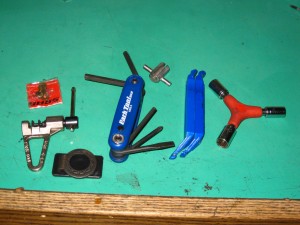
The tools that I am going to carry on the ride are the same tools I used to disassemble the bike. So I am relatively confident that first, I can put the bike back together, and secondly, I can take care of any mechanical issues that might occur.

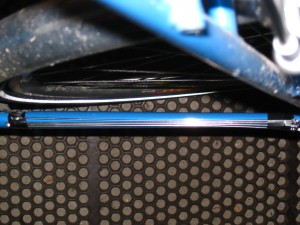
The Park multi tool has 4,5 and 6 millimeter hex wrenches and phillips and flat blade screwdrivers. And the three sided socket tool has 8, 9 and 10 mm sockets. Every fastener on the bike can be tightened with these two tools. I also carry a spoke wrench and some extra spokes taped to the left chainstay. And since, according to Murphy’s Law, the drive side spokes on the rear wheel will break if any will, I carry a small cassette lockring tool to remove the cassette. There is a small chain tool and an extra chain connecting link. And, of course, tire levers.

These tools will handle most repairs on a touring bicycle.
Two different lengths of spokes will work to replace either front spokes or rear drive side and non drive side spokes.

I stuffed as many bicycle bags and as much clothing and miscellaneous items as I could into the box. Overall the weight was about 60 pounds and it cost about $75 to send it to Austin including insurance for $3000. The box is scheduled to arrive in Austin the day after I do. So far, so good!

Categories
Austin to New Orleans Tour Planning Resources

Tour Preparation, Day 4- What Could Possibly Go Wrong?

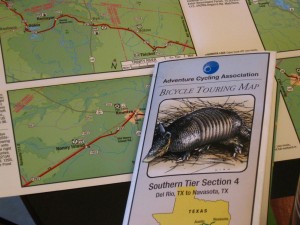
Adventure Cycling Southern Tier maps sections 4 and 5

There was new snow on the ground again this morning with more forecast for the rest of the week. I check the forecast for Texas and Louisiana and am pleased to see that temperatures are predicted to be in the 70’s during the day and merely down to the 50’s at night for at least the next week. There is some rain in the forecast and according to the Adventure Cycling map I just got on the mail, Louisiana receives on the average in February and March as much precipitation as this part of Idaho gets in a year. Since my hammock and sleeping pad will travel strapped to the sides of my rear rack I decided I better address the probability of them getting wet.

After brushing the snow off the car we made our way to the Army Navy store where I found some compact and lightweight dry sacks of the perfect size. Since I already have a waterproof compression sack for my sleeping bag, I think I am all set in the riding-in-the-rain department.

The remainder of the afternoon has been spent developing a reasonable schedule so that I could book a hotel room in New Orleans and a flight home. That and reading Sue Gray’s account of her ride on the same part of the Southern Tier earlier this month in some abberantly cold weather. My last two tours have been sort of aggressive from a time allowed standpoint, especially last year, when I did 850 miles in 11 days of riding for an average of 77 miles per day. This year’s route is about 700 miles and I figure I can do it comfortably in 12 days which averages to about 58 miles a day. As an extra cushion I am allowing for one rest day, with zero miles, and one day in New Orleans to get the bike packed and ready to ship back.

We are leaving for Austin on Wednesday. I still need to pack my bike and get it to FedEx tomorrow in order to feel comfortable about it getting there before the end of the week. Stacy flies back home on Tuesday March 1, my first day on the bike.

Categories
Austin to New Orleans Tour Planning Resources

Tour Preparation, Day Three- Daruma’s, Decaleurs and Mid-Fork Eyelets

I remember riding through downtown Montreal, Quebec, Canada on my first self supported bike tour with homemade rear panniers which, when the bike hit a rough patch,  bounced around and came un-hooked from the rack. Luckily they didn’t fall completely off because the gang of homeless men accosting me from a vacant lot as I rode past would have been happy to relieve me from my load and probably my bike if I had stopped. Needless to say, since that tour I am a little more finicky about my equipment.

On my up-coming  tour I am using front and rear racks made by Nitto in Tokyo, Japan. These are made of nickel plated, tubular Chrome-moly steel with simple and solid attachment hardware.

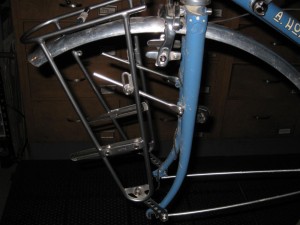
The Nitto Campee front rack sans the low rider attachments.
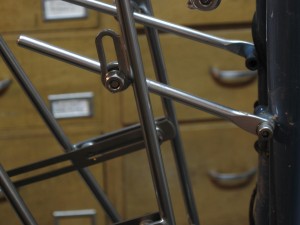
Highly adjustable aluminum struts allow for a custom fit.
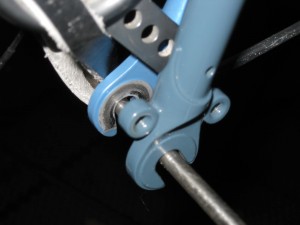
The lower leg of the Campee rack has an integral spacer to clear the fork blade.
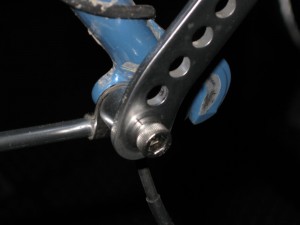
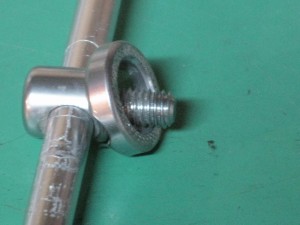
Daruma bolt
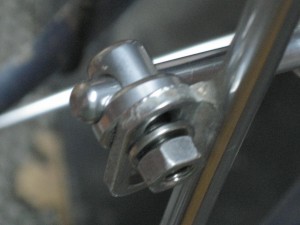
Daruma bolt attached to rack and strut.

The Nitto Campee front rack comes with detachable low-rider panels for attaching panniers. I have removed those, because I don’t have low rider panniers. The panniers and bags I will be using are the subject of another post. The aluminum struts attaching the rack  to the fork eyelets in these photos are sold as separate accessories. The struts which come with the rack are made to attach to cantilever brake posts.

This seems like as good a time as any to look at a couple different fork blade/eyelet/brake combinations. Eyelets are the small, threaded holes drilled into the sides of the fork or into tabs which are then welded onto the dropout (the piece on the end of the fork blade…where the wheel axle attaches). Some bikes have one eyelet on the fork dropout and some have two. There is only one on each dropout on my bike, so the rack and the fender strut clamps will share the same hole. A bike with two dropout eyelets allows a little more flexibility in attaching racks and fenders.

A fork blade dropout(from a Surly Long Haul Trucker) with two eyelets

Not all bikes have eyelets on the forks. What? How can that be? Well, some people don’t want to carry stuff on their bikes, believe it or not. For the person who actually uses their bike, however, the more eyelets the better. OK so how about the mid-fork eyelets? On most touring bikes these are located to facilitate “low rider” racks such as the Tubus Tara or the Tubus Duo. And on really well designed touring bikes, like Surly’s Long Haul Trucker, there are two mid-fork eyelets on each fork blade…one on the outside and one on the inside. The Tubus Duo was actually made with that bike in mind. On some bikes, like my Rivendell, the eyelets are located higher on the fork, and these will not work with low-rider only racks. Bikes such as Rivendell, with higher fork mount braze-on eyelets seem to work best with the Nitto type hardware and designs.

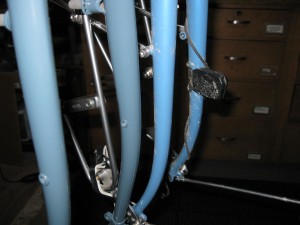
The fork on the left has inner and outer eyelets in the fork blade. The other fork blade has braze-on eyelets mounted higher.

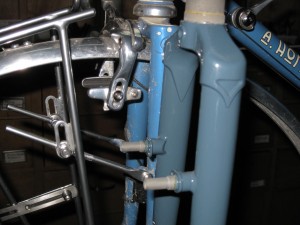
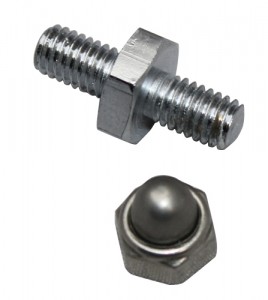
Many touring bikes will also be designed for cantilever style brakes. These brakes are mounted on special posts which are welded on to the fork blades. Some racks like Old Man Mountain brand Cold Springs and Ultimate Low Rider models attach directly to these posts with provided replacement bolts. Others, like some Nitto models attach to these posts with a special, double ended brake bolt or stud.

The fork in the foreground has posts for cantilever style brakes. The brakes on the other fork are center mount, sidepulls.
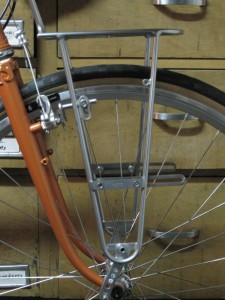
The Nitto Campee rack on a bike with cantilever brakes. The struts would bolt on to a stud (pictured below) which replaces the brake bolt.
This is the stud which replaces the cantilever brake bolt.
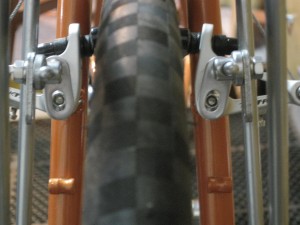
The struts are adjusted to line up with the brake bolt, which would be replaced with the double ended stud.

I got a little carried away and off topic with this post, but it felt like a good time to get into some rack details. Hopefully it might give you, good readers, some things on which to cogitate. In the next post I talk about my dual Schmidt E6 headlight setup, about which I am unnaturally excited.

Categories
Austin to New Orleans Tour Planning Resources

“Goin’down groovin’ all the way”, Prologue

“…now the sky is gettin’ light
everything will be alright
I think I finally got the knack
just floatin’ and lazin’ on my back

I never really liked that town
think I’ll ride the river down
just movin’ slow and floatin’ free
this river swingin’ under me

wavin’ back to folks on shore
I should have thought of this before
I’m goin’ on down to New Orleans
pick up on some swingin’ scenes

I know I’ll know a better day
goin’ down groovin’ all the way…

Micky Dolenz, “Goin’ Down”

Yep, the bike hermit is goin’ on down to New Orleans. Since we are going to be in Austin for the North American Handmade Bicycle Show in  February, I started to think about ways to take advantage of being in the south while Idaho emerges from the cold, wet winter months. That thinking has evolved into a bicycle tour from Austin to New Orleans.  I will load Chief and journey out on section 5 of the Adventure Cycling Association‘s  Southern Tier Route, from Navasota, TX to St. Francisville, LA., and from there down to the Big Easy. Since I am self-absorbed and delusional enough to think people I don’t even know might be interested, I have decided to document my daily planning and preparation tasks,  the ride, the trip home and any epilogues.

A simple Google search will uncover a plethora of web pages with itemized lists of what other people take on a bicycle tour , and I think those lists are boring. So I won’t be doing that. Some people have created spreadsheets to plan their itineraries and to document the daily mileage, weather, lodging, food and probably bowel movements. I’m not going to do that either. I want to speak in more general terms about the process of conceiving, planning and executing this bike touring trip as I figure it out. About things that I find out and discover as I explore how to get from here to there by bicycle. The whole concept to me is about freedom. I’m free to ride my bike all day if I want. Indeed, I’m free to ride all night if I feel like it. I’m free to stop whenever and wherever I want. I can go as fast or as slow as I want. All this freedom within limits of course. I do need to complete the ride and come home on the designated day. But everything in between getting on the bike in Austin and getting off in New Orleans is going to unfold as it will. I am literally just along for the ride. And the beer.

Categories
Bike Touring Equipment Nutrition for the Bike Tourist

Cook Stoves for Bike Touring

Back in the day there were not a lot of choices in lightweight backpacking or bike touring stoves. The bike hermit used (and still has) a Svea brand stove. Aside from being dangerous, unreliable, inconsistent, inefficient, heavy and difficult to use, that stove is great. Nowadays there is a better selection of stoves from which to choose, with various models burning everything from white gas to isobutane/propane to denatured alcohol to sticks. The different fuel sources all have pluses and minuses and most people will have a preference for one or the other based on their own demands.

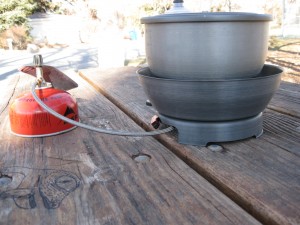
My most recent experience has been with the Primus EtaPowerTrail EF Stove

Primus EtaPower stove in use. The black knob on the line attached to the top of the fuel canister allows for flame adjustment.

This is an isobutane/propane stove so the fuel source is a sealed canister with a screw fitting for a fuel line which connects to the burner. The fuel is pretty easy to find at most outdoor stores and even Walmart, so even though you can’t fly with it or ship it, you can get it on route.

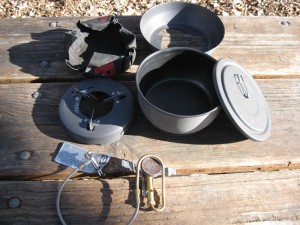
The kit I purchased includes the burner unit with fuel line , a base, a windscreen, a 1.7 liter aluminum pot with a lid and a pot handle.

All the parts

This is not the most compact stove available but it has some features I like.
Namely;
-Relatively large and very stable base.
-Windscreen
-Easy to light
-Great heat output Boils about 3 cups of water at 32 degree F. ambient temp. in about 4 minutes.
-1.7 liter pot is good for cooking pasta dishes or for making freeze dried food with water left over for coffee or cleaning.
-Separate, light, easy to use pot handle
-Piezoelectric start precludes need for matches

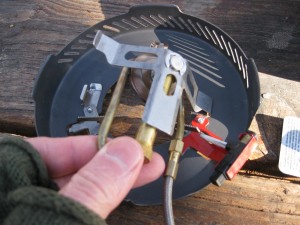
The burner unit snaps into the base.
The burner in place. The piezoelectric starter button is the black button in the lower right of the photo above
Base unit with burner attached, ready for windscreen
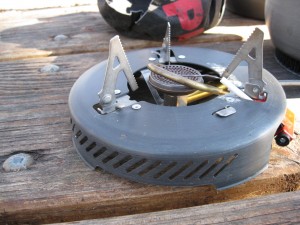
The windscreen sits on the base and is secured by rotating counterclockwise to engage the helical cut outs with the bases of the pot support wings. The wings are then folded down to provide a level pot surface.

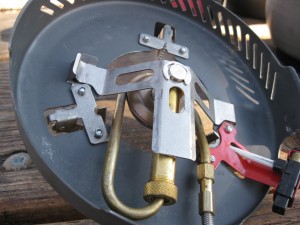
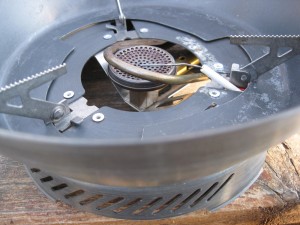
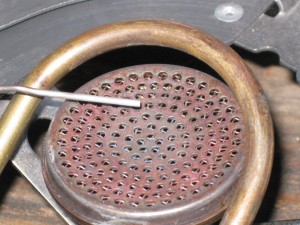
Pressing the piezoelectric ignition button creates a current in the wire which is suspended over the burner plate and a spark generates between the end of the wire and the plate, igniting the fuel coming through the line from the canister. If the wire gets bent and is too close to the plate, no spark will generate and the wire needs to be re-positioned away from the plate surface until the spark is visible when the ignition button is pressed.

The space between the end of the wire and the plate may need to be adjusted to achieve a spark when the ignition button is pressed.

Even though this might appear to be a complicated kit, it is well made and durable. I need to be more diligent in making sure all the connections are tight between uses. The entire kit (minus fuel canister) weighs about 27 ounces or 765 grams. Now I see on the Primus website they have a stove that is slightly lighter but much more compact, the Primus Eta Lite

Primus ETA Lite Stove

The Primus ETA Lite Stove sets a new standard for compact, all in one backpacking stove… [More]

Price: $99.95

I think when it is time to get a new stove for Sky King we may be looking at that one.

Categories
Planning Resources

Planning A Bike Touring Route

Deciding where to go on your bicycle touring adventure and planning the route is an enjoyable part of the experience. Maybe there’s a part of the country or world you have always wanted to visit, and doing it on a bike can be a profound pleasure.

But…how does one know what the roads are like?…Is the area safe?…..What about auto traffic?….

There are some good sources  for route planning.

The Adventure Cycling Association publishes excellent maps outlining almost 41,000 miles of bicycle routes which have been researched and refined over the last 4 decades. These have descriptions of what to watch out for and how to plan. They also offer supported trips, a Cyclist’s Yellow Pages, and a print publication that always has great useful articles.

Google Maps is another good resource. Just click on any area in the world and you can look at the topography, with elevations included, or a satellite view, or the straight up map view. This application also allows you to view a photograph at almost any point along most roads, by simply dragging an icon, placing it on the highlighted road and dropping it. Very, very cool. In Google Earth one can “fly” over the route.

Another idea is to use routes identified by companies which specialize in guiding supported tours. These routes are usually  researched thoroughly  and a person can find information on camping and other places to stay, where to eat, topography, traffic, etc.

Crazyguyonabike.com is another fantastic resource. This is a free, independent website for hosting bicycle touring journals, forums and resources. The content is contributed by people from all over the world. There are currently (2010) almost 5000 journals and over ½ million photos contributed by people doing their own bicycle tours. Many of these are updated daily by people during the tour, so you can follow them every day!

When planning the route, take into consideration how much time you have, your fitness level, the fitness level of your traveling partner(s) if any, and expected conditions such as weather and elevation changes. Consider where you want to end up each night. With these things in mind plot out your daily mileage, remembering that, if you are self supported, you will be  carrying additional weight. So, even if you are in great shape and regularly do 80 to 90 or more mile training rides, those are not realistic numbers for touring. Some days 40 miles might feel like an epic ride. Other days 100 miles will be doable. Allowing plenty of time to complete your route,…more than you think you need…will give you time to stop at points of interest, or even just (gasp) relax! Remember, this is supposed to be fun.