If you ship your bike home from the end point of your tour, you will probably have removed you seat post and saddle in order to fit the bike into whatever case you used. When you get home and are putting the bike back together you will want to end up with the saddle at the same height relative to the pedals as it was when you took it off. A simple way to ensure that is, before you remove it, to wrap a piece of tape (electrical tape works best) around the seat post where it enters the frame. Then, when you put it back, just insert the post to the same spot.
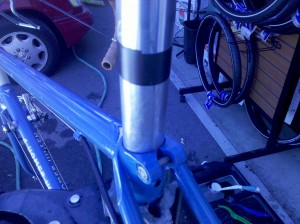
An aluminum seat post inserted into a steel frame will result in galvanic corrosion between the two metals. If not removed and cleaned and re-lubed periodically the seat post will become well and truly stuck and may need to be cut out. Removing it for a period of time will also allow any moisture which might be in the frame tubes to evaporate. Applying grease to the inside of the seat tube rather than to the seat post results in less of the goop squished out onto exposed bits and ending up on your clothes.
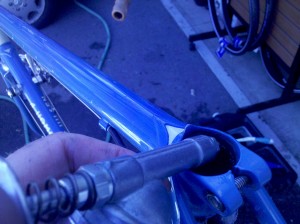
Don’t use grease on a carbon post or with a carbon frame. Use a special paste made for this purpose. The paste won’t damage the carbon and it has a little bit of grit to it that will help hold the post in place without over tightening.
Category: Bike Touring Tips
How to articles and resources for the bicycle traveler.
Bike Preventive Maintenance
I was pinned down in Orberlin, LA by thunderstorms on my recent Austin to New Orleans Tour. Luckily I had a nice dry and warm storage shed at the fire station in which to store my gear. (I ended up sleeping there too, but that’s for another story) So I took the opportunity to do a little preventive maintenance. It’s much easier to fix a loose bolt or other potential problem when you have the time and the the place than it is to repair a failed part along the road when it’s getting dark. 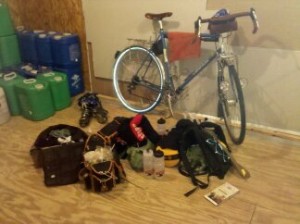
Removing all the luggage makes it easier to inspect bike and accessories. After checking the tightness of all the rack attachment bolts and fender mounts, I also go through the bike and tighten the stem bolts, seatpost bolt, brake lever and brake caliper bolts, derailleur attachment bolts and chainring bolts. Then I lube the chain. I turn the bike upside down and place it on the floor resting on the handlebars and saddle. Then I can visually inspect the tires for cuts or abrasions, and spin the wheels to check alignment. Like the man said,”an ounce of prevention is worth a pound of cure“.
The so-called paleo diet or caveman diet is a low carb high protein diet claimed by some to be a good way to lose weight. It has some proponents in the bicycling world too. One needs to be careful when considering extreme changes in their diet or just extremes in general. Bike touring is very demanding and your body is another piece of equipment you need to depend on. I was reading this thread on Bike Forums this morning. Try to ignore the name calling from the original poster and read the rest of the posts. Interesting stuff.
Gary Taubes is the latest proponent of a high protein low carb diet. From his blog: “My message and the message of Why We Get Fat was not that we should all be eating nothing but animal products–…… but that carbohydrate-rich foods are inherently fattening, some more so than others, and that those of us predisposed to put on fat do so because of the carbs in the diet“. (emphasis added). Mostly he is talking to obese or overweight people or people with that metabolic tendency and it might be easy to see him as a person feeding on people’s desire for a quick and easy way to lose weight.
I wonder if anyone has personal experience with a high protein low carb diet and bike touring? We’d love to hear about it!

Bike Touring and Clothing
What are the basic essential articles of clothing needed for a successful bike tour? Obviously it depends on the season and local climate. My last three trips have been in late winter in the southern and southwestern US. Still, it can get cold…down to 25 degrees in Marathon Texas last year. And rain and even snow are always possibilities. So I carry what I consider to be the bare necessities for comfort without going overboard and bringing too much.
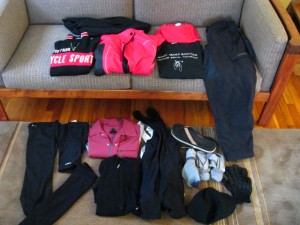
At the top I have long johns and a long sleeve polypropylene t-shirt. The long johns and sometimes the long sleeve t for sleeping on the cold night. I have a Woolistic brand wool trainer, a rain jacket, this happens to be a Bellwether, a long sleeve cotton t-shirt and some Endura Humvee pants made out of nylon.
On the floor, wool leg and arm warmers and a pair of knee warmers, a Club Ride jersey and a Surly wool jersey, riding shorts (yes, I prefer bibs), flip flops, for the inevitable gross showers and for hanging out, socks, (I carry 2 or 3 pairs of undershorts too), a wool cap and gloves. When I’m riding I, of course, wear my helmet and bike shoes.
Every two or three days I can hit a laundromat and wash everything. In a pinch I can wash the basics in the shower at night and hang them to dry. Even though my trips of late have been shorter than 3 weeks, I don’t think I would need to carry much more even if I were going for 3 months.
Every person has different specific nutritional needs. Some basic ideas about fuel for muscles during and after exercise cannot be easily disregarded. There is some noise being made in the cycling world about the so called paleo diet which poo poos the need for carbohydrates in the form of grains and potatoes. This may be OK for the relatively sedentary person whose physiology makes it easy for them to put on pounds. But for the person pedaling a loaded touring bike for several hours each day complex and simple carbohydrates are essential. Carbohydrates provide the fuel your muscles will need in order to fire hour after hour. No carbohydrates, no fuel and no pedals going round. The purpose of protein is to rebuild the muscle tissue being torn down by the exercise. This happens after you stop exercising. The body human is amazingly adaptive to training, and the muscles will be rebuilt stronger than before and with a greater ability to use oxygen and thus greater endurance. I’m no expert or professional in medicine or nutrition but I suggest being careful with fads. Watch this series of videos if you are interested.
http://www.youtube.com/watch?v=OdBDQdOKbJQ
When I’m touring I like to carry enough food to last for about 36 hours. Because you never know when you might be able to buy groceries again. And I have a fear of getting stranded in the middle of nowhere without enough fuel to get to the next store or restaurant. Even in what one might think are relatively populated areas there might not be anyplace to get decent food. If you are lucky, maybe you can survive and thrive on hot dogs and chocolate milk and cupcakes from convenience stores, and there never seems to be a shortage of those.
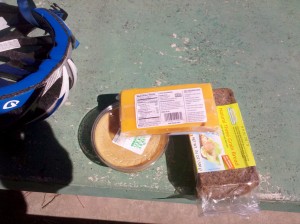
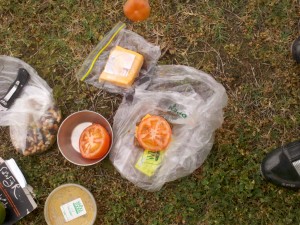
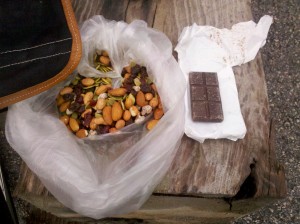
I will also take pasta in the form of quick cooking thin spaghetti. Throw in a few veggies when it is almost cooked and voila, pasta primavera. That works out most of the time, unless there happen to be some ghosts who don’t appreciate your presence as happened to me recently in Merryville, LA. With this result:

I also take powdered milk and muesli. Great for breakfast or emergency meals. Dried soup (I like the Nile Spice brand) can be taken out of the container and carried in zip lock bags. Light, easy to pack, carry and to cook. Lastly, at least one emergency ration of a freeze dried meal or a meal in a boil and eat package.
Basically, I try to bring food that packs the most punch for the pound and that is easy to prepare. Fresh fruits and vegetables are a bonus but they’re hard to carry, so when I find them I buy what I can eat on the spot, or if I am at the day’s stop, what I need for dinner.
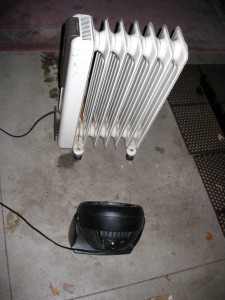
Most of the day yesterday was spent taking apart Chief and putting him in his box for the trip via FedEx to Austin. Even though the thermometer outside struggled to reach 40 degrees, the garage eventually was comfortable thanks to my upgraded heat system.
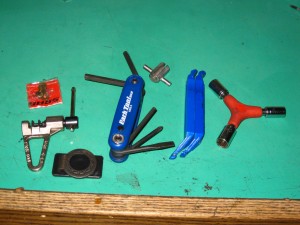
The tools that I am going to carry on the ride are the same tools I used to disassemble the bike. So I am relatively confident that first, I can put the bike back together, and secondly, I can take care of any mechanical issues that might occur.
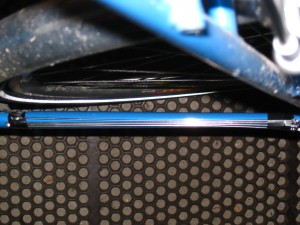
The Park multi tool has 4,5 and 6 millimeter hex wrenches and phillips and flat blade screwdrivers. And the three sided socket tool has 8, 9 and 10 mm sockets. Every fastener on the bike can be tightened with these two tools. I also carry a spoke wrench and some extra spokes taped to the left chainstay. And since, according to Murphy’s Law, the drive side spokes on the rear wheel will break if any will, I carry a small cassette lockring tool to remove the cassette. There is a small chain tool and an extra chain connecting link. And, of course, tire levers.
I stuffed as many bicycle bags and as much clothing and miscellaneous items as I could into the box. Overall the weight was about 60 pounds and it cost about $75 to send it to Austin including insurance for $3000. The box is scheduled to arrive in Austin the day after I do. So far, so good!
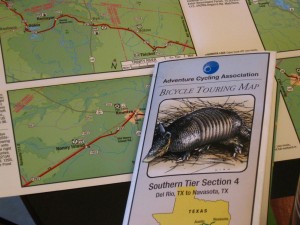
There was new snow on the ground again this morning with more forecast for the rest of the week. I check the forecast for Texas and Louisiana and am pleased to see that temperatures are predicted to be in the 70’s during the day and merely down to the 50’s at night for at least the next week. There is some rain in the forecast and according to the Adventure Cycling map I just got on the mail, Louisiana receives on the average in February and March as much precipitation as this part of Idaho gets in a year. Since my hammock and sleeping pad will travel strapped to the sides of my rear rack I decided I better address the probability of them getting wet.
After brushing the snow off the car we made our way to the Army Navy store where I found some compact and lightweight dry sacks of the perfect size. Since I already have a waterproof compression sack for my sleeping bag, I think I am all set in the riding-in-the-rain department.
The remainder of the afternoon has been spent developing a reasonable schedule so that I could book a hotel room in New Orleans and a flight home. That and reading Sue Gray’s account of her ride on the same part of the Southern Tier earlier this month in some abberantly cold weather. My last two tours have been sort of aggressive from a time allowed standpoint, especially last year, when I did 850 miles in 11 days of riding for an average of 77 miles per day. This year’s route is about 700 miles and I figure I can do it comfortably in 12 days which averages to about 58 miles a day. As an extra cushion I am allowing for one rest day, with zero miles, and one day in New Orleans to get the bike packed and ready to ship back.
We are leaving for Austin on Wednesday. I still need to pack my bike and get it to FedEx tomorrow in order to feel comfortable about it getting there before the end of the week. Stacy flies back home on Tuesday March 1, my first day on the bike.
I remember riding through downtown Montreal, Quebec, Canada on my first self supported bike tour with homemade rear panniers which, when the bike hit a rough patch, bounced around and came un-hooked from the rack. Luckily they didn’t fall completely off because the gang of homeless men accosting me from a vacant lot as I rode past would have been happy to relieve me from my load and probably my bike if I had stopped. Needless to say, since that tour I am a little more finicky about my equipment.
On my up-coming tour I am using front and rear racks made by Nitto in Tokyo, Japan. These are made of nickel plated, tubular Chrome-moly steel with simple and solid attachment hardware.
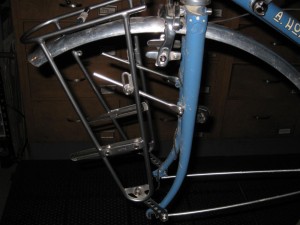
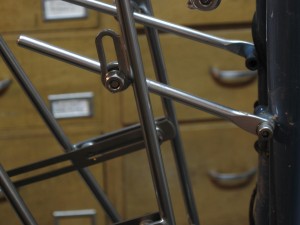
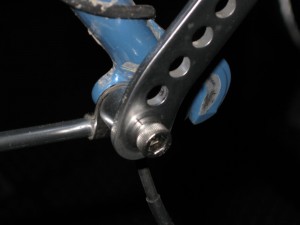
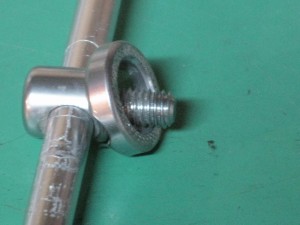
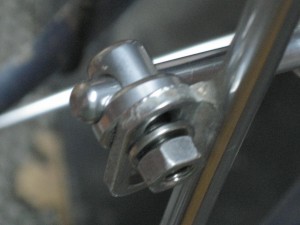
The Nitto Campee front rack comes with detachable low-rider panels for attaching panniers. I have removed those, because I don’t have low rider panniers. The panniers and bags I will be using are the subject of another post. The aluminum struts attaching the rack to the fork eyelets in these photos are sold as separate accessories. The struts which come with the rack are made to attach to cantilever brake posts.
This seems like as good a time as any to look at a couple different fork blade/eyelet/brake combinations. Eyelets are the small, threaded holes drilled into the sides of the fork or into tabs which are then welded onto the dropout (the piece on the end of the fork blade…where the wheel axle attaches). Some bikes have one eyelet on the fork dropout and some have two. There is only one on each dropout on my bike, so the rack and the fender strut clamps will share the same hole. A bike with two dropout eyelets allows a little more flexibility in attaching racks and fenders.
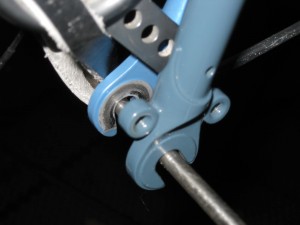
Not all bikes have eyelets on the forks. What? How can that be? Well, some people don’t want to carry stuff on their bikes, believe it or not. For the person who actually uses their bike, however, the more eyelets the better. OK so how about the mid-fork eyelets? On most touring bikes these are located to facilitate “low rider” racks such as the Tubus Tara or the Tubus Duo. And on really well designed touring bikes, like Surly’s Long Haul Trucker, there are two mid-fork eyelets on each fork blade…one on the outside and one on the inside. The Tubus Duo was actually made with that bike in mind. On some bikes, like my Rivendell, the eyelets are located higher on the fork, and these will not work with low-rider only racks. Bikes such as Rivendell, with higher fork mount braze-on eyelets seem to work best with the Nitto type hardware and designs.
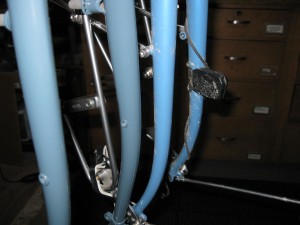
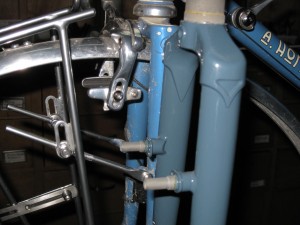
Many touring bikes will also be designed for cantilever style brakes. These brakes are mounted on special posts which are welded on to the fork blades. Some racks like Old Man Mountain brand Cold Springs and Ultimate Low Rider models attach directly to these posts with provided replacement bolts. Others, like some Nitto models attach to these posts with a special, double ended brake bolt or stud.
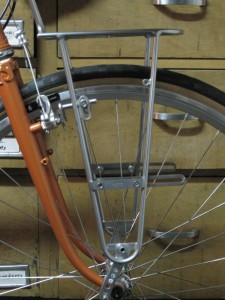
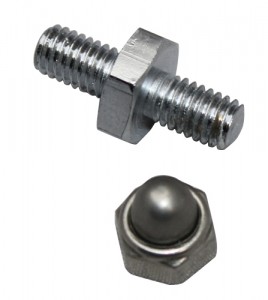
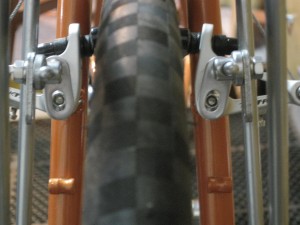
I got a little carried away and off topic with this post, but it felt like a good time to get into some rack details. Hopefully it might give you, good readers, some things on which to cogitate. In the next post I talk about my dual Schmidt E6 headlight setup, about which I am unnaturally excited.
Back when I used to race (and I use that term loosely) my road bike I made it a rule to never do any maintenance on the bike the day before or the day of the race more involved than putting air in the tires. The reason being I always wanted time to do a shakeout ride before race day to make sure everything was working properly. The same rule applies when I go touring.
The chain on my bike was worn, so I replaced it. How do I know it was worn? Because a new chain has a pitch,or distance between links, of exactly 1/2 inch. A quick measurement showed how much my chain had “stretched”
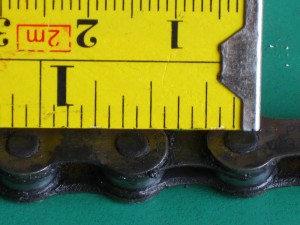
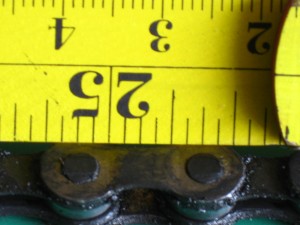
Of course the chain doesn’t actually stretch, the material on the pins and on the links wears away resulting in a new pitch. Over time the teeth on the rear wheel cogs and on the front chainrings will wear to mesh with the new pitch. Then when a new chain is put on, one with a 1/2 inch pitch, it will not lay evenly on the teeth of those other drivetrain components and those will need to be replaced as well or the chain will jump and skip when pedaling. New chains are relatively cheap so I say when in doubt, whip it out.
I will carry a small chain tool with me as well. Chains seldom break, but if they do it could leave me stranded in the middle of nowhere. I will carry the cut off section of a few links from the new chain along with a spare quick link. I’m sure an internet search will reveal a number of videos on how to repair and replace a chain so I will not duplicate that here.
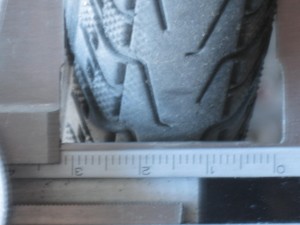
I decided to replace my rear tire as well and take the old one as a spare. The Panaracer T-Serv tire had over 2000 miles of multi surface riding on it and it still has some life in it. I just would rather start out with a fresh tire on this trip. I will be using the Schwalbe Marathon Supreme, my first experience with Schwalbe tires. I will report on that later.
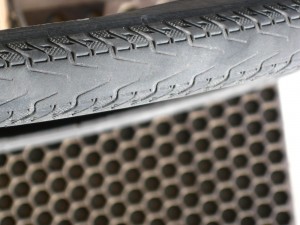
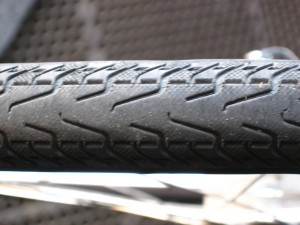
I was a little surprised to see that the Schwalbe tire was a millimeter or so narrower than the Panaracer tires even though both tires are nominally 700 x 32.
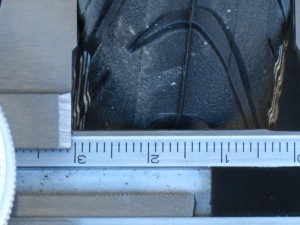
I still need to change my front rack and install the headlights but that’s enough for today.
I leave in one week so I am focusing on those items on the critical path. Items without which the tour cannot be accomplished and which have longer lead times.
Item number one is a box to ship the bike. Rather than a softsided or other airplane friendly case I ordered a re-usable cardboard box like the one I used on the last two tours which is pretty ratty now and besides, I used it to ship a bicycle back to Rivendell last year. I should receive it on Friday. That will leave the weekend to unbuild the bike and pack it so that I can take it to FedEx on Monday. I will send it to the motel in Austin where we are staying. I suppose I could do the same with a conventional, and more durable bicycle case but those all cost more than I want to spend. I can do a dozen tours using 3 or 4 of the cardboard boxes and still be ahead.
Item number next is ordering a map of section 5 of the Southern Tier from Adventure Cycling Association. These maps are so detailed and so refined over the years they have been in use that I get a little nervous when I need to detour from them. It’s also comforting to think of all the other bike tourists who have been along these same routes if only because of the assumption that local motorists might be more aware of bicyclers.
I also plot the route on Google Maps.
View Austin to New Orleans in a larger map
This is not the exact route but for some reason Google Maps would quit letting me make changes after some amount of time or changes.
Since the Southern Tier route only goes to St. Francisville, LA I had to find a way to get through Baton Rouge and into New Orleans. I have been spending some time on the bikeforums.net touring forum and I thought I would put the question to that group. I did a quick search of the forum for routes in New Orleans and was directed to several threads, and I found out about the Mississippi River Trail. From their website:
The Mississippi River Trail, coursing along America’s backbone, the Mississippi River, from its headwaters in Itasca, Minnesota to the Gulf of Mexico, offers approximately 3,000 miles of on-road bikeways and pedestrian and bicycle pathways for the recreational enjoyment, health, conservation and tourism development of river communities, river states, and the nation.
I was able to plot a route, which I’m hoping is pretty decent for cycling, from St. Francisville into New Orleans.
So now I can use my maps to figure out the best places to end up each day. Since I want to go as inexpensively as possible I will be looking for KOA campgrounds and state parks with showers, and I am going to register on the warm showers website to see if I can score some free overnight stays.
