Categories
Triple Brew Pub Tour

Java Man Triple Brew Pub Bike Tour- Day Four

August 3, 2011

Crack….Thump….Whoomp
I’m flat on my back on the ground.
“Are you OK?”
“Yeah, I’m OK…….are you OK?”
“Yeah”
For all of the trees around here, most of them are massive cedars and they are too big to tie the hammock straps. Earlier, I had tied one end of each hammock to what turned out to be a rotten stump of a tree, with the other ends going to separate trees. The weight of both of us in our hammocks was too much for the remaining roots and the whole thing pulled out at ground level and fell neatly in between us. Sky King had retired before I did and I tried not to think about what might have happened if her weight alone had been enough to pull the tree over, because I imagine it would have fallen on top of her. A rude awakening to say the least.

We scuttled around with the headlamps on to retrieve our sleeping bags from the wreckage and we spent the rest of the night under the stars. I felt dumb, but I don’t think that will happen again!

It’s less than 20 miles to the Clinton ferry from South Whidbey Island state Park, and US 525 has a nice shoulder. A short diversion on Newman Road from Freeland provided a quite ride until the junction with 525.
A few miles outside of Clinton a parking lane appears which is meant for vehicles waiting for the ferry and we coast past a long line of cars which, according to the signs, will still not be on the ferry for another hour. And when we get in line to buy our passes the woman in the car behind us tells us it is free for bicycles going back to the mainland. So we roll right to the front, rejoicing in one of the very few moments when a bicycle has more rights than a car.
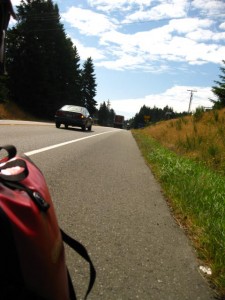
texas size shoulder
In Texas they call them courtesy lanes. I don't think they had cyclists in mind but they are nice riding.

I would give directions to the multi use path, or MUP, system from Mukilteo, but I’m still not sure how we found it. I had directions printed off of Google Maps but after talking to a driver at the fruit stand where we stopped who said, “I’ve been delivering here for 15 years and I’ve never heard of Natures Path Road” we abandoned those and used the Droid to find another route. But after getting well and truly lost again we stopped at a fishing tackle store where we were told how to get to the Burke-Gilman trail. We got a few miles closer using his directions but still had to rely on the Droid for the last few miles.
We finally crossed Bothell Drive and were on the trail. A chatty Seattle cyclist lady gave us directions to the Sammamish Trail, but by thus time I was having none of it and decided to trust the Droid from here to Bellevue.
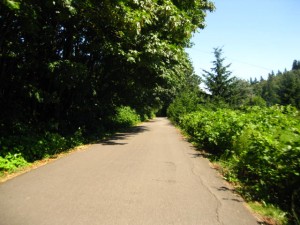
Seattle's Burke-Gilman
Finally, we are on the Burke-Gilman Trail
handlebar shot while riding
making up some time......
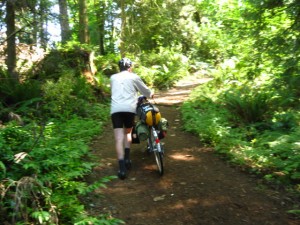
walking up a dirt trail pushing the bike
Please, Seattle, if it's not asking too much, more signs!
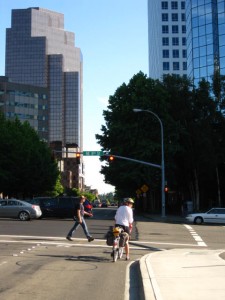
The shiny, happy town of Bellevue

I have to give kudos to Seattle for their MUP system but I wonder if they could scrounge a few dollars more for some signage. Once we got on the Burke-Gilman we still were confused and took a number of wrong turns before we got to the Sammamish Trail and ultimately to the 520 Trail. But not before a detour over the Bridal Crest Trail, which is dirt and very steep. And then we literally were ejected onto a suburban neighborhood street with no idea where the trail went until we saw a bike rider appear from a barricaded abandoned road which was the access to the 520 Trail continuing toward Bellevue.
Once back to our starting point in Bellevue we both had to agree that this tour was a success. No mechanical failures and no major physical problems presented themselves. This is a spectacular part of the country. I really didn’t realize the extent of the rugged mountains and wilderness which exist so close to Seattle and which we could see in the distance every day of our ride. We plan to do some more bike touring here in the near future.

Categories
Triple Brew Pub Tour

Java Man Triple Brew Pub Bike Tour- Day Three

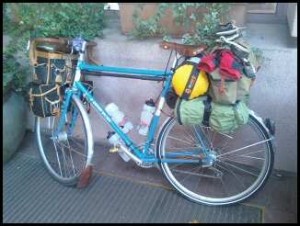
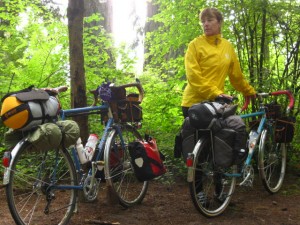
Sky King and loaded bikes
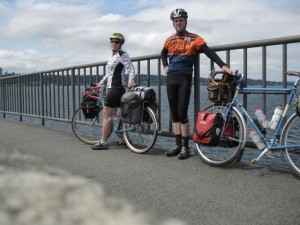
Sky King, Sky and Chief

August 2, 2011
Each decision we make when bike touring is meaningful and can have an impact that is more significant than it might be if we were traveling by automobile. I have developed a habit of stopping at produce stands, grocery stores and restaurants if they look decent whether or not I need to right at that moment. I don’t know when the next opportunity will come and backtracking on the bike is often not an option.

That habit pays off this morning when we stop at the Boatyard Coffee Shop in, you guessed it, the boatyard in Port Townsend. A small loaf of made in house raisin and nut bread, sliced in half and served with cream cheese and jelly would supply the glucose drip I needed for the next few hours.

I did not follow my own rule when on Whidbey Island we passed by the Red Apple Market. We did not see another store the rest of the day. Not a major problem because we had planned on eating our emergency ration of food tonight anyway since it was to be our last night, but it was an inconvenience because we had no beer. As we were explaining our predicament to the campground host in South Whidbey State Park a fellow camper (who had a car) overheard us and offered to buy us beer in the town 6 miles down the road when they went later this evening. I made the exchange with the beer fairy later in the parking lot and we both felt as though we were doing something illegal. Pretty funny. Thanks, beer fairy!

Another ride on a big boat over to Whidbey Island. The landscape is a little different over here and the traffic seems a little lighter. Really nice riding on Whidbey Island, probably my favorite so far. Apparently this is a popular place for Seattleites to come ride. There is a nice 80 mile or so loop around the island from the Clinton ferry terminal. For us this was about a 28 mile day on the bikes.

Categories
Triple Brew Pub Tour

Java Man Triple Brew Pub Bike Tour- Day Two

Loaded up and ready to leave
The campsites at Fay Bainbridge State Park, normally $21 are $5 apiece for bikes. Coin operated showers too.


August 1, 2011
It’s only about 46 miles from Fay Bainbridge State Park to Fort Worden State Park in Port Townsend
. By the time we were finished riding on the day we had covered 58 miles.

After a few miles on the scenic pastoral backroads we were back to the treacherous 305. Crossing the Agate Pass Bridge on a bicycle is not for the timid. Sky King went first and did it exactly the way it should be done. Timing her entry in front of a big box van, she rode in the traffic lane, since there is no shoulder, and the truck slowed to follow her across, with traffic backing up behind. There is no choice but to hold up traffic in situations like this and most people are not psychopaths and they will not, usually, mow down a bicycler.

Immediately after crossing the bridge we took a right onto Suquamish Way up to Suquamish and to Port Gamble. Winding back roads with low traffic brought us to the town of Port Gamble where we stopped for lunch. Then we were on the ACA West Coast route up to Fort Townsend.

The hills are numerous and steep, but, thankfully, usually short.

We passed by Fort Townsend State Park south of town because it was our intention to stay at Fort Worden State Park. It is not evident on reaching Fort Worden that any camping is even offered. We rode around the barracks and other buildings and found a campsite but the sign said pre-registration was a requirement and that the campground was full anyway. I flagged down a passing vehicle and the driver told us the office was closed but directed us to the hiker-biker camping area. A network of trails connects primitive campsites for tent campers all of which were available except for one which contained a tent already pitched. We stopped at site adjacent to this one to leave our bikes and reconnoiter the area.

A man of normal build and maybe 40 years, wearing basketball shorts, a t-shirt, gym shoes, a short hair cut and a goatee walked passed us and said, “How’s it goin?” in a voice that was maybe a little too loud and forced, before he turned into the next campsite which apparently was his.
“Fine” I replied.

We could still hear him talking and as we continued past his site we saw him standing on the bench of his picnic table facing away from the trail towards the woods and reading aloud from the bible. We thought that was a little different and looked for a site as far away as possible. When we came back to retrieve our bikes he had changed his demeanor and was assuring some person who remained unseen that,
“They are all f****** liars. They’re all f******* liars and they aren’t going to get away with it.”
When our eyes met his words to me were,
“Yeah, I’m talkin’ to you”

We secured our bikes and gear and took them and exited out of the other end of the hiker-biker area. We rode down to the beach camp ground which was also full. I told a passing city cop about the incident in the hiker-biker area. We saw him again a few minutes later and he told us he had spoken to the park ranger who was going to have a talk to the individual, and who was not happy that we felt too threatened to stay in his park. Both the city cop and the park ranger took us seriously and they were concerned about keeping the area safe and so I’m sure this was an isolated incident.

As we were riding back towards Fort Townsend State Park I couldn’t help but feel sorry for this fellow. I can’t even imagine what it must be like to live inside his scrambled head, but it must be terrifying. He might have been a high functioning schizophrenic but still he doesn’t have a lot of choice but to scuffle around and try to find someplace to stay until he gets run off. There are not really any social services for these poor people. I don’t know what can or should be done for them but it’s really sad.

Adjacent to the boatyard, through which runs the bike path, the Port Townsend Brewing Company is located just off Haines Place on 10th Street. This is just a tasting room with no food but the beer is good and there are nearby places to eat. After doing our due diligence here, we proceeded to the Safeway across the street and bought a baked, whole chicken and some broccoli to take back with us to Fort Townsend State Park, where we ate and collapsed into our sleeping bags.

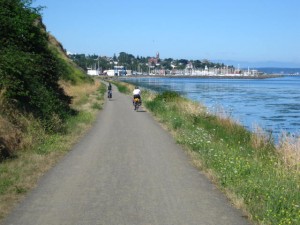
coming into Port Townsend on the bike path
The last section of the ACA route into Port Townsend is on this bike path. Slow down here because the brewpub is adjacent to the boatyard, and the Boatyard Coffee Shop is in the yard.
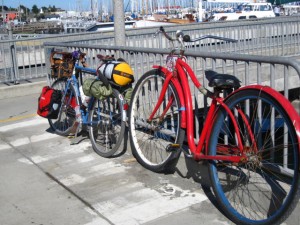
36 inch wheel bike
You look purty to me boy. Where do you think yer goin'?
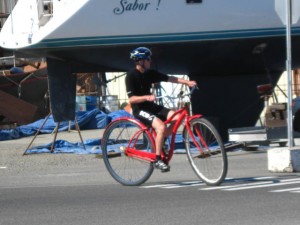
riding the big wheel bike
I was taking pictures and the proprieter said everybody in the port rides it. So......"
Categories
Triple Brew Pub Tour

Java Man Triple Brew Pub Bike Tour- Day One

On the I90 trail Seattle

On the 28th of July we drove to Bellevue, WA to attend a relative’s wedding. On the 4th we are going to Sky King’s family reunion on Snoqualmie Pass. In the intervening days we are bike touring. Originally I was going to post a journal on crazyguyonabike, but that site has been down today while I’m updating so I decided to post the tour journal here too.

Once we are in the bike touring mode and all our gear is readily accessible and we’re mentally and physically ready, it is easy to sandwich in a 3 or 4 day tour. It doesn’t take a huge amount of planning and we were going to be in Seattle anyway. It’s not as if a person has to quit their job or even take major time off in order to go touring.

On the 31st we rode to the Seattle ferry terminal and took the Bainbridge ferry. From there we started riding towards Port Townsend via Fay Bainbridge State Park where we spent the night. Getting to the ferry terminal from Bellevue was a piece of cake on the I90 Trail and the Mountains to Sound Trail. The 305 out of the town of Bainbridge Island has a beautiful, wide shoulder with a nice surface but the amount of automobile traffic is astounding. It was only about 4 miles to the turn off on Day Road but the relative silence was  immediately apparent as soon as we got off 305. Then it was a couple more bucolic miles to the state park.

Fay Bainbridge State Park is a wedge of land opening to Puget Sound and holding back housing developments on both sides. Weathered, beam straight cedar logs are spread out on the black volcanic sand, but not in a jumble, rather aligned with the shoreline up to the high tide water’s edge. The view of the sound and Mt Rainier and the Seattle Skyline and the North/Canadian Cascades is nothing short of breathtaking.

While in Bainbridge Island we hit the Safeway and bought beer and vegetables so we were able to make past primavera for dinner. This park only charges $5.00 per bicycle because they want to encourage that type of behavior and the showers are 25 cents for a minute and a half. Good place to stay!

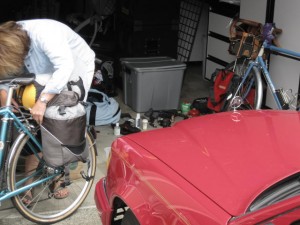
Preparing to leave Bellevue.
waiting for the Bainbridge ferry
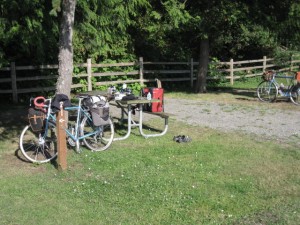
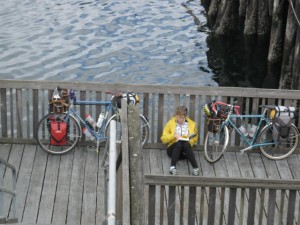
One of the best things about bike touring is these short breaks with nothing to do but relax.
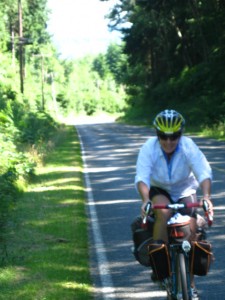
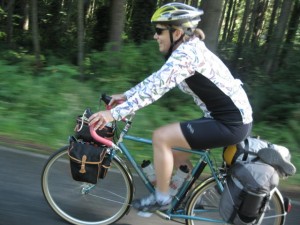
Sky King riding
Almost to the end of the first 18 mile day!
Categories
Austin to New Orleans Tour Living Vicariously

Austin to New Orleans-Goin’ Down Groovin’

While the Bike Hermit is exploring Texas and Louisiana, he is journaling on Crazy Guy on A Bike.  Here are a few photos and the link to his Journal

Chief - aka A. Homer Hilson loaded and ready to roll
the Bike Hermit, happy to be wearing his new jersey by Club Ride
Three nice pockets and comfortable pleating on this Club Ride Jersey
The Bike Hermit rolling out of the Sheraton Hotel, Downtown Austin
The first of many routes to New Orleans
Categories
Austin to New Orleans Tour Planning Resources

Tour Preparation, Day Five- Packing and Shipping

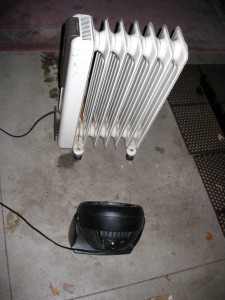
Most of the day yesterday was spent taking apart Chief and putting him in his box for the trip via FedEx to Austin. Even though the thermometer outside struggled to reach 40 degrees, the garage eventually was comfortable thanks to my upgraded heat system.

Upgrade of the Binford 4000 Series Electric Oil Radiator with the addition of the Binford 3100 Fan.

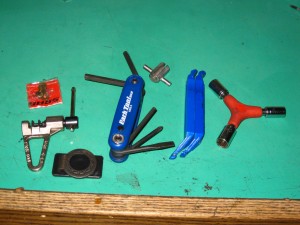
The tools that I am going to carry on the ride are the same tools I used to disassemble the bike. So I am relatively confident that first, I can put the bike back together, and secondly, I can take care of any mechanical issues that might occur.

The Park multi tool has 4,5 and 6 millimeter hex wrenches and phillips and flat blade screwdrivers. And the three sided socket tool has 8, 9 and 10 mm sockets. Every fastener on the bike can be tightened with these two tools. I also carry a spoke wrench and some extra spokes taped to the left chainstay. And since, according to Murphy’s Law, the drive side spokes on the rear wheel will break if any will, I carry a small cassette lockring tool to remove the cassette. There is a small chain tool and an extra chain connecting link. And, of course, tire levers.

These tools will handle most repairs on a touring bicycle.
Two different lengths of spokes will work to replace either front spokes or rear drive side and non drive side spokes.

I stuffed as many bicycle bags and as much clothing and miscellaneous items as I could into the box. Overall the weight was about 60 pounds and it cost about $75 to send it to Austin including insurance for $3000. The box is scheduled to arrive in Austin the day after I do. So far, so good!

Categories
Austin to New Orleans Tour Planning Resources

Tour Preparation, Day 4- What Could Possibly Go Wrong?

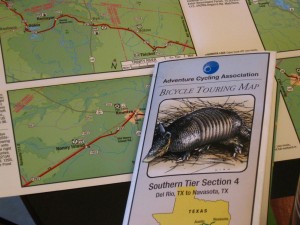
Adventure Cycling Southern Tier maps sections 4 and 5

There was new snow on the ground again this morning with more forecast for the rest of the week. I check the forecast for Texas and Louisiana and am pleased to see that temperatures are predicted to be in the 70’s during the day and merely down to the 50’s at night for at least the next week. There is some rain in the forecast and according to the Adventure Cycling map I just got on the mail, Louisiana receives on the average in February and March as much precipitation as this part of Idaho gets in a year. Since my hammock and sleeping pad will travel strapped to the sides of my rear rack I decided I better address the probability of them getting wet.

After brushing the snow off the car we made our way to the Army Navy store where I found some compact and lightweight dry sacks of the perfect size. Since I already have a waterproof compression sack for my sleeping bag, I think I am all set in the riding-in-the-rain department.

The remainder of the afternoon has been spent developing a reasonable schedule so that I could book a hotel room in New Orleans and a flight home. That and reading Sue Gray’s account of her ride on the same part of the Southern Tier earlier this month in some abberantly cold weather. My last two tours have been sort of aggressive from a time allowed standpoint, especially last year, when I did 850 miles in 11 days of riding for an average of 77 miles per day. This year’s route is about 700 miles and I figure I can do it comfortably in 12 days which averages to about 58 miles a day. As an extra cushion I am allowing for one rest day, with zero miles, and one day in New Orleans to get the bike packed and ready to ship back.

We are leaving for Austin on Wednesday. I still need to pack my bike and get it to FedEx tomorrow in order to feel comfortable about it getting there before the end of the week. Stacy flies back home on Tuesday March 1, my first day on the bike.

Categories
Austin to New Orleans Tour

Tour Preparation, Day Three And A Half- Schmidt E6 and Nabendynamo, ogh,ogh,ogh,ogh

Dynamo hubs use the rotation of the front wheel to produce electrical current. The bike hermit doesn’t know how they do this. It is an unknowable mystery of the universe. That hasn’t kept him from using Schmidt brand dynamo lighting  systems on two of his bikes and one on Sky King’s bike too. When he owned a bike shop he sold and installed many systems also.

Schmidt dynamo hubs and headlights are made in Germany and they are designed to give at least 50,000 trouble free kilometers of service. They are heavier and have more spinning resistance than standard hubs, but the resistance is less than that of other brands of dynamo hubs. The bike hermit requires a reliable source of light that is always available and not dependent on remembering to buy or recharge batteries. Those who know the bike hermit, know why.

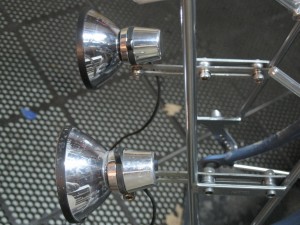
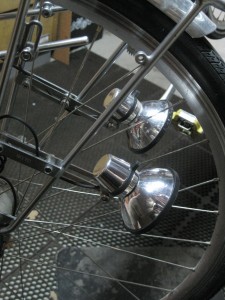
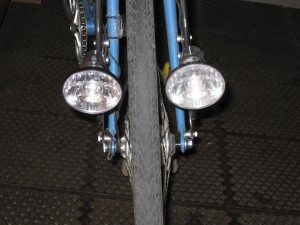
The Schmidt E6 halogen primary headlight Chief has carried on previous tours has been joined by a secondary E6. And it looks awesome.

Brace of Schmidt E6 lights
Dual Schmidt E6
Dual Schmidt E6
Schmidt E6 headlight dyad


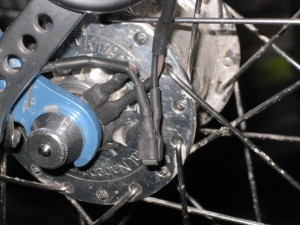
One wire from the primary light is taken off the hub connector and one wire from the secondary replaces it. The two loose ends connect to each other.
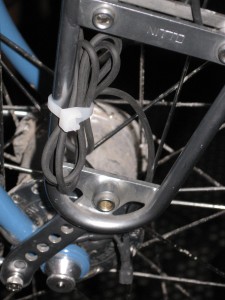
The excess wire from the secondary is secured out of the way.

According to the information that came with the secondary light, full brightness of both lights will only be reached at speeds of 16 kph and upwards. Then, by rights, there should be twice the light of one alone. At speeds less than 16 kph, switching off the secondary light will result in the best light output. Which is fine because at lower speeds it is less important to see far ahead and at higher speeds the extra illumination will be nice.
Here is a question for the non electrically challenged. This is a 6 volt system. Each light is 3 watts. Assuming the bike is traveling over 16 kph so that the entire 6 volts is present, switching on the secondary 3 watt light will draw 1/2 amp more in current than the primary light was drawing. Does this mean there will be more resistance in the hub? Will the bike hermit be working harder to light two lights than he was when only one was turned on? The bike hermit’s head is hurting.
The rear light is easier. The bike hermit uses a Spanninga battery powered light mounted to the fender. The AAA batteries for this light are easy to carry and they last for an extremely long time. They are deceptively bright and they don’t have the annoying strobelight, flashing feature, since flashing tail lights are not allowed in Germany. Smart people.

Categories
Austin to New Orleans Tour Planning Resources

Tour Preparation, Day Three- Daruma’s, Decaleurs and Mid-Fork Eyelets

I remember riding through downtown Montreal, Quebec, Canada on my first self supported bike tour with homemade rear panniers which, when the bike hit a rough patch,  bounced around and came un-hooked from the rack. Luckily they didn’t fall completely off because the gang of homeless men accosting me from a vacant lot as I rode past would have been happy to relieve me from my load and probably my bike if I had stopped. Needless to say, since that tour I am a little more finicky about my equipment.

On my up-coming  tour I am using front and rear racks made by Nitto in Tokyo, Japan. These are made of nickel plated, tubular Chrome-moly steel with simple and solid attachment hardware.
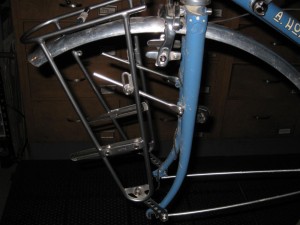
The Nitto Campee front rack sans the low rider attachments.
Highly adjustable aluminum struts allow for a custom fit.
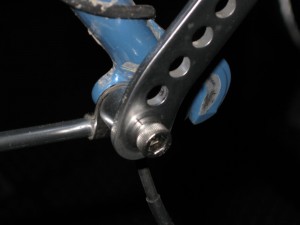
The lower leg of the Campee rack has an integral spacer to clear the fork blade.
Daruma bolt
Daruma bolt attached to rack and strut.
The Nitto Campee front rack comes with detachable low-rider panels for attaching panniers. I have removed those, because I don’t have low rider panniers. The panniers and bags I will be using are the subject of another post. The aluminum struts attaching the rack  to the fork eyelets in these photos are sold as separate accessories. The struts which come with the rack are made to attach to cantilever brake posts.

This seems like as good a time as any to look at a couple different fork blade/eyelet/brake combinations. Eyelets are the small, threaded holes drilled into the sides of the fork or into tabs which are then welded onto the dropout (the piece on the end of the fork blade…where the wheel axle attaches). Some bikes have one eyelet on the fork dropout and some have two. There is only one on each dropout on my bike, so the rack and the fender strut clamps will share the same hole. A bike with two dropout eyelets allows a little more flexibility in attaching racks and fenders.

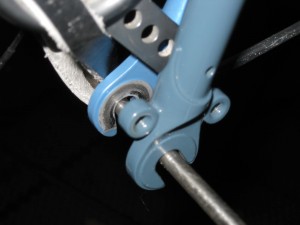
A fork blade dropout(from a Surly Long Haul Trucker) with two eyelets

Not all bikes have eyelets on the forks. What? How can that be? Well, some people don’t want to carry stuff on their bikes, believe it or not. For the person who actually uses their bike, however, the more eyelets the better. OK so how about the mid-fork eyelets? On most touring bikes these are located to facilitate “low rider” racks such as the Tubus Tara or the Tubus Duo. And on really well designed touring bikes, like Surly’s Long Haul Trucker, there are two mid-fork eyelets on each fork blade…one on the outside and one on the inside. The Tubus Duo was actually made with that bike in mind. On some bikes, like my Rivendell, the eyelets are located higher on the fork, and these will not work with low-rider only racks. Bikes such as Rivendell, with higher fork mount braze-on eyelets seem to work best with the Nitto type hardware and designs.

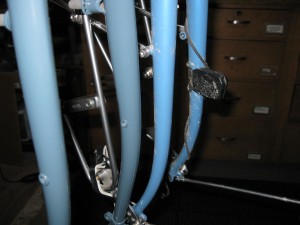
The fork on the left has inner and outer eyelets in the fork blade. The other fork blade has braze-on eyelets mounted higher.

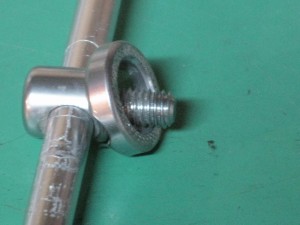
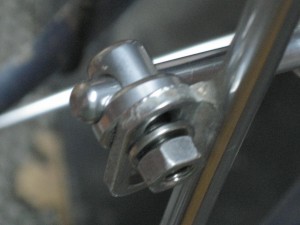
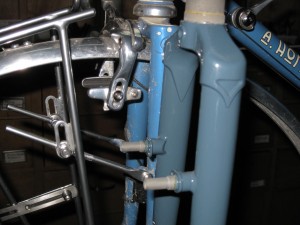
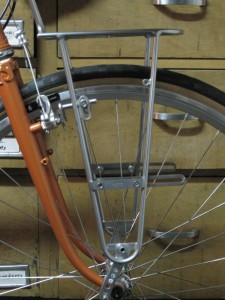
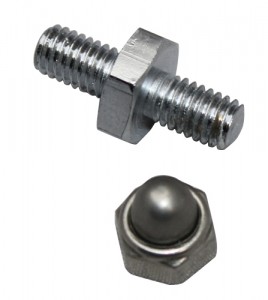
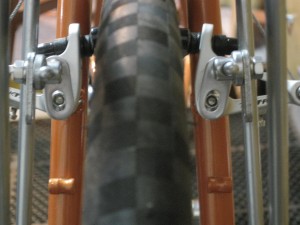
Many touring bikes will also be designed for cantilever style brakes. These brakes are mounted on special posts which are welded on to the fork blades. Some racks like Old Man Mountain brand Cold Springs and Ultimate Low Rider models attach directly to these posts with provided replacement bolts. Others, like some Nitto models attach to these posts with a special, double ended brake bolt or stud.

The fork in the foreground has posts for cantilever style brakes. The brakes on the other fork are center mount, sidepulls.
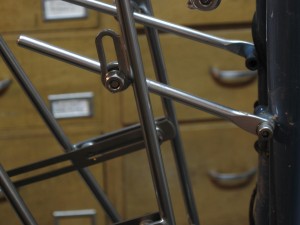
The Nitto Campee rack on a bike with cantilever brakes. The struts would bolt on to a stud (pictured below) which replaces the brake bolt.
This is the stud which replaces the cantilever brake bolt.
The struts are adjusted to line up with the brake bolt, which would be replaced with the double ended stud.

I got a little carried away and off topic with this post, but it felt like a good time to get into some rack details. Hopefully it might give you, good readers, some things on which to cogitate. In the next post I talk about my dual Schmidt E6 headlight setup, about which I am unnaturally excited.

Categories
Austin to New Orleans Tour Planning Resources

Tour Preparation, Day Two – Bike Maintenance

Back when I used to race (and I use that term loosely) my road bike I made it a rule to never do any maintenance on the bike the day before or the day of the race more involved than putting air in the tires. The reason being I always wanted time to do a shakeout ride before race day to make sure everything was working properly. The same rule applies when I go touring.

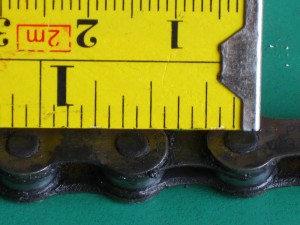
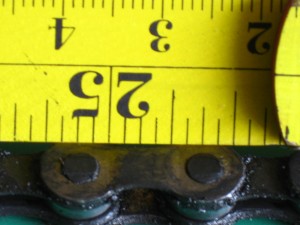
The chain on my bike was worn, so I replaced it. How do I know it was worn? Because a new chain has a pitch,or distance between links, of exactly 1/2 inch. A quick measurement showed how much my chain had “stretched”

One end of the old chain...still about 1/2" between pins and the wear is not readily apparent, but.....
25 inches away the chain has "stretched" about 1/16"

Of course the chain doesn’t actually stretch, the material on the pins and on the links wears away resulting in a new pitch. Over time the teeth on the rear wheel cogs and on the front chainrings will wear to mesh with the new pitch. Then when a new chain is put on, one with a 1/2 inch pitch, it will not lay evenly on the teeth of those other drivetrain components and those will need to be replaced as well or the chain will jump and skip when pedaling. New chains are relatively cheap so I say when in doubt, whip it out.

I will carry a small chain tool with me as well. Chains seldom break, but if they do it could leave me stranded in the middle of nowhere. I will carry the cut off section of a few links from the new chain along with a spare quick link. I’m sure an internet search will reveal a number of videos on how to repair and replace a chain so I will not duplicate that here.

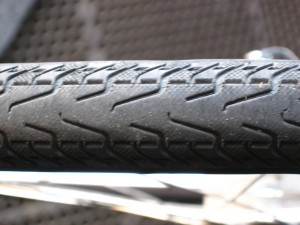
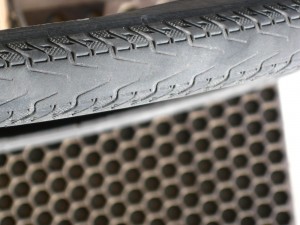
I decided to replace my rear tire as well and take the old one as a spare. The Panaracer T-Serv tire had over 2000 miles of multi surface riding on it and it still has some life in it. I just would rather start out with a fresh tire on this trip. I will be using the Schwalbe Marathon Supreme, my first experience with Schwalbe tires. I will report on that later.

Panaracer T-Serv with over 2000 hard miles
Relatively pristine Panaracer T-Serv with only around 1000 miles on it.

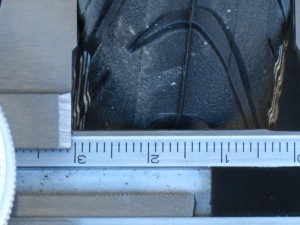
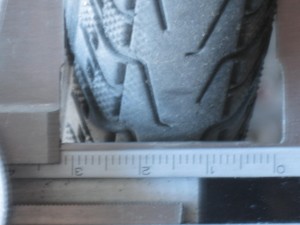
I was a little surprised to see that the Schwalbe tire was a millimeter or so narrower than the Panaracer tires even though both tires are nominally 700 x 32.

Schwalbe Marathon Supreme 700 x 32
Panaracer T-Serv 700 x 32

I still need to change my front rack and install the headlights but that’s enough for today.