Categories
Advocacy/Awareness

Sky King’s take on Austin

While much of our time in Austin was spent inside at the North American Handmade Bicycle Show, we did get out and about a bit.  Most of these photo’s were taken with my phone but thought it would be fun to give you a little view of some of the things we saw.

I must confess, on day one, we observed a gentleman riding his bicycle wearing nothing but a G-string, way too much information for us.  Needless to say we decided no one else needed to be exposed to that either.
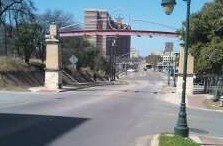
Ironwork Arch in East Austin

As a bit of a history nut, I imagine this Arch as an entrance to East Austin that the community installed to declare a neighborhood existence beyond downtown Austin. Now somewhat drawfed by I35 it still stands with pride.

Also in East Austin was this funky neighbor music venue and some interesting tiled mosaic murals.
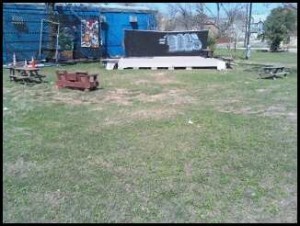
Neighborhood music venue
tile mosaic mural

Eating at Scholz Garten, was a treat, Only a few blocks from the stadium where the Texas Longhorns play basketball, the place was packed with people wearing orange t-shirts with longhorns but cleared out quickly once the game commenced. Scholz was established in 1866 and prides itself in serving German Food but they also make a pretty decent pulled pork sandwich!
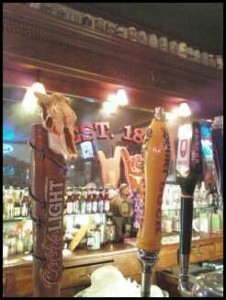
i
The Bar At Scholz Garten, serving beer and German Food since 1866

Our “go to” beer in Austin quickly became the Live Oak Big Bark, interesting taste, not real hoppy and a bit of blend between a black IPA and a Red Ale. Of course Jim could probably go into way more detail, but I just drink them.
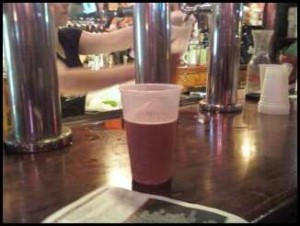
The Live Oak Big Bark quickly became our beer of choice (sorry Lone Star)

Mellow Johnny’s was a big supported of the North American Handmade Bicycle show. They hosted a huge party Friday night but didn’t have honky tonk so we cruised the shop and then departed. We are happy to say they are a dealer for Zimbale North America and had the bags displayed beautifully. To bad this photo doesn’t do justice to this bike. Similar to the Surly Big Dummy and Mellow Johnny’s decked it out with propane hot plate and mixing bowls – was pretty entertaining. The panniers are Giant – could probably stuff two kids, all the groceries and the kitchen sink.
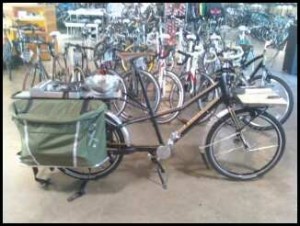
Treks extended bicycle

The Bike Hermit has the highest metabolism of anyone I know so finding Whole Foods was on the top of the list. The Austin store is the flag ship and a must visit for anyone who goes to Austin. I thought this “desert” stream in their landscaping was quite pleasant and deserving of a photo.
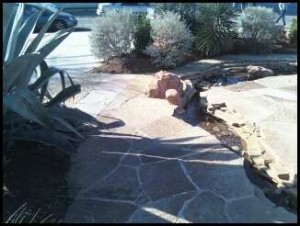
When at the Austin Whole Foods, be sure to admire the desert stream.

As I failed to do much research prior to our trip regarding bike rental options, I was the queen of walking. BUT just so you know, Austin Bike Tours and Rentals not only rents bikes they deliver and pick them up when you are done – DANG
I walked past this very clever bike rack, if you have any old frames in your garage, just weld them together!
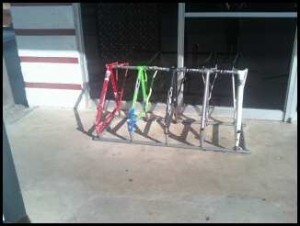
recycled bike frames make a great bike rack!
Categories
Austin to New Orleans Tour Living Vicariously

Austin to New Orleans-Goin’ Down Groovin’

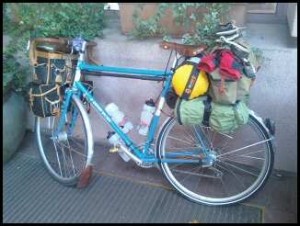
While the Bike Hermit is exploring Texas and Louisiana, he is journaling on Crazy Guy on A Bike.  Here are a few photos and the link to his Journal

Chief - aka A. Homer Hilson loaded and ready to roll
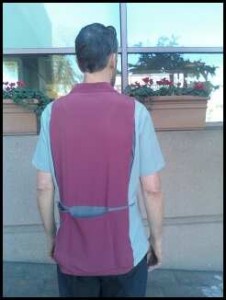
the Bike Hermit, happy to be wearing his new jersey by Club Ride
Three nice pockets and comfortable pleating on this Club Ride Jersey
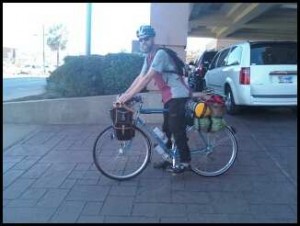
The Bike Hermit rolling out of the Sheraton Hotel, Downtown Austin
The first of many routes to New Orleans
Categories
Living Vicariously

Two Cycling Bloggists and Tourists

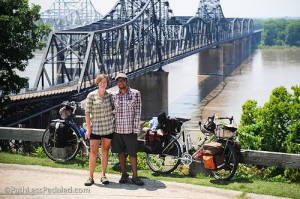
At NAHBS in Austin we met Russ Roca and Laura Crawford, the couple behind The Path Less Pedaled and The Epicurean Cyclist

Russ Roca and Laura Crawford

They are in the middle of an “open ended journey” and they are doing it on bicycles. When we saw them they had their Brompton folding bikes with them preparing to ride the Adventure Cycling Northern Tier route. I wish them luck and will be following their adventures.

Categories
Touring Bicycles

NAHBS 2011, Day Two

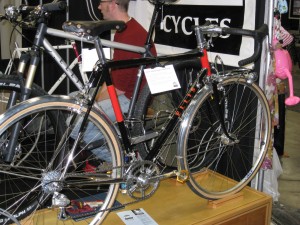
The bike hermit is only interested in useful bikes. Randonneuring, commuting and touring bikes with racks or at least eyelets and with fenders are the only bikes that make sense. And the only ones that look proper. Ellis Cycles’ owner Dave  Wages has a resume that includes stints with Ben Serotta, Dave Kirk and Waterford. Pretty good resume. And it shows in the details.

Ellis Cycles
Ellis Cycles cool touring bike


Ellis Cycles
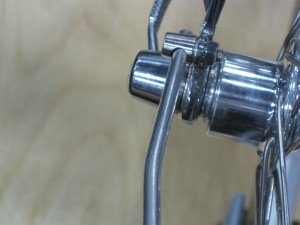
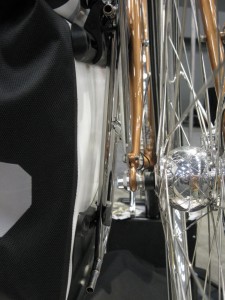
Custom fender stay bolts


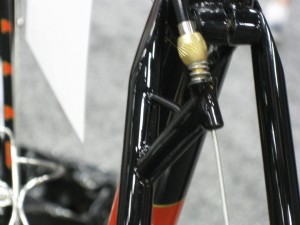
Cable hanger. Stout


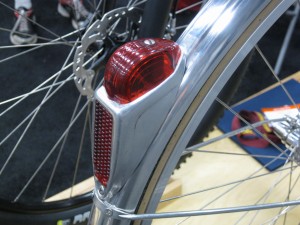
Custom rear tail light, wired inside fender.


Another view of Ellis Cycles touring bike

And I’ve decided what a crummy photographer I am. The pictures of the light wiring inside the front rack and the custom brake cable hangers and the engraved head tube logo were not done justice in the photos I did take. This bike ended up with the Best Of Show award and it was well deserved. Everything well thought out designed, built and integrated into a seamless whole. Making simple look easy.

Categories
Touring Bicycles

NAHBS , Day One

Tim had this bike painted twice and still was not completely happy. Looked pretty good to me!

As promised, here is a pic of  Tim O’Donell’s fillet brazed road bike. We are right next to YiPsan Bicycles‘ booth. Renold has some good ideas. Especially the porteur/low rider front rack. The two side platforms on the front rack come off and attach to the lower stays to support panniers. A really clever solution and one that I’m sure will be reproduced in a production way by somebody judging from the number of photos taken during the day. When you see it, know where it came from.

The YiPsan transformer rack. The right side of the platform has been removed and attached to the right stays to support a low rider pannier.
The YiPsan transformer front rack.
YiPsan transformer rack. This is the right side platform attached to the side for a front low rider pannier
Categories
Austin to New Orleans Tour Planning Resources

Tour Preparation, Day Three- Daruma’s, Decaleurs and Mid-Fork Eyelets

I remember riding through downtown Montreal, Quebec, Canada on my first self supported bike tour with homemade rear panniers which, when the bike hit a rough patch,  bounced around and came un-hooked from the rack. Luckily they didn’t fall completely off because the gang of homeless men accosting me from a vacant lot as I rode past would have been happy to relieve me from my load and probably my bike if I had stopped. Needless to say, since that tour I am a little more finicky about my equipment.

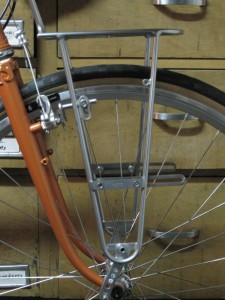
On my up-coming  tour I am using front and rear racks made by Nitto in Tokyo, Japan. These are made of nickel plated, tubular Chrome-moly steel with simple and solid attachment hardware.

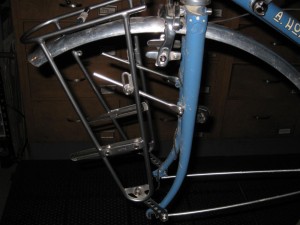
The Nitto Campee front rack sans the low rider attachments.
Highly adjustable aluminum struts allow for a custom fit.
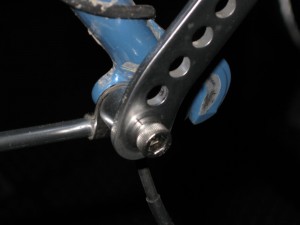
The lower leg of the Campee rack has an integral spacer to clear the fork blade.
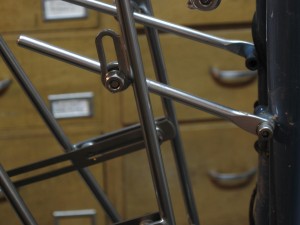
Daruma bolt
Daruma bolt attached to rack and strut.

The Nitto Campee front rack comes with detachable low-rider panels for attaching panniers. I have removed those, because I don’t have low rider panniers. The panniers and bags I will be using are the subject of another post. The aluminum struts attaching the rack  to the fork eyelets in these photos are sold as separate accessories. The struts which come with the rack are made to attach to cantilever brake posts.

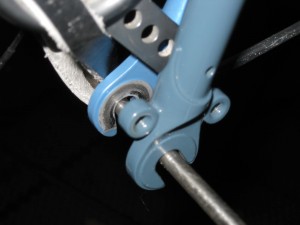
This seems like as good a time as any to look at a couple different fork blade/eyelet/brake combinations. Eyelets are the small, threaded holes drilled into the sides of the fork or into tabs which are then welded onto the dropout (the piece on the end of the fork blade…where the wheel axle attaches). Some bikes have one eyelet on the fork dropout and some have two. There is only one on each dropout on my bike, so the rack and the fender strut clamps will share the same hole. A bike with two dropout eyelets allows a little more flexibility in attaching racks and fenders.

A fork blade dropout(from a Surly Long Haul Trucker) with two eyelets

Not all bikes have eyelets on the forks. What? How can that be? Well, some people don’t want to carry stuff on their bikes, believe it or not. For the person who actually uses their bike, however, the more eyelets the better. OK so how about the mid-fork eyelets? On most touring bikes these are located to facilitate “low rider” racks such as the Tubus Tara or the Tubus Duo. And on really well designed touring bikes, like Surly’s Long Haul Trucker, there are two mid-fork eyelets on each fork blade…one on the outside and one on the inside. The Tubus Duo was actually made with that bike in mind. On some bikes, like my Rivendell, the eyelets are located higher on the fork, and these will not work with low-rider only racks. Bikes such as Rivendell, with higher fork mount braze-on eyelets seem to work best with the Nitto type hardware and designs.

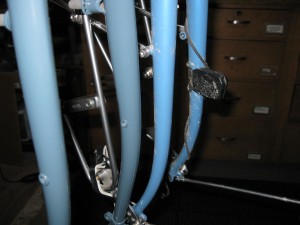
The fork on the left has inner and outer eyelets in the fork blade. The other fork blade has braze-on eyelets mounted higher.

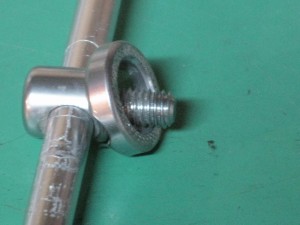
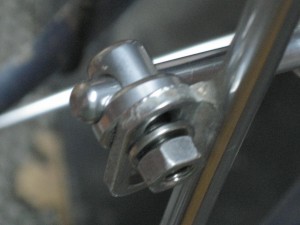
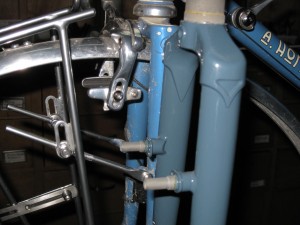
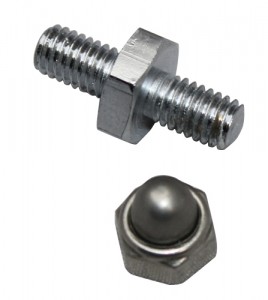
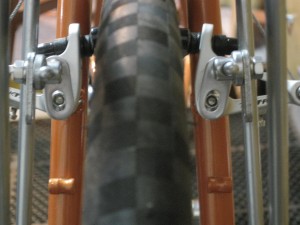
Many touring bikes will also be designed for cantilever style brakes. These brakes are mounted on special posts which are welded on to the fork blades. Some racks like Old Man Mountain brand Cold Springs and Ultimate Low Rider models attach directly to these posts with provided replacement bolts. Others, like some Nitto models attach to these posts with a special, double ended brake bolt or stud.

The fork in the foreground has posts for cantilever style brakes. The brakes on the other fork are center mount, sidepulls.
The Nitto Campee rack on a bike with cantilever brakes. The struts would bolt on to a stud (pictured below) which replaces the brake bolt.
This is the stud which replaces the cantilever brake bolt.
The struts are adjusted to line up with the brake bolt, which would be replaced with the double ended stud.

I got a little carried away and off topic with this post, but it felt like a good time to get into some rack details. Hopefully it might give you, good readers, some things on which to cogitate. In the next post I talk about my dual Schmidt E6 headlight setup, about which I am unnaturally excited.

Categories
Austin to New Orleans Tour Planning Resources

Tour Preparation, Day Two – Bike Maintenance

Back when I used to race (and I use that term loosely) my road bike I made it a rule to never do any maintenance on the bike the day before or the day of the race more involved than putting air in the tires. The reason being I always wanted time to do a shakeout ride before race day to make sure everything was working properly. The same rule applies when I go touring.

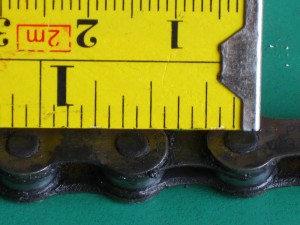
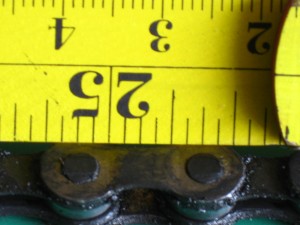
The chain on my bike was worn, so I replaced it. How do I know it was worn? Because a new chain has a pitch,or distance between links, of exactly 1/2 inch. A quick measurement showed how much my chain had “stretched”

One end of the old chain...still about 1/2" between pins and the wear is not readily apparent, but.....
25 inches away the chain has "stretched" about 1/16"

Of course the chain doesn’t actually stretch, the material on the pins and on the links wears away resulting in a new pitch. Over time the teeth on the rear wheel cogs and on the front chainrings will wear to mesh with the new pitch. Then when a new chain is put on, one with a 1/2 inch pitch, it will not lay evenly on the teeth of those other drivetrain components and those will need to be replaced as well or the chain will jump and skip when pedaling. New chains are relatively cheap so I say when in doubt, whip it out.

I will carry a small chain tool with me as well. Chains seldom break, but if they do it could leave me stranded in the middle of nowhere. I will carry the cut off section of a few links from the new chain along with a spare quick link. I’m sure an internet search will reveal a number of videos on how to repair and replace a chain so I will not duplicate that here.

I decided to replace my rear tire as well and take the old one as a spare. The Panaracer T-Serv tire had over 2000 miles of multi surface riding on it and it still has some life in it. I just would rather start out with a fresh tire on this trip. I will be using the Schwalbe Marathon Supreme, my first experience with Schwalbe tires. I will report on that later.

Panaracer T-Serv with over 2000 hard miles
Relatively pristine Panaracer T-Serv with only around 1000 miles on it.

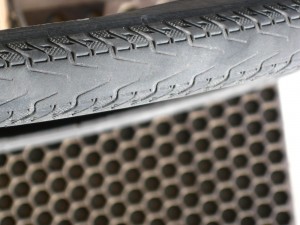
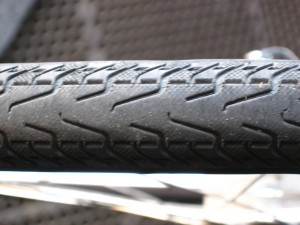
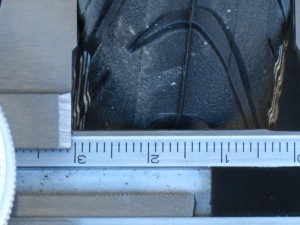
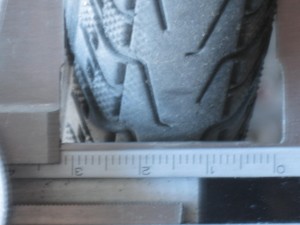
I was a little surprised to see that the Schwalbe tire was a millimeter or so narrower than the Panaracer tires even though both tires are nominally 700 x 32.

Schwalbe Marathon Supreme 700 x 32
Panaracer T-Serv 700 x 32

I still need to change my front rack and install the headlights but that’s enough for today.

Categories
Cockpit Handlebars and Stems Touring Bike Components

4 Handlebars

Wherein the  bike hermit compares and contrasts 4 different drop style handlebars for the touring bike. Finding the perfect handlebar for his touring bike has him in a bit of a bother.

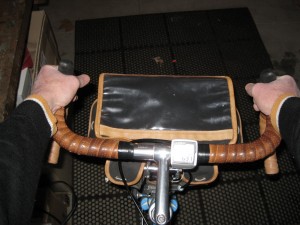
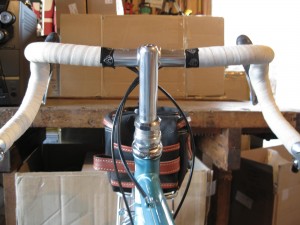
Last season I installed the Nitto Dirt Drop bars on Chief. I like the way the drops flair out.

Nitto Dirt Drop

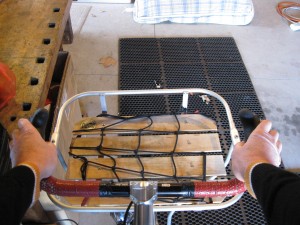
The bars actually have a very slight rise from the clamp area to the ramps. These are the medium width version. There is a version that is narrower and one that is wider. These feel a little too narrow for me when I’m riding on the hoods. Dang, should have got the wider ones.  But I like the angled-in aspect of the brakes on the flair of these bars. It feels natural.

On the hoods.

The other nice thing about the drops being wider than the tops ….my wrists don’t hit the tops of the bars when “in the drops”.

Nitto Dirt Drop touring handlebars,"in the drops"

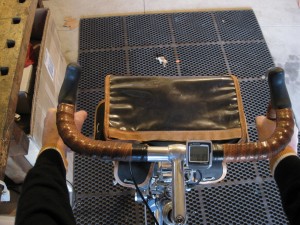
On Norm, my everyday bike, I have the On One Midge handlebar. Perhaps my favorite bar of all time.

On One brand Midge handlebar

This handlebar might look a little crazy…. in fact I have been labeled “crazy bar guy” on group rides…but the ergonomics are fantastic. These have a super wide, flat top section so there are multiple positions available on the top of the bars alone. As the top of  the bar bends to begin the drop portion it also flairs out at a dramatic angle.

On One Midge.....Wide tops, crazy bends

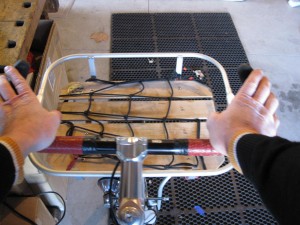
The other thing that happens when the bend from the tops is so gradual is that the brake levers get mounted at an even more extreme angle. But if I raise my arms out in front of my body, in a relaxed way, my fingers do not naturally line up perpendicular to the ground. They are more like 30 to 40 degrees from vertical. An angle very similar to the angle of the the brake levers on the Midge bar:

Natural angle to the brake hoods

I like to install these handlebars with the ramps level. This provides a great platform and plenty of support for the hands.

Notice the ramps, the portion of the bar behind the levers, are basically level.
Another position I use a lot with the Midge bars.
Nice platform for the hands

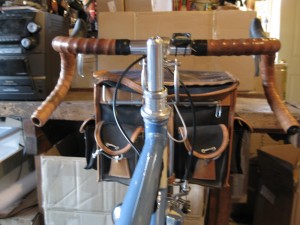
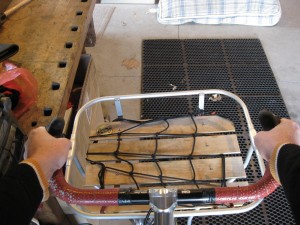
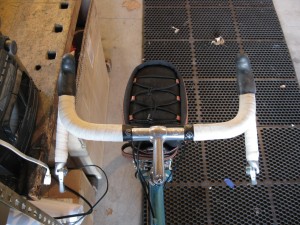
Sky King has the Nitto Grand Randonneur on her Rivendell Bleriot.

Sky King's Nitto Grand Randonneur bars

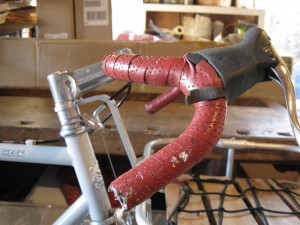
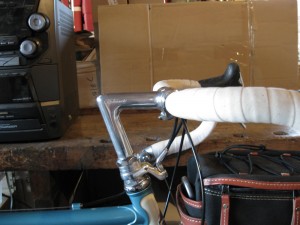
The most notable thing in this view is the distance the ends of the bars extend toward the rider. This should allow for riding comfortably in the drops without reaching. The picture below shows the rise from the center up to the ramp portion.

The Grand Randonneur rises from the center to the ramp
A view of the upward rise from the center, the slight flair of the drops, and the angle of the brake levers.

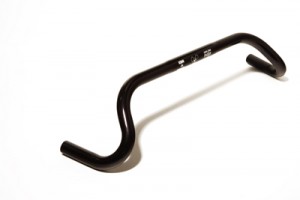
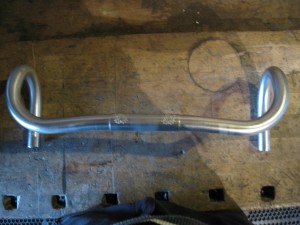
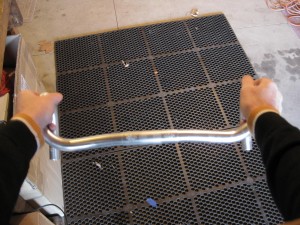
The handlebar I am itching to try on my touring bike is the Nitto Noodle.

I guess I know why they are called "Noodle"

These bars intrigue me because of the slight rearward bend of the top portion. Again, if I examine the shape of my palm, curled into a gripping shape, I find that it is at a slight angle, from inside to outside. Corresponding to the shape of the Noodle bar.
They don’t have any flair to the drops though. The ramps are basically parallel to the drops. These would be really cool if they had the backward bend plus a flair like the Midge bars! Then they would be the Pretzel bar.

No flair to the drops and subsequently.... to the brake levers

So, there you have four options for drop style handlebars for touring. If you are thinking about changing handlebars keep in mind that there are three standard diameters for handlebars where they clamp to the stem: 25.4 mm, 26mm, and 31.8mm. Stems are made for all those diameters too. A stem with a clamp for 25.4 will not work with a 26 or 31.8 handlebar, but a smaller diameter handlebar can be made to work with a larger clamp diameter stem by means of handy dandy shims made for that purpose!
After looking at these pictures I think I need to write a post about handlebar tape and how to change it.

Categories
Advocacy/Awareness

“Sudden” Insights

I wonder if my experience is that much different from other bicyclers’.  Some of the time, or most of the time, after I have been out on my bicycle for a while, and usually when I am by myself, I will have an insight or a solution to a particular problem or situation which I am not even specifically thinking about at the time, but which I have been working on in everyday life. I recently came across a description of how this “eureka” moment comes about.

The Most Powerful Idea In The World is a book written by William Rosen and ostensibly about the Industrial Revolution, and the steam engine, but it’s just as much about invention and creativity and how insights to a problem can suddenly occur when the creator is not even “working” on the problem.

According to Rosen, people who study this sort of thing sometimes use “chaos theory to describe how neurons fire together. When a single neuron chemically fires it’s electrical charge, and causes it’s neighbors to do the same, the random electrical activity that is always present in the human brain can result in a “neuronal avalanche” within the brain”.

Most of this activity takes place in a part of the brain to which the blood flow is inhibited by most “normal” brain activity, i.e. the type of activity associated with everyday tasks such as (at least in modern day life) paying the power bill, going to the grocery store, and holding down a job. In short, survival. Likewise, early Homo Sapiens would not have had the luxury of being able to spend a lot of time daydreaming about new ways to start a fire.

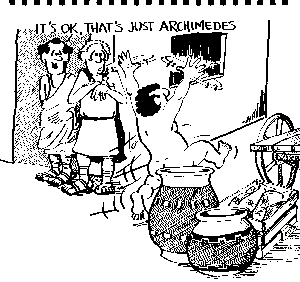
Therefore, the human brain still does it’s best creative thinking when there is a sense of security or safety and relaxation. That might be why the  Greek dude who ran down the street naked shouting “eureka” was relaxing in the bathtub when he had his insight.

I thought this was an interesting description of a phenomenon I have always noticed to some degree when I’m riding my bike. And now, if you’ll excuse me, I think I will go do just that! (ride my bike that is..not run down the street naked)

Categories
Bike Touring Equipment Nutrition for the Bike Tourist

Cook Stoves for Bike Touring

Back in the day there were not a lot of choices in lightweight backpacking or bike touring stoves. The bike hermit used (and still has) a Svea brand stove. Aside from being dangerous, unreliable, inconsistent, inefficient, heavy and difficult to use, that stove is great. Nowadays there is a better selection of stoves from which to choose, with various models burning everything from white gas to isobutane/propane to denatured alcohol to sticks. The different fuel sources all have pluses and minuses and most people will have a preference for one or the other based on their own demands.

My most recent experience has been with the Primus EtaPowerTrail EF Stove

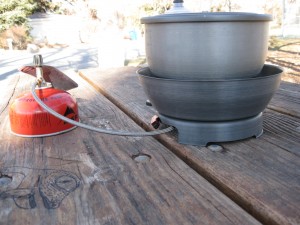
Primus EtaPower stove in use. The black knob on the line attached to the top of the fuel canister allows for flame adjustment.

This is an isobutane/propane stove so the fuel source is a sealed canister with a screw fitting for a fuel line which connects to the burner. The fuel is pretty easy to find at most outdoor stores and even Walmart, so even though you can’t fly with it or ship it, you can get it on route.

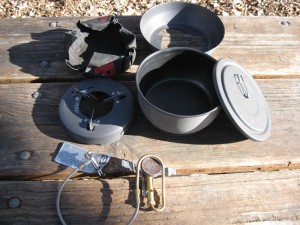
The kit I purchased includes the burner unit with fuel line , a base, a windscreen, a 1.7 liter aluminum pot with a lid and a pot handle.

All the parts

This is not the most compact stove available but it has some features I like.
Namely;
-Relatively large and very stable base.
-Windscreen
-Easy to light
-Great heat output Boils about 3 cups of water at 32 degree F. ambient temp. in about 4 minutes.
-1.7 liter pot is good for cooking pasta dishes or for making freeze dried food with water left over for coffee or cleaning.
-Separate, light, easy to use pot handle
-Piezoelectric start precludes need for matches

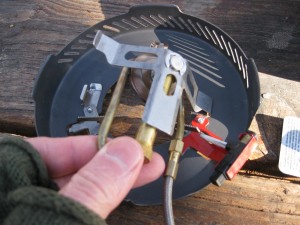
The burner unit snaps into the base.
The burner in place. The piezoelectric starter button is the black button in the lower right of the photo above
Base unit with burner attached, ready for windscreen
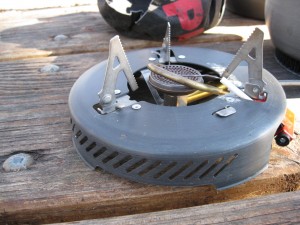
The windscreen sits on the base and is secured by rotating counterclockwise to engage the helical cut outs with the bases of the pot support wings. The wings are then folded down to provide a level pot surface.

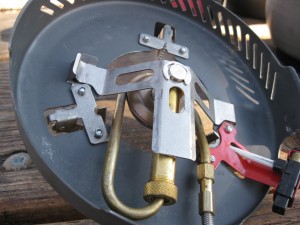
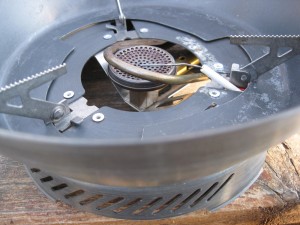
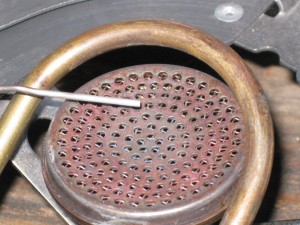
Pressing the piezoelectric ignition button creates a current in the wire which is suspended over the burner plate and a spark generates between the end of the wire and the plate, igniting the fuel coming through the line from the canister. If the wire gets bent and is too close to the plate, no spark will generate and the wire needs to be re-positioned away from the plate surface until the spark is visible when the ignition button is pressed.

The space between the end of the wire and the plate may need to be adjusted to achieve a spark when the ignition button is pressed.

Even though this might appear to be a complicated kit, it is well made and durable. I need to be more diligent in making sure all the connections are tight between uses. The entire kit (minus fuel canister) weighs about 27 ounces or 765 grams. Now I see on the Primus website they have a stove that is slightly lighter but much more compact, the Primus Eta Lite

Primus ETA Lite Stove

The Primus ETA Lite Stove sets a new standard for compact, all in one backpacking stove… [More]

Price: $99.95

I think when it is time to get a new stove for Sky King we may be looking at that one.