Categories
Austin to New Orleans Tour Planning Resources

Tour Preparation, Day One

I leave in one week so I am focusing on those items on the critical path. Items without which the tour cannot be accomplished and which have longer lead times.

Item number one is a box to ship the bike. Rather than a softsided or other airplane friendly case I ordered a re-usable cardboard box like the one I used on the last two tours which is pretty ratty now and besides, I used it to ship a bicycle back to Rivendell last year. I should receive it on Friday. That will leave the weekend to unbuild the bike and pack it so that I can take it to FedEx on Monday. I will send it to the motel in Austin where we are staying.  I suppose I could do the same with a conventional, and more durable bicycle case but those  all cost more than I want to spend. I can do a dozen tours using 3 or 4 of the cardboard boxes and still be ahead.

Item number next is  ordering a map of section 5 of the Southern Tier from Adventure Cycling Association.  These maps are so detailed and so refined over the years they have been in use that I get a little nervous when I need to  detour from them. It’s also comforting to think of all the other bike tourists who have been along these same routes if only because of the assumption that local motorists might be more aware of bicyclers.

I also plot the route on Google Maps.

View Austin to New Orleans in a larger map
This is not the exact route but for some reason Google Maps would quit letting me make changes after some amount of time or changes.

Since the Southern Tier route only goes to St. Francisville, LA I had to find a way to get through Baton Rouge and into New Orleans. I have been spending some time on the bikeforums.net touring forum and I thought I would put the question to that group. I did a quick search of the forum for routes in New Orleans and was directed to several threads, and I found out about the Mississippi River Trail. From their website:

The Mississippi River Trail, coursing along America’s backbone, the Mississippi River, from its headwaters in Itasca, Minnesota to the Gulf of Mexico, offers approximately 3,000 miles of on-road bikeways and pedestrian and bicycle pathways for the recreational enjoyment, health, conservation and tourism development of river communities, river states, and the nation.

I was able to plot a route, which I’m hoping is pretty decent for cycling, from St. Francisville into New Orleans.

So now I can use my maps to figure out the best places to end up each day. Since I want to go as inexpensively as possible I will be looking for KOA campgrounds and state parks with showers, and I am going to register on the warm showers website to see if I can score some free overnight stays.

Categories
Austin to New Orleans Tour Planning Resources

“Goin’down groovin’ all the way”, Prologue

“…now the sky is gettin’ light
everything will be alright
I think I finally got the knack
just floatin’ and lazin’ on my back

I never really liked that town
think I’ll ride the river down
just movin’ slow and floatin’ free
this river swingin’ under me

wavin’ back to folks on shore
I should have thought of this before
I’m goin’ on down to New Orleans
pick up on some swingin’ scenes

I know I’ll know a better day
goin’ down groovin’ all the way…

Micky Dolenz, “Goin’ Down”

Yep, the bike hermit is goin’ on down to New Orleans. Since we are going to be in Austin for the North American Handmade Bicycle Show in  February, I started to think about ways to take advantage of being in the south while Idaho emerges from the cold, wet winter months. That thinking has evolved into a bicycle tour from Austin to New Orleans.  I will load Chief and journey out on section 5 of the Adventure Cycling Association‘s  Southern Tier Route, from Navasota, TX to St. Francisville, LA., and from there down to the Big Easy. Since I am self-absorbed and delusional enough to think people I don’t even know might be interested, I have decided to document my daily planning and preparation tasks,  the ride, the trip home and any epilogues.

A simple Google search will uncover a plethora of web pages with itemized lists of what other people take on a bicycle tour , and I think those lists are boring. So I won’t be doing that. Some people have created spreadsheets to plan their itineraries and to document the daily mileage, weather, lodging, food and probably bowel movements. I’m not going to do that either. I want to speak in more general terms about the process of conceiving, planning and executing this bike touring trip as I figure it out. About things that I find out and discover as I explore how to get from here to there by bicycle. The whole concept to me is about freedom. I’m free to ride my bike all day if I want. Indeed, I’m free to ride all night if I feel like it. I’m free to stop whenever and wherever I want. I can go as fast or as slow as I want. All this freedom within limits of course. I do need to complete the ride and come home on the designated day. But everything in between getting on the bike in Austin and getting off in New Orleans is going to unfold as it will. I am literally just along for the ride. And the beer.

Categories
Cockpit Handlebars and Stems Touring Bike Components

4 Handlebars

Wherein the  bike hermit compares and contrasts 4 different drop style handlebars for the touring bike. Finding the perfect handlebar for his touring bike has him in a bit of a bother.

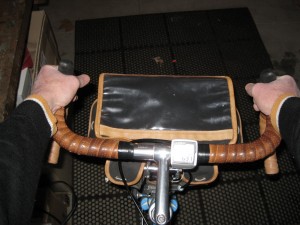
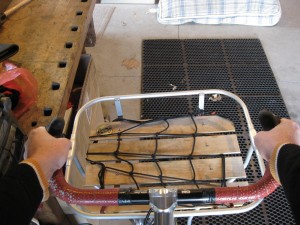
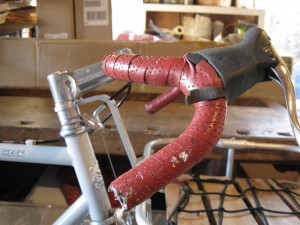
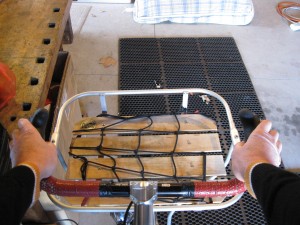
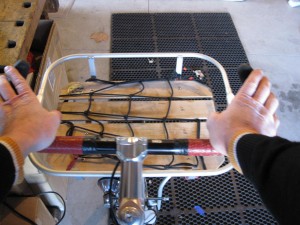
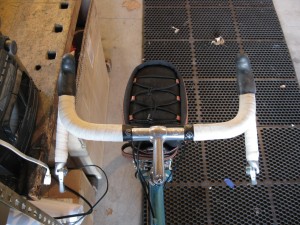
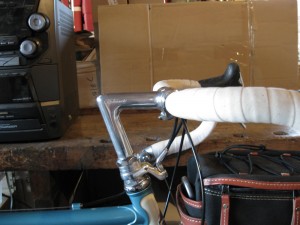
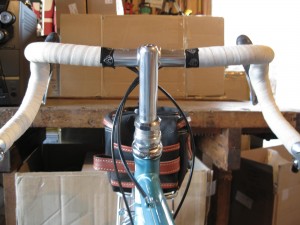
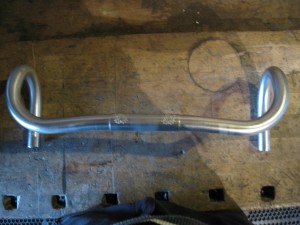
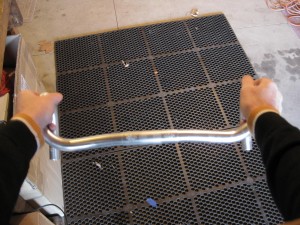
Last season I installed the Nitto Dirt Drop bars on Chief. I like the way the drops flair out.

Nitto Dirt Drop

The bars actually have a very slight rise from the clamp area to the ramps. These are the medium width version. There is a version that is narrower and one that is wider. These feel a little too narrow for me when I’m riding on the hoods. Dang, should have got the wider ones.  But I like the angled-in aspect of the brakes on the flair of these bars. It feels natural.

On the hoods.

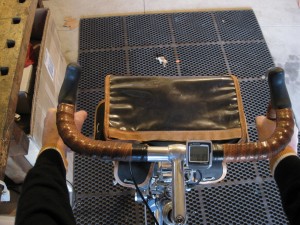
The other nice thing about the drops being wider than the tops ….my wrists don’t hit the tops of the bars when “in the drops”.

Nitto Dirt Drop touring handlebars,"in the drops"

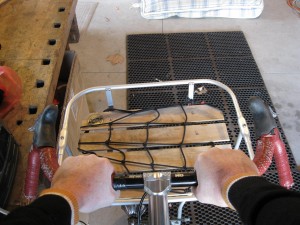
On Norm, my everyday bike, I have the On One Midge handlebar. Perhaps my favorite bar of all time.

On One brand Midge handlebar

This handlebar might look a little crazy…. in fact I have been labeled “crazy bar guy” on group rides…but the ergonomics are fantastic. These have a super wide, flat top section so there are multiple positions available on the top of the bars alone. As the top of  the bar bends to begin the drop portion it also flairs out at a dramatic angle.

On One Midge.....Wide tops, crazy bends

The other thing that happens when the bend from the tops is so gradual is that the brake levers get mounted at an even more extreme angle. But if I raise my arms out in front of my body, in a relaxed way, my fingers do not naturally line up perpendicular to the ground. They are more like 30 to 40 degrees from vertical. An angle very similar to the angle of the the brake levers on the Midge bar:

Natural angle to the brake hoods

I like to install these handlebars with the ramps level. This provides a great platform and plenty of support for the hands.

Notice the ramps, the portion of the bar behind the levers, are basically level.
Another position I use a lot with the Midge bars.
Nice platform for the hands

Sky King has the Nitto Grand Randonneur on her Rivendell Bleriot.

Sky King's Nitto Grand Randonneur bars

The most notable thing in this view is the distance the ends of the bars extend toward the rider. This should allow for riding comfortably in the drops without reaching. The picture below shows the rise from the center up to the ramp portion.

The Grand Randonneur rises from the center to the ramp
A view of the upward rise from the center, the slight flair of the drops, and the angle of the brake levers.

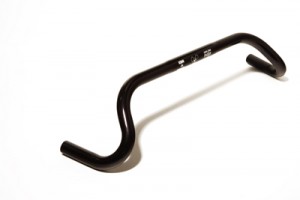
The handlebar I am itching to try on my touring bike is the Nitto Noodle.

I guess I know why they are called "Noodle"

These bars intrigue me because of the slight rearward bend of the top portion. Again, if I examine the shape of my palm, curled into a gripping shape, I find that it is at a slight angle, from inside to outside. Corresponding to the shape of the Noodle bar.
They don’t have any flair to the drops though. The ramps are basically parallel to the drops. These would be really cool if they had the backward bend plus a flair like the Midge bars! Then they would be the Pretzel bar.

No flair to the drops and subsequently.... to the brake levers

So, there you have four options for drop style handlebars for touring. If you are thinking about changing handlebars keep in mind that there are three standard diameters for handlebars where they clamp to the stem: 25.4 mm, 26mm, and 31.8mm. Stems are made for all those diameters too. A stem with a clamp for 25.4 will not work with a 26 or 31.8 handlebar, but a smaller diameter handlebar can be made to work with a larger clamp diameter stem by means of handy dandy shims made for that purpose!
After looking at these pictures I think I need to write a post about handlebar tape and how to change it.

Categories
Advocacy/Awareness

“Sudden” Insights

I wonder if my experience is that much different from other bicyclers’.  Some of the time, or most of the time, after I have been out on my bicycle for a while, and usually when I am by myself, I will have an insight or a solution to a particular problem or situation which I am not even specifically thinking about at the time, but which I have been working on in everyday life. I recently came across a description of how this “eureka” moment comes about.

The Most Powerful Idea In The World is a book written by William Rosen and ostensibly about the Industrial Revolution, and the steam engine, but it’s just as much about invention and creativity and how insights to a problem can suddenly occur when the creator is not even “working” on the problem.

According to Rosen, people who study this sort of thing sometimes use “chaos theory to describe how neurons fire together. When a single neuron chemically fires it’s electrical charge, and causes it’s neighbors to do the same, the random electrical activity that is always present in the human brain can result in a “neuronal avalanche” within the brain”.

Most of this activity takes place in a part of the brain to which the blood flow is inhibited by most “normal” brain activity, i.e. the type of activity associated with everyday tasks such as (at least in modern day life) paying the power bill, going to the grocery store, and holding down a job. In short, survival. Likewise, early Homo Sapiens would not have had the luxury of being able to spend a lot of time daydreaming about new ways to start a fire.

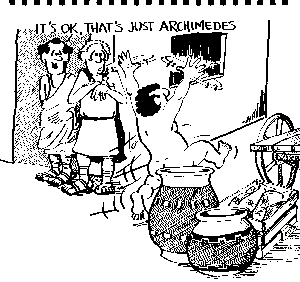
Therefore, the human brain still does it’s best creative thinking when there is a sense of security or safety and relaxation. That might be why the  Greek dude who ran down the street naked shouting “eureka” was relaxing in the bathtub when he had his insight.

I thought this was an interesting description of a phenomenon I have always noticed to some degree when I’m riding my bike. And now, if you’ll excuse me, I think I will go do just that! (ride my bike that is..not run down the street naked)

Categories
Event Coverage

North American Handmade Bicycle Show 2011

As the Bike Hermit I give myself permission to indulge my reclusive nature. As the North American distributor for Zimbale, a line of traditional style saddlebags crafted in Korea, I sometimes need to bear the discomfort of being in large groups of people. Such as the circus that is Interbike. This year I am looking forward to exhibiting at the 2011 North American Handmade Bicycle Show in Austin, TX. The show takes place February 25-27, 2011

For it’s seventh edition, the NAHBS is in Austin, TX . The first show in 2005 in Houston featured 23 exhibitors and 700 people attended. Last year in Richmond, VA there were 126 exhibitors and 6000 attendees.

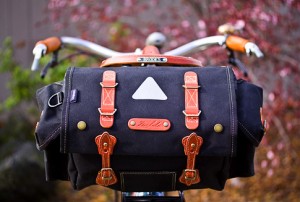
Zimbale 11 liter saddlebag

Zimbale bags have been featured in posts on EcoVelo, Lovely Bicycle and others. Great products for commuting, touring, randonneuring and everything in between.

We will be posting updates and photos from the show here.

Categories
Bike Touring Equipment Nutrition for the Bike Tourist

Cook Stoves for Bike Touring

Back in the day there were not a lot of choices in lightweight backpacking or bike touring stoves. The bike hermit used (and still has) a Svea brand stove. Aside from being dangerous, unreliable, inconsistent, inefficient, heavy and difficult to use, that stove is great. Nowadays there is a better selection of stoves from which to choose, with various models burning everything from white gas to isobutane/propane to denatured alcohol to sticks. The different fuel sources all have pluses and minuses and most people will have a preference for one or the other based on their own demands.

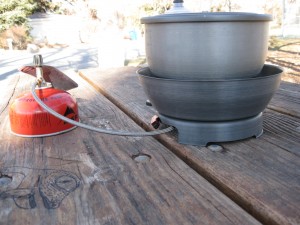
My most recent experience has been with the Primus EtaPowerTrail EF Stove

Primus EtaPower stove in use. The black knob on the line attached to the top of the fuel canister allows for flame adjustment.

This is an isobutane/propane stove so the fuel source is a sealed canister with a screw fitting for a fuel line which connects to the burner. The fuel is pretty easy to find at most outdoor stores and even Walmart, so even though you can’t fly with it or ship it, you can get it on route.

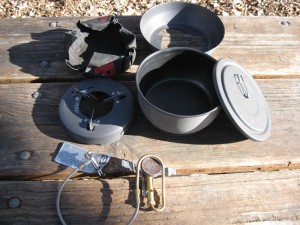
The kit I purchased includes the burner unit with fuel line , a base, a windscreen, a 1.7 liter aluminum pot with a lid and a pot handle.

All the parts

This is not the most compact stove available but it has some features I like.
Namely;
-Relatively large and very stable base.
-Windscreen
-Easy to light
-Great heat output Boils about 3 cups of water at 32 degree F. ambient temp. in about 4 minutes.
-1.7 liter pot is good for cooking pasta dishes or for making freeze dried food with water left over for coffee or cleaning.
-Separate, light, easy to use pot handle
-Piezoelectric start precludes need for matches

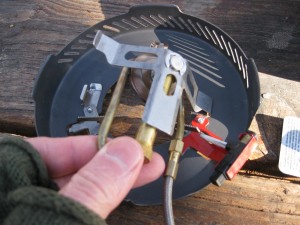
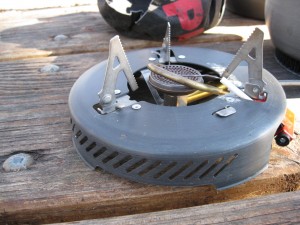
The burner unit snaps into the base.
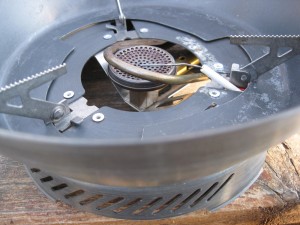
The burner in place. The piezoelectric starter button is the black button in the lower right of the photo above
Base unit with burner attached, ready for windscreen
The windscreen sits on the base and is secured by rotating counterclockwise to engage the helical cut outs with the bases of the pot support wings. The wings are then folded down to provide a level pot surface.

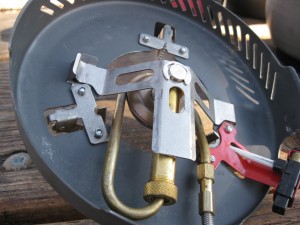
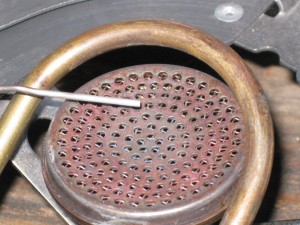
Pressing the piezoelectric ignition button creates a current in the wire which is suspended over the burner plate and a spark generates between the end of the wire and the plate, igniting the fuel coming through the line from the canister. If the wire gets bent and is too close to the plate, no spark will generate and the wire needs to be re-positioned away from the plate surface until the spark is visible when the ignition button is pressed.

The space between the end of the wire and the plate may need to be adjusted to achieve a spark when the ignition button is pressed.

Even though this might appear to be a complicated kit, it is well made and durable. I need to be more diligent in making sure all the connections are tight between uses. The entire kit (minus fuel canister) weighs about 27 ounces or 765 grams. Now I see on the Primus website they have a stove that is slightly lighter but much more compact, the Primus Eta Lite

Primus ETA Lite Stove

The Primus ETA Lite Stove sets a new standard for compact, all in one backpacking stove… [More]

Price: $99.95

I think when it is time to get a new stove for Sky King we may be looking at that one.

Categories
Crossroads

A Beginners Guide To Bike Touring

The Bike Hermit didn’t write this but he thinks it’s funny. Actually, this was posted on the Touring pages of bikeforums dot net

Easy to get lost for hours on those pages. Don’t forget to come back!

A Beginners Guide to Cycle Touring: How to prepare

Step 1: Get a spagetti-strainer and several small sponges. Soak the sponges in salt-water and paste them to the inside of the spagetti-strainer. Place the
strainer on your head. Find a busy road. Stand by the side of the road and do
deep knee-bends for 8 hours. This will acclimatize you to a day’s ride.

Step 2: Take some 200-grit sandpaper and rub your rear-end and the insides of your legs for about 20 minutes. Rinse with salt-water. Repeat. Then, sit on a softball for 8 hours. Do this daily for at least 8 days.

Step 3: Each day, take two twenty-dollar bills and tear them into small pieces. Place the pieces on a dinner-plate, douse them with lighter fluid and burn them. Inhale the smoke (simulating car-fumes). Rub the ashes on your face. Then go to the local motel and ask them for a room.

Step 4: Take a 1-quart plastic bottle. Fill it from the utility sink of a local
gas-station (where the mechanics wash their hands). Let the bottle sit in the
sun for 2 or 3 hours until it’s good and tepid. Seal the bottle up (kinda,
sorta) and drag it through a ditch or swamp. Walk to a busy road. Place your
spagetti-strainer on your head and drink the swill-water from the bottle while
doing deep knee-bends along the side of the road.

Step 5: Get some of those Dutch wooden-shoes. Coat the bottoms with 90-W
gear-oil. Go to the local supermarket (preferably one with tile floors). Put
the oil-coated, wooden shoes on your feet and go shopping.

Step 6: Think of a song from the 1980’s that you really hated. Buy the CD and play 20 seconds of that song over and over and over for about 6 hours. Do more deep knee-bends

Step 7:
Hill training: Do your deep knee-bends for about 4 hours with the
salt-soaked spagetti-strainer on your head, while you drink the warm
swill-water and listen to the 80’s song over and over (I would recommend “I’m a cowboy/On a STEEL horse I ride!” by Bon Jovi). At the end of 4 hours, climb onto the hood of a friend’s car and have him drive like a lunatic down the twistiest road in the area while you hang on for dear life.

Step 8:
Humiliation training: Wash your car and wipe it down with a
chamois-cloth. Make sure you get a healthy amount of residual soap and
road-grit embedded in the chamois. Put the chamois on your body like a
loin-cloth, then wrap your thighs and middle-section with cellophane. Make sure it’s really snug. Paint yourself from the waist down with black latex paint.  Cut an onion in half and rub it into your arm-pits. Put on a brightly colored shirt and your Dutch oil-coated wooden shoes and go shopping at a crowded local mall.

Step 9:
Foul weather training: Take everything that’s important to you, pack it in a Nylon corodura bag and place it in the shower. Get in the shower with it. Run the water from hot to cold. Get out and without drying off, go to the local convienience store. Leave the wet, important stuff on the sidewalk. Go inside and buy $10 worth of Gatorade and Fig Newtons.

Step 10:
As Archimedes hypothesized: “Use a simple lever to move the Earth from one place to another”. After doing that, go around your house and lift heavy things that you never imagined a person could lift. Surprise yourself. Do 1,000 sit-ups. Then 10,000. Eat lunch. Repeat. Argue with every girlfriend/boyfriend you’ve ever known and be RIGHT. Solve all the problems of politics, faith and economics. At the end of the day, get into a huge tub filled with hot soapy water and relax, because tomorrow is another BIG DAY ON THE BIKE!

Step 11: Headwinds training: Buy a huge map of the entire country. Spread it in front  of you. Have a friend hold a hair-dryer in your face. Stick your feet in
taffy and try to pull your knees to your chest while your friend tries to
shove you into a ditch or into traffic with his free hand. Every 20 minutes
or so, look at the huge map and marvel at the fact that you have gone nowhere  after so much hard work and suffering. Fold the map in front of a window-fan set to “High”.

Useful tips for anyone planning a bicycle tour, trip, journey, expedition, whatever
you label it. Hope you have enjoyed this page.