Sounds sexy and easy. But it’s not.
 Hermit's Woodshed
Sounds sexy and easy. But it’s not.
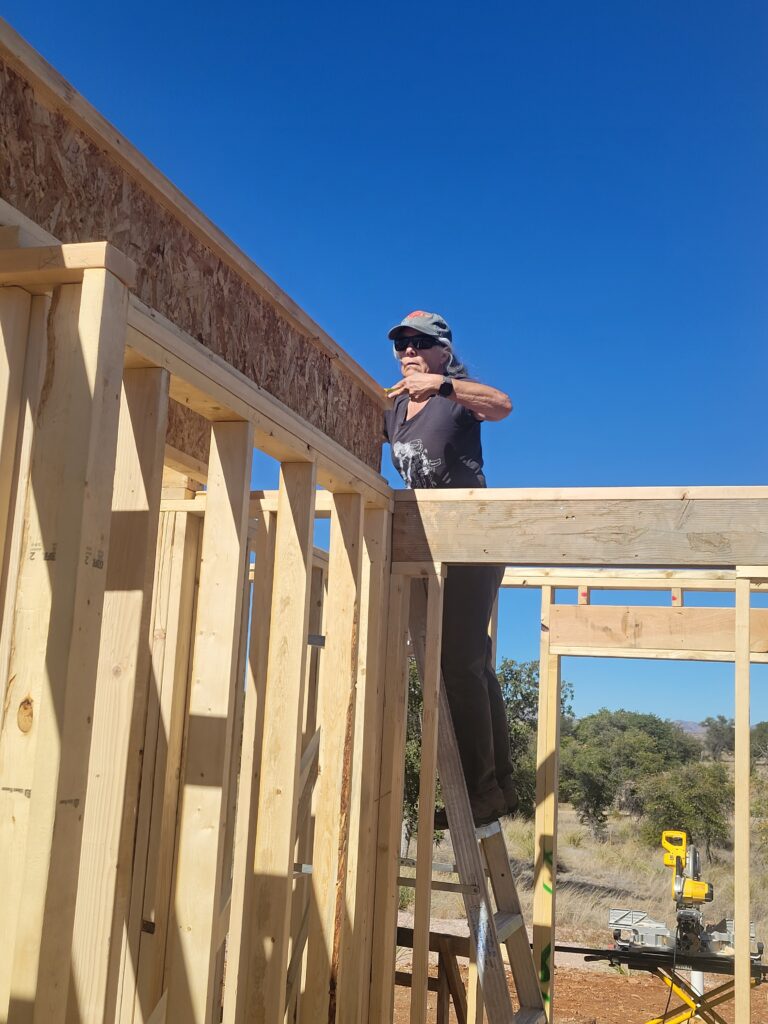
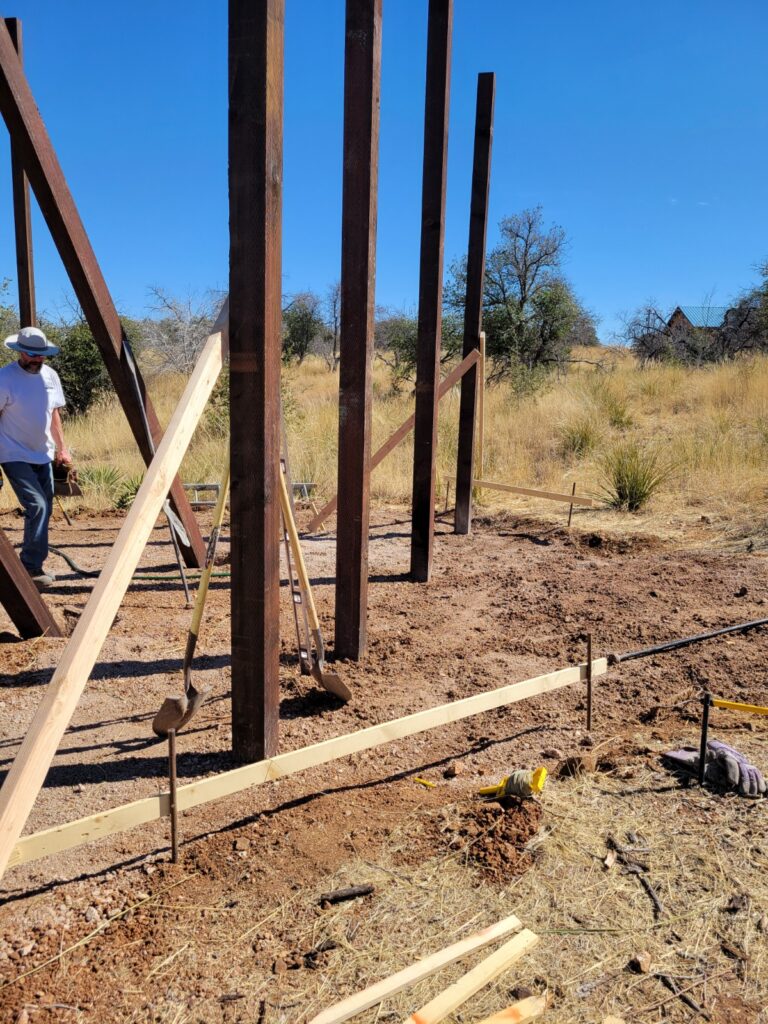
Bryan volunteered to travel from Idaho to help us frame the walls. We started out, randomly, on the north side. For the first wall we cut slots into the pressure treated bottom plate lining up with the anchor bolts in the concrete slab, thinking that this would make it easier to stand the walls. Turns out, it was just as easy to take a couple measurements and drill holes for the anchor bolts.
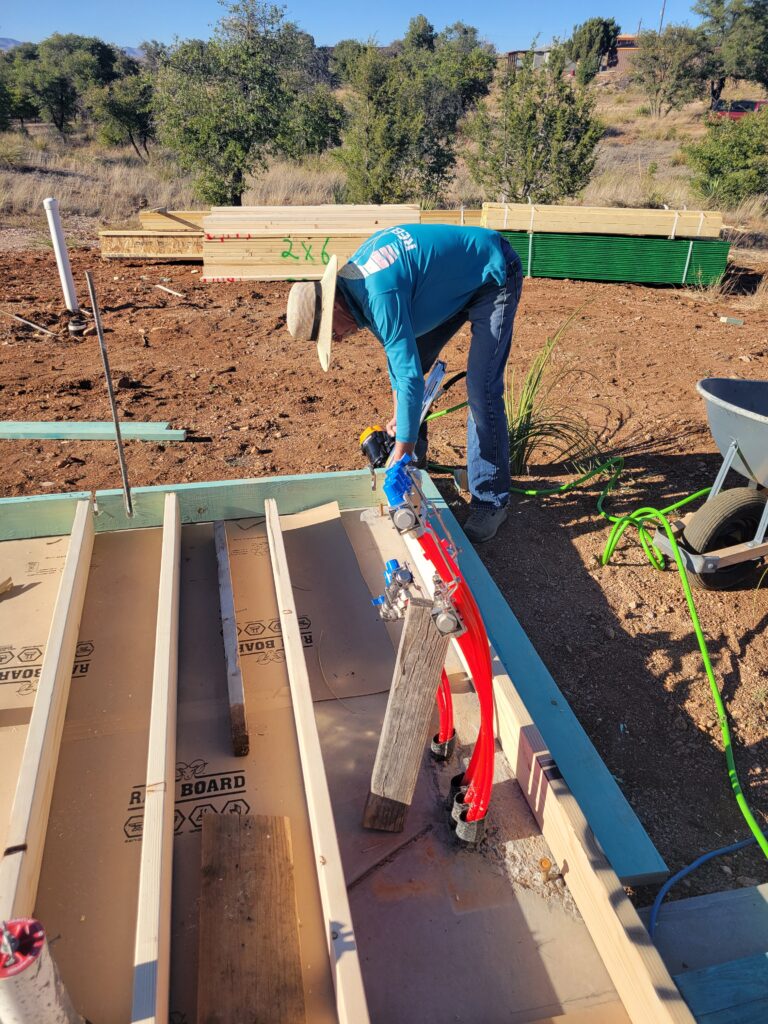
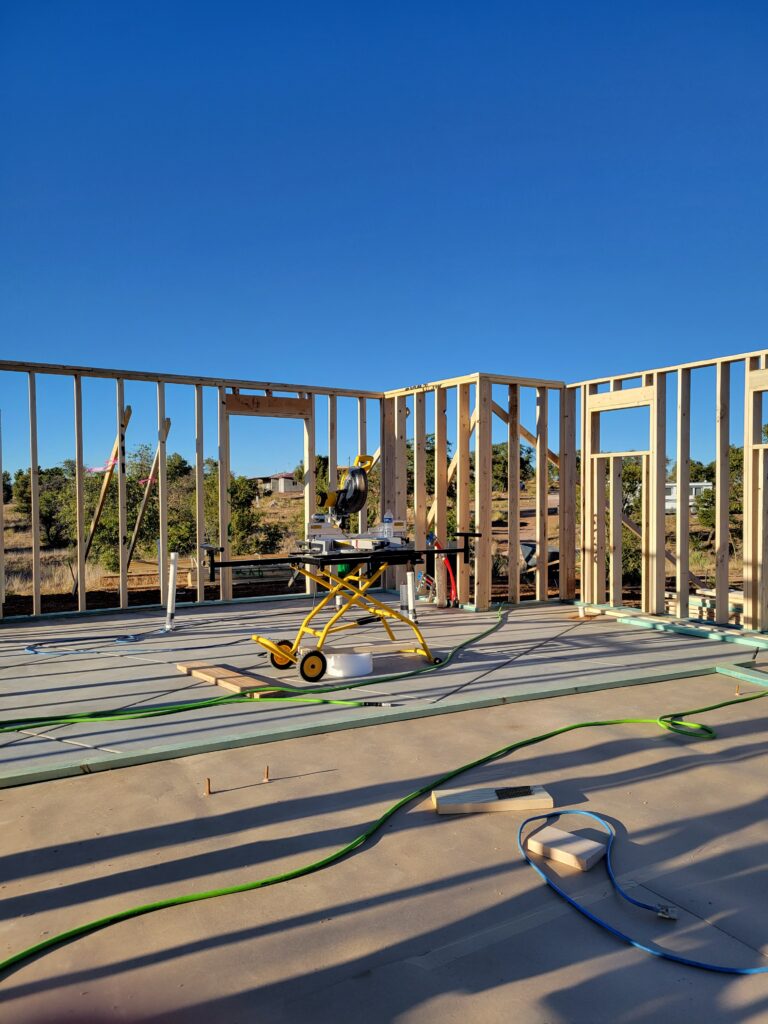
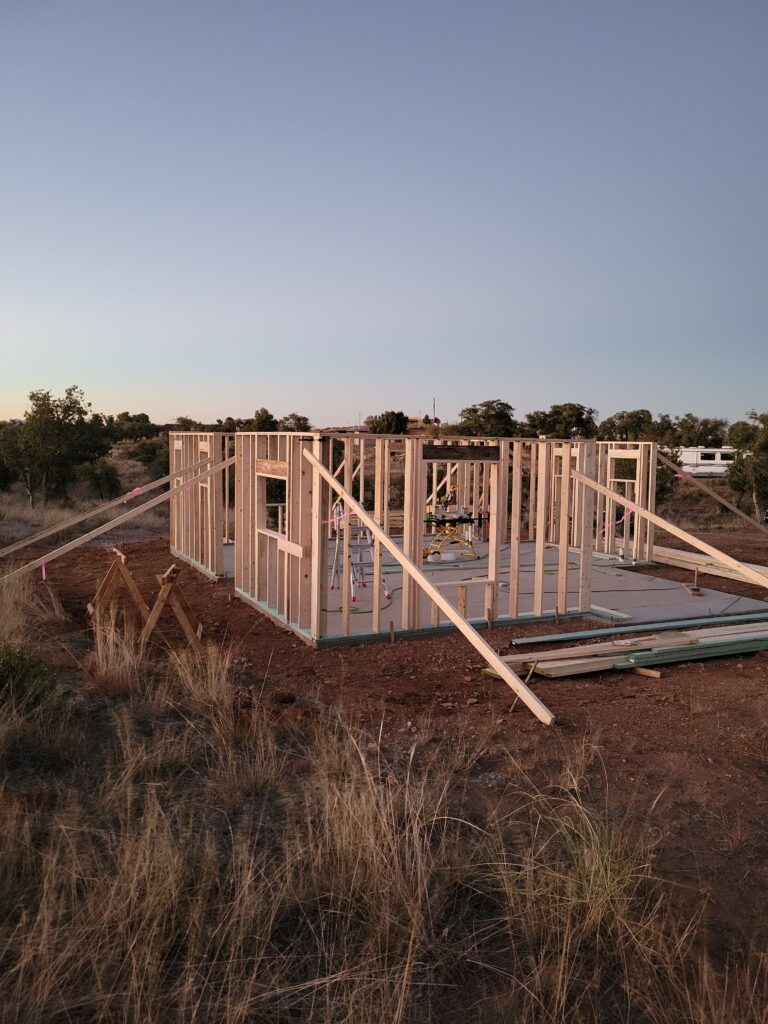
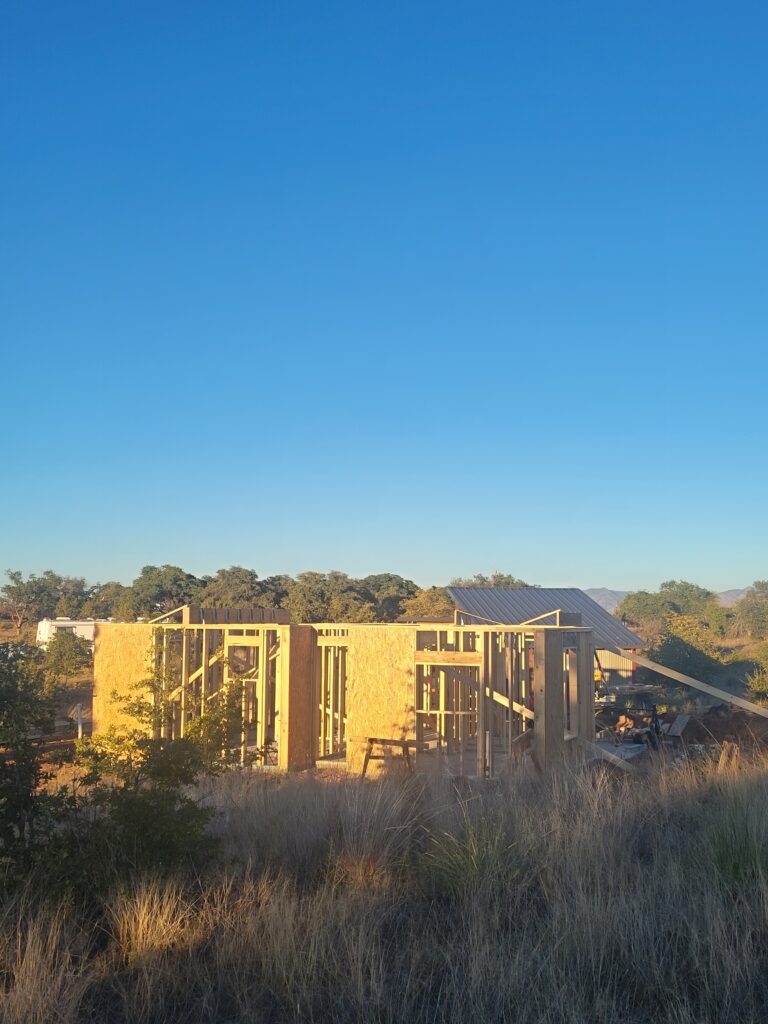
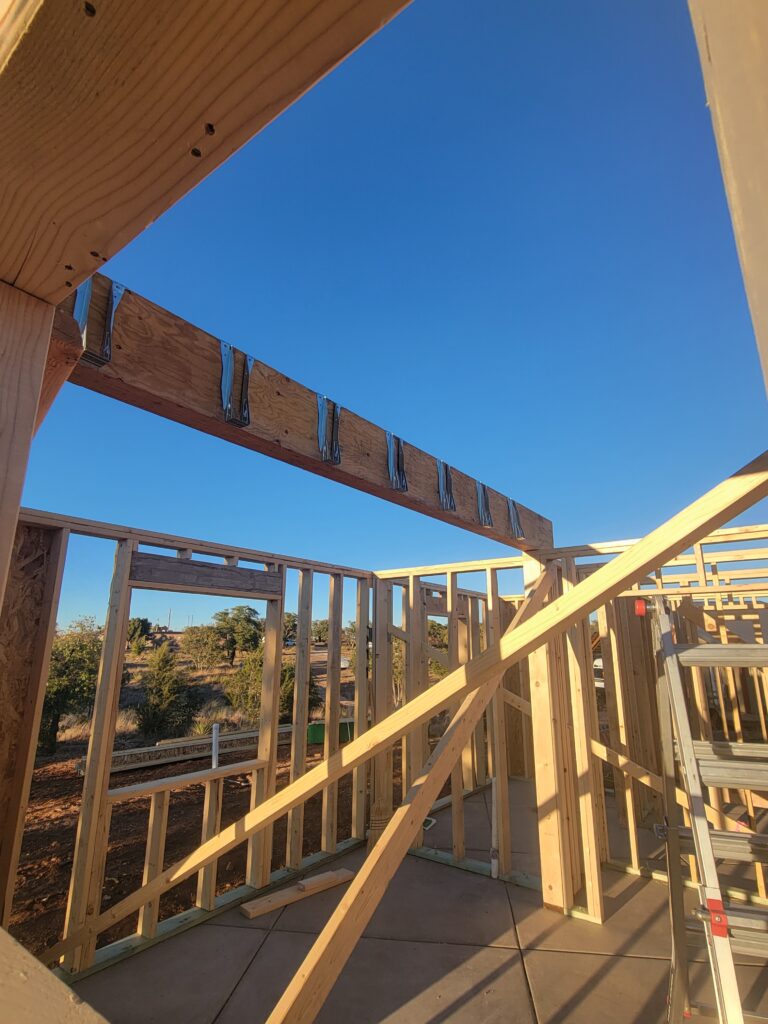
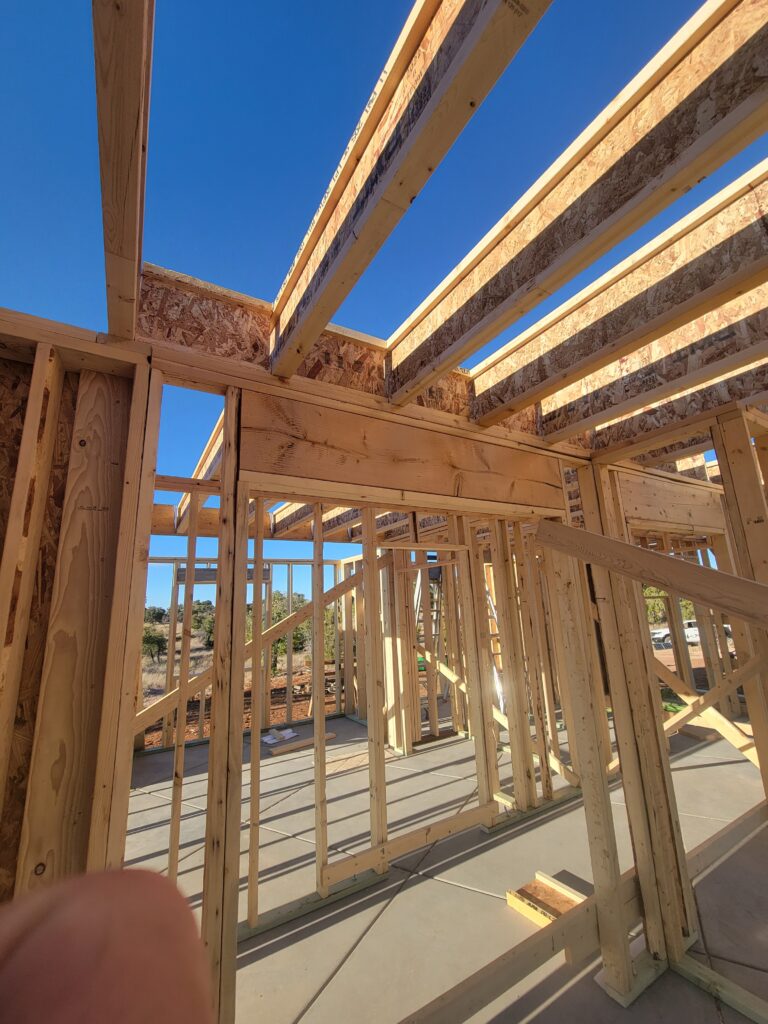
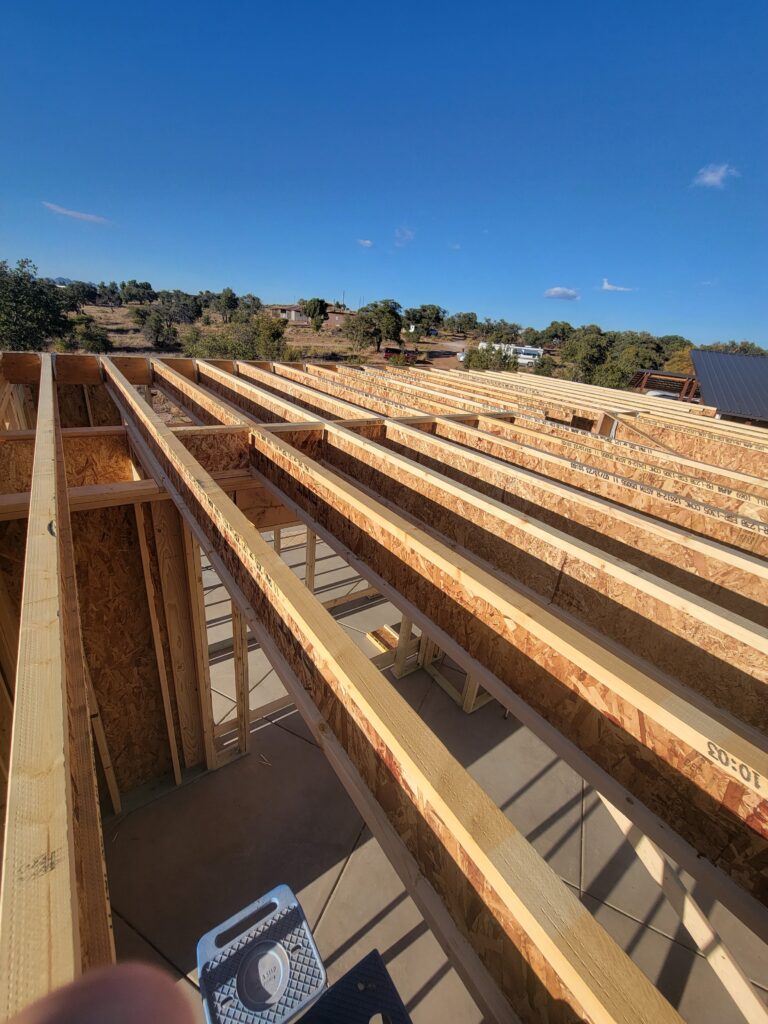
We worked our way around framing the exterior walls. Then we went back and stapled OSB sheathing on the corners to keep everything square. The next phase is laying out the second floor joists and rolling them into place. Holderness Supply in Tucson designed the I-joist floor system and sent the whole package, including beams, hangers, layout drawings and, the 3/4″ sub-floor.
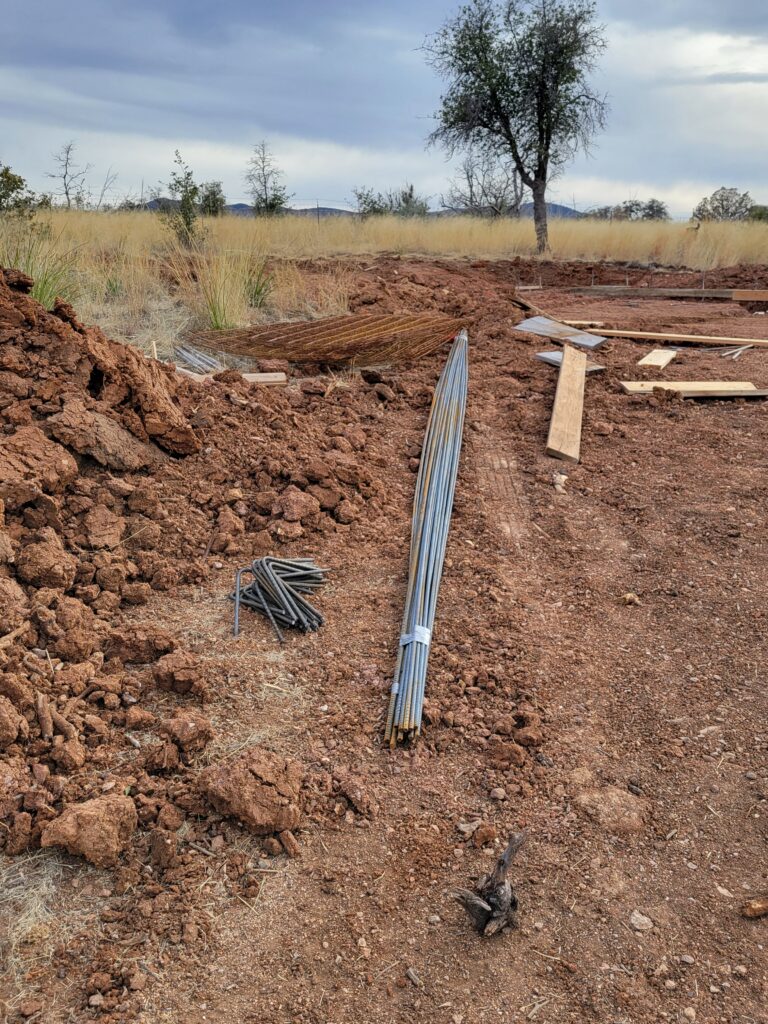
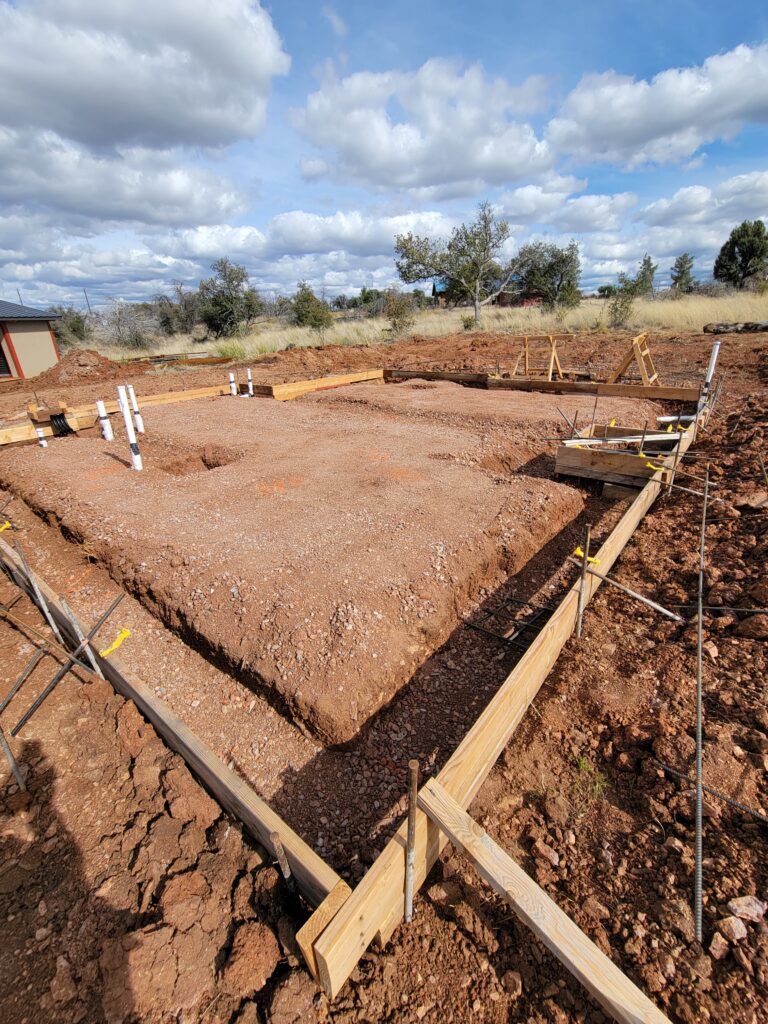
February 2023. Bryan and I built the form work for the slab and we got all the reinforcing steel for the footings in place.
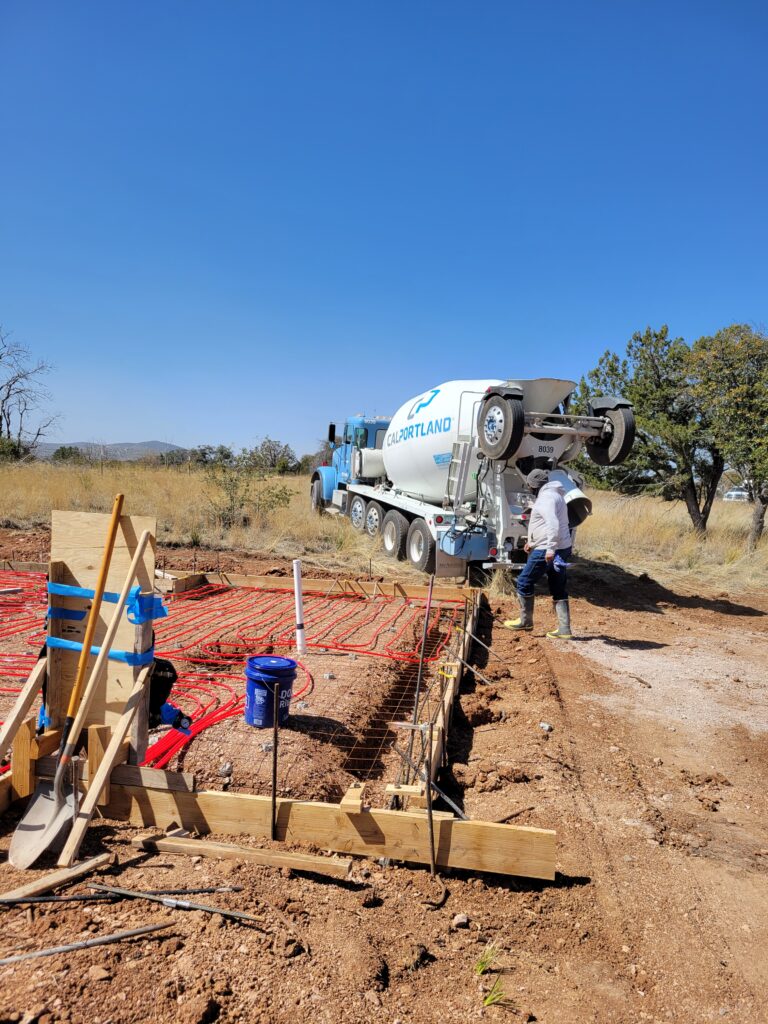
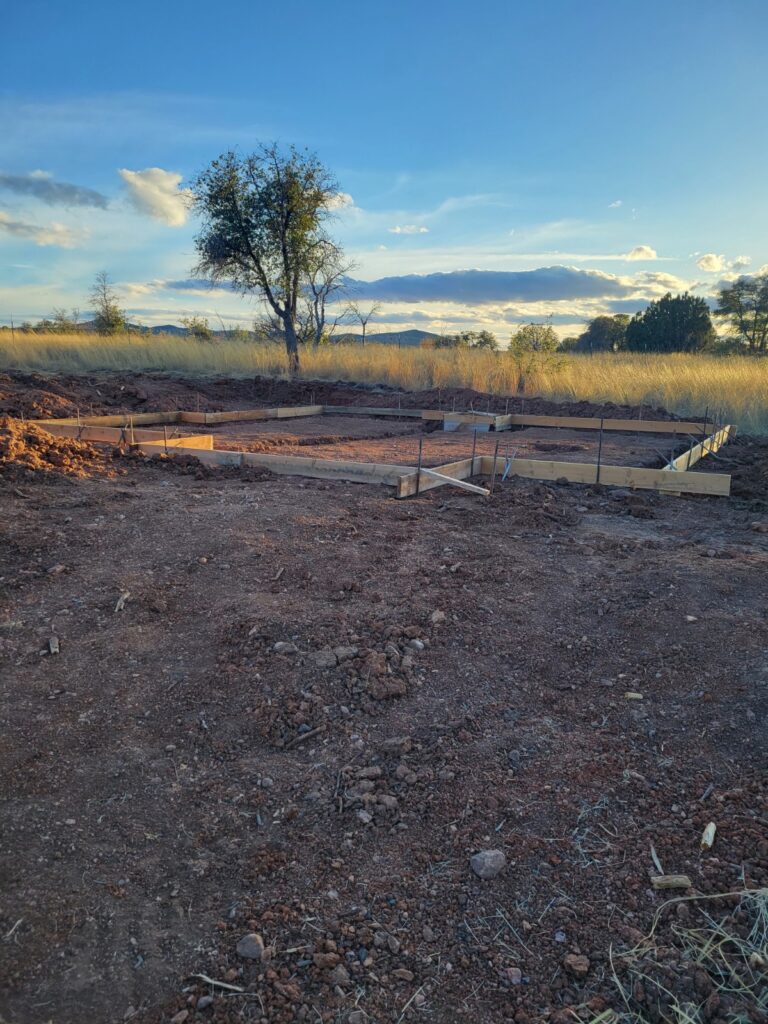
After some major weather inflicted delays, in early March the plumbers installed the ground work (all of the drain pipes and vent pipes for the eventual plumbing fixtures) which will be buried in the ground under the concrete slab.
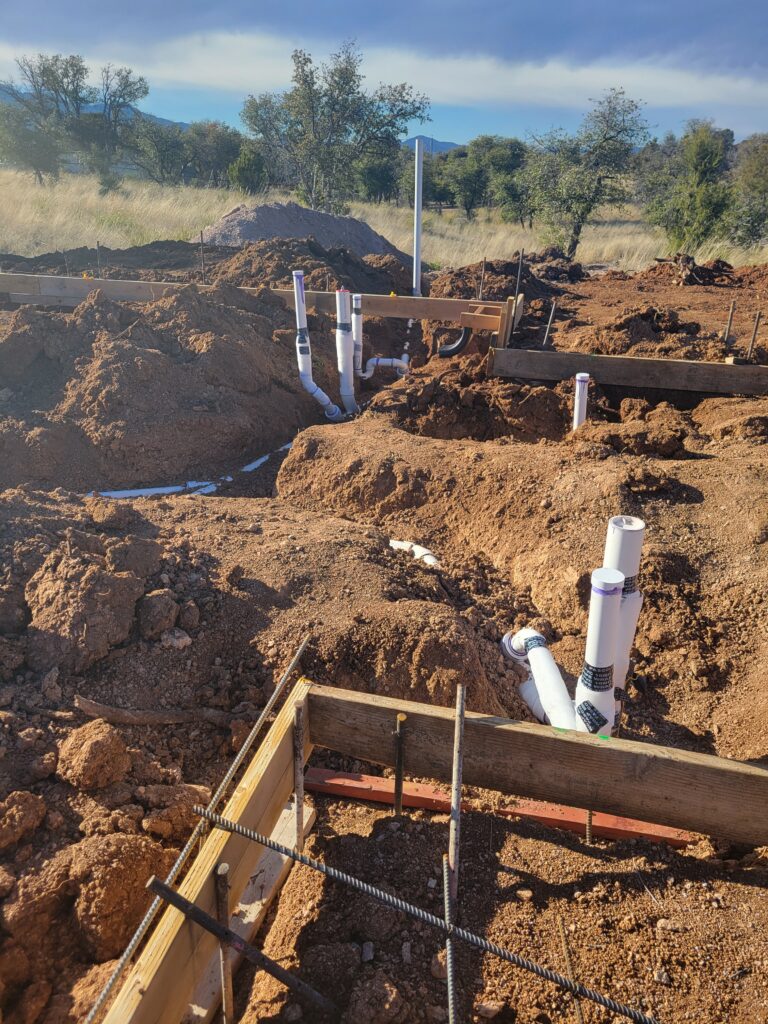
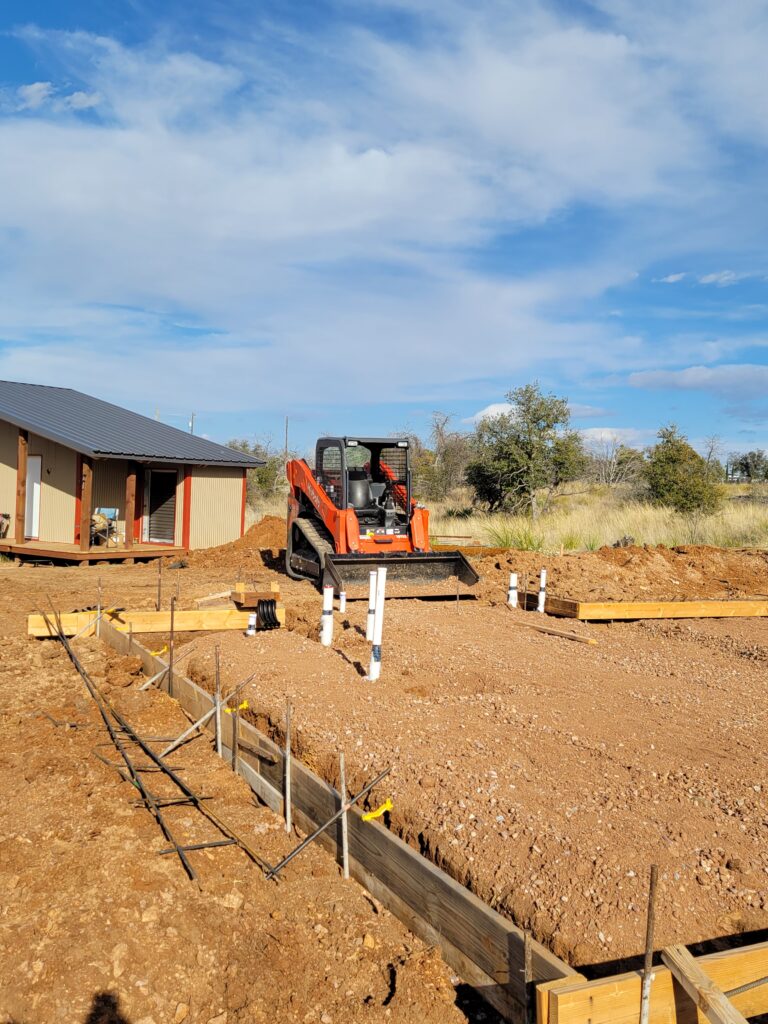
With that work finished, we were able to backfill the trenches and bring in the ABC material for under the slab. ABC means aggregate base course and it is a mixture of course and fine gravel and dirt. It’s called different things in different parts of the country, but it’s used under slabs because it’s easy to get level and smooth, it compacts nicely and it provides drainage.
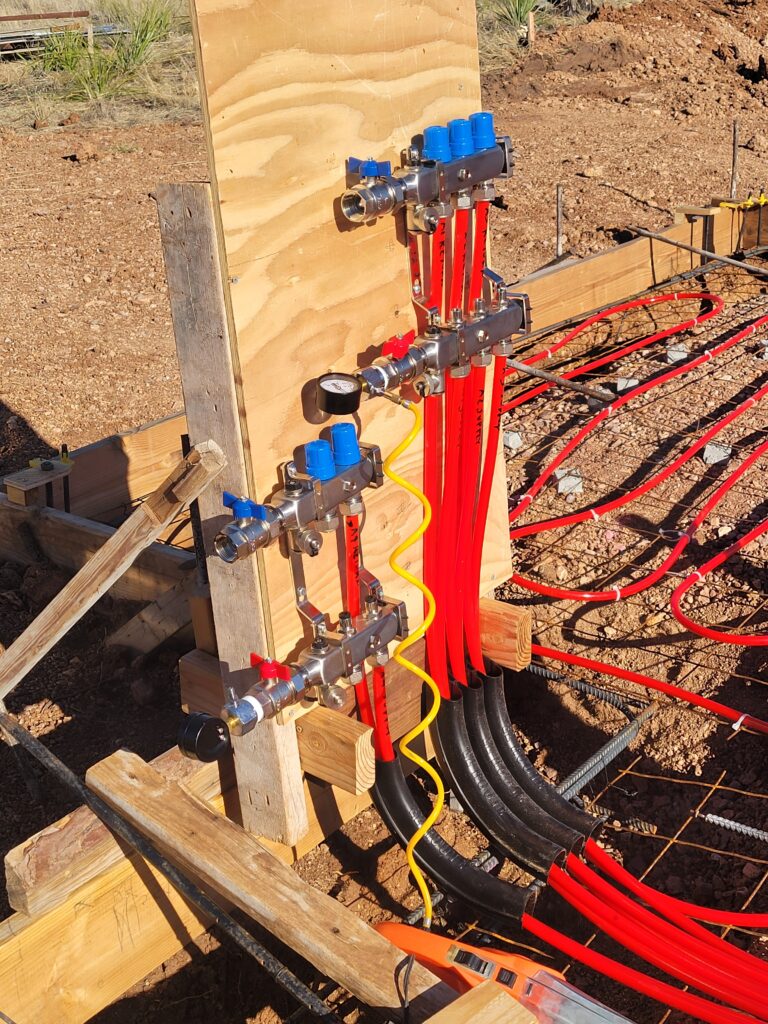
At 5000′ elevation it gets cold here during the winter, even though we are 30 minutes from the Mexican border. A heated slab is the most comfortable and quiet way to heat, at least the lower level. We decided on a hydronic system which uses heated water running through loops of pipe buried in the concrete. A propane boiler will heat the water and pump it through the embedded pipes via a manifold system which feeds five circuits and two separate zones. There will be two thermostats regulating the two zones.


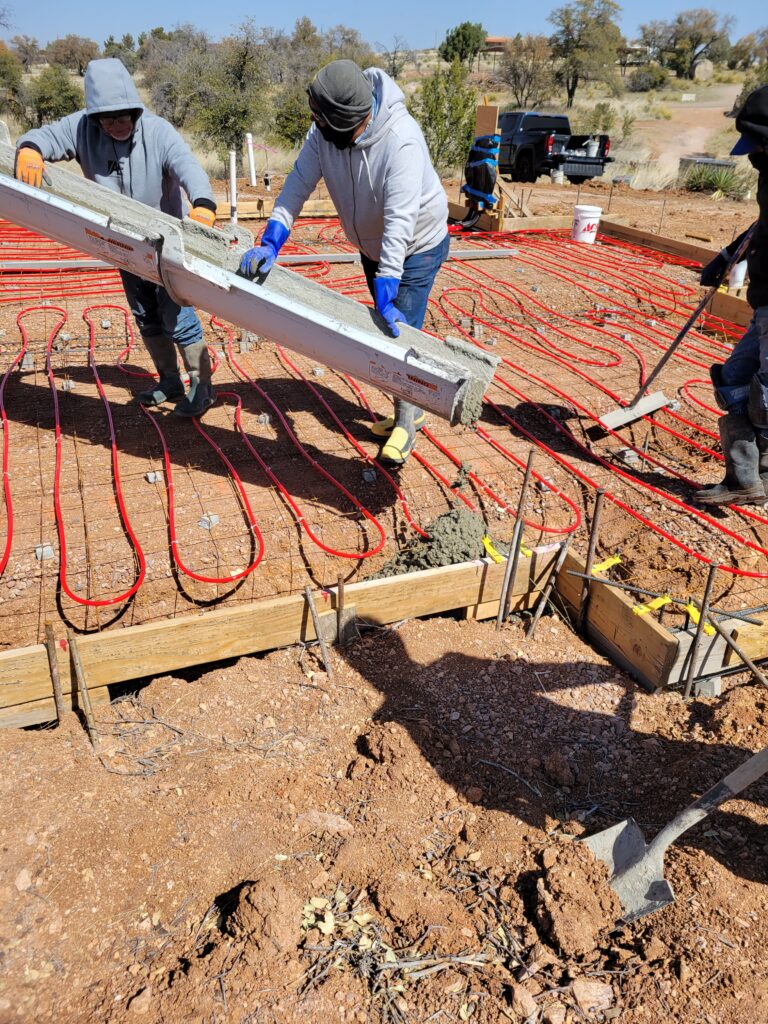
We were lucky to find a good crew to place and finish the concrete slab. Originally I was going to place a 6 mil poly vapor barrier under the slab, which is standard practice in some parts of the country. Luis convinced me that doing that here would create more problems than it solved. Namely, the top of the slab would cure more quickly than the bottom which would result in cracks. All concrete will crack, but we might as well mitigate it as much as possible. He also helped layout the control joints which are tooled into the wet concrete rather than cut in later. The slab will remain exposed in the finished house, so this was an important design element. ( editor’s note: 10 months later the slab still only has one minor crack outside the control joints)
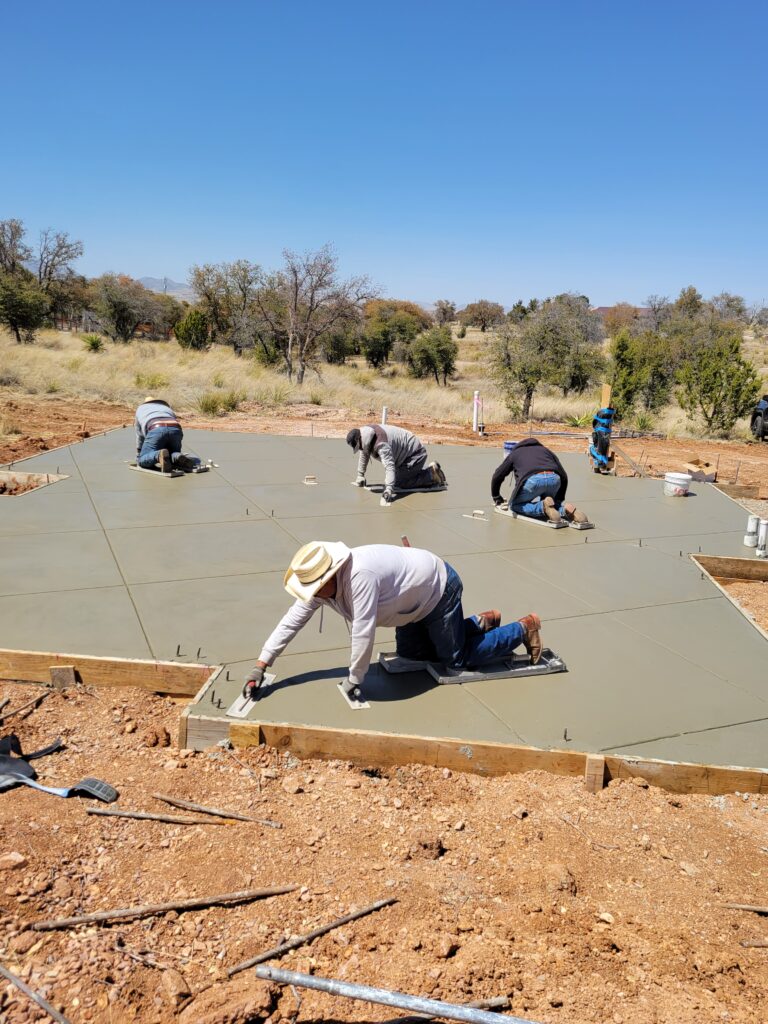
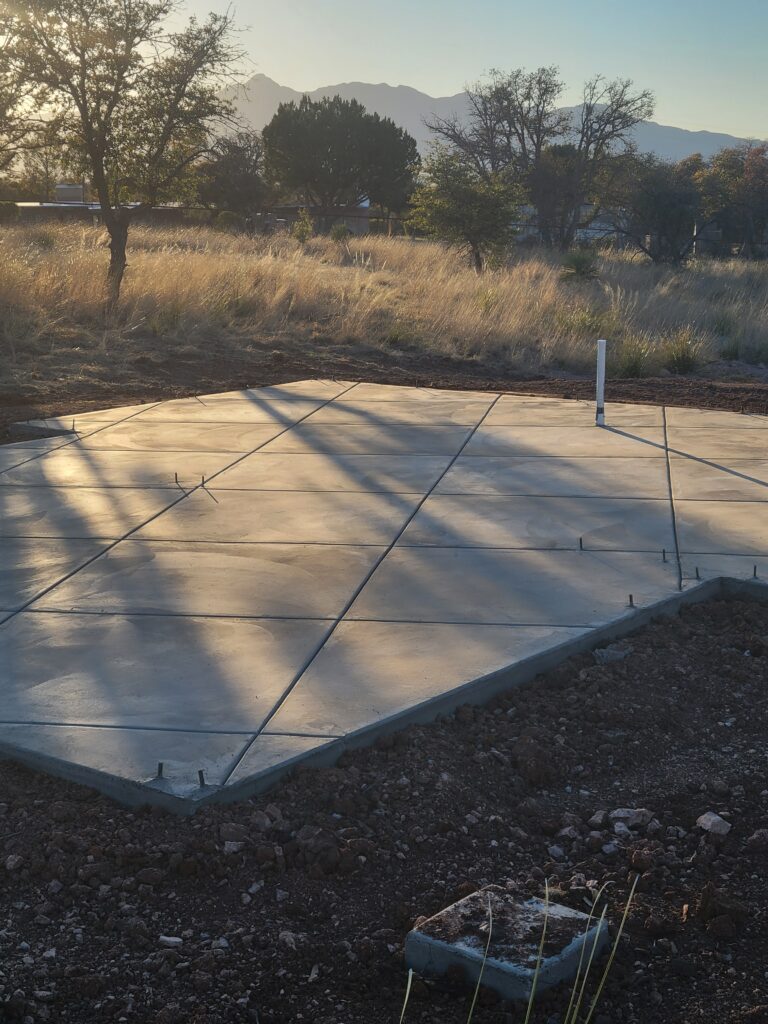
Getting the slab poured was our goal for this winter, and we barely made it! Now we get to go back to our summer jobs to make some more money so we can carry on in the fall.
I learned from one of the first general contractors I worked for after college that every time you start a new job you are preparing to go to court. I learned to keep a daily diary recording the weather, who was on the job, and what happened. I was never in court (for that) but it’s a practice I try to keep now.
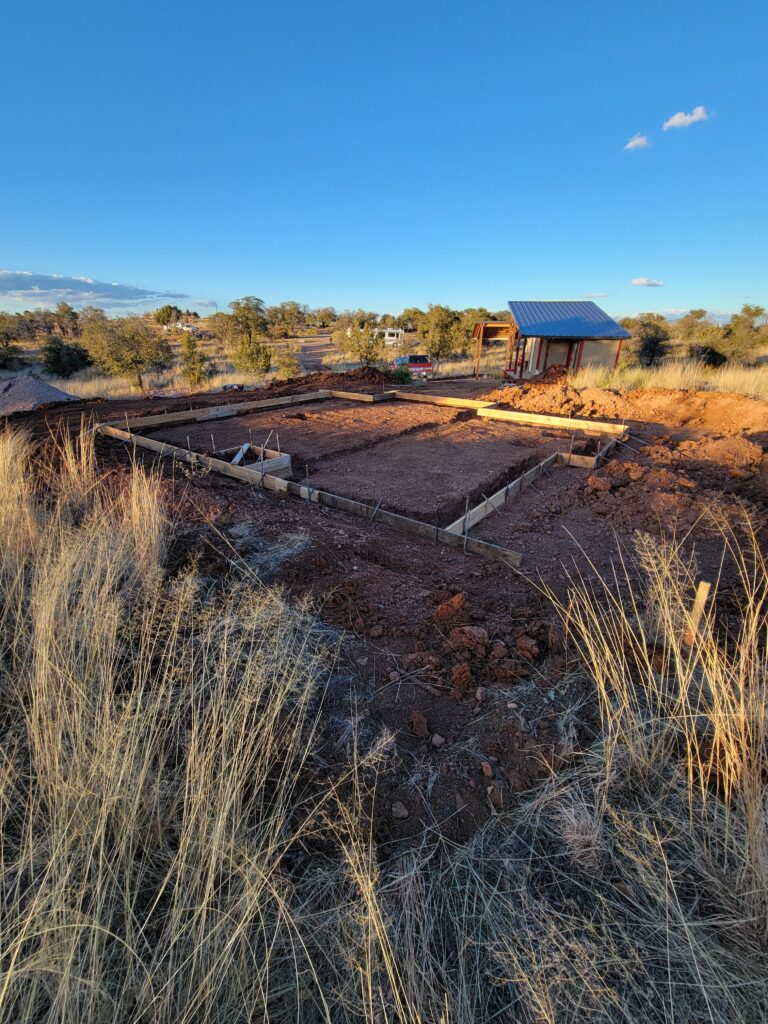
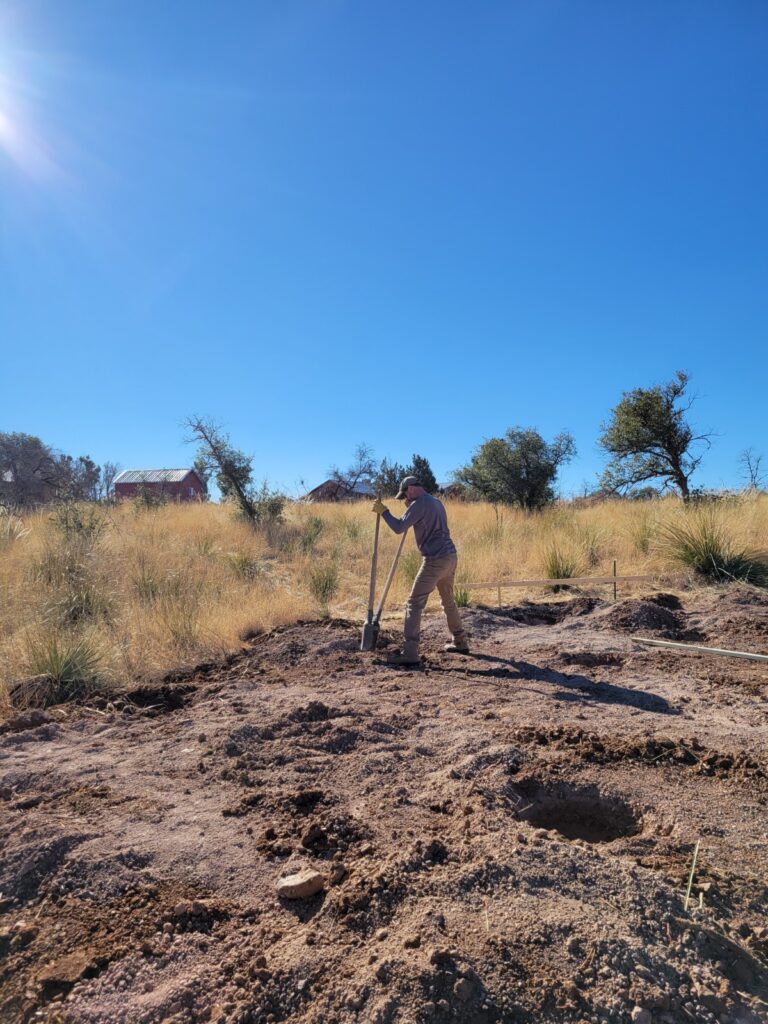
Today is February 22, 2023 and it is starting to snow in southern Arizona, after a night and day of winds at 35 m.p.h. with gusts that might blow a man down. We have the footings excavated and the form boards in place for the slab on grade. The plumber is scheduled for Friday to put in all the drain pipes that need to be under the concrete.
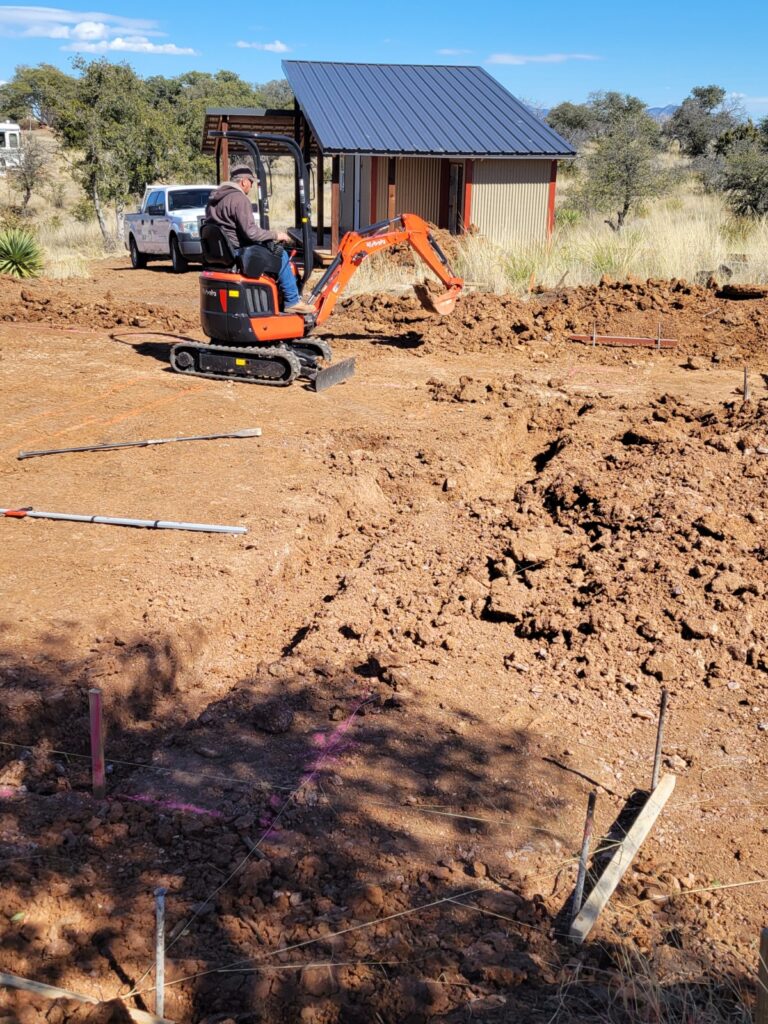
I rented a mini excavator on Saturday the 11th and Russell came and finished the footings Sunday. He makes it look easy, but trust me……it’s not. The outside edge of the footing trench wants to be in line with where the form boards will go for the outside edge of the slab in order to minimize wasting concrete.
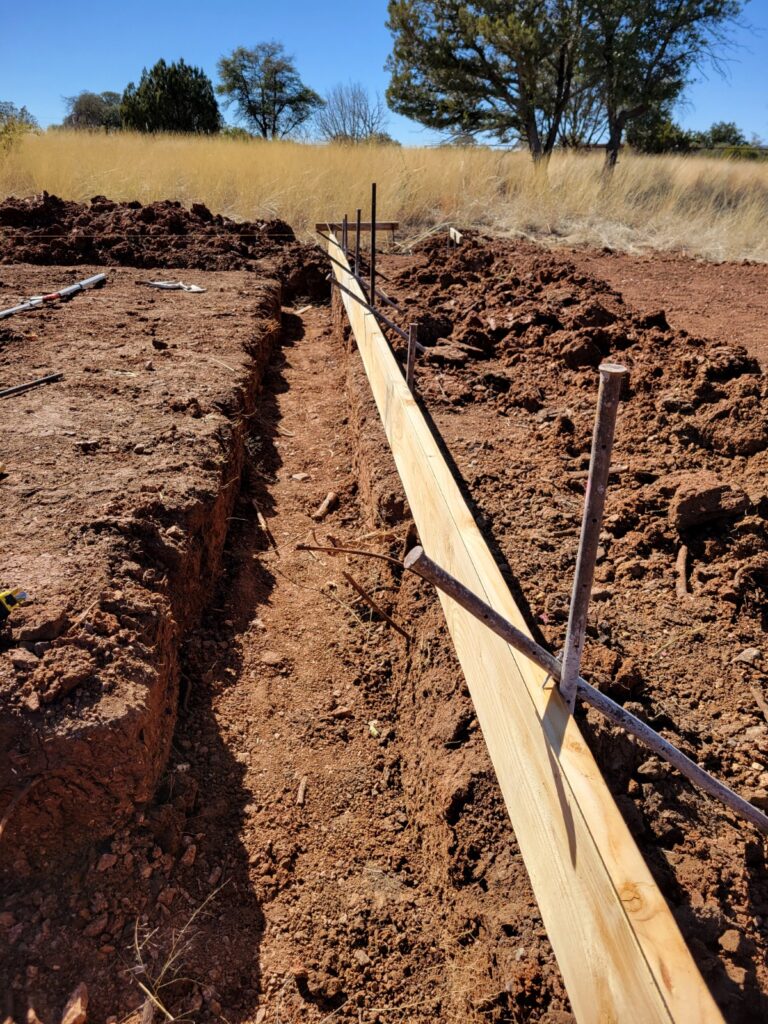
Steel was delivered on Thursday, the 16th and we finished the forms, 99% anyway, on Friday. After the plumbing inspection we can lay down the 4″ of gravel sub-base and finish tying the reinforcing steel.
Santa Cruz County has approved our application for a building permit. Bless their hearts. $2000.00 for a house smaller than 1400 square feet seems reasonable.
Because contractors here are either unresponsive or terribly expensive, we will be doing most of the concrete slab work , and, probably, as much as we can after that, ourselves. We know a former general contractor from the area who is very generous with his time and skills. He has another day job now, and does this kind of thing on the weekends, so we are sort of at the mercy of his schedule.
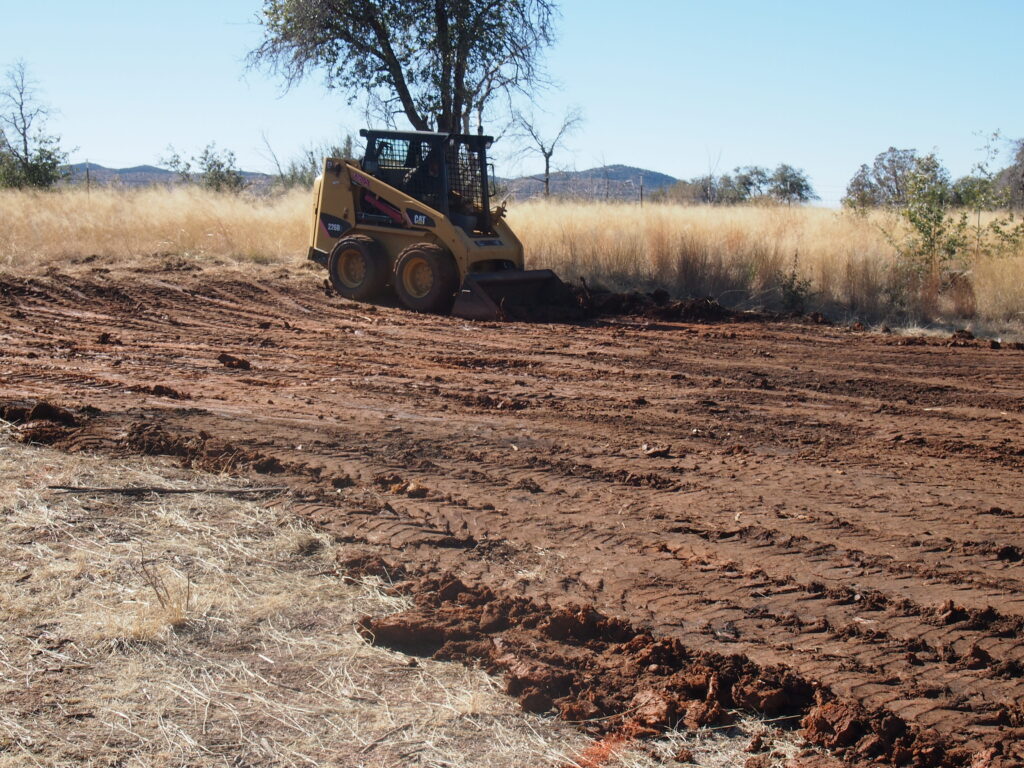
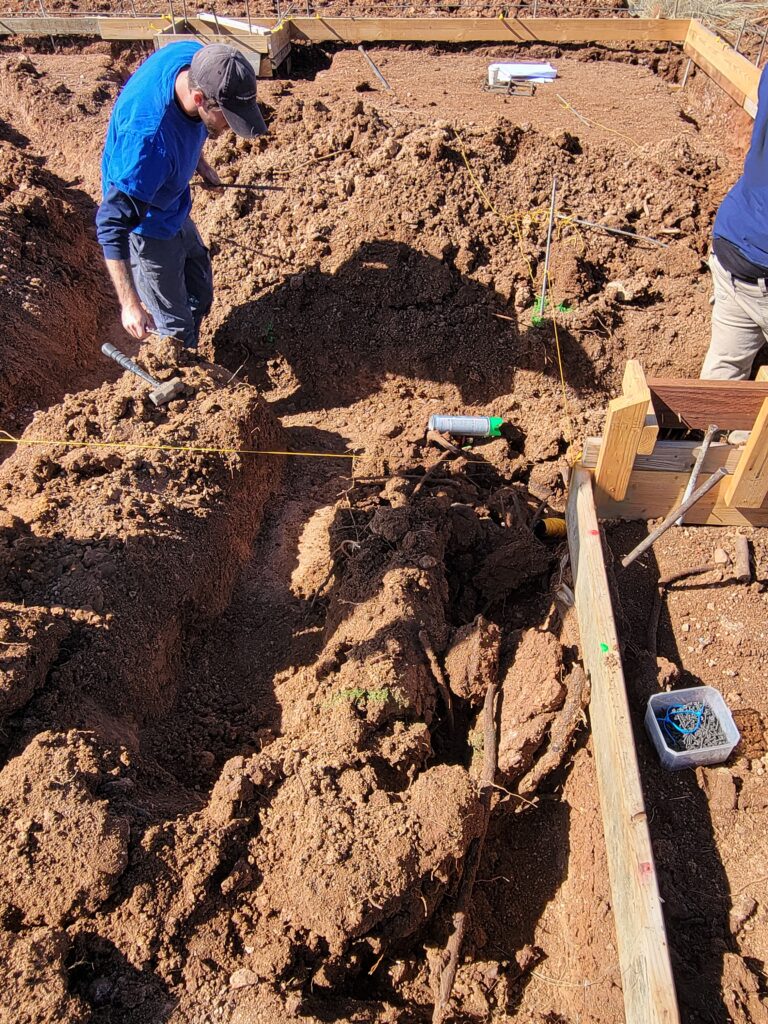
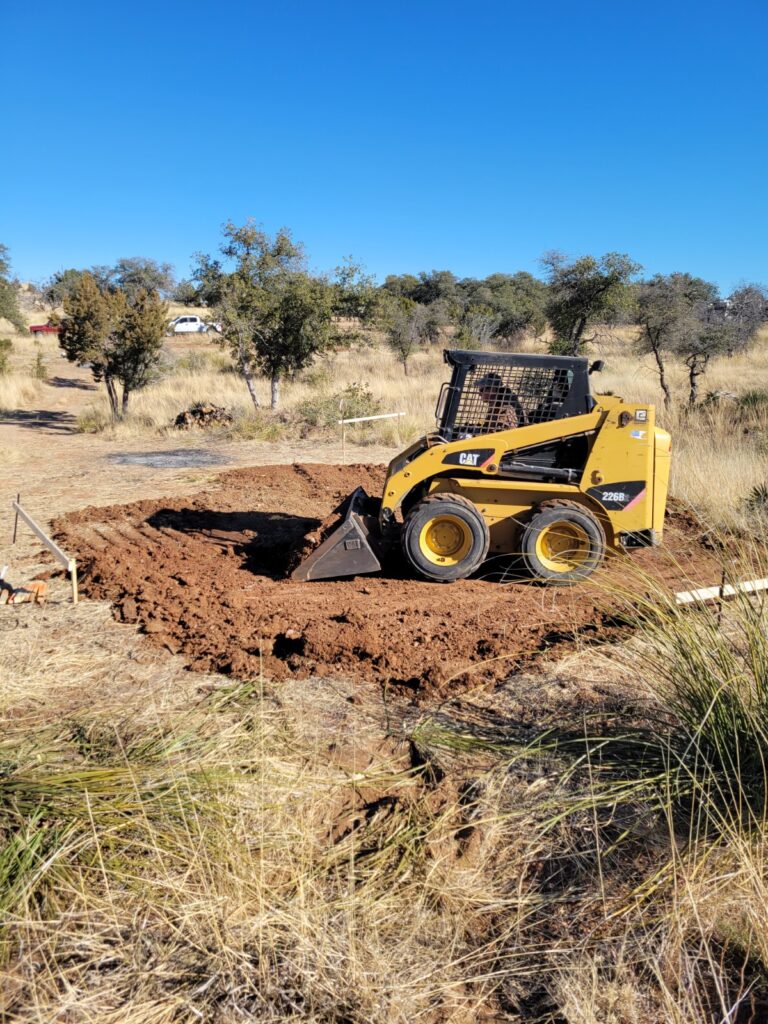
To my surprise, the first couple of feet of soil on this part of the lot were clay, still saturated even though that far below the surface. Last year, when we excavated for the chicken coop and for the septic tank, the soil was more of a granular sand and gravel type, and that’s what I expected.
Montmorillonite, smectite and bentonite, oh my. Expansive clay is bad for supporting any type of structure, because when it gets wet, it expands with a force that can break dreams.
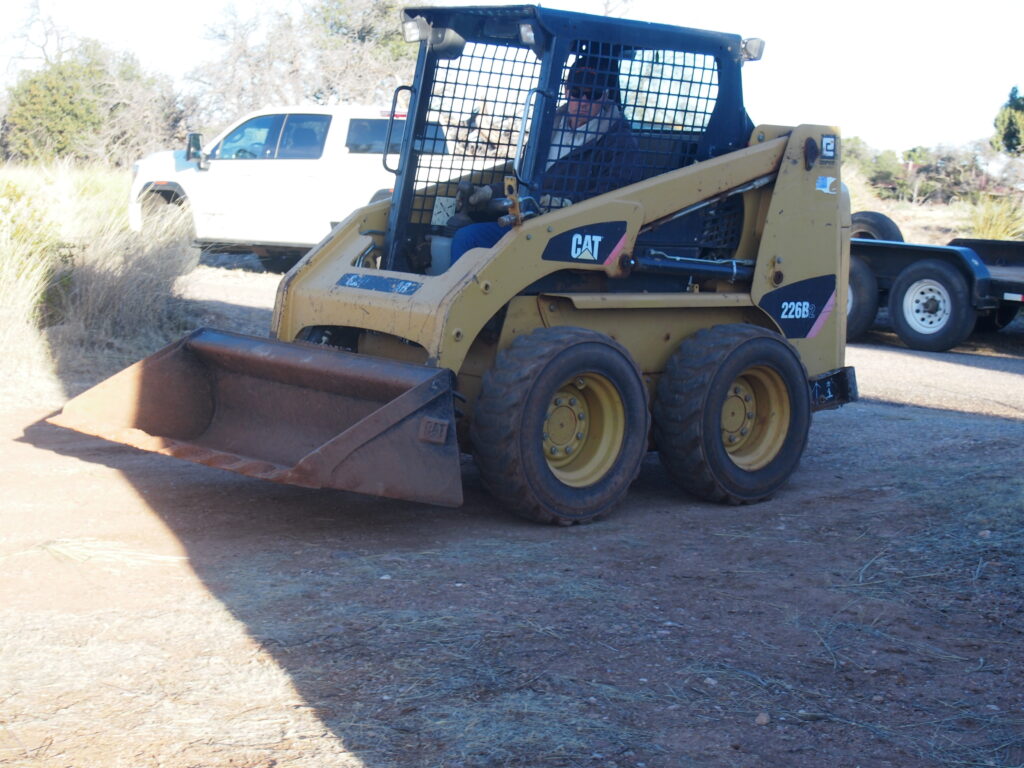
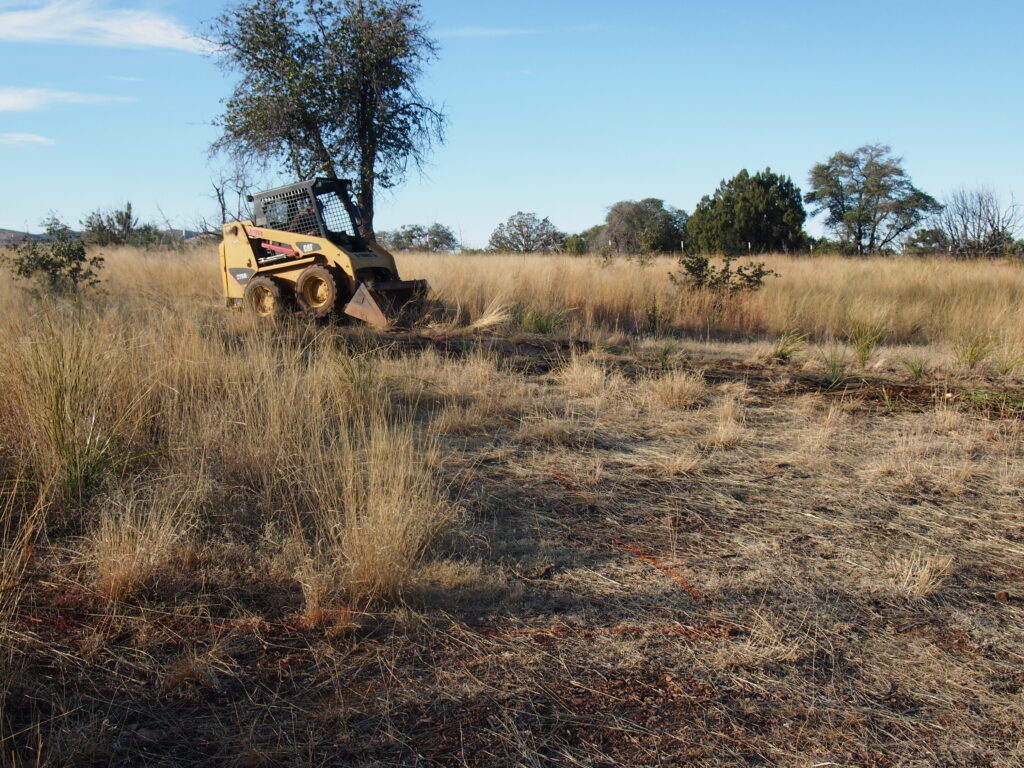
The next morning I reserved a skid-steer tractor from a local rental place. I was able to dig out the cohesive clay material down to a more granular, and more predictable, substrate.
Next weekend we hope our guy can dig the thickened edges and interior footings. The week after involves setting the forms for the slab, which we will do. The plumber is on notice, since then it is his turn to put in all the drain and water supply pipes.
That’s the way it is. February 6, 2023.
It is winter solstice in southern Arizona and the solar panels on our coach don’t get enough sunshine to fully charge the batteries. Additionally, it is so fucking cold (50’s during the day and high 20’s at night) that the furnaces run a lot. The battery voltage has been as low as a little over 11- barely more than dead. Running the generator during the day helps to top them off.
Regardless, we are planning to make the new house totally reliant on solar power. The chicken coop roof is designed to carry 18 solar panels and is oriented to the south with a slope of 25 degrees. We plan on using 48 volt lithium iron phosphate (LiFePO4) batteries to store the sun’s power. These batteries store tons, or more accurately, kilowatt hours, of power and can be drained to 80 and even 100% of their capacity without damage. A line buried in conduit to a sub-panel will power everything in the house. This will work for two reasons: -because I want it to, and -because in order to run new lines to our property, the utility company wants the same amount of money an off-grid solar system will cost.
After all, we are in southern Arizona and it’s a shame not to use all the sunshine we get. Plus I trust the engineers at Northern Arizona Wind and Sun to provide me with a system which has the ability to power the house even when the sun doesn’t shine for a few days.
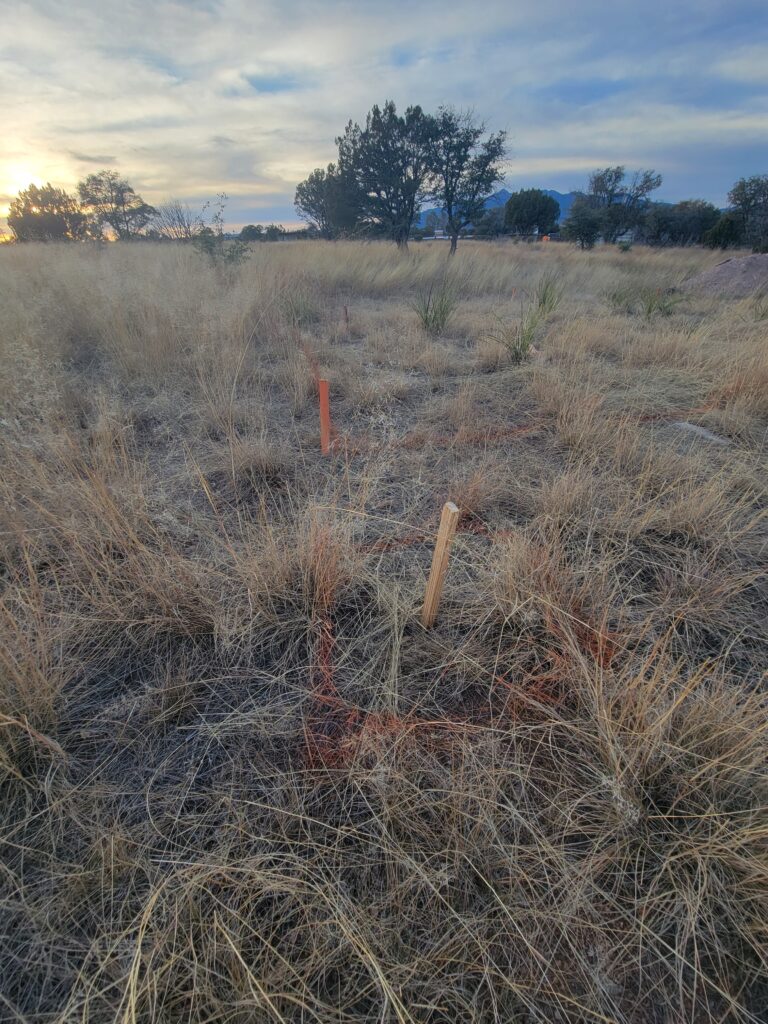
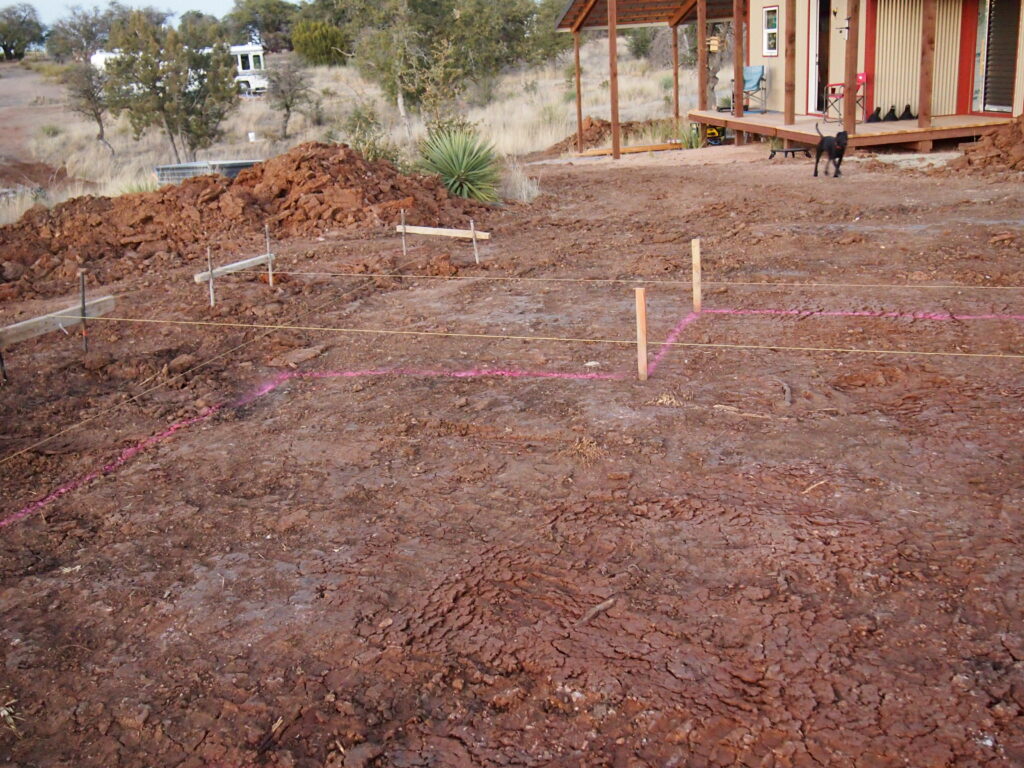
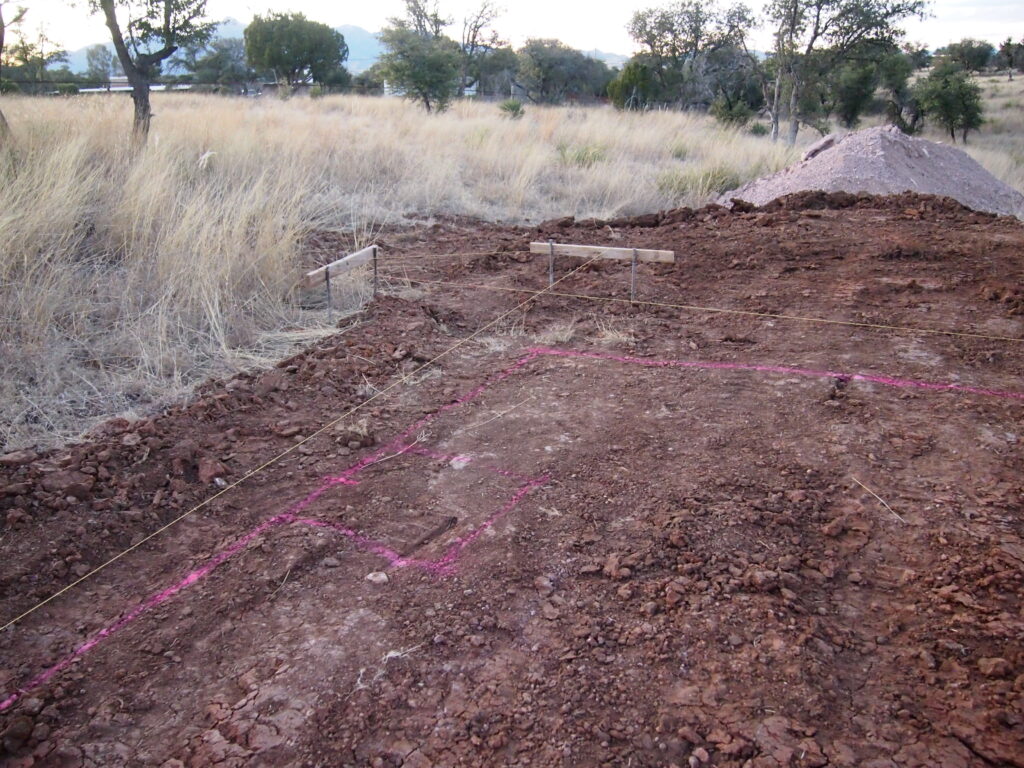
The house footprint is staked and I am meeting with excavators and concrete placers to get prices. The first bid for the concrete had me considering buying a mini-excavator and starting my own business. We are still willing and able to put as much sweat equity into the house as possible, but forming and placing and finishing concrete, while it might look simple, requires a lot of practice. And we will hire a pro for that.
“Off Our Rockers”
Little Feat
Well, we have decided to scrap the house plans we have been working on for the last 6 months in favor of the idea we originally had when we found this property and thought about building.
It was important that the living spaces take advantage of the desert sunsets and of the views of the Santa Rita Mountains. The idea was for a 2 story house consisting of a living room with a western exposure, and a kitchen oriented to the east for the morning sun- all on the 2nd story. The 2 bedrooms would be on the first floor along with the entry.
We were not crazy about the resulting elevations which looked sort of like a fire lookout tower. Not that there’s anything wrong with fire lookout towers, it just seemed out of place.
Then I thought I wanted a sort of “compound” with several buildings of different scales and materials looking as though they were all built at different times. Like some precious old west reproduction. Fuck, I might be a hipster. We already have the shop/carport and thought we could build a casita between that building and the main house that would make a nice transition between the buildings and would create some drama. There were problems with the new plans too. After staking out the footprint, the house didn’t really inhabit the site like I thought it would. And there was some awkwardness with the floor plan. There was also awkwardness with financing and we started discussing building in phases. Those discussions led back to building the simpler, original house.
Those plans are now with the architect and engineer who will provide the information the Santa Cruz county building department needs in order to issue a building permit. The goal is to have the slab on grade poured this winter, the house closed in next winter, and the finish work done the following winter. That’s a ridiculously long time to build a 1400 square foot house, but hey, we’re old folks.
As soon as I typed this title I thought of Christine McVie. R.I.P.
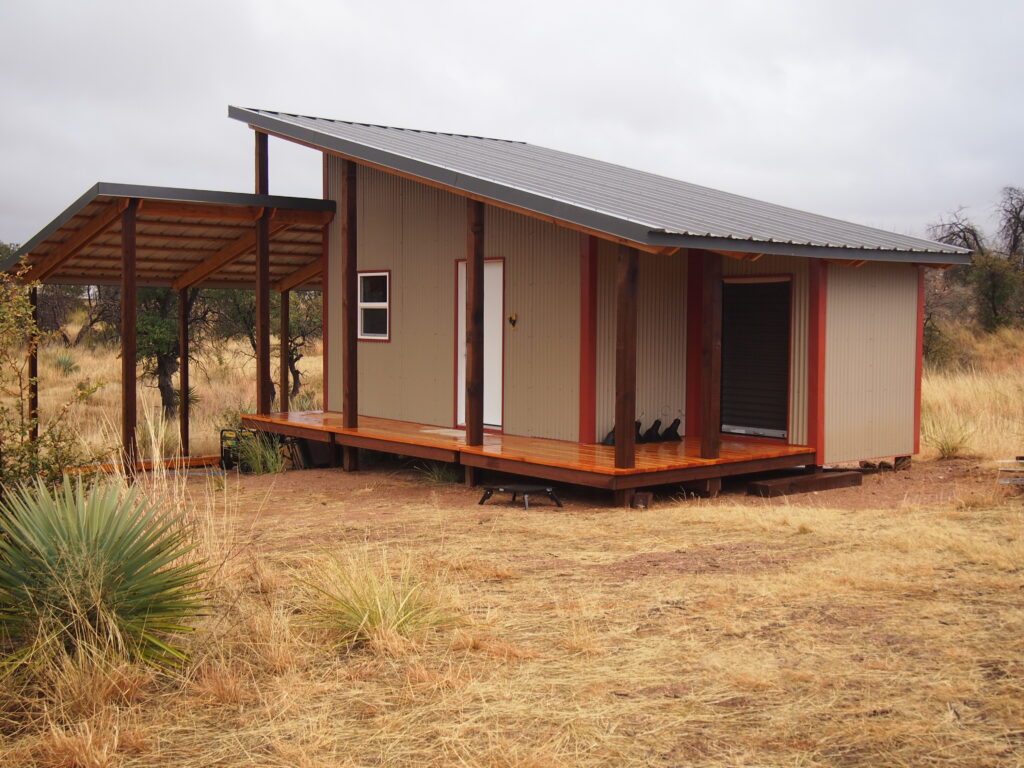
Our chicken coop was built in response to a particular building, but also as an attempt to build something that reflects a history. A long time ago, people would build shelters which fit into the landscape and which provided shelter from elements like wind and sun and at the same time provided some sort of comfort. In the desert southwest there is a ubiquitous form which goes a long ways towards meeting these goals. Mainly as an outbuilding, lean-to sheds proliferate like Blue Grama grass in southern Arizona.
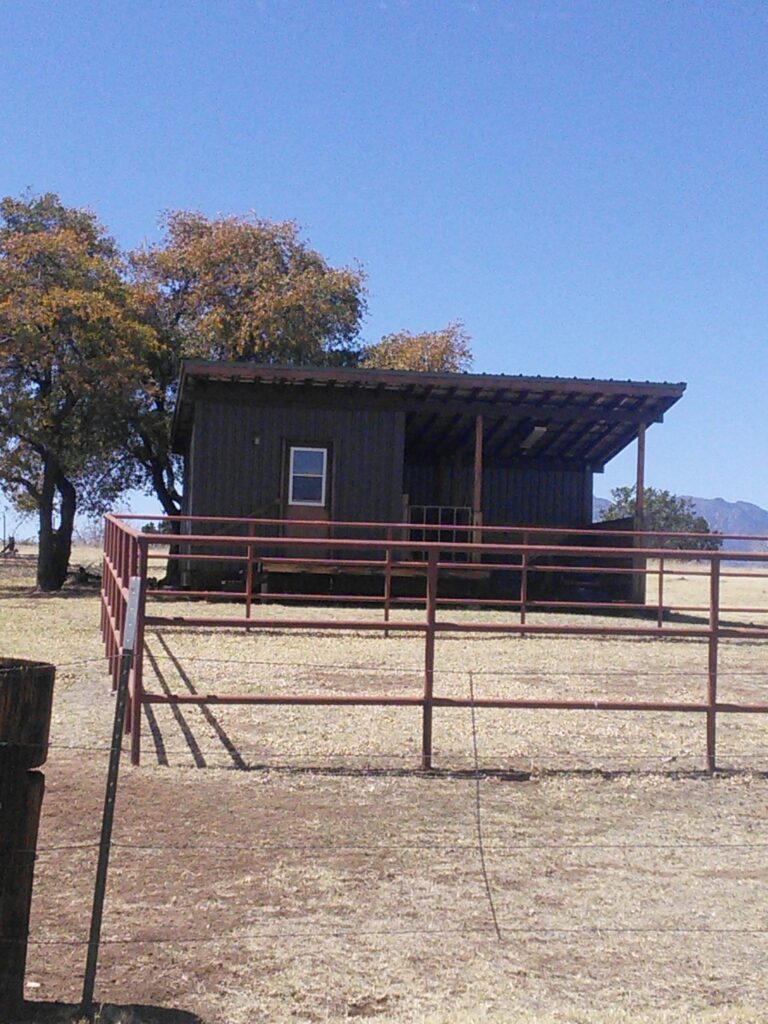
This particular building captured our attention when we first explored the area. The proportions and colors seem just about right. It may be just a work of art though, since we never see anybody around.
But, more about Christine McVie (Perfect). Really good blues pianist who, in her role in Chicken Shack, a British blues outfit, contributed a rollicking barrelhouse groove. She went on to write and sing for Fleetwood Mac after Peter Green left, which is ironic because Peter Green’s Fleetwood Mac was a pretty hardcore blues band, and after he left they started changing direction. When Green left, along with Jeremy Spencer, I think the band sort of lost its way. They put out a couple of good albums but, after the “Future Games” album, Stevie Nicks joined the band and it all went to shite, in my opinion. Christine McVie died in 2022.
I wanted to build something which could be completed by hand, like a ten year old kid building a fort. Can I just bury poles in the ground, nail some supports to them, build a floor platform, bolt on some rafters, put on a metal roof and siding, and call it good? Apparently so.

“As in the Arsenal of the Venetians, in winter, the sticky pitch for smearing their unsound vessels is boiling, because they cannot go to sea, and, instead thereof, one builds him a new bark, and one caulks the sides of that which hath made many a voyage….”
Dante’s Inferno (The Divine Comedy) Canto XXI
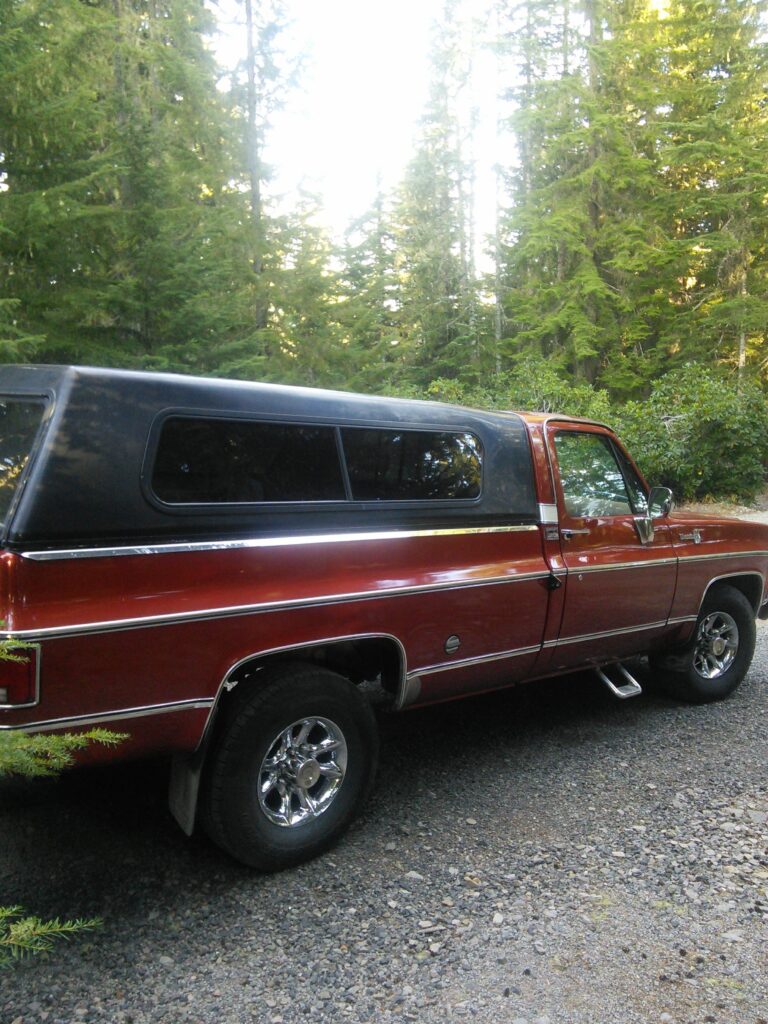
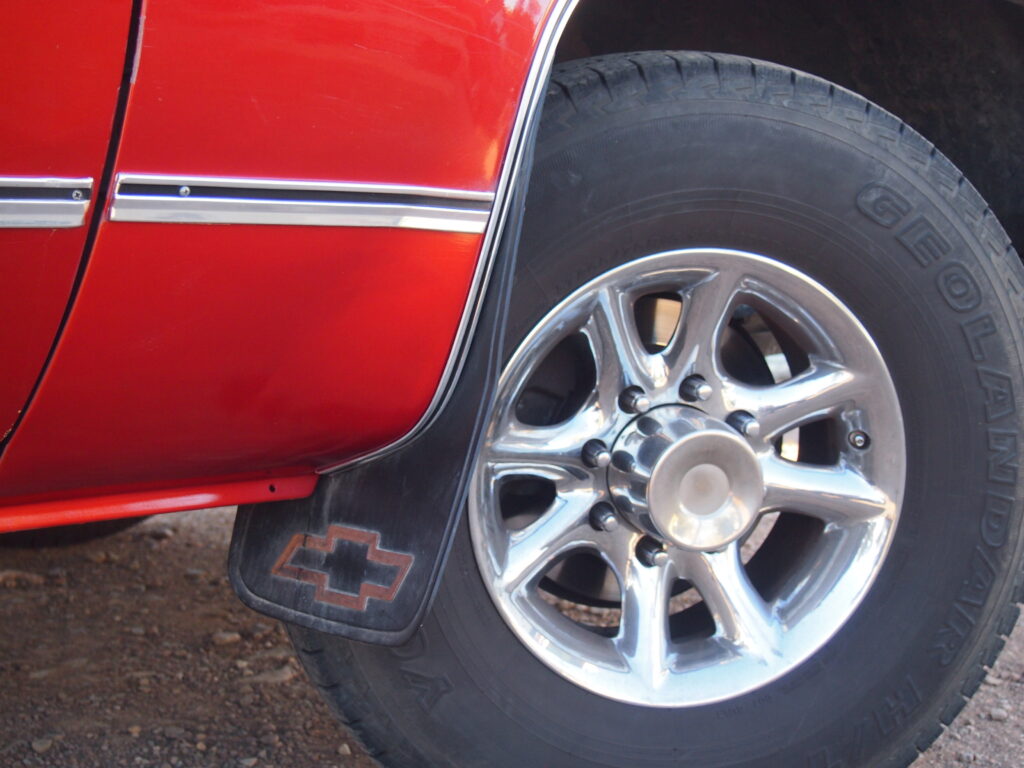
Many a voyage indeed hath this 44 year old truck made. Not recognizing the first blisters in the re-paint and the accumulation of leaves and dirt between the fender panels resulted in some seriously rusted body parts. I am not ready to go to the expense and inconvenience of leaving my truck for some unknowable amount of time at a body shop for repairs and a repaint. Instead thereof, I am repairing the rusted parts myself. Having neither the experience nor the right tools- no mig welder, no spray booth, nay, not even a garage- shan’t stop me, since I do have a thorough working knowledge of YouTube.
Caveat: I am not responsible for anybody taking this post as instructional and attempting to do the same things I do.
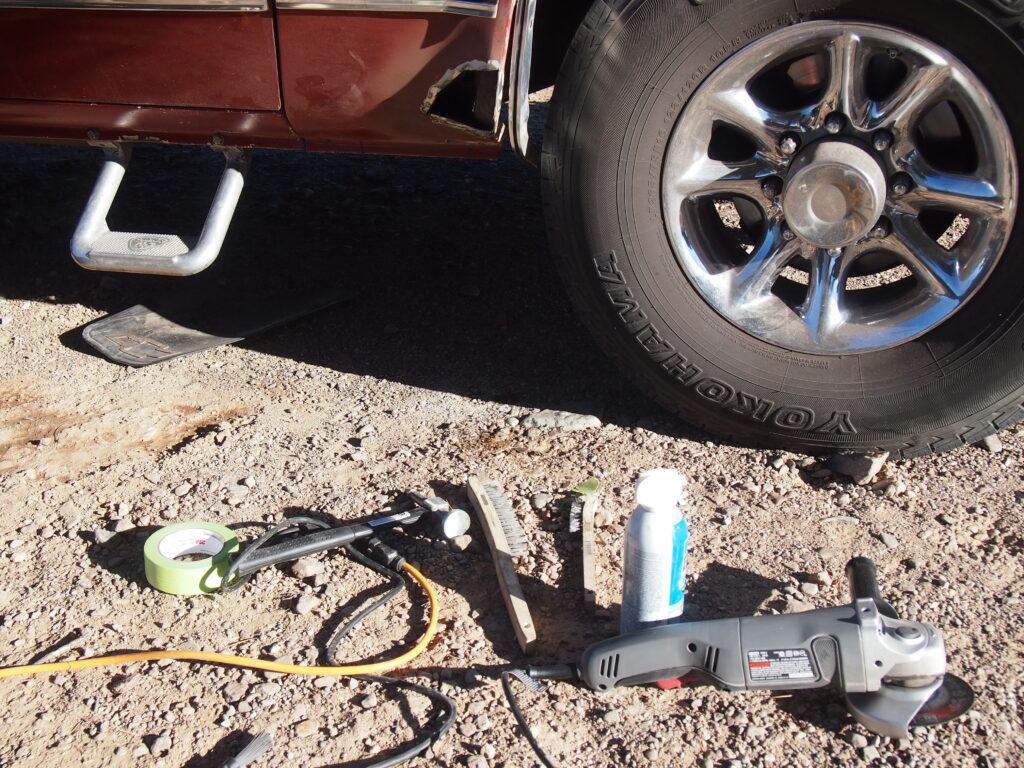
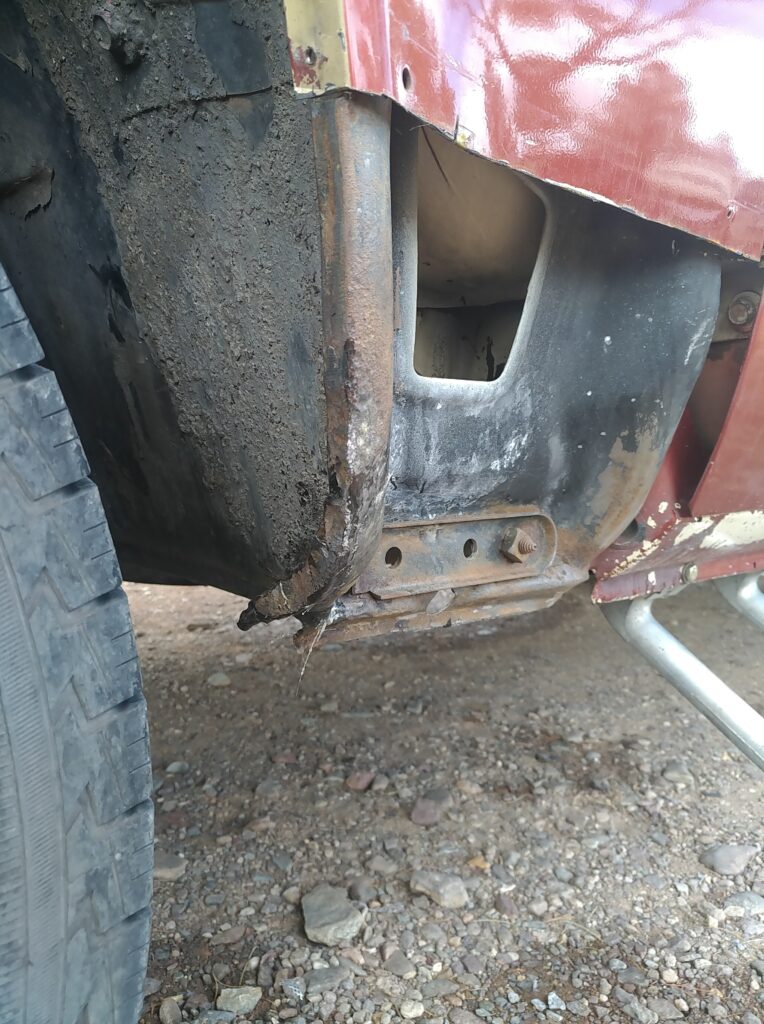
First item was to address keeping future rust on the rest of the truck at bay. I decided on a rust converter called OSPHO which is a water thin solution of phosphoric acid. According to the manufacturer’s website; “When applied to rusted surfaces, it resists/retards rust in chemical change on drying to a tough, hard surface ready for priming.” My understanding is that it can be applied to bare metal as well and left un-painted, even though not painting it means re-treating the metal in a year or so. I spent a day or so scuffling around on the ground coating all the exposed, rusty looking body pans and structural parts.
Second item was to survey the damage to the body panels. Minimum tool investment was a body hammer and an angle grinder with grinding, sanding and cutting wheels. Tapping around the suspect areas with the pointy end of the hammer exposes where the sheet metal is rusted through. Grinding and sanding with the angle grinder makes things easier to see and exposes surface rust and prior repairs. I could cut out sections of the drinker side fender and the hood where the rust was all the way through and then use some expanded metal and fiberglass and then Bondo Glass topped with regular Bondo to get a smooth, paintable surface. Since this is a repair and not a restoration I’m pretty confident that it will last and look good for a reasonable time.
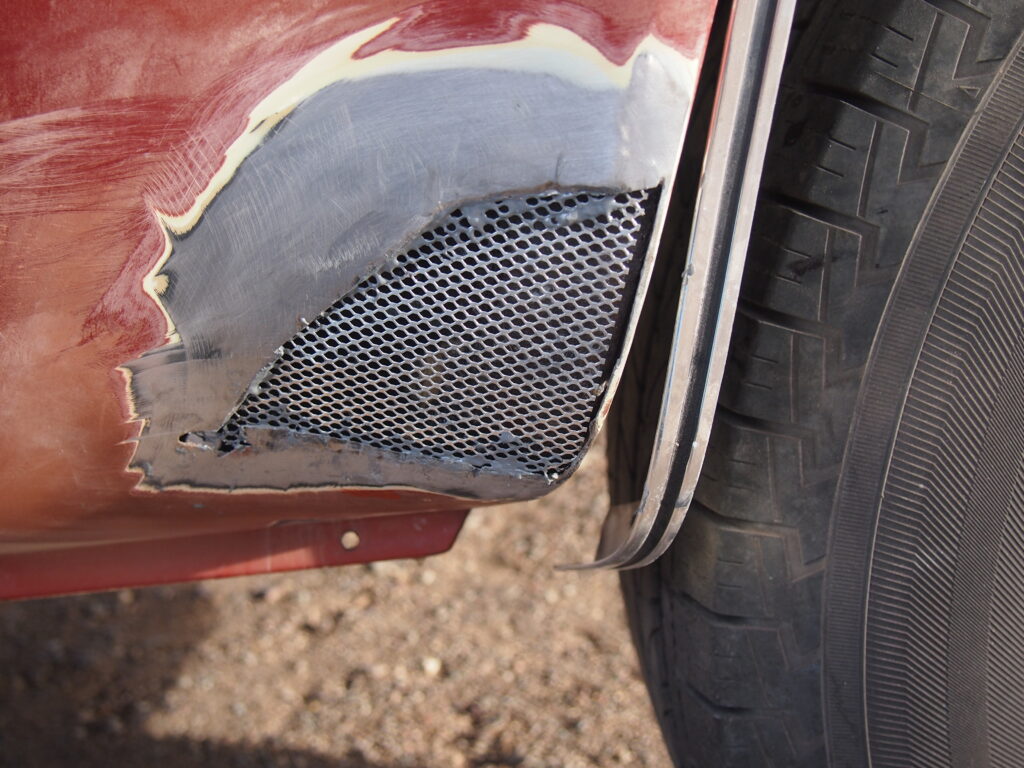
The driver side fender was pretty gone and I ended up cutting that completely off and replacing it with a patch panel purchased from LMC Truck. Based on a recommendation I found a body shop that was amenable to welding on the new piece.
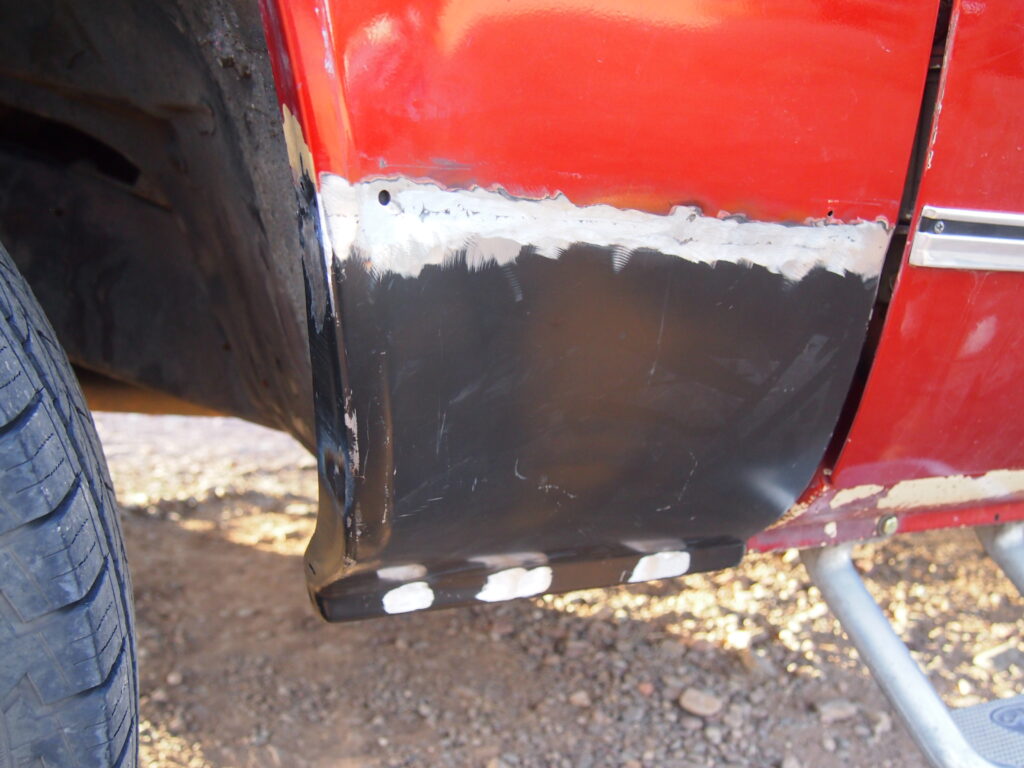
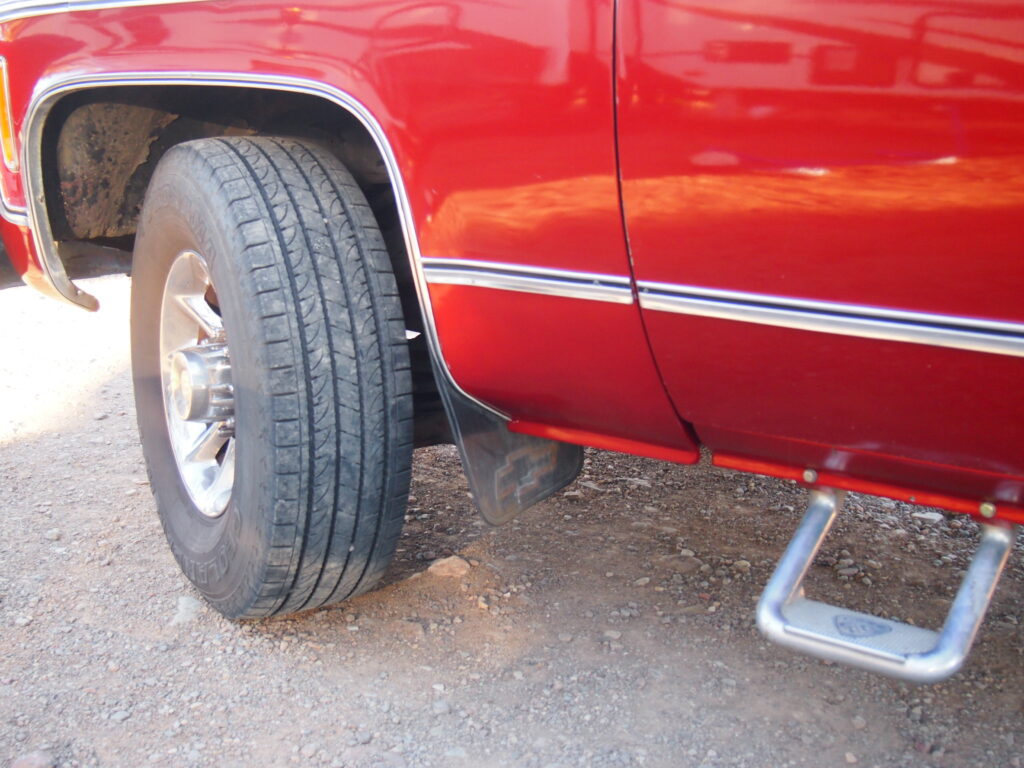
I found another company called PaintScratch which sells paint in rattle cans based on the original manufacturer’s codes. Luckily I had the code from the original repaint. It is Sunburst Orange Metallic used on the 2007 Dodge Caliber which is a rather boring looking 4 door hatchback. I think the fenders and rocker panels came out satisfactorily. The finish is not quite as shiny and deep as the rest of the truck but it is hard to notice unless one looks very close. We’ll not talk about the hood other than to say it will need to be redone when I have a large indoor area to work on it. Anyway, I think the truck will be good for a few more voyages and if I ever decide to repaint it I can replace the hood and the drinker’s side fender and it will look like new.
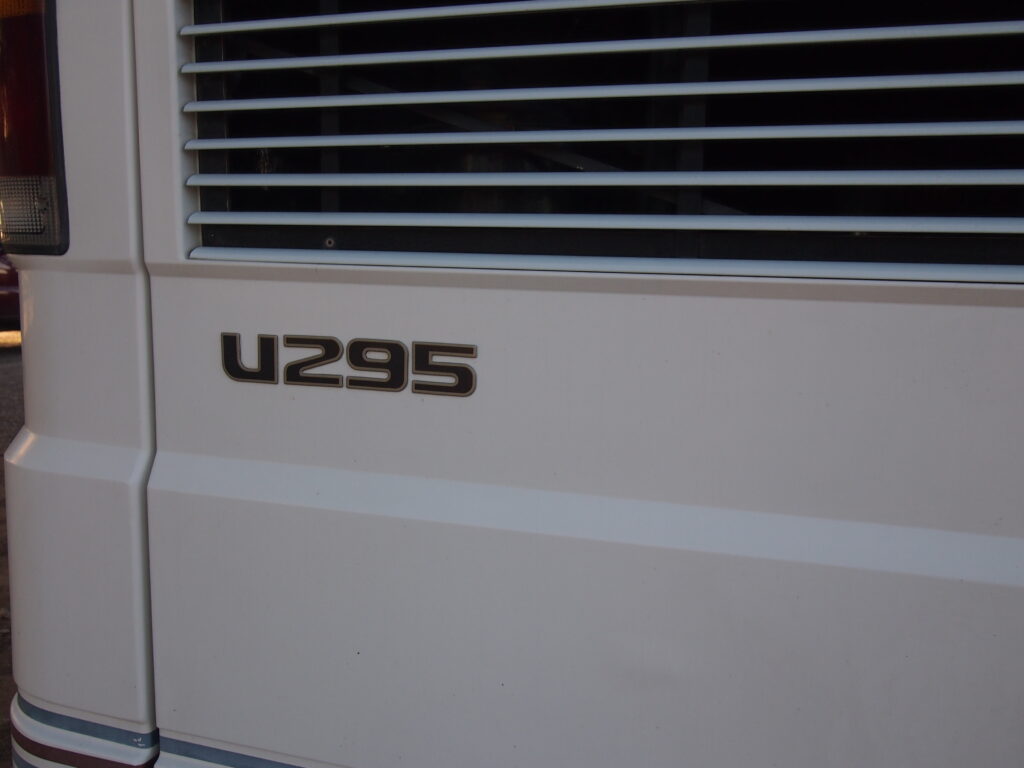
The Armadillo is a 1996 Foretravel U295 Motor Coach. Made from scratch in Nacogdoches, Texas. We bought it at Motor Homes of Texas which is about a quarter of a mile from the factory. That’s pretty neat. Just before we bought it the original owner installed a residential refrigerator which requires a relatively large amount of A.C. power. There is no option to use propane as with some RV refrigerators. Hence, we either need to be connected to 120V “shore power” or we need to run the annoying built-in generator, which defeats the purpose of parking out in the desert for any length of time.
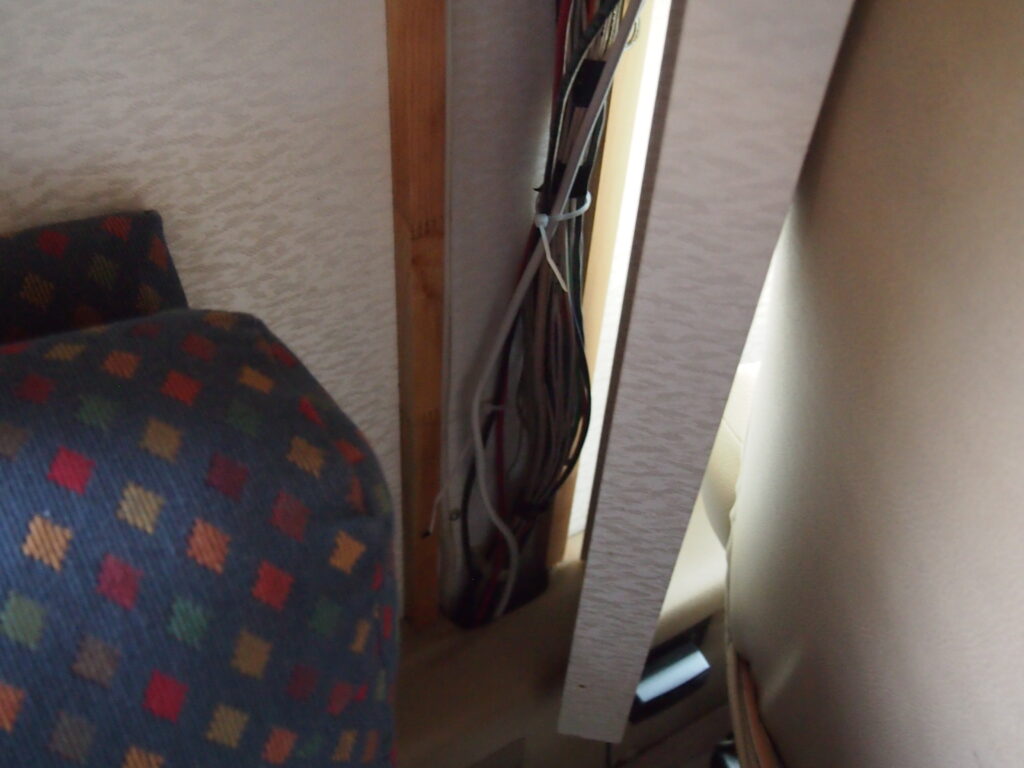
So it is critical to have another way to charge the batteries and to run the refrigerator. The Hermit does have experience with one solar power installation on a vintage travel trailer. That project involved adding batteries, solar panels and an inverter. Inverters use magic to take 12 volts from the batteries and provide 120 volt power. This new project was more intimidating because the generator, the engine starter batteries, and the engine alternator are all interconnected. Plus, the wires are way bigger. Turns out, the solar is more or less separate from all the factory wiring of the coach. The panels send power to the charger which then sends the magic to the batteries!
Must include the standard caveat here: I know just about exactly enough to get into trouble when it comes to this type of thing so if you are looking for guidance for your own project visit Handy Bob’s Blog and Kelly’s RV Solar Blog
For the trailer I bought everything from Starlight solar in Yuma, AZ but they have since closed shop. After research and calls and emails I bought material for this project from Northern Arizona Wind and Sun in Flagstaff. From their website I was able to fill out a load calculation worksheet for our coach and send it to them. A few days later I received an itemized quote. The sales rep patiently answered all my questions and I made a couple changes and additions to the quote before pulling the trigger. The quote to add solar from the dealer where we bought the Armadillo was around $8000.00 while these parts cost me about $1700.00. Can’t blame them for trying to make a living though, and I don’t think they really wanted to mess with it.
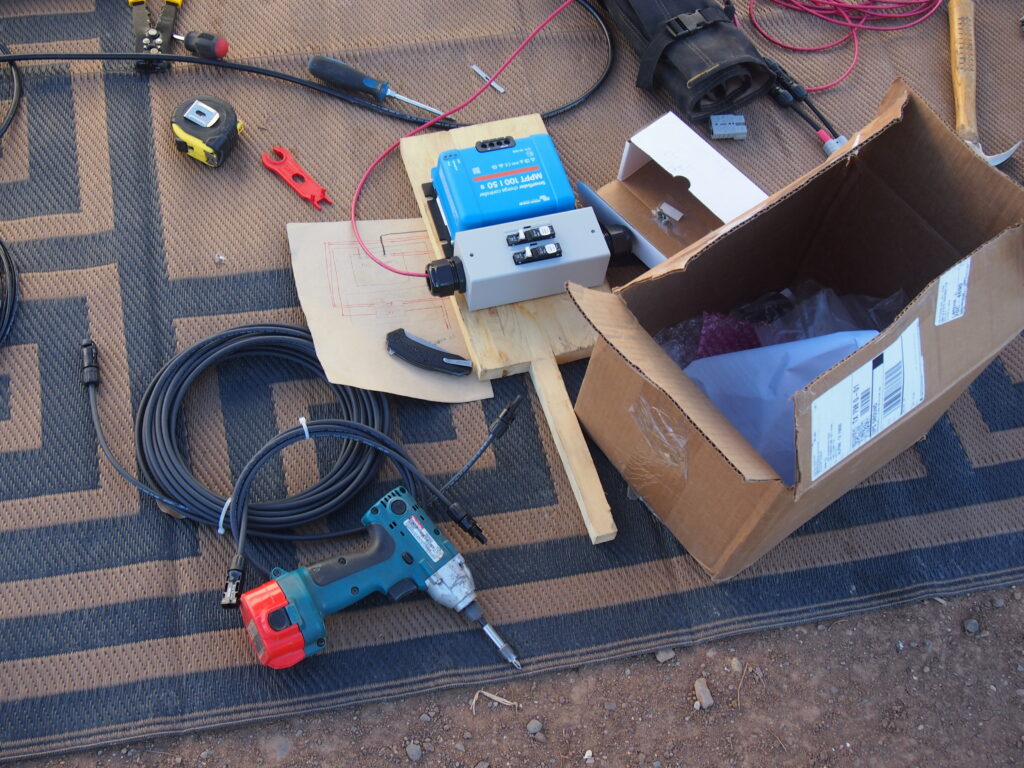
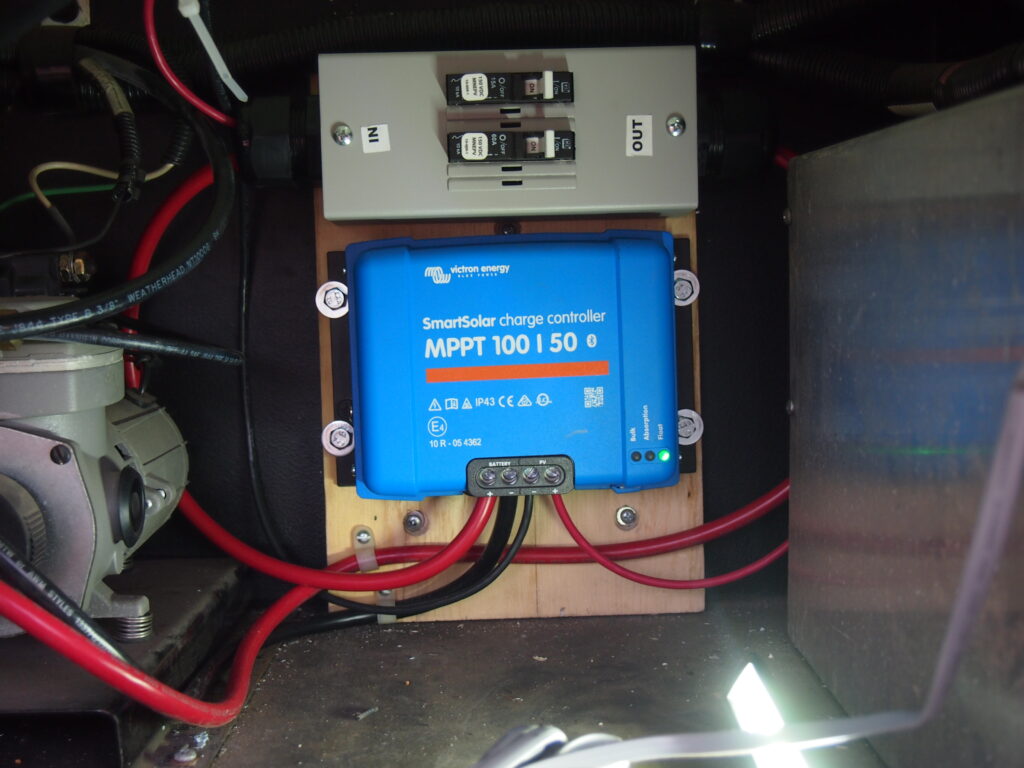
The guts of the system are two 330 watt solar panels, a MPPT charge controller and a smart shunt. The shunt is a device which measures loads and also communicates the battery status. A smart shunt does this without wires which is awesome for a retrofit because it saved hours of time tracing and rerouting wires inside the coach. The MPPT charge controller takes the 70+ volts coming from the solar panels and changes it to 12 volts before sending the current to the batteries. This is good for a couple of reasons, the best one being I can use 12 AWG wire, which is relatively small, from the panels on the roof to the charge controller which is in a bay underneath.
The supplier sent a diagram of how everything was to be wired and I did a little sketch for myself just as a visual aid for the layout.

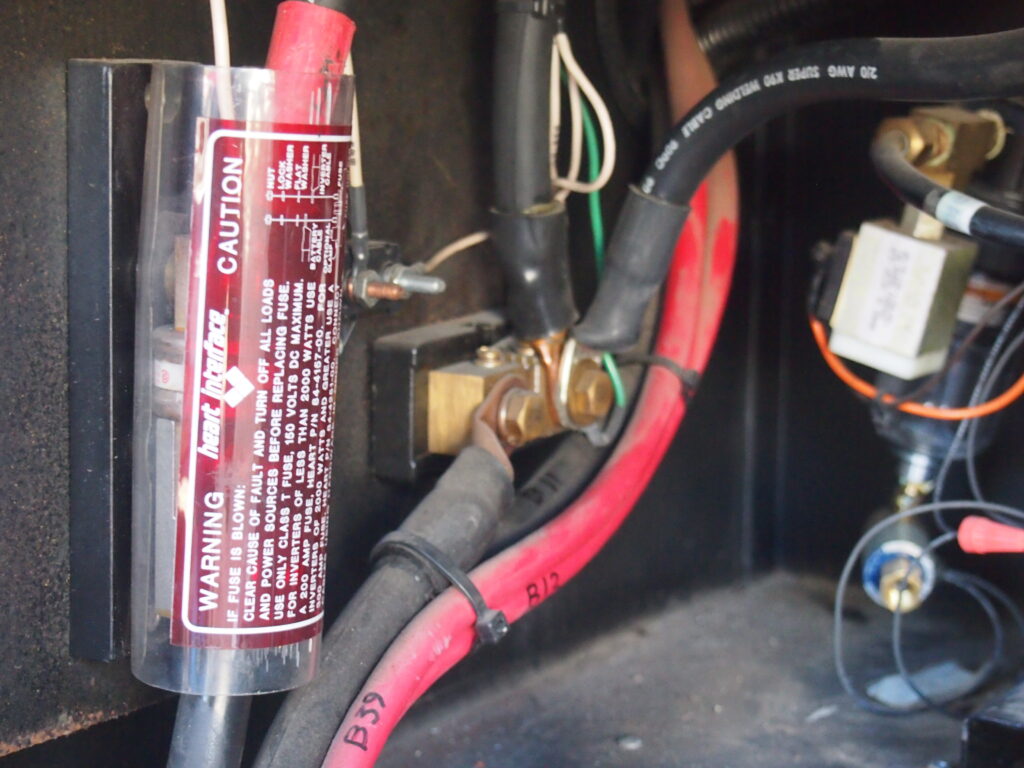
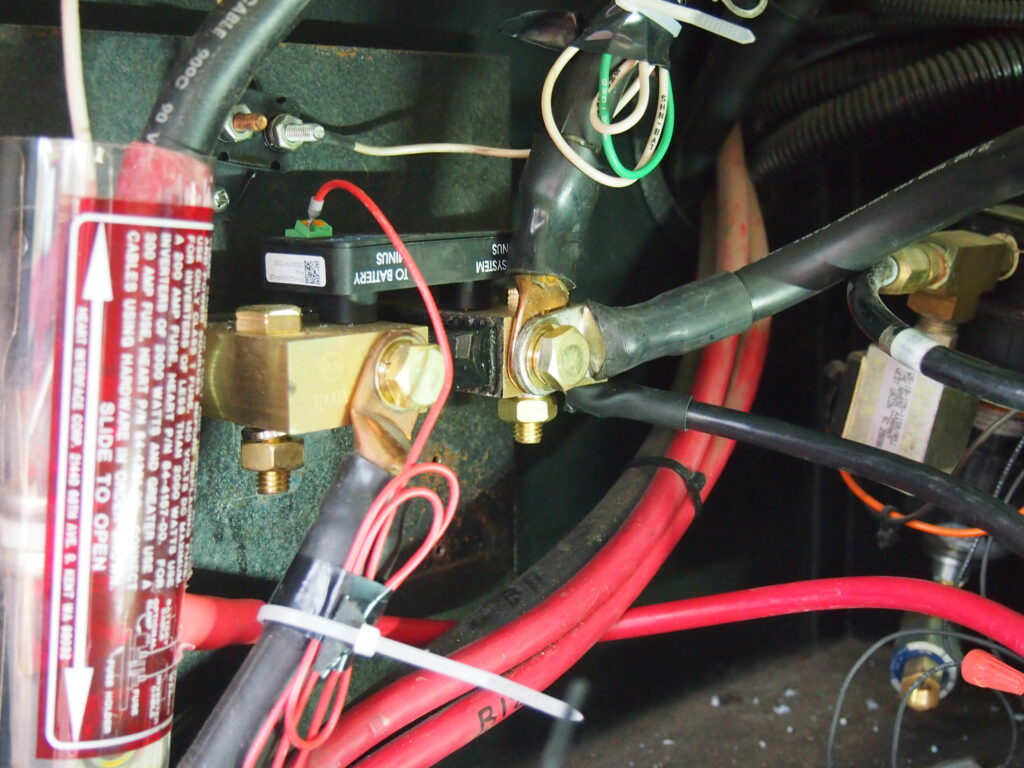
The next step is to carefully dump everything out of the box and start building. I have a spot in the bay for the controller and fuse box so I just had to make those fit on the appropriate size back board. This actually worked out quite well since all the connections were made before the board was attached in the small, hard to reach space in the bay.
The shunt was easy, I just disconnected the old one and put the new one in its place with the additional wire from the solar charge controller.
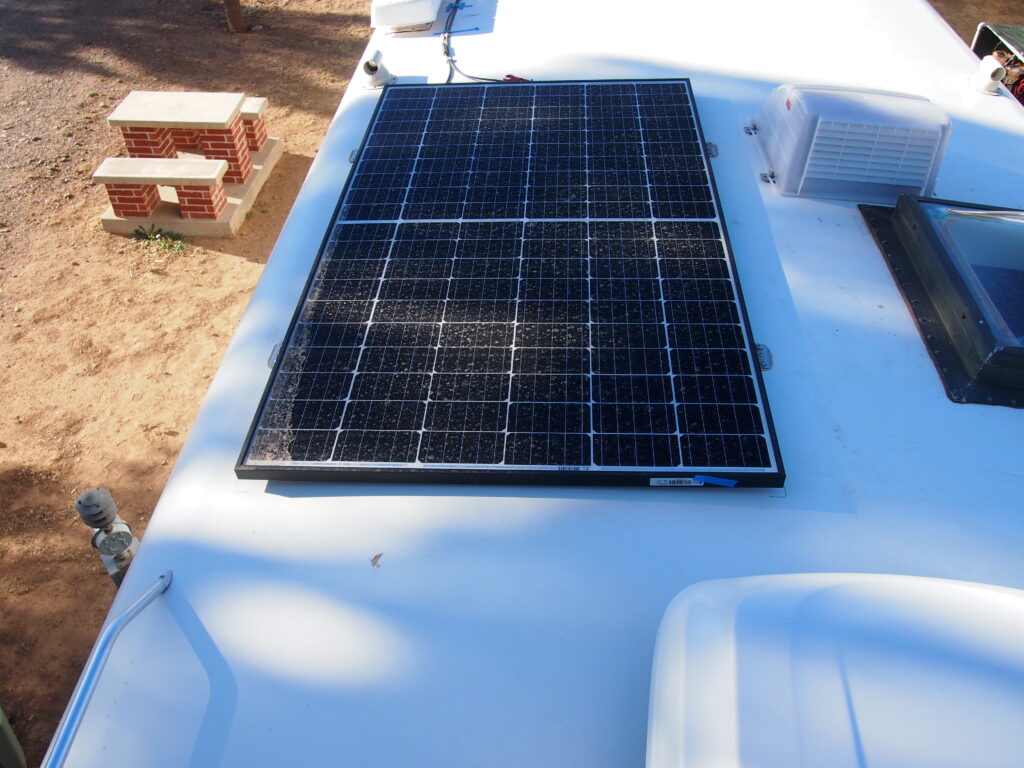
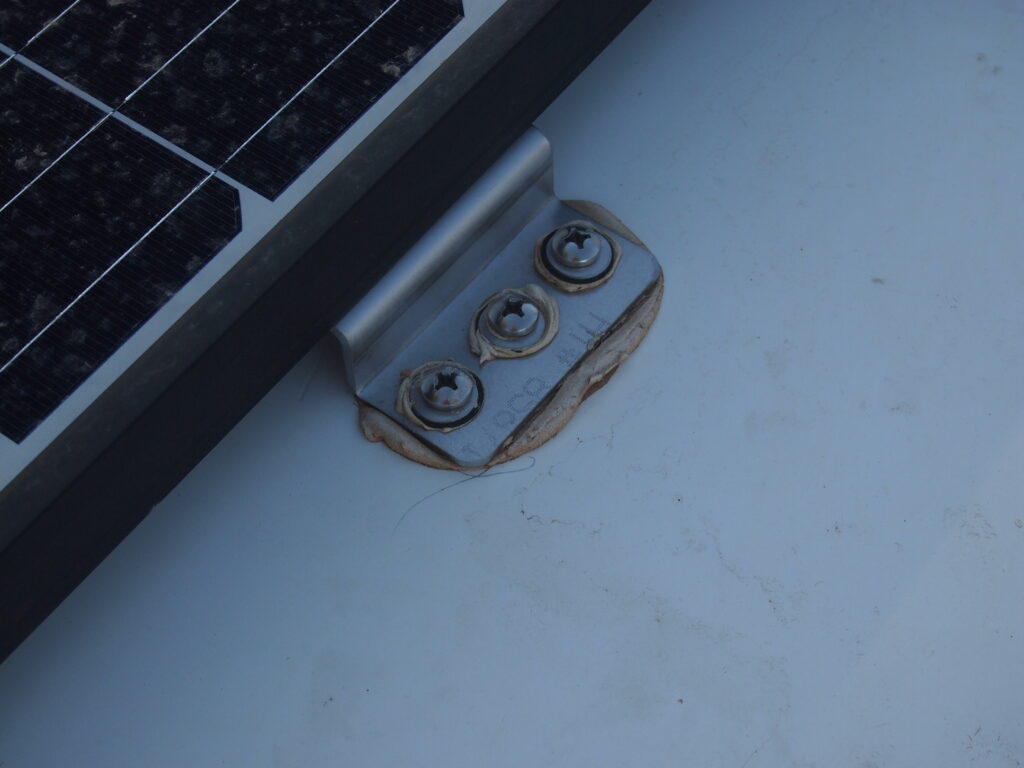
I did all of this before installing the panels. And when I did put the panels on the roof I covered them with cardboard before dealing with any wire connections because as soon as the sun hits a panel there is live voltage. I bolted the included angle mounting brackets onto the panels and then set the panels on the roof where I wanted them. I marked the brackets and the screw holes on the roof, moved the panels, drilled the holes and placed a bed of urethane sealant to set the brackets in for extra stability and for waterproofing.
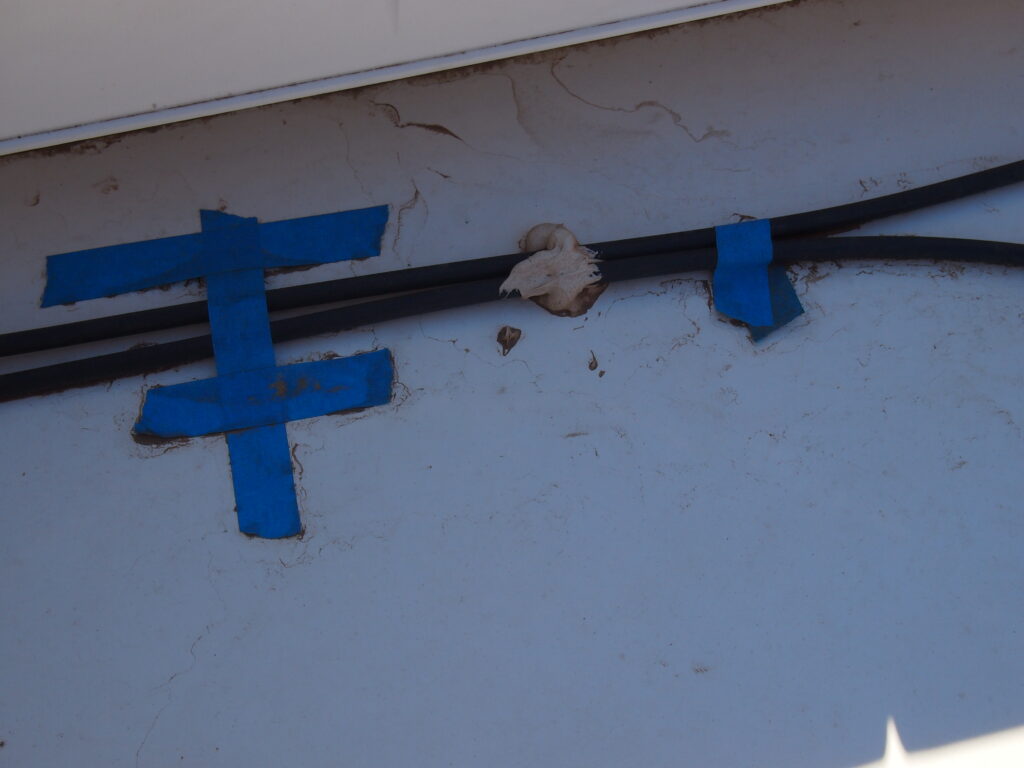
I disconnected the house batteries and the starter batteries before making the final connections and flipping the breakers because I didn’t want any loud and/or fiery surprises. When I finally did though, everything worked! I can monitor the state of charge and the volts and amps from the batteries using the smart phone app. Now we can drive down the road with the inverter on keeping the fridge cold without burning up the coach alternator. And when we make a shopping trip to the Walmart in Ft. Stockton and spend the night in the parking lot we don’t need to run the generator. Pretty excited to see how this works for boondocking in the Nevada desert.